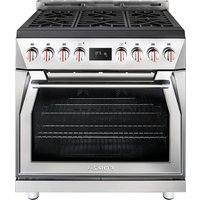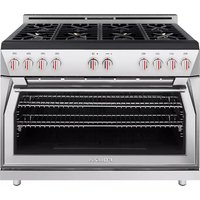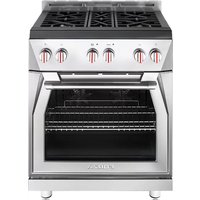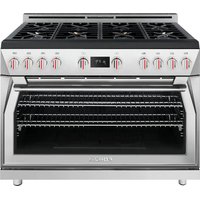
FR488DF - Cooker Forza - Free user manual and instructions
Find the device manual for free FR488DF Forza in PDF.


| Product type | Freestanding gas range |
| Brand | Forza |
| Model | FR488DF |
| Width | 30 inches (76 cm) |
| Gas supply | Natural gas (NG) or propane (LP), depending on conversion |
| Electrical supply | 120 V / 240 V, 60 Hz, 15 A |
| Number of burners | 4 gas burners (including 2 dual flame) |
| Burner power (max) | 20,000 BTU/h (front right dual flame) |
| Oven type | Convection oven with fan |
| Oven capacity | Approximately 5.5 cu ft (156 L) |
| Oven functions | Bake, roast, broil, convection cooking, defrost, pyrolytic self-cleaning |
| Self-cleaning | Pyrolytic, adjustable duration from 1 to 3 hours |
| Oven light | Replaceable halogen bulb |
| Safety | Anti-tip device, thermocouple on burners, door lock during pyrolysis |
| Maintenance | Manual cleaning of burners and grates; pyrolytic self-cleaning of oven |
| Spare parts | Halogen bulbs, oven racks, telescopic supports, burner caps |
| Repairability | Repair by authorized technician; mandatory approved parts |
| Warranty | 2 years parts and labor (residential) |
| Approximate weight | 68 kg (150 lbs) |
| Origin | Made in Modena, Italy by GlemGas S.p.A. |
Frequently Asked Questions - FR488DF Forza
User questions about FR488DF Forza
0 question about this device. Answer the ones you know or ask your own.
Ask a new question about this device
Download the instructions for your Cooker in PDF format for free! Find your manual FR488DF - Forza and take your electronic device back in hand. On this page are published all the documents necessary for the use of your device. FR488DF by Forza.
USER MANUAL FR488DF Forza
P.3 USE + CARE MANUAL
P.61 UTILISATION + ENTRETIEN MANUEL
P.119 USO + MANTENIMIENTO MANUAL
natural_image
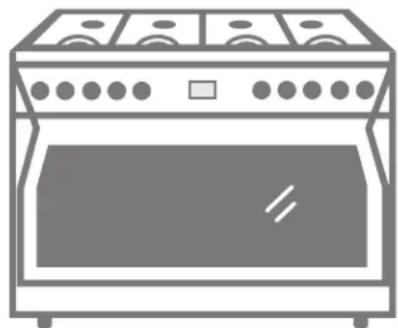
Line drawing of a standard electric stove with multiple ovens and front panels (no text or symbols)DUAL FUEL RANGE MODELS
FORZA™
USE + CARE MANUAL
DUAL FUEL RANGE MODELS
FR304DF
FR366DF
FR488DF
FORZA™
Congratulations on your recent Forza purchase! Before you begin using your new Forza product, please take a moment to review the Use + Care Manual. You will find the answers to all of your questions as well as some very important safety information. Your Forza product is ready and waiting to be used for your next gourmet creation!
Table of Contents
05 General Warnings
16 Your Product
22 Use
22 Cooktop
25 Oven
25 General oven information
27 Electronic control
30 Cooking with the Convection Oven
31 Oven Modes
32 Cooking functions
33 Quick Tips
34 Setting an oven function manually
35 Convection Bake Tips and Techniques
36 Bake Tips and Techniques
37 Convection Broil Tips and Techniques
38 Broil Tips and Techniques
39 Convection Roast Tips and Techniques
40 Dehydrate Tips and Techniques
41 Solving Baking Problems
42 Oven Care and Cleaning
43 Setting the Self-Cleaning Mode
44 Sabbath Mode & Meat Probe Function
46 Accessories
46 DIY Maintenance & Cleaning
47 Cooktop
48 Oven
49 Cleaning Chart
54 Troubleshooting
56 Service Information
57 Warranty
This Forza appliance is proudly made in Modena, Italy by GlemGas S.p.A, a family owned company.
www.forzacucina.com
We have provided many important safety messages in this manual and on your appliance. Always read and obey all safety messages.

This is the safety alert symbol.
This symbol alerts you to potential hazards that can kill or hurt you and others.
All safety messages will follow the safety alert symbol and either the word "DANGER" or "WARNING."
DANGER
You can be killed or seriously injured if you don't immediately follow instructions.
WARNING
You can be killed or seriously injured if you don't follow instructions.
All safety messages will tell you what the potential hazard is, tell you how to reduce the chance of injury, and tell you what can happen if the instructions are not followed.
WARNING: If the information in this manual is not followed exactly, a fire or explosion may result causing property damage, personal injury or death.
Do not store or use gasoline or other flammable vapors and liquids in the vicinity of this or any other appliance.
What to do if you smell gas:
- Do not try to light any appliance.
- Do not touch any electrical switch.
- Do not use any phone in your building.
- Immediately call your gas supplier from a neighbor's phone. Follow the gas supplier's instructions.
- If you cannot reach your gas supplier, call the fire department.
Installation and service must be performed by a qualified installer, service agency or the gas supplier.
IMPORTANT: Do not install a ventilation system that blows air downward toward this gas cooking appliance. This type of ventilation system may cause ignition and combustion problems with this gas cooking appliance resulting in personal injury or unintended operation.
IMPORTANT: Save these instructions for the local electrical inspector use.
INSTALLER: Please leave this manual with owner for future reference.
OWNER: Please keep this manual for future reference.
WARNING
natural_image
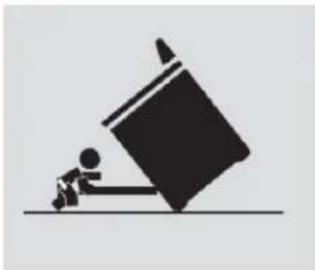
Silhouette of a person pushing a large block on a flat surface (no text or symbols)Tip Over Hazard
- A child or adult can tip the range and be killed.
- Ensure the anti-tip bracket is engaged when the range is moved.
- Do not operate range without anti-tip bracket installed and engaged.
- Failure to follow these instructions can result in death or serious burns to children and adults.
To verify the anti-tip bracket is installed and engaged:
- Slide range forward.
- Look for the anti-tip bracket securely attached to floor or
- Slide range back so rear range foot is under anti-tip bracket.
• See installation instructions for details.
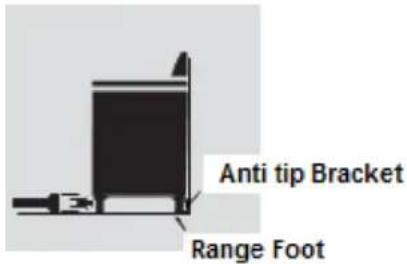
text_image
Anti tip Bracket Range Foot| ⚠ WARNING | |
 | Poisoning HazardNever cover any slots, holes, or passages in the oven bottom, cover an entire rack or the oven floor with materials such as aluminum foil.Doing so blocks airflow through the oven and may cause carbon monoxide poisoning. Aluminum foil linings may also trap heat, causing a fire hazard.Clean the appliance with caution. If a wet sponge or cloth is used to wipe spills on a hot cooking area, be careful to avoid steam burn.Some cleaners can produce noxious fumes if applied to a hot surface. Follow the directions of the cleaner manufacturer.Never use this appliance as a space heater to heat or warm the room.Doing so may result in carbon monoxide poisoning and overheating of the appliance.Failure to follow this advice may result in poisoning or death. |
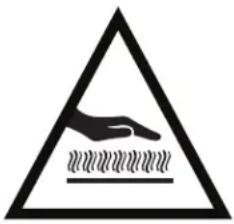 | Hot Surface HazardAccessible parts may become hot during use.Do not touch burners, areas near burners, the grill, griddle, grease drip-pans, heating elements or interior surfaces of the oven. These may be hot enough to cause burns even though they are dark in color.During and after use, do not touch or let clothing or other flammable materials contact these parts and surfaces until they have had sufficient time to cool. Other parts and surfaces of the appliance may become hot enough to cause burns—among these areas are the grates, back trim and oven vents at the back of the cooktop, front edge, surfaces adjacent to the cooktop and the oven door.Use only dry potholders—moist or damp potholders on hot surfaces may result in burns from steam. Do not let the potholder touch hot heating elements. Do not use a towel or other bulky cloth.Let hot grease cool before attempting to handle it.Failure to follow this advice could result in burns and scalds. |
WARNING
Please read all instructions before using this appliance.
Read this instruction booklet before installing and using the appliance.
The manufacturer will not be responsible for any damage to property or to persons caused by incorrect installation or improper use of the appliance.
The manufacturer reserves the right to make changes to its products when considered necessary and useful, without affecting the essential safety and operating characteristics.
This appliance has been designed for non-professional, domestic use only.
Do not use this appliance to heat a room.
Do not place any pot or pan on the open oven door. The door is made of glass and it can break if loaded with a weight.
Before beginning installation, please read these instructions completely and carefully.
Do not remove permanently affixed labels, warnings, or plates from the product. This may void the warranty. Please observe all local and national codes and ordinances.
Please ensure the range is properly grounded.
The installer should leave these instructions with the consumer who should retain for local inspector's use and for future reference.
The plug should always be accessible.
! Installation must conform with local codes or in the absence of codes, the National Fuel Gas Code NSIZ223.1 latest edition. Electrical installation must be in accordance with the National Electrical Code, ANIS/NFPA70–latest edition and/or local codes.
Installation of any gas fired equipment should be made by a licensed plumber. A manual gas shut off valve must be installed in the gas supply line ahead of the oven in the gas flow for safety and ease of service.
This appliance should be serviced only by a qualified service technician. Contact the nearest authorized service center for examination, repair or adjustment.
Do not repair or replace any part of the appliance unless specifically recommended. Refer service to an authorized servicer.
Do not operate this appliance if it is not working properly or if it has been damaged, until an authorized servicer has examined it.
Install or locate this appliance only in accordance with the Installation Instructions.

Use this range only as intended by the manufacturer. If you have any questions, contact the manufacturer.

Do not cover or block any openings on this appliance.

Use this appliance only for its intended use as described in this manual. Do not use corrosive chemicals, vapors, or non-food products in this appliance. This type of oven is specifically designed to heat or cook. It is not designed for industrial or laboratory use. The use of corrosive chemicals in heating or cleaning will damage the appliance.

In the event that personal clothing or hair catches fire, DROP AND ROLL IMMEDIATELY to extinguish flames.

In the event of a grease fire SMOTHER FLAMES with a close-fitting lid, cookie sheet, or other metal tray, then turn off the gas burner.

BE CAREFUL TO PREVENT BURNS. If the flames do not go out immediately, EVACUATE AND CALL THE FIRE DEPARTMENT.

Do not use water, including wet dishcloths or towels on grease fires. A violent steam explosion may result.

NEVER PICK UP A FLAMING PAN. You may be burned.

ALWAYS have a working SMOKE DETECTOR near the kitchen.

LEAVE THE HOOD VENTILATOR ON when flambéing food.

Do not obstruct the flow of combustion air at the oven vent nor around the base or beneath the lower front panel of the range.

Avoid touching the vent openings or nearby surfaces as they may become hot while the oven is in operation. This range requires fresh air for proper burner combustion.

NEVER cover any slots, holes or passages in the oven or cover an entire rack with aluminum foil. Doing so blocks air flow through the oven and may cause carbon monoxide poisoning. Aluminum foil linings may also trap heat, causing a fire hazard.

NEVER use this appliance as a space heater to heat or warm the room. Doing so may result in carbon monoxide poisoning.

Do not allow alluminium foil, plastic, paper or cloth to come in contact with hot burners or grates.

Do not allow pans to boil dry.

Do not store items of interest to children above the appliance. If children should climb onto the appliance to reach these items, they could be seriously injured.

Do not leave children alone. Children should not be left alone or unattended in area where appliance is in use. They should never be allowed to sit or stand on any part of the appliance.

Never use your appliance for warming or heating the room.

WARNING
IN CASE OF AN ELECTRICAL FAILURE
To light the burners manually, carefully hold a lit match to the burner ports and turn the gas control knob to high. During a power failure, you can use the standard cooktop burners, but each must be lit with a match.
The use of gas cooking appliances results in the production of heat and moisture.
It is the personal responsibility and obligation of you, the user, to have this appliance connected to the electrical power supply by a qualified electrician, in accordance with the National Electrical Code and/or applicable local codes and ordinances.
Read this Use and Care Guide carefully before using your new range, to reduce the risk of fire, electrical shock, or injury to persons.
Ensure proper installation and servicing. Follow the installation instructions provided with this product. Have the range installed and electrically grounded by a qualified technician.
Have the installer show you where the electric circuit breaker and the gas supply shut off valve are located so you know how and where to turn off the gas and electricity to the range.
In the event a burner goes out and gas escapes, open a window or a door. DO NOT attempt to use the range until the gas has had time to dissipate. Wait at least 5 minutes before using the range.
When using the Flush Island Trim, recommends a minimum 12" (305 mm) rear clearance to a combustible surface.
Clearances from non-combustible materials are not part of the ANSI Z21.1 scope. Clearances of less than 12" (305 mm) must be approved by the local codes and/or by the local authority having jurisdiction.

WARNING
TO REDUCE THE RISK OF A GREASE FIRE:
Never leave surface units unattended at high settings.
Boilovers cause smoking and greasy spillovers that may ignite. Heat oils slowly on low or medium settings.
Always turn hood ON when cooking at high heat or when flambéing food (i.e. Crepes Suzette, Cherries Jubilee, Peppercorn Beef Flambé).
Clean hood filters frequently. Grease should not be allowed to accumulate on fan or filter.
Use proper pan size. Always use cookware appropriate for the size of the cooktop burner.
When children become old enough to use the appliance, it is the responsibility of the parents or legal guardians to ensure that they are instructed in safe operation of the appliance by qualified person.
WARNING
DO NOT store items of interest to children above or at the back of the range. If children should climb onto the appliance to reach these items, they could be seriously injured.
DO NOT allow anyone to climb, stand, lean, sit, or hang on any part of an appliance, especially a door. This can damage the appliance, and the unit may tip over, potentially causing severe injury.
DO NOT allow children to use this appliance unless closely supervised by an adult.
Children and pets should not be left alone or unattended in the area where the appliance is in use. They should never be allowed to play in its vicinity, whether or not the appliance is in use.
NEVER use any part of the range or ovens for storage. Flammable materials can catch fire and plastic items may melt or ignite.
DO NOT hang articles from any part of the appliance or place anything against the ovens. Some fabrics are quite flammable and may catch on fire.
Use only dry potholders: moist or damp potholders on hot surfaces may cause burns from steam. DO NOT use a towel or other bulky cloth in place of potholders. DO NOT let potholders touch hot elements, hot burners, or burner grates.
WARNING
TO REDUCE THE RISK OF INJURY TO PERSONS, IN THE EVENT OF A RANGE TOP GREASE FIRE, OBSERVE THE FOLLOWING:
Smother flames with a close-fitting lid, cookie sheet, or other metal tray, then turn off the gas burner or the electric element. Be careful to prevent burns. If the flames do not go out immediately, evacuate and call the fire department.
Never pick up a flaming pan - You may be burned.
DO NOT USE WATER, including wet dish cloths or towels - a violent steam explosion will result.
Use an extinguisher only if:
You know you have a class ABC extinguisher and you already know how to operate it.
The fire is small and contained in the area where it started.
The fire department is being called.
You can fight the fire with your back to an exit.
When using the cooktop: DO NOT TOUCH THE BURNER GRATES OR THE IMMEDIATE SURROUNDING AREA. Areas adjacent to the burners may become hot enough to cause burns.
Never leave the range unattended when using high flame settings. Boil overs cause smoking and greasy spillovers that may ignite. Also, if the burner flames and igniter are smothered with spillage, unburned gas will escape into the room.
DO NOT heat or warm unopened food containers. Build-up of pressure may cause the container to burst and cause injury.
Only certain types of glass, heatproof glass-ceramic, ceramic, earthenware, or other glazed cookware are suitable for cooking on the range burners. This type of cookware may break with sudden temperature changes.
Use only on low or medium heat settings according to the utensil manufacturer's directions.
During cooking, set the burner control so that the flame heats only the bottom of the pan and does not extend beyond the bottom of the pan.
Always use pots and pans that have flat bottoms large enough to cover the burner. The use of undersized pots and pans could expose a portion of the flame and may result in ignition of clothing.
To minimize the risk of burns, ignition of flammable materials and unintentional spillage, position handles of pots and pans inward so they do not extend over adjacent work areas, cooking areas, or the edge of the range's cooktop.
DO NOT use flammable cleaners to clean the range.
Hold the handle of the pan to prevent movement when stirring or turning food.

WARNING: After a spill or boil over, turn off the burner and using caution due to possible hot surfaces, clean around the burner and burner ports. After cleaning, check for proper operation.
Ensure all cooktop controls are turned off and the cooktop is cool before using any type of aerosol cleaner on or around the cooktop. The chemical that produces the spraying action could, in the presence of heat, ignite or cause metal parts to corrode.
Place oven racks in desired position while oven is cool. If a rack must be moved while the oven is hot, do not let the potholders contact the broiler element.
When using the oven do not touch the broiler element, the interior surfaces of the oven or the exterior area immediately surrounding the door. Interior oven surfaces become hot enough to cause burns.
Use care when opening the oven door; let hot air or steam escape before removing or replacing foods.
DO NOT clean, rub, damage, move or remove the door gasket. It is essential for a good seal during baking. If the gasket becomes worn or excessively soiled with food particles, replace gasket to assure a tight seal.
WARNING
natural_image
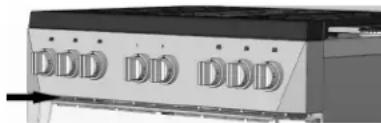
Exterior view of a mechanical device with multiple circular components (no visible text or symbols)DO NOT block or obstruct the flow of air through the ventilation openings. The oven vent is located at the back of the appliance.
The vents need to be unobstructed and open to provide necessary airflow that is important for proper oven performance.
DO NOT touch oven vent area while the appliance is on and for several minutes after the appliance is off. Some parts of the vent and surrounding areas become hot enough to cause burns. Allow appliance sufficient time to cool before touching or cleaning vent areas.
DO NOT position plastic or other heat-sensitive items in front of or near the oven vent.
These items could melt or ignite.
To reduce the risk of burn injuries during cook top use, observe the following:
- Children or pets should not be left alone or unattended in an area where appliances are in use.
- Children should never be allowed to sit or stand on any part of the appliance.
- Do not store flammable materials on or near the cooktop.
- When using the cooktop: DO NOT TOUCH THE BURNER GRATES OR THE IMMEDIATE SURROUNDING AREA. Use only dry potholders; moist or damp potholders on hot surfaces may cause burns from steam.
- Never leave the cooktop unattended when in use.
- Boilovers cause smoking, and greasy spillovers may ignite. A spill on a burner can smother all or part of the flame or hinder spark ignition. If a boilover occurs, turn off burner and check operation. If burner is operating normally, turn it back on.
- During cooking, set the burner control so that the flame heats only the bottom of the pan and does not extend beyond the bottom of the pan.
• Take care that drafts like those from fans or forced air vents do not blow flammable material toward the flames or push the flames so that they extend beyond the edges of the pan. - Always position handles of utensils inward so they do not extend over adjacent work areas, burners, or the edge of the cooktop.
- Wear proper apparel. Loose fitting garments or hanging sleeves should never be worn while cooking.
- Never let clothing, potholders, or other flammable materials come in contact with hot burners or hot burner grates.
- Use only certain types of glass, heatproof glass ceramic, ceramic, earthenware, or other glazed utensils that are suitable for cooktop use.
- Do not clean the cooktop while it is still hot. Some cleaners produce noxious fumes when applied to a hot surface.
To reduce the risk of fire in the oven cavity:
- Do not store flammable materials in or near the oven.
- Do not use water on a grease fire. Smother fire or use a dry chemical or foam-type extinguisher.
- It is highly recommended that a fire extinguisher be readily available and highly visible next to any cooking appliance.
- Do not overcook food. Carefully attend oven if paper, plastic or other combustible materials are placed inside the oven.
- Do not use the cavity for storage purposes. Do not leave paper products, cooking utensils or food in the cavity when not being used.
- If materials inside the oven should ignite, keep oven door closed. Turn oven off and disconnect the circuit at the circuit breaker box.
- Do not block any vent openings.
- Be sure the blower fan runs whenever the oven is in operation. If the fan does not operate, do not use the oven. Call an authorized service center.
- For personal safety, wear proper clothing. Loose fitting or garments with hanging sleeves should never be worn while using this appliance.
- Tie long hair so that it doesn't hang loose.
- Do not touch interior surfaces of oven.
- During and after use, do not touch or let clothing or other flammable materials contact the burners or the interior surfaces of the oven until they have had sufficient time to cool. Other surfaces of the appliance may become hot enough to cause burns - among these surfaces are (identification of surfaces - for example, oven vent openings and surfaces near these openings, oven doors, and windows of oven doors).
- The trim on the top and sides of the oven door may become hot enough to cause burns.
- Use care when opening the door. Open the door slightly to let hot air or steam escape before removing or replacing food.
- Do not heat unopened food containers. Build-up of pressure may cause the container to burst and cause injury.
• Always place oven racks in desired location while oven is cool. If a rack must be moved while oven is hot, do not let pot holder contact the hot burners. - Use only dry pot holders. Moist or damp pot holders on hot surfaces may result in burns from steam. Do not let pot holder touch burners. Do not use a towel or other bulky cloth.
WARNING


For proper lighting and performance of the burners, keep the igniters clean and dry.
In the event that a burner goes out and gas escapes, open a window or a door. Wait at least 5 minutes before using the cooktop.
Do not obstruct the flow of combustion and ventilation air.
Do not use aluminum foil to line any part of the cooktop.
If the range cookers is near a window, be certain blow over or near the burners; they could catch on fire.
The heating elements may be hot even though they are dark in color. Interior surfaces of an oven become hot enough to cause burns.
Do not allow aluminum foil or meat probe to contact heating elements.
Safety for the Self-Cleaning Oven
- Confirm that the door is locked and will not open once both selectors are in CLEAN position and the door lock icon appears. If the door does not lock, turn the cook mode selector to OFF and do not run Self-Clean. Contact Service.
- Do not clean the door gasket. It is essential for a good seal. Care should be taken not to rub, damage, move or remove the door gasket.
- Do not use commercial oven cleaners or oven liner protective coatings of any kind in or around any part of the oven.
- Clean only oven parts listed in this manual.
- Before self-cleaning the oven, remove the broiler pan, oven racks, other utensils and excess soft spillage or food.

WARNING

The elimination of soil during self-cleaning generates some byproducts which are on this list of substances. To minimize exposure to these substances, always operate this oven according to the instructions in this manual and provide good ventilation to the room during and immediately after self-cleaning the oven.
The California Safe Drinking Water and Toxic Enforcement Act requires the Governor of California to publish a list of substances known to the State of California to cause cancer, birth defects, or other reproductive harm, and requires businesses to warn of potential exposure to such substances. This product contains a chemical known to the State of California to cause cancer, birth defects, or other reproductive harm. This appliance can cause low-level exposure to some of the substances listed, including benzene, formaldehyde, carbon monoxide, toluene, and soot.

Do not use the cooktop during the oven self cleaning cycle.
Your Product
Your range consists of the following main parts:
- Cooktop: flat top part where the pan supports (supports for the pots) and the gas burners.
• Control panel: cooker control devices zone (i.e. knobs and lights). - Oven door.
30" Range
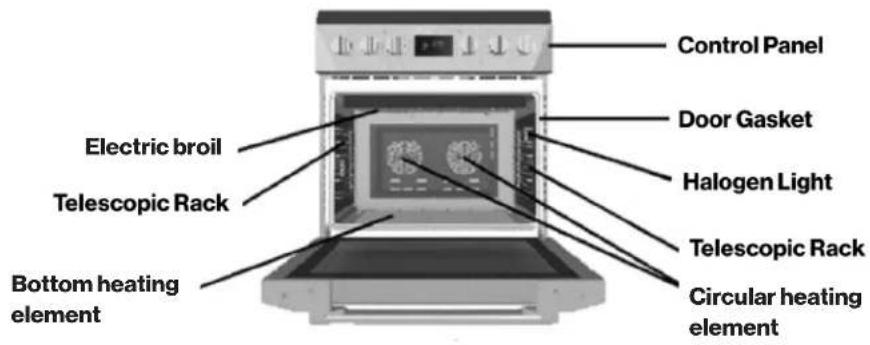
text_image
Control Panel Door Gasket Electric broil Telescopic Rack Halogen Light Telescopic Rack Circular heating element Bottom heating element36" Range
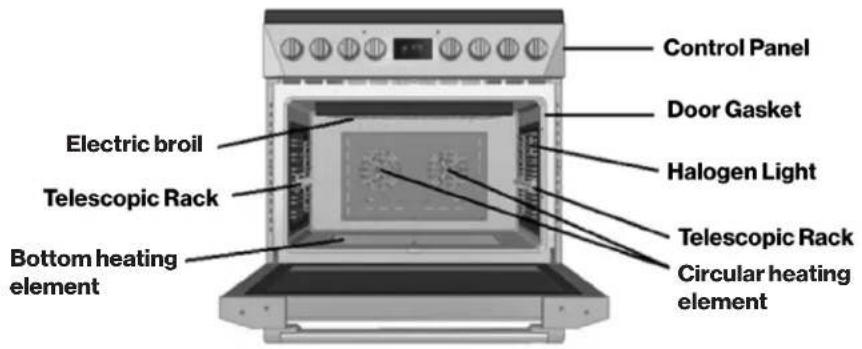
text_image
Control Panel Door Gasket Electric broil Telescopic Rack Halogen Light Telescopic Rack Circular heating element Bottom heating element48" Range
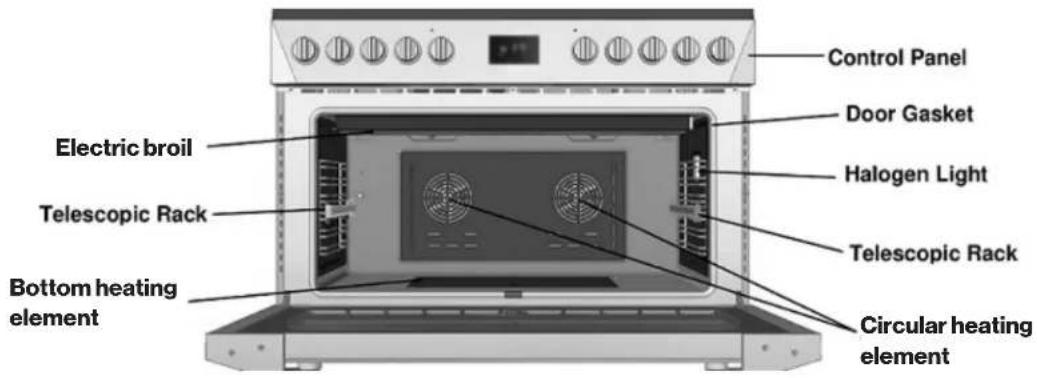
text_image
Control Panel Electric broil Door Gasket Telescopic Rack Halogen Light Telescopic Rack Bottom heating element Circular heating element30" + 36" + 48" are equipped with 6 rack levels
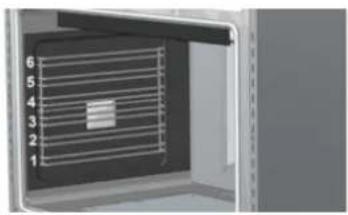
natural_image
Interior view of a room with numbered lanes and a central storage unit (no text or symbols visible)30" Range Control Panel
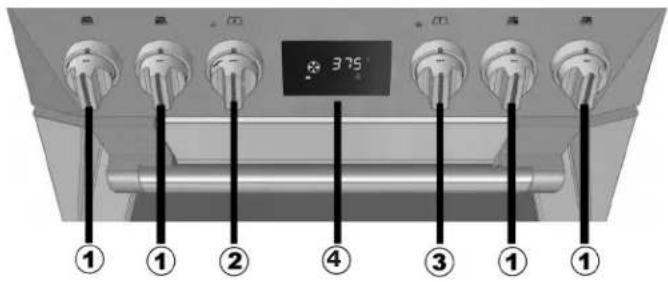
text_image
375° ① ① ② ④ ③ ① ①36" Range Control Panel
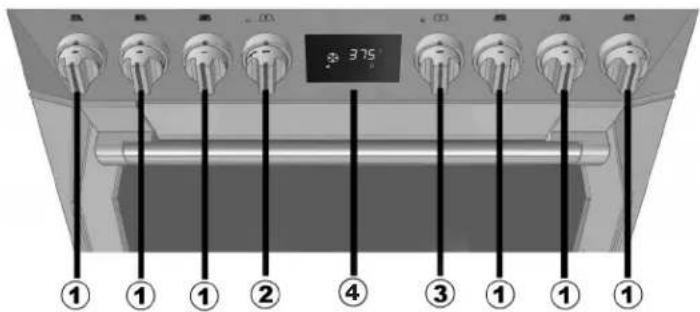
text_image
375° ① ① ① ② ④ ③ ① ① ① ①48" Range Control Panel
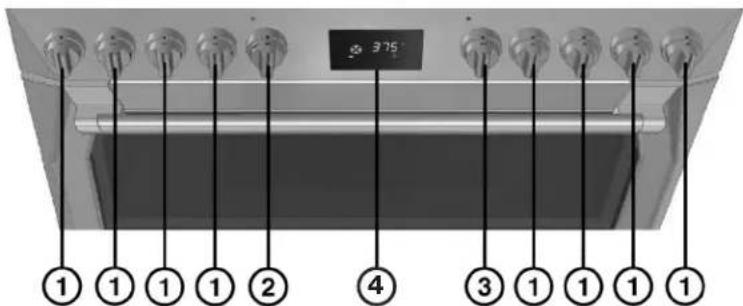
text_image
375 ① ① ① ① ② ④ ③ ① ① ① ① ①1) Useful for lighting and adjusting the cooktop burners.
2,3,4) The user interface has the following features: display, preheat light indicators, keys for commands, cooking mode and temperature selectors.
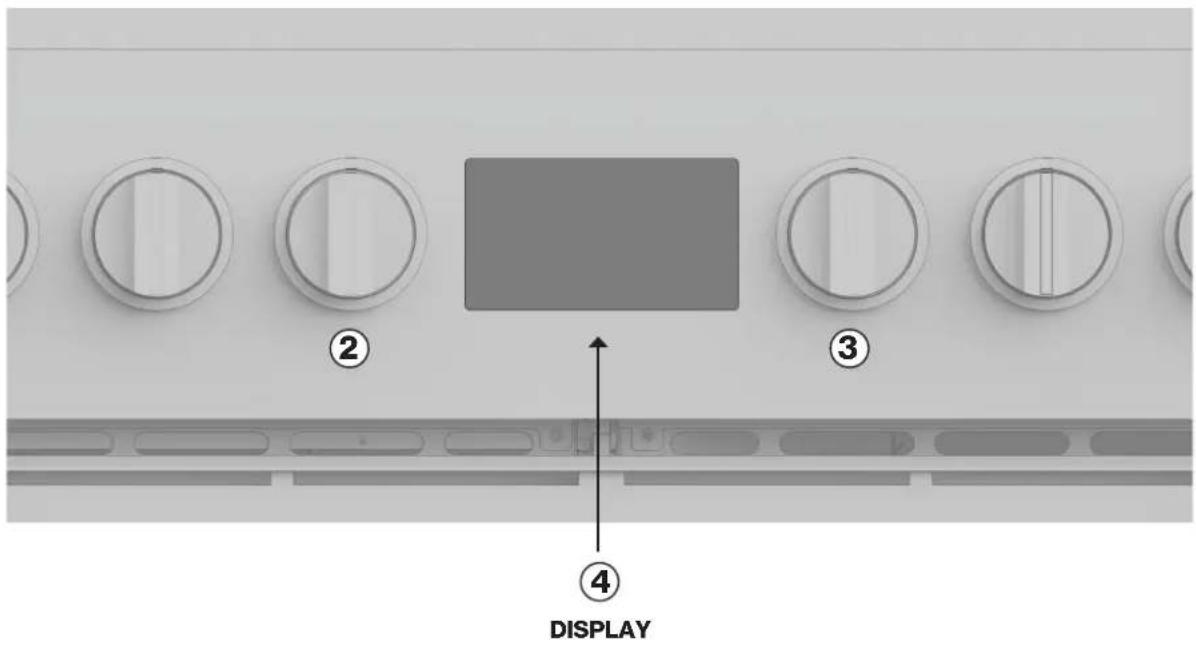
text_image
② ③ ④ DISPLAY② COOKING MODE SELECTOR
natural_image
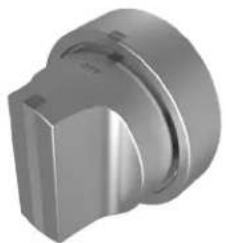
3D rendered mechanical component with no visible text or symbols


③ TEMPERATURE & FUNCTIONS SELECTOR
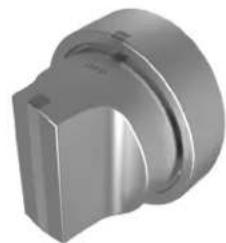
natural_image
3D rendered metallic mechanical component with stepped cylindrical and rounded features (no text or symbols)
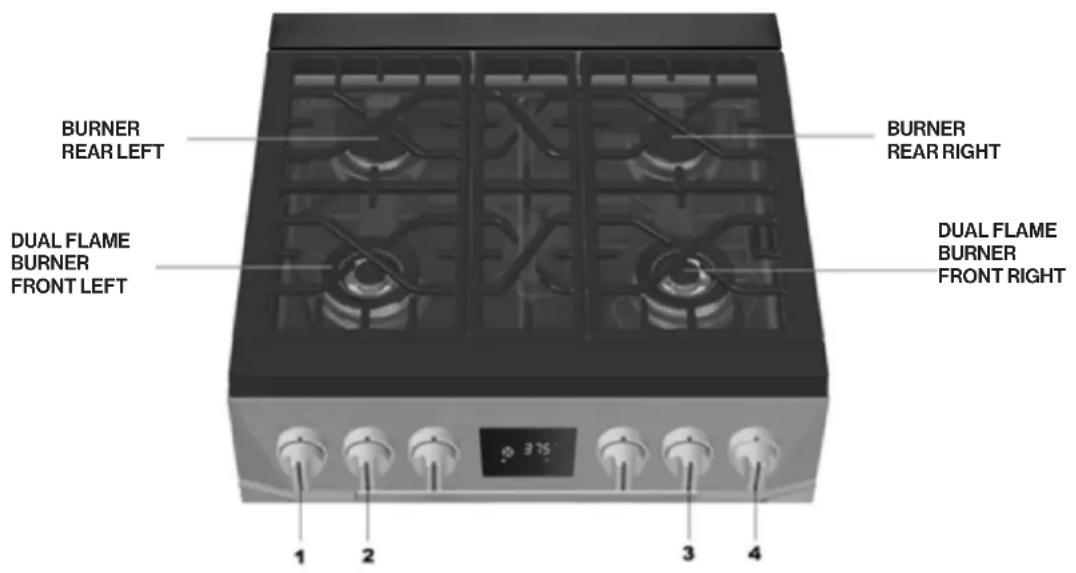
30" Cooktop Features
text_image
BURNER REAR LEFT DUAL FLAME BURNER FRONT LEFT 1 2 3 4 BURNER REAR RIGHT DUAL FLAME BURNER FRONT RIGHT| KNOB COOKTOP BURNER30” Model | BURNER OUTPUT RATINGS:BTU/HRNG (Natural) Gas, 5” W.C.P | BURNER OUTPUT RATINGS:BTU/HRLP (Propane) Gas, 10” W.C.P. | |
| 1 | Burner rear left | 12,000 btu/h 12,000 btu/h | |
| 2 | Dual Flame Burner front left | 15,000 btu/h 15,000 btu/h | |
| 3 | Dual Flame Burner front right | 20,000 btu/h 20,000 btu/h | |
| 4 | Burner rear right | 12,000 btu/h 12,000 btu/h | |
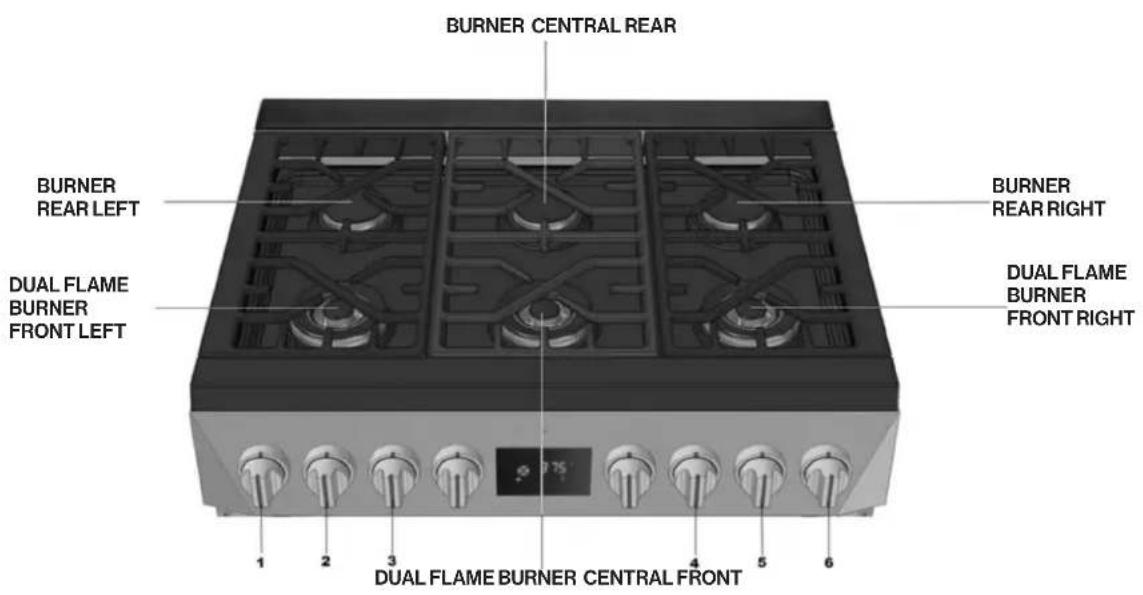
36" Cooktop Features
text_image
BURNER CENTRAL REAR BURNER REAR LEFT DUAL FLAME BURNER FRONT LEFT 1 2 3 4 5 6 BURNER REAR RIGHT DUAL FLAME BURNER FRONT RIGHT 1 2 3 4 5 6 DUAL FLAME BURNER CENTRAL FRONT| KNOB COOKTOP BURNER36” Model | BURNER OUTPUT RATINGS:BTU/HRNG (Natural) Gas, 5” W.C.P | BURNER OUTPUT RATINGS:BTU/HRLP (Propane) Gas, 10” W.C.P. |
| 1 Burner Rear Left 12,000 btu/h 12,000 btu/h | ||
| 2 Dual Flame Burner Front Left 20,000 btu/h 20,000 btu/h | ||
| 3 Dual Flame Burner Front Right 20,000 btu/h 20,000 btu/h | ||
| 4 Burner Central Rear 12,000 btu/h 12,000 btu/h | ||
| 5 Dual Flame Burner Central Front 15,000 btu/h 15,000 btu/h | ||
| 6 Burner Rear Right 12,000 btu/h 12,000 btu/h |
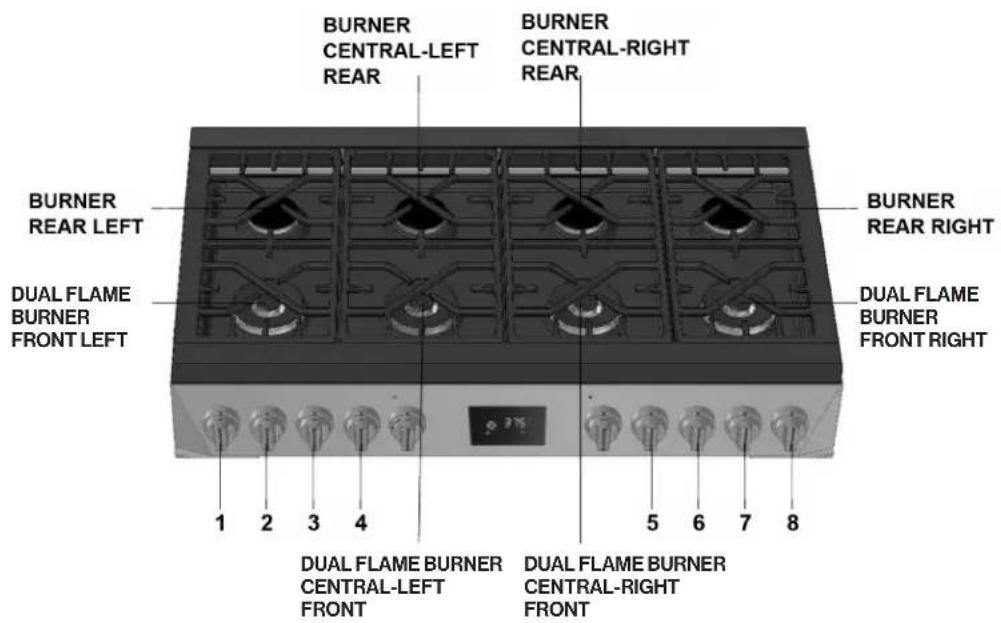
48" Cooktop Features
text_image
BURNER CENTRAL-LEFT REAR BURNER CENTRAL-RIGHT REAR BURNER REAR LEFT DUAL FLAME BURNER FRONT LEFT 1 2 3 4 5 6 7 8 DUAL FLAME BURNER CENTRAL-LEFT FRONT DUAL FLAME BURNER CENTRAL-RIGHT FRONT| KNOB COOKTOP BURNER48” Model | BURNER OUTPUT RATINGS:BTU/HRNG (Natural) Gas, 5” W.C.P | BURNER OUTPUT RATINGS:BTU/HRLP (Propane) Gas, 10” W.C.P. |
| 1 Burner Rear Left 10,000 btu/h 10,000 btu/h | ||
| 2 Dual Flame Burner Front Left 17,000 btu/h 17,000 | btu/h | |
| 3 Dual Flame Burner Front Central Left 17,000 btu/h 17,000 btu/h | ||
| 4 Burner Rear Central Left 10,000 btu/h 10,000 btu/h | ||
| 5 Dual Flame Burner Front Central Right 17,000 btu/h 17,000 btu/h | ||
| 6 Burner Rear Central Right 10,000 btu/h 10,000 btu/h | ||
| 7 Dual Flame Burner Front Right 17,000 btu/h 17,000 btu/h | ||
| 8 Burner Rear Right 10,000 btu/h 10,000 btu/h |
Cooktop
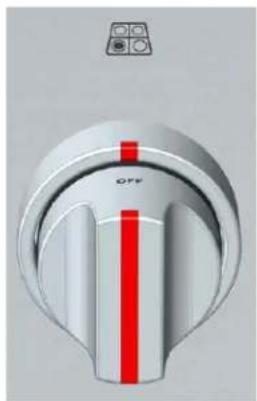
natural_image
Close-up of a white rotary dial with red and black stripes, no visible text or symbols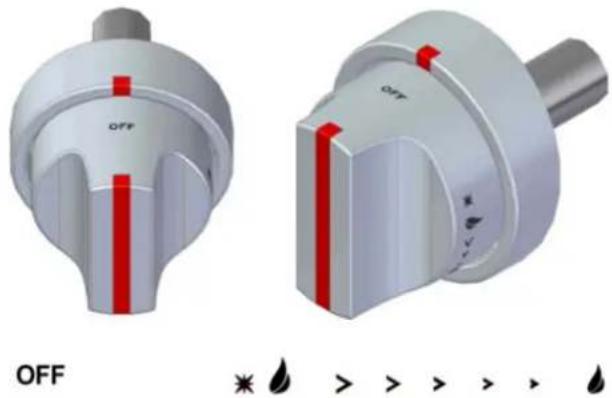
natural_image
Two 3D model of a rotary knob with red adjustment knobs, labeled 'OFF' and a legend indicating action buttons (no text or symbols on the knob itself)Turning on the Gas Burner
Press and turn the corresponding knob counter-clockwise to the MAX position.
When it is lit, hold the knob down for approximately 10 seconds, then release it and adjust flame intensity, being careful to position the knob in the area between maximum and minimum (included) and never between maximum and zero to prevent turning it off unexpectedly.
The burner may go out when you release the knob: this means that the thermocouple is not hot enough. If it does not ignite within 15 seconds, wait 1 minute before trying again.
Dual Flame Burner
The dual flame burner has two separate flame rings to provide a complete heat regulation from the high power to simmering.
To set:
1) Push and turn the knob counter clockwise within the main high and low range, when the burner is turned on, the Simmer flame ring ignite and remain on.
2) Set desired temperature within the high and low simmering range;
3) Continue turning the knob counter-clockwise to ignite both the flame rings and set the burner at its high power range.

Do not operate a burner using empty cookware or without cookware on the grate.

Do not touch the burner when the igniters are clicking

Do not let the burner flame extend beyond the edge of the pan.

Turn off all controls when not cooking.
IMPORTANT:
Never leave empty cookware on a hot surface cooking area, element or surface burner.
Ideal cookware should have a flat bottom, straight sides, a well-fitting lid and the material should be of medium-to-heavy thickness. Rough finishes may scratch the cooktop.
Aluminum and copper may be used as a core or base in cookware. However, when used as a base it can leave permanent marks on the cooktop or grates. Cookware material is a factor in how quickly and evenly heat is transferred, which affects cooking results. A nonstick finish has the same characteristics as its base material. For example, aluminum cookware with a non-stick finish will take on the properties of aluminum. Use the following chart as a guide for cookware material characteristics.
FLAME DESCRIPTION:
Yellow Flames
Further adjustment is required
Yellow Tips on Outer Cones
Normal for LP Gas
Soft Blue Flames
Normal for Natural Gas
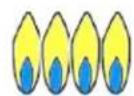
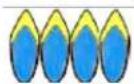
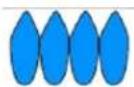
If the flame is completely or mostly yellow, verify that the regulator is set for the correct fuel. After adjustment, retest.
Some orange-colored streaking is normal during the initial start-up.
Allow unit to operate 4-5 minutes and re-evaluate before making adjustment.
Cookware Recommendations

WARNING: To avoid risk of serious injury, damage to appliance or cookware, please observe the following:
Bakeware, such as large casserole, pans, cookie sheet, etc. should never be used on the cooktop.
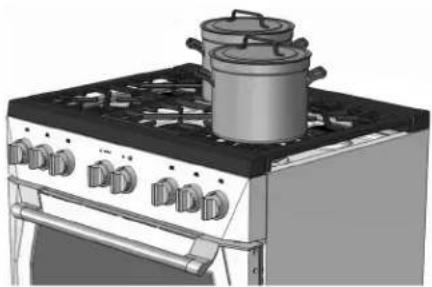
Placement of large stock pots should be staggered when used on the cooktop.
Select the base diameter to match the diameter of the flame. The diameter of the flame should be the same size as the pan base or slightly smaller. Oversize or under size pans sacrifice cooking performance. A 5½" (140mm) base size is generally the smallest recommended.
natural_image
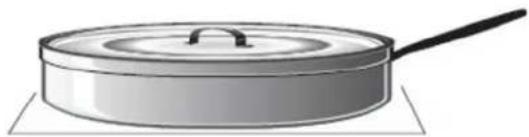
Illustration of a vintage kitchen stove with a pot on top (no text or symbols visible)Avoid using high flame setting with a pan larger than the grate or with one that spans more than one burner, such as a griddle, for prolonged periods of time. This can result in poor combustion that generates harmful by-products.
Balance is important for stability and even cooking. The handle must not be heavier than the pan and tilt in unevenly. A pan must sit level on the grate without rocking or wobbling.
natural_image
Illustration of a frying pan on a stand (no text or symbols)Food packaged in aluminum foil should not be placed directly on the burner grate. Aluminum foil can melt during cooking. Do not let plastic, paper or cloth come in contact with a hot burner grate. They may melt or catch fire.
Never let a pan boil dry. This can damage your pan and the cooking surface.
Professional quality pans with metal handles are recommended because plastic handles can melt or blister if the flame extends up the side of the pan. Professional quality pans are found at restaurant supply stores and gourmet specialty shops. All cookware should have these characteristics: good heat conductivity, good balance, correctly sized base diameter, a heavy, flat base, and a proper fitting lid.
For best cooking results, the flame should be contained under the bottom of the pan.
Aluminum and copper are pan materials that conduct the heat quickly and evenly. These metals are sometimes attached to the base or in the core between stainless steel.
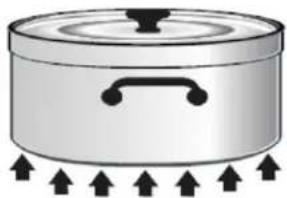
A heavy, flat base is more apt to remain flat when heated. Pan bases that are warped, dented, ridged or too lightweight will heat unevenly. Heat and cool pans gradually to avoid sudden temperature changes which tend to distort cookware. DO NOT add cold water to a hot pan.
natural_image
Illustration of a cylindrical container with a lid and handle, emitting upward arrows (no text or symbols)A properly fitting lid will shorten cooking time and make it possible to use lower heat setting.
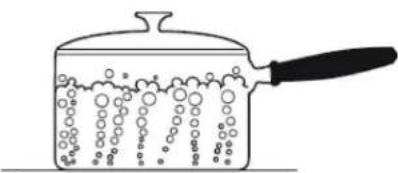
natural_image
Simple line drawing of a cooking pot with bubbles rising from it, no text or symbols presentSpecialty Cookware
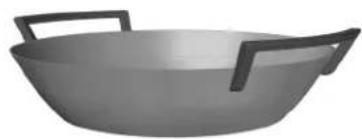
Woks
Either flat-based or round-bottom woks with the accessory ring can be used on all models. Round bottom woks must be used with a support ring. The Wok pan and the porcelain-coated cast iron wok support ring must be purchased separately.
natural_image
Illustration of a stainless steel bok with two handles (no text or symbols)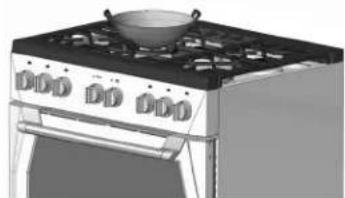
natural_image
Illustration of a vintage stove with a pan on top (no text or symbols visible)Canning Tips
- Use a cover when bringing the contents to a boil.
- Once the contents have reached a boil on high, use the lowest flame possible to maintain the boil or pressure.
Match Pan Diameter to Flame Size
The flame should be the same size as the bottom of the pan or smaller. Do not use small pans with high flame settings as the flames can lick up the sides of the pan. Oversize pans that span two burners are placed front to rear, not side to side. Use balanced pans. Pans must sit level on the cooktop grate without rocking. Center pan over burner. Use a lid that fits properly; a well-fitting lid helps shorten the cooking time. Flat, heavy bottom pans provide even heat and stability.

text_image
WARNING BALANCED PAN CONCAVE (HOLLOW) FLAME TOO LARGE FOR PAN SIZE BALANCED PAN CONVEX (ROUNDED) USE LIDS THAT FIT PROPERLY BALANCED PAN UNBALANCED PANOven
General oven information
CAUTION
Before using your oven
- Remove all packing and foreign materials from the oven. Any material of this sort left inside may melt or burn when the appliance is used.
- Heat the empty appliance to the maximum temperature in order to remove any manufacturing residues which could affect the food with unpleasant odours.
120 V / 240 V vs. 120 V / 208 V Connection
Most oven installations will have a 120 V / 240 V connection. If your oven is installed with 120 V / 208 V, the preheat time may be slightly longer than with 120 V / 240 V. The oven is designed to assure the same clean time at 120 V / 208 V.s.
High Altitude Baking
When cooking at high altitude, recipes and cooking time will vary from the standard.
Power Failure
After the power returns to the oven, the clock displays the time 12.00.
E Error Number Codes
If E codes are displayed when the electronic control detects a problem in the oven or in the electronics.
Squeak Noise
You may hear a sound from the unit while using the oven due to heat warping, but this is not a malfunction.
Flashing Symbols or Numbers
Signal an incomplete action that is in progress (locking the door, preheat, etc.).
Beeps
Signal that the set temperature has been reached. Beeps also signal the end of a function or an oven fault.
Convection Fan
The convection fan operates during any Convection Mode and when dehydrating.
Component Cooling Fan
Activates during any cooking or Self-Cleaning mode to cool inner components and outer door surfaces. This air is exhausted through the vent located above the oven door. It continues to run until components have cooled sufficiently. The cooling fan operates at double speed (or RPM's) in Self-Cleaning and whenever the internal components temperature becomes high.
Component Cooling Fan
When the oven is in use, oven lights turn on automatically when a mode is started. Oven lights will turn off automatically when finish and the oven mode is cancelled. The lights do not operate in the Self-Cleaning Mode.

[LIGHT] Knob to activates the lights in oven.
The temperature is preset in Fahrenheit, however it can be changed to Celsius.
WARNING

Keeping appliance area clear and free from combustible materials, gasoline, and other flammable vapors and liquids.

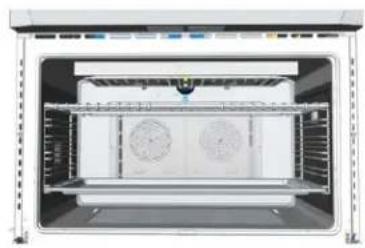
IMPORTANT: Pay more attention during cooking with high percentage of oil, grease etc... If you insert the oven rack on the 6 level, the oven tray must be positioned on the first level. See pictures below:
natural_image
Interior view of a microwave oven with cooling fans and ventilation grilles (no text or symbols visible)Correct!
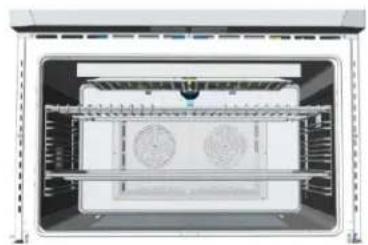
natural_image
Interior view of a microwave oven with cooling fans and ventilation grilles (no visible text or labels)☒ Wrong Position: 2-3-4-5 levels

natural_image
Interior view of an oven with cooling fans and a central chamber (no visible text or symbols)☒ Wrong: Oven Tray on Oven Rack
Electronic control
Control panel description
The oven control panel is made with one display and two knobs.
• Time & Temperature display
• Time & Temperature knob (Push & Shuttle)
• Mode (oven functions) knob
The push & shuttle knob is mainly for clock or temperature setting and automatic time functions programming. Select the desired item by pushing the knob.
OVEN CONTROL PANEL
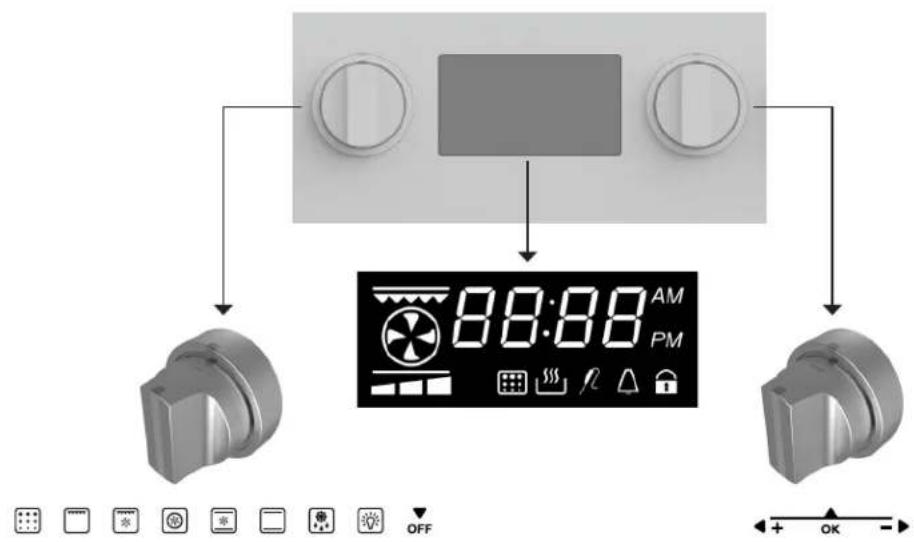
text_image
88:88 AM PM OFF + OK -| 1 | temperature display and time display functions |  | |
| 2 | 3 preheating bar Led |  | |
| 3 | Heating Element |  | |
| 4 | Setting Time 12hr AM / PM or Setting Time 24hr S | showed when the day time is displayed if 12h is set. |  |
| 5 | Pot Showed when a cooking function is set. |  | |
| 6 | Duration cooking function |  | |
| 7 | Delayed cooking function |  | |
| 8 | Minute minder function Showed when the timer is | active. |  |
| 9 | Door Lock | Fixed when door lock is closed Blinking when the lock cycle is running |  |
| 10 | Pyrolytic Cycle Showed when a Pyrolytic cycle is | set. |  |
| 11 | Meat Probe function Showed when a cooking with | meat probe is running. |  |
| 12 | Meat Probe Showed when when the meat probe is | inserted. |  |
Programming time functions
At every power-up, the control shows the time of day blinking, set at 12:00AM as the initial value, and the buzzer will sound 3 times. The time increases every minute. The only possible action is the "Clock Regulation", all other oven operations are inhibited. In general, turn the Temp/Time selector left or right in order to edit the values and modify them by steps; hold the knob on the left or right to fasten the decrease/increase operations.
Setting the time of day
The time of day is always displayed in the 12:00 AM/PM hours as default. Hours and minutes are set separately. In order to set the time of day, mode selector must be in OFF position, the -/+ knob acts on the time of day by default.
- Turn the selector left/right, the hours flash.
- Modify the flashing hours value turning the selector left/right.
- Push the Temp&Time selector to switch back and forth between hours and minutes.
- Modify the flashing minutes turning left/right.
• After a few seconds the whole time of day value starts flashing: wait until the new time of day is steady.
Push the knob to toggle between the time of day and the minute minder and check the set values. The clock is selected by default while the Symbol appears when the minute minder is displayed.
Setting the minute minder
When the Symbol is displayed, turn the knob left/right in order to set the timer value.
The standard value is 30 minutes, it's possible to modify it in the range between 0 and 240 minutes.
This timer has no influence on the oven activities and can be set also when the oven is off. The time of day is displayed with priority in any case, the Symbol shows the minute minder is active.
When the time expires, the △ symbol flashes and the buzzer sounds a warning sequence to recall the user attention. Push the knob to stop it.
The buzzer stops in any case after a time-out.
3 Tone Buzzer Setting
With the cooking selector in OFF position press the +/- knob until the "ton..." is showed, rotate the same knob count clockwise to set the desired tone from 1 to 3 and press to confirm.
Temperature & Time Format
Temperature unit in °F and 12h AM/PM are preset. When the oven mode selector is in off position, push the shuttle&push selector (TEMP & TIME) in order to select another available format.
Turn the knob to select a different desired format, and press the knob again to confirm.
| TEMPERATURE SELECTOR KNOB: | |
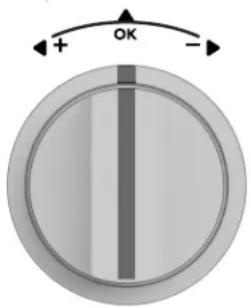 | MINUS - = decreasePLUS + = increasePUSH OK = functions scroll |
| COOKING FUNCTION SELECTOR KNOB AS EXAMPLE: | MODE | DISPLAY ICON | MEAT PROBE | MIN | DEFAULT | MAX |
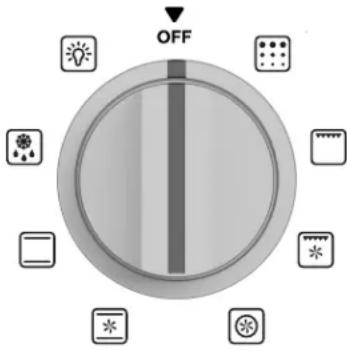 | LIGHT |  | ---- | |||
| DEFROST |  | ---- | ||||
| BAKE |  | • | 120°F(50°C) | 410°F(210°C) | 480°F(250°C) | |
| CONVECTION ROAST |  | • | 120°F(50°C) | 375°F(190°C) | 480°F(250°C) | |
| CONVECTION BAKE |  | • | 120°F(50°C) | 375°F(190°C) | 480°F(250°C) | |
| CONVECTION BROIL |  | • | 120°F(50°C) | 445°F(230°C) | 480°F(250°C) | |
| BROIL |  | • | 120°F(50°C) | 445°F(230°C) | 480°F(250°C) | |
| PYROLYTIC SELF CLEAN | [BYZX] | ---- |
Cooking with the Convection Oven

WARNING: Do not broil with the oven door open

WARNING: Open and then immediately close the door when accessing the food inside while broiling.
In a conventional oven, the heat sources cycle on and off to maintain an average temperature in the oven cavity.
As the temperature gradually rises and falls, gentle air currents are produced within the oven. This natural convection tends to be inefficient because the currents are irregular and slow. In this convection system, the heat is “conveyed” by a fan that provides continuous circulation of the hot air. This European Convection system provides state-of-the-art engineering and advanced design to create the finest convection oven. In standard convection ovens, a fan simply circulates the hot air around the food.
The system is characterized by the combination of an additional heating element located around the convection fan and the venting panel that distributes heated air in three dimensions: along the sides, the top and the full depth of the oven cavity. This European Convection system aids in maintaining a more even oven temperature throughout the oven cavity.
The circulating air aids in speeding up the baking process and cooks the food more evenly. By controlling the movement of heated air, convection cooking produces evenly browned foods that are crispy on the outside yet moist inside. Convection cooking works best for breads and pastries as well as meats and poultry. Air-leavened foods like angel food cakes, soufflés and cream puffs rise higher than in a conventional oven.
Meats stay juicy and tender while the outside is flavourful and crisp.
By using European Convection, foods can be cooked at a lower temperature and cooking times can be shorter.
When using this mode, the standard oven temperature should be lowered by 25^ F ( 15^ C).
Foods requiring less cooking time should be checked slightly earlier than normal. For best results, foods should be cooked uncovered, in low-sided pans to take advantage of the forced air circulation. When using the Convection Roast mode, the standard oven temperature does not need to be reduced.
Advantages of Convection Cooking
• Even baking, browning and crisping are achieved.
- During roasting, juices and flavors are sealed in while the exterior is crisp.
- Yeast breads are lighter, more evenly textured, more golden and crustier.
• Air-leavened foods such as cream puffs, soufflés and meringues are higher and lighter.
- Baking on multiple racks at the same time is possible with even results.
- Multiple-rack baking saves time.
- Prepare whole meals at once with no flavor transfer.
- Dehydrates herbs, fruits and vegetables.
- Requires no specialized bake ware.
- Saves time and energy.
- Convection broiling allows for extraordinary grilling with thicker cuts of food.
Oven Modes
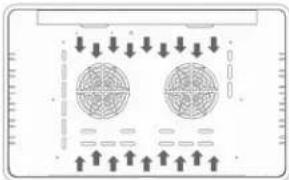
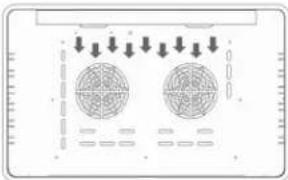
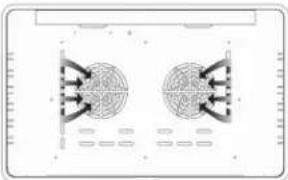
The following illustrations give an overview of what happens in the oven with each mode setting. The arrows represent the location of the heat sources during specific modes. The lower element is concealed under the oven floor.
In maximum setting time for heating, it is until 11 hours 59 minutes.
After the heating end, "End" is displaying it to a display:
- Time is united by + [INC] or - [DEC], and additional heating can be performed.
- Change of a function can be performed by Cooking Mode Dial.
| CAVITY STYLES | ||
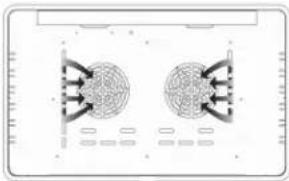 | 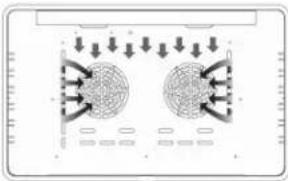 | 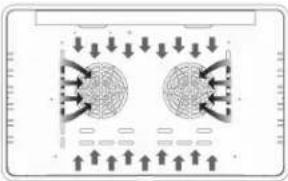 |
| True European Convection Bake (Multilevel) | Convection Broil Convection Roast | |
| Set temperature: from 120 °F (50 °C) to 480 °F (250 °C) (preset position 375 °F (190 °C). Convection Bake cooks with heat from ring elements behind the back wall of the oven. The heat is circulated throughout the oven by the Convection Fan. | Set temperature: from 120 °F (50 °C) to 480 °F (250 °C) (preset position 445 °F (230 °C). Convection Broil combines the intense heat from the upper element with the heat circulated by the Convection Fan. | Set temperature: from 120 °F (50 °C) to 480 °F (250 °C) (preset position 375 °F (190 °C). Convection Roast uses the upper and lower elements and Convection Fan. |
 |  |  |
| Bake Broil | Thaw (Defrost) | |
| Set temperature: from 120 °F (50 °C) to 480 °F (250 °C) (preset position 410 °F (210 °C). Bake cooks with heated air. Both the upper and lower elements cycle to maintain the oven temperature. | Set temperature: from 120°F (50°C) to 480 °F (250 °C) (preset position 445°F (230°C). Broiling uses intense heat radiated from the upper element. | Defrost does not use any heating element, but only the Convection Fan is used to defrost foods. |
Cooking functions
Each type of oven is provided for various cooking systems. A system can be selected by bringing the pointer of knob to the relating symbol.
| ICON MODE DESCRIPTION USED FOR | ||
| OFF | All the cooking modes are OFF and the oven heating elements are OFF. | - |
 | The light is on only. | - |
| [ZA27] | In this mode only the internal oven convection fan is ON i.e. there is no oven heating. | This mode is used to defrost deepfrozen food. |
 | In this mode both upper (top) and lower (bottom) oven heating elements are used to heat the oven air. However, no fan is used to circulate the heat. | This is the traditional mode of cooking on one shelf. Therefore only one rack can be used when selecting the Bake mode. Ideal for Appetizers, Biscuits, Coffee Cakes and Cookies. |
 | The Convection Roast mode uses the upper (top) oven heating element, the lower (bottom) heating element and the convection fan inside the oven. | Ideal for the roasting of whole chickens or turkey and pizza.It can also be used for baking-cooking Appetizers, Biscuits, Coffee Cakes and Cookies on one or more levels. |
 | The Convection Bake mode uses the circular or third heating element hidden behind the baffle at the back wall of the oven. The heat is circulated throughout the oven by the convection fan. | Consequently different foods can be cooked simultaneously (maximum three levels) and is suitable for preparing a complete dinner (small portions). Mixing of flavours is avoided and an important energy saving is obtained. |
 | Suitable for preparing a complete dinner (small portions). Mixing of flavours is avoided and an important energy saving is obtained. | Ideal for steak, hamburgers, chicken quarters or chicken breasts. |
 | The Grill mode uses intense heat radiated from the upper (top) heating element. | Ideal for preparing toast, browning and grilling. |
 | The standard time is 1.30 h and can be changed. | PYRO or self-cleaning mode.Here the oven is automatically cleaned by burning-off cooking residues at high temperature (about 460 °C) from 1h to 3h.During the self-cleaning cycle all fumes produced are filtered and then expelled to ambient. |
Quick Tips
CONVECTION COOKING About Convection Cooking
Standard cooking modes (Bake, Broil, etc.) use heat radiated from one or more elements to cook food. Convection modes use both heat from the elements and fans in the back of the oven to continuously circulate the heated air throughout the oven.
ADVANTAGES OF CONVECTION COOKING
• Even baking, browning and crisping.
- Juices and flavors are sealed in.
- Air-leavened foods such as cream puffs, soufflés, meringues and breads are higher and lighter.
- Multiple rack cooking.
- No special bakeware required.
- Saves time and energy.
DO NOT use Convection Bake for meats. Use Convection Roast instead.
| MODE USE THIS MODE FOR FOR BEST RESULTS QUICK COOKING TIP | |||
| Convection Bake | · Large quantities of food on multiple racks.· Pastries, breads, snack, foods and appetizers. | · Use low-sided, uncovered pans.· Center baking sheets side to side on the oven rack. | · Reduce recipe temperature by 25 °F (15 °C).· Check food for doneness early:If recipe call for Check food 1-15 min. 3 min. early 16-30 min. 5 min. early 31 min.-1hr. 10 min. early |
| Convection Broil | · Thicker, tender, cuts of meat, poultry and fish.· DO NOT use this mode for browning breads or casseroles. | · Meats should be at least 1" thick. | · No conversion from standard Broil is necessary.· Refer to Convection Broil Chart in this Manual for cooking times. |
| Convection Roast | · Large, tender cuts of meat and poultry such as roast or whole chicken. | · DO NOT cover meat or use cooking bags.· Refer to Convection Roast Chart in this Manual for cooking times. | · DO NOT change recipe temperature. |
Setting an oven function manually
Turn the mode knob into the desired position, the clock display shows On for a few seconds. The oven will work for a maximum time (12hours). Depending on the oven model, the number and type of available functions can be different.
If the clock display function is active the symbol 🎨 appears (it doesn't appear in light position and defrost position).
Turn the Temp & Time selector and set the desired oven temperature. The control offers a PRESET temperature per every cooking mode or a full range between MIN and MAX to be adjusted by hand. Check the value on the display after having selected the temperature.
The temperature appears on the clock display when the Time & Temp selector is pushed or when a new function has just been selected.
As soon as the oven starts, the preheat led (indicated by the bars) on the bottom of the clock display starts flashing and becomes steadily on when the preheat ends with 5 beeps.
Turn the mode selector to ZERO (OFF) position to stop any activity, the display will show OFF for a few seconds.
Setting an automatic oven function
After having selected a function as described before, the control can be programmed in order to set timed cooking activities. The time program remains active even if the function is changed (exception: pyrolyse). The following possibilities are available:
- Timed cooking setting the cooking time (duration).
- Timed cooking setting the end of cooking time (stop time).
- Delayed cooking setting duration and stop time.
Push the knob in order to toggle between cooking duration (cook time) and end of cooking time (stop time): the words "dur" or "End" are displayed respectively. Turn the knob left/right to edit the duration or the stop time when the proper word is displayed:
- When the word dur is displayed, the control shows 30' as the standard cooking duration. Turn the knob left/right in order to set the actually desired cooking time in a range between 0 and 240 minutes. The display will flash dur and its value alternatively for a few seconds then it will show the time of day, the pot symbol will flashes to indicate that an automatic cooking is running. The end of cooking time is updated automatically.
-
When the word End is displayed, the control shows the current time as the initial stop time. In order to set the actually desired end of cooking time in a 4 hours range:
-
Turn the knob left/right, the hours flash.
- Modify the flashing hours value turning the knob left/right.
- Push the knob to switch back and forth between hours and minutes or wait a few seconds until the minutes flash.
- Modify the flashing minutes value the knob left/right.
- Wait until the new End of Cooking time value stops flashing.
The display will flash End and its value alternatively for a few seconds then it will show the time of day, the pot symbol will flashes to indicate that a timed cooking is active. The cooking duration is updated automatically.
-
Repeat the same operations of point 1 then push the knob until End appears. the control shows the "current time + cooking time" as the initial stop time. It's not possible to lower the end of cooking time below this value, in order to set the actually desired end of cooking time in a 24 hours range:
-
Turn the knob left/right, the hours flash.
- Modify the flashing hours value turning the knob left/right.
- Push the knob to switch back and forth between hours and minutes or wait a few seconds until the minutes flash.
- Modify the flashing minutes value turning the knob left/right.
- Wait until the new End of Cooking time value stops flashing.
The display will flash End and its value alternatively for a few seconds then it will show the time of day and flashing the cooking icons to indicate that a delayed cooking has been programmed. As soon as the delay time expires, the oven starts and works for the programmed cooking time. The pot symbol flashes.
At the end of any timed activity the control shuts down the oven, the buzzer sounds a warning sequence (two short beeps repeated every 3 seconds) to recall the user attention, for a maximum time and makes the time related icons (flash on the display. Push the knob to silent the buzzer and reset the warning message. Turn the mode selector to ZERO (OFF) position before reusing the oven.
Convection Bake Tips and Techniques
Convection Bake Chart
- Reduce standard recipe temperature by 25^ (15°C) for Convection Bake.
• Temperatures have been reduced in this chart.
| FOOD ITEM RACK POSITION | TEMP. °F (°C) (PREHEATED OVEN) | TIME (MIN.) | |
| Cake | |||
| Cupcakes | 2 | 325 (165) | 16-20 |
| Bundt Cake | 1 | 325 (165) | 37-43 |
| Angel Food | 1 | 325 (165) | 25-35 |
| Cookies | |||
| Sugar | 2 | 325-350 (165-175) | 8-12 |
| Chocolate Chip | 2 | 325-350 (165-175) | 10-15 |
| Brownies | 2 | 325 (165) | 25-30 |
| Breads | |||
| Yeast bread loaf, 9x5 | 2 | 350 (175) | 15-22 |
| Yeast rolls | 2 | 350-375 (175-190) | 10-15 |
| Biscuits | 2 | 375 (190) | 6-10 |
| Muffins | 2 | 400 (205) | 13-16 |
| Pizza (Multiple rack cooking) | |||
| Frozen | 1 and 3 | 375-425 (190-220) | 12-18 |
| Fresh | 1 and 3 | 375-425 (190-220) | 8-14 |
The TEMP. and TIME in the chart above are for the 240 V setting.
This chart is a guide. Follow recipe or package directions and adjust temperatures / time appropriately.
Bake Tips and Techniques
Baking is cooking with heated air. Both upper and lower elements in the oven are used to heat the air but no fan is used to circulate the heat.
Follow the recipe or convenience food directions for baking temperature, time and rack position. Baking time will vary with the temperature of ingredients and the size, shape and finish of the baking utensil.
General Guidelines
• For best results, bake food on a single rack with at least 1" - 1-1/2" (2,5 - 3cm) space between utensils and oven walls.
- Use one rack when selecting the Bake Mode.
- Check for doneness at the minimum time.
- Use metal bake ware (with or without a non stick finish), heatproof glass, glass-ceramic, pottery or other utensils suitable for the oven.
- When using heatproof glass, reduce temperature by 25^ (15°C) from recommended temperature.
- Use baking sheets with or without sides or jelly roll pans.
- Dark metal pans or nonstick coatings will cook faster with more browning. Insulated bake ware will slightly lengthen the cooking time for most foods.
- Do not use aluminum foil or disposable aluminum trays to line any part of the oven. Foil is an excellent heat insulator and heat will be trapped beneath it. This will alter the cooking performance and can damage the finish of the oven.
- Avoid using the opened door as a shelf to place pans.
- Tips for Solving Baking and Roasting Problems are found on Page 41.
Bake Chart
| FOOD ITEM RACK POSITION | TEMP. °F (°C) (PREHEATED OVEN) | TIME (MIN.) | |
| Cake | |||
| Cupcakes | 2 | 350 (175) | 19-22 |
| Bundt Cake | 1 | 350 (175) | 40-45 |
| Angel Food | 1 | 350 (175) | 35-39 |
| Cookies | |||
| Sugar | 2 | 350-375 (175-190) | 8-10 |
| Chocolate Chip | 2 | 350-375 (175-190) | 8-13 |
| Brownies | 2 | 350 (175) | 29-36 |
| Breads | |||
| Yeast bread loaf, 9x5 | 2 | 375 (190) | 18-22 |
| Yeast rolls | 2 | 375-400 (190-205) | 12-15 |
| Biscuits | 2 | 375-400 (190-205) | 7-9 |
| Muffins | 2 | 425 (220) | 15-19 |
The TEMP. and TIME in the chart above are for the 240 V setting.
This chart is a guide. Follow recipe or package directions and adjust temperatures/time appropriately.
Convection Broil Tips and Techniques
- Place rack in the required position needed before turning on the oven.
- Use Convection Broil mode with the oven door closed.
- Do not preheat oven.
- Use the 2-piece broil pan. (Without 2 Pans may have risk of fire with drip of the fat from the meats.)
- Turn meats once halfway through the cooking time (see Convection Broil Chart).
Convection Broil Chart
| FOOD AND THICKNESS | PACK POSITION | OVEN TEMP. °F (°C) | TIME SIDE 1 (MIN.)* | TIME SIDE 2 (MIN.)* |
| Beef | ||||
| Steak (1" or more) | ||||
| Medium rare | 4 | 450 (230) | 10-12 | 10-12 |
| Medium | 4 | 450 (230) | 15-17 | 13-15 |
| Well | 4 | 450 (230) | 16-18 | 13-15 |
| Hamburgers (1" or more) | ||||
| Medium | 4 | 550 (290) | 9-11 | 5-8 |
| Well | 4 | 550 (290) | 11-13 | 8-10 |
| Poultry | ||||
| Chicken Quarters | 4 | 450 (230) | 18-20 | 13-15 |
| Chicken Halves | 3 | 450 (230) | 25-27 | 15-18 |
| Chicken Breasts | 4 | 450 (230) | 14-16 | 10-14 |
| Pork | ||||
| Pork Chops (1-1/4" or more) | 4 | 450 (230) | 13-15 | 12-14 |
| Sausage - fresh | 4 | 450 (230) | 4-6 | 3-5 |
The TEMP. and TIME in the chart above are for the 240 V setting.
* Broiling and convection broiling times are approximate and may vary slightly.
Cooking times are indicative and also depend on the thickness and the starting temperature of the meat before cooking.
Broil Tips and Techniques
- Place rack in the required position needed before turning on the oven.
- Use Broil mode with the oven door closed.
- Preheat oven for 5 minutes before use.
- Use the 2-piece broil pan. (Without Pan may have risk of fire with drip of the fat from the meat.)
- Turn meats once halfway through the cooking time (see Broil Chart).
Broil Chart
| FOOD AND THICKNESS | RACK POSITION | BROIL SETTING | TIME SIDE 1 (MIN.)* | TIME SIDE 2 (MIN.)* |
| Beef | ||||
| Steak (3/4"-1") | ||||
| Medium rare | 5 | L5 | 5-7 | 4-6 |
| Medium | 5 | L5 | 6-8 | 5-7 |
| Well | 5 | L5 | 8-10 | 7-9 |
| Hamburgers (3/4"-1") | ||||
| Medium | 4 | L5 | 8-13 | 11 |
| Well | 4 | L5 | 10-15 | 8-12 |
| Poultry | ||||
| Breast (bone-in) | 4 | L4 | 10-12 | 8-10 |
| Thigh (very well done) | 4 | L3 | 28-30 | 13-15 |
| Pork | ||||
| Pork Chops (1") | 5 | L5 | 7-9 | 5-7 |
| Sausage - fresh | 5 | L5 | 5-7 | 3-5 |
| Ham Slice (1/2") | 5 | L5 | 4-6 | 3-5 |
| Seafood | ||||
| Fish Filets, 1" | 4 L 4 10-14 | |||
| Buttered | ||||
| Lamb | ||||
| Chops (1") | ||||
| Medium Rare | 5 | L5 | 5-7 | 4-6 |
| Medium | 5 | L5 | 6-8 | 4-6 |
| Well | 5 | L5 | 7-9 | 5-7 |
| Bread | ||||
| Garlic Bread, 1" slices | 4 | L5 | 2-3 | |
| Garlic Bread, 1" slices | 3 | L5 | 4-6 |
The BROIL SETTING and TIME in the chart above are for the 240 V setting.
* Broiling and convection broiling times are approximate and may vary slightly.
Cooking times are indicative and also depend on the thickness and the starting temperature of the meat before cooking.
| Food Service Temperature Guidelines from FSIS (USDA food Safety & Inspection Service) | |||
| 140 °F (60 °C) | Ham, precooked (to Reheat) | 165 °F (74 °C) | Ham, precooked (to Reheat) |
| 145 °F (63 °C) | Fresh beef, Veal, Lamb (medium rare) Fresh beef | Veal, Lamb (medium rare) | |
| 160 °F (71 °C) | Ground Meat & Meat mixtures (Beef, Pork, Veal, Lamb) | 170 °F (77 °C) | Ground Meat & Meat mixtures (Beef, Pork, Veal, Lamb) |
| Fresh beef, Veal, Lamb (medium) Fresh beef, | Veal, Lamb (medium) | ||
| Fresh Pork (medium) Fresh Pork (medium) | |||
| Fresh Ham (raw) | 180 °F (82 °C) | Fresh Ham (raw) | |
| Egg Dishes Egg Dishes | |||
| 165 °F (74 °C) | Ground Meat & Meat mixtures (Turkey, Chicken) | Ground Meat & Meat mixtures (Turkey, Chicken) | |
Note: Eggs (alone, not used in a recipe) – cook until yolk & white are firm
Convection Roast Tips and Techniques
- Do not preheat for Convection Roast. (This mean, "PREHEAT" indication is automatically appear when the Convection Roast mode is selected, but place food inside the oven before selecting the Cooking mode.)
- Roast in a low-sided, uncovered pan.
- When roasting whole chickens or turkey, tuck wings behind back and loosely tie legs with kitchen string.
• Use the broil pan for roasting uncovered. (Without Pan many have risk of the fire with drip of the fat from the meat.)
• Use the probe or a meat thermometer to determine the doneness by checking internal temperature (see Convection Roast Chart).
• Double-check the internal temperature of meat or poultry by inserting meat thermometer into another position.
• Large poultry may also need to be covered with foil (and pan roasted) during a portion of the roasting time to prevent over-browning.
IMPORTANT
Quick and easy recipe tips
Converting from standard BAKE to CONVECTION ROAST:
• Temperature does not have to be lowered.
- Roasts, large cuts of meat and poultry generally take 10 - 20% less cooking time. Check doneness early.
• Casseroles or pot roasts that are baked covered in CONVECTION ROAST will cook in about the same amount of time.
- The minimum safe internal temperature for stuffing in poultry is 165^ (74 °C).
• After removing the item from the oven, cover loosely with foil for 10 to 15 minutes before carving if necessary to increase the final foodstuff temperature by 5^ to 10^ F ( 3^ to 6^ C).
- Tips for Solving Baking and Roasting Problems are found on Page 41
Convection Roast Chart
| MEATSWEIGHT lb (kg) | RACK POSITION | OVENTEMP. °F (°C) | TIME (Min. per lb) | INTERNAL TEMP. °F (°C) | |
| Beef | |||||
| Rib Roast | 4-6 (2-3) | 2 | 325 (165) | 18-22 | 145 (63) medium rare |
| 20-25 | 160 (71) medium | ||||
| Rib Eye Roast, (boneless) | 4-6 (2-3) | 2 | 325 (165) | 18-22 | 145 (63) medium rare |
| 20-25 | 160 (71) medium | ||||
| Rump, Eye, Tip, Sirloin (boneless) | 3-6 (1,5-3) | 2 | 325 (165) | 18-22 | 145 (63) medium rare |
| 20-25 | 160 (71) medium | ||||
| Tenderloin Roast | 2-3 (1-1,5) | 2 | 425 (220) | 15-20 | 145 (63) medium rare |
| Pork | |||||
| Loin Roast (boneless or bone-in) | 5-8 (2,5-4) | 2 | 350 (175) | 18-22 | 160 (71) medium |
| Shoulder | 3-6 (1,5-3) | 2 | 350 (175) | 20-25 | 160 (71) medium |
| Poultry | |||||
| Chicken whole, not stuffed | 3-4 (1,5-2) | 2 | 375 (190) | 20-23 | 180 (82) |
| Turkey, not stuffed | 12-15 (6-7,5) | 1 | 325 (165) | 10-14 | 180 (82) |
| Turkey, not stuffed | 16-20 (8-10) | 1 | 325 (165) | 9-11 | 180 (82) |
| Turkey, not stuffed | 21-25 (10,5-12,5) | 1 | 325 (165) | 6-10 | 180 (82) |
| Turkey Breast | 3-8 (1,5-4) | 1 | 325 (165) | 15-20 | 170 (77) |
| Cornish Hen | 1-1-1/2 (0,5-0,75) | 2 | 350 (175) | 45-75 total | 180 (82) |
| Lamb | |||||
| Half Leg | 3-4 (1,5-2) | 2 | 325 (165) | 20-27 | 160 (71) medium |
| 25-32 | 170 (77) well | ||||
| Whole Leg | 6-8 (3-4) | 1 | 325 (165) | 20-27 | 160 (71) medium |
| 25-32 | 170 (77) well | ||||
The TEMP. and TIME in the chart above are for the 240 V setting.
Cooking times are indicative and also depend on the thickness and the starting temperature of the meat before cooking.
Dehydrate Tips and Techniques
- Dehydrating can be done using the a lower temperature is used and the circulating heated air slowly removes the moisture for food preservation.
- Choose convection bake as the heating mode when dehydrating
- The Dehydrate temperatures recommended are 120^ (50°C) to 160^ (70°C).
- Multiple racks can be used simultaneously.
- Some foods require as much as 14-15 hours of time to fully dehydrate.
- Consult a food preservation book for specific times and the handling of various foods.
- This method is suitable for a variety of fruits, vegetables, herbs and meat strips.
- Drying screens can be purchased at specialty kitchen shops.
- By using paper towels, some food moisture can be absorbed before dehydrating begins (such as with sliced tomatoes or sliced peaches).
Dehydrate Chart
| FOOD PREPARATION | APPROXIMATE DRYING TIME* (hrs) | TEST FOR DONENESS | ||
| FRUIT | ||||
| Apples | Dipped in 1⁄4 cup lemon juice and 2 cups water, 1⁄4 slices | 11-15 | Slightly pliable | |
| Bananas | Dipped in 1⁄4 cup lemon juice and 2 cups water, 1⁄4 slices | 11-15 | Slightly pliable | |
| Cherries | Wash and towel dry.For fresh cherries, remove pits | 10-15 | Pliable, leathery, chewy | |
| Oranges Peels and slices | 1⁄4 slices of orange;orange part of skin thinly peeled from oranges | Peels: | 2-4 | Orange peel: dry and brittle |
| Slices: | 12-16 | Orange slices: skins are dry and brittle, fruit is slightly moist | ||
| Pineapple rings | Towel dried | Canned: | 9-13 | Soft and pliable |
| Fresh: | 8-12 | |||
| Strawberries | Wash and towel dry.Sliced 1⁄2" thick, skin (outside) down on rack | 12-17 | Dry, brittle | |
| VEGETABLE | ||||
| Peppers | Wash and towel dry.Remove membrane of pepper, coarsely chopped about 1" pieces | 16-20 | Leathery with no moisture inside | |
| Mushrooms | Wash and towel dry.Cut of stem end.Cut into 1/8" slices | 7-12 | Tough and leathery, dry | |
| Tomatoes | Wash and towel dry.Cut this slices, 1/8" thick, dry well | 16-23 | Dry, brick red color | |
| HERBS | ||||
| Oregano, sage parsley and thyme, and fennel | Rinse and dry with paper towel | Dry at 120°F(60°C) | 3-5 | Crisp and brittle |
| Basil | Use basil leaves 3 to 4 inches from top. Spray with water, shake off moisture and pat dry | Dry at 120°F(60°C) | 3-15 | Crisp and brittle |
Solving Baking Problems
With either Bake or Convection Bake, poor results can occur for many reasons other than a malfunction of the oven. Check the chart below for causes of the most common problems. Since the size, shape and material of baking utensils directly affect the baking results, the best solution may be to replace old baking utensils that have darkened and warped with age and use.
| BAKING PROBLEM CAUSE | |
| Food browns unevenly | - Oven not preheated- Aluminum foil on oven rack or oven bottom- Baking utensil too large for recipe- Pans touching each other or oven walls |
| Food too brown on bottom | - Oven not preheated- Using glass, dull or darkened metal pans- Incorrect rack position- Pans touching each other or oven walls |
| Food is dry or has shrunk excessively | - Oven temperature too high- Baking time too long- Oven door opened frequently- Pan size too large |
| Food is baking or roasting too slowly | - Oven temperature too low- Oven not preheated- Oven door opened frequently- Tightly sealed with aluminum foil- Pan size too small |
| Pie crusts do not brown on bottom or have soggy crust | - Baking time not long enough- Using shiny steel pans- Incorrect rack position- Oven temperature is too low |
| Cakes pale, flat and may not be done inside | - Oven temperature too low- Incorrect baking time- Cake tested too soon- Oven door opened too often- Pan size may be too large |
| Cakes high in middle with crack on top | - Baking temperature too high- Baking time too long- Pans touching each other or oven walls- Incorrect rack position- Pan size too small |
| Pie crust edges too brown | - Oven temperature too high- Edges of crust too thin |
Oven Care and Cleaning
Self-Cleaning the Oven
This oven features a pyrolytic Self-Cleaning function that eliminates the difficult and time consuming manual scrubbing of the oven interior. During Self-Cleaning, the oven uses a very high temperature to burn away food soil and grease.
- Do not use the cooktop during the oven self cleaning cycle.
- It is common to see smoke and/or an occasional flame-up during the Self-Cleaning cycle, depending on the content and amount of soil remaining in the oven. If a flame persists, turn off the oven and allow it to cool before opening the door to wipe up the excessive food soil.
- The door latch is automatically activated after selecting the Self-Cleaning cycle. The "SYMBOL" writings will appear in the display. This ensures that the door cannot be opened while the oven interior is at clean temperatures.
- The oven light does not operate during this mode.
- During Self-Cleaning, the kitchen should be well ventilated to help eliminate odors associated with Self-Cleaning. Odors will lessen with use.
• 1h:30 is the preset length of cleaning.
• The mode automatically stops at the end of the clean hours. - When the oven heat drops to a safe temperature, the automatic door lock will release and the door can be opened.
Preparing the Oven for Self-Cleaning
- Remove all utensils and bakeware.
- Remove non-porcelain oven racks.

CAUTION: If chromed racks are left in the oven during the Self-Cleaning cycle, they will permanently lose the shiny finish and change to a dull dark finish. See Cleaning Chart for proper care.
- Wipe up any soft soil spills and grease with paper towels. Excess grease will cause flames and smoke inside the oven during Self-Cleaning.
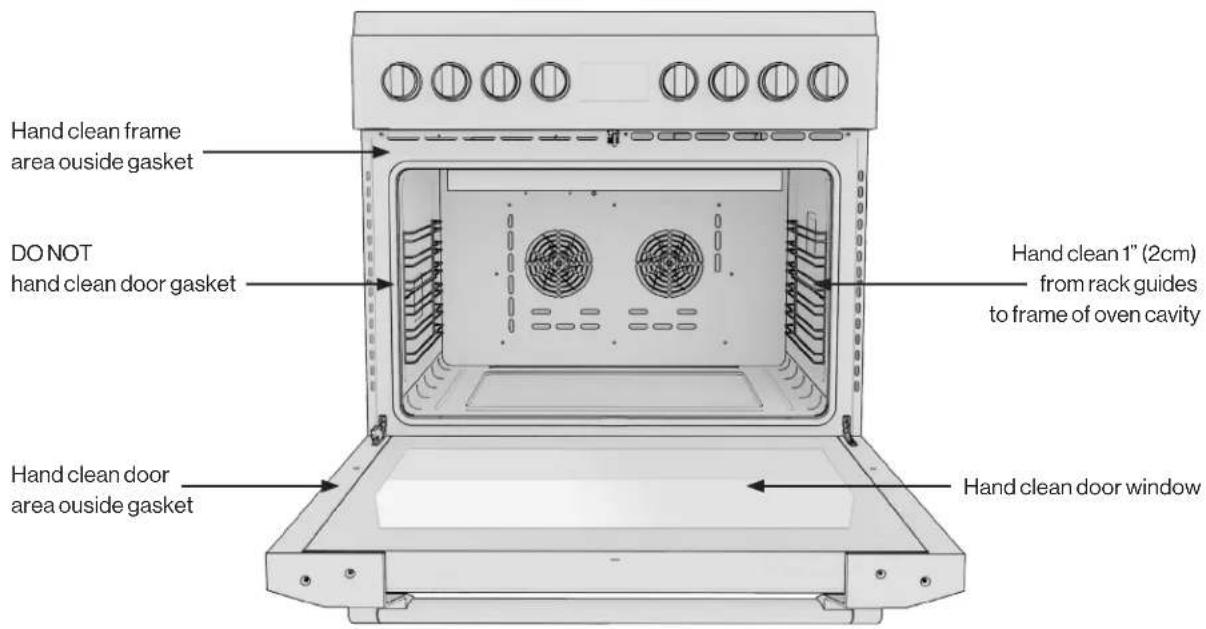
- Review illustration below. Some areas of the oven must be cleaned by hand before the cycle begins. They do not get hot enough during the cleaning cycle for soil to burn away. Use a soapy sponge or plastic scrubber or a detergent-filled S.O.S. ^ pad. Hand-clean the oven door edge, oven front frame and up to 1-1/2" (2 - 3 cm) inside the frame with detergent and hot water. Do not rub the gasket on oven. Clean by hand the oven door window. Rinse all areas thoroughly then dry.
-
- Be sure oven interior lights are turned off and the light bulbs and lens covers are in place.
text_image
Hand clean frame area outside gasket DO NOT hand clean door gasket Hand clean 1" (2cm) from rack guides to frame of oven cavity Hand clean door area outside gasket Hand clean door windowSetting the Self-Cleaning Mode
Before using the Self-Cleaning Mode please read the Oven Care and Cleaning page carefully and follow the Preparing the Oven for Self-Cleaning first.

ATTENTION: Once the pyrolysis (self-clean) function has started, when the flashing padlock symbol appears, DO NOT OPEN THE DOOR and do not change the function.
Once the pyrolysis function is completed, the door will automatically unlock when the oven's internal temperature drops below 100^ C.
Do not force to open the door when the padlock symbol is on or flashing.
Pyrolyse (Self-Clean)
Turn the mode knob in the proper position than press the +/- knob to start a cleaning cycle.
The clean time can be set according to the same rules of the automatic functions, and therefore the pyrolitic cycle can be delayed.
The maximum allowed clean time is 3 hours, the minimum 1 hour. The standard time is 1h:30min, the clock display shows P1:30.
At the end of the self-cleaning activity the display shows END steady. The writings on the display disappear when the mode selector is placed in the ZERO position showing “---”.
The door remains locked until the oven temperature drops below the safety threshold, at this time the control unlocks the door.
The cooling fan starts as soon as the function is selected and turns to its higher speed when the inner parts get hot. The oven temperature is automatically set to 460^ C in order to perfectly clean the cavity.
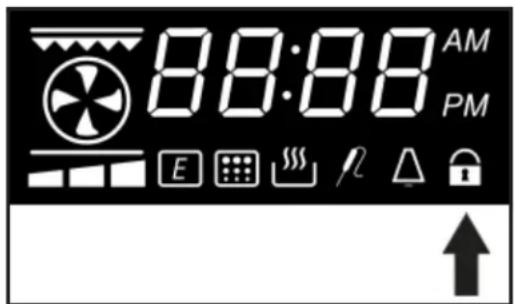
text_image
88:88 AM PM E S S S R A D U ↑The control also locks immediately the door in order to guarantee the user safety, given that the temperature inside gets very hot. A lock led shows the status of the latch mechanism at any time:
• Door unlocked, lock led off.
- Door locked, lock led always on.
- Latch moving, transition in progress, lock led flashing.
To reuse the oven after a pyrolyse, turn the mode selector to ZERO (OFF) position.

CAUTION: Do not use the hob during the pyrolysis function (Self-clean).
Sabbath Mode & Meat Probe Function
Sabbath Mode
- Rotate selector to BAKE and set the desired temperature by the +/- knob.
- Press and hold +/- knob for 5 seconds. "SAb" will appear and flash on oven control knob indicating Sabbath mode has been initiated. From this point it is no longer possible to change the temperature by turning the +/- knob.
- Turn cooking mode selector to OFF or to any other cooking mode to stop the Sabbath function.
NOTE: The sabbath mode function can only be set within the first 10 seconds after choosing 'bake' mode or after the set of temperature changing.
Sabbath Mode
- Sabbath Mode sets the oven to remain on in a BAKE setting.
• Available only in manual setting not timed cooking. - The display(s) will not indicate temperature and time, only SAB is showed.
• 72 Hours max duration in manual. - All tones and chimes are disabled.
- Minute minder function is disabled.
- All time functions changing are disabled.
- Oven light status will remain always in the ON state when the oven is in Sabbath Mode.
Meat Probe Function
This oven is provided with the meat probe feature to sense the temperature inside meat and stop cooking as soon as the set value is reached.
| The following modes can be selected to work with the meat probe: | |
 | CONVECTION BAKE |
 | CONVECTION ROAST |
 | BAKE |
 | CONVECTION BROIL |
Other modes are not allowed to start if the probe is inserted. The P of 165P (in Fahrenheit) or 75P (in Celsius) text and Meat. Probe symbol flashes when the mode is not valid for cooking with probe or the probe is removed during cooking. In this case the heating elements are de-energized and the control automatically switches in OFF condition, showing the time of the day.
Activation Methods
- Once the probe has been inserted in its receptacle and detected by the control turn the cooking mode knob into a valid position, the 165P (75°C) text appears on the 4 DIGITS display.
- Once a valid cooking mode is started the probe can be inserted in its receptacle and detected by the control, the 165P (75°C) text appears on the 4 DIGITS display.
The meat probe standard temperature 165^ F ( 75^ C) flashes on display for 5 seconds. Using the + / - knob, it's possible to change the probe set.
The standard probe temperature set-point is 165^ F ( 75^ C).
The allowed range is between 120°F (50°C) and 210°F (99°C).
The maximum cavity temperature during cooking with meat probe is 480^ F ( 250^ C).
| Start from ambient temp. | 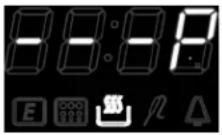 |
| The current probe temperature is showed from 105°F (40°C) | 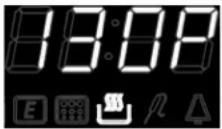 |
| The current probe temperature is showed until the set is reached. | 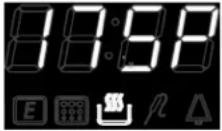 |
| End cooking. |
As soon as the set probe temperature is reached, the control beeps indicating the end of cooking and stops the oven.
Press +/- knob once to check the probe set temperature.
Press +/- knob twice to change the oven setting temperature.
When it's flashing turn the +/- knob to modify the value.
After 5 second the current oven temperature is shown automatically on the 4 digits display.
Always turn the cooking mode to the OFF position after the end of cooking has automatically turned off the oven so it is properly reset for the next time it is used.
Automatic time functions are disabled when using the meat probe, only the minute minder can be set.
When activated the Minute Minder have to work in background.
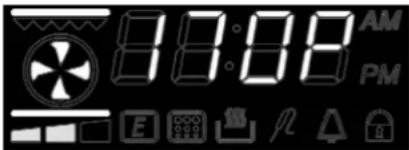
text_image
88:08 AM PM E 铺 R △
WARNING:
When using the meat probe, make sure that the cable does not touch the upper resistive elements.
Accessories
Some models are not provided with accessories.
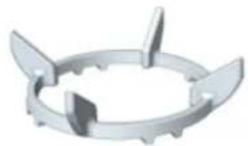
Wok Ring
Useful when using a wok, use this accessory with high BTU burners
Slow Cooking / Moka
The cast-iron SlowCooking/Moka plate provides a steady temperature, evenly distributed across a stable heating surface.
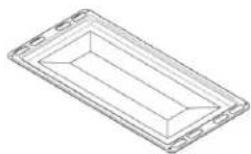
Oven Tray Broiler Rack
Useful for collecting fat from foods.
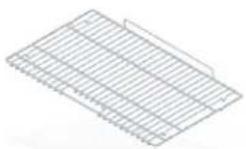
Oven Rack
Useful for supporting containers with food during cooking. Placed on the rack above.
DIY Maintentance & Cleaning
It is necessary to periodically clean the oven thoroughly to avoid the formation of grease, which over time can produce smoke, unpleasant odor and malfunctions. Below is a list of our tips concerning the various parts of your cooker.

WARNING:
- Do not use jets of steam to clean the appliance.
- Steam could reach the electrical parts, damaging them and causing short circuits.
- Do not use cleaning products that contain chlorine, ammonia or bleach on parts made of steel or superficially treated with metal finishes (for example anodizing, nickel-plating, chrome-plating).
Food Stains or Residues
Do not use metallic sponges or sharp scrapers as they will damage the surfaces. Use ordinary non-abrasive products with the aid of wooden or plastic utensils if necessary. Rinse thoroughly and dry with a soft cloth or a microfiber cloth. Do not allow residues of sugary foods (such as jam) to set inside the oven. If left to set for too long, they might damage the enamel lining of the oven.
Cleaning the Cooktop
It is advisable to clean the hob daily after every use, once it has cooled down, using specific products for steel, or a normal degreaser for colored cookers. Be careful to remove all cooking residues. We strictly advise you against using abrasive or chlorine-based products.

Before cleaning, make sure all controls are off and the cooktop is cool.

Always use the mildest cleaner that will do the job. Use clean, soft cloths, sponges or paper towels.

Rub stainless steel finishes in the direction of the grain. Wipe area dry to avoid water marks.

Do not clean removable cooktop parts in any self-cleaning oven.

After cleaning, place all parts in their proper positions before using cooktop.
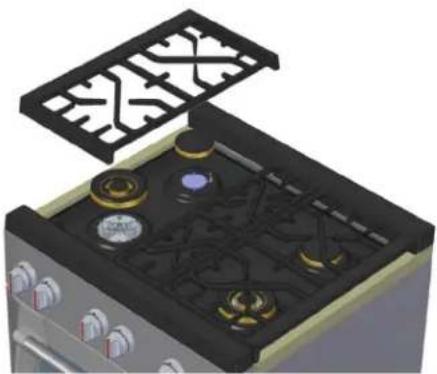
natural_image
3D illustration of a kitchen stove with four fans and a top panel (no text or symbols)Cleaning the Pan Support
The pan supports must be cleaned on a regular basis with warm water and non-abrasive detergent, being careful to remove all incrustations.
Cleaning the Burner Cap And Gas Spreader
Always keep the burner cap and gas spreader in place when using a surface burner. A clean burner cap and spreader will help prevent poor ignition and uneven flames. Always clean the parts after a spillover and routinely remove and clean.
Burner Base and Injector
Gas must flow freely throughout the injector orifice to light properly. Keep this area free of soil and do not allow spills, food, cleaning agents or any other material to enter the injector orifice opening. Protect it during cleaning.
Cleaning the Spark Plugs and Thermocouples
The burner caps and flame spreaders can be taken off to make it easier to clean the hob. Wash them with hot water and non-abrasive detergent, making sure they are thoroughly dry before being re-installed.
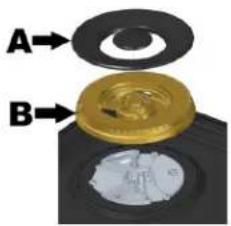
text_image
A BA = Burner Cap
B = Burner Gas Spreader
Following there is a procedure:
1) Remove the burner cap from the burner base and clean according to cleaning section.
2) Remove the burner spreader. Clean the gas tube opening and burner port according to cleaning section.
3) Clean the burner base with a damp cloth (keep the gas injector area free of cleaning agents and any other material from entering the injector orifice).
4) Replace the burner spreader and cap, making sure the alignment pins are properly aligned with the slots.
5) Turn on the burner.
If the burner does not light, check cap and spreader alignment. If the burner still does not light, do not service the gas burner yourself. Contact a trained repair specialist.
Be sure when lighting the burner:
- Gas spreader is seated correctly and pin is properly aligned with burner base slot.
- Cap is seated correctly and pin is properly aligned with gas spreader slot.
Burner Ports
Check burner flames occasionally. A good flame is blue in color, not yellow. Keep this area free of soil and do not allow spills, food, cleaning agents or any other material to enter the burner ports.
Cleaning the Oven
For a good preservation of the oven it must be cleaned regularly after it has cooled down.
- Remove all removable parts.
- Clean the oven grids with hot water and non-abrasive detergents, rinse and dry.
• To make cleaning easier, it is possible to take the door and/or the glass off (refer to the maintenance paragraph). - At the end of these operations, to dry the damp parts thoroughly. It is advisable to turn the oven on for a maximum of 15/20 minutes after the use of specific cleaning products, in order to eliminate any residues from the inside of the oven.
- Do not use abrasive detergents or metal scrapers to clean the oven door glass as this may scratch the surface of the glass, causing its breakage.
- Make sure oven is cool and power to the oven has been turned off before removing the door. Failure to do so could result in electrical shock or burns.
- The oven door is substantial. Use both hands to remove the oven door. The door front is glass.
- Handle carefully to avoid breakage.
- Grasp only the sides of the oven door. Do not grasp the handle as it may swing in your hand and cause damage or injury.
- Failure to grasp the oven door firmly and properly could result in personal injury or product damage.
Cleaning Chart
1) Locate the number of the part to be cleaned in the illustration on this page.
2) Find the part name in the chart.
- Use the cleaning method in the left column if the range has a colored enamel finish.
- Use the cleaning method in the right column if the range is stainless steel.
3) Match the letter with the cleaning method on following page.

text_image
Labeled diagram of an oven with numbered parts for identification| Part Cleaning Method | Part Cleaning Method | Nameled Stainless | |||||||
| Enameled Steel / Zama | Stainless | Glass | Steel / Zama | Glass | |||||
| 1 | Control Panel | - | F | - | 10 | External Glass | - | - | B |
| 2 | Sides | -F- | 11 | ||||||
| 3 | Frames | -F- | 12 | ||||||
| 4 | Oven Cavity | D | - | - | 13 | ||||
| 5 | Inner Glass | - | - | E | 14 | ||||
| 6 | Handle | -F- | 15 | ||||||
| 7 | Handle Terminal | - | F | - | 16 | ||||
| 8 | Door Frame | C | F | - | 17 | ||||
| 9 | Rack | - | A | - | 18 | ||||
The entire oven can be safely cleaned with a soapy sponge, rinsed and dried. If stubborn soil remains, follow the recommended cleaning methods below.
• Always use the mildest cleaner that will do the job.
- Rub metal finishes in the direction of the grain.
- Use clean, soft cloths, sponges or paper towels.
- Rinse thoroughly with a minimum of water so it does not drip into door slots.
• Dry to avoid water marks.
The cleaners listed below indicate types of products to use and are not being endorsed. Use all products according to package directions.
| Part Cleaning Method | |
| A. Chrome Plated | Wash with hot sudsy water. Rinse thoroughly and dry. Or, gently rub with Soft Scrub®Bon-Ami®, Comet®, Ajax®, Brillo® or S.O.S.® pads as directed. Easy Off® or Dow®OvenCleaners (cold oven formula) can be used, but may cause darkening and discoloration.Racks may be cleaned in the oven during the self-clean mode. However, chromed racks will lose their shiny finish and permanently change to a metallic gray. |
| B. Glass | Spray Windex® or Glass Plus® onto a cloth first then wipe to clean. Use Fantastik® or Formula 409® to remove grease spatters. |
| C. Painted | Clean with hot sudsy water or apply Fantastik® or Formula 409® first to a clean sponge or paper towel and wipe clean. Avoid using powdered cleansers and steel wool pads. |
| D. Enameled | Immediately wipe up acidic spills like fruit juice, milk and tomatoes with a dry towel. Do not use a moistened sponge/towel on hot porcelain. When cool, clean with hot sudsy water or apply Bon- Ami® or Soft Scrub® to a damp sponge. Rinse and dry. For stubborn stains, gently use Brillo® or S.O.S.® pads. It is normal for porcelain to craze (fine lines) with age due to exposure from heat and food soil. |
| E. Reflective | Clean with hot sudsy water and sponge or plastic scrubber. Rub stubborn stains with vinegar, Windex®, ammonia or Bon-Ami®. DO NOT USE HARSH ABRASIVES. |
| F. Stainless Steel / Zama | Always wipe or rub with grain. Clean with a soapy sponge then rinse and dry. Or, wipe with Fantastik® or Formula 409® sprayed onto a paper towel. Protect and polish with Stainless Steel Magic® and a soft cloth. Remove water spots with a cloth dampened with white vinegar. Use Zud®, Cameo®, Bar Keeper's Friend® or RevereWare Stainless Steel Cleaner®, to remove heat discoloration. |
| G. Probe (if present) | Clean probe by hand with detergent and hot water. Then rinse and dry. Do not so or clean in dishwasher. |
The entire Cooktop can be safely cleaned by wiping with a soapy sponge, then rinsing and drying. If stubborn soil remains, follow the recommended cleaning methods below.

ATTENTION
- Before cleaning, be certain the burners are turned off and the grates are cool.
• Always use the mildest cleaner that will do the job. Use clean, soft cloths, sponges or paper towels. - Rub stainless steel finishes in the direction of the grain. Wipe area dry to avoid water marks.
- Do not clean removable cooktop parts in any self-cleaning oven.
• After cleaning, place all parts in their proper positions before using cooktop.
| Parts and Materials Suggested Cleaners Suggestions/Reminders | ||
| Burner Base(Cast aluminum) | Damp cloth. Keep the gas injector area free of cleaning agents and any other material from entering the injector orifice. | |
| Gas Spreader(Brass) | Detergent and hot water; rinse and dry.Stiff nylon bristle-toothbrush to clean port openings.Abrasive cleansers: Revere ware® metal polish. Following package direction Use Brillo® or S.O.S.® pads.Rinse and dry. | Rub lightly, in a circular motion.Aluminium cleaners may dull the surface.To clean port opening, use a tooth brush or straightened paper clip. Take care not to damage / augment the shape of the ports. |
| Burner Cap and Grate(Porcelain enamel on cast iron) | Non abrasive cleaners: Hot water and detergent, Fantastic, Formula 409. Rinse and dry immediately.Mild abrasive cleaners: Bon Ami® and Soft Scrub®.Abrasive cleaners for stubborn stains: soap- filled steel wool pad. | The grates are heavy; use care when lifting. Place on a protected surface.Blisters/crazing/chips are common due to the extreme temperatures on grate fingers and rapid temperature changes.Acidic and sugar-laden spills deteriorate the enamel. Remove soil immediately.Abrasive cleaners, used too vigorously or too often, can eventually mar the enamel. |
| Control Knobs(Zama) | Hot sudsy water: rinse and dry immediately. If necessary, remove knobs (lift straight up). | Do not soak knobs.Do not use abrasive scrubbers/cleaners.Do not force knobs onto valve shaft.Pull knobs straight away from control panel to remove.When replacing knobs, make sure knobs are in the OFF position.Do not remove seats under knobs. |
| Igniters(Ceramic) | Carefully wipe with a cotton swab dampened with water, ammonia or Formula 409®. Gently scrape soil off with a toothpick. | Avoid excess water on the igniter. A damp igniter will prevent burner from lighting.Remove any lint that may remain after cleaning. |
Removing the door
For easier cleaning, the door can be removed and placed on a canvas. To remove the door proceed as follows:
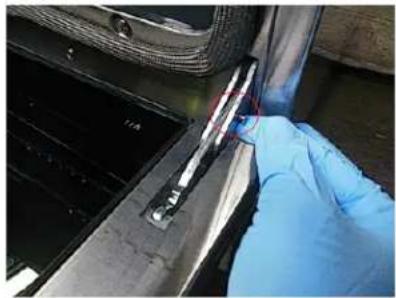
natural_image
Close-up of a gloved hand holding a tool near a car or vehicle component (no visible text or symbols)1) Open the door completely and insert two pins into the holes on the hinges indicated in the figure.
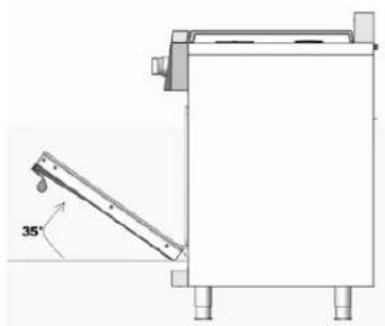
natural_image
Technical line drawing of a mechanical device with a 35-degree angle标注 (no text or symbols beyond the angle marker)2) Grasp the door on both sides with both hands, lift it forming an angle of around 35^ and remove it.
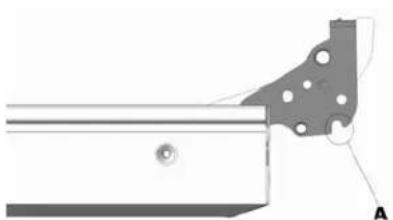
natural_image
Technical diagram of a mechanical joint or bracket with labeled point A (no text or symbols present)3) To reassemble the door, put the hinges in the relevant slots in the oven, making sure that grooved sections A are resting completely in the slots. Lower the door and once it is in place remove the pins from the holes in the hinges.
Cleaning the Door Glazing
The glass in the door should always be kept thoroughly clean. Use absorbent kitchen roll. In case of stubborn dirt, wash with a damp sponge and an ordinary detergent.
Replacing the internal light bulb.

WARNING: Before this operation is necessary to disconnect the range from the power supply.
To replace the light bulb proceed as follows:
1) Remove all the accessories inside the oven;
2) Remove the side chromed racks;
3) Remove the bulb protector A by a screwdriver;
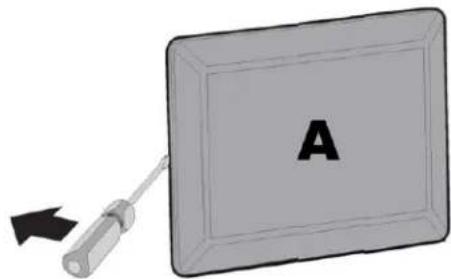
natural_image
Illustration of a screwdriver holding a labeled tray with letter A, no text or symbols present4) Replace the bulb B with a similar one. Re-fit bulb protector A

Attention: Do not touch the halogen lamp directly with your fingers, but have an insulating cover.
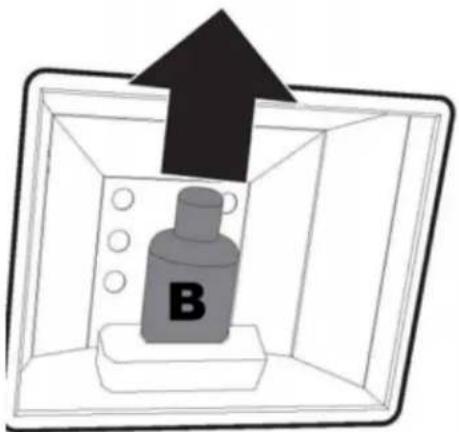
text_image
BTroubleshooting
Before contacting service, check the following to avoid unnecessary service charges.
| Problem Problem Solving Steps | |
| Cooling fan continues to run after oven is turned off The fan turns off automatically when the components have cooled sufficiently. | |
| Oven temperature is too hot or too cold The oven thermostat needs adjustment. | |
| Oven light is not working properly Replace or reinsert the light bulb if loose or defective. | |
| Cannot remove lens cover on light There may be a soil build-up around the lens cover. Wipe lens cover area with a clean dry towel prior to attempting to remove the lens cover. | |
| Excessive moisture When using Bake mode, preheat the oven first. Convection Bake and Convection Roast will eliminate any moisture in oven (this is one of the advantages of convection). | |
| Porcelain chips When oven racks are removed and replaced, always tilt racks upward and do not force them to avoid chipping the porcelain. | |
| Ignition will not operate Is the power supply cord unplugged? Plug into a grounded 3 prong outlet. | |
| Surface burners will not operate Is the power supply cord unplugged? Plug into a grounded 3 prong outlet. | |
| Surface burners flames are uneven yellow and/or noisy | Are the burner ports clogged?See “Cleaning gas burners” section. |
| Are the burner caps positioned properly?See “Cleaning the burner cap and gas spreader” section. | |
| Is propane gas being used?The appliance may have been converted improperly.Contact a service technician. | |
| Surface burners makes popping noise | Is the burner wet?Let it dry. |
| Is the cap and gas spreader positioned correctly?Make sure the alignment pins are properly aligned see “Cleaning the burner cap and gas spreader” section. | |
| Excessive heat around cookware on cooktop | Is the cookware the proper size?Use cookware about the same size as the surface cooking area, element or surface burner. Cookware should not extend more than 1 in (2.5 cm) outside the cooking area. |
| Cooktop cooking result not what expected | Is the proper cookware being used?See “Cookware” section. |
| Is the control knob set to the proper heat level?See “Setting the Control Knobs” section. | |
| E008 Error appears in the display window A | problem with latch mechanism occurred. Remove power and turn it back on again after a few seconds. The oven should run a latch auto-test.If condition persists, note the code number and contact service. |
| Other E__Error appears in the display window | Remove power and turn it back on again after a few seconds. If condition persists, note the code number and contact service. |
| The oven display stays OFF Turn off power at the main power supply (fuse or breaker box). Turn breaker back on. If condition persists, call an authorized service. | |
| Oven door is locked and will not release, even after cooling | Turn the oven off at the circuit breaker and wait a few seconds. Turn breaker back on. The oven should reset itself and will be operable. |
| Oven is not heating | Check the circuit breaker or fuse box to your house. Make sure there is proper electrical power to the oven. Make sure the oven temperature has been selected. |
| Oven will not Self-Clean properly Allow the oven to cool before running Self-Clean. Always wipe out loose soils or heavy spillover before running Self-Clean. If oven is badly soiled, set oven for a four-hour Self-Clean. See Preparing the Oven to Self-Clean, Page 43. | |
Service Information
If service is required, call your dealer or authorized service agency.
The name of the authorized service agency can be obtained:
• from the dealer or distributor in your area
• contacting the following telephone number 480.282.6406
• writing an email to service@forzacucina.com
Have the following information readily available:
- Model number
- Serial number
- Date purchased
• Name of dealer from whom purchased - Clearly describe the problem that you are having
Record the information indicated below.
You will need it if service is ever required.
The model and serial number can be found on the range frame (see the picture below).
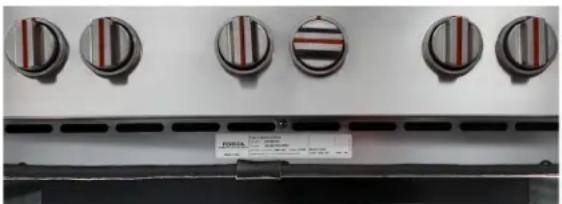
natural_image
Front view of a stainless steel electric stove with five circular heat sinks and a small label on the grille (no readable text or symbols)Model no.
Serial no.
Date of purchase
Date installed
Dealer's name
Address
If service requires installation of parts, use only authorized parts to insure protection under warranty.
Keep this manual for future reference.
FORZA WARRANTY U.S.A.
FREESTANDING GAS RANGES - WALL OVENS - RANGE TOPS - DISHWASHERS - RANGE HOODS
The warranties provided by Forza in this statement apply exclusively to Forza appliances and accessories sold as new products to the original owner by a Forza authorized distributor, retailer, dealer or service center and installed in the United States.
The warranties provided in this statement are not transferable and have validity from the date of original purchase.
Duration of warranty:
For twenty-four (24) months from the original date of purchase, the Forza warranty covers all parts and labor to repair or replace, under normal residential use, any part of the product proving to be defective in material or workmanship as a result of the original manufacturing process. Repair service must be performed by a Forza Authorized Service Center during normal working hours.
Responsibilities of the buyer:
When writing or calling about a service problem, please include the following information:
- Your name, address and telephone number;
- Appliance model and serial number;
• Name of your dealer; - A clear description of the problem you are having;
• Proof of purchase (sales receipt).
Cosmetic warranty:
Forza will cover parts showing cosmetic defects (doors, handles, glass, product frames, racking and interior, exterior surfaces) in material and workmanship for a period of seven (7) days after the delivery of the unit. This coverage will include scratches, stains, surface imperfections on stainless steel, paint and porcelain, with the exclusion of slight differences in color due to materials and painting/enameling technologies. However, slight color variation may be noticed because of the inherent differences in painted parts and porcelain parts as well as differences in kitchen lighting, product locations, and other factors. Therefore, this warranty does not apply to color variation attributable to such factors.
WHAT IS NOT COVERED:
1) The product used in any commercial application.
2) Service trips to your home, during which no fault is found.
3) Repair service provided by any service agency that is not Forza authorized.
4) Damage or repair service to correct any service provided by an unauthorized agency.
5) Damage or repair service to correct the use, addition or substitution of any original part with an unauthorized part.
6) Installation not in accordance with local electrical codes or plumbing codes.
7) Defects or damage due to improper storage of the product.
8) Damages due to failure in following the manufacturer's recommended care, cleaning and maintenance instructions; in particular, damages to the oven and/or the cooktop if they have not been cared and cleaned according to these instructions.
9) Defects, damages or missing parts on products sold out of the original factory packaging or from displays.
10) Service calls or repairs to correct the installation of the product and/or related accessories, calibrations and normal
adjustments after installation and setup, including burner adjustments.
11) Service calls to connect, convert or otherwise repair the electrical wiring and/or gas line to properly use the product.
12) Service calls to provide instructions on the use of a Forza product.
13) Repair or failure of the product if it is abused, misused, used improperly, used for other than the intended purpose or if used commercially/industrially.
14) Damage or repairs caused by the use of harsh chemicals or cleaning products improperly applied.
15) Replacement of wear and tear parts.
16) Replacement of house fuses or resetting of circuit breakers.
17) Damages to anything situated next to the product, including, but not limited to, ceiling, floor or cabinetry.
18) Defects and damages arising from accidents, alterations, misuse, abuse, improper installation, or installation that does not conform to instructions given by Forza.
19) Damages occurred during transit, handling and/or installation of the product.
20) Defects and damage arising from external forces beyond the control of Forza such as fire, flood, earthquakes and other acts of God.
21) Forza cannot guarantee the availability of service in areas more than 30 miles from an authorized retailer. In such cases where travel charges are levied, those will be borne by the consumer.
22) This warranty only covers service performed at the location of product installation and will not cover costs associated with repairing off-site unless expressly authorized by Forza nor does it cover the travel costs associated with providing service to remote locations.
23) Replacement filters for ventilation hood recirculating kits are not covered by the product warranty.
24) Products with original serial numbers that have been removed.
25) Replacement light bulbs are not covered by the product warranty.
26) Damages to people or property caused by the product or through its usage.
In the case that the product is will be installed in a remote area, where certified trained technicians are not reasonably available, the customer will be responsible for the transportation costs for the delivery of the product to the nearest authorized service center or for the travel costs of a certified trained technician.
Remote locations/area: are defined as being outside of a 30 miles from any service provider.
Forza reserves the right to revise this warranty at any time.
Forza does not assume any responsibility for incidental or consequential damages. Some states do not allow the exclusion or limitation of incidental or consequential damages, so the above limitation or exclusion may not apply to you. This warranty gives you specific legal rights and you may also have other rights which may vary from state to state.
FORZA WARRANTY U.S.A.
B-STOCK/ DISPLAY MODEL
FREESTANDING GAS RANGES - WALL OVEN'S - RANGE TOPS - DISHWASHERS - RANGE HOODS
The warranties provided by Forza in this statement apply exclusively to Forza appliances and accessories sold to the original owner by a Forza authorized distributor, retailer, dealer or service center and installed in the United States.
The warranties provided in this statement are not transferable and have validity from the date of original purchase.
B-Stock (refurbished product, product returns, 'scratch and dent' products, old stock (defined as more than one year's difference between production date and date of sale to end user, discounted product etc.) and display models (trade shows, dealer, project or distributor showroom display models, etc.) are not considered 'new', in-the-box product and are thus not covered by FORZA standard warranty.
For any functional or cosmetic issue not disclosed by the seller realized at initial inspection / commission of the product: please contact the seller.
Duration of warranty:
FULL NINETY DAY TOTAL PRODUCT WARRANTY
For ninety days from the original date of purchase, the FORZA product warranty covers all parts and labor to repair or replace, under normal residential use, any part of the product proving to be defective in material or workmanship as a result of the original manufacturing process. There is no service or cosmetic warranty of any kind of B-Stock model.
Responsibilities of the buyer: When writing or calling about a service problem, please include the following information:
- Your name, address and telephone number;
• Appliance model and serial number;
• Name of your dealer; - A clear description of the problem you are having;
• Proof of purchase (sales receipt).
WHAT IS NOT COVERED:
1) The product used in any commercial application.
2) Service trips to your home, during which no fault is found.
3) Repair service provided by any service agency that is not Forza authorized.
4) Damage or repair service to correct any service provided by an unauthorized agency.
5) Damage or repair service to correct the use, addition or substitution of any original part with an unauthorized part.
6) Installation not in accordance with local electrical codes or plumbing codes.
7) Defects or damage due to improper storage of the product.
8) Damages due to failure in following the manufacturer's recommended care, cleaning and maintenance instructions; in particular, damages to the oven and/or the cooktop if they have not been cared and cleaned according to these instructions.
9) Defects, damages or missing parts on products sold out of the original factory packaging or from displays.
10) Service calls or repairs to correct the installation of the product and/or related accessories, calibrations and normal adjustments after installation and setup, including burner adjustments.
11) Service calls to connect, convert or otherwise repair the electrical wiring and/or gas line to properly use the product.
12) Service calls to provide instructions on the use of a Forza product.
13) Repair or failure of the product if it is abused, misused, used improperly, used for other than the intended purpose or if used commercially/industrially.
14) Damage or repairs caused by the use of harsh chemicals or cleaning products improperly applied.
15) Replacement of wear and tear parts.
16) Replacement of house fuses or resetting of circuit breakers.
17) Damages to anything situated next to the product, including, but not limited to, ceiling, floor or cabinetry.
18) Defects and damages arising from accidents, alterations, misuse, abuse, improper installation, or installation that does not conform to instructions given by Forza.
19) Damages occurred during transit, handling and/or installation of the product.
20) Defects and damage arising from external forces beyond the control of Forza such as fire, flood, earthquakes and other acts of God.
21) Forza cannot guarantee the availability of service in areas more than 30 miles from an authorized retailer. In such cases where travel charges are levied, those will be borne by the consumer.
22) This warranty only covers service performed at the location of product installation and will not cover costs associated with repairing off-site unless expressly authorized by Forza nor does it cover the travel costs associated with providing service to remote locations.
23) Replacement filters for ventilation hood recirculating kits are not covered by the product warranty.
24) Products with original serial numbers that have been removed.
25) Replacement light bulbs are not covered by the product warranty.
26) Damages to people or property caused by the product or through its usage.
In the case that the product is will be installed in a remote area, where certified trained technicians are not reasonably available, the customer will be responsible for the transportation costs for the delivery of the product to the nearest authorized service center or for the travel costs of a certified trained technician.
Remote locations/area: are defined as being outside of a 30 miles from any service provider.
Forza reserves the right to revise this warranty at any time.
Forza does not assume any responsibility for incidental or consequential damages. Some states do not allow the exclusion or limitation of incidental or consequential damages, so the above limitation or exclusion may not apply to you. This warranty gives you specific legal rights and you may also have other rights which may vary from state to state.
UTILISATION + ENTRETIEN MANUEL
MODÈLES CUISINIÈRES DUAL FUEL
FR304DF
FR366DF
FR488DF
FORZA™
natural_image
Silhouette of a person pushing a large block on a flat surface (no text or symbols)natural_image
Symbolic icon of a human head with a starburst inside, enclosed in a diamond shape (no text or numbers)natural_image
Warning symbol depicting a hand pressing down on a surface with steam lines (no text or numbers)Risque de Surface Chaude
natural_image
Exterior view of a mechanical device with multiple circular components (no visible text or symbols)natural_image
Interior view of a microwave oven with numbered lanes (1-6) and a central vent, no visible text or symbols on the cabin itself.natural_image
3D rendered mechanical component with no visible text or symbols


③ SÉLECTEUR DE
TEMPÉRATURE ET FONCTIONS
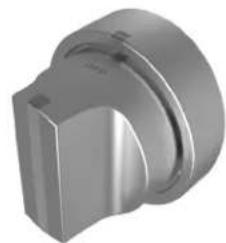
natural_image
3D rendered metallic mechanical component with stepped cylindrical and rounded features (no text or symbols)
natural_image
Close-up of a metallic rotary knob with red and gray stripes, no visible text or symbols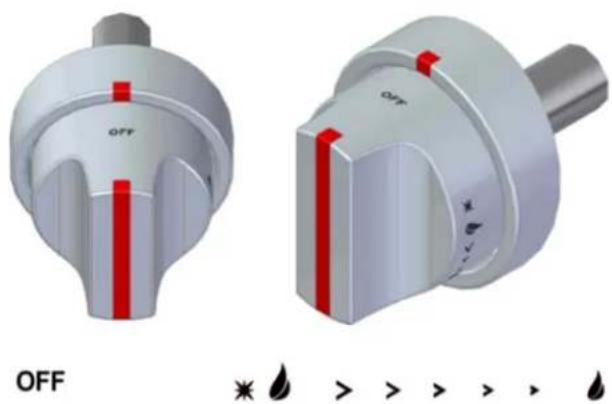
natural_image
Two 3D model of a rotary knob with red adjustment knobs, labeled 'OFF' and a legend indicating action buttons (no text or symbols on the knob itself)natural_image
Illustration of a vintage kitchen stove with a cooking pot on top (no text or symbols visible)natural_image
Illustration of a frying pan with a handle, placed on a stand (no text or symbols)natural_image
Illustration of a cylindrical container with upward arrows indicating pressure or flow (no text or symbols)natural_image
Simple line drawing of a pot with bubbles rising from inside, no text or symbols presentnatural_image
3D rendering of a stainless steel bowl with two handles (no text or symbols)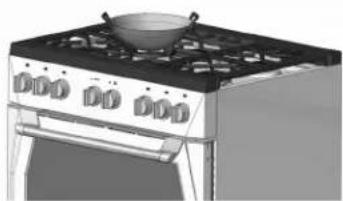
natural_image
Illustration of a vintage stove with three panes and a side table (no text or symbols visible)natural_image
Interior view of an oven with two circular fans inside, showing no text or symbols on the fan itself.Correct!
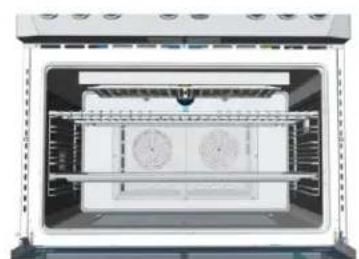
natural_image
Interior view of a large oven or oven unit with ventilation ducts and cooling fans (no visible text or labels)☒ Position Erronée: niveaux 2-3-4-5
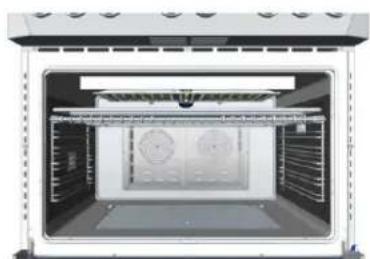
natural_image
Interior view of an oven with cooling fans and ventilation grilles (no text or symbols visible)text_image
8:8:88 AM PM OFF + OK -text_image
88:88 AM PM E S S S R A Ptext_image
8:08 AM PM
WARNING:
natural_image
3D rendering of a kitchen stove with visible flames and control knobs (no text or symbols)natural_image
Close-up of a mechanical component with labeled parts A and B, showing cross-sectional views (no text or symbols beyond labels)text_image
Labeled diagram of an oven with numbered parts for identificationnatural_image
Close-up of gloved hands applying blue adhesive to a mechanical component (no visible text or symbols)natural_image
Technical line drawing of a mechanical device with an inclined plane and 35-degree angle annotation (no text or symbols beyond the angle marker)natural_image
Technical diagram of a mechanical assembly with labeled component A (no text or symbols present)natural_image
Illustration of a screwdriver next to a labeled rectangular object with letter A (no text or symbols on the object itself)natural_image
Front view of a kitchen stove with five circular fans and a label reading 'POSSA' (no visible text on main subject)No. modèle
No. sériel
Date d'achat
Date d'installation
Nom du Vendeur
Adresse
GARANTIE PRODUIT TOTALE QUATRE-VINGT-DIX JOURS
natural_image
Silhouette of a person pushing a large block on a flat surface (no text or symbols)Peligro de vuelco
natural_image
Symbolic icon of a human figure with a starburst inside, enclosed in a diamond frame (no text or numbers)ADVERTENCIA
text_image
Warning sign depicting a hand pressing down on a surface with wavy lines indicating thermal stress or damage.natural_image
Close-up of a mechanical device with multiple circular components and mounting brackets (no visible text or symbols)natural_image
Interior view of a microwave oven with numbered ventilation slots (1-6) and a central grille (no text or symbols visible)natural_image
3D rendered mechanical component with no visible text or symbols


③ SELECTOR DE TEMPERATURA Y FUNCIONES
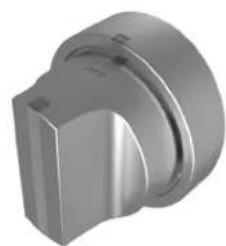
natural_image
3D rendered mechanical component with metallic surfaces and a rounded corner (no text or symbols visible)
natural_image
Close-up of a white rotary dial with red and black stripes, no visible text or symbols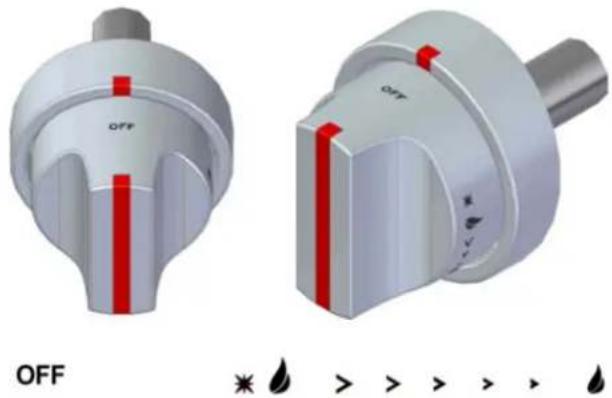
natural_image
Two 3D mechanical knob designs with red adjustment knobs, labeled 'OFF' and a legend indicating action buttons (no text or symbols on the knob itself)natural_image
Illustration of a vintage kitchen stove with a cooking pot on top (no text or symbols visible)natural_image
Illustration of a frying pan on a stove (no text or symbols)natural_image
Illustration of a cylindrical container with a lid and handle, emitting upward arrows (no text or symbols)natural_image
Simple line drawing of a cooking pot with bubbles rising from it, no text or symbols presentnatural_image
Illustration of a gray stainless steel bowl with two handles (no text or symbols)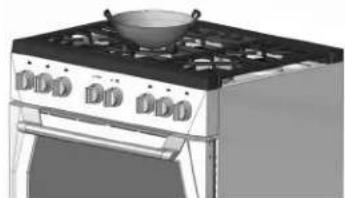
natural_image
Illustration of a vintage stove with a pan on top (no text or symbols visible)natural_image
Interior view of a microwave oven with open doors and control knobs (no visible text or labels)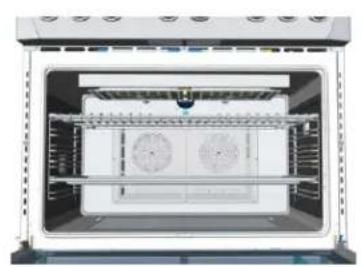
natural_image
Interior view of a microwave oven with two fans and a tray (no visible text or labels)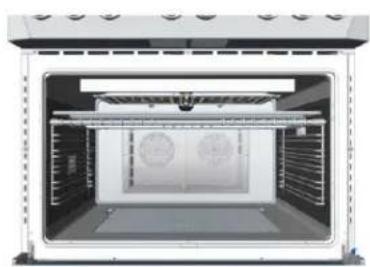
natural_image
Interior view of a large oven with cooling fans and ventilation ducts (no text or symbols visible)text_image
88:88 AM PM OFF + OK -Note: Eggs (alone, not used in a recipe) – cook until yolk & white are firm
text_image
88:88 AM PM E S W R A L H N ↑text_image
88:00 AM PM
ADVERTENCIA:
natural_image
3D rendering of a gas stove interior with cooling fans and a mounted door (no text or symbols visible)natural_image
Cross-sectional diagram of a mechanical component with labeled parts A and B (no text or symbols present)A = Tapa del quemador
B = Difusor de gas del quemador
text_image
Labeled diagram of an oven with numbered parts for identification| Pieza Método de limpieza | Part Cleaning Method | ||||||||
| Esmaltado | Acero inoxidable / Zamak | Cristal | Esmaltado | Acero inoxidable / Zamak | Cristal | ||||
| 1 | Panel de mandos – F – 10 | Cristal externo | -- | B | |||||
| 2 | Laterales | -F – 11 | |||||||
| 3 | Marcos | -F – 12 | |||||||
| 4 | Cavidad del horno | D | - | - | 13 | ||||
| 5 | Cristal interno | - | - | E | 14 | ||||
| 6 | Mango | -F – 15 | |||||||
| 7 | Extremo del mango | -F – 16 | |||||||
| 8 | Marco de la puerta | CF – 17 | |||||||
| 9 | Rejilla | - | A – 18 | ||||||
natural_image
Close-up of gloved hands applying blue adhesive to a car interior (no visible text or symbols)natural_image
Technical line drawing of a mechanical device with an inclined plane and 35-degree angle annotation (no text or symbols beyond the angle marker)natural_image
Technical diagram of a mechanical assembly with labeled component A (no text or symbols present)natural_image
Illustration of a screwdriver holding a labeled tray with letter A, no text or symbols presentnatural_image
Front view of a stainless steel electric stove with five circular heat exchangers and a label on the grille (no readable text or symbols)Modelo n°.
N° de serie.
Fecha de compra