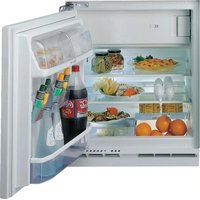
KSU 8GF2E - Freezer BAUKNECHT - Free user manual and instructions
Find the device manual for free KSU 8GF2E BAUKNECHT in PDF.

 FR
FR
 BG
BG
 CS
CS
 DA
DA
 DE
DE
 EL
EL
 EN
EN
 ES
ES
 ET
ET
 FI
FI
 HE
HE
 HU
HU
 HY
HY
 IS
IS
 IT
IT
 KK
KK
 KY
KY
 LT
LT
 LV
LV
 NL
NL
 NO
NO
 PL
PL
 PT
PT
 RO
RO
 RU
RU
 SK
SK
 SL
SL
 SV
SV
 TR
TR
 UK
UK
 ZH
ZH
| Product type | Freezer |
| Brand | Bauknecht |
| Model | KSU 8GF2E |
| Power supply | 220-240 V ~ 50 Hz |
| Defrost type | Manual |
| Reversible door | Yes |
| Temperature alarm | Yes |
| Removable drawers | Yes |
| Freezing capacity | Up to the quantity indicated on the rating plate |
| Storage duration (at -18°C) | From 1 to 12 months depending on the food |
| Cleaning | Soft cloth and mild detergent |
| Replaceable door gasket | Yes |
| Included accessories | Ice cube tray, drain cleaning tool |
Frequently Asked Questions - KSU 8GF2E BAUKNECHT
User questions about KSU 8GF2E BAUKNECHT
0 question about this device. Answer the ones you know or ask your own.
Ask a new question about this device
Download the instructions for your Freezer in PDF format for free! Find your manual KSU 8GF2E - BAUKNECHT and take your electronic device back in hand. On this page are published all the documents necessary for the use of your device. KSU 8GF2E by BAUKNECHT.
USER MANUAL KSU 8GF2E BAUKNECHT
User Manual
User Manual
Table of Contents
Fans
Legend

**
MODERATE ZONE
Instructions for Use
INSTRUCTIONS FOR USE
CONTENTS
Bulb type 2)
Shelves
Explanatory Notes

**
MODERATE ZONE
Explanations
User manual
USER MANUAL
TABLE OF CONTENTS
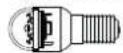
Lamp type 2)
Shelves
Key

**
TEMPERED AREA
Operating instructions
OPERATING INSTRUCTIONS
INDEX
Light type 2)
Storage surfaces
Symbols

TEMPERATURE RANGE
Legend
A. FREEZER COMPARTMENT (if available)
User Manual
USER MANUAL
INDEX
Sections
Legend

TEMPERATURE ZONE
User Manual
USER MANUAL
INDEX
Use & Care guide 2
Refrigerator light 2
Replacing the LED light bulb (depending on model) 2
Shelves 2
Door 2
How to use the appliance 3
First time use 3
Refrigerator compartment and food storage 3
How to store fresh food and beverages 3
* Freezer compartment food storage (Depending on model) 4
Food shelf life at different temperatures 4
* How to defrost the freezer compartment (Depending on model) 5
Functional sounds 5
Recommendation in case of no use of the appliance 5
Cleaning and maintenance 6
Gasket replacement 7
Refrigerator light
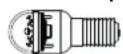
The light system inside the refrigerator compartment uses LED lights, providing better illumination than traditional light bulbs and consuming very little energy. Contact the Technical Assistance Service if you need a replacement. Important: The refrigerator compartment light switches on when the refrigerator door is opened.
Replacing the LED light bulb (depending on model)
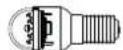
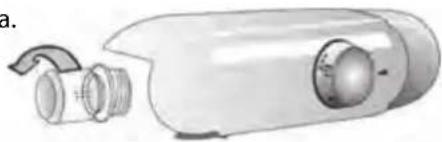
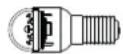
Always disconnect the appliance from the power supply before replacing the light bulb. Then follow the instructions based on the type of light bulb for your product. Replace the light bulb with one with the same features, available from the Technical Assistance Service and authorized sellers.
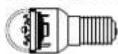
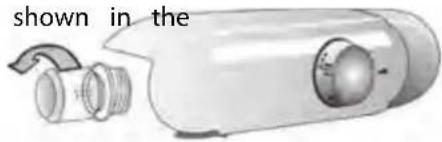
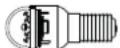
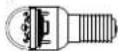
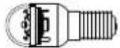
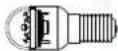
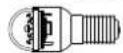
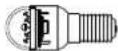
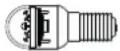
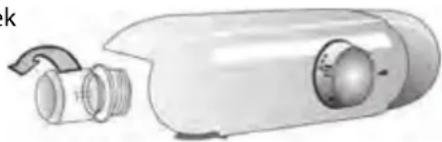
Light type 1)
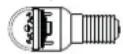
To remove the light bulb, unscrew it in an anti-clockwise direction, as shown in the figure. Wait 5 minutes before reconnecting the appliance.
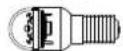
LED light bulb (max 25W)
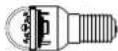
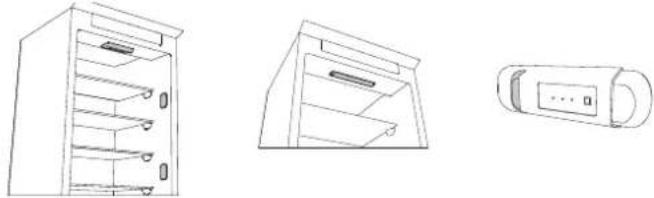
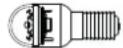
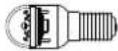
Light type 2)
If the product has LED lights, as demonstrated in the figures below, contact the Technical Assistance Service if you need a replacement. LEDs last longer than traditional light bulbs, improve internal visibility, and are environmentally friendly.
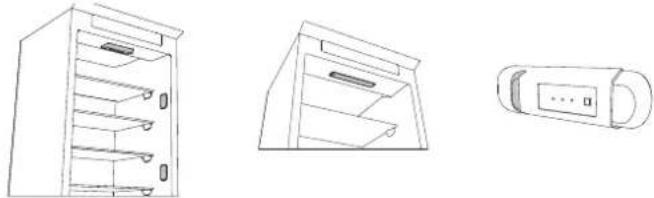
Shelves
All of the drawers, door shelves, and shelves can be removed.
Door
Door reversibility
Note: The direction of door opening can be changed. If this operation is performed by After-sales Service, it is not covered by the warranty. Follow the instructions in the Installation Guide.
How to use the appliance
First time use
Wait at least two hours, after the installation, before connecting the appliance to the power supply. Connect the appliance to the power supply it starts the operation automatically. The ideal storage temperatures for the food are preset in the factory.
After turning the appliance on, you must wait for 4-6 hours for the correct storage temperature to be reached for a normally filled appliance. Position the antibacterial anti-odour filter in the fan as demonstrated in the filter packaging (if available). If the audible signal sounds, it means that the temperature alarm has intervened: press the button to switch off the acoustic alarms.
Refrigerator compartment and food storage
The refrigerator compartment allows for the storage of fresh food and drink. The refrigerator compartment defrosts completely automatically. The occasional presence of drops of water on the internal back wall of the compartment is a sign of the automatic defrosting phase. The defrosting water is channelled into a drain and then collected in a container, where it evaporates.
Note: the ambient temperature, how often the doors are opened and the position of the appliance may affect the internal temperatures in the two compartments. Set the temperatures depending on these factors. In very humid conditions, condensation may form in the refrigerator compartment, especially on the glass shelves. In this case, it is recommended that you close containers with liquids in (e.g. a pot of stock), wrap up food with a high water content (e.g. vegetables) and turn on the fan, if there is one. All of the drawers, door shelves and shelves can be removed.
Air ventilation
The ventilation air allows a better distribution of the temperatures inside the compartments and, consequently, be preservation of the food and reduction of excess humidity. Do not obstruct the ventilation area.
How to store fresh food and beverages
Foods which give off a large amount ethylene gas (apples, apricots, pears, peaches, avocado, figs, prunes, blueberries, mellons, beans) and those that are sensitive to this gas, such as fruit vegetables and salad, should always be separated or wrapped so as not to reduce the storage life; for example do not store tomatoes together with kiwi fruits or cabbage. Do not store food too close together to enable sufficient air circulation. Use recyclable plastic, metal, aluminum and glass containers and cling film to wrap foods.
If you have a little quantity of food to store in the refrigerator, we recommend to use the shelves above the crisper for fruits and vegetables since this is the coolest area of the compartment. Always use closed containers for liquids and for food that may give off or be tainted by odor or flavor transfer or cover them. To avoid bottles falling over, you can use the bottle holder (available on selected models).
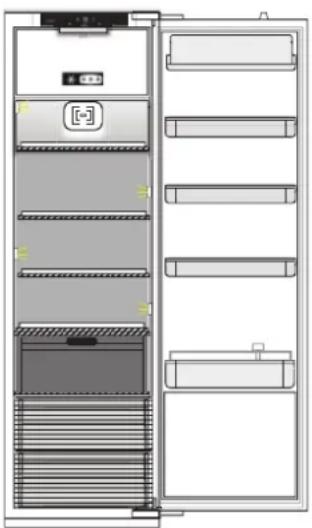
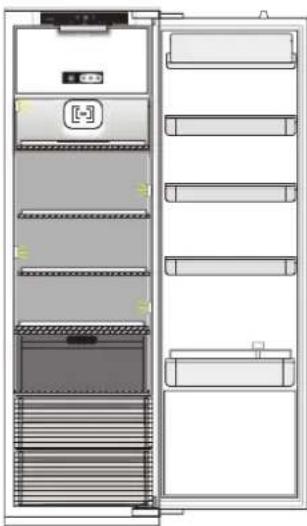
Legend

**
TEMPERATE ZONE
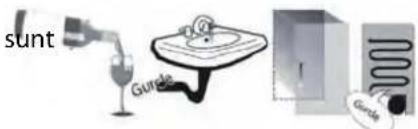
Suggested for storage of tropical fruit, cans, drinks, eggs, sauces, pickles, butter, jam
COOL ZONE
Suggested for the storage of cheese, milk, daily food, delicatessen, yogurt
COOLEST AREA
Suggested for storage of cold cuts, desserts, meat and fish
FRUIT AND VEGETABLE DRAWER
For models with "0 ° ZONE" COMPARTMENT the "coolest area" is the one highlighted in the legend
* Freezer compartment food storage (Depending on model)
*** The frozen compartment allows long time storage for frozen food. You can only use the "Storage" compartment maintaining frozen food BUT IT IS NOT CAPABLE TO FREEZE NEW FRESH FOOD.
The freezer compartment allows long time storage of frozen food and freezing of fresh food. The quantity of food that can be frozen in 24 hours is written on the rating plate. Arrange the fresh food in the freezing area inside the freezer compartment, leaving enough space around the food packages to allow air to circulate freely. It is advisable that you do not re-freeze food that has partially defrosted. It is important to wrap the food in a way that prevents the ingress of water, humidity or condensation.
Ice cubes
Fill 2/3 of the ice tray with water and put it back in the freezer compartment. Do not use sharp or pointed objects to remove the ice under any circumstances.
Removing the drawers
Pull the drawers outwards as far as they will go, lift them up and remove them. To get more volume, the freezer compartment can be used without the drawers. Make sure that the door is closed properly after putting the food back on the grilles/shelves.
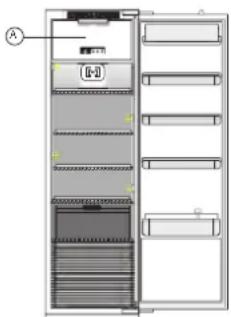
Legend
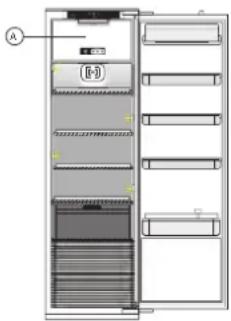
A. FREEZER COMPARTMENT (If the refrigerator has one)
Food shelf life at different temperatures
| FROZEN COMPARTMENT | |||
| Product Storage period (-12°C) | Recommended Storage period (-18°C) | Storage period (-24°C) | |
| Butter or margarine 1 month | 6 months 9 months | ||
| Fish 1 month 1-3 months | 6 months | ||
| Fruits (except citrus) & Vegetables | 1 month 8-12 months | 12 months | |
| Meat- Ham- sausage Roasts (beef-pork- lamb) Steaks or chops (beef-lamb-pork) | 1 month 2 months | 8-12 months4 months | 12 months |
| Milk, Fresh fluid, Cheese, Ice cream or sherbet | 1 month 1-3 months | 5 months (not recommended for ice cream) | |
| Poultry (chicken-turkey) | 1 month 5-7 months | 9 months | |
Food shelf life at different temperatures
| UNFROZEN COMPARTMENT | |||
| Product | Storage period 0-3°C | Storage period (3-6°C) | Storage period 6-8°C |
| Cans, drinks, eggs, sauces, pickles, butter, jam | 3-4 weeks | 3-4 weeks | 3-4 weeks |
| Tropical fruit | Not recommended 2-4 weeks | 3-4 weeks | |
| Cheese, milk, dairy food, deli-5 daysfood, yoghurt | 2-5 days | 2-5 days | 2-5 days |
| Cold cuts, desserts, meat and fish and home-cooked food | 3-5 days | 1-2 days | Not recommended |
| Store vegetables and fruits (excluding tropical fruits and citrus) | 15 days | 10-12 days | 4-7 days |
* How to defrost the freezer compartment (Depending on model)
- It is advisable to set the temperature colder or turn on the Fast Freeze/Fast Cool* at least four hours before removing the food from the freezer compartment, to prolong the preservation of the food during the defrosting phase.
- To defrost, turn the appliance off and remove the drawers. Put the frozen food in a cool place. Leave the door open to allow the frost to melt. To prevent the water from escaping during the defrost, it is advised that you place an absorbent cloth on the bottom of the freezer compartment and wring it out regularly.
- Clean the inside of the freezer compartment and dry it carefully.
- Turn the appliance back on and put the food back inside.
Functional sounds
- A buzz generated by the compressor is normal while the product is working.
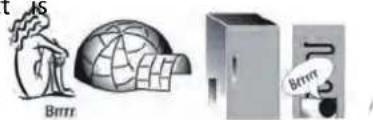
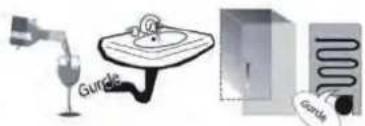
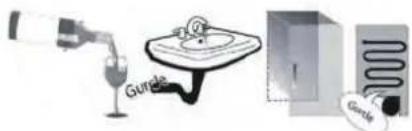
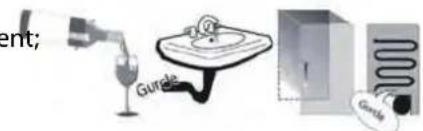
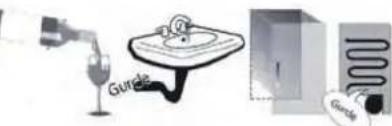
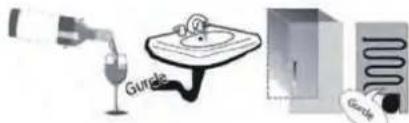
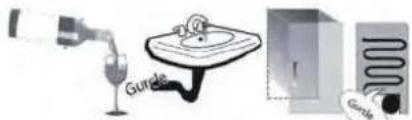
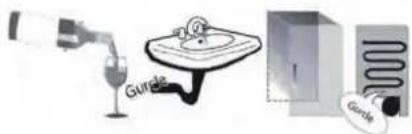
- Gurgling and crackles are generated by the passage of the refrigerant gas inside the cooling circuit, therefore these are normal noises.
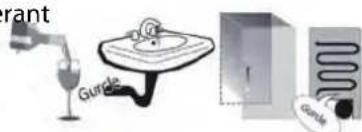
- It's possible to "hear" creaks when the compressor is active and inactive: it is a normal sound of the product's structure.
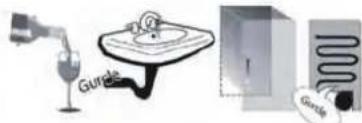
- Check that the balconies on the inside of the refrigerator door, the shelves and the drawers in the refrigerator compartment are attached and positioned properly, to avoid possible vibrations.
- Don't place glass containers (bottles, jars, etc.) in direct contact with each other, to avoid vibrations.
- This device is equipped with a compressor that operates at an optimum speed to minimize energy consumption. So it may happen that in certain situations (in summer or if large quantities of food are introduced) that the increases the speed and therefore it is more noisy than usual.
Recommendation in case of no use of the appliance
In the event of non-use of the appliance
Disconnect the appliance from the power supply, empty it, defrost it (if necessary) and clean it.
Keep the doors slightly ajar to let air circulate inside the compartments. By doing this, you avoid the development of mould and bad odours.
In the event of an interruption to the power supply
Keep the doors closed so the food stays cold for as long as possible. Do not re-freeze food that has partially defrosted. If there is a prolonged power cut, the black out alarm may also activate (in products with electronics).
Cleaning and maintenance
Before any cleaning or maintenance operation, unplug the appliance from the mains or disconnect the electric power supply.
Never use abrasives. Never clean refrigerator parts with flammable fluids.
Do not use steam cleaners.
The buttons and control panel display must not be cleaned with alcohol or alcohol-derived substances, but with a cloth.
Clean the appliance occasionally with a cloth and a solution of warm water and neutral cleaning agents specifically for cleaning the inside of the refrigerator.
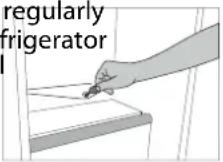
To ensure the constant and correct flow of the defrosting water, regularly clean the inside of the drain situated in the back wall of the refrigerator compartment near the fruit and vegetable drawer using the utensil provided.
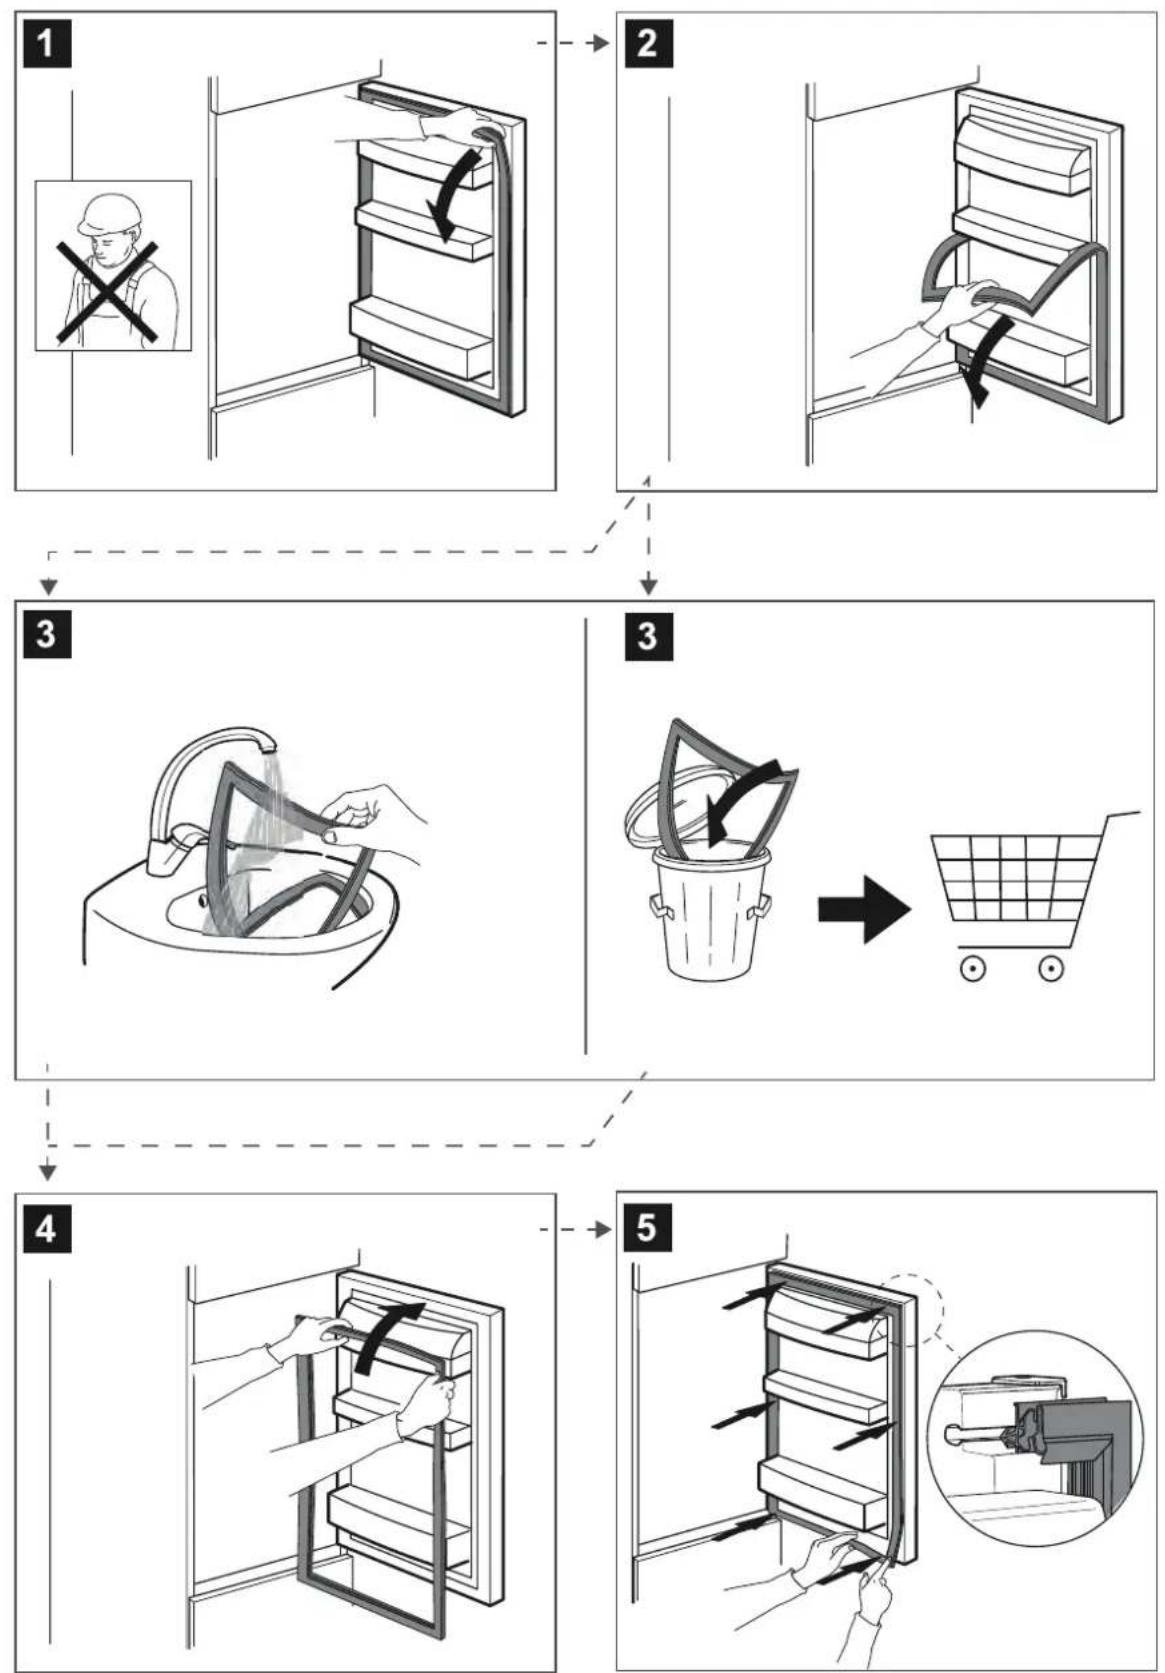
Gasket replacement
User manual
USER MANUAL
INDEX
Shelves
Legend

**
TEMPERATURE ZONE
User manual
USER MANUAL
REGISTER
Lamp type 2)
Shelves
Description
**
MODERATE ZONE
Description
User manual
USER MANUAL
CONTENTS
Bulb type 2)
Shelves
Legend

**
COOL ZONE
Legend
Bulb type 2)
Shelves
Legend

**
TEMPERATE ZONE
- 1970-1980 & 1981 2 2 (ALRA ARI) LED 2 D'970 2 3 3 3
- 3 (ALRAHI) ALRAHI (ALRAHI) 4 5 (BRAHIATOTAH) KRAHIATOTAH (BRAHIATOTAH)
- 5 6 7
OTD
.1
.2
Light type 2)
Shelves
All drawers, door shelves and shelves can be removed.
Door
Legend

**
MODERATE ZONE
Recommended for storing tropical fruit, cans, drinks, eggs, sauces, canned vegetables, butter, jam
COLD ZONE
Recommended for storing cheese, milk, dairy products, delicatessen, yogurt
COLDEST ZONE
Recommended for storing cold cuts, desserts, meat and fish
FRUIT AND VEGETABLE CABINET
User Manual
USER MANUAL
TABLE OF CONTENTS
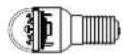
Type 2 bulb
Shelves
Legend

**
MODERATE TEMPERATURE ZONE
Legend
Safety instructions and warnings 2 Intended use 2 Installation instructions 2 Electrical connection (for UK only) 2 Description of the appliance 2 Control panel 3 Using the appliance 3 Cleaning and maintenance 3 Troubleshooting 3 * Technical data (for UK only) 4 Disposal of the appliance 4 * Energy efficiency information (for UK only) 5 Warranty and service 5 Description of the appliance 5 Control panel 5 Using the appliance 5 Cleaning and maintenance 6 Troubleshooting 7
The manufacturer reserves the right to make changes to the product, which do not affect the operation of the device, without prior notice. The manufacturer is not responsible for any errors or omissions in this manual. For more information, please contact the manufacturer's customer service.
ln juh mluwq 2)
bpt upwnwnpwnfgh ndh Luunwnlwnpwjsh iwnktp, hfywku heilud k gtpfuh ghpuktpnuu, lpuq hwnwnnntf Stjofhlwhuw Usohfgnuu Twnwnjnppnjw htn, bpt wji qinjokm wthpwdtkcwnnpjnh qw: Lnnwnnlwngtpf wqth ptywp t6 oqnwnqnpdmiu fw6 wqlwnpwjw chpqwgnuu iwnwkpp, iwnlngfniu k6 gtpfih wkwngklwnpjnup k huftkth k6 ihswnlwwh hwnup:
Twpwltp
Fulup yupwghkpp, yuw hupwghkpp k upwlmcmwptpp cmpdwqsh tg:
γn,n
7 nui hiunwnwpaklhpipjni6
1 Cenü 2 Pauhi pugduhi nupupjuzfu hupun t qinjutki: Bpt mju qpouuupjuzfu jpuuqufuugfui t Luhuanfud Uquwulffkph Uquwnaphdunh Ythunpufh hnquhg, mnpu mgh sh lupun kpuuuf uupunghkl: Zinh tf Stpuupfui fntggnjgnuf uplud gngwnukkph:
húzhu oqunwqnptl uwpfwnpnnlup
Unwghi oqunwqnpndi
Stnupptng hwn, uwmuf wnfuqfi kplni dnd f wufuq unpfundpntup hnuwifh f uhwgtpf: Umpfundpntup dhwgptf klpmpudwnulqupundp le wfi lquh wjunnanm lkpwnl wejwnkt: Upkpf uwhqnufduf hpkwulwuf gcpwnunphdup fuwwnklu fcuwufhncf gnpdwpufni:
Umpfwnlpncup ahugfiknig hkan wihpudkem t uqnukl 4-6 dnd fhen uuhqufidu# skpwnunphwifh hwnftin hwnmp: Thpfuynptf hwnwpwnlpphw lphuupp onwnfnphsh aig wifuqlu, fhiyulu fcajd l, phlmph whplpwdnpnd dpm (wnlpwnrpjwi qbafm): bpl luqniu l, dwjfuynfi mqqufcui, wnpu hwnfuynut l, np skpwnunphwifh whuquifqp ahugt k. uknqtf klnfuip ndyfuynh# whuquifqkph wfgwnktm hwnmp:
Uunnupwgh hghh l uptpfh wuhkun
Uunhwnpuuhi fogliyud hwnpug tf upulti powu uptpuf l jofjsf: Uunhwnpuuhi fogliyud wimunnan htpuyul wupnqsnprjwup hwnsntd t: fogliyhu bndl gkpfhfr upunh dwa gph luhphlukph wumwnwhpug hwnyukltkp fowdi t wji puuhi, np wji wimunnan hwlbgduhi qhlnted t: Zwlpud znpp lglnud t wpwnwhnuf hwnqnyuh bly, hyl hluu hwnqwfqnd awwpujmud apubq wji qnlnpchwfsnd t:
1 Tpswph ahpwnwph gtpwnwnhghp ' hwpvdud npnd puqduh huhwnpwulncpnjclhg l uupfwnpndu nlpfthg, hwpun t uqptgucppnc ndkthm lphni fghylph glpfh gtpwnwnhghp qpu: Uwhuwfl gtpwnwnhghplpp hwpvdud wju qnpdnghphg: Twm jongui wujdwglpnd awngwpwgh fghplnd hwpun t qupem fwnugutw unngwulw, hwnhwuktu wnpult npnpwlhtplki: Ujn ytknfund pmphcnp t uipufd whulti htqnulj liu wpnpitpp (op. hwpum), fhpwppt pmpap gph wqpwnwnhprpnid mltgqn dpkpf6kpp (op. 'pwgswptk6) h shwgkl onwnhjhp, kpt mwh k: Fnlnp npnpwlh6kpp, qnu6 nppwhl6kpp l qnpwnwewpplpp cupdwlgu6 li:
Οηωψηνηργηδ
The installation and maintenance instructions for the device are provided in this document. The device must be installed and maintained by qualified personnel only. Failure to follow these instructions may result in damage to the device or injury to personnel. [1] [end] of the document. The following sections describe the installation and maintenance procedures in detail.
F62wku wuhk1 pwnf uptpfp l pufwlhf
The device is designed to operate in a wide range of environmental conditions (temperature, humidity, vibration, shock, dust, salt, etc.) and is suitable for use in industrial, commercial, and residential applications. The device is equipped with advanced features such as remote monitoring, data logging, and communication interfaces. It is important to follow the installation and maintenance instructions provided in this manual to ensure proper operation and longevity of the device. The device should be installed by qualified personnel only, and all safety precautions must be observed. The device is designed to meet international standards for safety and performance.
The device is designed to operate in a wide range of environmental conditions, including temperature, humidity, and vibration. It is important to ensure that the device is installed in a location that is free from excessive moisture and dust. The device should be mounted on a stable surface and secured properly to prevent damage. The device is equipped with a protective cover that should be kept in place during operation. The device should be cleaned regularly to ensure optimal performance. The device is designed to operate in a wide range of environmental conditions, including temperature, humidity, and vibration. It is important to ensure that the device is installed in a location that is free from excessive moisture and dust. The device should be mounted on a stable surface and secured properly to prevent damage. The device is equipped with a protective cover that should be kept in place during operation. The device should be cleaned regularly to ensure optimal performance.
The device is designed to operate in a wide range of environmental conditions, including temperature, humidity, vibration, and shock. It is important to follow the installation and maintenance instructions provided in this manual to ensure proper operation and longevity of the device.
The device is designed to operate in a wide range of environmental conditions, including temperature, humidity, vibration, and shock. It is important to follow the installation and maintenance instructions provided in this manual to ensure proper operation and longevity of the device.

The device is designed to operate in a wide range of environmental conditions, including temperature, humidity, vibration, and shock. It is important to follow the installation and maintenance instructions provided in this manual to ensure proper operation and longevity of the device.
The device is designed to operate in a wide range of environmental conditions, including temperature, humidity, vibration, and shock. It is important to follow the installation and maintenance instructions provided in this manual to ensure proper operation and longevity of the device.
* The device is designed to operate in a wide range of environmental conditions (temperature, humidity, vibration, and shock).
*** The device is designed to operate in a wide range of environmental conditions, including temperature, humidity, vibration, and shock. It is important to follow the installation and maintenance instructions provided in this manual to ensure proper operation and longevity of the device. The device is designed to meet international standards for safety and performance.
*** The following instructions apply to: all models with a power supply of 24 volts, including the standard version and the version with a timer. The timer version is equipped with a built-in timer that can be set from 1 to 24 hours, as well as a photocell sensor for automatic operation. The timer version is supplied with a separate photocell sensor that must be connected to the control board, which is located inside the motor housing. The control board has a terminal block for connecting the photocell sensor, as well as a switch for selecting the operating mode. The timer version also has a manual override button for temporary operation.
Installation instructions
The following safety instructions must be observed during installation: The power supply must be disconnected before opening the housing. All electrical connections must be made by a qualified electrician.
Safety instructions
The operator must be installed in accordance with the manufacturer's instructions and all applicable local and national regulations. The operator is intended for use with sectional doors, overhead doors, and similar applications. The operator must be installed in a location where it is not exposed to rain or moisture. The operator must be grounded in accordance with the National Electrical Code and local codes.
P_w g_l w_b g_c w_d g_t
A. UU08U08H4(kpt uunnfupwifp nufh)
Control board connection diagram
| UUUH3GUO HSHY | |||
| Upuunqpw6f Nwhquw6fng dwuhtun (-12°C) Unwgwphjlnq wwhquw6fng dwuhtun (-18°C) | Unwhquw6fng dwuhtun (-24°C) | ||
| Чуиця hyuú úmpqwphi 1 wúhu 6 wúhu 9 wúhu | |||
| Qniy 1 wúhu 1-3 wúhu 6 wúhu | |||
| Уралр (puqh ghuqnluhg) & fwugwptnli 1 wúhu 8-12 wúhu 12 wúhu | |||
| Урн- Uwflwnwś úhu- lípplpehly Suwqlwś úhu (wnwlwph-jwnqhi-qwnu6i) Uptjftp hyuú hyuultw6tp (wnwlwph- qunu6i - lonqhi) 1 wúhu 2 wúhu 8-12 wúhu 4 wúhu 12 wúhu | |||
| Чур, Фрупú htημh, Μωθμ, Μωηquwnwú hyuú ckrppp 1 wúhu 1-3 wúhu 5 wúhu (lonphuyn sh wpufnu 4 wúhu 12 wúhu | |||
| Фрундмuh (hui-hünhuhwuj) 1 wúhu 5-7 wúhu 9 wúhu | |||
Control board programming instructions
| QUUQ3FUO h8f4 | |||
| Upunupmuf Quhupufuf duyltun 0-3°C Quhupufuf duyltun (3-6°C) Quhupufuf duyltun 6-8°C | |||
| Fwglw6tp, puwltpf, dnt, unnu6tp, ppnt, lwpwq, glu | 3-4 cwrnp | 3-4 cwrnp | 3-4 cwrnp |
| Spunhlwulfu uhpq | bnplnrpf yl mplnu | 2-4 cwrnp | 3-4 cwrnp |
| Qw6tp, lwp, lwpfuwptp, nklhlwunku ufmln, umdnli | 2-5 op | 2-5 op | 2-5 op |
| Uwnp lwpf6tp, wnw6tp, dhu la dntl h mufp wwnpwnmifud ufmln | 3-5 op | 1-2 op | bnplnrpf yl mplnu |
| QUU.Nb3FU.T h3h4 | |||
| Upunwnpwif Nuhwugdung dwuhtun 0-3°C Nuhwugdung dwuhtun (3-6°C) Nuhwugdung dwuhtun 6-8°C | |||
| Nuhwugdung puftwupkntfip h upqtpp (pwgwnnppwup unwnhlwhpuf upqtpph g hwnpmuh) | 15 op 10-12 op 4-7 op | ||
* Note: The photocell sensor is optional.
- The operator is designed for use with sectional doors and overhead doors with a maximum width of 4 meters and a maximum height of 3 meters. The door must be balanced and in good working condition before installation.
- The operator must be installed on a solid, level surface. The mounting brackets must be securely fastened to the door and the operator. The operator must be installed in a location where it is not exposed to rain or moisture. The operator must be grounded in accordance with the National Electrical Code and local codes.
- The operator must be connected to a properly grounded electrical outlet. The power supply must be disconnected before making any electrical connections.
- The operator must be installed in accordance with the manufacturer's instructions and all applicable local and national regulations.
9n16ghghngwL hG2Jn16Gtp
- Umpfwnlnpuug wejwnwufh dwnwghlf lndupptunph wpawlnd awjgujlgh mqnufemhp hmdmpulnf h fupui:
- thng le chung unwugmud t6, lpp unntgduq qwq ufgnud t hwnwpmud quh hauugduq lonqnulh, hklwwpup, qu fnpuiu t:
- Tuf hupnq tf juk finungh dwj6, tpp hnunptanpp qudlnu 5 wlnhyl h ns wluwhl qhwlpnd. puw wnpfwnpndw hwnngdwdfi yw hwawpnlu l, bnpawl dwj6:
- Ummcqkf, npqtkuqh uunnfmpufgh qawfi npuinequafekpp le uunnfmpufgh qnpwlpfikpp npuineufi hkpwnl nhpfwnlpnld lphkf' hfpwpwnlp pppnnnfblphy lonnuwflun hudwpr:
- Qh hwplLh wqwlhl wmpwflp6 wfghgwwlu (ceclp, pwflhwflp b wjlG) dltg p jcnuhfi hquld qfdL hfuwpwdp pppnnufblphg fonuwhlLn hwnfmp:
- Uja uwpfwaqnpntu hwqtgwsl, shyunqptunpu, npb wcpwnnni l, owwhdwl wpwqmpjwop 'tftpqhwjh wqwnnni up hwugftny fuqmqmpqnjsh: Ztknmpmp, hpmpn k ywnwnhki ynfuktu, np npnc nkwftpmui (munwup hwi kpp utd fwuhwmpjwih uptpf k npplnu) lnwupktnpp hpmpn k utdugftl wpwqnpjwop le lthlt uwlth wqdhwn fwi unlpnpupp:
hnpnlpnftp umpfwlnpnlup soqunwqnptlni ntuwfnul
Uupfuynpnuip 2oqnnqnpdkni nkwfnu
U.6qwntf wupfuwrnpncu6 tjthwnpuwwnwnwhwpwnpnchg, npwnwphtf w36, hwtgptf (kpt w6hpudtcun t) u ndwptf:
bpptf 2oqnwnqnptf hnlynn dwfph26tp: bpptf 2dwfptf wnnfwpw6h dwukpp qmnpwun htqnch6tpnyl:
Qh hwpth oquwnqnptl qnlnpchnl dwfph26tp:
Notandahandbók
Notandahandbók
ATRÍDASKRÁ
Hillur
Explanation

**
TEMPERATURE REGULATOR
Explanation
A. FREEZER COMPARTMENT (if the refrigerator has one)
Cleaning and maintenance
User manual
USER MANUAL
INDEX
LED bulb (max 25W)
Shelves
Legend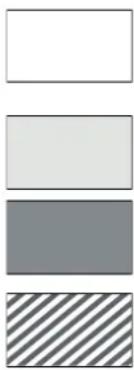
**
TEMPERATE ZONE
2- lamp type)
Cubes
Legend

**
TEMPERATURE ZONE
Legend
Cubes
Legend
TEMPERATE ZONE
Legend
User manual
USER MANUAL
INDEX
2 bulb type
Shelves
Legend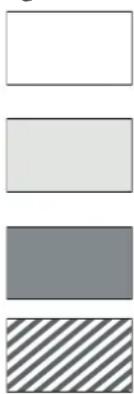
**
MIDDLE TEMPERATURE ZONE
Light type 2)
Shelves
All drawers, door shelves and shelves can be removed.
Door
Designation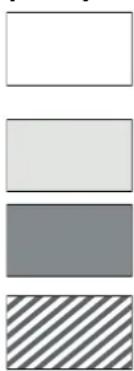
**
MODERATE ZONE
Manual
MANUAL
INDEX
Lamp type 2)
Shelves
Legend

TEMPERATE ZONE
User manual
USER HANDBOOK
INDEX
Lamp type 2)
Shelves
Legend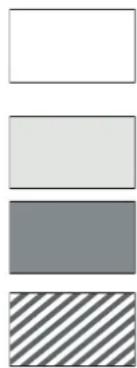
TEMPERATE ZONE
THE COLDEST AREA
Lamp type 2)
Shelves
Legend


TEMPERATE ZONE
Legend
User Manual
USER MANUAL
INDEX
Lamp type 2)
Shelves
Legend
**
TEMPERATURE ZONE
Recommended for storing tropical fruits, cans, beverages, eggs, sauces, pickles, butter, and jams
FRESH ZONE
Legend
A. FREEZER COMPARTMENT (If the refrigerator has one)
Food shelf life at different temperatures
User manual
USER MANUAL
TABLE OF CONTENTS
Bulb type 2)
Shelves
Legend

**
TEMPERATE ZONE
Legend
Shelves
Symbols

**
TEMPERATE ZONE
Symbols
User manual
INSTRUCTIONS FOR USE
CONTENTS
Type of light 2)
Shelves
Legend


**
MODERATE ZONE
Legend
A. FREEZER COMPARTMENT (if the refrigerator is equipped with one)
Instructions for use
INSTRUCTIONS FOR USE
TABLE OF CONTENTS
Shelves
Legend

**
TEMPERATURE WARNING ZONE
For storing tropical fruits, preserves, drinks, eggs, sauces, pickles, butter, and jam
REFRIGERATOR COMPARTMENT
User manual
USER MANUAL
INDEX
Instructions for use and maintenance 2
Refrigerator light 2
Replacing the LED bulb (depending on model) 2
Shelves 2
Door 2
How to use the appliance 3
First use 3
Refrigerator compartment and food storage 3
How to store fresh food and drinks 3
Shelves
All shelves, door bins and shelves can be removed.
Door
Legend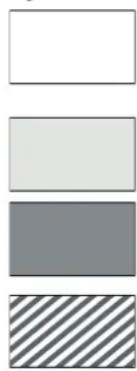
**
MODERATE ZONE
Recommended for storing tropical fruit, canned goods, drinks, eggs, sauces, pickles, butter, jam
COOLING ZONE
Suggested for storing cheese, milk, dairy products, deli items, yogurt
COLDEST ZONE
User Manual
USER MANUAL
TABLE OF CONTENTS
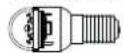
Lamp type 2)
Shelves
Explanation

**
TEMPERATE ZONE
Explanation
User Manual
USER MANUAL
INDEX
LED lamp (max. 25W)
Bulb type 2)
Shelves
Legend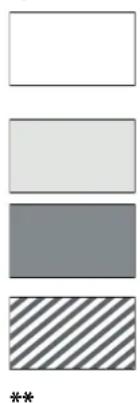
TEMPERATE ZONE
Legend
A.
Cleaning and maintenance
Lamp type 2)
Shelves
Symbols

**
User Manual
User Manual
Index
Use & Care Guide
Refrigerator light
Replacing the LED bulb (depending on model)
Shelves
Door
How to use the appliance
First use
Refrigerator compartment and food storage
How to store fresh food and beverages
* Freezer food storage (depending on model)
Shelf life of food at different temperatures
* How to defrost the freezer (depending on model)
Function sounds
Recommendations when the appliance is not in use
Cleaning and maintenance
Replacing the door gasket
Refrigerator light
Bulb type 2)
Shelves
All drawers, door shelves, and storage racks can be removed.
Door
Reversible refrigerator door
Legend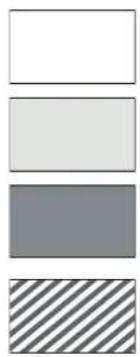
Ambient temperature zone
Cleaning and maintenance
User manual
User manual
Index
User & maintenance guide
Refrigerator lighting
Replacing LED bulbs (depending on model)
Shelves
Door
How to use this appliance
First use
Refrigerator compartment and food storage
How to store fresh food and beverages
* Freezer compartment (depending on model)
Storage life of food on shelves at different temperatures
* Freezer defrosting method (depending on model)
Operating sounds
Recommendations when not using this appliance
Cleaning and maintenance
Gasket replacement
Refrigerator lighting
Bulb type 2)
Shelves
All drawers, door shelves, or shelves can be removed.
Door
Reversing the door opening direction
Diagram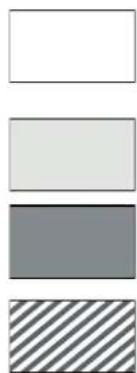
Chill zone
Diagram
A. Freezer compartment (if the refrigerator is equipped with a freezer compartment)
The shelf life of food stored on shelves at different temperatures


- USER MANUAL
- FANS
- MODERATE ZONE
- INSTRUCTIONS FOR USE
- SHELVES
- EXPLANATIONS
- TABLE OF CONTENTS
- TEMPERED AREA
- OPERATING INSTRUCTIONS
- INDEX
- STORAGE SURFACES
- SYMBOLS
- TEMPERATURE RANGE
- LEGEND
- SECTIONS
- TEMPERATURE ZONE
- USE & CARE GUIDE 2
- REFRIGERATOR LIGHT 2
- HOW TO USE THE APPLIANCE 3
- CLEANING AND MAINTENANCE 6
- GASKET REPLACEMENT 7
- REFRIGERATOR LIGHT
- REPLACING THE LED LIGHT BULB (DEPENDING ON MODEL)
- DOOR
- DOOR REVERSIBILITY
- HOW TO USE THE APPLIANCE
- FIRST TIME USE
- REFRIGERATOR COMPARTMENT AND FOOD STORAGE
- AIR VENTILATION
- HOW TO STORE FRESH FOOD AND BEVERAGES
- TEMPERATE ZONE
- COOL ZONE
- COOLEST AREA
- FRUIT AND VEGETABLE DRAWER
- FREEZER COMPARTMENT FOOD STORAGE (DEPENDING ON MODEL)
- ICE CUBES
- REMOVING THE DRAWERS
- HOW TO DEFROST THE FREEZER COMPARTMENT (DEPENDING ON MODEL)
- FUNCTIONAL SOUNDS
- RECOMMENDATION IN CASE OF NO USE OF THE APPLIANCE
- IN THE EVENT OF NON-USE OF THE APPLIANCE
- IN THE EVENT OF AN INTERRUPTION TO THE POWER SUPPLY
- CLEANING AND MAINTENANCE
- GASKET REPLACEMENT
- REGISTER
- DESCRIPTION
- CONTENTS
- OTD
- COLD ZONE
- COLDEST ZONE
- FRUIT AND VEGETABLE CABINET
- TYPE 2 BULB
- MODERATE TEMPERATURE ZONE
- TWPWLTP
- N
- HÚZHU OQUNWQNPTL UWPFWNPNNLUP
- UNWGHI OQUNWQNPNDI
- UUNNUPWGH HGHH L UPTPFH WUHKUN
- ΟΗΩΨΗΝΗΡΓΗΔ
- F62WKU WUHK1 PWNF UPTPFP L PUFWLHF
- THE DEVICE IS DESIGNED TO OPERATE IN A WIDE RANGE OF ENVIRONMENTAL CONDITIONS (TEMPERATURE, HUMIDITY, VIBRATION, AND SHOCK)
- INSTALLATION INSTRUCTIONS
- SAFETY INSTRUCTIONS
- P_W G_L W_B G_C W_D G_T
- CONTROL BOARD CONNECTION DIAGRAM
- CONTROL BOARD PROGRAMMING INSTRUCTIONS
- NOTE: THE PHOTOCELL SENSOR IS OPTIONAL
- 9N16GHGHNGWL HG2JN16GTP
- HNPNLPNFTP UMPFWLNPNLUP SOQUNWQNPTLNI NTUWFNUL
- NOTANDAHANDBÓK
- ATRÍDASKRÁ
- HILLUR
- TEMPERATURE REGULATOR
- EXPLANATION
- CUBES
- MIDDLE TEMPERATURE ZONE
- MANUAL
- USER HANDBOOK
- THE COLDEST AREA
- FRESH ZONE
- TEMPERATURE WARNING ZONE
- REFRIGERATOR COMPARTMENT
- INSTRUCTIONS FOR USE AND MAINTENANCE 2
- COOLING ZONE
- USE & CARE GUIDE
- AMBIENT TEMPERATURE ZONE
- USER & MAINTENANCE GUIDE
- REFRIGERATOR LIGHTING
- DIAGRAM
Brand : BAUKNECHT
Model : KSU 8GF2E
Category : Freezer