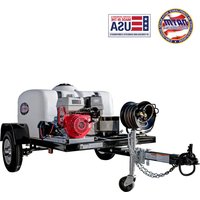
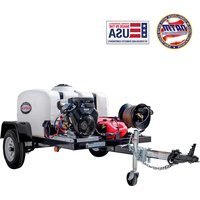
ALIR2535012B - Pressure washer Simpson - Free user manual and instructions
Find the device manual for free ALIR2535012B Simpson in PDF.

User questions about ALIR2535012B Simpson
0 question about this device. Answer the ones you know or ask your own.
Ask a new question about this device
Download the instructions for your Pressure washer in PDF format for free! Find your manual ALIR2535012B - Simpson and take your electronic device back in hand. On this page are published all the documents necessary for the use of your device. ALIR2535012B by Simpson.
USER MANUAL ALIR2535012B Simpson
natural_image
Line drawing of a pressure water heater with wheels and control panel (no text or symbols)
natural_image
Line drawing of a portable water heater with hoses and wheels (no text or symbols)
READ THIS MANUAL CAREFULLY BEFORE OPERATION
Failure to follow the instructions and safety precautions in this manual can result in property damage, serious injury and/or death.
If your pressure washer is not working or if there are parts missing or broken, please DO NOT RETURN IT TO THE PLACE OF PURCHASE. Contact our Customer Service Department by calling 1-877-362-4271 or emailing cservice@fna-group.com
SAVE THIS MANUAL FOR FUTURE REFERENCE
NOTE: Photographs and line drawings used in this manual are for reference only and may not represent your specific model.
THIS PAGE WAS INTENTIONALLY LEFT BLANK
SAVE THIS MANUAL FOR FUTURE USE
Keep this manual for future reference. This manual should be considered a permanent part of the product and stay with it. This manual should be available to anyone operating the product(s) it covers. This manual should remain with the product(s) it covers if sold to a new owner. If the manual becomes damaged, lost, or otherwise unusable, you may download a new copy from the product pages at www.simpsoncleaning.com or contact customer support by calling 1-877-362-4271.
Write down the model number, serial number, and purchase date of this product in the spaces provided below then keep this manual with the purchase receipt(s) for future reference.
Model Number:
Serial Number:
Purchase Date:
DISCLAIMERS
- All information in this publication was based on the latest product information available at the time of printing. The FNA Group reserves the right to update, change, and/ improve the product and this document at any time, without notice, and without incurring any obligation.
- This manual may cover more than one machine. The pictures and figures in the manual should be used for reference only. There may be differences between your product and the pictures, drawings, and diagrams in this manual.
SAFETY INSTRUCTIONS | 4
Read this Manual Before Operating 4
Additional Instructions | 4
Hazard Alert Symbols 4
DISCLAIMERS | 6
PERSONAL PROTECTIVE EQUIPMENT | 6
UNPACKING | 7
ASSEMBLY | 7
Adding the Pump Breather Cap | 7
Assemble the Spray Gun | 7
Activating the Hour Meter 8
Organize Accessories | 8
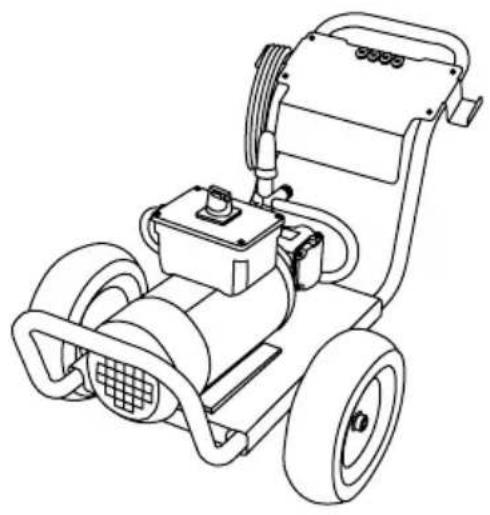
COMPONENT LOCATION | 9
30 ampere style | 9
50 ampere style | 10
CONNECTING HOSES | 11
PURGING AIR FROM THE PUMP | 12
NOZZLES | 13
Nozzle Selection | 13
Nozzle Installation | 13
OPERATING CHECKLIST | 14
Location | 14
Operating Conditions | 14
STARTING THE PRESSURE WASHER | 15
USING CHEMICALS | 18
TURNING OFF PRESSURE WASHER | 19
HOUR METER | 19
OPERATION TIPS | 20
Terms | 20
Preparation | 20
Pressure Washing | 20
Adjusting Pressure | 20
TROUBLESHOOTING | 21
MAINTENANCE | 22
Maintenance | 22
Cleaning the Pressure Washer | 22
Connections | 22
Nozzle Cleaning | 23
Water Inlet Filter | 23
Pump Maintenance | 24
STORING THE PRESSURE WASHER | 24
USING SIMPSON® PUMP GUARD | 25
WARRANTY | 26
READ THIS MANUAL BEFORE OPERATING
This manual contains important safety information and instructions. Do not operate this product until you have read, and completely understand all safety, operation, and maintenance instructions listed in this manual. Failure to follow the information contained in this manual will result in property damage, injury, and/or death.
NOTE: The warnings and precautions discussed in this manual cannot cover all conditions and situations that may occur. The operator must understand awareness and caution are factors which cannot be built into this product and so must be exercised by the operator.
ADDITIONAL INSTRUCTIONS
Along with this manual, be sure to read any additional instructions provided both on and with the product, attached equipment, accessories, and the motor powering the product. Pay careful attention to all additional safety rules and instructions on proper startup, operation, and shutdown procedures. Always use any recommended protective apparel that may be needed to operate the equipment safely.
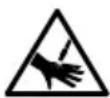
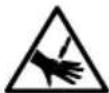
HAZARD ALERT SYMBOLS
Be sure to understand the safety symbols and definitions listed below. Each symbol contains one of four words: DANGER, WARNING, CAUTION, NOTICE, indicating different levels of hazard severity. These symbols are used throughout this manual and are followed information about a specific hazard, the consequences of the hazard, and instructions on how to avoid the hazard. Failure to heed these symbols and follow the instructions provided with them will result in property damage, injury, and/or death.

Indicates an imminently dangerous situation, which if not avoided, will result in property damage, serious injury, and/or death.

Indicates a potentially hazardous situation, which if not avoided, could result in property damage, serious injury, and/or death.

Indicates a hazardous situation, which if not avoided, could result in property damage and/or minor to moderate injury.

Indicates information considered important, but not directly hazard related.
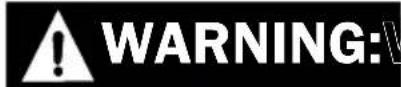
CAUTION

text_image
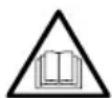
TRIPPING HAZARDHoses may pose a tripping hazard that can cause injuries resulting from a fall.

SLIP / TRIP HAZARDS
When pressure washing in public areas, signs should be posted that indicate to stay clear of the area as high-pressure washing is being performed. Also, signs should be posted that the surface may be slippery and trip hazards may be present.
Special consideration needs to be made to the safety of not just the operator of the pressure washer, but also people who may be adjacent to the area being cleaned. The best way to warn unsuspecting individuals is with signage and barriers.
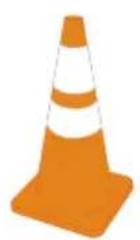
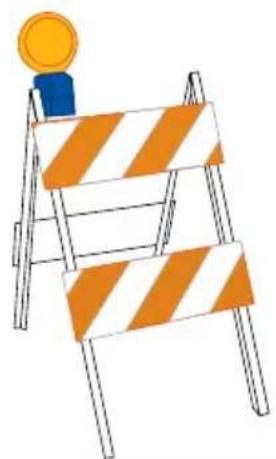
Barriers can be as simple as plastic traffic cones or barricades to using barrier belts around the area being cleaned. Remember, pressure washing can dislodge weak or broken pavement turning it into projectiles that may injure others. Keeping people clear of the area is the best way to avoid injury.
Wet pavement can be slippery to unsuspecting individuals causing injury from slips and falls. High-pressure and low-pressure hoses can be trip hazards. Segregating the area and placing appropriate signage can reduce injury.
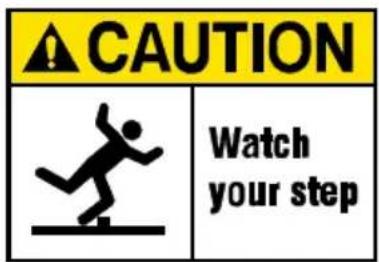
Sign examples
text_image
CAUTION Watch your step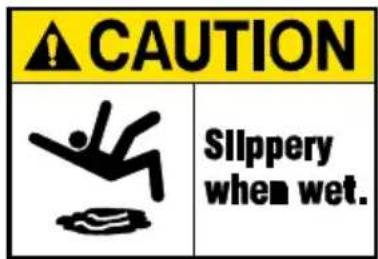
text_image
CAUTION Slippery when wet.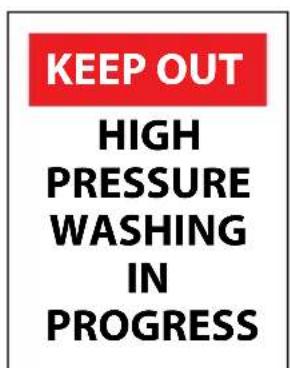
text_image
KEEP OUT HIGH PRESSURE WASHING IN PROGRESS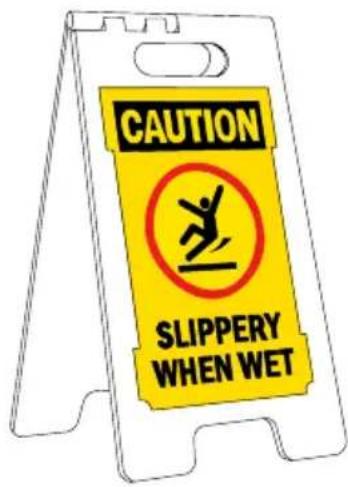
text_image
CAUTION SLIPPERY WHEN WETBarrier examples
natural_image
Illustration of a ladder with orange and white striped bars, topped with a yellow coin (no text or symbols)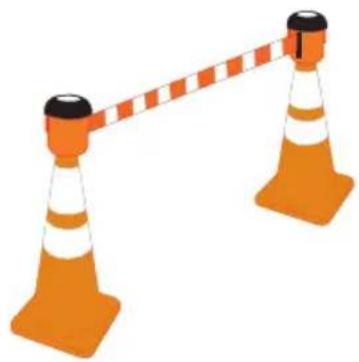
natural_image
Illustration of two orange traffic cones with white and black stripes, connected by a red-and-white striped barrier (no text or symbols)NOTICE
This appliance is not intended to be used by persons (including children) with reduced physical, sensory, or mental capabilities, or lack of experience and knowledge, unless they have been given supervision or instruction concerning use of the appliance by a person responsible for their safety.
Children should be supervised to ensure that they do not play with the appliance.
CALIFORNIA PROPOSITION 65 WARNING
This product can expose you to chemicals which are known to the state of California to cause cancer, birth defects, or other reproductive harm. For more information on California Proposition 65, go to www.P65Warnings.ca.gov.
DISCLAIMERS
- All information in this publication was based on the latest product information available at the time of printing. The FNA Group reserves the right to update, change, and/ improve the product and this document at any time, without notice, and without incurring any obligation.
- This manual may cover more than one machine. The pictures and figures in the manual should be used for reference only. There may be differences between your product and the pictures, drawings, and diagrams in this manual.
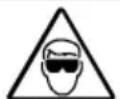
PERSONAL PROTECTIVE EQUIPMENT (PPE)
It is important to understand what personal protective equipment (PPE) should be utilized when using your pressure washer. Below is a list of PPE items that should be utilized at all times when using the pressure washer.
Hearing - Ear plugs or muffs to protect your hearing.
Vision - Safety goggles to protect your eyes.
Clothing - Long pants to protected your legs from flying debris.
Shoes - Shoes that fully cover your feet to protect against debris and over spray.
UNPACKING
Follow the steps outlined in this section to unpack and assemble your pressure washer. If you have any questions regarding the unpacking or assembly of your pressure washer, please have your model number and serial number ready, then contact customer support at 1-877-362-4271 or email cservice@fna-group.com.
- Place the shipping carton on a solid, flat surface.
- Carefully cut the top of the carton open.
- Carefully cut each corner of the carton from top to bottom.
- Lay each side of the carton flat on the ground.
- Remove the contents of the carton.
ASSEMBLY
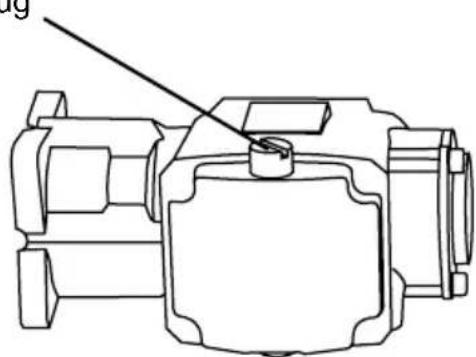
Adding the pump breather cap (if applicable)
A RED shipping plug is in the pump that must be replaced with a BLACK breather cap. The plug is easy to replace with the following steps:
- Using a bladed screw driver, remove the RED shipping plug from the top of the pump.
- Hand thread the BLACK breather cap into the pump.
- Snug the cap with your fingers.
RED shipping plug
natural_image
Technical line drawing of a mechanical component with no visible text or symbolsBLACK breather cap
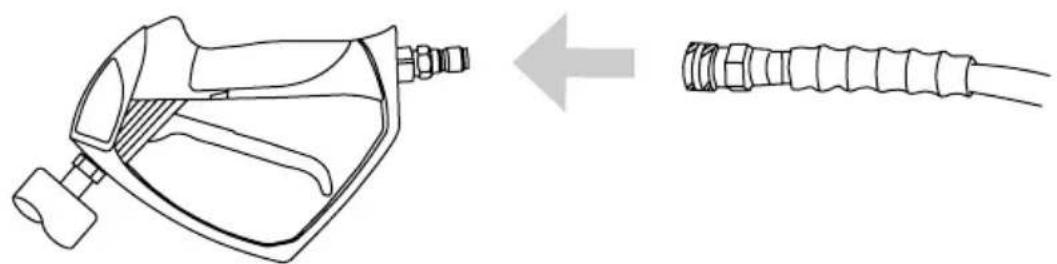
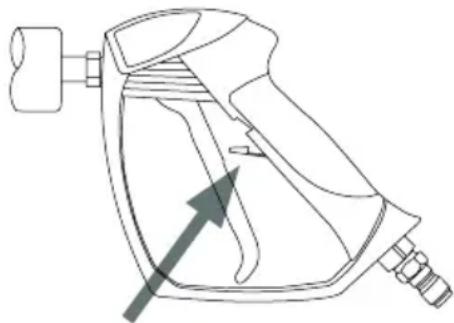
Assemble the spray gun
Hand thread the lance clockwise into the gun. Be careful not to cross-thread the gun and lance. Using an adjustable wrench, tighten the lance by placing the wrench on the flats of the nozzle quick-connector.
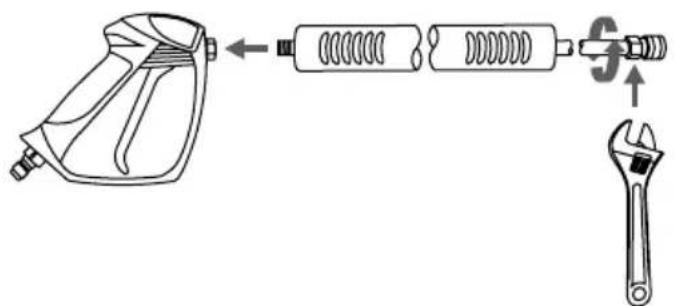
text_image
Diagram showing the assembly of a spray gun with spring, spring-loaded components, and an adjustable wrench.WARNING! The threads on the lance and gun coupler can be easily cross threaded resulting in an improper assembly. An improper assembly of the gun and lance can result in personal injury. Do not use if the threads on the gun coupler and or lance are cross threaded.
Activating the hour meter
- Using wire cutters, cut the wire loop, originating from the back of the hour meter, to activate it.
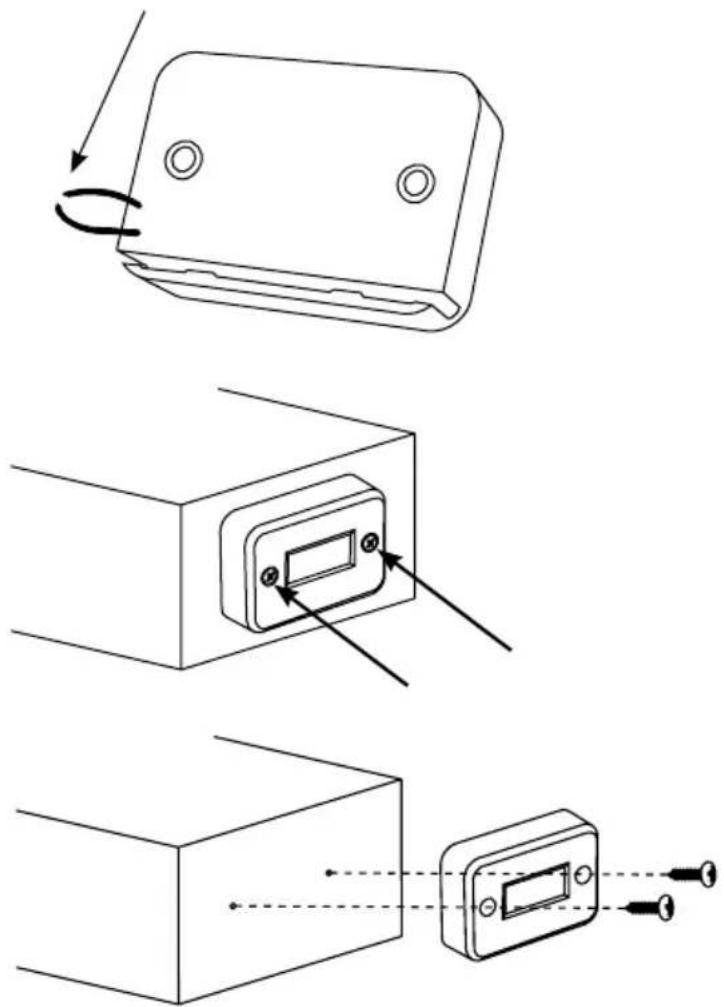
-
(If the wire is not accessible) Using a Phillips screwdriver, remove the screws and the hour meter. After locating the wire loop, please follow Step #1.
-
(If required) Place the screws back into the hour meter housing. Using the Philips screwdriver, tighten the screws into the control box housing.
Organize accessories
-
Place the spray gun and lance assembly into the holder on the dashboard.
-
Push the nozzles into the rubber grommets on the dashboard. Note: the dashboard label indicates correct nozzle placement.
-
Hang the high-pressure hose on the holder.
text_image
1 2 3
OPERATING CHECKLIST
Attempting to use the pressure washer incorrectly can result in motor and/or pressure washer damage, and may cause serious injury or death. To avoid these hazards, be sure to read, understand, and follow the steps outlined in the OPERATING CHECKLIST section of the owner's manual and follow all the guidelines for proper use of the pressure washer.
text_image
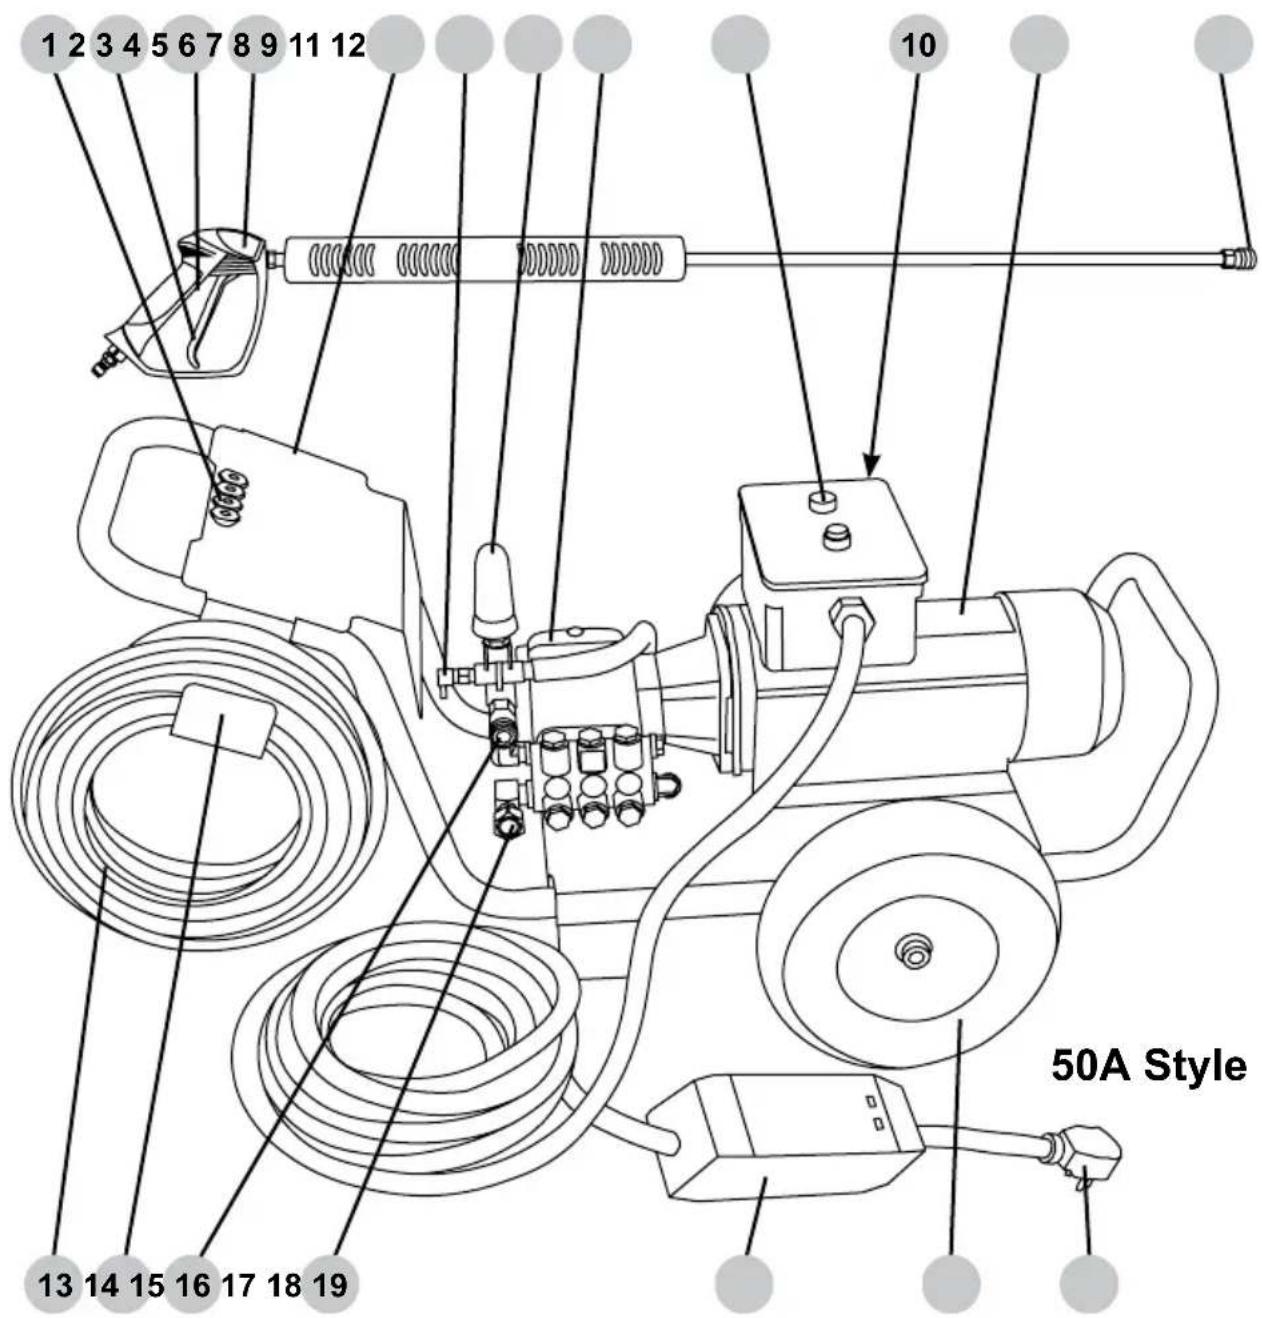
1 2 3 4 5 6 7 8 10 11 9 12 13 14 15 16 17 18 19 30A Style- Nozzle holders
- Spray gun trigger
- Spray gun trigger lock
- Spray gun
- Spray gun holder
- Unloader control knob
- Pump
- ON/OFF switch
- Hour meter (not shown)
-
Electric motor
-
Spray wand quick connector
- High-pressure hose
- Hose hanger
- High-pressure pump outlet
- Garden hose coupler and filter
- Ground Fault Circuit Interrupter (GFCI)
- Thermal relief valve
- NEMA 6-30 male power supply plug
- Wheel
text_image
1 2 3 4 5 6 7 8 9 11 12 10 13 14 15 16 17 18 19 50A Style- Nozzle holders
- Spray gun trigger
- Spray gun trigger lock
- Spray gun
- Spray gun holder
- Thermal relief valve
- Unloader control knob
- Pump
- ON/OFF pushbuttons
-
Hour meter (not shown)
-
Electric motor
- Spray wand quick connector
- High-pressure hose
- Hose hanger
- High-pressure pump outlet
- Garden hose coupler and filter
- Ground Fault Circuit Interrupter (GFCI)
- Wheel
- NEMA 6-50 male power supply plug
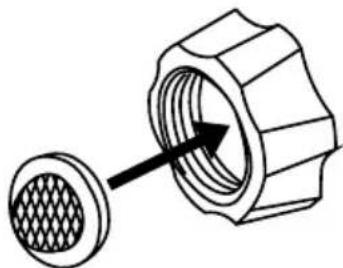
CONNECTING HOSES
Before connecting a water supply hose, be sure the water supply is capable of providing an uninterrupted source of clean, cold water at a minimum rate of 5 gallons per minute (GPM) and 20 pounds per square inch (PSI) of pressure. Once a proper water supply is secured, follow the instructions below to connect both the water supply and high-pressure hoses to the pressure washer.
- Verify the inlet screen is free of any dirt or debris and is in place with the convex side facing out.
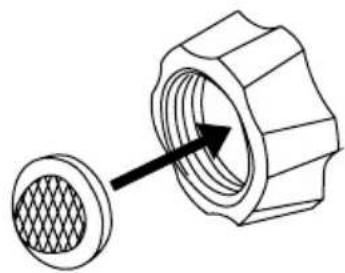
natural_image
Technical illustration of a mechanical component with a meshed circular feature and an arrow indicating direction (no text or symbols)- Turn on the water supply and run for 30 seconds to purge any debris from the supply hose. Then, turn off the water supply and thread the water supply hose into the pump inlet.
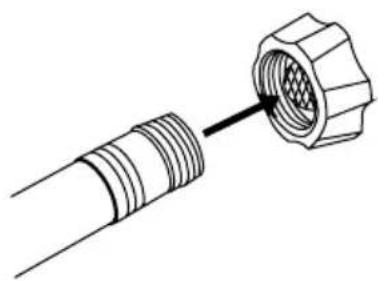
natural_image
Diagram of a connector with threaded ends and a hexagonal nut inserted (no text or symbols)- While pulling back on the pump outlet collar, insert the hose connector then release the collar. Gently tug on the hose to make sure it is locked.

natural_image
Diagram showing a pipe fitting before and after assembly, with no text or symbols present.- While pulling back on the hose outlet collar, insert the gun connector then release the collar. Gently tug on the hose to make sure it is locked.
natural_image
Technical line drawing of a mechanical device with a separate schematic view showing internal components (no text or symbols)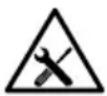
NOTICE
PUMP PURGING
Running a pressure washer pump without water will severely damage the pump seals and other internal components. To avoid this hazard, make sure your water supply is uninterrupted and at least 5 GPM at 20 PSI, and always purge the air your pressure washer pump before starting the engine.
WARNING:
INJECTION INJURY
The high pressures created by a pressure washer can cause fluid injection injuries, severe lacerations, amputations, and / or death. To avoid these hazards, always aim the spray gun and lance in a safe direction when using the pressure washer and never attempt to touch a leak in a high-pressure hose or fitting.
A pressure washer pump is designed to operate with water flowing through it. Water lubricates and cools the internal components of the pump. Running a pressure washer pump without water will severely damage the pump seals and other internal components. Damage caused by running a pressure washer pump without water is not covered under warranty. Be sure to follow the instructions below to correctly purge the air from your pressure washer pump before starting the engine.
- Connect all the hoses by following the steps outlined in the CONNECTING HOSES section of this manual then turn on the cold water source.
- Aim the spray gun in a safe direction then squeeze and hold the trigger for at least 30 seconds or until the water runs steady and all the air is purged from the pump and hoses.
- Check hoses and connections for leaks. If leaks are found, turn off the machine, aim the spray gun in a safe direction and squeeze the trigger to relieve any built up pressure in the system. Never attempt to touch a leak in a high-pressure hose or fitting. Never attempt to repair a high-pressure hose.
Engage the trigger lock.4.
natural_image
Line drawing of a spray gun with an arrow pointing to the handle (no text or symbols)Nozzle Selection
The nozzles supplied with the pressure washer have specific spray patterns designed to clean different surfaces. Using the incorrect nozzle can damage surfaces. Refer to the table below to select the correct nozzle before using the pressure washer. NOTE: The selection of nozzles included may vary with pressure washer models.
| Color | Spray pattern | SurfacesUses | |
| Yellow | [05DH]15°HIGH PRESSURE | Intense cleaning of unpainted surfaces | Grills, driveways, concrete and brick walkways, unpainted brick and stucco |
| Green |   PRESSURE PRESSURE | Standard cleaning nozzle for most applications | Yard tools, sidewalks, lawn furniture, unpainted siding, stucco, gutters, eaves, concrete, and brick surfaces |
| White |   E E | Cleaning painted or delicate surfaces | Auto, truck, RV, marine, wood, painted brick, painted stucco, vinyl, and painted siding |
| Black |  SOAP LOW PRESSURE SOAP LOW PRESSURE | Applies cleaning solutions | Safe on all surfaces. Always verify compatibility of cleaning solution(s) prior to use. |
NOTICE
SPRAY DAMAGE
High-pressure spray can damage plants and other surfaces. To avoid causing damage, cover plants before spraying near them, refer to the Nozzle Selection table in this manual for correct nozzle selection, and test surfaces before spraying to make sure they are strong enough to withstand high-pressure spray.
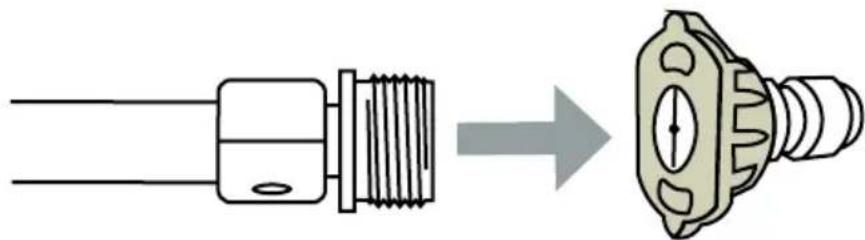
Nozzle Installation
If the motor is running, make sure the trigger lock is in the locked position before removing and installing nozzles.
To place a nozzle into the spray wand, pull the quick-connect coupler back, insert the nozzle, then release the coupler allowing it to snap back in place. Once installed, pull on the nozzle to make sure it secure.
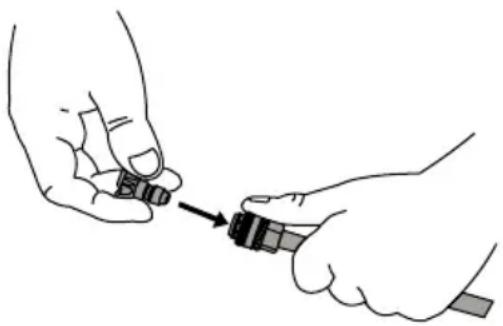
natural_image
Illustration of two hands holding a small object with an arrow pointing to it (no text or symbols present)Location
Place the pressure washer on a level surface outside. Never use an extension cord with the electric pressure washer. If the power supply cord will not reach a receptacle, move the pressure washer closer to the receptacle.
Operating Conditions
Before each use, check for loose or damaged parts, leaks, and/or any other condition that may affect proper operation. Repair or replace all damaged and/or defective parts immediately. Always keep all safety guards in place and in proper working order. For safety reasons, the manufacturer recommends all maintenance and repairs be performed by an authorized service center.
Before using the pressure washer, remove any excessive dirt and debris from the cooling vents of the motor. Always operate the pressure washer on a level surface and never move or tip the pressure washer while operating. Use the pressure washer only for its intended purpose. If you have questions about the proper use of your pressure washer, please contact customer support at 1-877-362-4271 or cservice@fna-group.com.
Know how to stop the product and bleed pressures quickly. Be thoroughly familiar with the controls. Stay alert - watch what you are doing. Do not overreach or stand on unstable support. Keep good footing and balance at all times. Do not operate the product when fatigued or under the influence of alcohol or drugs. Keep operating area clear of all persons.

RISK OF EYE INJURY
Spray can splash back or propel objects. Always wear properly rated eye protection such as safety goggles or face shield while spraying. (Safety glasses do not provide full protection).

UNTRAINED OPERATION
Untrained adults and children can be seriously injured or killed if allowed to incorrectly operate or play with running pressure washer. To avoid these hazards, be sure anyone operating the pressure washer receives proper instructions, understands safe operation, and has read the owner's manual before operating this product. Do not let children operate the pressure washer without parental supervision. Keep children and pets away from the pressure washer while it is running. Always turn off the pressure washer before leaving the area.

Failure to inspect this product before use could create a hazardous situation resulting in product damage, serious injury, and/or death. To avoid these hazards, inspect the pressure washer before each use. Check for loose or damaged parts, signs of oil leaks, missing guards, plugged cooling vents, or any other condition that may affect proper operation. Repair or replace all damaged or defective parts and keep all safety guards in place and in proper working order before using the pressure washer.
INJECTION INJURY
The high pressures created by a pressure washer can cause fluid injection injuries, severe lacerations, amputations, and / or death. To avoid these hazards, always aim the spray gun and lance in a safe direction when using the pressure washer and never attempt to touch a leak in a high-pressure hose or fitting.
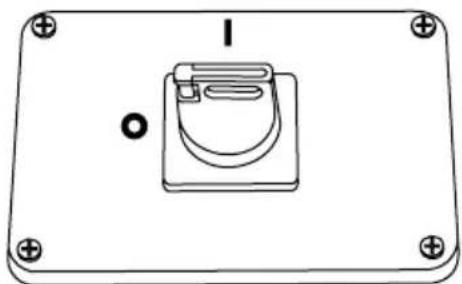
STARTING THE PRESSURE WASHER
- Connect the hoses as instructed on Page 11.
- Turn on the water and purge the system of air as instructed on Page 12.
- Insert the desired nozzle as instructed on Page 13.
- Make sure the master ON/OFF switch is in the OFF (0) position.
natural_image
Simple line drawing of a rectangular device with a central component and mounting holes (no text or symbols)30 ampere style
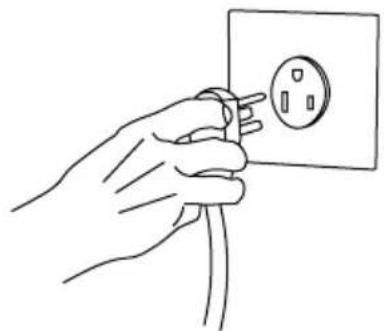
- Plug the electrical power cord into a grounded receptacle, rated for voltage and current requirements of the pressure washer, that was properly installed in accordance with all local codes and ordinances.

natural_image
Line drawing of a hand holding an electrical outlet with wires (no text or symbols)250v 30A 6-30R
natural_image
Line drawing of a hand holding an electrical outlet with a plug (no text or symbols)250v 50A 6-50R
WARNING:
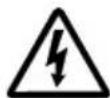
ELECTROCUTION HAZARD
Improper connection of the equipment-grounding conductor can result in a risk of electrocution. Check with a qualified electrician or service personnel if you are in doubt as to whether the outlet is properly grounded. Do not modify the plug provided with the product - if it will not fit the outlet, have a proper outlet installed by a qualified electrician. Do not use any type of adapter with this product.
This Product is Provided With A Ground Fault Circuit Interrupter Built Into The Power Cord or Plug. If Replacement Of The Ground Fault Circuit Interrupter Or Cord Is Needed, Use Only Identical Replacement Parts.
- Test the GFCI by following the steps for your particular unit. NOTICE - DO NOT use the pressure washer if the below tests fail.
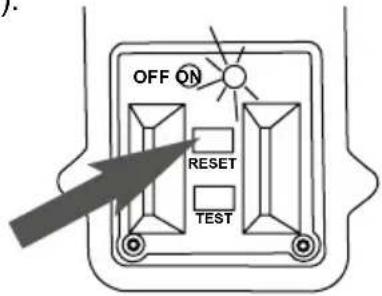
30 ampere style
A). Press the RESET button. The ON indicator light will now be illuminated (ON).
text_image
OFF ON RESET TESTB). Press the TEST button. The OFF indicator light will now be illuminated.
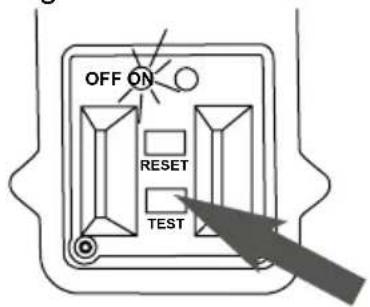
text_image
OFF ON RESET TESTC). Press the RESET button. The ON indicator light will once again be illuminated (ON).
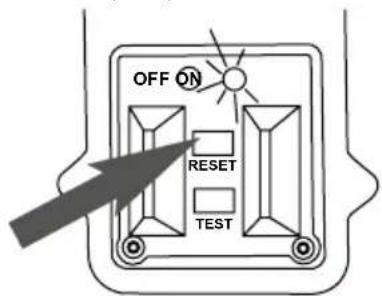
text_image
OFF ON RESET TEST50 ampere style
A). Press the TEST button. The indicator light should now be dark (OFF).
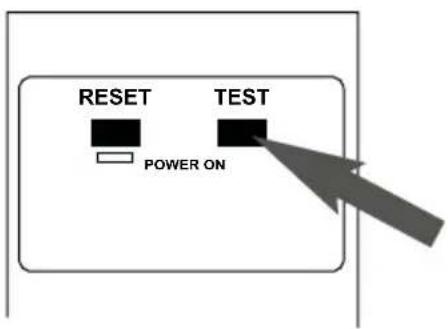
text_image
RESET TEST POWER ONB). Press the RESET button. The indicator light will now be illuminated (ON).
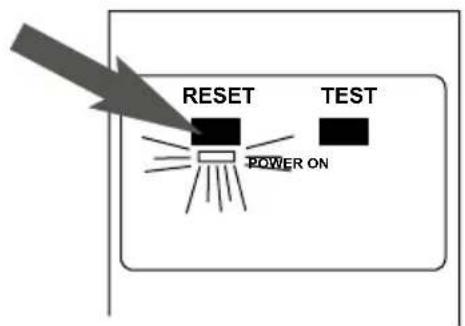
text_image
RESET TEST POWER ON- Turn the pressure washer ON.

natural_image
Simple line drawing of a device with a button labeled 'I' and circular arrow, no text or symbols present.Rotate the switch clockwise to the "I" position to turn the pressure washer on.
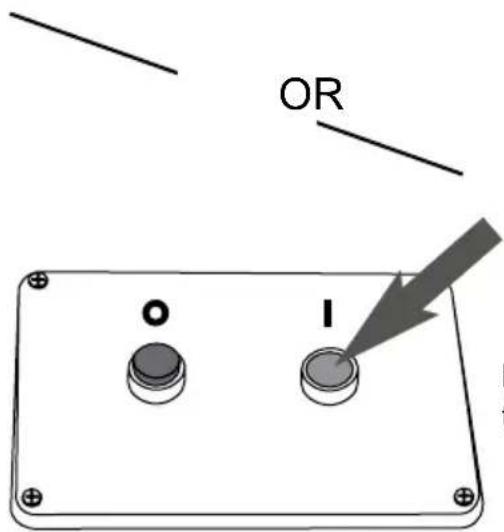
text_image
OR O IPress the GREEN button to turn the pressure washer on.
- Point the gun in a safe direction, open the trigger lock and squeeze the trigger.
NOTICE
VOLATILE LIQUIDS
Pressure washing with volatile, flammable, or corrosive liquids could cause pressure washer damage, fire, or explosion resulting in severe injury and/or death. To avoid these hazards, use only approved soaps and chemicals, do not attempt to pressure wash with volatile, flammable, or corrosive liquids, and NEVER use bleach.
- Ensure that the outboard soap injector is connected to the washer high-pressure output.
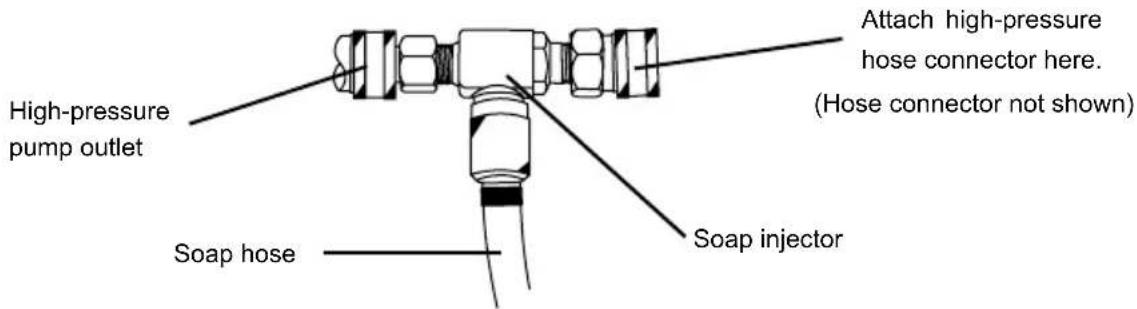
text_image
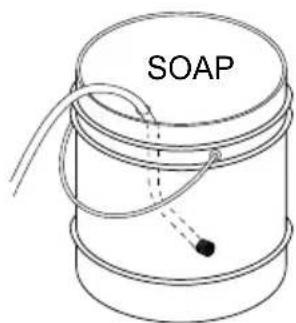
High-pressure pump outlet Soap hose Soap injector Attach high-pressure hose connector here. (Hose connector not shown)- Place the filtered end of the soap hose into a container of soap.
text_image
SOAP-
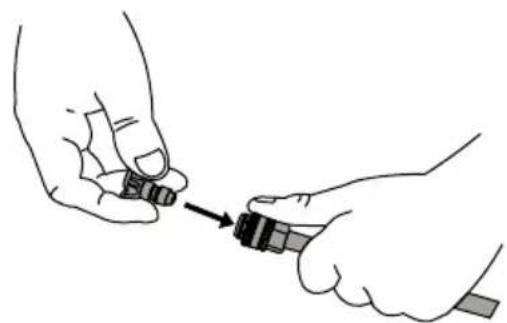
Make sure the trigger lock is in the locked position before removing and installing nozzles.
-
Insert the black nozzle into the spray wand per the Nozzle Installation section of this manual, page 13. NOTE: Soaps will not siphon if the black soap nozzle is not installed on the spray wand.
natural_image
Illustration of two hands holding a small object with an arrow pointing to it (no text or symbols present)- After using soap, place the filtered end of the soap hose into a container of clean water and run pressure washer drawing clean water through the hose and pump until the system is thoroughly rinsed. If soap or other chemicals remain in the pump, the pump could be damaged. Pump damage from soap or chemical residue is not covered under warranty.
TURNING OFF THE PRESSURE WASHER
- Set the trigger lock on the spray gun.
- Turn the pressure washer motor off.

natural_image
Simple line drawing of a switch mechanism inside a rectangular frame (no text or symbols)Rotate the switch counterclockwise to the "O" position to turn the pressure washer off.
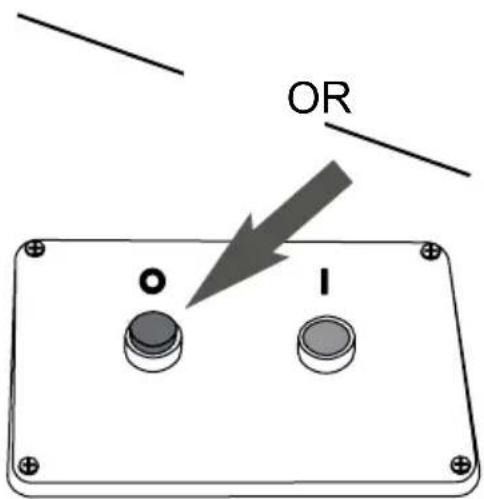
text_image
OR O IPress the RED button to turn the pressure washer off.
- Turn off the water supply.
- Release the trigger lock then squeeze the spray gun trigger to relieve the pressure in the hose and pump.
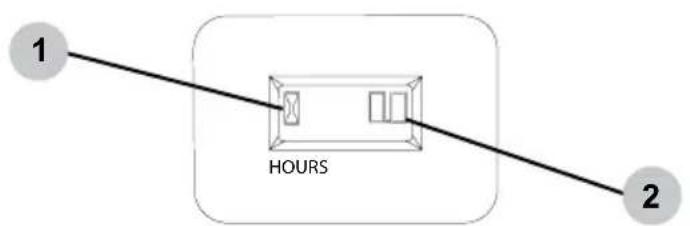
HOUR METER
The hour meter keeps track of the time the pressure washer is running. The hour glass icon flashes when the motor is running to signify the meter is tracking the hours of operation. The digital time display shows the recorded hours of operation. Use this information for preventative maintenance intervals.
For hour meter location see the COMPONENT LOCATION section of this manual.
flowchart
graph LR
    1["1"] --> HOURS["HOURS"]
    2["2"] --> HOURS
    style HOURS fill:#f9f,stroke:#333
- Hour glass icon
- Digital time display
Terms
- PSI - Pounds per square inch (PSI) is the unit to measure the pressure of water. In relation to a pressure washer, the higher the PSI number, the greater the pressure and stripping power produced.
- GPM - Gallons per minute (GPM) is the flow rate of water. In relation to a pressure washer, the greater the GPM, the greater the flow or rinsing power produced.
- CU - Cleaning units express the efficiency of the pressure washer. Cleaning units are calculated by multiply the PSI by the GPM. The higher the CU, the more efficient the pressure washer.
Preparation
- Read all warning and instructions in this and all manuals that came with the pressure washer.
- Remove all toys, bikes, lawn furniture, etc. from the work area if they are not to be cleaned.
- Sweep any loose dirt and debris from the surface you will be pressure washing.
- Cover nearby plants to avoid damaging them with the pressure washer spray.
- Use caution when spraying windows. Always use the white, 40^ nozzle and stay at least 4 feet away.
- Lay tarps down to collect paint chips and other debris blown off by the spray. Exterior paints used before 1977 may contain lead and will produce chips that will need to be collected and disposed of at a hazardous waste facility.
Pressure Washing
- A wider spray equals faster cleaning, while a tighter spray equals deeper cleaning.
- Keep the nozzle about 4 feet away from siding to avoid damage.
- Start washing siding at the bottom and work your way up, then rinse from the top down.
- Avoid driving water up behind siding.
- Use overlapping strokes for even cleaning.
• Work in small areas to keep the soap from drying. - Do not aim the nozzle straight at the surface. Hold the wand at a 45^ angle to the surface at a distance that cleans well without causing damage.
Adjusting Pressure
The pressure setting is preset at the factory to achieve optimum pressure and cleaning. If you should need to lower the pressure, it can be accomplished by the following methods.
- Back away from the surface to be cleaned. The further you position the nozzle from the surface to be cleaned, the lower the pressure to reach the surface.
- Change to the white, 40^ nozzle. This nozzle produces a lower pressure, wider width spray.
Your unit may be equipped with an additional feature that allows you to adjust the pressure.
To lower the pressure, turn the knob counterclockwise to the desired pressure.
To return the pressure to the factory setting, turn the knob clockwise until it stops.
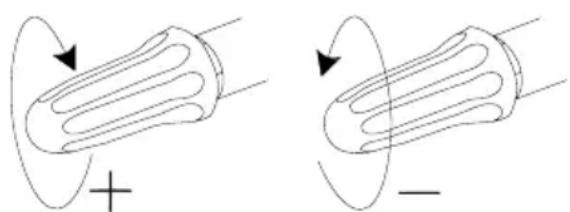
natural_image
Two diagrams showing a cylindrical object with internal channels, one marked with a plus sign and the other with a minus sign, surrounded by curved arrows indicating motion or force direction (no text or symbols)NOTE: Do not overtighten the pressure control knob. If overtightened, the knob COULD break causing immediate loss of pressure and costly repairs not covered by the warranty.
TROUBLE SHOOTING
| Issue Possible | Cause Solution | |
| Pressure washer will not start. | The power supply cord is not connected. | Plug the cord into a receptacle of the proper voltage and amperage. |
| The house circuit breaker is tripped. | Reset the circuit breaker. | |
| The GFCI equipped receptacle (if applicable) is tripped. | Reset the GFCI by pushing the RESET button. | |
| The GFCI in the power supply cord is tripped. | Reset the GFCI by pushing the RESET button. | |
| The master ON/OFF switch is in the OFF position. | Move the switch to the ON position. | |
| The thermal switch has tripped. | Turn the master ON/OFF switch to the OFF position. Allow the unit to cool for 30 minutes before trying the pressure washer once again. | |
| The pressure washer creates low or no water spray pressure. | There is air in the hoses and/or pump. | Refer to the PRIMING THE PUMP section of this manual to remove air from pump and hoses. |
| The water supply is insufficient. | Make sure the water supply pressure is at least 5 gpm @ 20 PSI. | |
| The nozzle is clogged. | Clean nozzle per the MAINTENANCE section of this manual. | |
| The water inlet screen is clogged. | Clean the water inlet screen per the MAINTENANCE section of this manual. | |
| Detergent fails to mix with the spray. | Transparent tube is clogged or cracked. | Clean or replace the transparent tube. |
| Transparent tube is not attached to the pump. | Attach the transparent tube to the detergent connector on the pump. | |
| Incorrect nozzle used. | Install the black soap nozzle on the wand. | |
| Detergent too thick. | Add water to the detergent to make it the consistency of water. |
For safety reasons, the manufacturer recommends all pressure washer service and repairs be performed by an authorized service center. All warranty replacements or repairs must be performed by an authorized distribution or service center. To find an authorized service center near you, make a warranty claim, or get authorized warranty repair, call 1-877-362-4271 or email cservice@fna-group.com.
It is the responsibility of the owner and/or operator to have all scheduled maintenance completed before operating the pressure washer. Be sure to follow the inspection and maintenance recommendations as listed in all the manuals that came with this unit.
Maintenance
Before each use, check pressure washer for leaks, loose or damaged parts, and any other condition that may affect proper operation. Be sure all safety guards are in place and in proper working order. Inspect all air vents and cooling slots to ensure they are clean and unobstructed. Repair or replace all damaged or defective parts immediately. For safety reasons, the manufacturer recommends all pressure washer service and repairs be performed by an authorized service center. Never attempt to repair a high-pressure hose.
Cleaning the Pressure Washer
Always clean the pressure washer with the motor off and cool. To clean the pressure washer, first use an air compressor set at no more than 25 PSI to clear dirt and debris from the pressure washer surfaces, vents, and cooling slots. Then, wipe the exterior clean with a damp cloth.

NOTICE
CLEANING
Water can damage the pressure washer electrical components if allowed to enter through cooling slots or other holes. Damage caused by water intrusion is not covered under warranty. To avoid electrical / motor water damage, do not use a pressure washer, garden hose, or any other sources of running water to clean the pressure washer motor, and never submerge the pressure washer in any liquids.

NOTICE
CHEMICAL CLEANERS
Using chemical cleaners and/or corrosive liquids can damage the pressure washer seals and internal components. Damage caused by chemical cleaners and corrosive liquids is not covered under warranty. To avoid these hazard, only used approved cleaning chemicals, never use bleach, and always run clean water through the pressure washer after using cleaning chemicals.
Connections
Hose, spray gun, and pump connections should be cleaned and lubricated with a thin film of lithium grease regularly to prevent o-ring damage and leaks.
Nozzle Cleaning
If a nozzle becomes clogged, the pump may pulsate and spray patterns could change. If the nozzle is not cleaned, excessive pressure may develop possibly damaging the pump, or other accessories. Inspect nozzles before using them and follow the instructions in this section for the proper nozzle cleaning procedure.
-
Shut off the pressure washer.
-
Turn off the water supply.
-
Point the Spray gun in a safe direction and squeeze the trigger to relieve water pressure.
-
Set the trigger lock.
-
Remove the nozzle from the lance quick connector.
-
Clear any obstructions from the nozzle by inserting the nozzle cleaning tool provided.
natural_image
Diagram of a mechanical component with a circular end connected to a cylindrical shaft, showing bidirectional arrow (no text or symbols)- Rinse any loose debris from the nozzle by directing a running garden hose into the output of the nozzle for at least 30 seconds.
natural_image
Diagram showing a connector being inserted into a socket (no text or symbols present)Water Inlet Filter
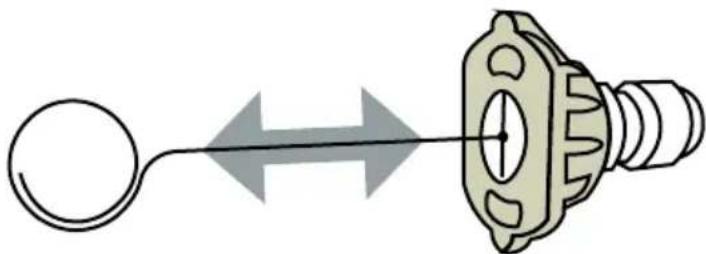
Before each use, check the inlet filter and clean by following the steps below. Never operate the pressure washer without the inlet filter properly installed.
- Remove the filter from the garden hose coupler.
- Use a water from a running garden hose to clean both sides of the filter.
- Insert the cleaned filter into the pump inlet with the convex side facing out.
natural_image
Technical diagram of a mechanical component with a textured circular base and arrow indicating direction (no text or symbols)Pump Maintenance
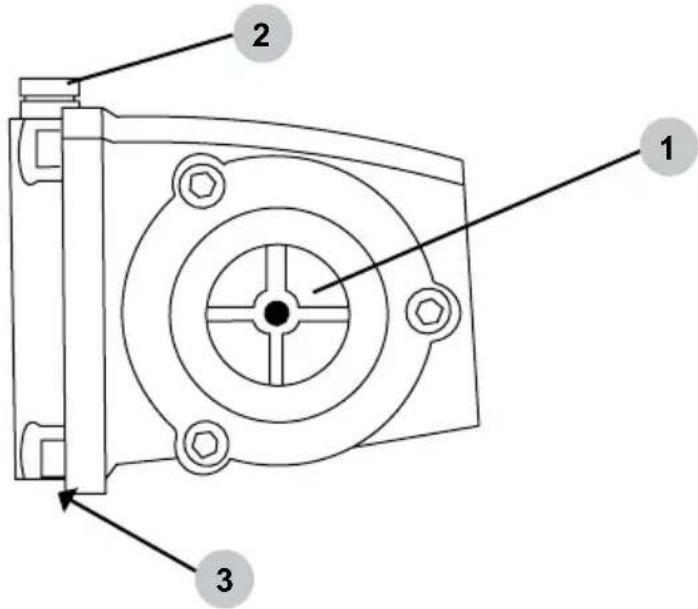
Note: The pump was filled with oil at the factory. The preferred oil is SIMPSON ^© Premium Pump Crankcase Oil. If this oil is not available, an SAE 15W-40 oil may be used. Change the oil after the first 50 hours of operation and every 100 hours thereafter or every 3 months.
text_image
1 2 3- Oil sight glass
- Oil fill plug / vent cap
- Oil drain plug (not shown)
How to change the pump oil
- Loosen the pump oil fill plug / vent cap.
- Place a container under the oil drain plug.
- Remove the oil drain plug.
- After the oil has drained, insert the oil drain plug; tighten securely.
- For AAA™ pumps, refill with SIMPSON® Premium Pump Crankcase Oil. If this oil is not available, an SAE 15W-40 oil may be used.
- Make sure the oil level meets but does not exceed the dot in the center of the sightglass.
- Insert the oil fill plug; tighten securely.
STORING THE PRESSURE WASHER
- Squeeze the trigger to relieve stored pressure in the pump and hose.
- Disconnect the high-pressure hose from the pump and the gun.
- Remove trapped water from the high-pressure hose; coil for storage.
- Hold the gun in a vertical plane and squeeze the trigger to remove trapped water.
- Protect the pump by using SIMPSON ^ Pump Guard per the USING PUMP GUARD section of this manual.
- Store the pressure washer and its accessories in a cool, dry location out of direct sunlight.

NOTICE
PUMP DAMAGE
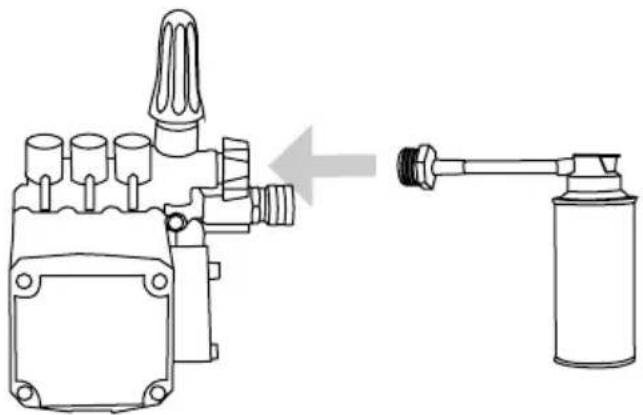
Leaving water inside the pump during freezing weather will cause severe damage to the pump. To avoid costly damage, always treat the pump with SIMPSON® Pump Guard to remove the trapped water and to fill the pump with a lubricating, antifreeze solution.
SIMPSON® Pump Guard (purchase separately) is formulated to protect your pump during long-term storage and from freezing damage. Pump Guard should be used throughout the season to keep the seals pliable and well lubricated. Before storing the unit for winter or for when there is a chance of freezing weather, use pump guard to remove all traces of water from the internal cavities while filling them with an antifreeze solution.
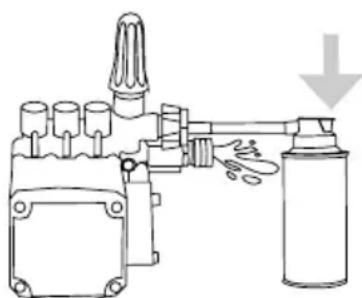
Simply use Pump Guard by following these easy steps:
- Screw the Pump Guard adapter into the garden hose input on the pump.
natural_image
Technical line drawing of a mechanical device with a gas nozzle connected to a cylindrical container (no text or symbols present)- Press and hold down on the button until all the water and the Pump Guard starts to come out of the high pressure port.
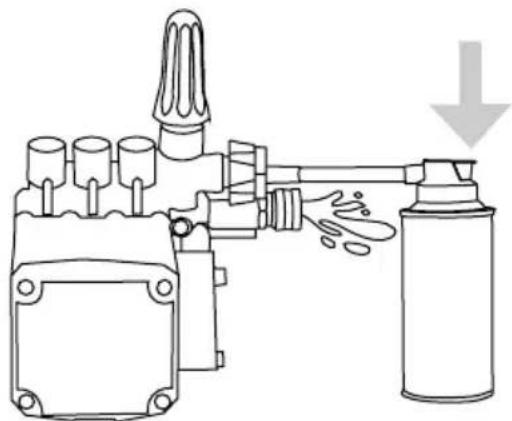
natural_image
Diagram of a mechanical device with a spray can and downward arrow indicating motion (no text or symbols)- Unscrew the Pump Guard from the pump then prepare the pressure washer for storage as outlined in STORAGE AND TRANSPORTATION.
LIMITED WARRANTY
Commercial / Industrial / Rental Products
WARRANTY COVERAGE TERMS:
The manufacturer of this product agrees to repair or replace designated parts that prove defective within the warranty period listed below at the manufacturers sole discretion. Specific limitations/extensions and exclusions apply.
This warranty covers defects in material and workmanship and not parts failure due to normal wear, depreciation, abuse, accidental damage, negligence, improper use, maintenance, water quality and storage. To make a claim under the terms of the warranty, all parts said to be defective must be retained and available for return upon request to a designated Warranty Service Center for warranty inspection. The judgments and decisions of the manufacturer concerning warranty claims are final.
There warranties pass through to the end user and are non-transferable. As a factory authorized and trained Warranty Service Center, the factory will honor the terms of all component warranties and satisfy claims of the appropriate warranty provisions.
Normal wear items included, but are not limited to, items such as valve and seals, which are not covered by this warranty.
This warranty replaces all warranties, express or implied, including without limitation any warranties of merchantability or fitness for a particular purpose and all such warranties are hereby disclaimed and excluded by the manufacturer. The manufacturer's warranty obligation is limited to repair and replacement of defective products as provided herein and the manufacturer shall not be liable for any further loss, damages, or expenses - including damages from shipping, accident, abuse, acts of God, misuse, or neglect. Neither is damage from repairs using parts not purchased from the manufacturer or alterations performed by non-factory authorized personnel. Failure to install and operate equipment according to the guidelines put forth in the instruction manual shall void warranty.
THIS WARRANTY DOES NOT COVER:
Damage resulting from shipping (claims must be filed with freighter), accident, abuse, acts of God, misuse or neglect. This warranty also does not cover damage from repairs or alterations performed by non-factory authorized personnel or failure to install and operate equipment according to the guidelines put forth in the instruction manual. The manufacturer will not be liable to any persons for consequential damage, for personal injury or for commercial loss.
RESPONSIBILITY OF ORIGINAL PURCHASER (INITIAL USER):
To process a warranty claim on your SIMPSON® pressure washer, report the concern to 1-877-362-4271 or cservice@fna-group.com for authorization and direction to the nearest authorized service center in your area. Retain original cash register receipt as proof of purchase for warranty work.
Use reasonable care in the operation and maintenance of the product as described in the Owner's Manual.
WHAT THIS WARRANTY DOES NOT COVER:
- Freight damage
- Damage due to chemical deterioration, scale build up, salt water, rust, corrosion or thermal expansion
- Freeze damage
- Damage caused by parts or accessories not obtained from an authorized dealer or not approved by the manufacturer
- Normal wear of moving parts or components affected by moving parts
- Consumable parts such as: Fuel filter, air filter, spark plug(s), recoil starter rope, oil and lubricant(s)
- Normal periodic maintenance work such as carburetor cleaning and engine oil draining
WARRANTY COVERAGE PERIODS:
ELECTRIC MOTOR
• ONE (1) year from date of purchase
HIGH PRESSURE PUMP (DEFECTS IN MATERIAL AND WORKMANSHIP)
• FIVE (5) years from date of purchase
FRAME (DEFECTS IN MATERIAL AND WORKMANSHIP)
• FIVE (5) years from date of purchase
ACCESSORIES (DEFECTS IN MATERIAL AND WORKMANSHIP)
- Nozzles, hoses, spray guns, wands, tires, rubber feet: Ninety (90) days from date of purchase
THIS PAGE WAS INTENTIONALLY LEFT BLANK

text_image
SIMPSON
READ THIS MANUAL CAREFULLY BEFORE OPERATION
Failure to follow the instructions and safety precautions in this manual can result in property damage, serious injury and/or death.
SAVE THIS MANUAL FOR FUTURE REFERENCE

text_image
SIMPSON®LAVEUR SOUS PRESSION
GUIDE D'UTILISATION ET D'ENTRETIEN
natural_image
Line drawing of a portable water heater with wheels and control panel (no text or symbols)
natural_image
Line drawing of a mechanical power supply with hoses and wheels (no text or symbols)
LIRE ATTENTIVEMENT CE GUIDE AVANT L'UTILISATION
Hoses may pose a tripping hazard that can cause injuries resulting from a fall.

RISQUES DE GLISSEMENT ET DE TRÉBUTS
text_image
KEEP OUT HIGH PRESSURE WASHING IN PROGRESS
text_image
CAUTION SLIPPERY WHEN WETnatural_image
Illustration of a worker standing on an orange-and-white striped barrier with a blue head (no text or symbols)
natural_image
Illustration of two orange traffic cones with white and black stripes, connected by a dashed orange bar (no text or symbols)AVISAVI
natural_image
Technical line drawing of a mechanical component with no visible text or symbols
Bouchon de reniflard NOIR
natural_image
Simple line drawing of a rectangular object with two circular holes and an arrow indicating rotational motion (no text or symbols)
natural_image
Simple line drawing of a rectangular device with two arrows pointing to its top panel (no text or symbols)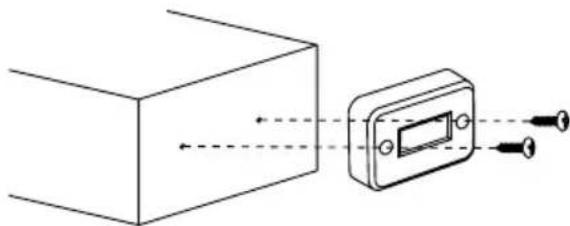
natural_image
Diagram showing a rectangular block connected to a device with arrows indicating direction (no text or symbols present)Organiser les accessoires
natural_image
Technical illustration of a mechanical component with a meshed circular feature and an arrow indicating direction (no text or symbols)natural_image
Technical line drawing of a threaded connector with a close-up view showing internal structure (no text or symbols)natural_image
Technical line drawing showing a pipe fitting before and after assembly (no text or symbols)natural_image
Technical line drawing of a mechanical component before and after assembly (no text or symbols)
AVISAVI
PURGE DE LA POMPE
natural_image
Line drawing of a mechanical device with a handle and arrow indicator (no text or symbols)natural_image
Illustration of two hands holding a small object with an arrow pointing to it, no text or symbols presentEmplacement
natural_image
Technical line drawing of a mechanical component with mounting holes and a central curved feature (no text or symbols)Modèle 30 ampères
natural_image
Simple line drawing of a device with a circular button and directional arrow (no text or symbols)natural_image
Illustration of two hands holding a small object with an arrow pointing to it (no text or symbols present)natural_image
Simple line drawing of a switch mechanism with no text or symbolsnatural_image
Two diagrams showing a cylindrical object with internal channels, one marked with a plus sign and the other with a minus sign, both without any text or symbols.natural_image
Diagram of a mechanical component with a circular end connected to a shaft, showing bidirectional arrow (no text or symbols)natural_image
Diagram showing a connector being inserted into a socket, with no text or symbols present.natural_image
Diagram of a mechanical component with a meshed circular base and an arrow indicating direction (no text or symbols)Entretien de la pompe
natural_image
Technical line drawing of a mechanical device with a gas jar and directional arrow (no text or symbols)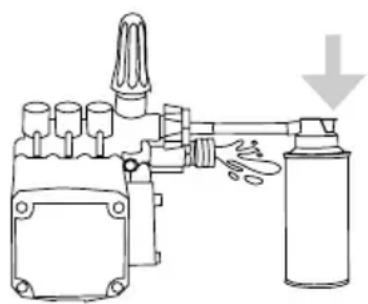
natural_image
Diagram of a mechanical device with a spray bottle and cylindrical components, no text or symbols presentGARANTIE LIMITÉE
natural_image
Line drawing of a pressure water heater with motor and wheels (no text or symbols)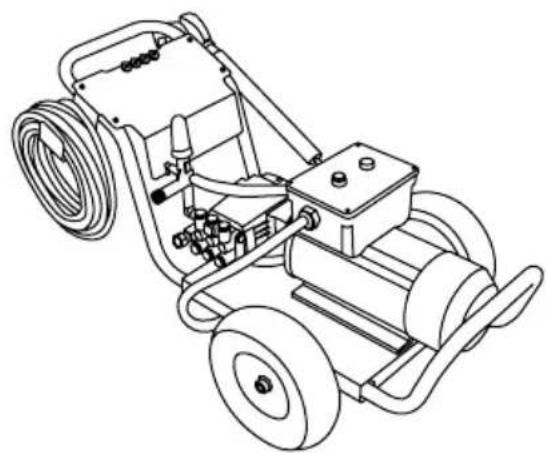
natural_image
Line drawing of a mechanical power supply vehicle with hoses and wheels (no text or symbols)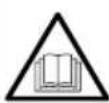
text_image
PRECAUCION:Hoses may pose a tripping hazard that can cause injuries resulting from a fall.

PRECAUCION:
PELIGROS DE RESBALÓN / TROPIEZO
text_image
KEEP OUT HIGH PRESSURE WASHING IN PROGRESS
text_image
CAUTION SLIPPERY WHEN WETnatural_image
Illustration of a worker standing on an orange-and-white striped barrier with a blue head (no text or symbols)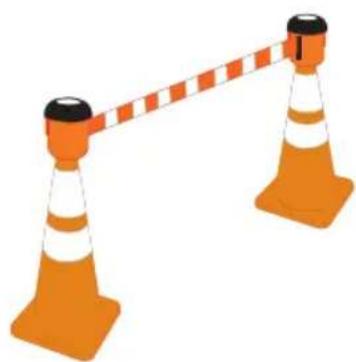
natural_image
Illustration of two orange traffic cones with white and orange stripes, connected by a dashed orange bar (no text or symbols)AVISOAV
natural_image
Technical line drawing of a mechanical assembly (no text or symbols)
natural_image
Simple line drawing of a rectangular object with two circular holes and an arrow indicating rotational motion (no text or symbols)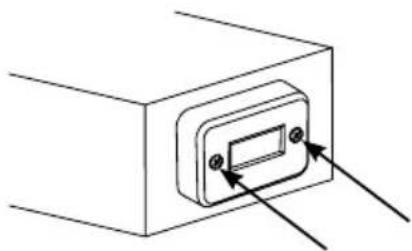
natural_image
Simple line drawing of a rectangular device with two arrows pointing to its top panel (no text or symbols)
natural_image
Diagram showing light rays interacting with a rectangular block and a device (no text or symbols)natural_image
Technical illustration of a mechanical component with a meshed circular feature and an arrow indicating direction (no text or symbols)natural_image
Technical line drawing of a connector with threaded ends and a hexagonal nut (no text or symbols)natural_image
Diagram showing a pipe fitting being processed into a mechanical component (no text or symbols present)natural_image
Technical line drawing of a mechanical component with a left-side arrow indicating assembly or transformation (no text or symbols present)
AVISOAV
PURGA DE BOMBA
natural_image
Line drawing of a spray gun with nozzle and handle (no text or symbols)natural_image
Illustration of two hands holding a small object with an arrow pointing to it (no text or symbols present)natural_image
Simple line drawing of a rectangular device with a central component and mounting holes (no text or symbols)natural_image
Simple line drawing of a device with a button labeled 'I' and an arrow indicating rotation (no text or symbols beyond basic labels)natural_image
Illustration of two hands holding a small object with an arrow pointing to it (no text or symbols present)natural_image
Simple line drawing of a switch mechanism with no text or symbolstext_image
Diagram showing a device with labeled buttons and an arrow indicating direction, possibly for electrical or control operation.flowchart
graph LR
    A["1"] --> B["HOURS"]
    B --> C["2"]
natural_image
Two diagrams showing magnetic field lines around a positively charged conductor, with no text or symbols present.natural_image
Diagram of a mechanical component with a circular end connected to a shaft, showing bidirectional arrow (no text or symbols)natural_image
Diagram showing a connector being inserted into a housing, with no text or symbols present.natural_image
Technical illustration of a mechanical component with a meshed circular base and arrow indicating direction (no text or symbols)natural_image
Technical line drawing of a mechanical device with a gas jar and directional arrow (no text or symbols)