
Distinta EOI406 - Oven DELONGHI - Free user manual and instructions
Find the device manual for free Distinta EOI406 DELONGHI in PDF.

| Product type | Countertop oven |
| Brand | DeLonghi |
| Model | Distinta EOI406 |
| Dimensions (W x H x D) | 435 x 220 x 320 mm |
| Weight | 5.74 kg |
| Power supply voltage | 220-240 V ~ 50/60 Hz |
| Power consumption | 1100 W |
| Cooking functions | Keep warm, Traditional oven, Toast, Grill |
| Temperature range | 140 °C to 220 °C (adjustable via knob) |
| Timer | Mechanical, 45 minutes max, repeatable |
| Thermostat indicator light | Turns on when oven heats, turns off at temperature |
| Interior light | Yes (on some models) |
| Included accessories | Rack, drip tray, diet rack, crumb tray (on some models) |
| Door | Glass |
| Body material | Steel and glass |
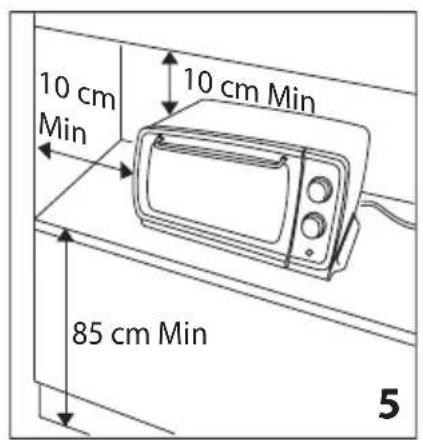
| Installation | On a horizontal surface, back against wall, min. height 85 cm |
| Intended use | Household only, food cooking |
| Safety | Auto-off not specified, but unplug before cleaning |
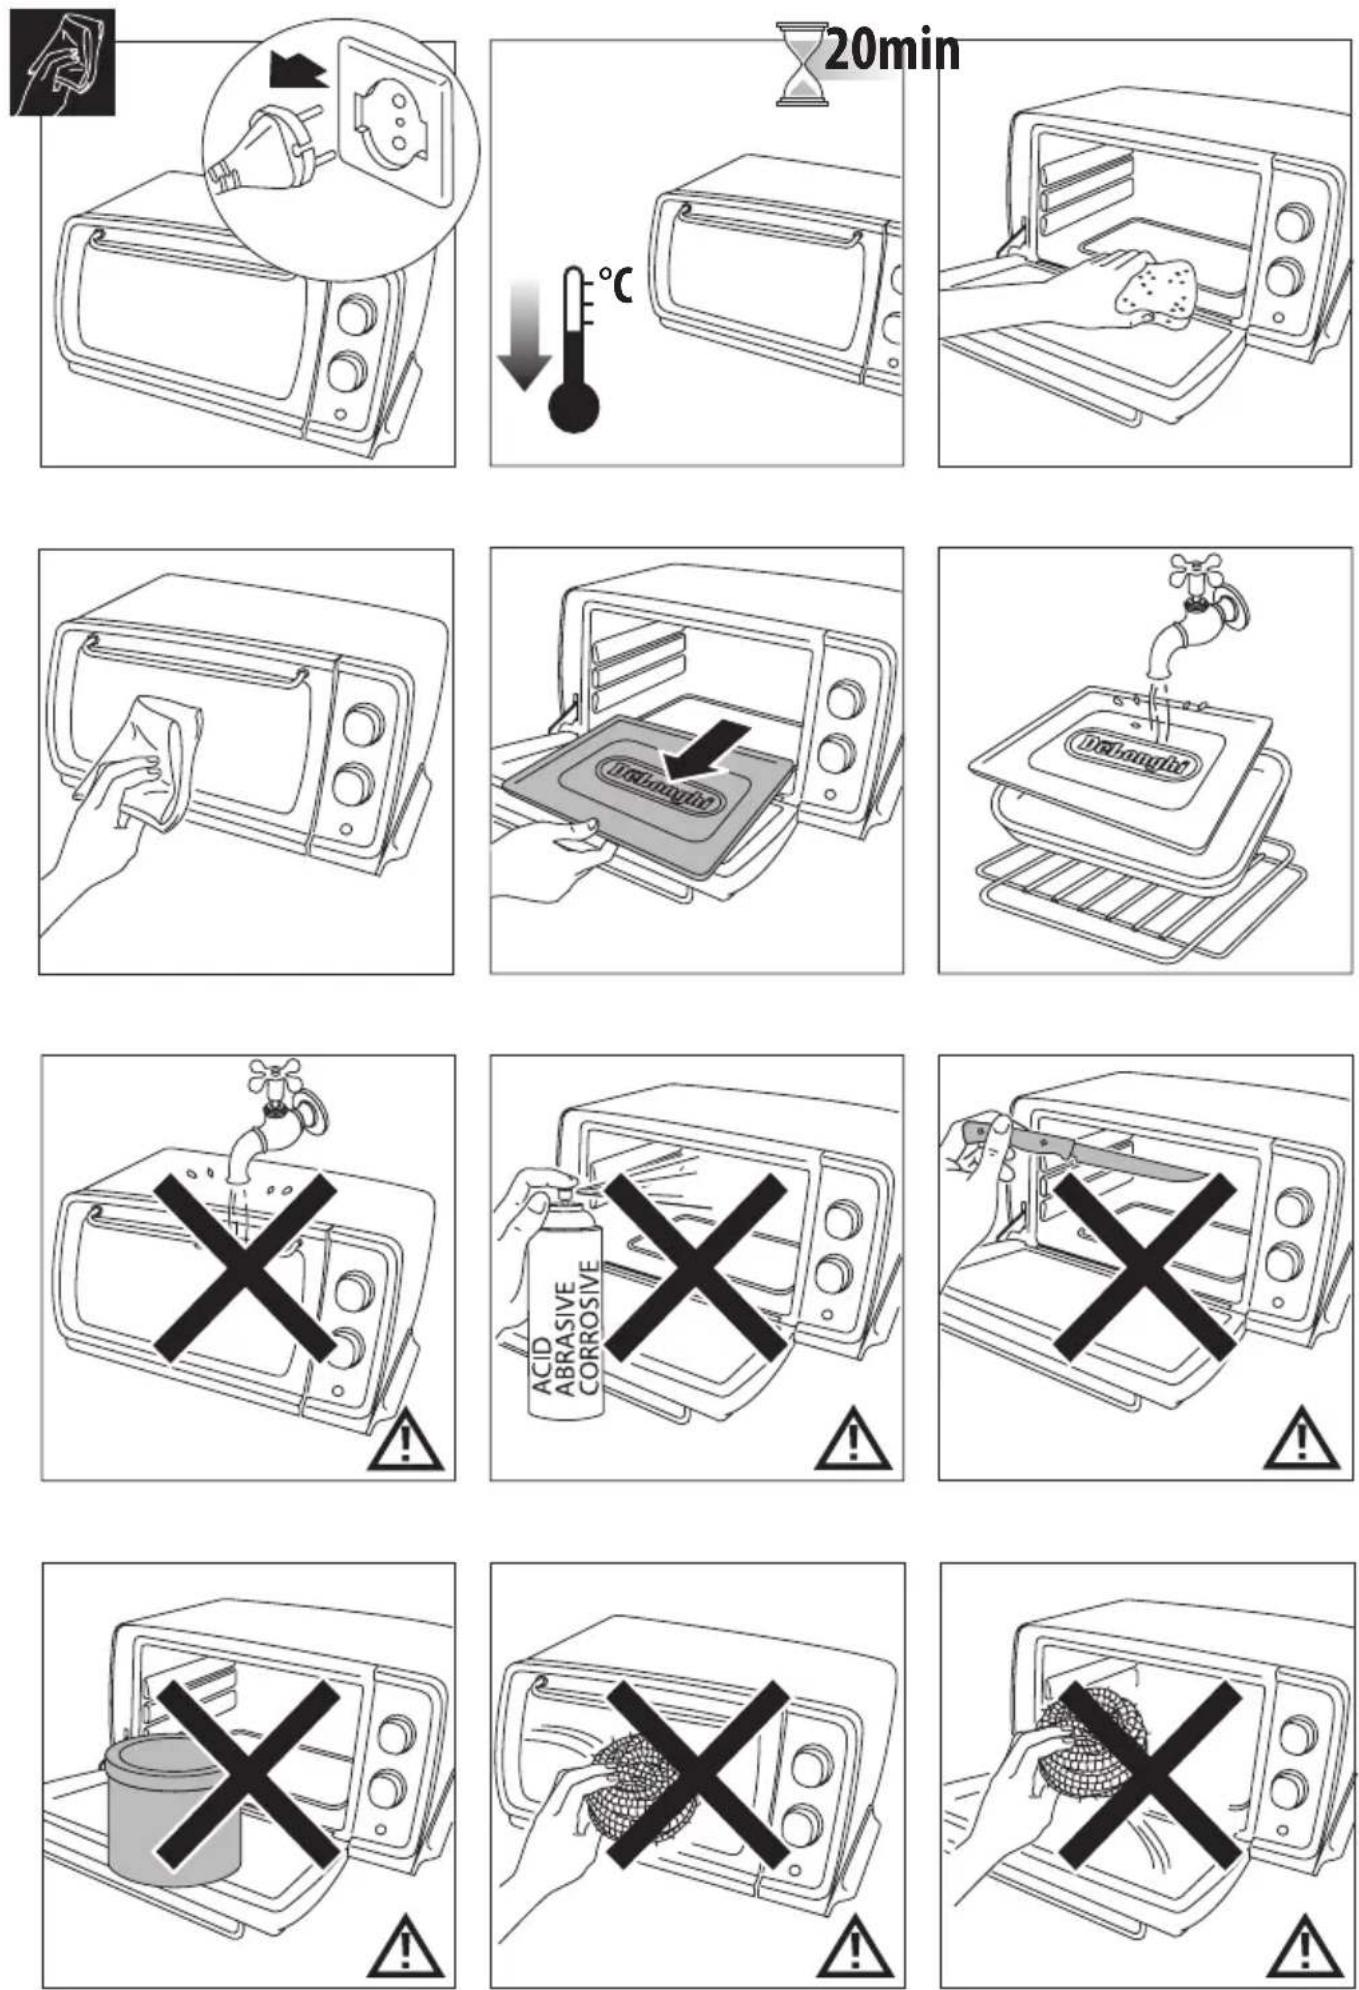
| Cleaning | Do not use acidic or abrasive detergents. Wash accessories with soapy water. |
| Repairability | Do not disassemble yourself. Contact an authorized service center. |
| Compliance | EC Directives: Low Voltage 2006/95/EC, EMC 2004/108/EC, Regulation (EC) No 1935/2004 |
| Disposal | Do not dispose with household waste. Take to a selective sorting center (Directive 2012/19/EU) |
Frequently Asked Questions - Distinta EOI406 DELONGHI
User questions about Distinta EOI406 DELONGHI
0 question about this device. Answer the ones you know or ask your own.
Ask a new question about this device
Download the instructions for your Oven in PDF format for free! Find your manual Distinta EOI406 - DELONGHI and take your electronic device back in hand. On this page are published all the documents necessary for the use of your device. Distinta EOI406 by DELONGHI.
USER MANUAL Distinta EOI406 DELONGHI
natural_image
Brown and beige ceramic microwave oven with black tray and control knobs (no visible text or symbols)FORNO ELETTRICO
ELECTRIC OVEN
FOUR ÉLECTRIQUE
ELEKTROBACKOFEN
ELEKTRISCHE OVEN
HORNO ELÉCTRICO
FORNO ELÉTRICO
ΗΛΕΚΤΡΙΚΟΣ ΦΟΥΡΝΟΣ
стр. 28 old. 31 str. 34 str. 37

A) If your appliance comes fitted with a plug, it will incorporate a 13 Amp fuse. If it does not fit your socket, the plug should be cut off from the mains lead, and an appropriate plug fitted, as below.
WARNING: Very carefully dispose of the cut off plug after removing the fuse: do not insert in a 13 Amp socket elsewhere in the house as this could cause a shock hazard.
With alternative plugs not incorporating a fuse, the circuit must be protected by a 15 Amp fuse. If the plug is a moulded-on type, the fuse cover must be re-fitted when changing the fuse using a 13 Amp Asta approved fuse to BS 1362. In the event of losing the fuse cover, the plug must NOT be used until a replacement fuse cover can be obtained from your nearest electrical dealer. The colour of the correct replacement fuse cover is that as marked on the base of the plug.
B) If your appliance is not fitted with a plug, please follow the instructions provided below:
WARNING - THIS APPLIANCE MUST BE EARTHED IMPORTANT
The wires in the mains lead are coloured in accordance with the following code:
Green and yellow: Earth
Blue: Neutral
Brown: Live
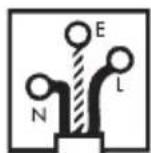
As the colours of the wires in the mains lead may not correspond with the coloured markings identifying the terminals in your plug, proceed as follows:
The green and yellow wire must be connected to the terminal in the plug marked with the letter E or the earth symbol or coloured green or green and yellow.
The blue wire must be connected to the terminal marked with the letter N or coloured black.
The brown wire must be connected to the terminal marked with the letter L or coloured red.
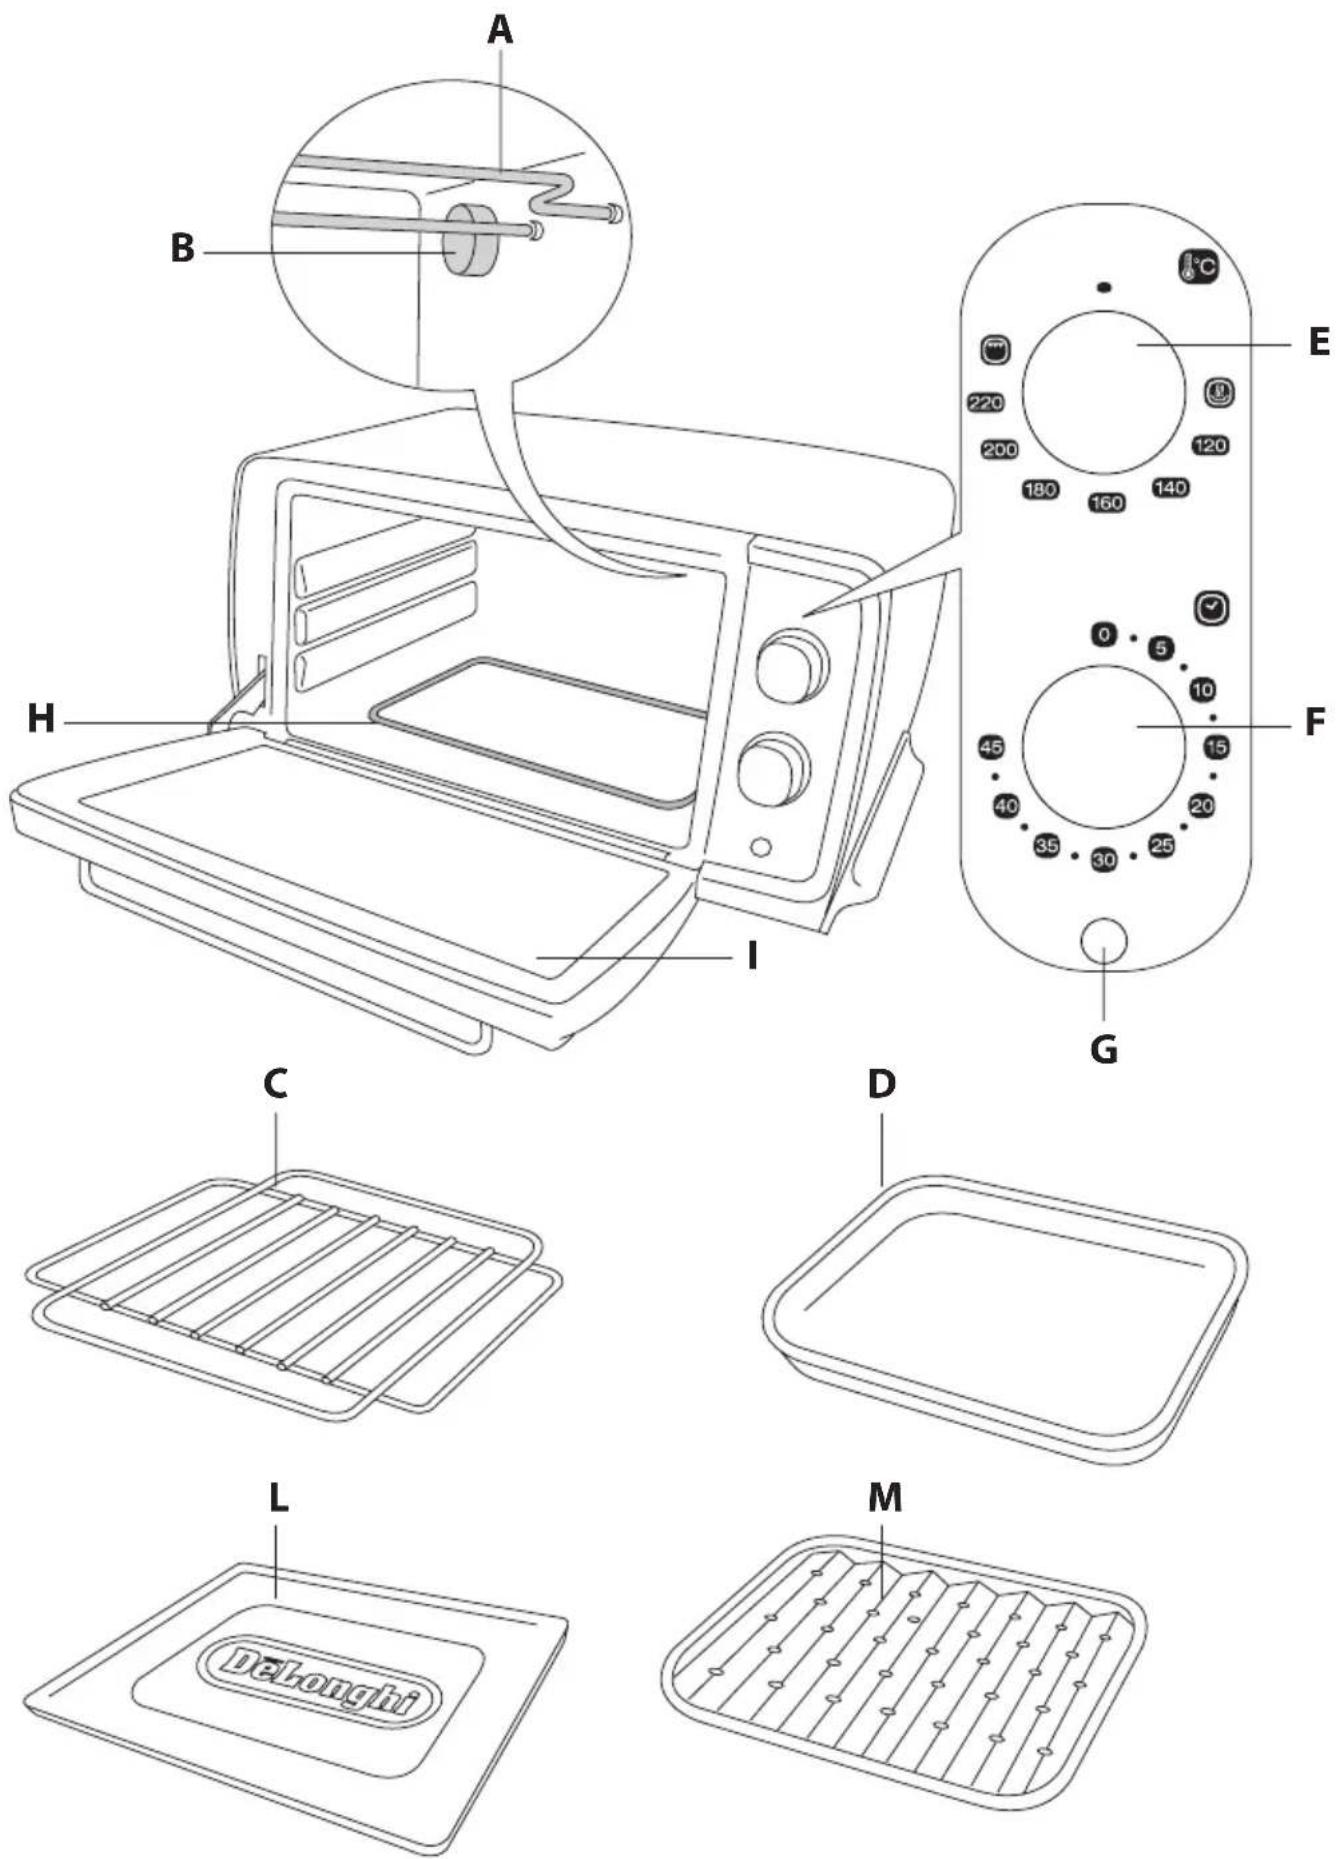
DESCRIZIONE APPARECCHIO
DESCRIPTION OF APPLIANCE
A Top heating element
B Interior lights (only in some models)
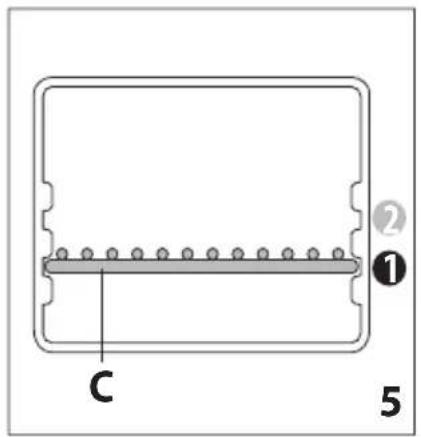
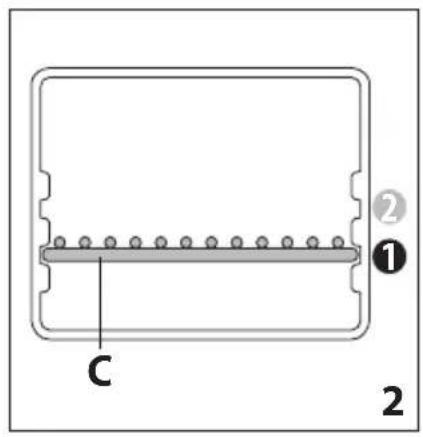
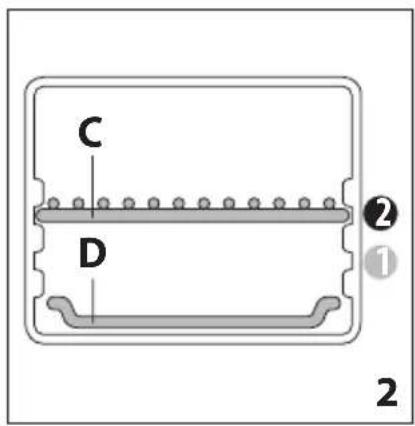
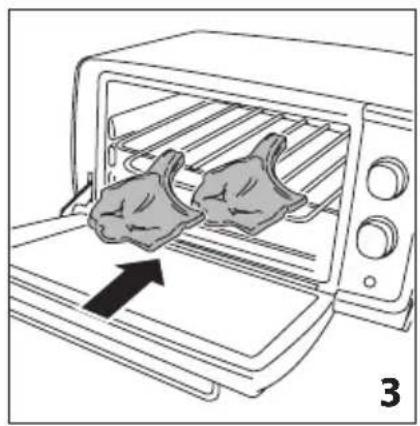
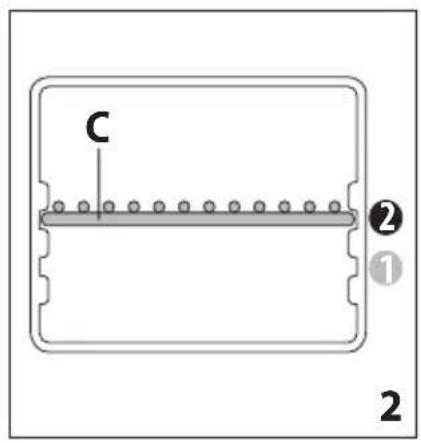
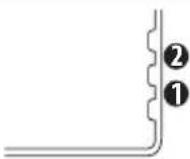
C Wire rack
D Bake pan (only in some models)
E Thermostat/function knob
F Timer knob
G Thermostat light
H Bottom heating element
I Glass door
L Crumb tray
M Broiling rack (only in some models)
TECHNICAL SPECIFICATION
Voltage: 220-240 V \~ 50/60Hz
Absorbed power: 1100 W
External dimension WxDxH: 435 x 220 x 320 mm
Weight: 5.74 kg

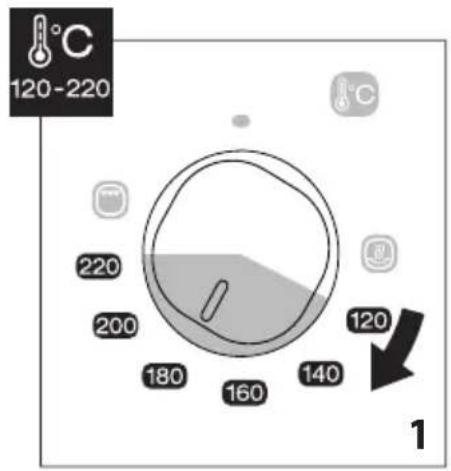
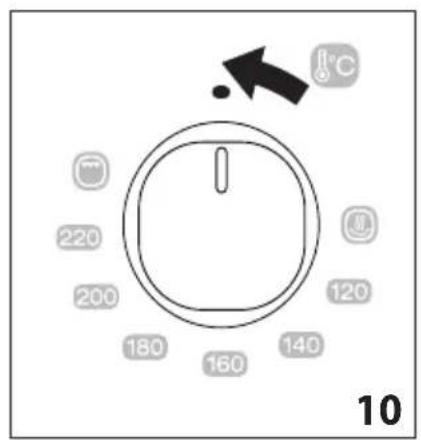
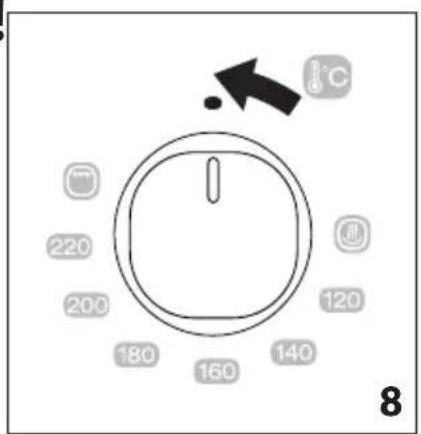
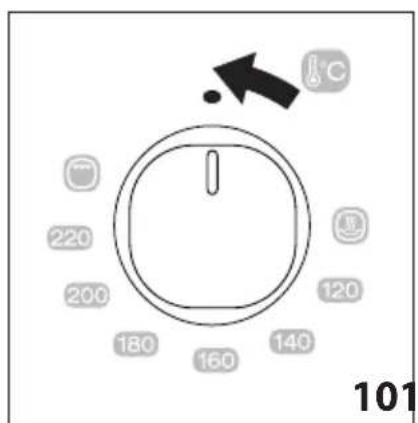
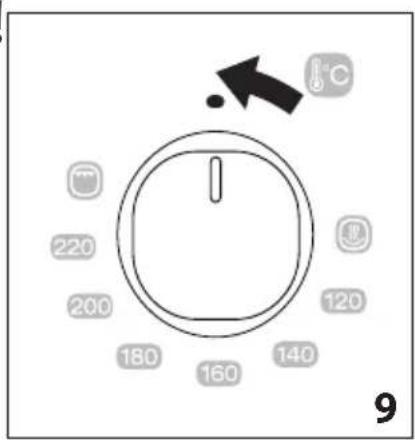
THERMOSTAT/FUNCTION KNOB
KEEP FOOD WARM: perfect for keeping food warm.
Set the thermostat/function knob (E) to

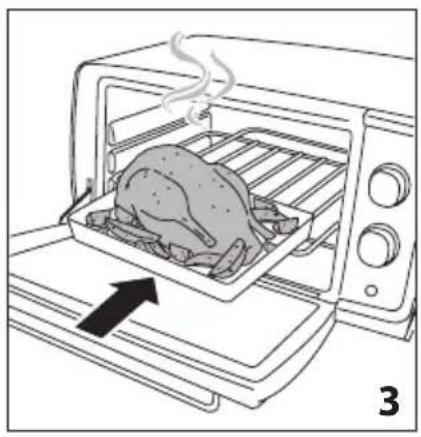
TRADITIONAL OVEN FUNCTION: perfect for all traditional cooking methods.
Set the thermostat/function knob (E) to a temperature between 120. 220
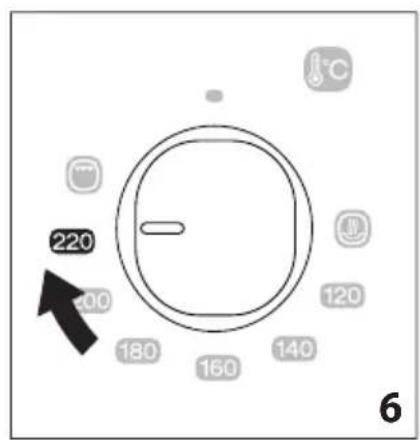
TOAST FUNCTION: perfect for toasting slices of bread.
Set the thermostat/function knob (E) to 220
GRILL FUNCTION: perfect for grilling food.
Set the thermostat/function knob (E) to


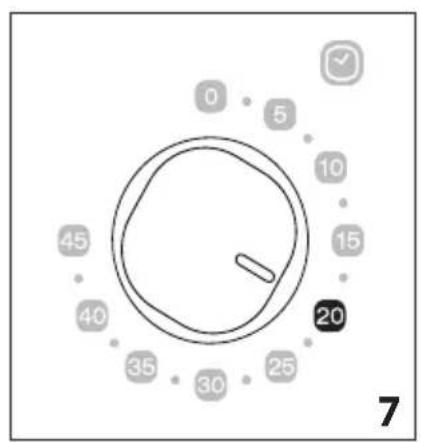
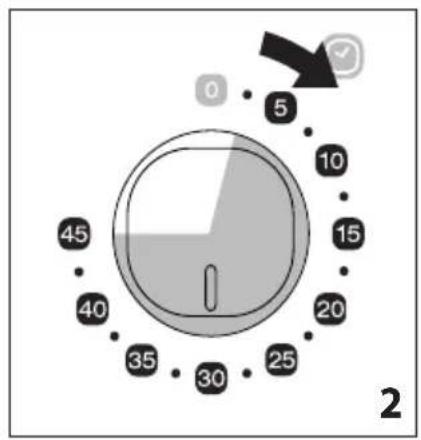
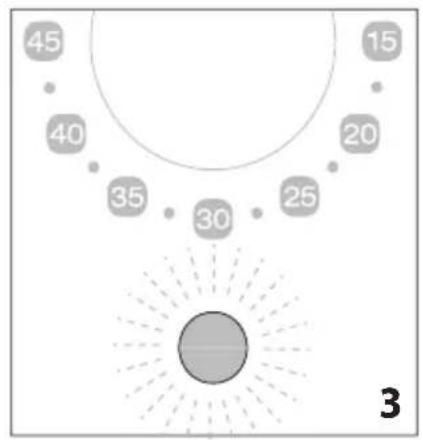
TIMER KNOB
Timer has a 45 minutes maximum duration. If your recipe needs a cooking time longer than this, you can set again the timer knob (F) once the 45 minutes duration has elapsed.
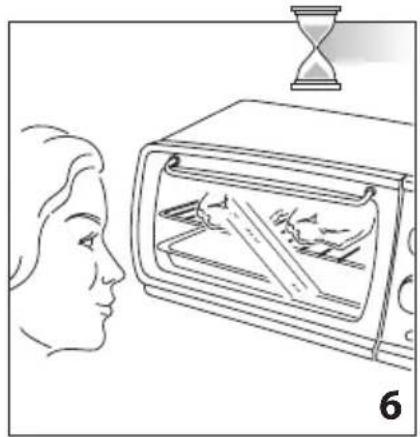
THERMOSTAT LIGHT
The thermostat light (G) lights when the oven is on and turns off when the oven reaches the set temperature.

Please note: For more instructions on the various
functions and for cooking tables, refer to the images on pages 74-81.
IMPORTANT SAFEGUARDS
Read all the instructions carefully before using the appliance. Keep these instructions

Please note:
This symbol identifies important advice or information for the user.
- Before using the oven for the first time, remove paper and other material inside the oven such as protective cardboard, booklets, plastic bags, etc.
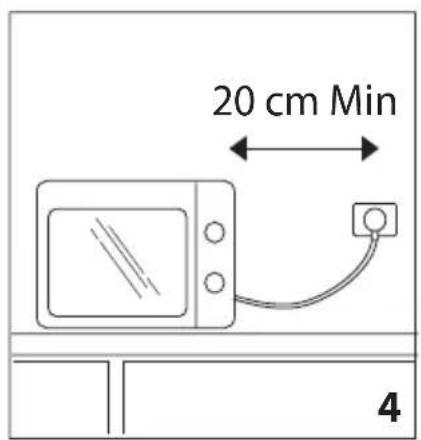
- The appliance must be kept at a distance of at least 20 cm from the mains power socket to which it is connected.
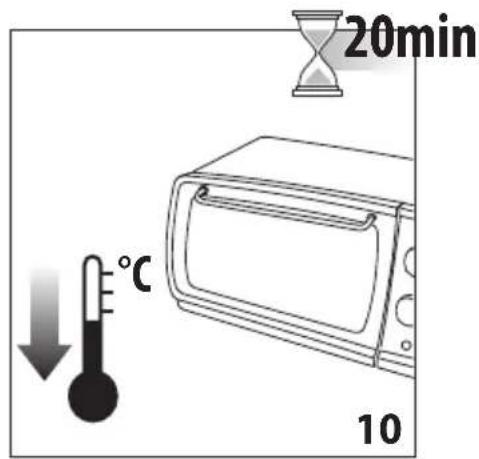
- Before using for the first time, operate the oven empty with the thermostat at maximum for at least 20 minutes to eliminate the "new" smell and any smoke caused by the presence of protective substances applied to the heating elements before transport. Ventilate the room.
• Wash all accessories thoroughly before use. - Do not use acidic or harsh detergents to clean the inside of the oven and accessories. Do not use degreasers, abrasive sponges or steel wool for cleaning the inside or outside of the appliance.

Attention!
Failure to observe the warning could result in injury or damage to the appliance.
- This oven is designed to cook food. It must never be used for other purposes, modified or tampered with in any way.
- When you have unpacked the appliance, make sure the door is undamaged and working correctly. The door is made from glass and is therefore fragile. If it is visibly chipped, scored or scratched, it should be replaced. While using, cleaning or moving the appliance, avoid slamming or knocking the door violently. Do not pour cold liquid onto the glass while the appliance is hot.
- Place the appliance on a level surface at least 85 cm high and out of reach of children.
- This appliance can be used by children aged from 8 years and above and persons with reduced physical, sensory or mental capabilities or lack of experience and knowledge if they have been given supervision or instruction concerning use of the appliance in a
safe way and understand the hazards involved. Children should be supervised to ensure that they do not play with the appliance.
Cleaning and user maintenance shall not be made by children, unless they are more than eight years old and under constant supervision.
- Keep the appliance and power cable away from children under eight years of age.
• Do not move the appliance while in use.
• Do not use the appliance if:
• The power cable is faulty - The appliance has been dropped, is visibly damaged or malfunctions. In these cases, to avoid all risk take the appliance to your nearest authorised customer service centre.
• Never position the appliance near heat sources.
• Do not use the appliance as a heat source. - Never place paper, cardboard or plastic inside the oven and never rest anything on top of the appliance (uten-sils, wire racks, other objects).
- Never insert anything into the ventilation oper. Make sure they are unobstructed.
• This oven is not designed for built-in installation. - Never rest heavy objects, hot dishes or containers on the door when it is open. Do not pull the handle down.
• Professional or inappropriate use, or failure to observe the instructions absolves the manufacturer from all responsibility and invalidates the guarantee. - This is a household appliance only. It is not intended for use in staff kitchen areas in shops, offices and other working environments; farm houses; by clients in hotels, motels and other residential type environments; bed and breakfast type environments.
- When not in use and before cleaning, always unplug
the appliance.
- The appliance must not be operated by a timer or a separate remote control system.
- The appliance must be placed and operated with the back next to the wall.
- Before cleaning, always turn the appliance off by setting the timer to "0" and unplugging it from the mains socket.

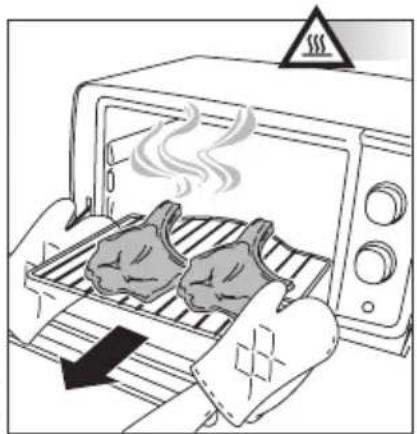
Danger of burns!
Failure to observe the warning could result in scalds or burns.
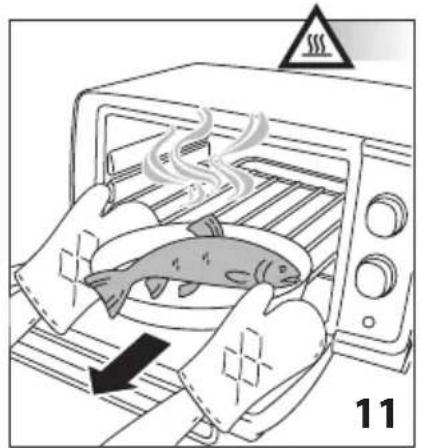
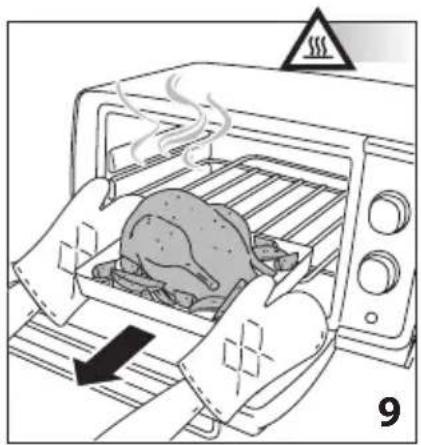
- When in operation, the door and accessible external surfaces could become very hot. Always use the knobs, handles and buttons. Never touch metal parts or the glass. Use oven gloves if necessary.
- This electrical appliance operates at high temperatures which could cause burns.
- Do not leave inflammable products near under the work surface where it is located.
- Never operate the appliance under a wall cupboard or shelf or near inflammable materials such as curtains, blinds, etc.
- If food or other parts of the oven catch fire, never try and put out the flames with water. Close the door, unplug from the mains and smother the flames with a damp cloth.
the

Danger!
Failure to observe the warning may result in life threatening injury by electric shock.
• Before plugging into the mains, make sure that:
- The mains voltage corresponds to the voltage indicated on the rating plate.
- The mains socket has a minimum rating of 16A and an earth wire.
The manufacturer declines all liability in the event that this important accident-prevention rule is not respected.
- Do not let the power cable dangle and avoid touching hot parts of the oven. Never unplug the appliance by
pulling on the power cable.
If you intend to use an extension cord, make sure it is in good condition, that the plug is earthed and that the cross section of the wires is at least equal to that of the power cable provided with the appliance.
• To avoid all risk of electric shock, never immers power cable, plug or appliance itself in water.
- If the power cable is damaged, it be replaced by the manufacturer, the manufacturer's Customer Experience or a qualified electrician in order to eliminate all risk.
- For your personal safety, never take the appliance to pieces on your own. Always contact Customer Services.

The appliance is in compliance with the following CE ectives:
- Low Voltage Directive 2006/95/EC and subsequent amendments;
• EMC Directive 2004/108/EC and subsequent amendments
• Materials and accessories coming into contact with food conform to European regulation (EC) no. 1935/2004.
DISPOSAL
For compliance with European directive 2012/19/EC, the appliance must not be disposed of with household waste, but taken to an authorised waste separation and recycling centre.
DESCRIPTION DE L'APPAREIL
BESCHRIJVING VAN HET APPARAAT
CONTROLELAMPJE THERMOSTAAT
VEILIGHEIDSWAARSCHUWINGEN
HOLDE VARM FUNKTION: ideel for at holde maden varm.
Indstil termostat/funktionsknappen (E) til position

FUNKTION FOR TRADITIONEL OVN: ideel til alle traditionelle stegemåder.
natural_image
Line drawing of a microwave oven with an open box and a curved arrow indicating rotation (no text or symbols)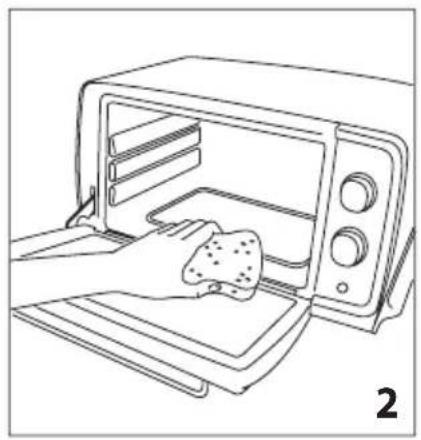
natural_image
Line drawing of a microwave oven with a hand placing food into the oven (no text or symbols)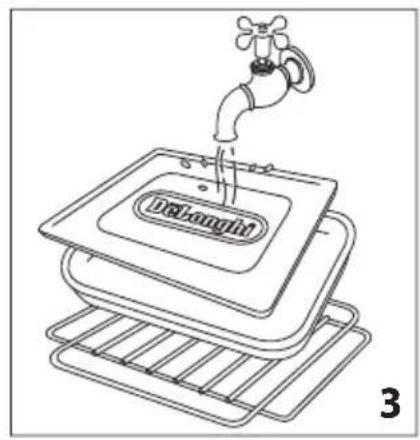

natural_image
Line drawing of a microwave oven with an hourglass icon above (no text or symbols on the device itself)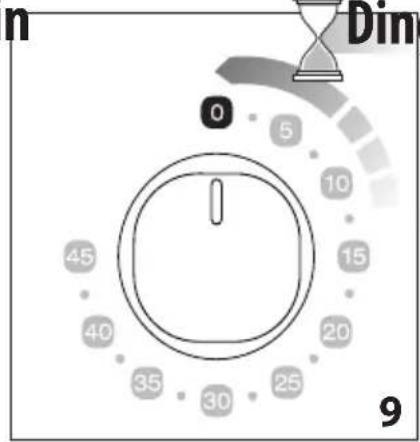
bubble
| Position | Value | |---|---| | Top Left | 45 | | Top Right | 15 | | Bottom Left | 40 | | Bottom Right | 20 | | Bottom Center | 35 | | Bottom Right | 30 | | Bottom Center | 25 | 3 |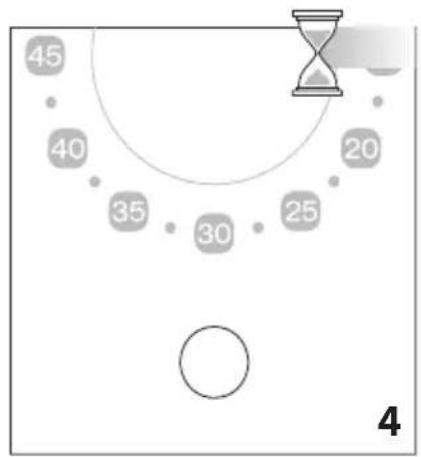
natural_image
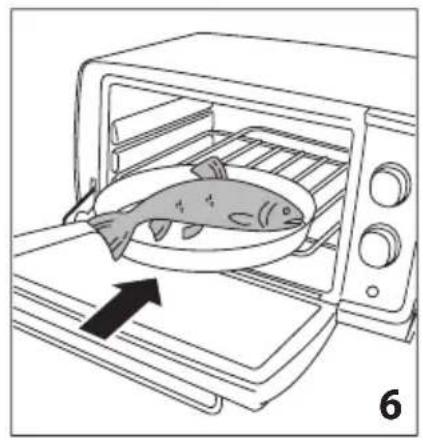
Line drawing of a fish inside an oven with an arrow pointing to it, no text or symbols present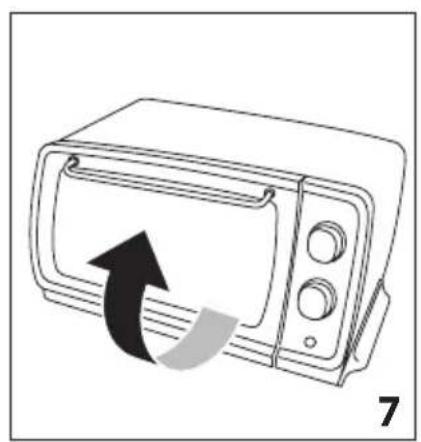
natural_image
Line drawing of a microwave oven with a paper being inserted, showing airflow direction (no text or symbols)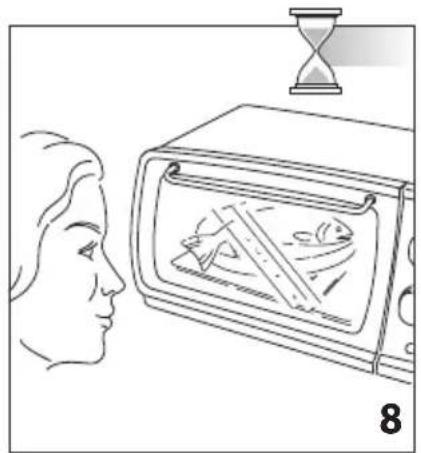
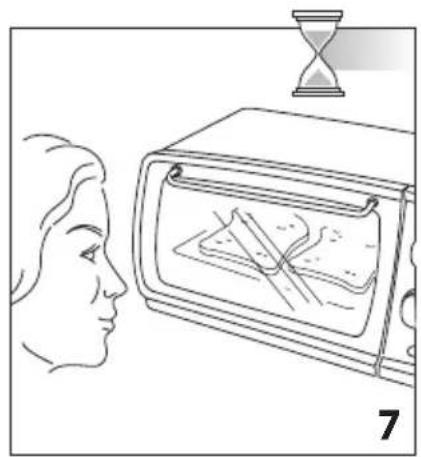
natural_image
Illustration of a person facing a kitchen with an hourglass above, showing food inside the oven (no text or symbols)
natural_image
Illustration of hands holding a toaster oven with a fish inside, emitting steam (no text or symbols)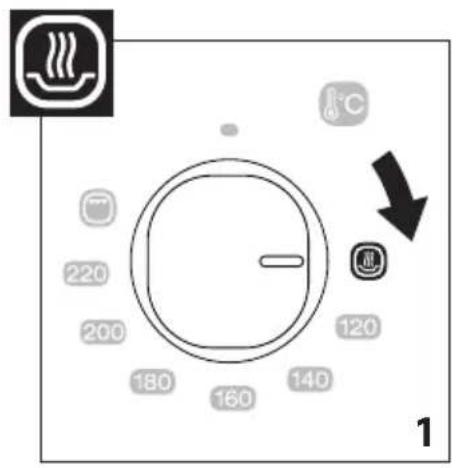
natural_image
Line drawing of a toaster oven with a roasted chicken inside, showing steam rising from the tray (no text or symbols)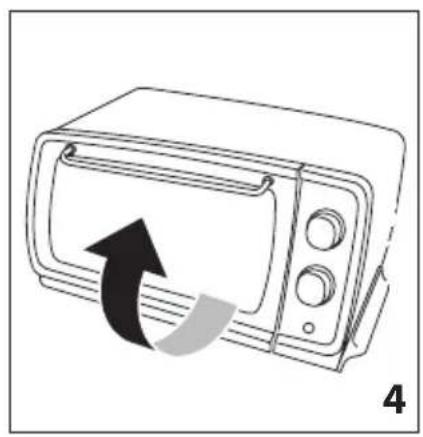
natural_image
Line drawing of a microwave oven with a paper scroll being inserted, no text or symbols present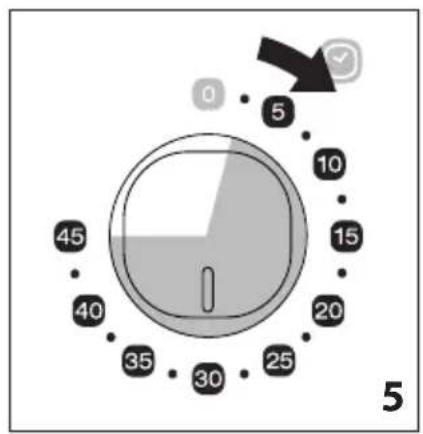
natural_image
Diagram of a grain processing container with directional arrows and an hourglass symbol (no text or labels)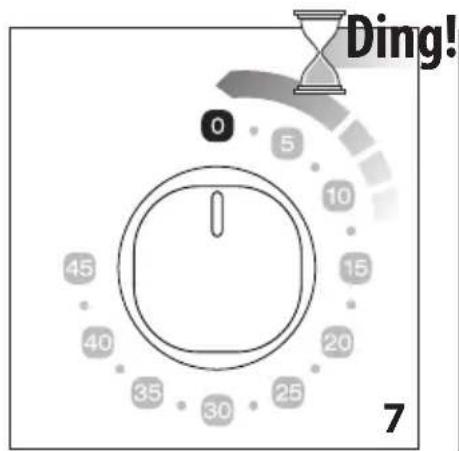
natural_image
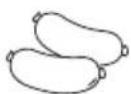
Illustration of a toaster oven with a roasted chicken being placed, showing steam rising from the tray (no text or symbols)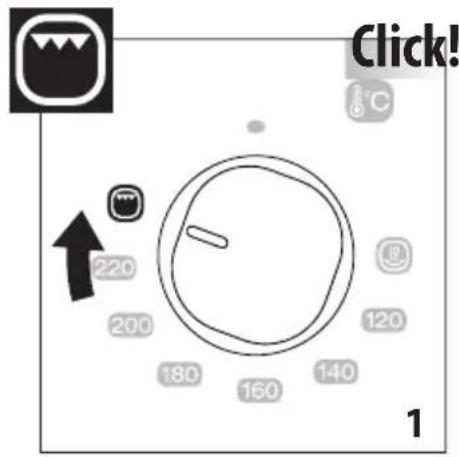
natural_image
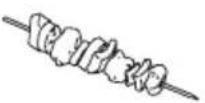
Line drawing of a toaster oven with two chickens inside, one being lifted by an arrow (no text or symbols)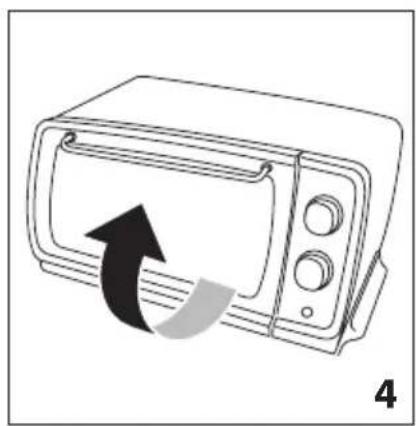
natural_image
Line drawing of a microwave oven with a paper roll being inserted, showing airflow direction (no text or symbols)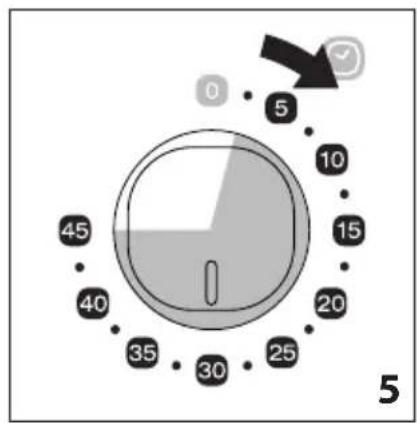
natural_image
Illustration of a person facing a kitchen with an hourglass above, showing food inside the oven (no text or symbols)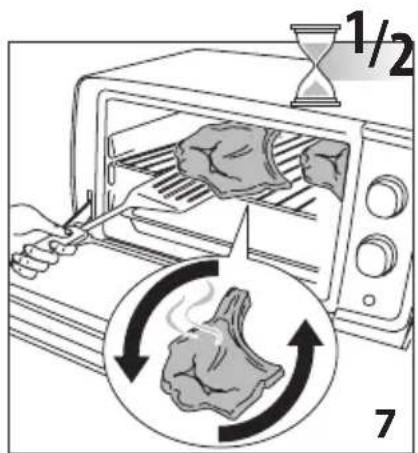

natural_image
Line drawing of a person facing a door with an hourglass above, showing interior lighting and a thought bubble (no text or symbols)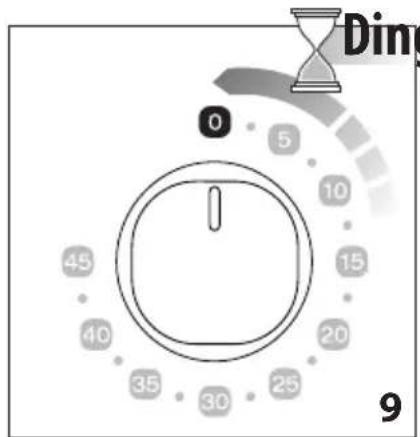
natural_image
Illustration of a toaster oven with two steaming chickens, one being heated by a hand gesture (no text or symbols)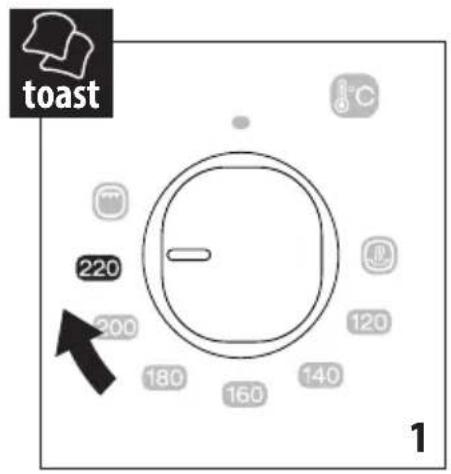
natural_image
Diagram showing two rectangular containers with textured surfaces, separated by a diagonal line (no text or symbols)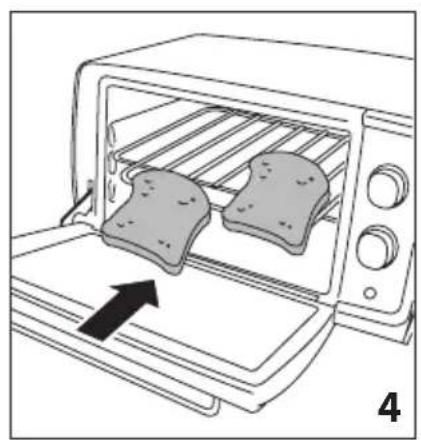
natural_image
Illustration of a toaster oven with two baked goods inside, showing a right-handled tray and an arrow pointing to the lid (no text or symbols)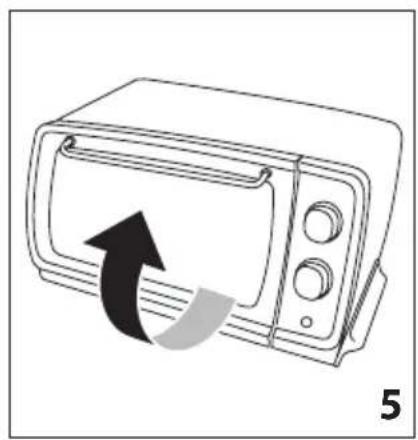
natural_image
Line drawing of a microwave oven with a black arrow indicating airflow or motion (no text or symbols)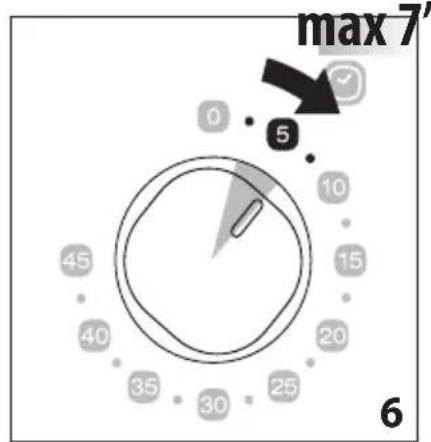
natural_image
Illustration of a person facing a door with an hourglass above, showing a close-up of the window (no text or symbols)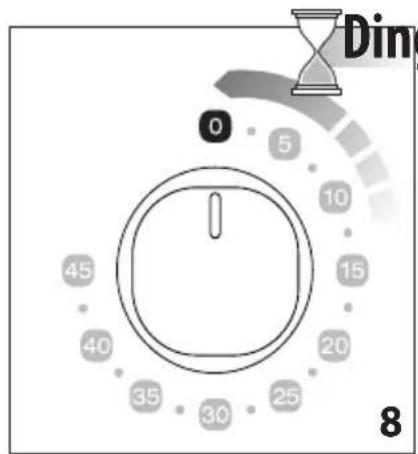
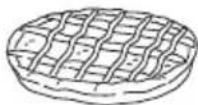
 |  |  |  | |
 | 600g |  | 180°C 30-40 min | |
 | 500g |  | 200°C 25-30 min | |
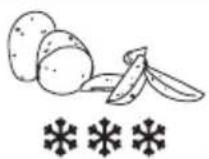
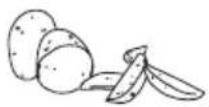
 *** *** | 400g |  | 200°C 20-25 min | |
 | 500g |  | 180°C 35-40 min | |
 | 800g |  | 180°C 35-40 min | |
 | 1000g |  | 200°C 60-70 min | |
 | 800g |  | 190°C 75-85 min | |
 | 500g |  | 40-45 min | |
 | 2 |  | 25-30 min | |
 | 400g |  | 35-45 min | |
 | 600g |  | 200°C 25-30 min | |
 | 600g |  | 200 °C 60-65 | min |
 | 600g |  | 200 °C 60-65 | min |
 | 800g |  | 200 °C 20-25 | min |
 | 300g |  | 180 °C 20-25 | min |
 | 6 |  | 180 °C 15-18 | min |
 | 600g |  | 180 °C 20-25 | min |
 | 700g |  | 180 °C 30-40 | min |
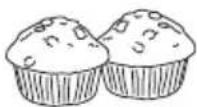 | 12 |  | 170 °C 30-35 | min |
 | 500g |  | 160 °C 90-100 | min |
 | 2 |  | 220 °C 4-5 min | |
 | 4 |  | 220 °C 5-6 min | |
CE
- WARNING - THIS APPLIANCE MUST BE EARTHED IMPORTANT
- DESCRIZIONE APPARECCHIO
- DESCRIPTION OF APPLIANCE
- TECHNICAL SPECIFICATION
- THERMOSTAT/FUNCTION KNOB
- TIMER KNOB
- THERMOSTAT LIGHT
- IMPORTANT SAFEGUARDS
- Please note:
- Attention!
- Danger of burns!
- Danger!
- DISPOSAL
- DESCRIPTION DE L'APPAREIL
- BESCHRIJVING VAN HET APPARAAT
- CONTROLELAMPJE THERMOSTAAT
- VEILIGHEIDSWAARSCHUWINGEN
- CE
Brand : DELONGHI
Model : Distinta EOI406
Category : Oven