AF-202W - Deep fryer Brentwood - Free user manual and instructions
Find the device manual for free AF-202W Brentwood in PDF.

User questions about AF-202W Brentwood
0 question about this device. Answer the ones you know or ask your own.
Ask a new question about this device
Download the instructions for your Deep fryer in PDF format for free! Find your manual AF-202W - Brentwood and take your electronic device back in hand. On this page are published all the documents necessary for the use of your device. AF-202W by Brentwood.
USER MANUAL AF-202W Brentwood
Brentwood® Appliances
© 2021 Brentwood Appliances, Inc.
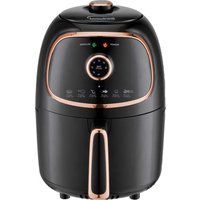
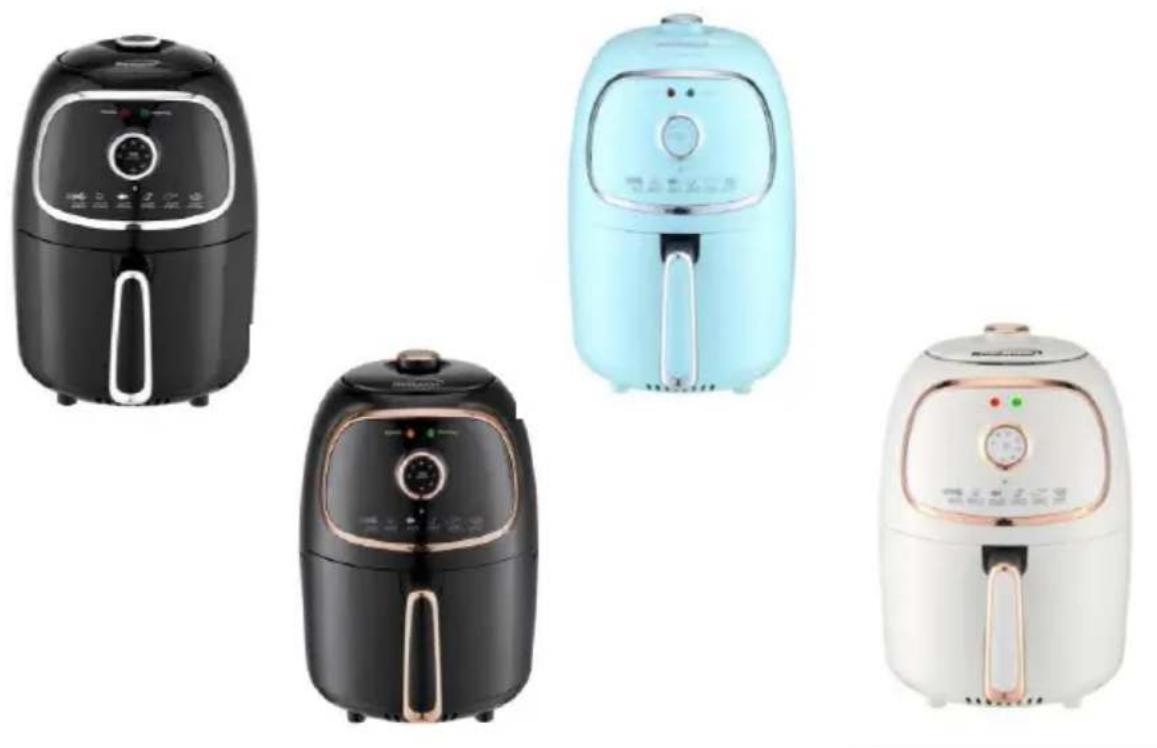
AIR FRYER 2L CAPACITY FREIDORA DE AIRE 2L DE CAPACIDAD FRITEUSE À AIR DE 2L CAPACITÉ
ITEM NO.: AF-202 BK(BLACK), AF-202BLC (BLACK/COPPER TRIM), AF-202BL(BLUE) & AF-202W (WHITE)
Operating and Safety Instructions
FOR INDOOR HOUSEHOLD USE ONLY
When using this or any other electrical appliance, always follow these basic safety precautions, especially when children are present.
READ ALL INSTRUCTIONS BEFORE USE
⚠ WARNING-To reduce the risk of fire, electric shock, serious personal injury and property damage please note the following:
- Never immerse the housing, which contains electrical components and the heating elements, in water or rinsing under the tap.
- Do not allow water to enter the appliance to prevent electric shock or short circuit.
- Keep all ingredients in the fry basket to prevent any contact from heating elements.
- Do not cover the air inlet and the air outlet when the appliance is operating.
- Don't touch the inside of the appliance while it is operating.
- Check if the voltage indicated on the appliance fits the local main voltage.
- Do not use the appliance if there is any damage on plug, main cord or other parts.
- Do not use an unauthorized person to replace or fix damaged main cord.
- Keep the main cord away from hot surfaces.
- Do not plug in the appliance or operate the control panel with wet hands.
- Do not place the appliance against a wall or against other appliances. Leave at least 6 in. free space on the back and sides and 6 in. free space above the appliance.
- Do not place anything on top of the appliance.
- Do not use the appliance for any other purpose than described in this manual.
- Do not let the appliance operate unattended.
- During hot air frying, hot steam is released through the air outlet openings. Keep your hands and face at a safe distance from the steam and from the air outlet openings.
- Be careful of hot steam and air when you remove the fry basket from the appliance.
- Immediately unplug the appliance if you see dark smoke coming out of the appliance. Wait for the smoke emission to stop before you remove the basket from the appliance.
- Ensure the appliance is placed on a horizontal, even, and stable surface.
- This appliance is designed for household use only. It may not be suitable or safe to use in environments such as staff kitchens, farms, motels, and other non-residential environments. Nor is it intended to be used by clients in hotels, motels, bed and breakfasts.
- If the appliance is used improperly or for professional or semi-professional purposes or it is not used according to the instructions in the user manual, the guarantee becomes invalid and we will be excused of any liability for damage caused.
- This product has no user-serviceable parts. Do not attempt to examine or repair this product yourself. Please review the Warranty Policy on Page 8.
• Always unplug the appliance when not in use. - The appliance needs approximately 60 minutes to cool down to safely handle and clean.

text_image
ENGLISHSPECIAL INSTRUCTIONS: A short power supply cord is provided to reduce the risk of becoming entangled in or tripping over a longer cord. An extension cord is not recommended for use with this product, but if one must be used:
— The marked electrical rating must be at least as great as that of the product.
- If the product is of a 3-prong grounding type, the extension cord must be a grounding-type 3-wire cord.
— Arrange the extension cord so that it will not drape over the countertop or tabletop where it can be tripped over or pulled.
- If this product is equipped with a polarized plug, one blade will be wider than the other blade; this is a safety feature. The plug will fit into a polarized outlet only one way. If you are unable to insert the plug into the electrical outlet, try reversing the plug. If the plug still does not fit, contact a qualified electrician. Never use the plug with an extension cord unless you can fully insert the plug into the extension cord. Do not alter the plug. Do not attempt to defeat the safety purpose of the polarized plug.
Parts:
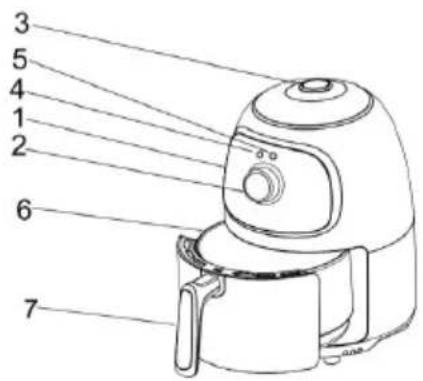
General Description (Fig.1)
- Upper Housing
- Time Knob
- Temperature Control Knob 4. Power Light
- Temperature Control Light 6. Basket
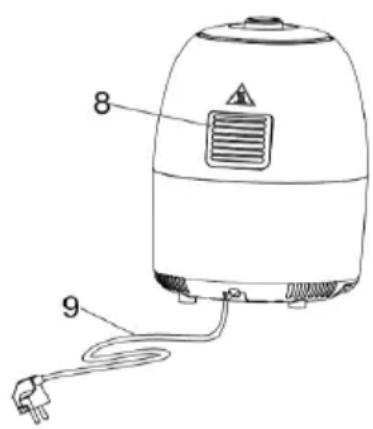
- Basket Handle 8. Air Outlet Openings
- Power Cord
text_image
Labeled diagram of an air fryer with numbered parts for identification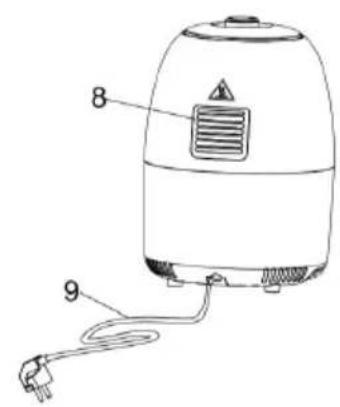
text_image
Diagram of a portable air purifier with labeled parts 8 and 9, showing internal components and wiring.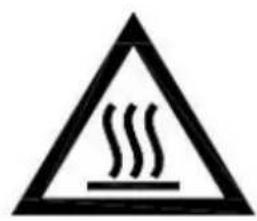
text_image
Warning sign depicting steam rising inside a triangle, indicating heat hazardFig.1
Fig.2
natural_image
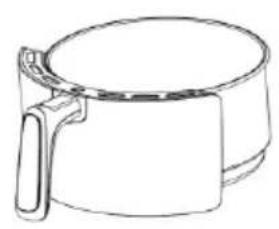
Line drawing of a cylindrical container with a handle, no text or symbols presentFig.3
natural_image
Line drawing of a cylindrical container filled with food items, no text or symbols presentFig.4
natural_image
Line drawing of an air fryer with a handle and side panel, showing no text or symbolsFig.5
natural_image
Line drawing of an air fryer with a handle and side arm, showing no text or symbolsFig.6
natural_image
Line drawing of a modern air fryer with a circular dial indicator (no text or symbols on the device itself)Fig.7
text_image
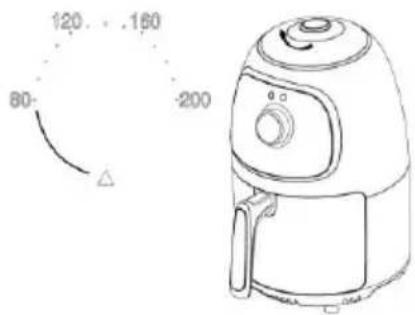
120 .160 80- -200Fig.8
Automatic Shut-Off
This appliance is equipped with a timer, when the timer has counted down to 0, the appliance produces a bell sound and shuts off automatically. To shut off the appliance manually, turn the timer knob counterclockwise to 0.
Before First Use
IMPORTANT: Please check all packaging material carefully before discarding as there may be accessory parts contained within the packaging material.
WARNING: Do not place any part of the product in a dishwasher.
- To remove any dust that may have accumulated, wash the Fry Basket with warm soapy water and dry thoroughly. Wipe the interior and exterior of the Air Fryer with a damp towel. Dry thoroughly. Note: NEVER immerse the air fryer body, cord, or plug in water.
- THIS IS AN OIL-FREE FRYER THAT WORKS WITH HOT AIR, DO NOT FILL THE FRY BASKET WITH OIL OR FRYING FAT.
SAVE THESE INSTRUCTIONS FOR FUTURE REFERENCE
Using Your Air Fryer:
Attention: First use may cause a slight odor or small smoking upon heating, it is normal. This is a result of the heating element chemical reaction. It quickly goes away.
OPERATIONAL LIGHTS:
Timer → Powers Unit On ‘Power On’ (Orange LED)
Temperature → Generates Heat ‘Working’ (Green LED)
Green LED will turn off and on, regulating specified temperature setting.
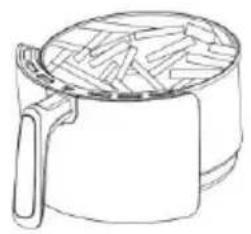
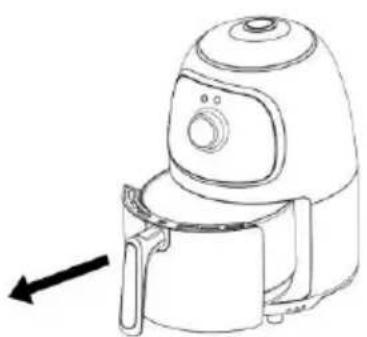
- Carefully pull the basket out of the air fryer (Fig. 6) and put the ingredients in the fry basket. (Fig. 4)
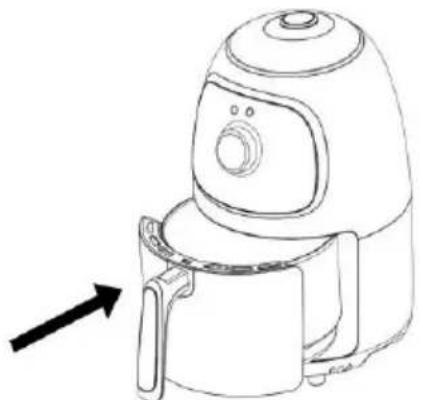
- Slide the fry basket back into the air fryer, carefully align with the guides in the body of the air fryer. (Fig. 5).
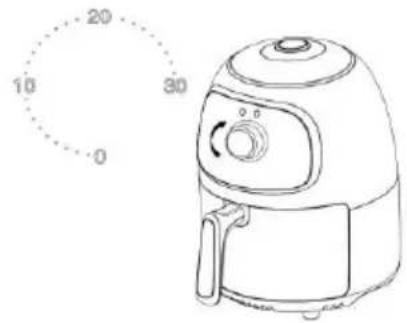
- To switch on the appliance, turn the timer knob to the required preparation time. (Fig. 7) POWER LIGHT (ORANGE) will light up, fan will start.
- Turn the temperature control knob to the required temperature. (Fig. 8) See section "Settings" to determine the right temperature.
Note: If you want, you can also let the appliance preheat without any ingredients inside. In that case, turn the timer knob to more than 3 minutes and wait until the heating-up light (GREEN) goes out (after approx. 3 minutes). Then fill the fry basket and turn the timer knob to the required preparation time.
Some ingredients require shaking halfway through the preparation time. To shake the ingredients, pull the fry basket out of the appliance by the handle and shake it. Then slide the fry basket back into the air fryer. Tip: If you set the timer to half the preparation time, you hear the timer bell when you have to shake the ingredients. However, this means that you have to set the timer again to the remaining preparation time after shaking.
Caution: Do not touch the fry basket during and sometime after use, as it gets very hot.
Only hold the fry pan by the handle. The appliance needs approximately 60 minutes to cool down to safely handle and clean.
- When you hear the timer bell, the set preparation time has elapsed. Pull the fry basket out of the appliance. Check if the ingredients are ready.
- To remove ingredients, pull the fry basket out of the air fryer. Use a non-metal spatula or a pair of tongs to remove ingredients to a clean plate.
- DO NOT turn the fry basket upside down to dump the food on a plate, as any excess oil that has collected on the bottom of the fry basket, under the trivet, will leak onto the ingredients. These ingredients will be VERY HOT. WARNING: CAUTION DO NOT TOUCH ANY PART OF THE BASKET IMMEDIATELY AFTER USE.
- The Air Fryer is instantly ready for preparing the next batch once you have made the first batch.
- DO NOT prepare overly greasy ingredients, such as sausage, in the air fryer.
- You can also use the air fryer to reheat ingredients. To reheat ingredients, set the temperature to 300F for up to 10 minutes.
Cleaning Your Air Fryer:
WARNING: Always turn the appliance "Off," unplug the product, and allow it to cool before cleaning or storing it.
- Wipe the outside of the appliance with a damp cloth.
- Clean the fry basket and trivet with hot water, dish soap and a non-abrasive sponge.
- You can use degreasing liquid to remove any remaining food.
Tip: If food is stuck to the basket or the trivet, fill the basket with hot soapy water. Put the trivet in the basket and let the trivet and the basket soak for approx. 10 minutes.
- Clean the inside of the appliance with hot water and non-abrasive sponge.
IMPORTANT: Never submerge the base or clean under running water.
SETTINGS:
| Min-max Amount (oz) | Time (min.) | Temperature (°F) | Shake | Extra information | |
| Potato & fries | |||||
| Thin frozen fries | 7-10.5 | 18-20 | 400 | shake | |
| Thick frozen fries | 7-10.5 | 20-25 | 400 | shake | |
| Potato gratin | 10.5 | 20-25 | 400 | shake | |
| Meat & Poultry | |||||
| Steak | 3.5-10.5 | 10-15 | 355 | ||
| Pork chops | 3.5-10.5 | 10-15 | 355 | ||
| Hamburger | 3.5-10.5 | 10-15 | 355 | ||
| Sausage roll | 3.5-10.5 | 13-15 | 400 | ||
| Drumsticks | 3.5-10.5 | 25-30 | 355 | ||
| Wings | 3.5-10.5 | 10-20 | 380-400 | shake | |
| Chicken breast | 3.5-10.5 | 15-20 | 355 | ||
| Snacks | |||||
| Spring rolls | 100-250 | 8-10 | 400 | shake | Use oven-ready |
| Frozen chicken nuggets | 3.5-10.5 | 6-10 | 400 | shake | Use oven-ready |
| Frozen fish fingers | 3.5-9 | 6-10 | 400 | Use oven-ready | |
| Frozen bread crumbed cheese snacks | 3.5-9 | 8-10 | 355 | Use oven-ready | |
| Stuffed vegetables | 3.5-9 | 10 | 320 | ||
Recipes:
French Fries
Serves 4
Ingredients
- 2 Russet potatoes
• 1 tablespoon olive oil
Directions:
- Blanch the potatoes in water until tender.
- Let cool. Cut into fries. Toss with olive oil and salt and pepper.
- Place the potatoes into the Fry Basket and then into the Air Fryer.
- Turn knobs to set cooking time to 18 minutes and temperature to 400 degrees.
- Halfway through cooking, toss the fries. Shake periodically.
Chicken Wings
Makes 2 batches
Ingredients
• 10 large chicken drumettes
- Cooking spray
• 1/4 cup rice vinegar
- 3 tbsp honey
• 2 tbsp unsalted chicken stock
• 1 tbsp lower-sodium soy sauce
• 1 tsp toasted sesame oil
• 3/8 tsp crushed red pepper
• 1/2 clove of garlic, finely chopped
- 1 tbsp chopped unsalted roasted peanuts
• 1/2 tablespoon chopped fresh chives
Directions: Place chicken in single layer in air fryer basket; coat well with cooking spray. Cook at 400^ F until skin is very crispy, 30 minutes, turning drumettes over halfway through cooking. Meanwhile, stir together vinegar, honey, stock, soy sauce, oil, crushed red pepper, and garlic in a small skillet. Bring to a simmer over medium-high; cook until slightly thickened and almost syrupy, 6 minutes. Place drumettes in a medium bowl. Add honey mixture and toss to coat. Sprinkle with peanuts and chives.
ONE YEAR LIMITED WARRANTY
Write down the following information about your appliance to better help you obtain assistance or service if you ever need it.
CUSTOMER RECORD
Date of Purchase ____ Store/Dealer ____
Model/Item No: ____
THIS WARRANTY APPLIES TO PRODUCTS PURCHASED AND USED IN THE CONTINENTAL U.S. AND CANADA ONLY. This is the only express warranty for this product and is in lieu of any other warranty or condition. This product is warranted to be free from defects in material and workmanship for a period of one (1) year from the date of original purchase. During this period, your exclusive remedy is repair or replacement of this product, at our option; however, you are responsible for all costs associated with returning the product to us and our returning a product or component under this warranty to you. If the product or component is no longer available, we will replace with a similar one of equal or greater value. This warranty does not cover glass, filters, wear from normal use, use not in conformity with the printed directions, or damage to the product resulting from accident, alteration, abuse, or misuse.
THIS WARRANTY EXTENDS ONLY TO THE ORIGINAL CONSUMER PURCHASER. KEEP THE ORIGINAL SALES RECEIPT, AS PROOF OF PURCHASE IS REQUIRED TO MAKE A WARRANTY CLAIM.
This warranty is void if the product is used for other than single-family household use or subjected to any voltage and waveform other than what is specified on the rating label (E.G., 120V\~60Hz). We exclude all claims for special, incidental, and consequential damages caused by breach of express or implied warranty. All liability is limited to the amount of the purchase price. Every implied warranty, including any statutory warranty or condition of merchantability or fitness for a particular purpose, is disclaimed except to the extent prohibited by law, in which case such warranty or condition is limited to the duration of this written warranty. This warranty gives you specific legal rights. You may have other legal rights that vary depending on where you live. Some states do not allow limitations on implied warranties or special, incidental, or consequential damages, so the foregoing limitations may not apply to you. To make a warranty claim do not return this appliance to the store.
TO OBTAIN WARRANTY SERVICE AND/OR TROUBLESHOOTING INFORMATION:
Call Customer Service at 1-888-903-0060 in the U.S.
Monday through Friday: 9:00am – 5:00pm PST.
U.S.A. Customers Please Email: warranty@brentwoodus.com
Canadian Customers Please Email: canada.warranty@brentwoodus.com
Go online at www.brentwoodus.com
PRECAUCIONES IMPORTANTES

text_image
Labeled diagram of an air fryer with numbered parts for identificationFig.1
text_image
Diagram of a portable air purifier with labeled parts 8 and 9, showing internal components and wiring.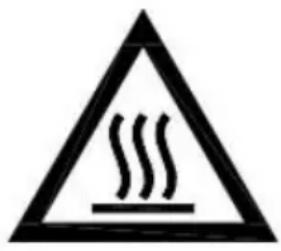
text_image
Warning sign depicting steam rising inside a triangle, indicating hazard or thermal hazard.Fig.2
text_image
Labeled diagram of an air fryer with numbered parts for identification
text_image
Diagram of a portable air purifier with labeled parts 8 and 9, showing internal components and wiring.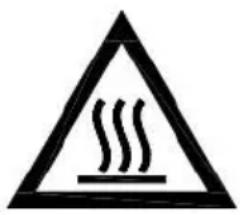
text_image
Warning symbol depicting steam rising inside a triangle, indicating heat or hazardFig.1
Fig.2
CONSERVEZ CES INSTRUCTIONS
© 2021 Brentwood Appliances, Inc.