MPI-60 - Iron Brentwood - Free user manual and instructions
Find the device manual for free MPI-60 Brentwood in PDF.

User questions about MPI-60 Brentwood
0 question about this device. Answer the ones you know or ask your own.
Ask a new question about this device
Download the instructions for your Iron in PDF format for free! Find your manual MPI-60 - Brentwood and take your electronic device back in hand. On this page are published all the documents necessary for the use of your device. MPI-60 by Brentwood.
USER MANUAL MPI-60 Brentwood
Brentwood® Appliances
© 2021 Brentwood Appliances, Inc.
STEAM IRON PLANCHA DE VAPOR / FER À VAPEUR
ITEM NO.: MPI-60 (White), MPI-61 (Red), & MPI-62 (Black)
natural_image
Three different types of electric iron machines shown in blue, red, and black, with no visible text or symbols.When using this or any other electrical appliance, always follow these basic safety precautions, especially when children are present.
READ ALL INSTRUCTIONS BEFORE USE
⚠ WARNING-- To reduce the risk of fire, electric shock, serious personal injury and property damage please note the following:
- This product is not intended for use by children. Keep the product out of reach of children and pets. Extra caution is necessary when using this appliance near children.
- Always ensure the product is unplugged from the electrical outlet and allowed to cool before assembling, disassembling, relocating, or cleaning it.
- Do not leave the product unattended while it is in use. Always unplug the product from the electrical outlet when not in use.
- Do not immerse the Base, Power Cord, or Plug of this product in or expose the Power Cord or Plug to water or other liquids.
- Do not touch hot surfaces. Use handle when handling product.
- Take proper precautions to prevent burns, fire, or personal or property damage as this appliance generates heat and steam during use.
- Do not use attachments not recommended or sold by the product manufacturer.
- Do not place on or near a hot gas or electric burner, in a heated oven, or other heated surfaces.
- Use the product in a well-ventilated area. Keep at least 4-6 inches of space on sides of the product to allow adequate air circulation.
- Use appliance on a table or flat surface. Keep the product away from curtains, wall coverings, clothing, dishtowels, or other flammable materials.
- Do not plug or unplug the product from the electrical outlet with a wet hand.
- This product is intended solely for non-commercial, non-industrial, household use; do not use the product outdoors or for any other purpose.
- Do not let cord hang over edge of table or counter where it may be tripped over or pulled. Do not allow cord to touch hot surfaces.
- Do not operate the product if it has a damaged or cut Power Cord or plug, if wires are exposed, if it malfunctions, if it is dropped or damaged, or if the Motor Housing is dropped in or expose to water.
- This product has no user-serviceable parts. Do not attempt to examine or repair this product yourself. Please review the Warranty Policy on Page 6.
- Do not put any stress on the power cord where it connects to the product, as the power cord could fray and break.
SPECIAL INSTRUCTIONS:
- The Iron should always be turned to "MIN" before plugging or unplugging from outlet.
- ways disconnect Iron from the outlet when filling with water, emptying and when not in use.
- Use caution when you turn the Iron upside down as there still be hot water in the reservoir.
- An extension cord is not recommended for use with this product, but if one must be used:
- The marked electrical rating must be at least as great as that of the product.
- Arrange the extension cord so that it will not drape over the countertop or tabletop
where it can be tripped over or pulled.
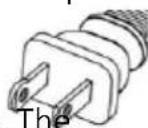
WARNING: This product is equipped with a polarized plug (one blade is wider than the other blade) to reduce the risk of electrical shock. This is a safety feature. The plug will fit into a polarized outlet only one way. If you are unable to insert the plug into the electrical outlet, try reversing the plug. If the plug still does not fit, contact a qualified electrician. Never use the plug with an extension cord unless you can fully insert the plug into the extension cord. Do not alter the plug. Do not attempt to defeat the safety purpose of the polarized plug.
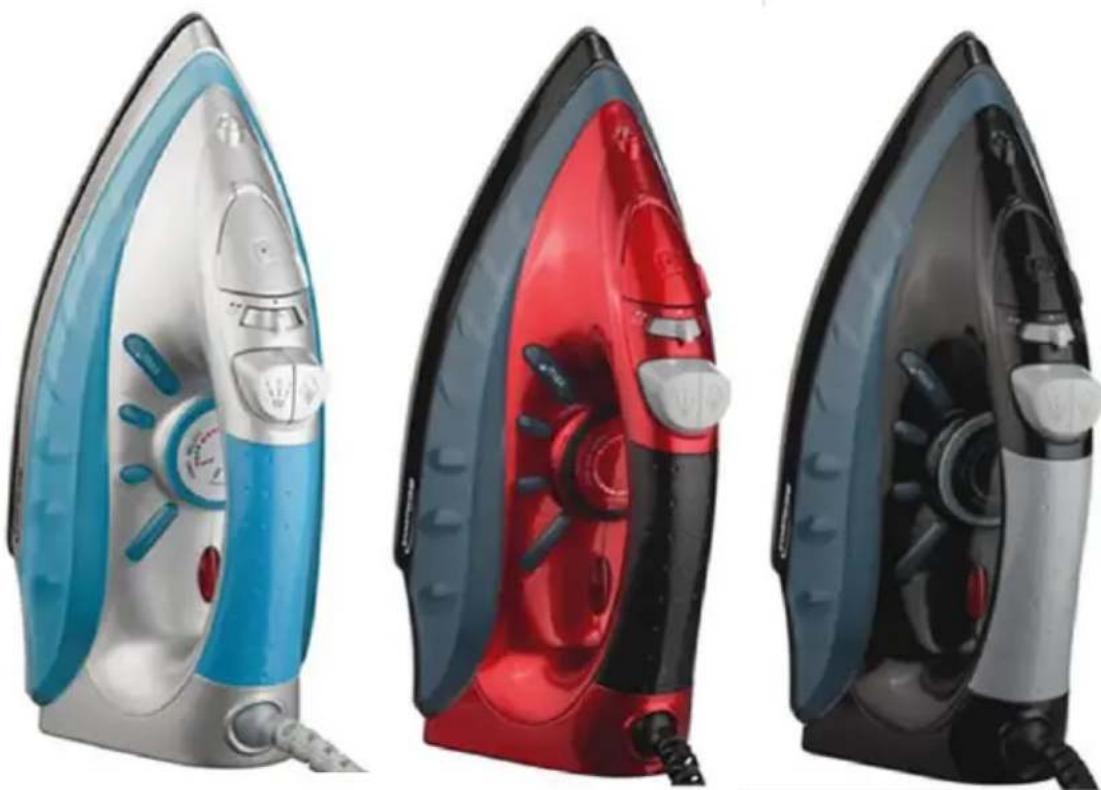
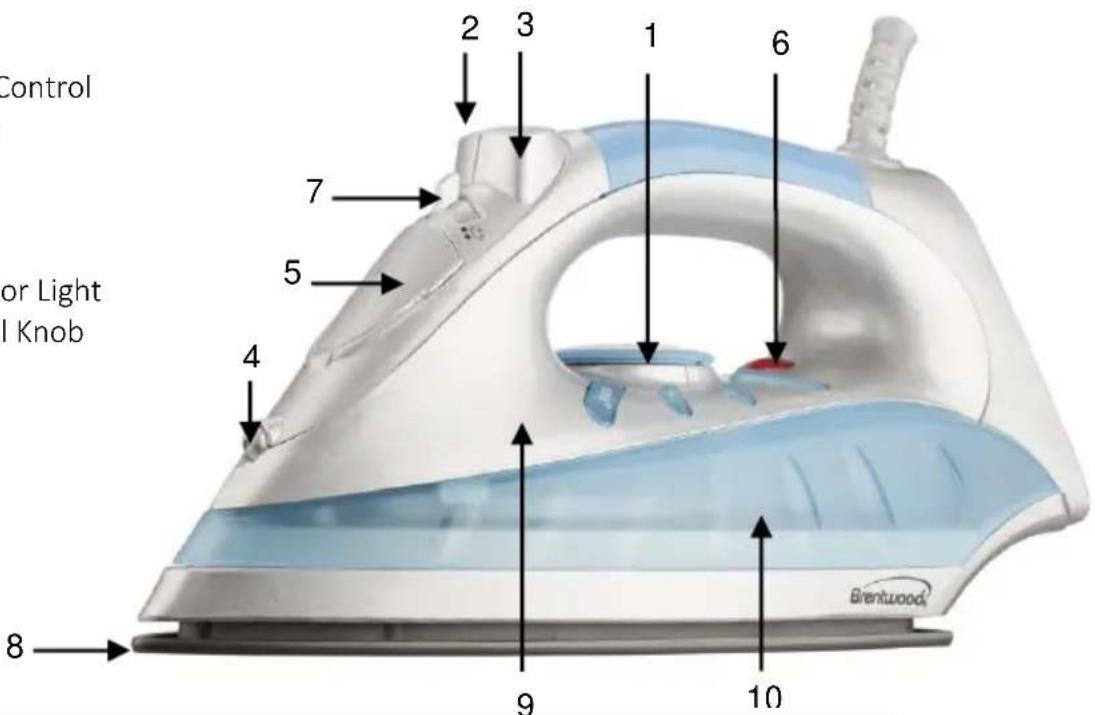
Parts:
- Temperature Control
- Steam Button
- Spray Button
- Spray Nozzle
- Water Inlet
- Power Indicator Light
- Steam Control Knob
- Sole Plate
- Body
- Water Tank
text_image
Control or Light I Knob 8 2 3 1 6 7 5 4 9 10 Brentwood| LABEL ICON | FABRIC TYPE | THERMOSTAT REGULATION |
| Synthetic | low temperature | |
| Silk - Wool | medium temperature | |
| Cotton - Linen | high temperature | |
| Fabrics should not be ironed | ||
SAVE THESE INSTRUCTIONS FOR FUTURE REFERENCE
BEFORE FIRST USE:
▲IMPORTANT: Please check all packaging material carefully before discarding as there may be accessory parts contained within the packaging material.
▲We recommend passing the iron over an ordinary cloth before using it for the first time.
USING YOUR STEAM IRON:
Attention: First use may cause a slight odor or small smoking upon heating, it is normal. This is a result of the heating element chemical reaction. It quickly goes away.
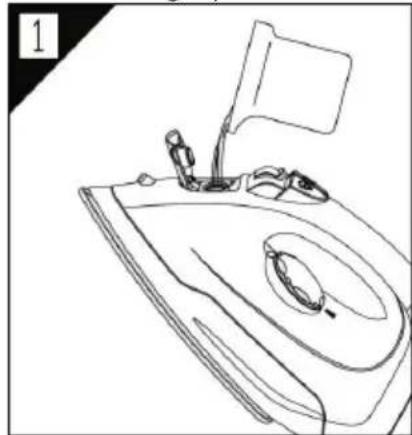
FILLING THE RESERVOIR:
- Set the steam control knob to "0" and the temperature control dial to "OFF". Unplug the iron from the wall outlet and wait for iron to cool down.
- Pour water into the water inlet and fill to the "MAX" level of the water tank.
SELECTING THE TEMPERATURE:
NOTE: Always check garment label for ironing instructions before ironing garment. If the instructions are missing, then use the table provided.
- Insert the plug into the wall outlet and stand Iron upright. Turn the temperature control dial (1) to the desired temperature.
- The power indicator light will turn off once temperature has been reached.
Note: The light will turn on and off indicating that the selected temperature is being maintained.
SELECTING SHOT-STEAM AND STEAM WHEN IRONING VERTICALLY:
- Press the shot-steam button (F) to generate a powerful burst of steam that can penetrate the fabrics and smooth the most difficult and tough creases. Wait for a few seconds before pressing again [Fig. 4].
- By pressing the shot-steam button at intervals you can also iron vertically (curtains, hung garments, etc.) [Fig. 6].
Warning: the shot-steam function can only be used at high temperatures. Stop the emission when the power light comes on, and then start ironing again only after the light has gone off. DRY IRONING
To iron without steam, follow the instructions in section “Steam Ironing”, leaving the steam selector on position “O”.
SPRAY FUNCTION
- Make sure that there is water in the reservoir.
- Press the spray button slowly (for a dense spray) or quickly (for a vaporized spray) [Fig. 2].
Warning: For delicate fabrics, we recommend moistening the fabric beforehand using the spray function or putting a damp cloth between the iron and the fabric. To avoid staining, do not use the spray on silk or synthetic fabrics.
TIPS:
- If the fabric is mixed, set the thermostat to the temperature of the fiber requiring the lower temperature.
- Use the lowest temperatures with fabrics that have unusual finishes such as sequins, embroidery, flush, etc.
-
If you do not know the composition of the fabric, try testing on a hidden corner of the garment. Start with a low temperature and increase it gradually until it reaches the ideal temperature.
-
Never iron areas with traces of perspiration or other marks. The heat of the plate fixes the stains on the fabric making them irremovable.
STORING YOUR STEAM IRON:
WARNING: Always unplug the product and allow it to cool before cleaning or storing it.
- When ironing is complete, turn the Steam Dial to the "O" position. When there is no steam, turn the Temperature Dial to "MIN" point. Unplug the product from the electrical outlet.
- Empty the reservoir by turning the Iron Upside down and gently shaking it. Please be very careful as contents might still be hot.
- Leave iron vertically to cool down completely. Always store iron in vertical position.
- Dry all parts thoroughly before storing or using again.
natural_image
Line drawing of a boat's side table with a flag and handle (no text or symbols)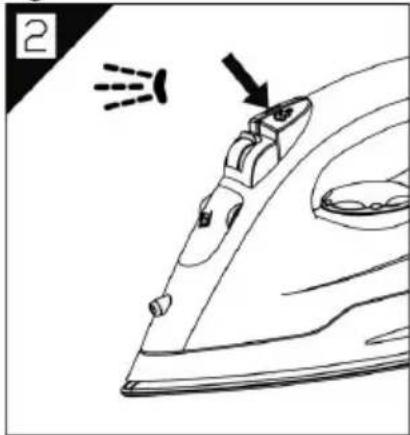
natural_image
Line drawing of an iron (£) with a light bulb and a black arrow pointing to the handle (no text or symbols)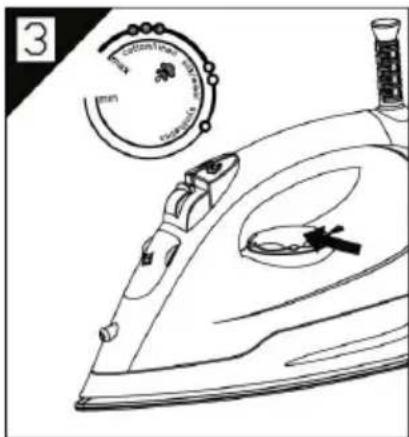
natural_image
Line drawing of an iron (£) with a watch and magnifying glass nearby (no text or symbols)
text_image
4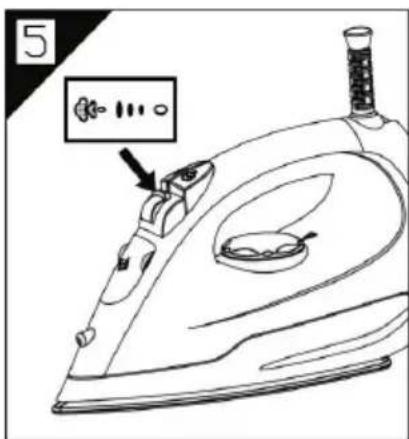
text_image
5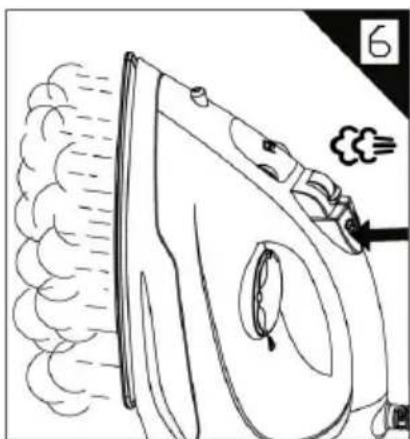
natural_image
Line drawing of a steam iron with exhaust smoke and a small smokestack emitting vapor (no text or symbols)ONE YEAR LIMITED WARRANTY
Write down the following information about your appliance to better help you obtain assistance or service if you ever need it.
CUSTOMER RECORD
Date of Purchase ____ Store/Dealer ____
Model/Item No: ____
THIS WARRANTY APPLIES TO PRODUCTS PURCHASED AND USED IN THE CONTINENTAL U.S. AND CANADA ONLY. This is the only express warranty for this product and is in lieu of any other warranty or condition. This product is warranted to be free from defects in material and workmanship for a period of one (1) year from the date of original purchase. During this period, your exclusive remedy is repair or replacement of this product, at our option; however, you are responsible for all costs associated with returning the product to us and our returning a product or component under this warranty to you. If the product or component is no longer available, we will replace with a similar one of equal or greater value. This warranty does not cover glass, filters, wear from normal use, use not in conformity with the printed directions, or damage to the product resulting from accident, alteration, abuse, or misuse.
THIS WARRANTY EXTENDS ONLY TO THE ORIGINAL CONSUMER PURCHASER. KEEP THE ORIGINAL SALES RECEIPT, AS PROOF OF PURCHASE IS REQUIRED TO MAKE A WARRANTY CLAIM.
This warranty is void if the product is used for other than single-family household use or subjected to any voltage and waveform other than what is specified on the rating label (E.G., 120V\~60Hz). We exclude all claims for special, incidental, and consequential damages caused by breach of express or implied warranty. All liability is limited to the amount of the purchase price. Every implied warranty, including any statutory warranty or condition of merchantability or fitness for a particular purpose, is disclaimed except to the extent prohibited by law, in which case such warranty or condition is limited to the duration of this written warranty. This warranty gives you specific legal rights. You may have other legal rights that vary depending on where you live. Some states do not allow limitations on implied warranties or special, incidental, or consequential damages, so the foregoing limitations may not apply to you. To make a warranty claim do not return this appliance to the store.
TO OBTAIN WARRANTY SERVICE AND/OR TROUBLESHOOTING INFORMATION:
Call Customer Service at 1-888-903-0060 in the U.S.
Monday through Friday: 9:00 am – 5:00 pm PT
U.S. Customers Please Email: warranty@brentwoodus.com
Canadian Customers Please Email: canada.warranty@brentwoodus.com
Go online at www.brentwoodus.com
PRECAUCIONES IMPORTANTES

natural_image
Line drawing of a boat hull with a flag, dock, and gear (no text or symbols)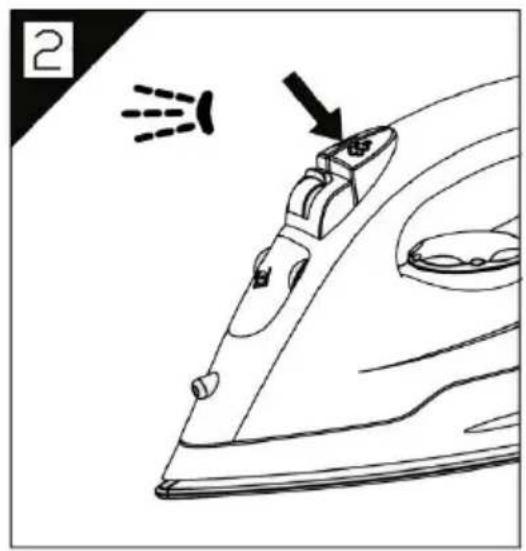
text_image
2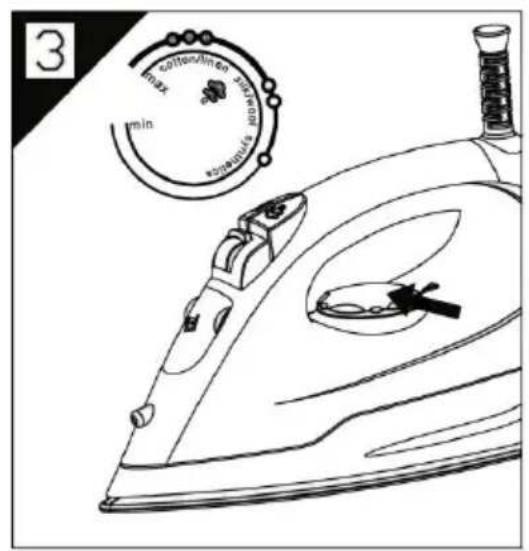
text_image
3 max min cotton/line min cotton feed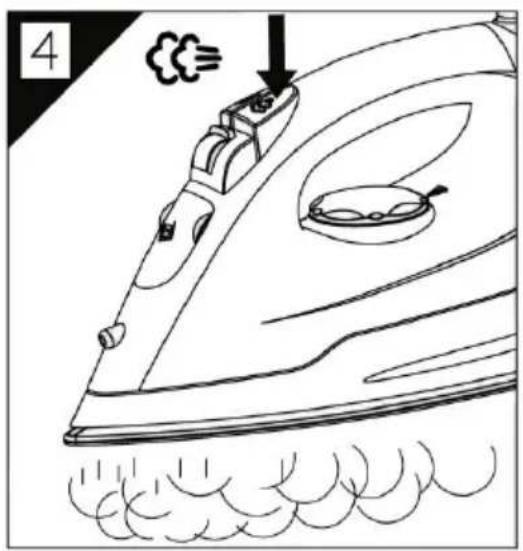
text_image
4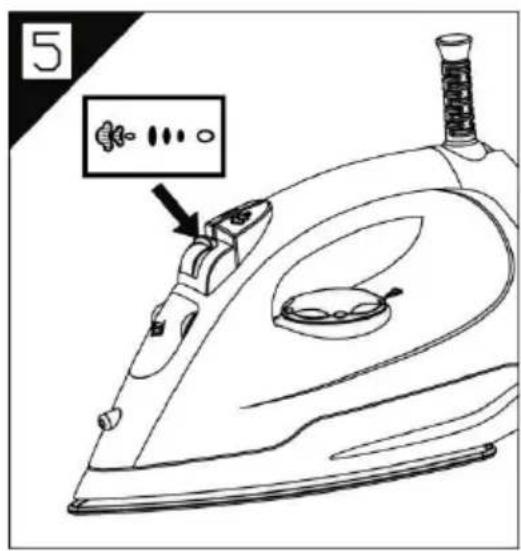
text_image
5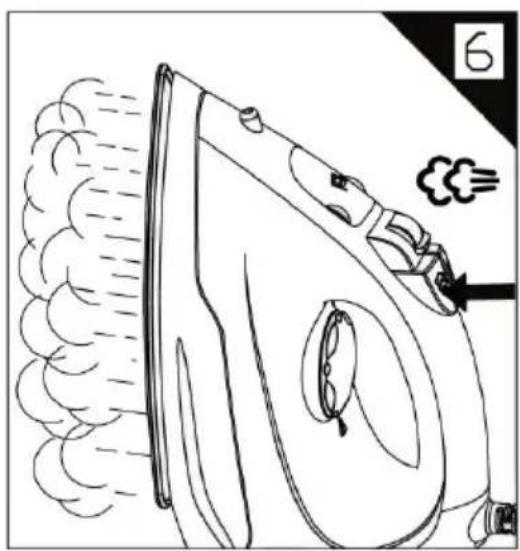
natural_image
Line drawing of a steam iron with exhaust smoke and airflow indicators (no text or symbols)IMPORTANTES MESURES DE SÉCURITÉ

natural_image
Line drawing of a mechanical device with a flag, lens, and base plate (no text or symbols)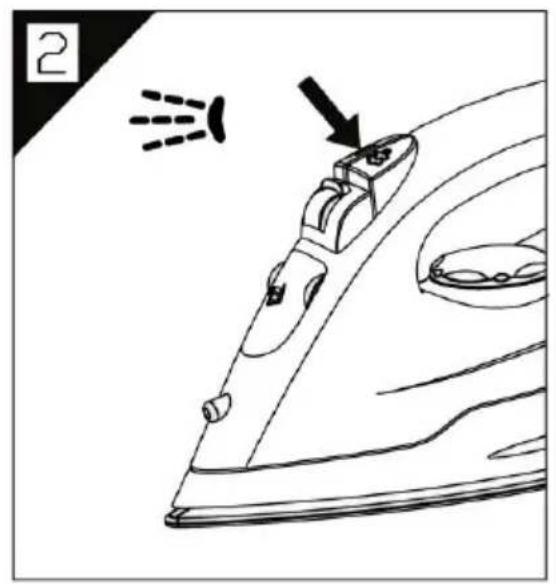
text_image
2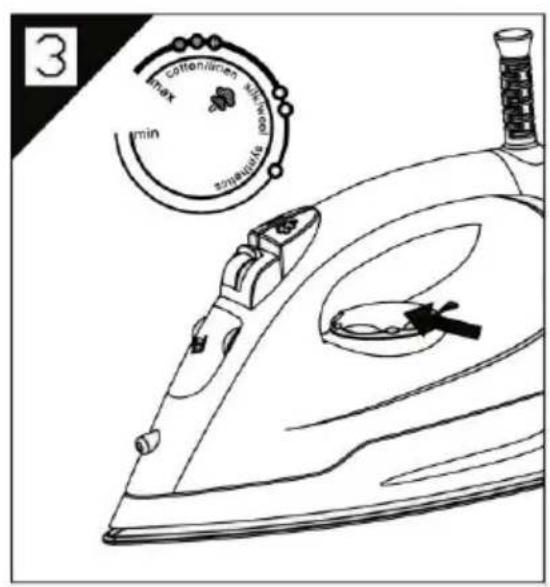
text_image
3 max min Cotton Mill Machine min min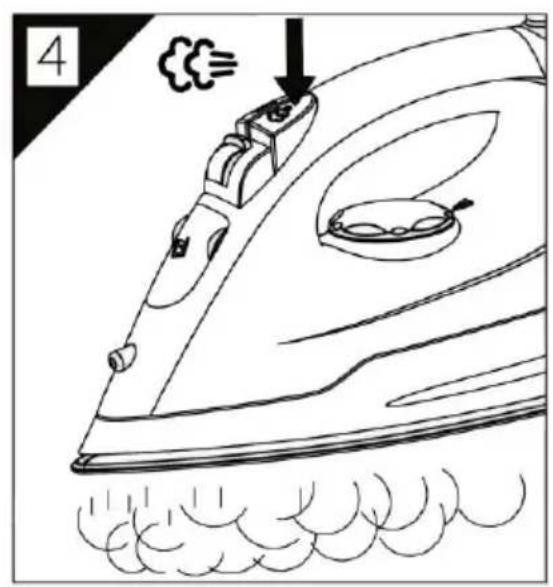
text_image
4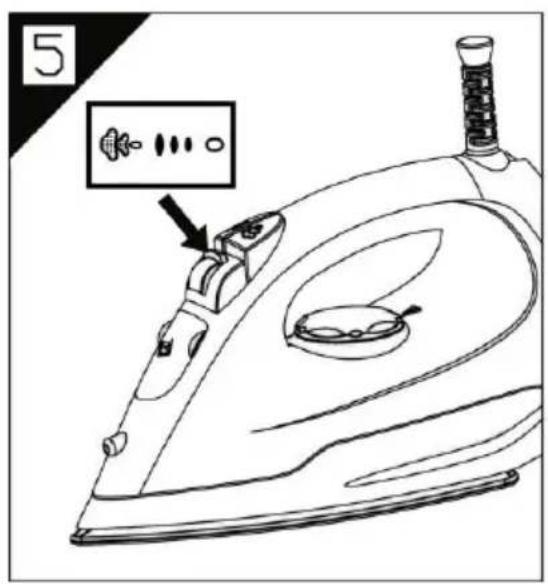
text_image
5
natural_image
Line drawing of a steam iron emitting exhaust smoke, with no text or symbols present
text_image
Brentwood® Appliances© 2021 Brentwood Appliances, Inc.