MPI-69BKRG - Iron Brentwood - Free user manual and instructions
Find the device manual for free MPI-69BKRG Brentwood in PDF.

User questions about MPI-69BKRG Brentwood
0 question about this device. Answer the ones you know or ask your own.
Ask a new question about this device
Download the instructions for your Iron in PDF format for free! Find your manual MPI-69BKRG - Brentwood and take your electronic device back in hand. On this page are published all the documents necessary for the use of your device. MPI-69BKRG by Brentwood.
USER MANUAL MPI-69BKRG Brentwood
© 2024 Brentwood Appliances, Inc.
STEAM IRON
PLANCHA DE VAPOR
FER À VAPEUR
ITEM NO: MPI-69BKRG
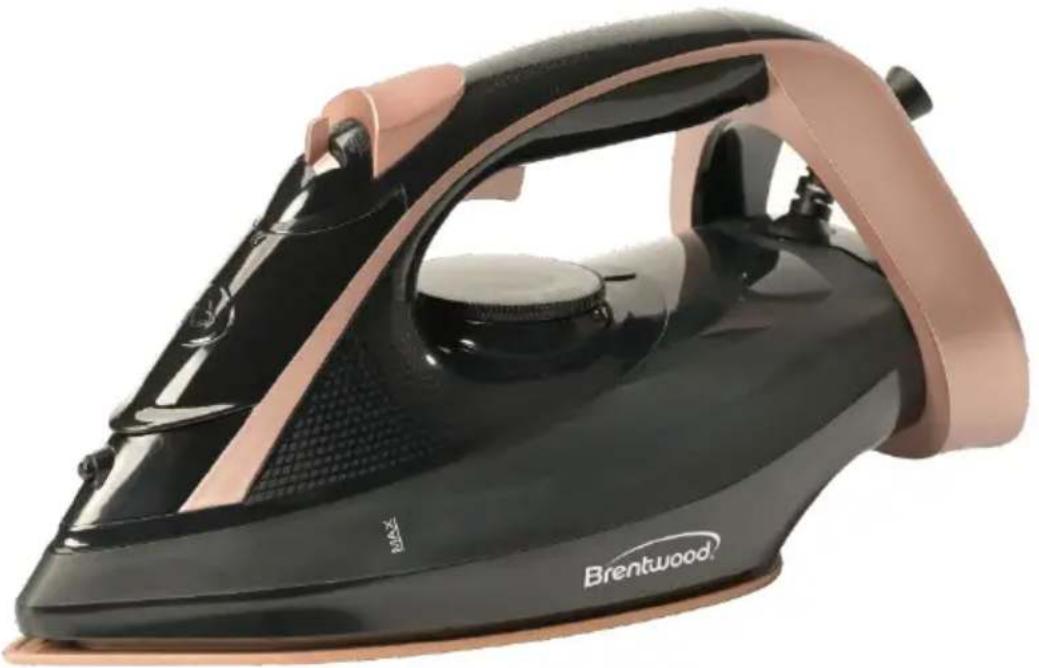
natural_image
Black and pink steam iron with brand mark 'Brentwood' on side (no additional text or symbols visible)Operating and Safety Instructions
FOR INDOOR HOUSEHOLD USE ONLY
When using this or any other electrical product, always follow these basic safety precautions, especially when children are present.
READ ALL INSTRUCTIONS BEFORE USE.
WARNING: To reduce the risk of fire, electric shock, serious personal injury, and property damage, please note the following:
- Store the iron out of reach of children and supervise its use by minors.
- Do not use the iron for anything other than its intended purpose.
- If the iron malfunctions, do not attempt to repair it yourself. Refer to the Warranty Policy on Page 9 for guidance.
- Do not use attachments not recommended or sold by the manufacturer.
- Regularly inspect the cord and plug for damage. Do not use the iron if any part is damaged.
- Ensure that the voltage of the power supply matches the specifications of the iron. Use a suitable outlet.
- Keep the power cord away from hot surfaces and sharp edges to prevent damage.
- Ensure a safe distance between the iron and flammable materials, such as clothing, curtains, or paper.
• Always use the iron on a stable and flat ironing board to prevent accidents. - For best results and to prevent mineral buildup, use distilled or demineralized water in the iron.
- If using tap water, check for high mineral content. Hard water can damage the iron and affect steam performance.
- Do not exceed the maximum water level indicated in the reservoir to prevent overflow.
- Ensure the fabric is suitable for steam ironing. Some materials may be damaged by steam or high temperatures.
- Adjust the temperature according to the fabric type being ironed. Always start with lower settings for delicate fabrics.
- The soleplate and steam vents can become very hot. Avoid direct contact and place the iron on a heat-resistant surface when not in use.
- Do not allow the soleplate to rest on fabric for extended periods to prevent scorching or burning.
-
Never iron over zippers, buttons, or other hard objects, as this can damage the soleplate.
-
When using the steam function, keep the iron upright, direct the steam away from your body and face, and ensure the iron remains stationary to avoid accidental burns.
- Be cautious when using the steam function. Steam can cause burns; avoid pointing the steam vents at yourself or others.
- Never leave the iron unattended while plugged in, especially when it is turned on.
• Always unplug the iron when not in use or when filling the water reservoir. - Let the iron cool down completely before storing it to prevent damage or fire hazards.
- Regularly clean the steam vents and reservoir as instructed in the manual to maintain optimal performance.
- Do not immerse the iron in water or any other liquids. Always keep the iron away from water and ensure it is unplugged before cleaning.
- Empty any remaining water from the reservoir to prevent stale water buildup and mineral deposits.
SPECIAL INSTRUCTIONS: A short power supply cord is provided to reduce the risk of becoming entangled in or tripping over a longer cord. Using an extension cord with the product is not recommended. However, if one must be used:
- The marked electrical rating of the extension cord must be at least as great as that of the product.
- Arrange the extension cord so that it does not drape over the countertop or tabletop where it can be tripped over or pulled.
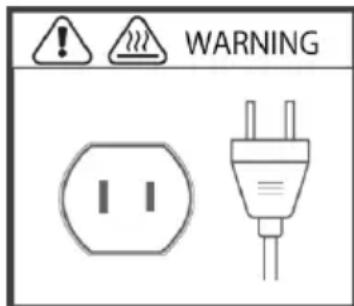
WARNING: The product is equipped with a polarized plug (one blade is wider than the other) to reduce the risk of electrical shock, which is a safety feature. The plug is designed to fit into a polarized outlet in only one direction. If you are unable to insert the plug into the outlet, try reversing it. If the plug still does not fit, contact a qualified electrician. Never use the plug with an extension cord unless you can fully insert the plug into the extension cord. Do not alter the plug or attempt to bypass its safety features.
text_image
WARNINGFOR HOUSEHOLD USE ONLY! PLEASE READ INSTRUCTIONS BEFORE USE & SAVE FOR FUTURE REFERENCE.
text_image
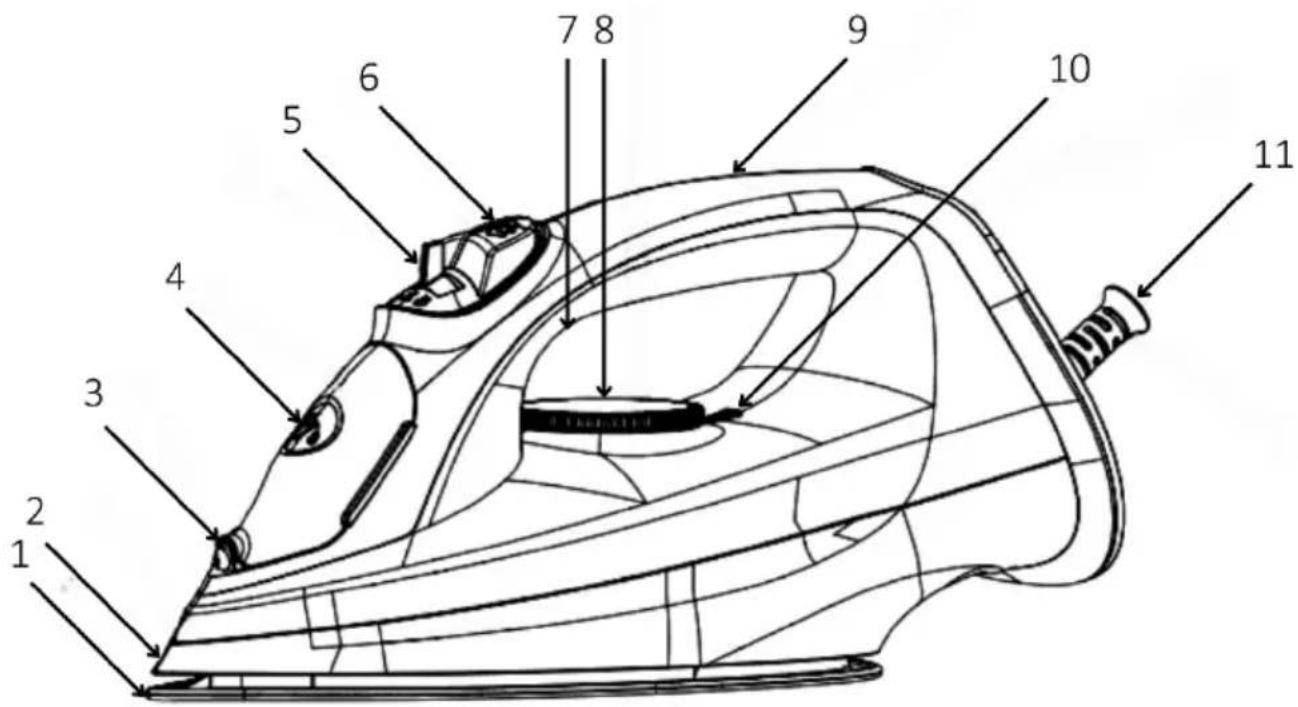
Technical diagram of a steam iron with numbered parts for identification| 1 | Soleplate | 7 | Steam Burst Button (at the bottom of the Spray Button) |
| 2 | Water Tank | ||
| 3 | Spray Nozzle | 8 | Temperature Control Knob |
| 4 | Water Reservoir Cover | 9 | Handle |
| 5 | Steam Dial | 10 | Light Indicator |
| 6 | Spray Button | 11 | Power Cord Guard |
FILLING THE WATER
TIP: Use distilled water if your tap water is hard to minimize scaling.
-
Ensure the iron is unplugged and completely cooled down before filling the water reservoir.
-
Lift the water reservoir cover.
-
Using a measuring cup, carefully pour water into the reservoir, filling it up to the maximum fill line indicated on the iron.
WARNING: Do not exceed the maximum fill line to prevent water from leaking during use.
-
Close the water reservoir cover and check for any water leaks.
-
Before plugging in the iron, set the steam dial to the "no steam" symbol (the middle position) and the temperature control knob to "OFF".
-
Once filled and secured, plug in the iron.
SETTING THE TEMPERATURE
- Before adjusting the temperature, check the care labels on the garments you plan to iron. Different fabrics require different heat settings.
a. If the ironing instructions are missing, the table below may help you.
| Symbol | Fabric | Fiber |
| • Synthetic | AcrylicModacrylicPolypropylenePolyurethane | |
| •• | Synthetic | AcetateTriacetateCuproPolyamide (Nylon)PolyesterViscose (Rayon) |
| Silk | Silk | |
| ••• | Wool | Wool |
| Cotton | Cotton | |
| Linen | Linen |
b. If the fabric consists of various types of fibers, always select the temperature for the fiber with the lowest recommended temperature.
-
Turn the temperature control knob to the desired setting. The indicator light will usually turn on and then off when the desired temperature is reached.
-
While waiting for the indicator light to turn off, let the iron stand upright.
-
When the indicator light turns off, test the temperature on a small, inconspicuous area of the fabric or on a scrap piece to ensure it is safe. If the temperature is too high or too low for the fabric, adjust the temperature control knob accordingly and allow the iron to heat up again.
USING THE IRON WITHOUT STEAM
NOTE: This function can be used at any time.
-
After setting the temperature, set the steam dial to the "no steam" symbol (the middle position).
-
Before ironing the garment, test the temperature on a small, inconspicuous area of the fabric or on a scrap piece to ensure it is safe.
-
Place the iron on the fabric, ensuring the soleplate makes even contact.
-
Move the iron slowly and steadily over the garment, applying light pressure as needed. If you notice any scorching or if the fabric is not smoothing out, adjust the temperature control knob accordingly.
WARNING: Avoid leaving the iron in one spot for too long to prevent scorching.
USING THE IRON WITH STEAM
NOTE: This function helps relax the fibers and eliminate wrinkles more effectively and can be used only at higher temperature settings, as water may leak from the soleplate if a low temperature is selected. You can use this in conjunction with regular ironing or as a standalone method for hanging garments.
| Symbol | Description |
| •• | Moderate Temperature |
| ••• | Maximum Temperature |
-
After setting the high temperature, set the steam dial to the “cloud with steam” symbol (the right position), and steam will gradually start to come out from the soleplate.
-
Before using the steam on the garment, test the steam function on a scrap piece of fabric or a small, inconspicuous area to ensure it is working properly.
-
Place the iron on the fabric, ensuring the soleplate makes even contact.
-
While steaming, move the iron slowly over the garment, making sure that the fabric can withstand steam. Some delicate fabrics may be damaged by high heat or moisture.
WARNING: Do not let the steam touch your skin or face and avoid directing steam at other people or flammable materials.
USING THE SPRAY
NOTE: This function can be used at any time and does not affect the temperature setting.
-
Before using the spray on the garment, test the spray function on a scrap piece of fabric or a small, inconspicuous area to ensure it disperses evenly.
-
Hold the iron at a slight angle, with the soleplate facing the fabric. Ensure you are at a safe distance to avoid direct contact with the hot soleplate.
-
Press the spray button gently to release a fine mist of water onto the fabric. Keep the iron a few inches away from the garment to avoid saturating the area.
-
After spraying, proceed to iron the garment as usual. The added moisture will help relax the fibers and make pressing easier.
WARNING: Be careful not to over-saturate the fabric, as too much moisture can lead to water spots or damage. Avoid using the spray function on delicate fabrics that may be damaged by moisture, such as silk or certain synthetics.
USING THE STEAM BURST
NOTE: This function provides an additional burst of steam to help remove stubborn wrinkles and can be used only at higher temperature settings, as water may leak from the soleplate if a low temperature is selected.
| Symbol | Description |
| •• | Moderate Temperature |
| ••• | Maximum Temperature |
- Before using it on the garment, test the steam burst on a scrap piece of fabric or an inconspicuous area to ensure it functions properly.
- Hold the iron upright and position the soleplate about 1-2 inches away from the fabric.
- Press the steam burst button to release a concentrated burst of steam onto the fabric.
- After using the steam burst, proceed to iron the garment as usual, allowing the steam to relax the fibers. Ensure the fabric can withstand high heat and moisture before using the steam burst function.
WARNING: Do not let the steam touch your skin or face and avoid directing steam at other people or flammable materials.
- If you want more steam, wait a few seconds before pressing the steam burst button again. Typically, all wrinkles can be removed within three presses.
CLEANING AND MAINTENANCE
TIP: Clean the iron regularly to prevent mineral buildup.
- Ensure the iron is unplugged and completely cooled down before filling the water reservoir.
- Lift the water reservoir cover.
- Using a measuring cup, carefully pour water into the reservoir, filling it up to the maximum fill line indicated on the iron.
WARNING: Do not exceed the maximum fill line to prevent water from leaking during use.
- Close the water reservoir cover and check for any water leaks.
-
Before plugging in the iron, set the steam dial to the "no steam" symbol (the middle position) and the temperature control knob to "OFF".
-
Once filled and secured, plug in the iron and turn the temperature control knob to the highest setting. The indicator light will usually turn on and then off when the desired temperature is reached.
- While waiting for the light indicator to turn off, let the iron stand upright.
- When the light indicator turns off, unplug the iron and hold it over the sink.
- Click and hold the steam dial at the “iron with steam” symbol (the left position) and gently shake off any boiling water, steam, and impurities from the soleplate.
- Once you are done, let the iron cool completely by standing it upright.
- After it has cooled, use a damp cloth or sponge to wipe the soleplate, and a cotton swab or toothpick to remove any lint or mineral buildup from the steam vents.
- Once completely dry, store the iron upright or in a safe position to prevent damage.
ONE YEAR LIMITED WARRANTY
Write down the following information about your product to better help you obtain assistance or service if you ever need it.
CUSTOMER RECORD
Date of Purchase: ____ Store/Dealer: ____
Model/Item No: ____
THIS WARRANTY APPLIES TO PRODUCTS PURCHASED AND USED IN THE CONTINENTAL U.S. AND CANADA ONLY. This is the only express warranty for this product and is in lieu of any other warranty or condition. This product is warranted to be free from defects in material and workmanship for a period of one (1) year from the date of original purchase. During this period, your exclusive remedy is repair or replacement of this product, at our option. However, you are responsible for all costs associated with returning the product to us and for the return of a product or component under this warranty to you. If the product or component is no longer available, we will replace it with a similar one of equal or greater value. This warranty does not cover glass, filters, wear from normal use, use not in conformity with the printed directions, or damage to the product resulting from accident, alteration, abuse, or misuse. THIS WARRANTY EXTENDS ONLY TO THE ORIGINAL CONSUMER PURCHASER. KEEP THE ORIGINAL SALES RECEIPT, AS PROOF OF PURCHASE IS REQUIRED TO MAKE A WARRANTY CLAIM. This warranty is void if the product is used for other than single-family household use or subjected to any voltage and waveform other than what is specified on the rating label (e.g., 120V\~60Hz). We exclude all claims for special, incidental, and consequential damages caused by breach of express or implied warranty. All liability is limited to the amount of the purchase price. Every implied warranty, including any statutory warranty or condition of merchantability or fitness for a particular purpose, is disclaimed except to the extent prohibited by law, in which case such warranty or condition is limited to the duration of this written warranty. This warranty gives you specific legal rights. You may have other legal rights that vary depending on where you live. Some states do not allow limitations on implied warranties or special, incidental, or consequential damages, so the foregoing limitations may not apply to you. To make a warranty claim, do not return this product to the store.
TO OBTAIN WARRANTY SERVICE AND/OR TROUBLESHOOTING INFORMATION:
Call Customer Service at 1-888-903-0060 in the U.S.
Monday through Friday: 9:00am – 5:00pm PST.
U.S. Customers Please Email: warranty@brentwoodus.com
Canadian Customers Please Email: canada.warranty@brentwoodus.com
Go Online at www.brentwoodus.com
PRECAUCIONES IMPORTANTES