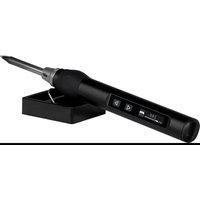
JT-SI01 - Welding machine Joy-It - Free user manual and instructions
Find the device manual for free JT-SI01 Joy-It in PDF.


| Brand | Joy-It |
| Model | JT-SI01 |
| Product type | Soldering iron with soldering station |
| Housing material | Aluminum and silicone |
| Supply voltage | 9 - 20 V (via USB-C PD or barrel jack adapter) |
| Maximum power | 65 W |
| Temperature range | 80 °C - 420 °C |
| Temperature accuracy | < 2% (PID regulation) |
| Display | 0.87" (2.21 cm) OLED |
| Interface | USB-C with PD (Power Delivery) protocol |
| Number of voltage modes | 4 (20 V / 15 V / 12 V / 9 V) |
| Main functions | Rapid heating, temperature adjustment, sleep mode, child lock, calibration |
| Locking nut for tip | Yes (replaceable tip) |
| Tip included | Yes (one standard tip included) |
| Recommended first tinning temperature | 250 °C |
| Maintenance and cleaning | Clean the tip after use, apply a small amount of solder to prevent oxidation |
| Safety | Child lock (3 presses on left button), overvoltage protection, sleep mode shutdown |
| Included accessories | USB-C cable, USB-C to barrel jack adapter |
| General information | Use for electronic soldering work, replaceable tip |
| Support | Email: service@joy-it.net, Ticket: support.joy-it.net, Phone: +49 (0)2845 9360 - 50 |
Frequently Asked Questions - JT-SI01 Joy-It
User questions about JT-SI01 Joy-It
0 question about this device. Answer the ones you know or ask your own.
Ask a new question about this device
Download the instructions for your Welding machine in PDF format for free! Find your manual JT-SI01 - Joy-It and take your electronic device back in hand. On this page are published all the documents necessary for the use of your device. JT-SI01 by Joy-It.
USER MANUAL JT-SI01 Joy-It
natural_image
Close-up of a black soldering iron with a 280-degree angle indicator, resting on a blue surface (no text or symbols visible)INHALTSVERZEICHNIS
natural_image
Pure mechanical assembly diagrams showing four stages of a device with arrows indicating motion, no text or symbols present.Thank you for choosing our product. In the following, we will show you what you need to bear in mind during commissioning and use. Should you encounter any unexpected problems during use, please do not hesitate to contact us.
- TECHNICAL DATA
| Material | Aluminum, silicone |
| Voltage & power | 9 - 20 V, 65 W |
| Temperature range | 80 °C - 420 °C |
| Display | 0,87” (2,21 cm) OLED |
| Temperature control | PID-controlled temperature control, deviation < 2% |
| Operation | USB-C via PD protocol, hollow plug power supply |
3. DEVICE OVERVIEW
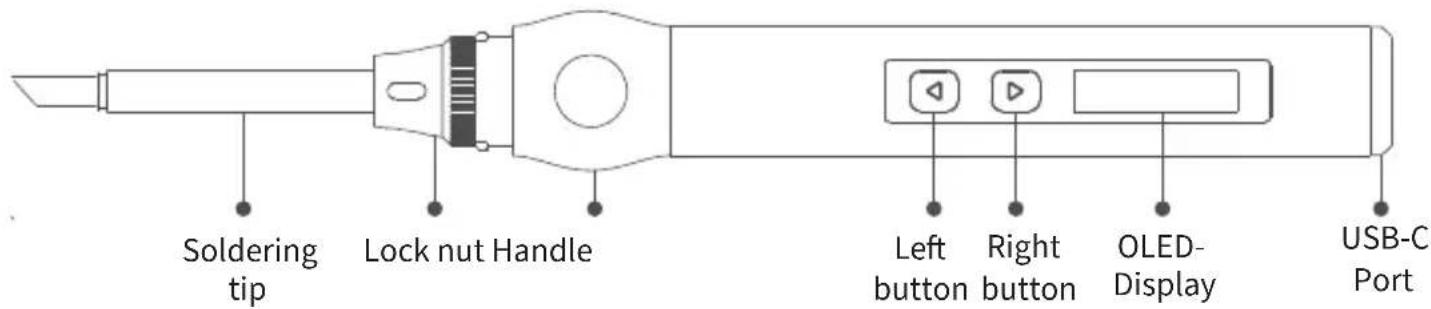
4. CONNECTION & USE
First connect a USB-C cable to the device. Please note that the power supply used must provide the PD protocol and a power of at least 65 W. Alternatively, you can also connect a hollow plug power supply with the enclosed USB-C adapter. In this case, the following operating modes are available: 20 V - 3,25 A - 65W, 15 V - 2,5A - 37,5 W, 12 V - 2 A - 24 W, 9 V - 1,5 A - 13,5 W
5. CHANGING THE TIPS
To change the tip, first loosen the lock nut. Now insert the soldering tip and secure it by tightening the locking nut.

natural_image
Pure mechanical diagram showing four sequential stages of a device with arrows indicating motion, no text or symbols present.CAUTION! Never change or remove the tip immediately after using the device. Allow the device to cool down completely before unlocking and touching the tip.
6. USE
After you have plugged in the device, the start screen appears first. If you have not yet inserted a soldering tip, you will now be prompted to do so.
Once the soldering tip has been successfully inserted, the display switches to the standby menu and indicates that the device is now ready for use.
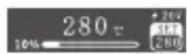
Press the left button to open the heating menu. The temperature and heating progress indicator are displayed here. The appliance will now start the heating process.
Press and hold the right button to end the heating process and return to the previous menu.
Briefly press the left or right button in the heating menu to open the heating settings. Here you can set the desired temperature using the left and right buttons.


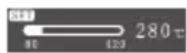
In the standby menu, press and hold the left and right buttons to open the settings menu.
The following settings can be made here:

BRIGHTNESS: Brightness setting of the OLED display.
CALIBRATION: If the measured temperature deviates from the set temperature, the temperature deviation can be adjusted here.
TEMPUNIT: Unit (°C or °F) in which the temperature is specified.
SLEEPTIME: Defines the time in minutes after which the system automatically switches to sleep mode.
SLEEPTEMP.: Defines the temperature that is maintained in sleep mode.
CHILD LOCK: Activates/deactivates the child lock. When the childproof lock is active, the device must first be unlocked each time it is started by pressing the left button three times in succession.
LANGUAGE: The device language can be set to German or English here.
HAND HELD: Sets the display orientation so that the device can be used as a left-handed or right-handed device.
VOLTAGE: The voltage can be selected here between 20 V, 15 V, 12 V and 9 V if the power supply unit used automatically switches to overvoltage protection. The default setting is 20 V.
7. NOTICES
When a new soldering tip is used for the first time, it must be heated to 250 °C and tinned to prevent dry burn oxidation.
After using the soldering iron, please apply a small amount of solder to the tip of the soldering iron to prevent oxidation.
Always wear safety goggles and heat-resistant gloves to protect your eyes and hands from sparks and hot materials.
Work in a well-ventilated area to avoid inhalation of vapors. The work area should be free of flammable materials.
Never touch the tip of the soldering iron when it is switched on. Wait until the soldering iron has cooled down completely before putting it away or storing it.
Make sure that your power source is stable and not overloaded.
Store the soldering iron in a safe place, away from children and pets.
In the event of a burn, cool the affected area immediately with cold running water and seek medical attention.
8. ADDITIONAL INFORMATION
OUR INFORMATION AND TAKE-BACK OBLIGATIONS UNDER THE GERMAN ELECTRICAL AND ELECTRONIC EQUIPMENT ACT (ELEKTROG)
SYMBOL ON ELECTRICAL AND ELECTRONIC EQUIPMENT:

This crossed-out garbage can means that electrical and electronic appliances do not belong in household waste. You must hand in the old appliances at a collection point. Before handing them in, you must separate used batteries and accumulators that are not enclosed by the old appliance.
RETURN OPTIONS:
As an end user, you can hand in your old appliance (which essentially fulfills the same function as the new appliance purchased from us) for disposal free of charge when purchasing a new appliance. Small appliances with no external dimensions greater than 25 cm can be disposed of in normal household quantities regardless of whether you have purchased a new appliance.
RETURN OPTION AT OUR COMPANY LOCATION DURING OPENING HOURS:
SIMAC Electronics GmbH, Pascalstr. 8, D-47506 Neukirchen-Vluyn
POSSIBILITY TO RETURN NEAR YOU:
We will send you a parcel stamp with which you can return the device to us free of charge. To do this, please contact us by e-mail to Service@joy-it.net or by telephone.
PACKAGING INFORMATION:
Please pack your old appliance securely for transportation. If you do not have suitable packaging material or do not wish to use your own, please contact us and we will send you suitable packaging.
9. SUPPORT
We are also there for you after your purchase. If any questions remain unanswered or problems arise, we are also available to assist you by e-mail, telephone and ticket support system.
E-Mail: service@joy-it.net
Ticket-System: http://support.joy-it.net
Phone: +49 (0)2845 9360 - 50 (Mo. - Thur.: 09:00 - 17:00, Fri.: 09:00 - 14:30 Uhr)
For further information, please visit our website:
WWW.JOY-IT.NET
1. INFORMATIONS GÉNÉRALES

Cher client,
natural_image
Pure mechanical assembly diagrams showing four stages of a device with arrows indicating motion, no text or symbols present.- INHALTSVERZEICHNIS
- DEVICE OVERVIEW
- CONNECTION & USE
- CHANGING THE TIPS
- USE
- NOTICES
- ADDITIONAL INFORMATION
- OUR INFORMATION AND TAKE-BACK OBLIGATIONS UNDER THE GERMAN ELECTRICAL AND ELECTRONIC EQUIPMENT ACT (ELEKTROG)
- SYMBOL ON ELECTRICAL AND ELECTRONIC EQUIPMENT:
- RETURN OPTIONS:
- RETURN OPTION AT OUR COMPANY LOCATION DURING OPENING HOURS:
- POSSIBILITY TO RETURN NEAR YOU:
- PACKAGING INFORMATION:
- SUPPORT
- INFORMATIONS GÉNÉRALES
Brand : Joy-It
Model : JT-SI01
Category : Welding machine