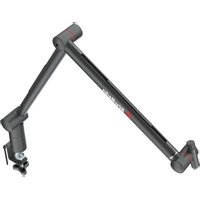
BA311 - Tripod AVERMEDIA - Free user manual and instructions
Find the device manual for free BA311 AVERMEDIA in PDF.


| Product type | Articulated arm for microphone and webcam |
| Brand | AVerMedia |
| Model | BA311 |
| Category | Desk tripod |
| Mounting mechanism | C-clamp for desk |
| Maximum height (arm extended) | Approximately 70 cm |
| Maximum load | 1 kg |
| Horizontal rotation | 360° |
| Vertical tilt | 90° (with stops) |
| Friction adjustment | By hex key on each joint |
| Cable management | Integrated channels and zip ties included |
| Main material | Steel and ABS plastic |
| Color | Black |
| Base dimensions (clamp) | 10 x 7 x 5 cm |
| Arm weight | Approximately 1.2 kg |
| Power supply | None (passive) |
| Microphone compatibility | Standard 3/8" or 5/8" mount with adapter |
| Webcam compatibility | 1/4" standard screw |
| Warranty | 1 year |
| Box contents | Arm, fixing clamp, hex key, zip ties (4 small, 2 large), quick start guide |
Frequently Asked Questions - BA311 AVERMEDIA
User questions about BA311 AVERMEDIA
0 question about this device. Answer the ones you know or ask your own.
Ask a new question about this device
Download the instructions for your Tripod in PDF format for free! Find your manual BA311 - AVERMEDIA and take your electronic device back in hand. On this page are published all the documents necessary for the use of your device. BA311 by AVERMEDIA.
USER MANUAL BA311 AVERMEDIA
natural_image
Line drawing of a robotic arm with articulated joints and a base mount (no text or symbols)EnglishČeština
Deutsch Русский
Français ภาษาไทย
Italiano 繁體中文
Español 简体中文
Nederlands 한국어
Polski 日本語
Disclaimer
All pictures contained in this documentation are example images only. The images may vary depending on the product and software version. Information presented in this documentation has been carefully checked for reliability; however, no responsibility is assumed for inaccuracies. The information contained in this documentation is subject to change without notice.
Copyright and Trademark Information
© 2021 by AVerMedia Technologies, Inc. All rights reserved. No part of this publication, in whole or in part, may be reproduced, transmitted, transcribed, altered or translated into any language in any form by any means without the written permission of AVerMedia Technologies, Inc. Information and specification contained in this manual are subject to change without notice and do not represent a commitment on the part of AVerMedia.
For more information, please visit www.avermedia.com.
AVerMedia is a trademark or registered trademark of AVerMedia Technologies, Inc.
Headquarters
Address No.135, Jian 1st Rd., Zhonghe Dist., New Taipei City 23585, Taiwan
Website www.avermedia.com
Support www.avermedia.com/support
Telephone +886-2-2226-3630
US Office
Address 4038 Clipper Ct., Fremont, CA 94538, United States
Website www.avermedia-usa.com
Europe Office
Address Hanauer Landstrasse 291 B, 60314 Frankfurt Hessen, Germany
國際總部
Address 1-8 Akihabara, Taito-ku, Tokyo TOWA Akihabara Building 10th floor
⚠️ Important Safety Instructions
- Read these instructions.
- Keep these instructions.
- Follow all instructions.
- Heed all warnings.
- Do not use the apparatus on uneven or unstable surfaces.
- Unplug the apparatus before cleaning. Clean only with a dry cloth.
- Use the apparatus within ambient temperatures 32–104°F (0–40°C).
- Do not place heavy objects on the apparatus.
- Do not install near heat sources such as radiators or stoves.
- Only use the attachments and accessories specified by the manufacturer.
- Do not modify or disassemble the apparatus in any way.
- Refer all servicing to AVerMedia Customer Service.
- Do not dispose the apparatus as general household waste. Dispose in accordance with local environmental laws.
重要安全說明
These are what you'll find in the box:
Live Streamer ARM
Quick Guide
C-Clamp
Crosshead
Hex Key
Cord Cover
(7.5 cm/2.95 in x 4,
15.0 cm/5.90 in x 2)
Quick Guide
Parts and Ports
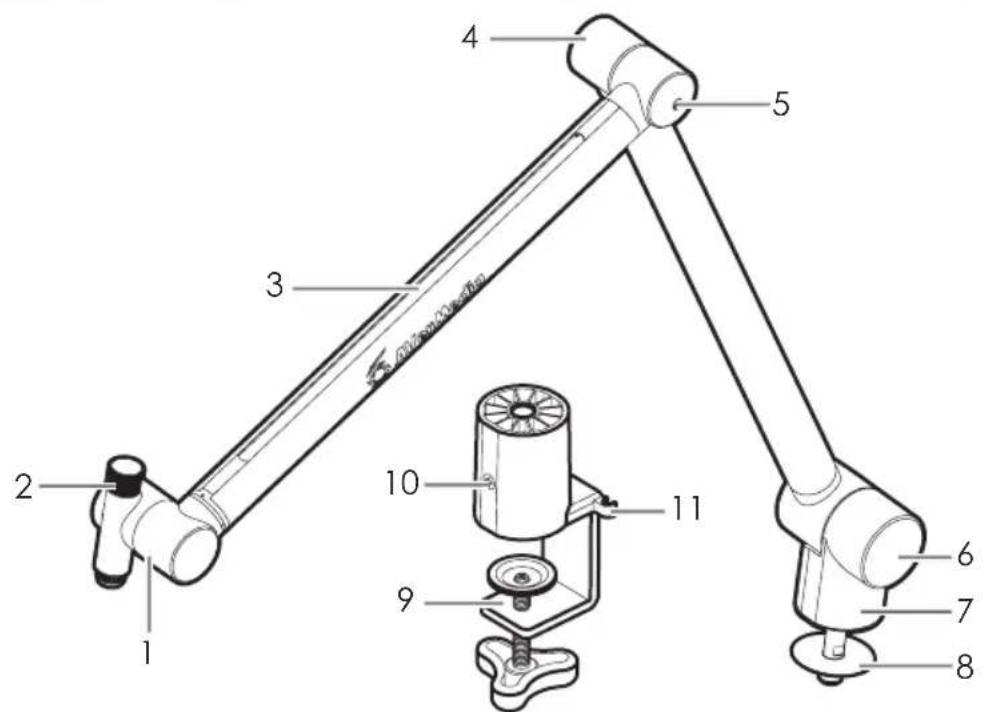
1 Tip Joint
5 Middle Joint Friction Adjustment
Clockwise: Tighten Joint
Counterclockwise: Loosen Joint
9 C-Clamp
2 Attachment Screw 6 Base Joint 10 Locking Screw
3 Cord Channel 7 Arm 11 Crosshead Hex Key Holder
4 Middle Joint 8 Washer
Installation
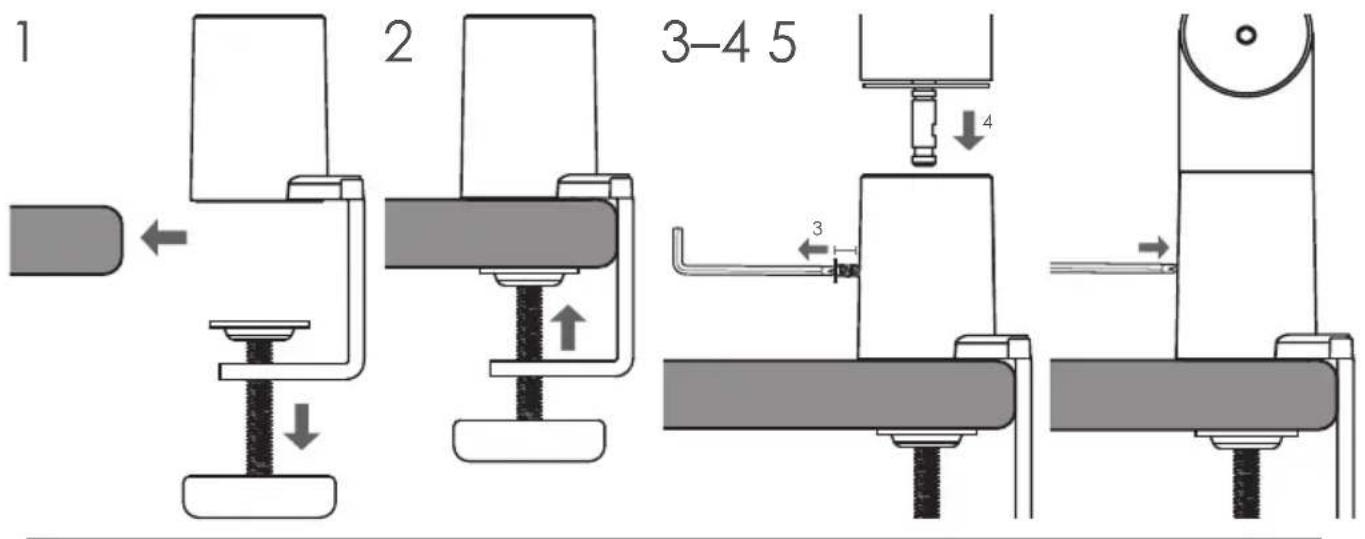
Note: Make sure the c-clamp sits flush on the top, bottom, and edge surfaces of your desk. Improper installation may lead to injuries.

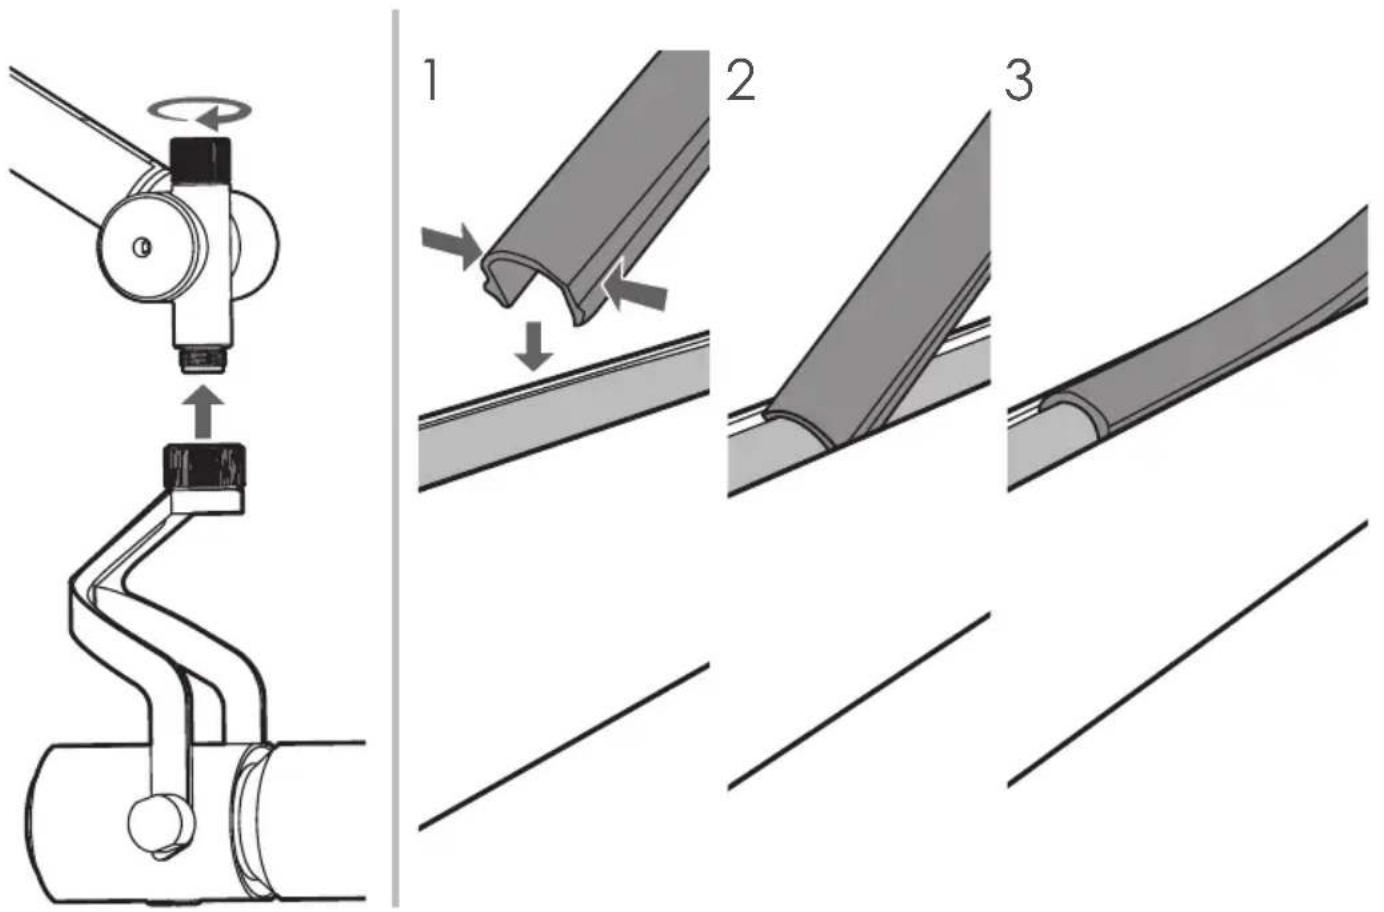
Connecting A Mic. & Applying A Cord Cover
Rotation Angles
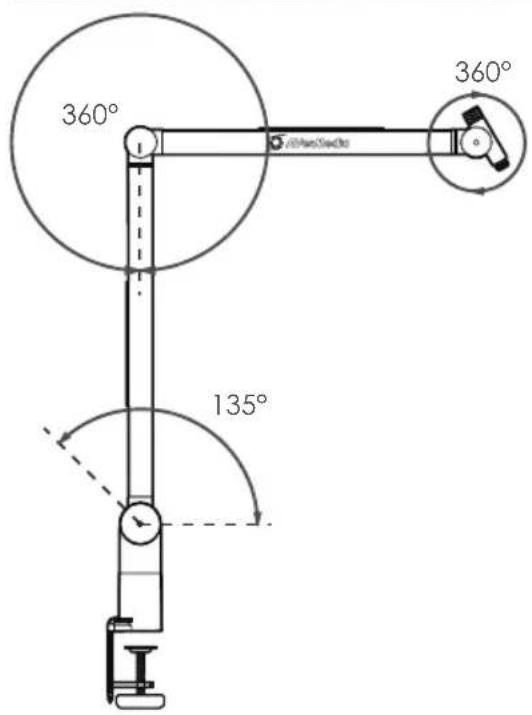
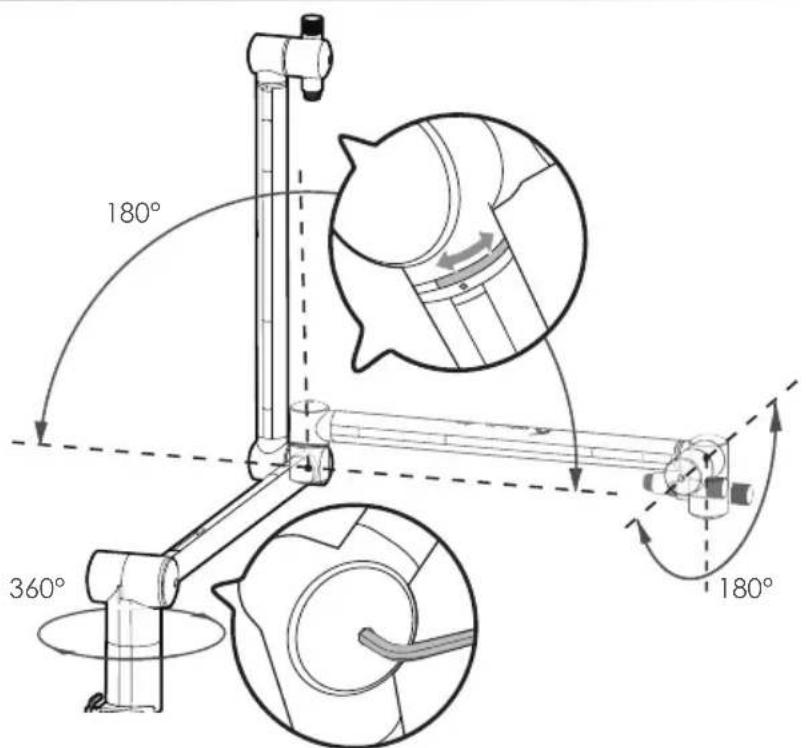
Note:
- Rotate according to the specified angles to avoid excessive stress or damages on the joints. The tip and middle joints also provide limit stripes (gray) and marks for making clear and safeguarded rotations.
- Do not attach a device that exceeds the maximum hold weight (see specifications).
- It is recommended to position the lower arm horizontally with its cord channel facing upward before rotating the upper arm.
-
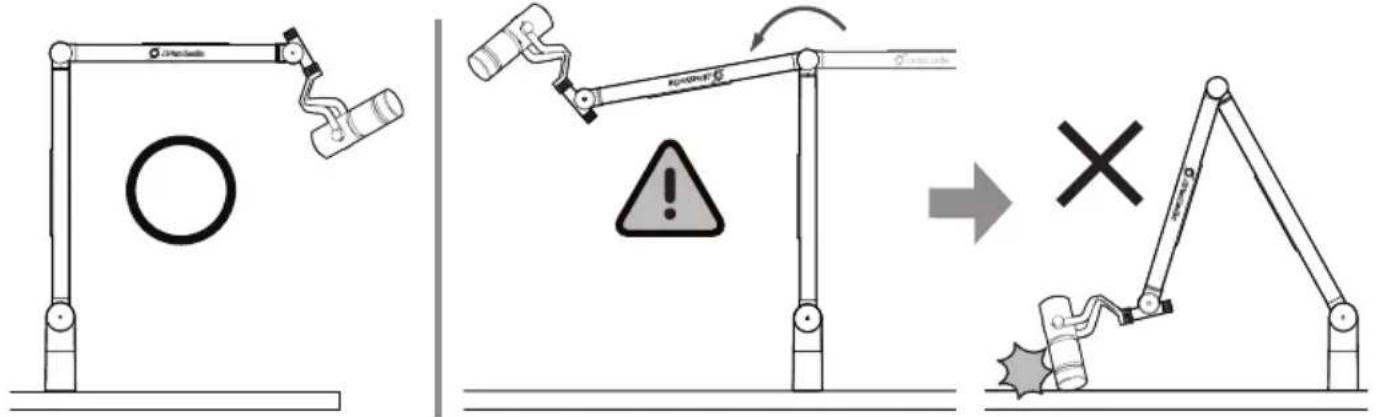
The Live Streamer ARM has an internal spring system to provide additional tension, so make sure to use the ARM with its cord channels facing upward/outward and tighten each joint as needed using the provided Crosshead Hex Key.
-
Be aware while adjusting the ARM from a position with its cord channels facing upward/outward to a position facing downward/inward, as the lack of spring support may result in the ARM and mic tilting over and hitting the desk, causing damages.
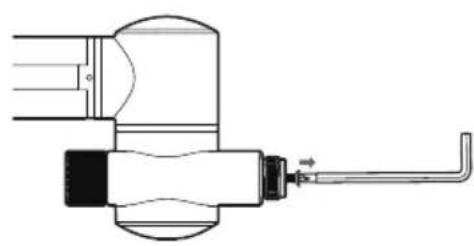
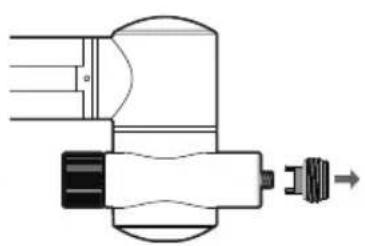
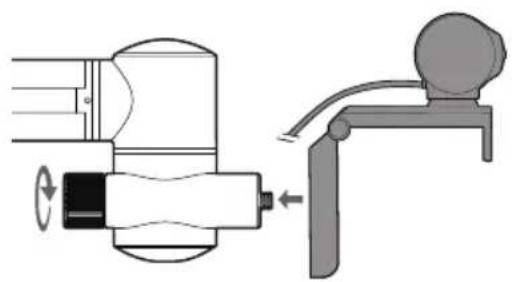
Connecting A Webcam
1
natural_image
Technical line drawing of a mechanical assembly with a pipe fitting (no text or symbols)2
natural_image
Pure mechanical component diagram without any text, numbers, or symbols3
natural_image
Diagram of a mechanical device with a rotating shaft and lever, showing no text or symbols.More Info
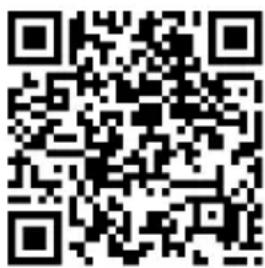
For more information, visit our webpage at http://q.avermedia.com/BA311 or scan this QR code.
Specifications
| Boom Type Tube-style | |
| Max. Hold Weight 1.8 kg / 4.0 lbs | |
| Cable Management Hidden-channel | |
| Max. Reach with C-Clamp | Horizontal: 87 cm / 34.3 inVertical: 100 cm / 39.4 in |
| Adapter | Mic: 5/8"-27Webcam: 1/4"-20 |
| Weight | Arm: 1,443 g (50.9 oz)C-Clamp: 490.6g (17.3 oz) |
Note: Specifications are subject to change without prior notice. Please refer to our webpage for the latest details.
Deutsch
Verpackungsinhalt
Brand : AVERMEDIA
Model : BA311
Category : Tripod