Caroline - Garden sheds Mr. Gardener - Free user manual and instructions
Find the device manual for free Caroline Mr. Gardener in PDF.


User questions about Caroline Mr. Gardener
0 question about this device. Answer the ones you know or ask your own.
Ask a new question about this device
Download the instructions for your Garden sheds in PDF format for free! Find your manual Caroline - Mr. Gardener and take your electronic device back in hand. On this page are published all the documents necessary for the use of your device. Caroline by Mr. Gardener.
USER MANUAL Caroline Mr. Gardener
Assembly, installation and maintenance manual
Montage-, Aufbau- und Wartungsanleitung • Assemblage, manuel de montage et d'entretien • Montaje, instalación y mantenimiento • Manuale di montaggio, installazione e manutenzione • Monterings- og vedlikeholdsmanual • Monterings-, installations- och underhållsmanual • Kokoamis-, asennus- ja huolto-ohje • Vejledning for montering og vedligehold • Handleiding voor montage, installatie en onderhoud • Manual de montagem, instalação e manutenção • Návod k montáži, instalaci a údržbě • Instrukcja montažu, instalacji i konserwacji • Surinkimo, montavimo ir priežiūros vadovas • Montāzas, uzstādīšanas un apkopes rokasgrāmata • Руководство по сборке и обслуживанию • Montaaži-, paigaldus- ja säilitamise juhend
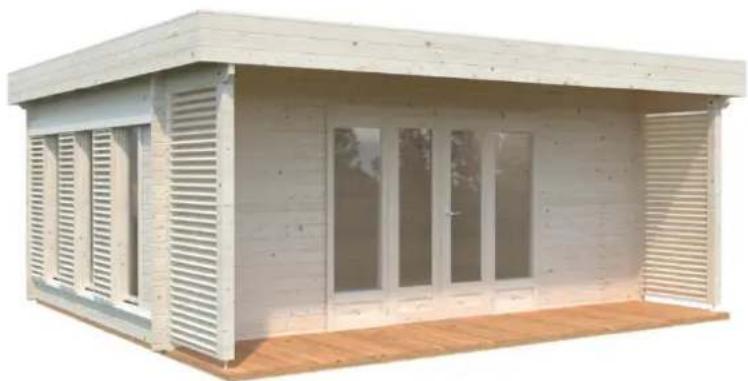
natural_image
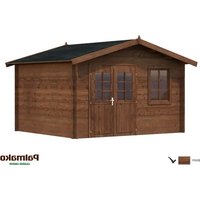
Exterior view of a simple wooden cabin with slatted windows and a wooden deck (no signage or text visible)Cabin FR44-4130
Treatment options, Item code
- Behandlungsoptionen, Artikel-Code • Traitement options, code de l'article • Opciones de tratamiento, código del artículo • Opzioni di trattamento, codice articolo • Behandlingsalternativer, artikkelnummer • Behandlingsalternativ, varukod • Käsittelyvaihtoehdot, yksikön koodi • Behandlingsmuligheder, artikel nummer • Behandelingsopties, artikelnummer • Opções de tratamento, código do artigo • Povrchové úpravy, kód položky • Możliwości leczenia, kod produktu • Apdorojimo variantai, prekės kodas • Apstrādes iespējas, artikula kods • Варианты обработки, код изделия • Töötlusvõimalused, tootekood
NO 109490
BNDIP 109492
GYDIP 109493
WTDIP 109491
Factory inspection by • Werkskontrolle durch • Contrôle à partir de l'usine par • Inspector de fábrica • Collaudato da • Fabrikkkontroll utført av • Fabriksbesiktigat av • Tehtaan tarkastaja • Fabriks Kontrol udført af • Fabriekscontrole door • Inspeção de fábrica, por: • Zkontrolováno ve výrobním závodě • Kontrola fabryczna do • Apžiūrą gamykloje atliko • Rūpnīcas pārbaudi veicis • Заводской контроль • Tehase kontroll teostatud:
Date • Datum • Date • Fecha • Data • Dato • Datum • Päiväys • Dato • Datum • Data • Datum • Data • Datums • Data • Data • Kuupäev:
Pack number • Pack Nr. • Packet n° • Bulto N° • Pacco N. • Serienr • Produktionsnummer • Pakettinro • Pakke nr. • Pak nr. • Número de embalagem • Číslo balení • Numer opakowania • Pakuotés numeris • lepakojuma numurs • Упаковочный номер • Pakinumber:
Inspection Certificate
Kontrollschein • Bulletin de contrôle • Certificado de control • Certificato di controllo • Kontrollskjema • Besiktningsprotokoll • Tarkastustodistus • Kontrol Certifikat • Control Certificaat • Certificado de Inspeção • Kontrolní certifikát • Certyfikat kontrolny • Apžiūros pažyma • Pärbaudes akts • Akt osmotra • Kontrollakt
Art. Nr. FR44-5641
Please keep safely!
Bitte gut aufbewahren! • A bien conserver, s.v.p.! • ¡A conservar! • Da conservare! • Ta vare på denne! • Vänligen förvara säkert! • Ole hyvä ja säilytä huolella! • Opbevares sikkert! • Zorgvuldig te bewaren! • Por favor, guarde em segurança! • Prosím, pečlivě uschovejte! • Przechowywać w bezpiecznym miejscu! • Laikykite saugiai! • Lüdzu, glabājiet drošā vietā! • Хранить в надежном месте! • Palun säilitada hoolsalt!
| English: The product you have purchased was manufactured in accordance with the high quality norms. The product unit has been carefully inspected and packed. In order to avoid possible problems during the assembly carried out by yourself or the building company of your choice, we recommend that you inspect the delivery for its completeness in accordance with the list of pieces before assembly. This inspection must be carried out within 14 days after delivery to your place. Warranty claims are limited to the exchange of defective materials. Defective product parts, which have already been used or painted, are excluded from being replaced. All further claims are excluded! In cases of complaints, please pay attention to the following procedures: Please present this inspection certificate along with the sales receipt to your place of purchase. Only in cases where these documents are presented will the complaint be dealt with quickly and without complications. |
| Deutsch: Der von Ihnen gekaufte Artikel wurde nach der hohen Qualitätsnorm gefertigt. Der Bausatz wurde sorgfältig geprüft und verpackt. Um etwaige auftretende Probleme während des Aufbaus durch Sie oder Ihre Aufbaufirma zu vermeiden, kontrollieren Sie bitte die Lieferung auf Vollständigkeit laut Stückliste vor dem Aufbau. Diese Kontrolle muss innerhalb 14 Tagen nach Anlieferung bei Ihnen erfolgen. Ansprüche auf Gewährleistung beschränken sich auf den Austausch von fehlerhaftem Material. Fehlerhafte Bauteile, die bereits verbaut oder gestrichen wurden, sind vom Umtausch ausgeschlossen. Alle weiteren Ansprüche sind ausgeschlossen! Sollte es zu einer Beanstandung kommen, beachten Sie folgende Vorgehensweise: Legen Sie Ihrem Fachhändler diesen Kontrollschein zusammen mit dem Einkaufsbeleg vor. Nur bei Vorlage dieser Unterlagen ist eine schnelle und problemlose Bearbeitung Ihrer Beanstandung möglich. |
| Français: Le produit que vous venez d'acheter a été fabriqué en respectant de hautes normes de qualité. Ce produit a été testé et emballé avec soin. Afin d'éviter des problèmes éventuels pendant la construction par vous-même ou par la société de construction mandatée, nous vous prions de bien vouloir vérifier que toutes les pièces ont été fournies selon la liste des pièces avant que vous ne commenciez la construction. Il vous incombe de faire ce contrôle dans les 14 jours après la fourniture. Les revendications en dédommagement se limitent à l'échange de matériel défectueux. Les pièces défectueuses, déjà construites ou peintes, ne font pas l'objet de l'échange. Toutes les revendications ultérieures ne sont pas prises en compte ! En cas d'une réclamation, veuillez respecter le déroulement suivant : il vous faudra présenter à votre commerçant agréé ce bulletin de contrôle avec le récépissé de l'achat. Ce ne sera que moyennant présentation de ces documents qu'un traitement rapide et sans problème de votre réclamation sera possible! |
| Español: El producto que ha adquirido ha sido fabricada de acuerdo con normas de alta calidad. Las piezas del producto han sido cuidadosamente inspeccionadas y embaladas. Con el fin de evitar posibles problemas durante el montaje, hecho por usted o por la empresa de construcción de su elección, le recomendamos revisar el paquete entregado, con la lista de piezas, antes de armar el producto. Haga la revisión dentro de 14 días después de recibir el paquete. La garantía se limita a reemplazar las piezas defectuosas. No se reemplazarán las partes defectuosas que ya hayan sido utilizadas o pintadas. ¡No se aceptan otras reclamaciones! En casos de queja, por favor, presente este certificado junto con la factura en el lugar donde hizo la compra. Sólo presentando estos documentos podremos resolver su problema rápidamente y sin complicaciones. |
| Italiano: Il prodotto che avete acquistato è stata prodotta secondo la norma di alta qualità. Il kit è stato controllato ed imballato con cura. Per evitare eventuali inconvenienti durante il montaggio, si prega di verificare, prima del montaggio, la completezza della fornitura in base alla distinta dei pezzi. Tale verifica deve essere effettuata entro 14 giorni dalla consegna. Eventuali diritti di garanzia si limitano alla sostituzione di materiale difettoso. Gli elementi difettosi già montati o verniciati sono esclusi dal diritto alla sostituzione. Ogni altro diritto resta escluso! In caso di reclamazione, procedere nel modo seguente: presentare questo certificato di controllo unitamente alla prova d'acquisto al rivenditore. Solo in questo modo la Sua reclamazione potrà essere evasa rapidamente e senza problemi. |
| Norsk: Produktet du har kjøpt, ble produsert i henhold til høye kvalitetskrav. Produktet har blitt kontrollert nøye og deretter omhyggelig pakket. For å unngå mulige problemer under monteringen, uansett om du gjør det selv eller får en godkjent håndverker til å gjøre det, anbefaler vi at du kontrollerer leveransen mot delelisten for å se om alle delene er inkludert. Denne kontrollen må gjøres innen 14 dager etter at delene ble levert til din adresse. Garantikrav begrenser seg til bytte av defekte deler. Defekte elementer som allerede har blitt brukt eller malt/beiset/limt, vil ikke bli erstattet. Alle andre krav er utelukket! Dersom du har en reklamasjon, vennligst gjør som følger: Lever dette kontrollskjema med kvitteringen til salgsstedet. Bare när du har med disse dokumentene kan klagen behandles raskt og uten komplikasjoner. |
| Svenska: Produkten du köpt har tillverkats i enlighet med de högsta kvalitetsstandarderna. Produktens delar har noggrant besiktigats och förpackats. För att undvika eventuella problem under monteringen som du utför själv eller låter en hantverkare att utföra, rekommenderar vi att du, innan monteringen påbörjas, besiktigar leveransen för att säkerställa att den är komplett enligt förteckningen över ingående delar. Denna besiktning måste utföras inom 14 dagar efter att du tagit emot leveransen. Garantianspråk är begränsade till ersättning av defekt material. Defekta produktdelar, vilka redan har använts eller målats, ersätts inte. Alla vidare anspråk avvisas! I håndelse av reklamationer, vänligen uppmärksamma följande: uppvisa detta besiktningsprotokoll tillsammans med inköpsbeviset till ditt inköpsställe. Endast om dessa dokument uppvisas kan vi garantera att reklamationen behandlas skyndsamt och utan krängel. |
| Suomi: Ostamasi tuote on valmistettu korkeita laatuvaatimuksia noudattaen, huolella tarkastettu ja pakattu. Jotta pystytys joko itsesi tai valitsemasi rakennuslikkeen toimesta sujuisi ongelmitta, suosittelemme, että tarkistat toimituksen sisällön osaluettelon avulla ennen kokoamisen aloittamista. Tämä tarkistus tulee tehdä 14 päivän kuluessa toimituksesta. Takuuvateet rajoittuvat viallisten materiaalien vaihtamiseen. Viallisia osia, joita on jo käytetty ja jotka on maalattu, ei vaihdeta uusiin. Lisävaatimuksia ei huomioida! Mahdollisissa valitustapauksissa toimi seuraavasti: Esitä oheinen tarkastustodistus ja kassakuitti ostopaikassa. Valituksen nopea ja mutkaton käsittely edellyttää näiden asiakirjojen esittämistä. |
| Dansk: Det købte produkt fremstillet i overensstemmelse med de høje kvalitets krav. Produktet er blevet omhyggeligt inspiceret og pakket. For at undgå eventuelle problemer i løbet af monteringen udført af dig selv eller håndværker af dit eget valg, anbefaler vi, at du undersøger leverancen for fuldstændighed i overensstemmelse med listen over dele før samling. Denne inspektion skal foretages inden 14 dage efter levering til din plads. Garantikrav er begrænset til udveksling af defekte materialer. Defekte produkter, som allerede er brugt eller malet, er udelukket fra at blive erstattet. Alle yderligere krav er udelukket! I tilfælde af klager, skal du være opmærksom på følgende procedurer: Venligst præsentere denne kontrol certifikat sammen med kvitteringen til det sted hvor produktet er købt. Kun i de tilfælde, hvor disse dokumenter er forelagt kan klagen behandles hurtigt og uden komplikationer. |
| Dutch: Het door U gekochte product werd vervaardigd overeenkomstig hoge kwaliteitsnormen. Het product werd zorgvuldig gecontroleerd en verpakt. Om tijdens de montage, uitgevoerd door Uzelf of een door U gekozen aannemer, problemen te vermijden, raden we U aan, vóór de montage de levering te controlleren op volledigheid in overeenstemming met de onderdelenlijst. Deze controle dient te gebeuren binnen 14 dagen na levering bij U thuis. Garantieclaims zijn beperkt tot het vervangen van defecte onderdelen. Defecte onderdelen die al gebruikt of geschilderd zijn, zijn uitgesloten van vervanging. Alle latere claims zijn uitgesloten! In geval van klachten dient u als volgt te handelen: Toon dit controlecertificaat, samen met Uw aankoopbewijs aan Uw verkoper. Alleen wanneer deze documenten getoond worden, zal de klacht snel en zonder complicaties in behandeling worden genomen. |
| Português: O produto que comprou foi fabricado em conformidade com as normas de alta qualidade. A unidade do produto foi cuidadosamente inspecionada e embalada. Para evitar possíveis problemas durante a montagem realizada por si ou pela empresa de construção à sua escolha, recomendamos que inspecione a entrega na íntegra, em conformidade com a lista de peças antes da montagem. Esta inspeção deve ser realizada no prazo de 14 dias após a entrega. As reclamações de garantia limitam-se à troca de materiais defeituosos. As peças do produto com defeito, que já tenham sido utilizadas ou pintadas, excluem-se da substituição. Excluem-se todas as outras reclamações! Em caso de reclamações, por favor, tome atenção aos seguintes procedimentos: Por favor, apresente este certificado de inspeção, juntamente com o recibo de venda no seu local de compra. Apenas nos casos em que estes documentos sejam apresentados a queixa será tratada com rapidez e sem complicações. |
| Čeština: Produkt, který jste zakoupil, byl vyroben v souladu s normami stanovujícími vysokou kvalitu. Produkt byl výrobcem pečlivě prohlédnutý a zabalený. Aby se předešlo možným problémům při montáži prováděné svépomocí nebo stavební firmou dle vašeho výběru, doporučujeme vám před montáží zkontrolovat dodávku na úplnost v souladu se seznamem dílů. Tato prohlídka musí být provedena do 14 dnů (!) od doručení do místa určení. Záruční nároky jsou omezeny na výměnu vadých materiálů. Vadné produkty, které již byly použity nebo které jsou již opatřeny nátěrem, nemohou být nahrazeny. Všechny další nároky jsou vyloučeny! V případě reklamace věnujte proším pozornost tomuto postupu: Předložte svému prodejci tento kontrolní certifikát spolu s prodejním dokladem. Pouze v případě, kdy jsou předloženy oba tyto dokumenty, lze reklamací rešit rychle a bez komplikací. |
| Polski: Produkt, który Państwo zakupili, wykonano według najwyższych norm jakości. Elementy konstrukcyjne przed zapakowaniem przeszły dokładną kontrolę jakości. Aby uniknąć problemów podczas samodzielnego montażu, bądź montażu zleconego firmie budowlanej, przed montażem zalecamy sprawdzenie zawartości przesyłki zgodnie z listą części zamieszczonych w zestawie. Kontroli kompletności zestawu należy dokonać w ciągu 14 dni od dostarczenia przesyłki. Reklamacje objęte gwarancją ograniczają się do wymiany wadliwych elementów. Wadliwe elementy, które zostały użyte lub pomalowane nie będą podlegały wymianie ani dalszym reklamacjom. W przypadku potrzeby zgłoszenia reklamacji, prosimy przestrzegać poniższych procedur: prosimy przedłożyć Certyfikat kontrolny wraz z paragonem zakupu i adresem dostawy. Reklamacje będą rozpatrywane wyłącznie po dostarczeniu powyższych dokumentów. |
| Lietuviškai: Produktas, kurj jsigijote, pagamintas pagal aukštos kokybės standartus. Produkto blokas, kurj reikia surinkti, buvo atidžiai patikrintas ir supakuotas. Siekiant išvengti galimų problemų surenkant produktą patiems arba pasirinkus tam norimą statybos bendrovę, prieš surenkant rekomenduojame patikrinti pristatymo komplektaciją pagal dalių sąrašą. Ši patikra turi būti atlikta per 14 dienų nuo pristatymo j jūsu nurodytą vietą. Garantinės sąlygos taikomos tik brokuotoms dalims. Brokuotos produkto dalys, kurios buvo panaudotos arba nudažytos, nebekeičiamos. Visos kitos pretenzijos nesvarstomos! Jei teikiate pretenziją, atkreipkite dèmesį j šias procedūras: i produkto jsigijimo vietą turite pristatyti apžiūros pažymėjimą bei pirkimo kvitą. Tik tais atvejais, kai pristatomi minėti dokumentai, pretenzija gali būti nagrinėjama greitai ir be komplikacijų. |
| Latviešu: Produkts, kuru esat iegădăjies, ir ražota saskaņa ar augstăm kvalitätes normām. Ši produkta vienība ir rūpīgi pārbaudīta un iepakota. Lai izvairítos no iespējamiem sarežgījumiem montażas laikā, kuru veicať jūs pats vai jūsu izvēlēts celtniecības uznēmums, pirms montażas iesakām pārbaudīt, vai piegādātajam izstrādājumam nekas netrūkst, izmantojot detalų sarakstu. Ši pārbaude jäveic 14 dienu laikā pēc piegādāšanas. Garantija paredz tikai defektīvo materiālu apmainų. Defektīvas produkta detalas, kuras jau ir izmantotas vai nokrāsotas, netiks mainitas. Visas turpmākās prasības tiks noraidītas! Sūdzību gadījumā, lūdzu, ievērojiet šadu kārtību: lūdzu, uzrādiet šo pārbaudes aktu kopā ar pirkuma čeku izstrādājuma iegādāšanās vietā. Sūdzība tiks atrisināta ātri un bez sarežgījumiem tikai tad, ja tiks uzrāditī šie dokumenti. |
| Русский: Приобретенное вами изделие изготовлено по высоким стандартам качества. Изделие внимательно проверено и упаковано. Во избежание возможных проблем в процессе сборки, выполняемой самостоятельно или привлеченной вами строительной компанией, рекомендуем перед сборкой проверить комплектность поставки по комплектовочной ведомости. Такую проверку следует провести в течение 14 дней после доставки товара. Претензии по гарантии ограничиваются заменой дефектных материалов. Дефектные части изделия, которые уже были использованы или окрашены, замене не подлежат. Все прочие претензии не принимаются! Порядок подачи претензии: Претензия подается с настоящим актом осмотра и товарным чеком по месту покупки товара. Только при наличии всех указанных документов претензия будет рассмотрена быстро и без сложностей. |
| Eesti: Ostetud toode on toodutud vastavuses körgete kvaliteedi normidega. Toote ühik on hoolikalt kontrollitud ja pakendatud. Et vältida võimalikke probleeme paigaldamisel, mida teostate ise või teostab teie poolt valitud paigaldusettevõte, soovitame enne paigaldama asumist kontrollida toote komplekssust detailide nimekirja alusel, mille leiate kaasas olevast juhendist. See kontroll tuleb teostada 14 páeva jooksul pārast tarnet. Garantii alla kuuluvad kaebused on piratud defektsete detailide välja vahetamisega. Defektsed detailid, mida on juba kasutatud või värvitud, ei kuulu garantiikorras välja vahetamisele. Köik edasised kaebused on välistatud! Kaebuste korral palun pöörake tähelepanu järgnevale: palun hoidke see kontrollakt koos müügiarvega alles. Ainult nende dokumentide esitamisel lahendatakse kaebused kiiresti ja ilma komplikatsioonideta. |
The producer shall have the right to make technical changes to the product. • Technische Änderungen vorbehalten. • Le producteur réserve le droit d'effectuer des modifications techniques au produit. • Reservado el derecho a modificaciones técnicas. • Il produttore mantiene il diritto di apportare modifiche tecniche al prodotto. • Produsent forbeholder seg retten til à endre tekniske egenskaper ved produktet. • Tillverkaren har rätt att utföra tekniska förändringar för produkten. • Valmistaja pidättää oikeuden tehdä tuotteeseen teknisiä muutoksia. • Producenten har ret til at foretage tekniske ændringer ved produktet. • Alle rechten en technische wijzigingen voorbehouden. • O fabricante reserva-se o direito de realizar alterações técnicas ao produto. • Výrobce je oprávněn provádět technické úpravy produktu. • Producent zastrzega sobie prawo do dokonywania zmian technicznych produktu. • Gamintojas turi teisę atlikti techninius gaminio pakeitimus. • Ražotājs patur tiesības veikt tehniskas produkta izmaiņas. • Производитель оставляет за собой право вносить в изделие технические изменения. • Tootja jätab endale õiguse muuta toote tehnilisi omadusi.
To be completed by buyer! (Please use block letters) • Vom Käufer auszufüllen! (Bitte in Druckschrift) • A remplir par l'acheteur! (en lettres d'imprimerie, s'il vous plaît) • ¡Completa el cliente! (en mayúsculas) • Da compilare dall'acquirente! (in stampatello) • Fylles ut av kjøper! (Vær vennlig å bruke blokkbokstaver) • Fylls i av köparen! (Vänligen texta) • Ostaja täyttää! (Ole hyvä ja käytä isoja kirjaimia) • Udfyldes af køber! (Benyt venligst Blokbogstaver) • In te vullen door de koper! (Graag in drukletters) • A completar pelo comprador! (por favor escreva em letra de máquina) • Vyplní kupující! (Prosíme hůlkovým písmem) • Wypełnia nabywca (drukowanymi literami) • Pildo pirkéjas (didžiosiomis raidémis)! • Aizpilda pircējs! (Lūdzu, izmantojiet drukātos burtus.) • Заполняется покупателем! (печатными буквами) • Täidetakse ostja poolt! (palun täita trükitähtedes):
Place of purchase • Bezugsquelle • Source d'achat • Lugar de compra • Acquistato presso • Salgs sted • Inköpsställe • Ostopaikka • Salgssted • Plaats van aankoop • Local de compra • Místo nákupu • Miejsce zakupu • Isigijimo data • legādāšanās vieta • Mecto покупки товара • Ostukoht:
Sales receipt No. • Kaufbeleg-№ • Récépissé n° • Recibo N° • Prova d'acquisto N. • Kvitteringsnr • Försäljningskvittots nummer • Kassakuitin numero • Kasse Bon nr • Aankoopbewijs № • Recibo de venda n.º • Prodejní doklad č. • Nr paragonu • Pardavimo kvito № • Pirkuma čeka Nr. • Номер товарного чека • Müügiarve number:
Sales receipt date • Kaufbeleg-Datum • Date du récépissé • Fecha recibo • Data prova d'acquisto • Kvitteringsdato • Försäljningskvittots daatum • Kassakuitin päiväys • Kasse bons dato • Aankoopbewijs -Datum • Data do recibo de venda • Datum prodejního dokladu • Data paragonu • Pirkimo kvito data • Pirkuma čeka datums • Дата товарного чека • Müügiarve kuupäev:
Delivery date • Lieferdatum • Date de livraison • Fecha de Endrega • Data di consegna • Leveringsdato • Leveransdatum • Toimituspäivä • Leverings dato • Leveringsdatum • Data de entrega • Termín dodání • Data dostawy • Pristatymo data • Piegādes datums • Dátata доставки • Tarne kuupäev:
Buyer's address • Kundenanschrift • Adresse du client • Dirección del cliente • Indirizzo del cliente • Kjøpers adresse • Köparens adress • Ostajan osoite • Købers adresse • Adres koper • Morada do comprador • Adresa kupujícího • Adres nabywcy • Pirkéjo adresas • Pircēja adrese • Адрес покупателя • Ostja aadress:
Telephone • Telefon • Téléphone • Téléfono • Telefono • Telefon nr • Telefon • Puhelin • Telefon • Telefoon • Telefone • Telefon • Telefon • Telefonas • Tâlrunis • Telefon • Telefon:
Forwarder: □Pick-up □Others ●
Afhalen: □Spedition □Selbstabholer Par: □Transporteur □Propres moyens Entrega: □Transporte organizado □Transporte propio Tramite: □Spedizioniere □Mezzo proprio Transportør: □Sendes □Hentes Speditör: □Avhämtning □Övrigt Rahdinkuljettaja: □Nouto □Muut Transportør: □Sendes □Hentes Door: □Verzending □Zelf Remetente: □Entrega □Outros Zasílatel: □Sběrná služba □Ostatní Przekazywanie: □Odbiór w sklepie □Inne Ekspeditorius: □“Pick-up” □Kita Ekspeditors: □Saņemšana uz vietas □Cits Экспедитор: □Приемка □Прочее Transport: □Järgi tulemine □Muu
Description of complaint • Schilderung der Beanstandung • Déscription de la réclamation • Descripción del problema • Descrizione della reclamazione • Beskrivelse av feil/ mangel • Beskrivning av reklamationen • Valituksen kuvaus • Beskrivelse af fejl / Mangel • Beschrijving van de klacht • Descrição da reclamação • Popis reklamace • Opis reklamacji • Skundo aprašymas • Sūdzības apraksts • Содержание претензии • Kaebuse kirjeldus
Please keep the parts which are the object of the complaint until the complaint is settled! • Bitte bewahren Sie unbedingt alle die Reklamation betreffenden Bauteile/Gegenstände auf, bis die Bearbeitung abgeschlossen ist. • Veuillez garder les pièces contestées jusqu'à ce que la réclamation soit traitée définitivement! • Por favor, conserve las piezas objeto de la queja hasta que el problema haya sido resuelto • Si prega di conservare i pezzi reclamati fino all'evasione della reclamazione! • Vær vennlig å ta vare på de aktuelle delene/produktet inntil saken er avsluttet! • Vänligen behåll delarna som är föremål för reklamation tills reklamationen har behandlats! • Ole hyvä ja säilytä osat, joita valitus koskee, kunnes valitus on käsitelty! • Venligst ta hånd om de aktueller dele / produkt indtil sagen er afsluttet! • Gelieve de betrokken onderdelen te bewaren tot de klacht is afgehandeld • Por favor, guarde as peças objeto da reclamação, até que a reclamação esteja resolvida! • Uchovejte prosím díly, které jsou předmětem stížnosti, dokud reklamace nebude vyřízena! • Prosimy zachować części będące przedmiotem reklamacji do czasu jej rozpatrzenia. • Dalis, kurios yra skundo objektas, reikia išsaugoti tol, kol skundas bus išnagrinétas! • Lūdzu, saglabājiet detaļas, uz kurām südzība attiecas, līdz südzība tiek atrisināta! • Просим сохранить части, являющиеся предметом претензии, до ее разрешения! • Palun hoidke kaebust puudutavad objektid/detailid alles, kuni kaebus on lahendatud!
| Pos | SPECIFICATION-STÜCKLISTE-NOMENCLATURE-ELEMENTI-ESPECIFICATIONFR44-5641 | Pcs | Profile(mm) | Length(mm) | ||
| 001 |  (570W) (570W) | 1 | 44x57 | 5600 | ||
| 002 |  | 20 | 44x114 | 5600 | ||
| 003 |   | 1 | 44x114 | 5800 | ||
| 004 | 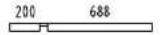 | 1 | 44x50 | 932 | ||
| 005 | 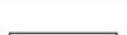 | 5 | 44x50 | 703 | ||
| 006 | 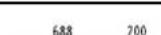 | 1 | 44x50 | 932 | ||
| 007 | 2 | 44x57 | 1600 | |||
| 008 | 34 | 44x114 | 1600 | |||
| 009 | 1 | 44x114 | 5800 | |||
| 010 | [200 688] | 1 | 44x100 | 932 | ||
| 011 |  | 5 | 44x100 | 703 | ||
| 012 | [688 700] | 1 | 44x100 | 932 | ||
| 013 | 21 | 44x114 | 4100 | |||
| 014 | 15 | 44x114 | 650 | |||
| 015 | 30 | 44x114 | 555 | |||
| 016 | 15 | 44x114 | 675 | |||
| 017 | 2 | 44x114 | 5200 | |||
| WA-1 | 1 | |||||
| WB-1 | 1 | |||||
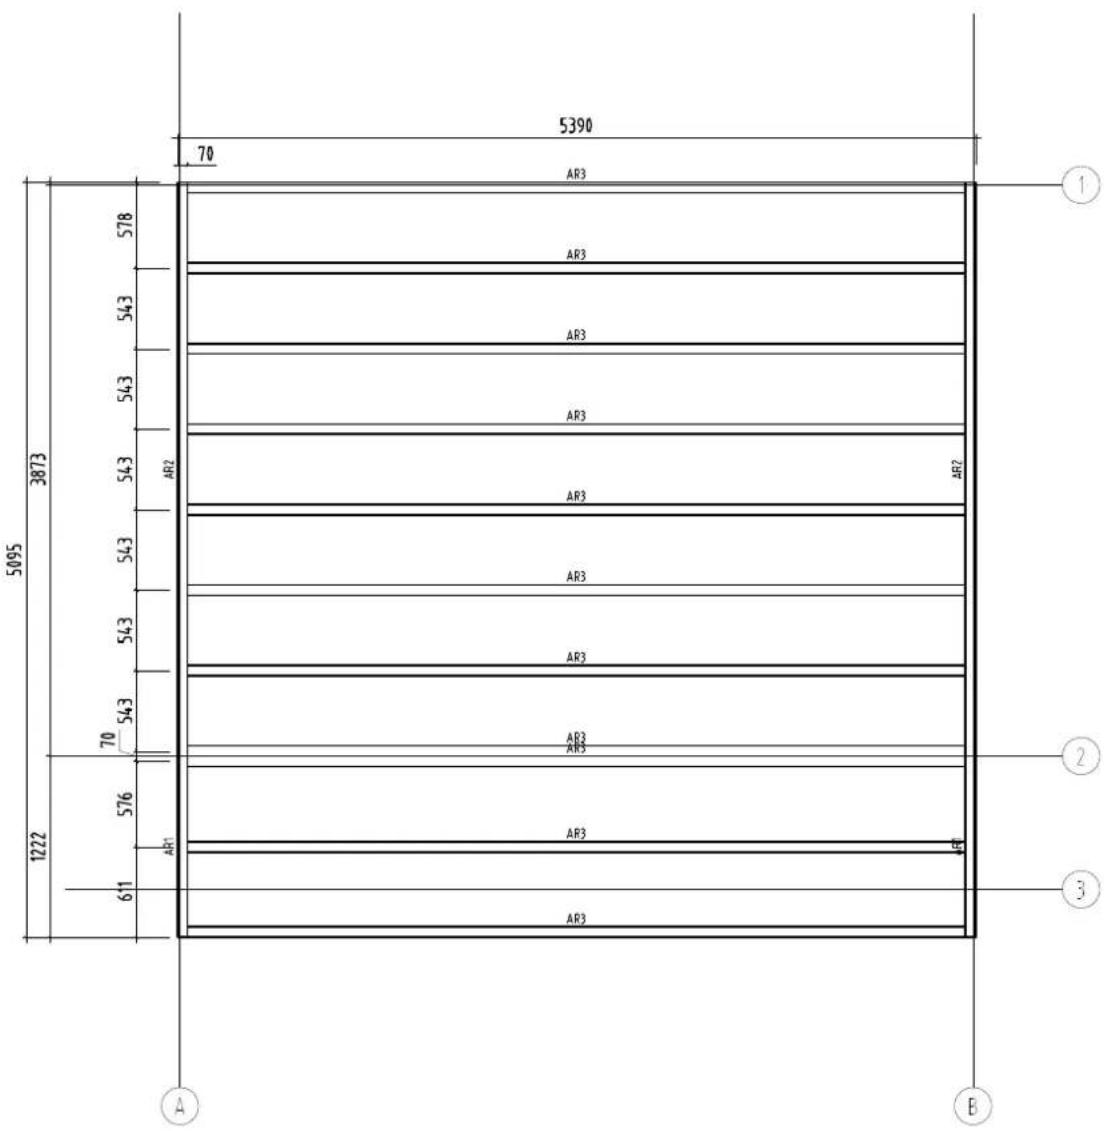
| AR3 | 11 | 70x45 | 5250 | |||
| AR2 | 2 | 70x45 | 3873 | |||
| AR1 | 2 | 70x45 | 1222 | |||
| CoB5 | 1 | 120x44 | 3805 | |||
| CoB6 | 1 | 95x19 | 3805 | |||
| CoB1 | 2 | 19x95 | 3250 | |||
 | Page 1/7 | |||||


| Pos | SPECIFICATION-STÜCKLISTE-NOMENCLATURE-ELEMENTI-ESPECIFICATIONFR44-5641 | Pcs | Profile(mm) | Length(mm) | |
| CoB3 | Covering board- Deckbrett- Madrier de couverture- Tavola di copertura- Listón de cubierta____ | 2 | 19x95 | 2730 | |
| CoB2 | Covering board- Deckbrett- Madrier de couverture- Tavola di copertura- Listón de cubierta____ | 2 | 19x95 | 2590 | |
| CoB4 | Covering board- Deckbrett- Madrier de couverture- Tavola di copertura- Listón de cubierta____ | 2 | 19x95 | 2520 | |
| Pst1 | Post- Prosten- Poteau- Montante- Poste____ | 2 | 90x90 | 2120 | |
| Rai13 | Railing board- Geländer- Barre de ranbarde- Tavola di ringhiera- Tabla de barandilla____ | 2 | 114x19 | 4340 | |
| Rai12 | Railing board- Geländer- Barre de ranbarde- Tavola di ringhiera- Tabla de barandilla____ | 2 | 114x19 | 4340 | |
| Rai8 | Railing board- Geländer- Barre de ranbarde- Tavola di ringhiera- Tabla de barandilla____ | 2 | 114x19 | 3360 | |
| Rai3 | Railing board- Geländer- Barre de ranbarde- Tavola di ringhiera- Tabla de barandilla____ | 2 | 114x19 | 3250 | |
| Rai2 | Railing board- Geländer- Barre de ranbarde- Tavola di ringhiera- Tabla de barandilla____ | 2 | 114x19 | 3249 | |
| Rai9 | Railing board- Geländer- Barre de ranbarde- Tavola di ringhiera- Tabla de barandilla____ | 2 | 114x19 | 2810 | |
| Rai1 | Railing board- Geländer- Barre de ranbarde- Tavola di ringhiera- Tabla de barandilla____ | 2 | 114x19 | 2590 | |
| Rai4 | Railing board- Geländer- Barre de ranbarde- Tavola di ringhiera- Tabla de barandilla____ | 4 | 114x19 | 2590 | |
| Rai7 | Railing board- Geländer- Barre de ranbarde- Tavola di ringhiera- Tabla de barandilla____ | 2 | 114x19 | 2040 | |
| Rai11 | Railing board- Geländer- Barre de ranbarde- Tavola di ringhiera- Tabla de barandilla____ | 2 | 105x19 | 3360 | |
| Rai6 | Railing board- Geländer- Barre de ranbarde- Tavola di ringhiera- Tabla de barandilla____ | 2 | 105x19 | 3249 | |
| Rai5 | Railing board- Geländer- Barre de ranbarde- Tavola di ringhiera- Tabla de barandilla____ | 2 | 105x19 | 2590 | |
| Rai10 | Railing board- Geländer- Barre de ranbarde- Tavola di ringhiera- Tabla de barandilla____ | 2 | 105x19 | 2040 | |
| RoR1 | Rafter- Sparre- Chevron- Trave- Cabrio____ | 6 | 70x140 | 5410 | |
| RoR2 | Rafter- Sparre- Chevron- Trave- Cabrio____ | 8 | 44x120 | 200 | |
| Sla4 | Slat- Leiste- Baguette- Listello- Listón____ | 3 | 70x19 | 509 | |
| Sla5 | Slat- Leiste- Baguette- Listello- Listón____ | 4 | 70x19 | 500 | |
| SP1 | Support brace- Stützleiste- Baguette de support- Listello di supporto- Listón de soporte____ | 10 | 44x44 | 330 | |
| SP2 | Support brace- Stützleiste- Baguette de support- Listello di supporto- Listón de soporte____ | 22 | 44x44 | 300 | |
| FB2-1 | Floor board- Fussbodenbrett- Madrier du plancher - Tavola pavimento- Tabla de suelo 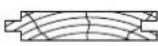 | 60 | 89x19 | 3806 | |
| TB1-1 | Terrace board- Terrassenbrett- Madrier de terrace- Tavola terrazzo- Tabla de terraza 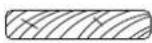 | 57 | 95x19 | 1200 | |
| RB2-1 | Roof board- Dachbrett- Madrier du toit- Tavola tetto- Tabla de tejado 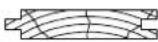 | 59 | 89x19 | 3290 | |
| Object name | Page 2/7 | ||||
| RB2-2 | Roof board- Dachbrett- Madrier du toit- Tavola tetto- Tabla de tejado  | 59 | 89x19 | 2510 | |
| FIB2-1 | Floor beading- Fussbodenleiste- Baguette du plancher- Listello pavimento- Listón de suelo | 9 | 19x19 | 1920 | |
| RE2-1 | Roof edge reinforcement- Dachrandleiste- Baguette en bordure du toit- Rinforzo bordo tetto- Refuerzo borde tejado | 2 | 32x40 | 95 | |
| RE2-2 | Roof edge reinforcement- Dachrandleiste- Baguette en bordure du toit- Rinforzo bordo tetto- Refuerzo borde tejado | 2 | 32x40 | 1195 | |
| RE2-3 | Roof edge reinforcement- Dachrandleiste- Baguette en bordure du toit- Rinforzo bordo tetto- Refuerzo borde tejado | 2 | 32x40 | 3810 | |
| Sla10-1 | Slat- Leiste- Baguette- Listello- Listón | 1 | 19x45 | 2400 | |
| StB1-1 | Storm brace- Sturmleiste- Protection contre le vent- Antivento-Protector contra tormentas  | 2 | 25x45 | 2200 | |
| StB1-2 | Storm brace- Sturmleiste- Protection contre le vent- Antivento-Protector contra tormentas | 2 | 25x45 | 2300 | |
| Fim | -Fixing kit- Befestigungsset- Moyens de fixation- Materiale di fissaggio- Kit de fijación | 1 | USE | ||
| QLA16 | Adjustment bolt - Senkbolzen - Boulon de reglage - Bullone di regolamento- Perno de ajuste | 2 | Pst1 | ||
| QPOYP8x100Zn | Bolt -Schloss-schraube -Boulon- Bullone- Perno- M8x100mm PUPO | 2 | Pst1 | ||
| QPOYP8x80Zn | Bolt -Schloss-schraube -Boulon- Bullone- Perno- M8x80mm PUPO | 8 | StB1-1; StB1-2 | ||
| QNU35x35x130Zn | L-iron- Winkel- Angle -Angolo- Angulo 35x35x130 EM VN353590 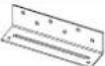 | 6 | Louvre-1 | ||
| QNA14x40Me | Nail- Nagel- Clou- Chiodo- Clavo- 1.4x40mm  | 60 | FIB2-1 | ||
| QNA22x50Zn | Nail- Nagel- Clou- Chiodo- Clavo- 2.5x50mm | 1350 | |||
| QNP25x60Zn | Nailing plate- Nagelplatte- Connecteur métallique- Piastra connettore- Placa del clavo 57x25x2 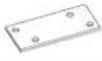 | 8 | 001;002007;008 | ||
| QMUKK8Zn | Nut- Schraubenmutter- Écrou- Dado- Tuerca- M8mm | 8 | |||
| QKRYP4_5x20Zn | Screw- Schraube- Vis- Vite- Tornillo- 4.5x20mm ZnY | 24 | 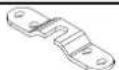 | ||
| QKRYP4_5x25Zn | Screw- Schraube- Vis- Vite- Tornillo- 4.5x25mm ZnY | 32 |  | ||
| QKRPP4_5x50Zn | Screw- Schraube- Vis- Vite- Tornillo- 4.5x50mm | 440 | CoB4; Sla2; Sla5 | ||
| QKRPP45x70Zn | Screw- Schraube- Vis- Vite- Tornillo- 4.5x70mm  | 20 | 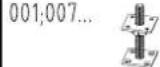 | ||
| QKRPP4x16Zn | Screw- Schraube- Vis- Vite- Tornillo- 4x16mm | 24 | 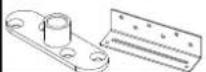 | ||
| QKRPP5x100Zn | Screw- Schraube- Vis- Vite- Tornillo- 5x100mm  | 6 | CoB3 | ||
| QKRYP5x40ZnTX | Screw- Schraube- Vis- Vite- Tornillo- 5x40mm | 6 | 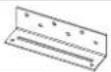 | ||
| QKRPP5x80ZnTX | Screw- Schraube- Vis- Vite- Tornillo- 5x80mm  | 80 | SP1+RoR1;SP2+RoR2RoR1+SP2 | ||
| QKRPP5x90Zn | Screw- Schraube- Vis- Vite- Tornillo- 5x90mm  | 44 | RoR1+004;005;006RoR1+010;011;012004;005;006 | ||
| QKRPP6x150Zn | Screw- Schraube- Vis- Vite- Tornillo- 6x150mm  | 38 | AR;018+RoR2 | ||
| QKRPP6x180Zn | Screw- Schraube- Vis- Vite- Tornillo- 6x180mm  | 12 | RoR1 | ||
| QSE8x20Zn | Washer- Dichtscheibe- Joint- Rondella- Arandela- 8x20mm | 10 | 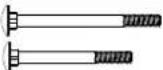 | ||
| Object name | Page 4/7 | ||||
| Pos | SPECIFICATION-STÜCKLISTE-NOMENCLATURE-ELEMENTI-ESPECIFICATIONFR44-5641 | Pcs | Profile(mm) | Length(mm) | |||
| QLY-SAH4140 | 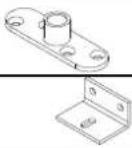 | 6 | Louvre-2 | ||||
| QLY-SAH6054 | kompl. | 6 | Louvre-2 | ||||
| QLY-SAH7200 |  | kompl. | 3 | Louvre-2 | |||
| QLY-SAH2000 |  | l=2m | 2 | Louvre-2 | |||
| QLY-SAH2000-1 |  | l=2m | 2 | Louvre-2 | |||
Žalusii-1-Louvre 900x1960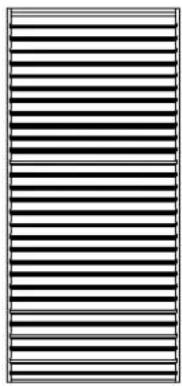 | 2 | ||||||
Žalusii-2-Louvre 520x1560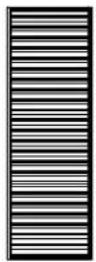 | 3 | ||||||
| Object name Page 5/7 | |||||||
| Pos | SPECIFICATION-STÜCKLISTE-NOMENCLATURE-ELEMENTI-ESPECIFICATIONFR44-5641 | Pcs | Profile(mm) | Length(mm) | |
| A44-71P | Window - Fenster - Fenetre - Finestra-Ventana 545x1670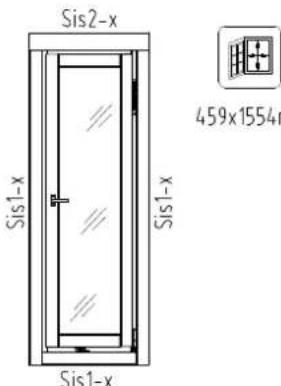 | 3 | |||
| Sis2-1 | Side slat- Randleiste- Baguette en bordure- Listón de borde- Listello bordo 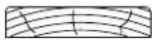 | 6 | 19x95 | 649 | |
| Sis1-1 | Side slat- Randleiste- Baguette en bordure- Listón de borde- Listello bordo 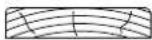 | 12 | 19x70 | 1698 | |
| Sis1-2 | Side slat- Randleiste- Baguette en bordure- Listón de borde- Listello bordo 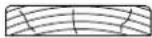 | 6 | 19x70 | 509 | |
| QKRPP4_5x50Zn | Screw- Schraube- Vis- Vite- Tornillo- 4.5x50mm  | 120 | |||
| QLIA | Window fittings- Fenstergriff- Poigne de la fenêtre- Maniglia finestra- Manilla (ventana) 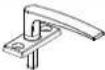 | 3 | |||
| TU44-107P | Door - Tür - Porte - Porta-Puerta 2390x1936 1144x1867mm 1144x1867mm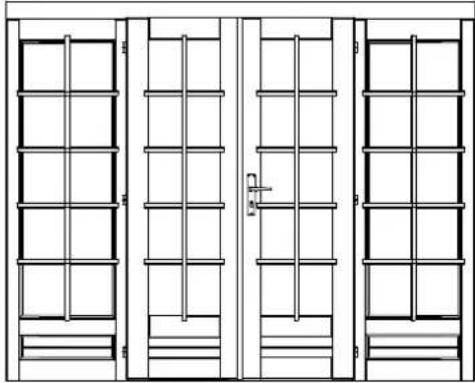 | 1 | |||
| QT18-1 | Seal- Gummidichtung- Joint d'isolation- Guarnizone- Burlete  | 1 | 5500 | ||
| QULSI30x35 | Cylinder- Zylinderschloss- Serrure a mortaiser- Serratura a cilindro- Bombin- 30.35 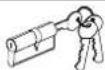 | 1 | |||
| QRV120Zn | Keeper- Schliessblech- Tole- Lamiera- Aldaba de candado- 120Zn [TETW] | 1 | |||
| QKRPP2_5x16Zn | Screw- Schraube- Vis- Vite- Tornillo- 2.5x16mm Zn [OK2C] | 2 | |||
| QKRPP3x20Zn | Screw- Schraube- Vis- Vite- Tornillo- 3x20mm [SAKX] | 40 | |||
| QKRPP4_5x50Zn | Screw- Schraube- Vis- Vite- Tornillo- 4.5x50mm [HAAR] | 12 | |||
| QLIU KAPal | Door fittings- Türbeschlag- Ferrure- Ferramenta porta- Manilla puerta- QLIUKAPal  | 1 | |||
| Object name | Page 7/7 | ||||
other
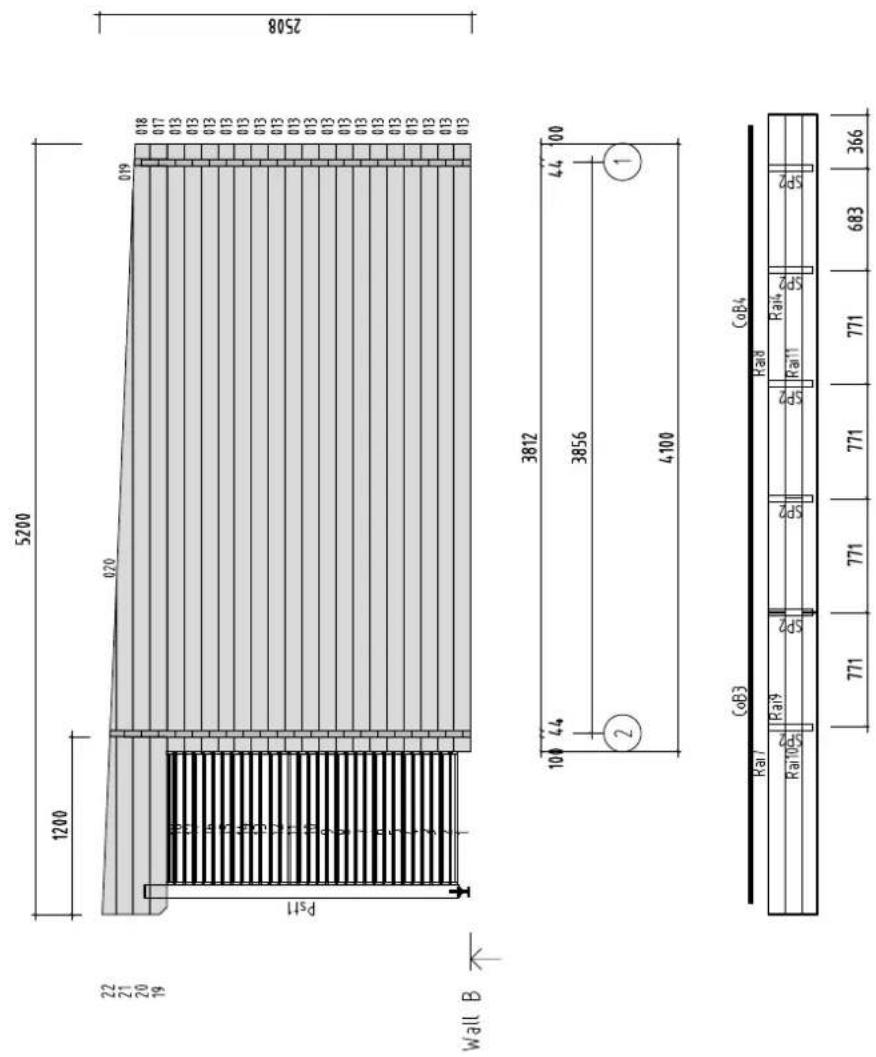
| Section | Dimension | | ------- | --------- | | AR3 | 70 | | AR2 | 70 | | Total | 5390 | | Total | 5095 | | Total | 3873 | | Total | 1222 | | Total | 611 | | Total | 576 | | Total | 543 | | Total | 543 | | Total | 543 | | Total | 543 | | Total | 578 | | Total | 578 | | Total | 543 | | Total | 543 | | Total | 543 | | Total | 543 | | Total | 543 | | Total | 543 | | Total | 543 | | Total | 543 | | Total | 543 | | Total | 543 | | Total | 542 | | Total | 542 | | Total | 542 | | Total | 542 | | Total | 542 | | Total | 542 | | Total | 542 | | Total | 542 | | Total | 542 | | Total | 542 | | Total | 541 | | Total | 541 | | Total | 541 | | Total | 541 | | Total | 541 | | Total | 541 | | Total | 541 | | Total | 541 | | Total | 541 | | Total | 541 | | Total | 540 | | Total | 540 | | Total | 540 | | Total | 540 | | Total | 540 | | Total | 540 | | Total | 540 | | Total | 540 | | Total | 540 | | Total | 540 | | Total | 5390 | | Total | 70 | | A | (not labeled) | B (not labeled) | ① (not labeled) | ② (not labeled) | ③ (not labeled) |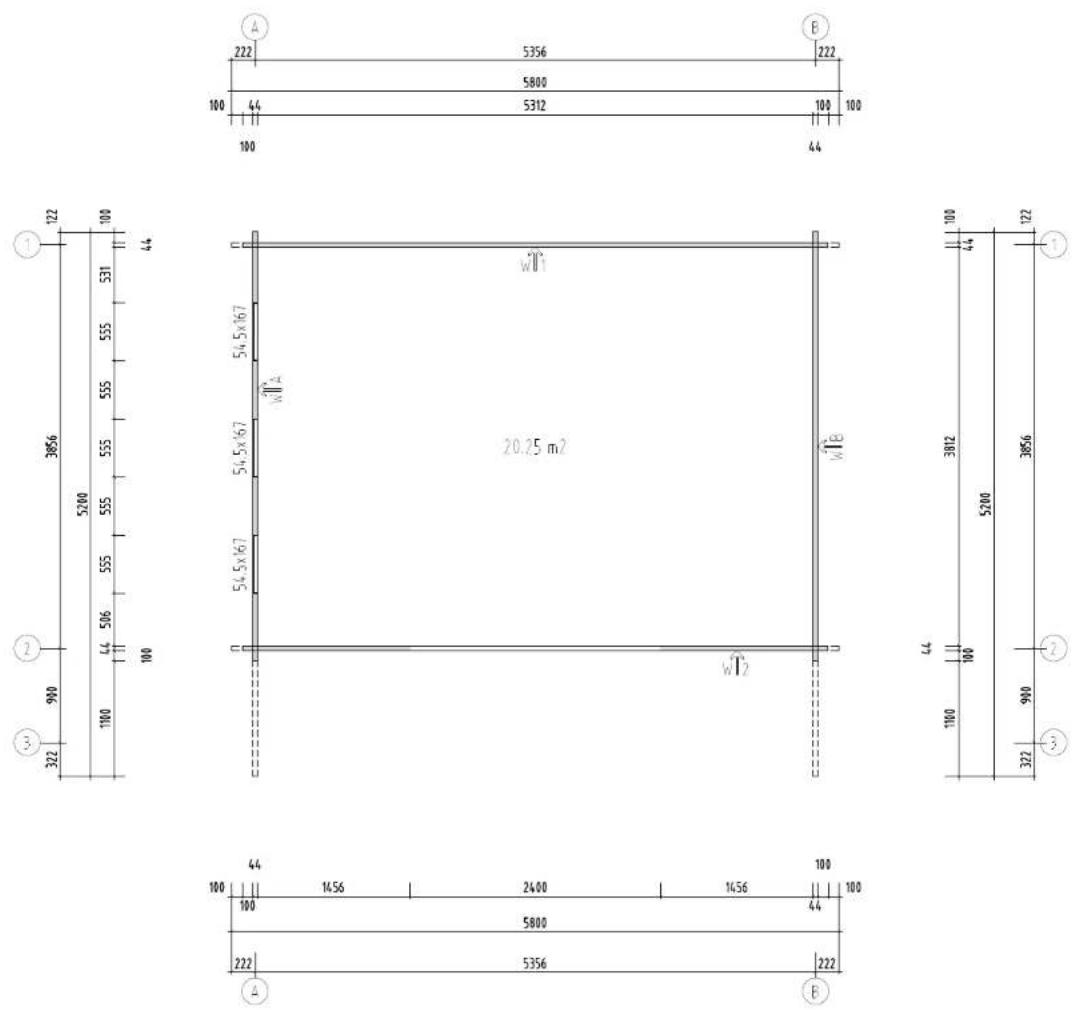
text_image
5200 1200 24* 22 21 20 19 2571 Pst11 Wall A 45 020 015 015 015 015 015 015 015 015 015 015 015 015 015 015 015 015 015 015 015 015 015 015 015 015 015 013 016 016 016 016 016 016 016 016 016 016 016 016 016 016 016 016 016 016 016 016 016 013 013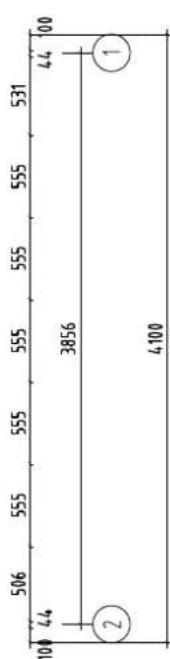
text_image
506 555 555 555 555 555 531 10 44 3856 44 00 2 4100 1
text_image
CoB3 Rai 7 Rai 8 Rai10 P2 Rai9 SP2 SP2 SP2 Rai 11 Rai4 SP2 SP2 CoB4
2508
text_image
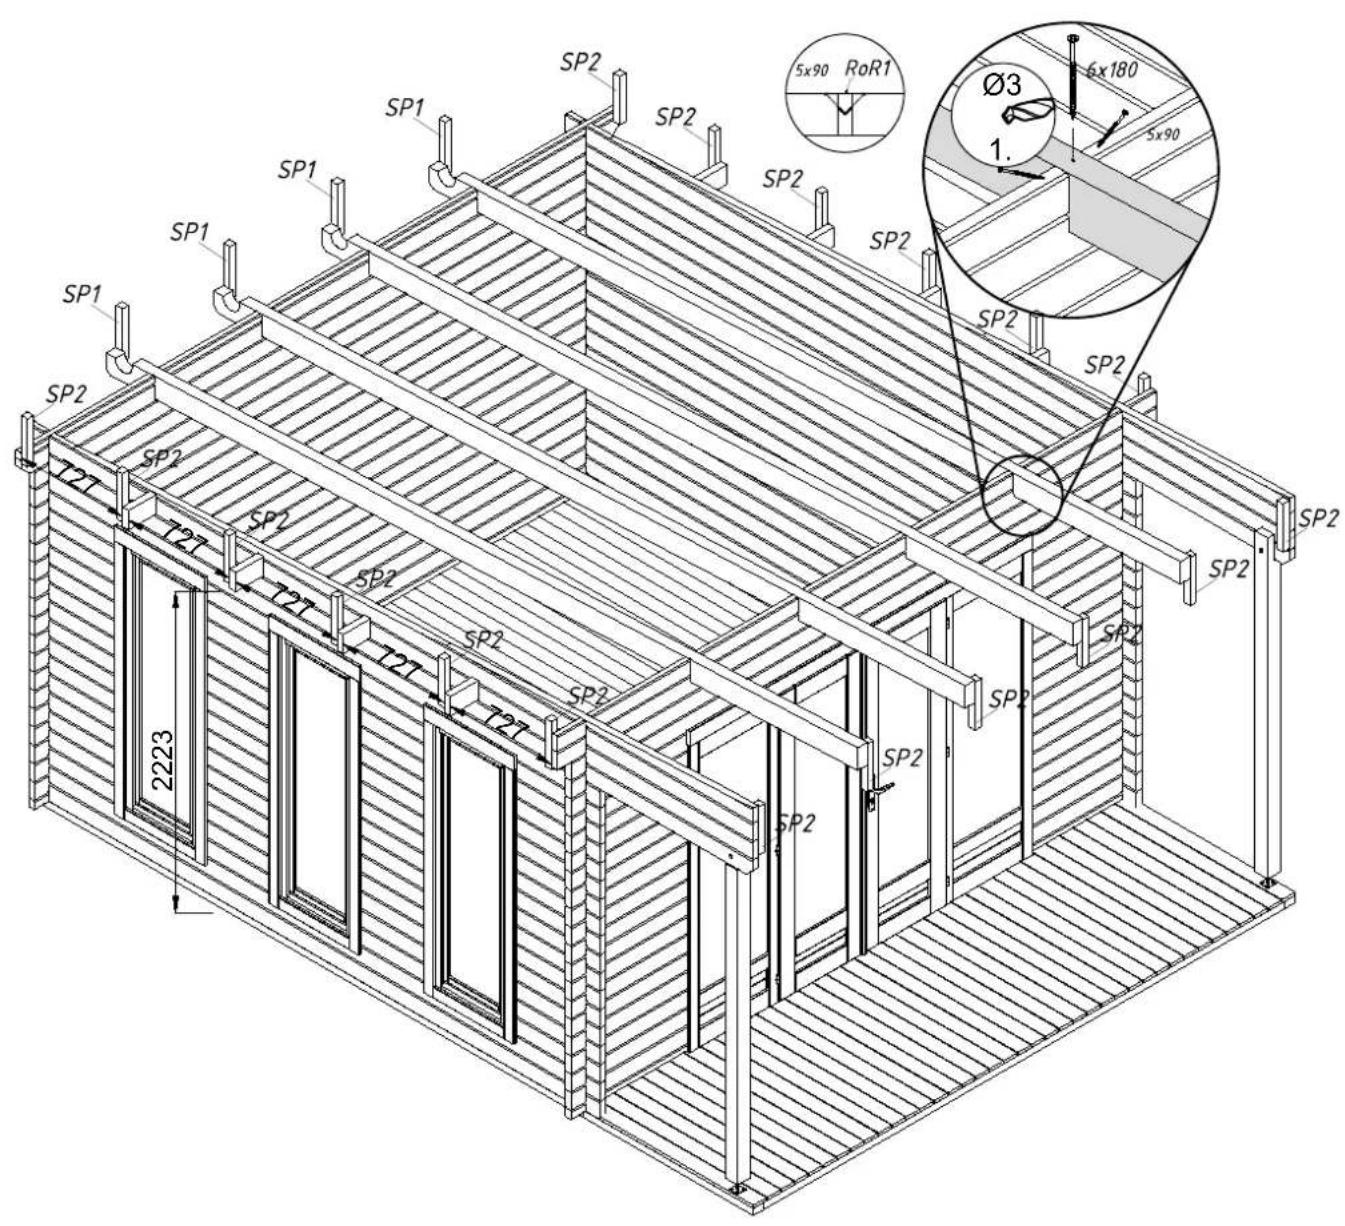
SP1 SP2 SP1 SP2 5x90 RoR1 Ø3 6x180 5x90 1. SP1 SP2 SP2 SP2 SP2 SP2 SP2 SP2 SP2 SP2 SP2 SP2 SP2 SP2 SP2 SP2 SP2 SP2 SP2 SP2 SP2 SP2 SP2 SP2 SP2 SP2 SP2 SP2 SP2 SP2 SP2 SP2 SP2 SP2 SP2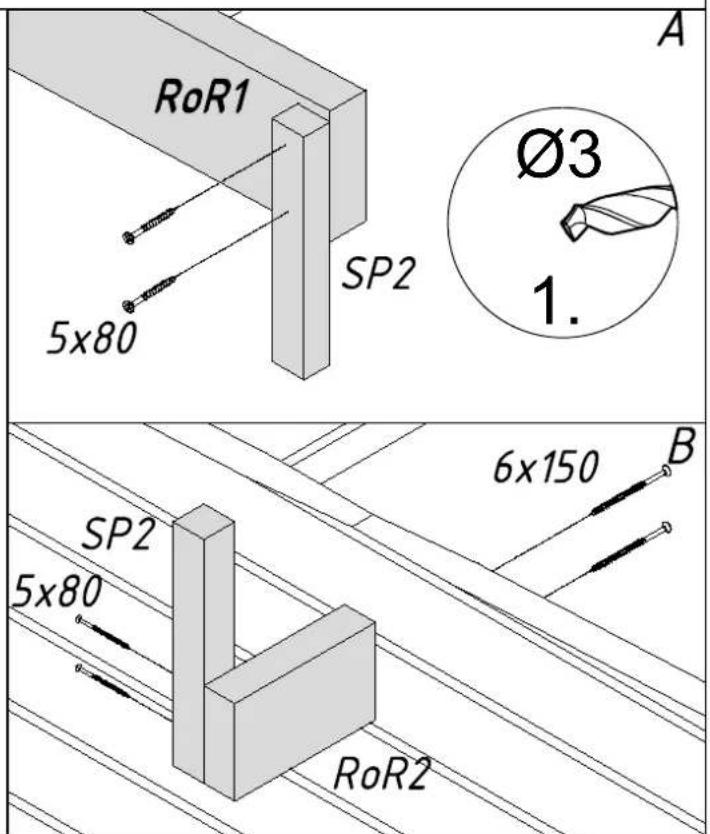
text_image
RoR1 5x80 SP2 A Ø3 1. 6x150 B SP2 5x80 RoR2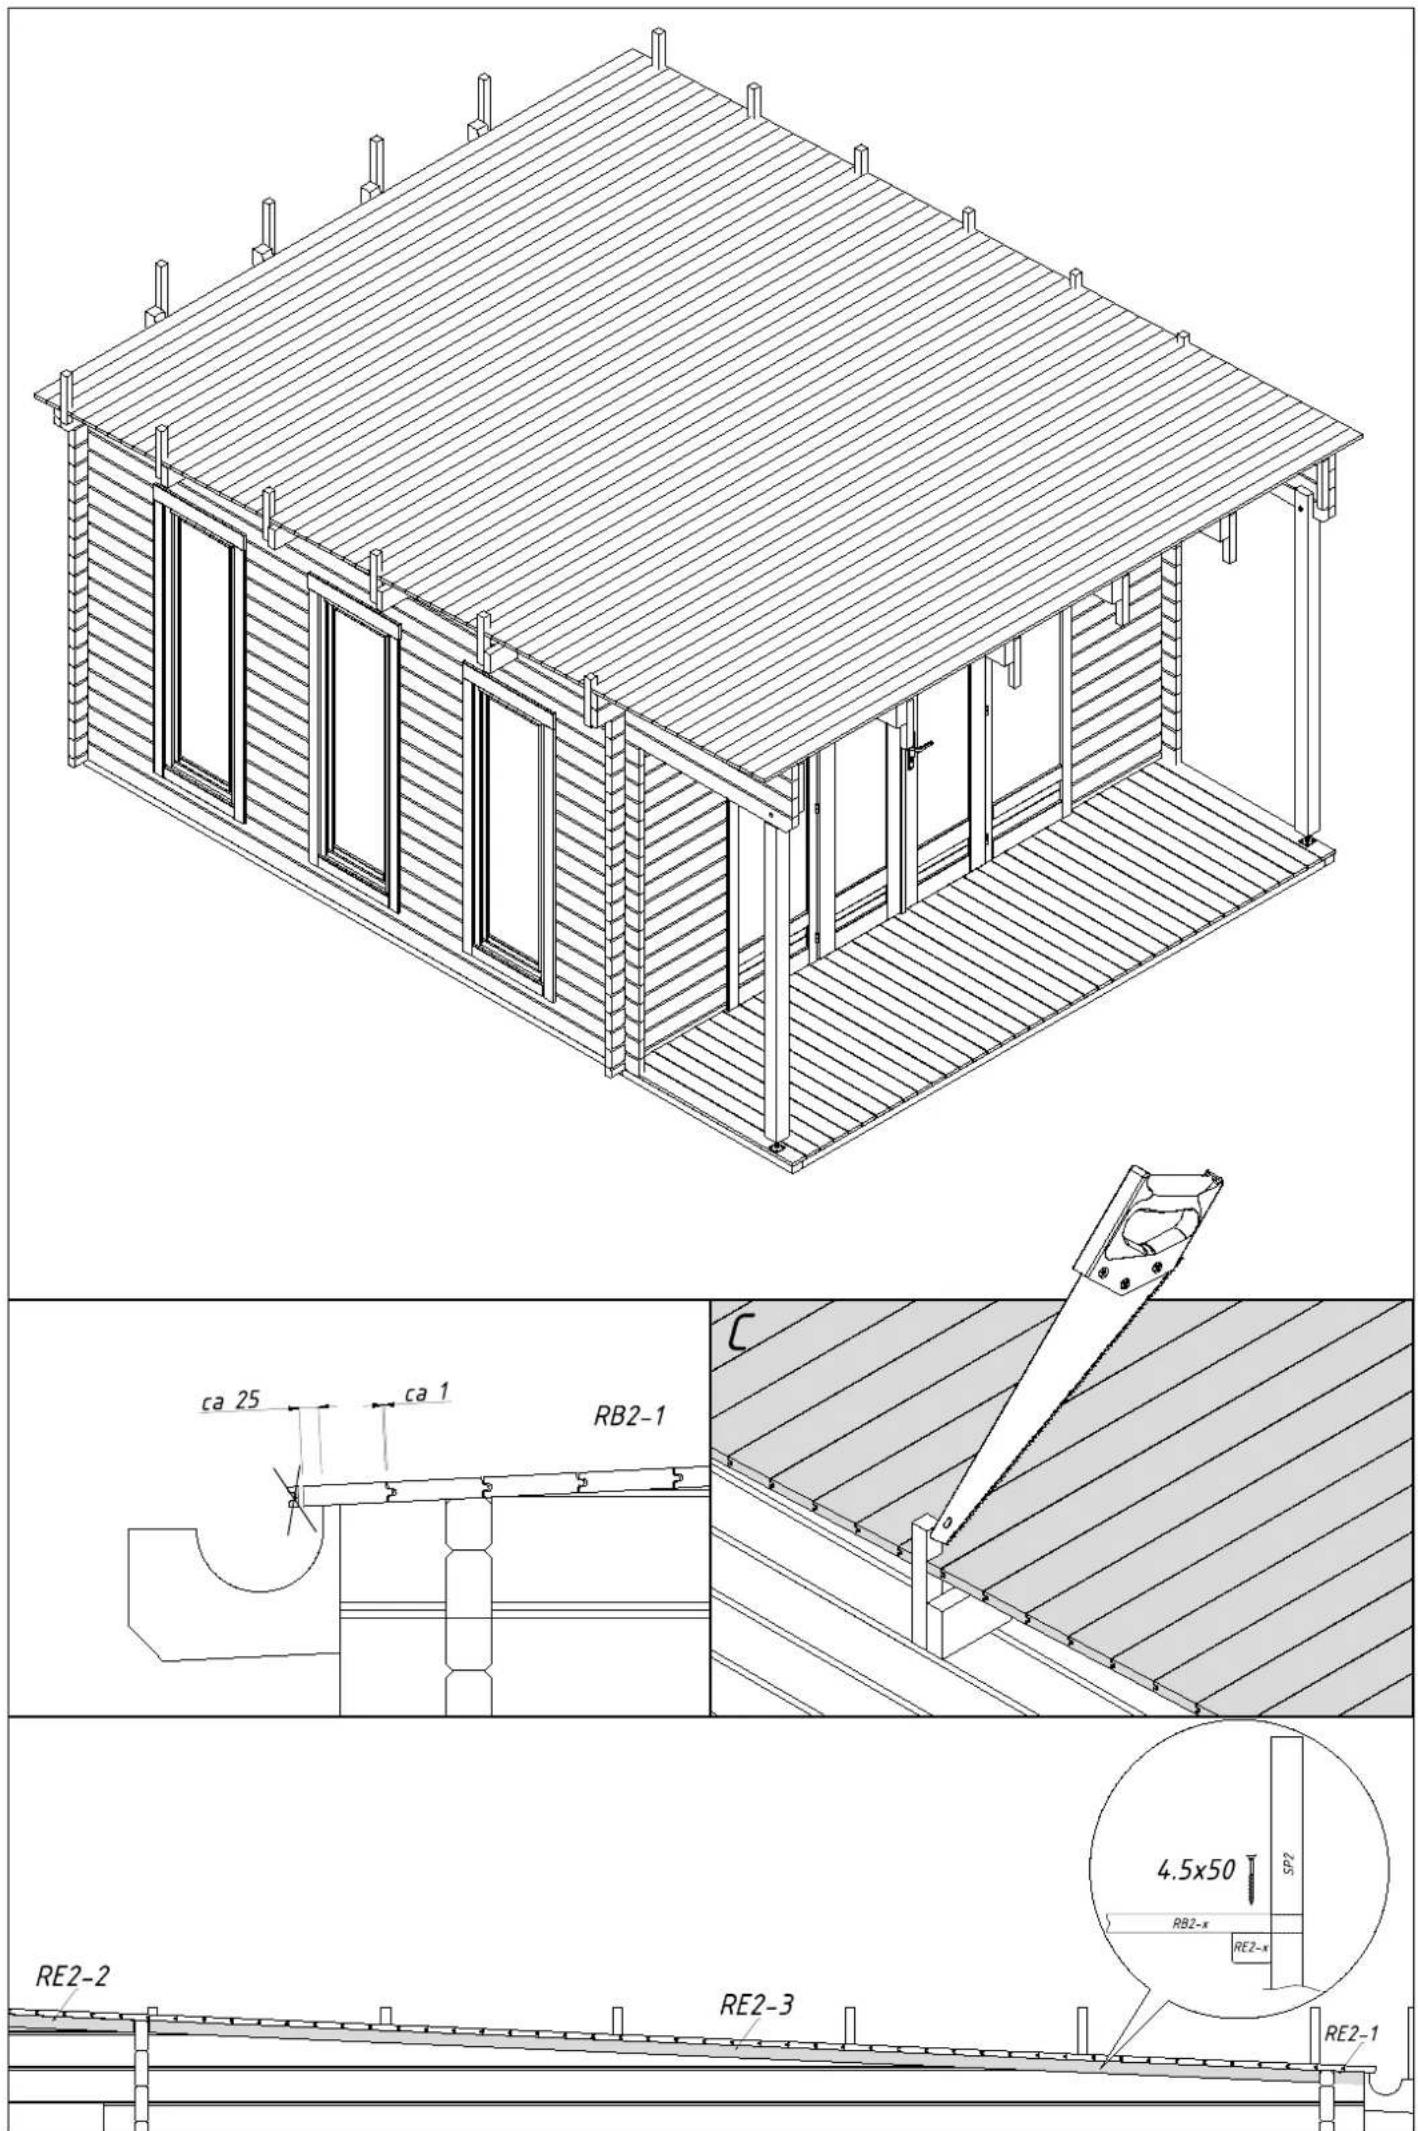
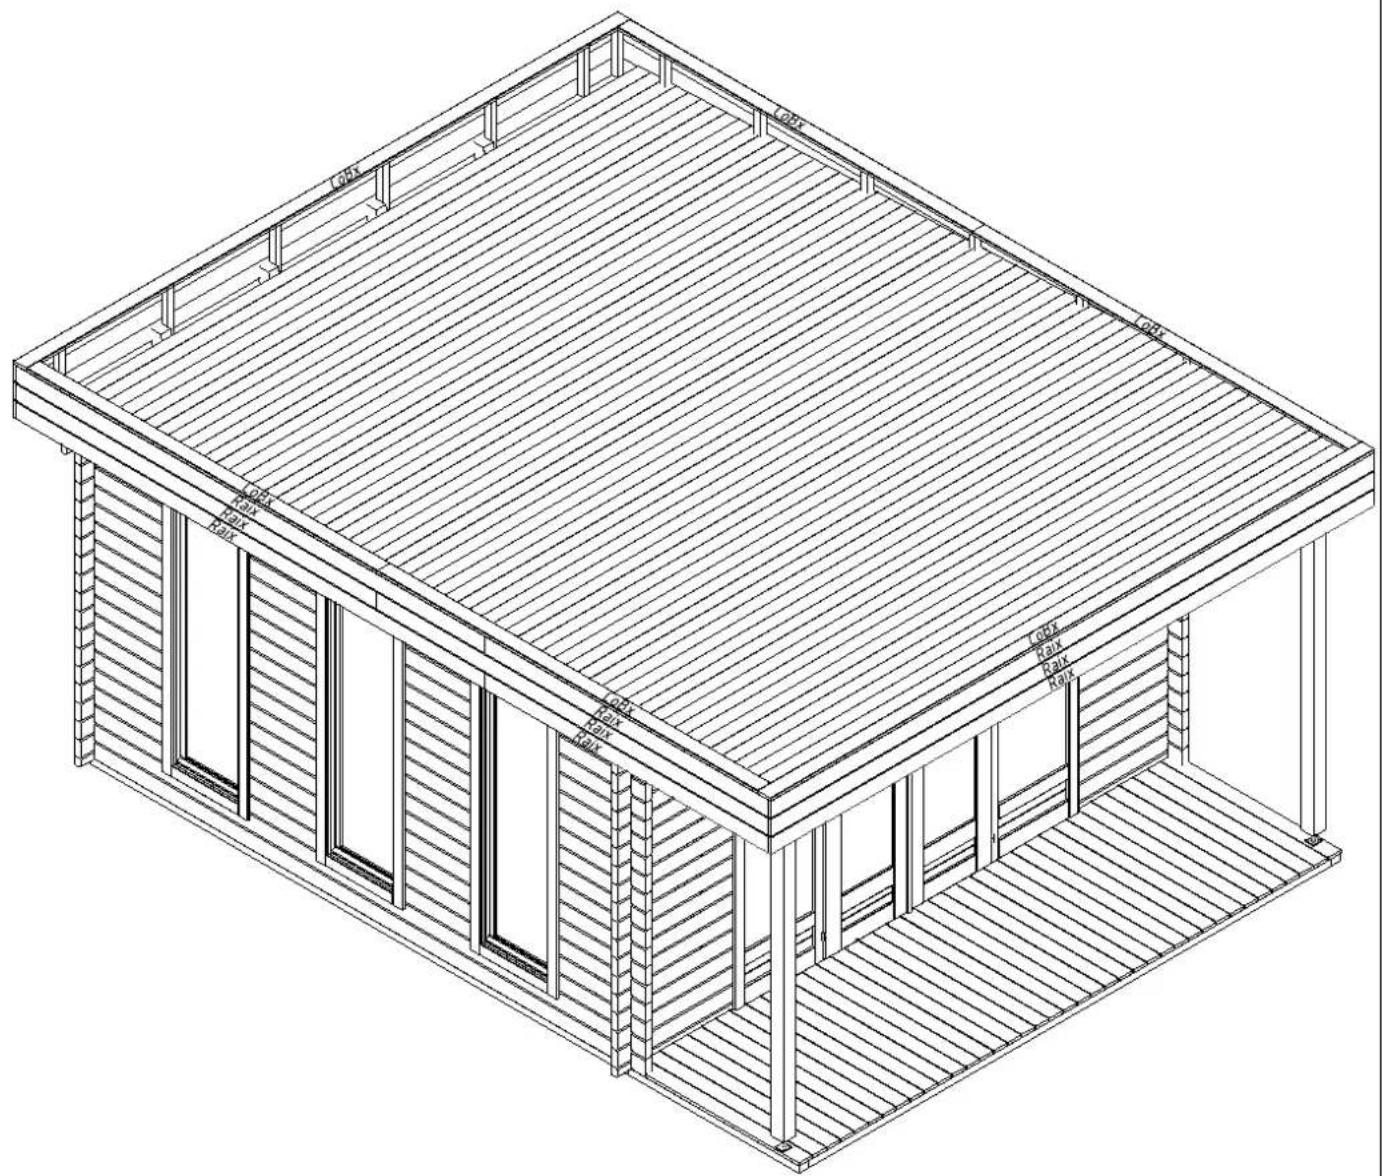
natural_image
Isometric line drawing of a two-story wooden house with slatted roof and visible doorways (no text or symbols)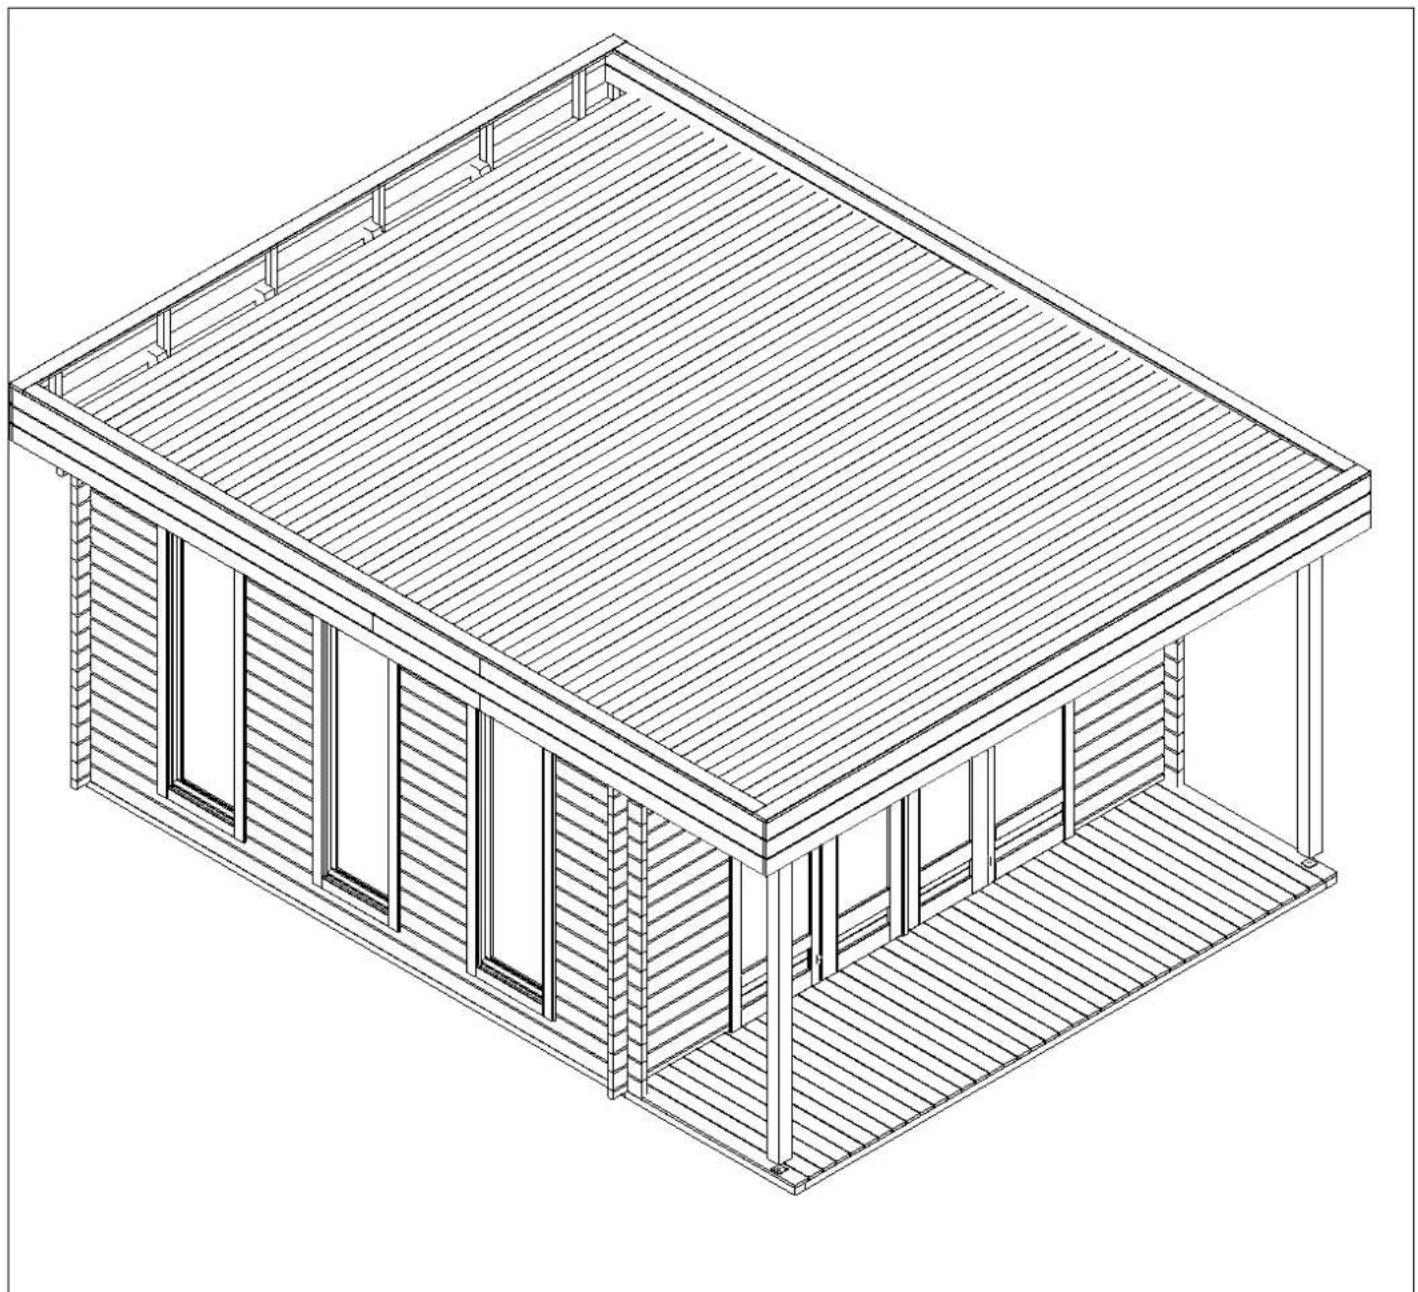
natural_image
Isometric line drawing of a modern two-story building with wooden deck and slatted roof (no text or symbols)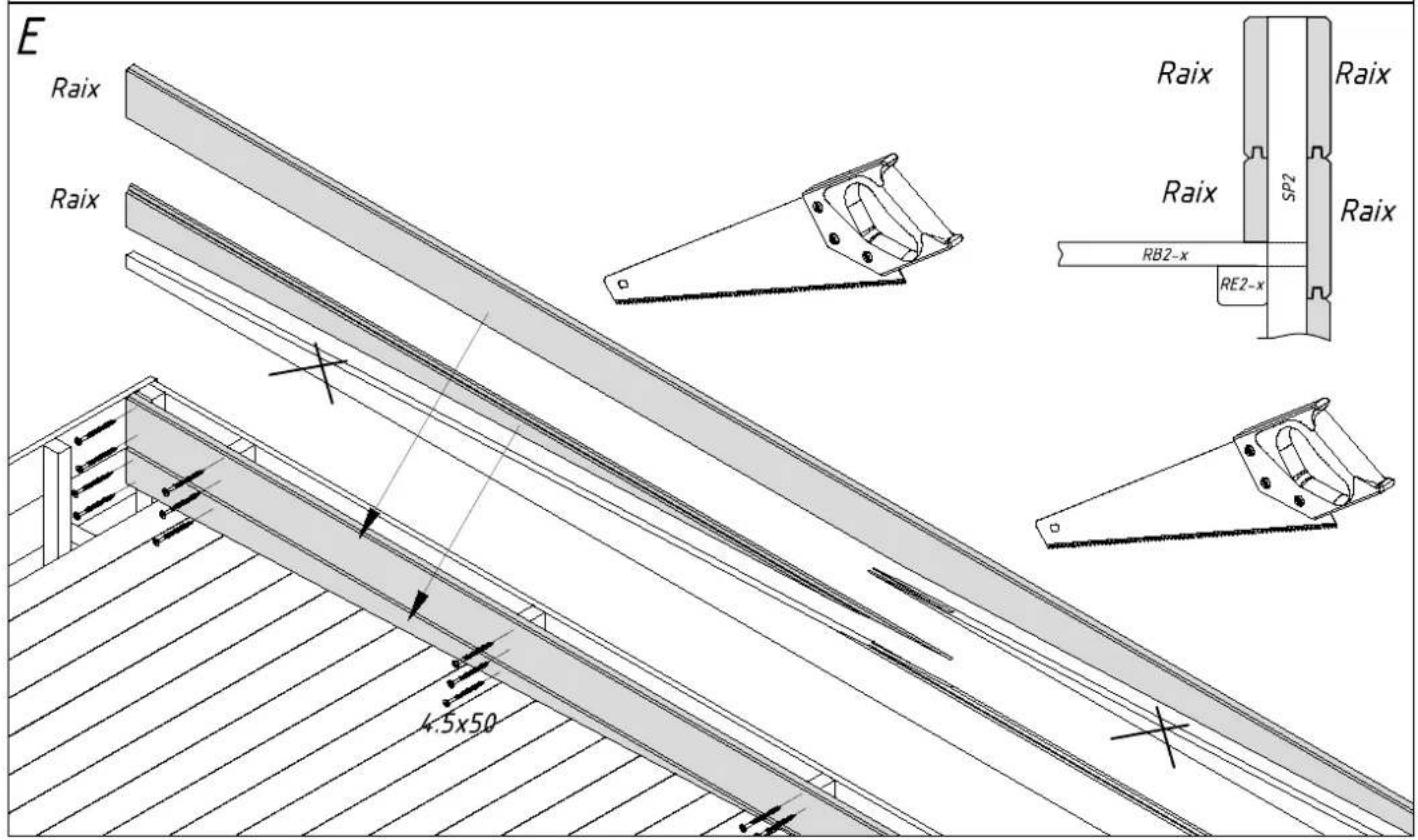
text_image
E Raix Raix 4.5x50 RB2-x SP2 RB2-x RE2-x Raix Raix Raix
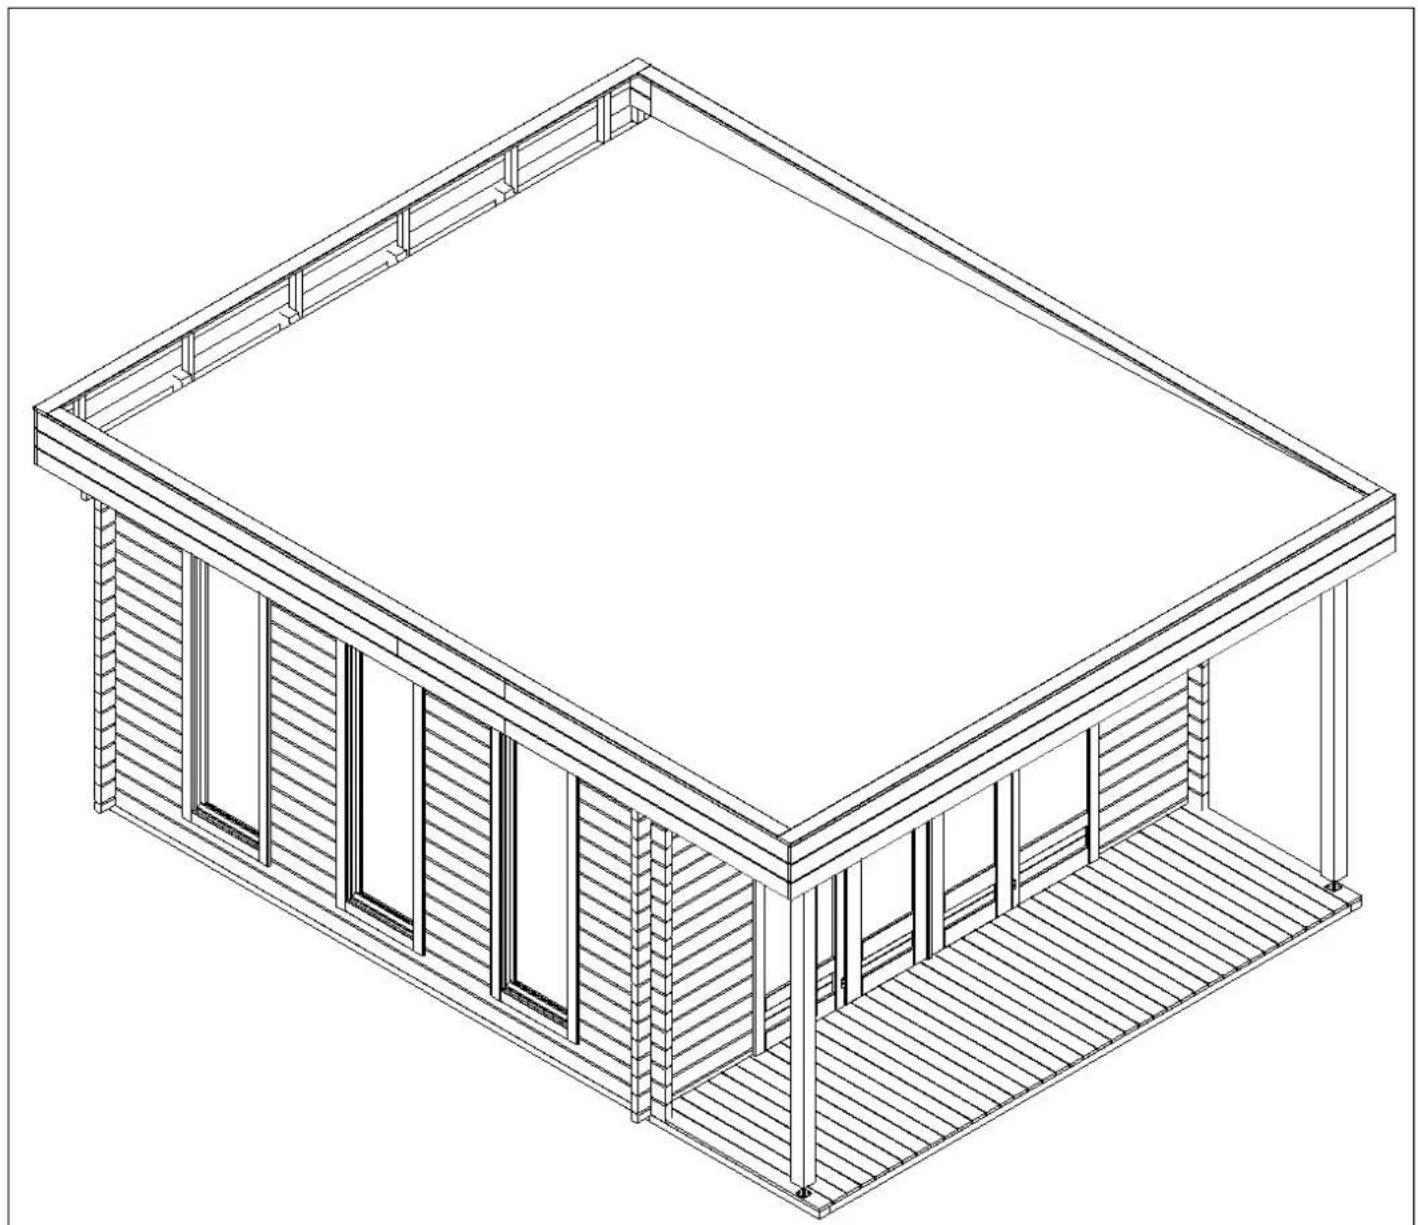
natural_image
Isometric line drawing of a modern two-story building with wooden framing and window panels (no text or symbols)
text_image
SBS CoB SBS CoB 4.5x50 SBS1 General information

Dear client,
We are glad that you have decided in favour of our garden house!
Please read the assembly manual carefully before proceeding with the house installation! You will thus avoid problems and will not waste time.
Recommendations:
Keep the house package until its complete assembly in a dry place, but not in direct contact with the ground, protected from weather conditions (moisture, the sun, etc.). Do not keep the house package in a heated room!
When selecting the garden house location, make sure that the house will not be subjected to extreme weather conditions (areas of strong snowfall or winds); otherwise you should attach the house (for instance, with anchors) to the subsoil.

Warranty
Your house is made from high quality spruce and delivered in the natural (unprocessed) form. If, despite our thorough inspection, you should have complaints, please submit the filled out control sheet and purchase invoice to the product seller.
ATTENTION: Please be sure to keep the documentation accompanying the house package! The control sheet includes the control number of the house. We can only review complaints if you submit the control number of the house to the seller!
The warranty does not cover:
➢ Peculiarities of wood as a natural material
➢ Wooden details already painted (processed with a wood preservative)
Wooden details containing whole branches that do not endanger the stability of the house
Colour tone variations caused by wood structure differences that do not influence wood lifetime
Wooden details containing (caused by drying) small cracks/gaps that do not pass through and do not influence the structure of the house
Twisted wooden details if they can nevertheless be installed
Roof and floor boards that may have on their concealed surfaces some non-planed areas, colour differences and waning
Complaints resulting from an incompetent manner of the installation of the house or the house subsiding due to an incompetently made foundation
Complaints caused by introducing self-initiative changes to the house, such as the deformation of wooden details and doors/windows due to an incompetent manner of wood processing; the attachment of storm braces too rigidly, doorframes being screwed onto wall logs, etc.
The complaints covered by the warranty are satisfied to the extent of replacing the deficient/faulty material. All other demands will be excluded!

Garden house painting and maintenance
Wood is a natural material, growing and adapting depending on weather conditions. Large and small cracks, colour tone differences and changes, as well as a changing structure of wood are not errors, but a result of wood growing and a peculiarity of wood as a natural material.
Unprocessed wood (except for foundation joists) becomes greyish after having been left untouched for a while, and can be turn blue and become mouldy. To protect the wooden details of your garden house, you must immediately process them with a wood preservative.
We recommend that you cover the floor boards in advance with a colourless wood impregnation agent, especially the bottom sides of the boards, to which you will no longer have access when the house is assembled. Only this will prevent moisture penetration.
We definitely recommend that you also process the doors and windows with a wood impregnation agent, and do that namely both inside and outside! Otherwise the doors and windows can become twisted.
After the house assembly is completed, we recommend for the conclusive finishing a weather protection paint that will protect wood from moisture and UV radiation.
When painting, use high quality tools and paints, follow the paint application manual and manufacturer's safety and usage instructions. Never paint a surface in strong sunlight or rainy weather. Consult a specialist regarding paints suitable for unprocessed softwood and follow the paint manufacturer's instructions.
Having been properly painted, your garden house's lifetime will increase substantially. We recommend that you inspect the house thoroughly once every six months.
2 Preparation for assembly
Tools and preparation of components
To assemble the garden house, you will need the following tools:

assembly aid

ladder

hammer

water-level

screwdriver

saw

knife

measuring tape

pliers

drill
ADVICE: To avoid splinters, we recommend that you wear the corresponding protective gloves during the assembly process.
Preparation of components:
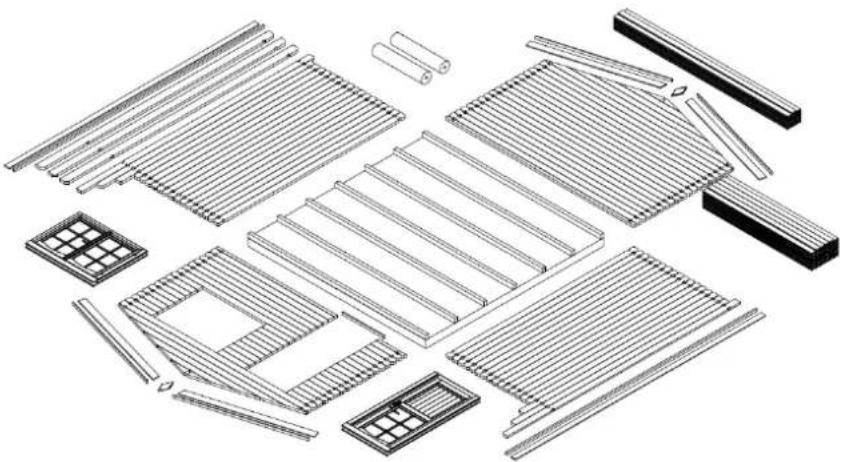
Sort the components based on the wall plans (see Technical specifications) and place them at the four sides of the house in the installation sequence.
ATTENTION: Never place the components directly on grass or a muddy surface because it will be very difficult or even impossible to clean them up later!
natural_image
Exploded view of various mechanical components including rods, grating, and housing (no text or symbols)Foundation
A good foundation is the most important aspect guaranteeing the duration and safety of your house. Only a completely level, rectangular and bearing foundation will ensure problem-free installation of the house, its stability and especially the matching of the doors. With a good foundation, your house will stand for many years more.
Prepare the foundation so that its upper edge extends from the ground to a height of at least 5 cm. At the same time make sure that there are sufficient air apertures under the house floor for ventilation.
We recommend the following foundation options:
- Strip or spot foundation
- Foundation from concrete or pavement slabs
- Cast concrete bed
Prepare the foundation so that the foundation joists are propped up on every side with intervals not exceeding 50-60 cm.
Consult an expert in this field or have the foundation prepared by specialists.
3 Garden house assembly
ATTENTION:
The house package also includes 2-3 marked hitting blocks (wall profile approximately 20-30 cm long).
All of the details listed above ARE NOT mentioned in the specification list.
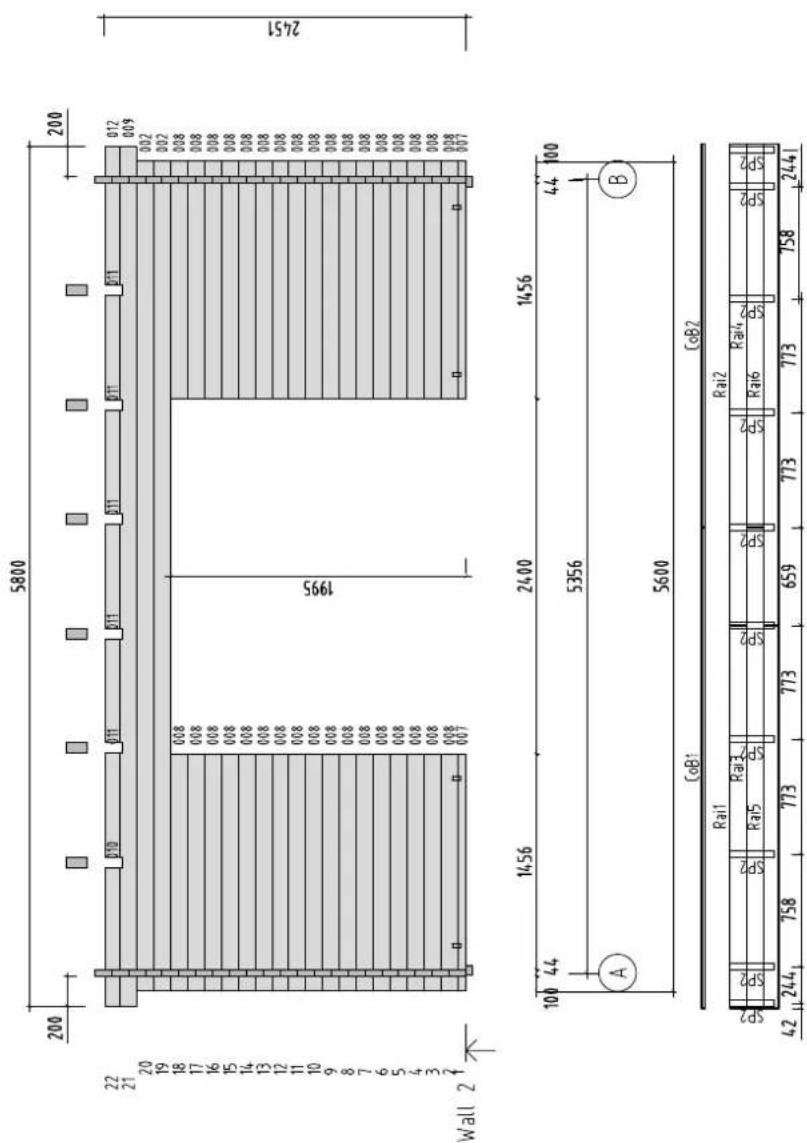
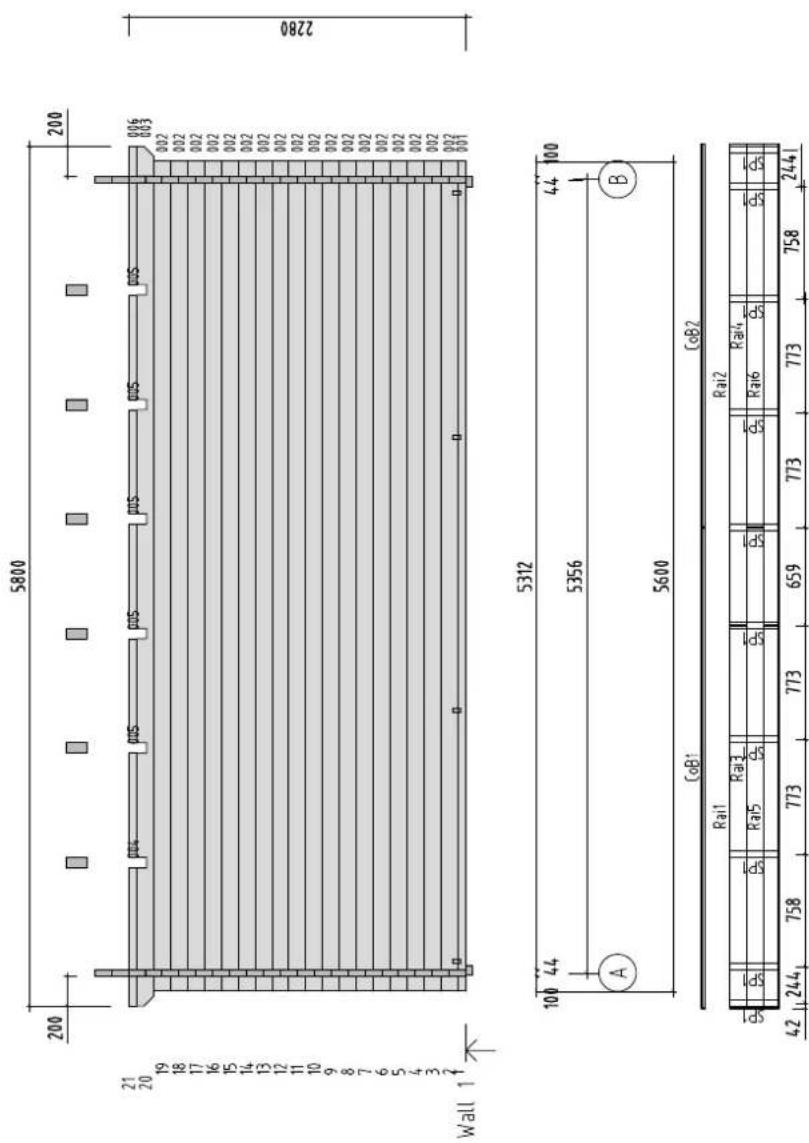
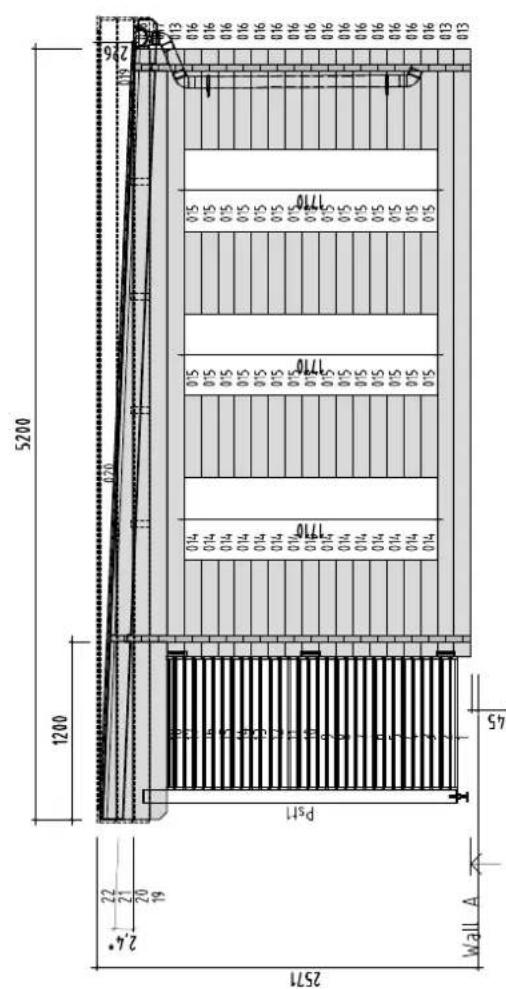
The drawings have the details marked with three-digit position numbers. The exact positions of those details that have the third digit "x" can be found in the specification list.
Base frame (Foundation joists)
The base frame of the house must be completely flat and level to ensure that the installation proceeds without problems.
ATTENTION: different house can have different foundation placements – see the appended base frame drawing (in Technical specifications)!
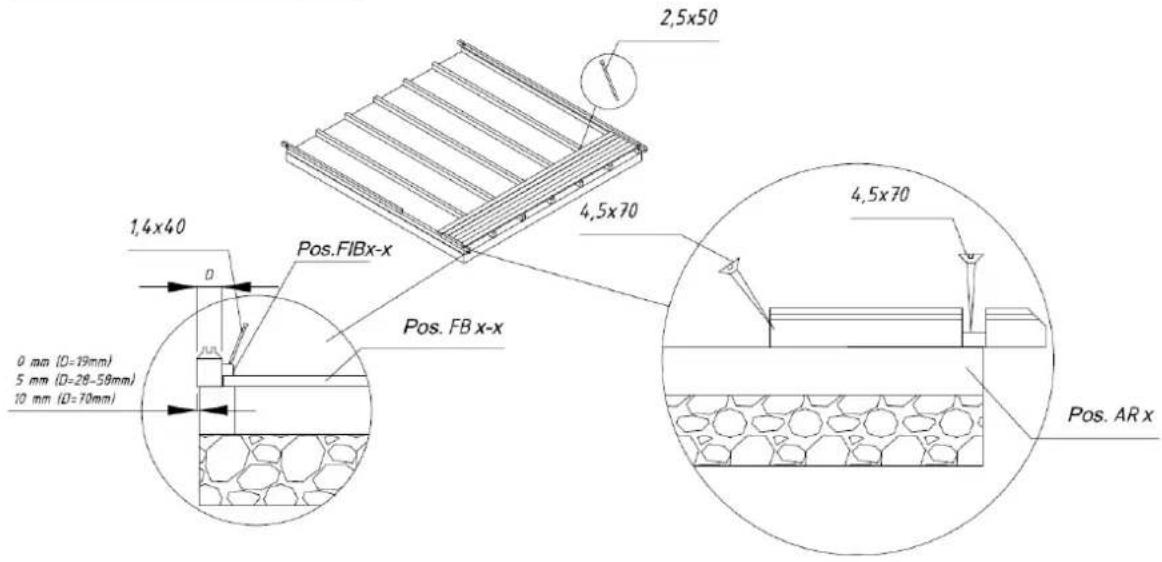
Place the impregnated foundation joists on the prepared foundation in accordance with the drawing at equal intervals. Make sure that the joists are level and rectangular prior to screwing them together.
ADVICE: It is recommended to place between the foundation joists and foundation a damp-proof course that will protect the house from moisture and decay.
ADVICE: To ensure protection from wind and storm, it is recommended to attach the foundation joists to the foundation (for this, you can use for instance metal angles, anchors, etc.). The corresponding materials are not included in the supplied kit!
Installation of foundation joists:
text_image
2,5x50 4,5x70 1,4x40 Pos.FIBx-x Pos. FB x-x 0 mm (D=19mm) 5 mm (D=28-58mm) 10 mm (D=70mm) 4,5x70 Pos. AR xWalls
When installing the walls, it is important to remember that:
The logs are always assembled with their tongue upwards!
If necessary, use the hitting block and hammer! Never directly hit the tongue with the hammer!
Install the walls in accordance with the appended wall plans (see Technical specifications).
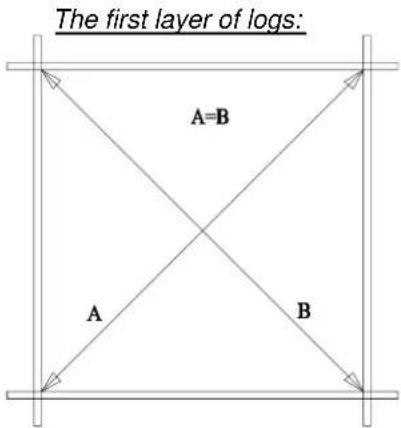
First of all place half logs of front and back wall at the correct location and attach them with screws to the foundation joists. Then install the side wall logs. Make sure that the first layer of logs extends a bit over the foundation joists: the logs must extend over the joists by some 3-5 mm. You will thus protect the house from moisture, allowing the free flow of rainwater into the ground.
ATTENTION: After the first layer of logs, measure the diagonal lengths and, if necessary, re-install the logs. Only if the diagonal lengths are completely equal is the base frame rectangular and you can mutually attach the logs.
text_image
The first layer of logs: A=B A BContinue the installation of the walls by strongly forcing the wall logs into one another. If necessary, use the hitting block and hammer. At the same time, do not forget to begin the installation of the door and windows. You should definitely begin the door installation after the 5^th-6^th layer of logs.
Door and window
Doorframe:
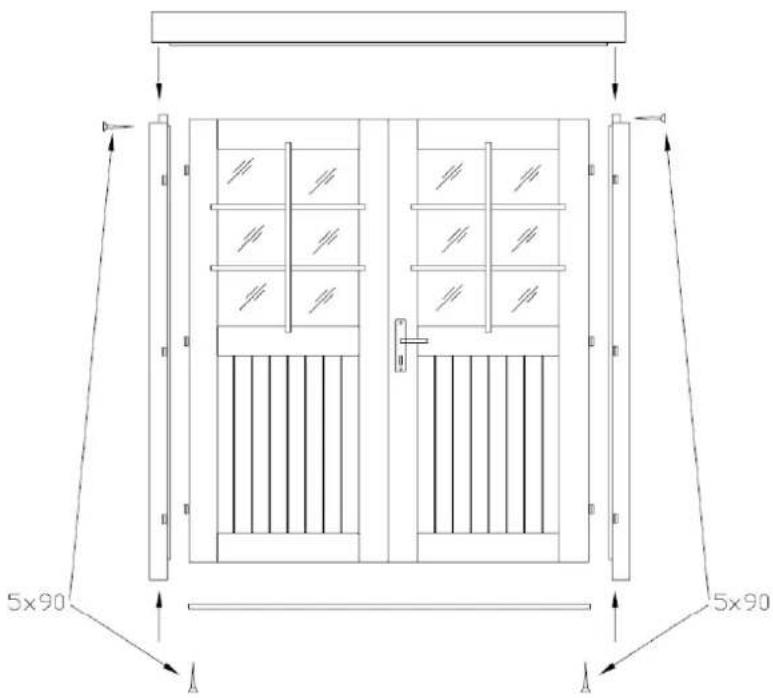
If it is a double door, the doorframe is supplied in separate parts due to transportation requirements and you will have to begin by assembling it.
To do this, place together the 4 parts of the frame and screw them onto one another.
Make sure that the part of the frame with the deeper notch is installed upwards. The lateral jamb parts have hinges and are mirrored.
It is recommended to install the leaves later.
If it is a single door, its frame and leaf are supplied already assembled.
Doorframe installation (Only necessary for a double door!):
text_image
5x90 A A 5x90Door installation:
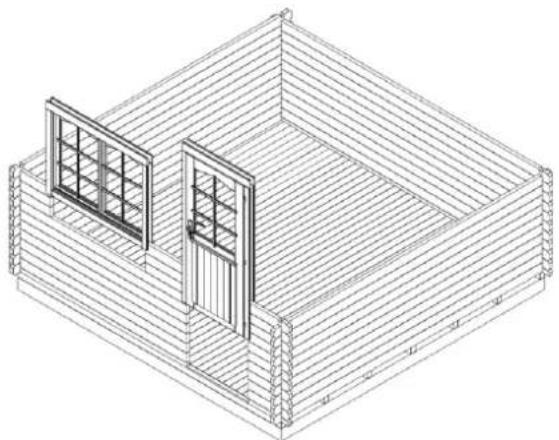
The doorframe is placed at the formed aperture and pushed with force onto the lower log. If it is a double door, place the leaves on the hinges now. To open and close the door, fit the separately packaged lock and handle.
natural_image
Isometric line drawing of a two-story wooden cabin with windows and a door, no text or symbols presentWindow installation:
Continue with the installation of the wall logs until you reach the window height. The wall plans (see Technical specifications) show how many logs go under the window. Install the window similarly with the door. Just like the door, push the window frame with the window into the window aperture onto the lower log, applying force. Make sure that the window is not fitted backwards (topsy-turvy).
ADVICE: Definitely make sure that the windows and doors open in the proper direction. The doors always open from the inside to the outside. The tilt&turn windows open to the inside. The revolving and the slinging windows open to the outside (the window handles are on the inside).
ATTENTION: It is not necessary to fix the doors and windows to the wall logs! If you wish to do this, it will be sufficient to fix them with a couple of screws in the lower part of the frame because as they dry, the wall logs will begin subsiding.
You can conduct the final adjustments of the doors and windows only some 2-3 weeks after the house installation, when the house will have become adapted to weather conditions and its logs settled.
Apex
In most cases, the apex is supplied in one piece (attention: in some house options, the apex can comprise several parts! In this case, these parts will have to be screwed together prior to other actions). Having installed the last wall logs, place the apex on the front and back walls and attach them with screws.
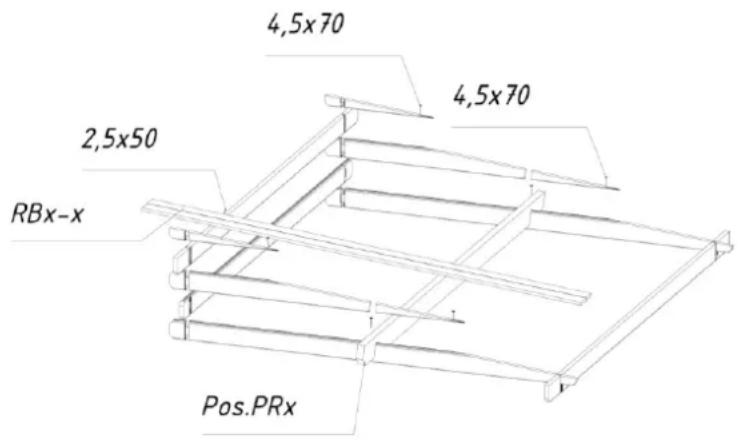
The apexes have indents for the purlins. The purlins also have the corresponding indents, ensuring that the roof is placed firmly and in the right place.
Now place the purlins in the corresponding indents in the apexes.
Make sure that the upper wall log, apexes and purlins are level. Having fitted the purlins, screw them onto the apex from above.
Installation of purlins:
text_image
4,5x70 4,5x70 2,5x50 RBx-x Pos.PRxATTENTION: If the wall logs are not properly pressed on top of one another without gaps, the upper wall log may not be on the same level with the apexes. In this case you should tap the wall logs downwards as necessary or plane the apex or sidewall log somewhat lower.
Roof
Before installing the roof boards, make sure that the house is completely level. Use the water-level to check all walls.
ATTENTION: When placing the roof, use a stable ladder. Do not step on the roof as the structure is suitable to sustain only an even load (snow, wind, etc.), and not a point load!
Begin the installation of the roof boards from the front edge of the roof. Tap the boards lightly and attach them from above and below with nails to the purlins and upper wall log.
ATTENTION: Do not press the roof boards together too densely and you will avoid moisture-causing bulging! Leave an interval of about 1 mm between the boards to allow for swelling.
- During the whole process of installing the roof boards, make sure that their crest purlins coincide and the eave sides of the boards extend at a uniform distance. Verify this with a rope or the lateral eave lath that you may install for verification purposes.
- The roof boards must be even with the purlin ends in front and behind. If necessary, saw both last roof boards so narrow that they are even with the purlin ends.
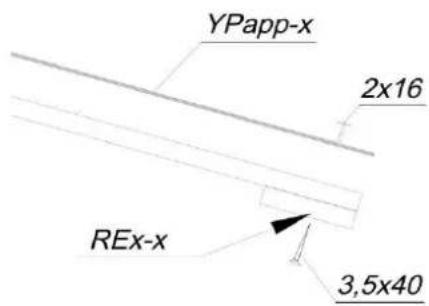
Having installed the roof boards, the roof felt and roof slats must be attached.
The table of components shows whether the roof cover material and slats are included with this house option!
First of all, screw the roof edge reinforcements and eave edgings under the roof board ends. Then install the roof cover material.
Installation of roof slats:

text_image
YPapp-x 2x16 3,5x40 REx-x EaEx-x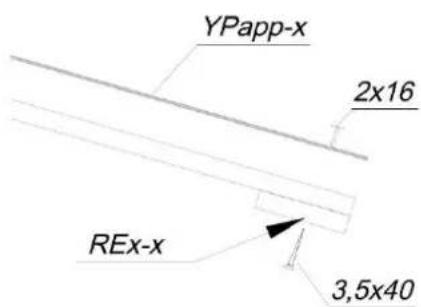
text_image
YPapp-x 2x16 REx-x 3,5x40Roof cover material (NB! Some house options do not include it in the kit!)
Cut the roof felt in accordance with the roof length into suitable pieces and begin installing them parallel to the lower edge of the roof, moving toward the crest and placing the felt strips in the direction from the back wall to the front wall. The felt should extend from the edge by approximately 2-4 cm. Attach the roof felt to the roof boards with the supplied felt nails at intervals of about 15 cm. Make sure that the felt strips overlap by at least 10 cm.
Floor
Only when the house is built completely you can install the floor boards, thus avoiding unnecessary smudging on the floor.
Place the floor boards on the base frame, tap them lightly against one another and then nail them with force to the foundation joists. If necessary, cut the last floor board to the suitable width.
The final operation is the fitting of the floor beadings to cover the spaces between the floor boards and walls. If necessary, cut the floor beadings to the suitable length.
ATTENTION: Depending on the climate at the house location, the floor boards can either swell or diminish. If the floor boards are very dry while the climate is damp, they will easily absorb moisture. In this case, the floor boards should not be attached very densely to avoid likely bulging. Leave some space (1-2 mm) between the floor boards to allow for swelling. But if your climate is warm and dry, you can install the boards densely because they will become drier and spaces may appear between them.
Storm braces (NB! Not included in some house option kits!)
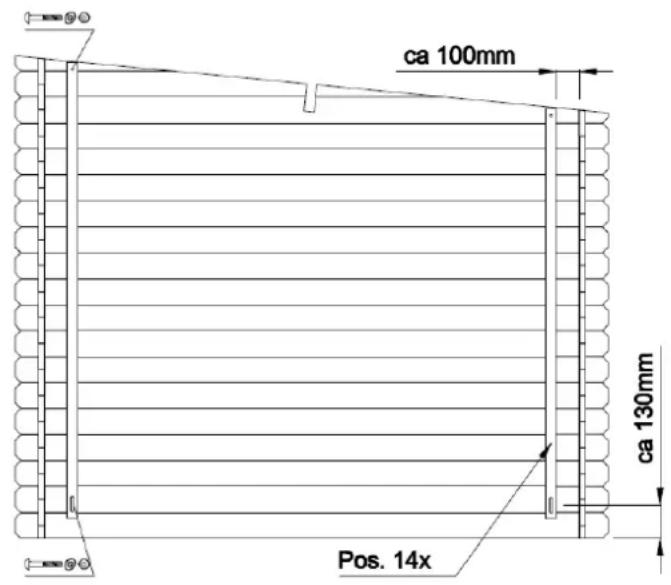
Attach the storm braces (if included in the supplied kit) to the inner sides of the front (2 units) and back (2 units) walls with the supplied bolts. It is important for the logs to be drilled through in advance. Please keep the distances indicated in the drawing so that no problems occur due to wood swelling or diminishing.
ADVICE: Make sure that the storm braces are attached to the apex log from above and to the middle of the first full-length wall log from below. If necessary, shorten the upper ends of the slats.
Do not turn the screws tightly so wood can further swell or diminish.
With the house having settled, you should adjust the attachments so the wall logs can settle.
Installation of storm braces:
text_image
ca 100mm ca 130mm Pos. 14xGeneral advice:
Problem: Gaps appear between the wall logs
Cause: Additional details are attached to the house that do not allow wood to swell/diminish.
Solutions: If the door/window is attached to the wall logs with screws/nails, remove these screws/nails;
If the storm brace is screwed on too tightly, loosen its attachment;
If (rain water) pipes are installed on the wall, loosen their attachments;
Problem: The doors and windows become stuck.
Cause: The house/foundation has settled.
Solution: Check whether the house is level. Level the foundation joists and walls.
Cause: The doors and windows have swelled due to moisture.
Solution: Adjust the door and window hinges; if necessary, plane the door or window narrower.

We wish you total success with the garden house installation and much joy with this house for many years to come!
1 Generelles

natural_image
Exploded view of a mechanical assembly with multiple parallel rods, rectangular components, and grid-like parts (no text or symbols)Fundament
natural_image
Isometric line drawing of a two-story building with windows and a door, no text or symbols presenttext_image
YPapp-x 2x16 3,5x40 REx-x EaEx-x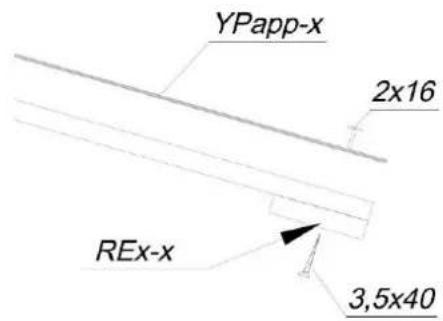
text_image
YPapp-x 2x16 REx-x 3,5x40natural_image
Exploded view of a grid-patterned mechanical assembly with multiple parallel strips and cutouts (no text or symbols)Fondations
natural_image
Isometric line drawing of a two-story building with windows and a door, showing structural framing (no text or symbols)text_image
YPapp-x 2x16 3,5x40 REx-x EaEx-x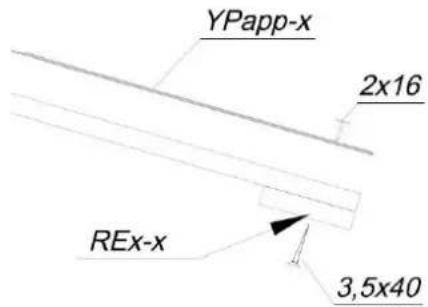
text_image
YPapp-x 2x16 REx-x 3,5x40natural_image
Exploded view of a mechanical assembly with multiple parallel strips and cutouts (no text or symbols)Cimentación
natural_image
Isometric line drawing of a two-story building with a window and door (no text or symbols)text_image
YPapp-x 2x16 3,5x40 REx-x EaEx-x YPapp-x 2x16 REx-x 3,5x40natural_image
Exploded view of a mechanical assembly with multiple parallel strips and cutouts (no text or symbols)Fondamenta
natural_image
Isometric line drawing of a wooden cabin with a window and door (no text or symbols)text_image
YPapp-x 2x16 3,5x40 REx-x EaEx-x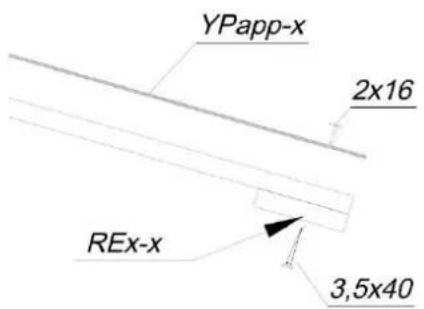
text_image
YPapp-x 2x16 REx-x 3,5x40natural_image
Exploded view of a mechanical assembly with multiple parallel strips and grid-like components (no text or symbols)Fundament
natural_image
Isometric line drawing of a two-story building with windows and a door, showing structural framing (no text or symbols)Montering av vindu:
text_image
YPapp-x 2x16 3,5x40 REx-x EaEx-x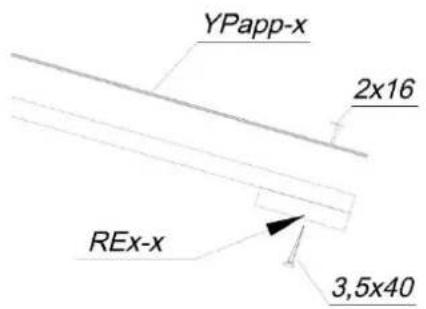
text_image
YPapp-x 2x16 REx-x 3,5x40natural_image
Exploded view of a grid-patterned mechanical assembly with multiple parallel strips and cutouts (no text or symbols)Grund
natural_image
Isometric line drawing of a two-story wooden cabin with a window and door (no text or symbols)text_image
YPapp-x 2x16 3,5x40 REx-x EaEx-x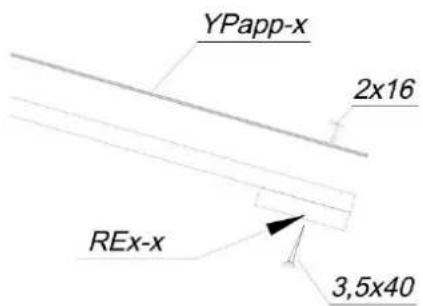
text_image
YPapp-x 2x16 REx-x 3,5x40natural_image
Exploded view of a mechanical assembly with multiple parallel strips and cutouts (no text or symbols)Perustus
text_image
YPapp-x 2x16 3,5x40 REx-x EaEx-x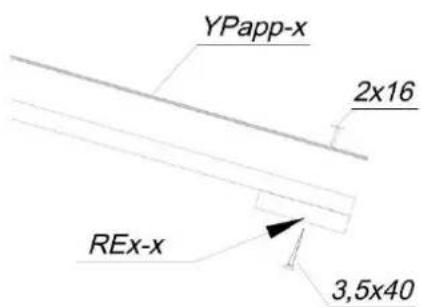
text_image
YPapp-x 2x16 REx-x 3,5x40natural_image
Exploded view of a grid-patterned mechanical assembly with multiple components (no text or symbols)Fundament
natural_image
Isometric line drawing of a two-story building with windows and a door, no text or symbols presenttext_image
YPapp-x 2x16 3,5x40 REx-x EaEx-x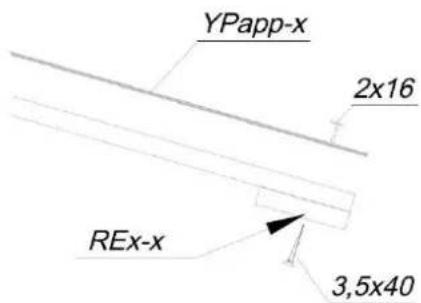
text_image
YPapp-x 2x16 REx-x 3,5x40natural_image
Exploded view diagram of a grid-patterned mechanical assembly (no text or symbols)Fundering
text_image
YPapp-x 2x16 3,5x40 REx-x EaEx-x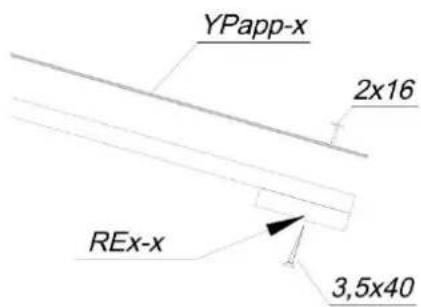
text_image
YPapp-x 2x16 REx-x 3,5x40Roofing (indien meegeleverd)
natural_image
Isometric line drawing of various mechanical components including slats, grating, and a grid-patterned frame (no text or symbols)Alicerce
natural_image
Isometric line drawing of a two-story wooden cabin with a window and door (no text or symbols)text_image
YPapp-x 2x16 3,5x40 REx-x EaEx-x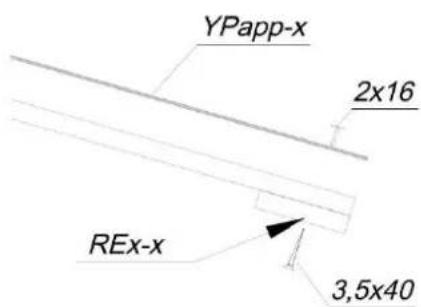
text_image
YPapp-x 2x16 REx-x 3,5x40natural_image
Exploded view of a mechanical assembly with multiple parallel strips, rectangular components, and cutouts (no text or symbols)Základy
natural_image
Isometric line drawing of a two-story wooden cabin with a window and door (no text or symbols)Instalace okna:
text_image
YPapp-x 2x16 3,5x40 REx-x EaEx-x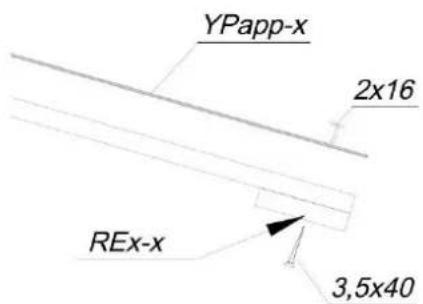
text_image
YPapp-x 2x16 REx-x 3,5x40natural_image
Exploded view of a grid-patterned mechanical assembly (no text or symbols)Fundament
natural_image
Isometric line drawing of a two-story building with windows and a door, showing structural details (no text or symbols)Instalacja okien:
text_image
YPapp-x 2x16 3,5x40 REx-x EaEx-x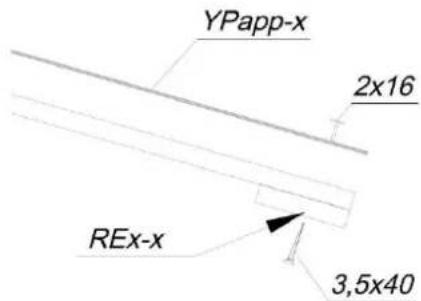
text_image
YPapp-x 2x16 REx-x 3,5x40natural_image
Exploded view of a mechanical assembly with multiple parallel strips and grid-like components (no text or symbols)Pamatai
text_image
YPapp-x 2x16 3,5x40 REx-x EaEx-x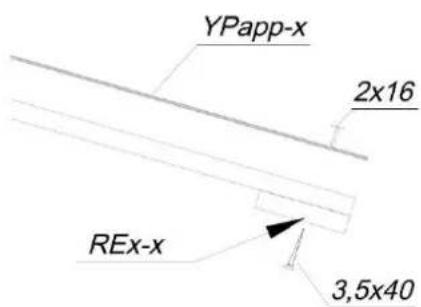
text_image
YPapp-x 2x16 REx-x 3,5x40natural_image
Exploded view of a mechanical assembly with multiple parallel strips and cutouts (no text or symbols)Pamati
natural_image
Isometric line drawing of a two-story building with windows and a door, showing structural framing (no text or symbols)Loga uzstādīšana:
text_image
YPapp-x 2x16 3,5x40 REx-x EaEx-x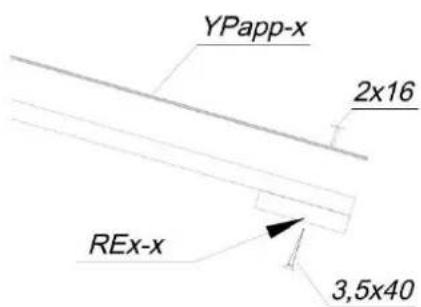
text_image
YPapp-x 2x16 REx-x 3,5x40natural_image
Exploded view of mechanical components including slats, grating, and housing (no text or symbols)Фундамент
natural_image
Isometric line drawing of a two-story wooden cabin with a window and door (no text or symbols)Установка окон:
text_image
YPapp-x 2x16 3,5x40 REx-x EaEx-x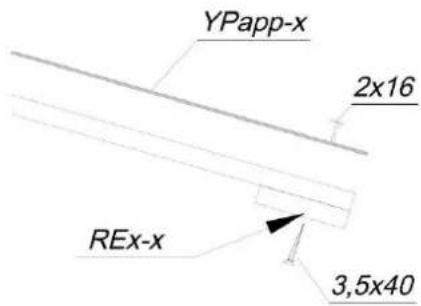
text_image
YPapp-x 2x16 REx-x 3,5x40natural_image
Isometric line drawing of various mechanical components arranged in a grid-like layout (no text or symbols)Vundament
natural_image
Isometric line drawing of a two-story wooden cabin with a window and door (no text or symbols)Akende paigaldamine:
text_image
YPapp-x 2x16 3,5x40 REx-x EaEx-x