
VDM-CA-CATH-BK - Ceiling mount bracket Middle Atlantic - Free user manual and instructions
Find the device manual for free VDM-CA-CATH-BK Middle Atlantic in PDF.

| Product Type | Ceiling Mount Bracket |
| Brand | Middle Atlantic |
| Model | VDM-CA-CATH-BK |
| Intended Use | Ceiling installation for audiovisual equipment |
| Color | Black (BK) |
| Material | Steel |
| Approximate dimensions (L x W x H) | 30 cm x 20 cm x 5 cm |
| Approximate weight | 1.1 kg |
| Maximum load capacity | 45 kg |
| Structural compatibility | Wood joists 2x6 minimum, drywall thickness max 1.6 cm |
| Power supply | Not applicable (mechanical support) |
| Main functions | Secure attachment of equipment to the ceiling, designed for cathedral ceilings |
| Maintenance and cleaning | Clean with a dry cloth only |
| Safety | Do not exceed weight capacity, use only with recommended accessories, do not use outdoors, heed dangerous voltage warnings |
| Spare parts and repairability | No spare parts provided, return to an authorized service center for repair |
| Installation | Reserved for a qualified installer, follow all instructions in the manual |
| General information | User manual available for free download |
Frequently Asked Questions - VDM-CA-CATH-BK Middle Atlantic
User questions about VDM-CA-CATH-BK Middle Atlantic
0 question about this device. Answer the ones you know or ask your own.
Ask a new question about this device
Download the instructions for your Ceiling mount bracket in PDF format for free! Find your manual VDM-CA-CATH-BK - Middle Atlantic and take your electronic device back in hand. On this page are published all the documents necessary for the use of your device. VDM-CA-CATH-BK by Middle Atlantic.
USER MANUAL VDM-CA-CATH-BK Middle Atlantic
natural_image
Technical line drawing of a mechanical component with no visible text or symbolsTHANK YOU
Thank you for purchasing the VDM-CA-CATH-BK cathedral ceiling mount.
Please read these instructions thoroughly before installing or assembling these products.
PRODUCT FEATURES
- Accepts 1 1/2" NPSM pipe and extensions
• 300 lb. weight capacity
IMPORTANT SAFETY INSTRUCTIONS
- Read these instructions.
- Heed all warnings.
- Clean only with dry cloth.
- Keep these instructions.
- Follow all instructions.
- Only use attachments/accessories specified by the manufacturer.

DANGER HAZARDOUS VOLTAGE: The lightning flash with the arrowhead symbol, within an equilateral triangle is intended to alert the user to the presence of uninsulated dangerous voltage within the product's enclosure that may be of sufficient magnitude to constitute a risk of electric shock to persons.
WARNING: A warning alerts you to a situation that could result in serious personal injury or death.
CAUTION: A caution alerts you to a situation that may result in minor personal injury or damage to the product and/or property.
NOTE: A note is used to highlight procedures pertaining to the installation, operation, or maintenance of the product.

WARNING: Failure to read, understand and follow the following information can result in serious personal injury, damage to the equipment or voiding of the warranty. It is the responsibility of the Installer/User to ensure that this product is loaded according to specifications.

WARNING: Failure to provide correct structural strength for the component may result in serious personal injury or damage the equipment. The wood joists to which the component is being attached must be a minimum of a 2x6 and may have a maximum drywall thickness of 5/8" (1.6 cm).

WARNING: Exceeding the weight capacity may result in personal injury or equipment damage. The combined weight of all components attached to the mount must not exceed weights listed on page 3.

WARNING: Be aware of pinch points and do not place fingers in between moving parts.

WARNING: Use this product for its intended use and only use attachments recommended by the manufacturer.

WARNING: Do not use a damaged product. Return damaged products to a qualified service center for repair.

WARNING: Not intended for outdoor use.
INSTRUCTIONS IMPORTANTES SUR LA SÉCURITÉ
- Lire ces instructions.
| Model Weight Rating | gProduct Weight | |
| VDM-CA-2J-BK 3 | (0.54bs138.08 kg) | Maximum Total Rated Load |
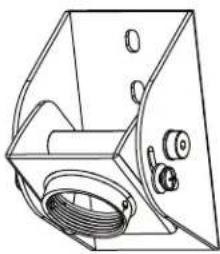
SUPPLIED COMPONENTS AND HARDWARE
natural_image
Technical line drawing of a mechanical component with no visible text or symbolsCathedral Mount A
(3x)
Hex Head Screw
B

(2x)
Set Screw
C

(2x)
Security Set Screw
D
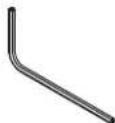
2.5mm Security
Hex Wrench
E
REQUIRED TOOLS
• #2 Phillips Screwdriver
- Drill
- Protective Eyewear
- 5/32" Wood Bit
- Hammer
- 1/2" Hex Socket

-
Determine ceiling location for mount and find center of joist closest to desired position on the ceiling.
-
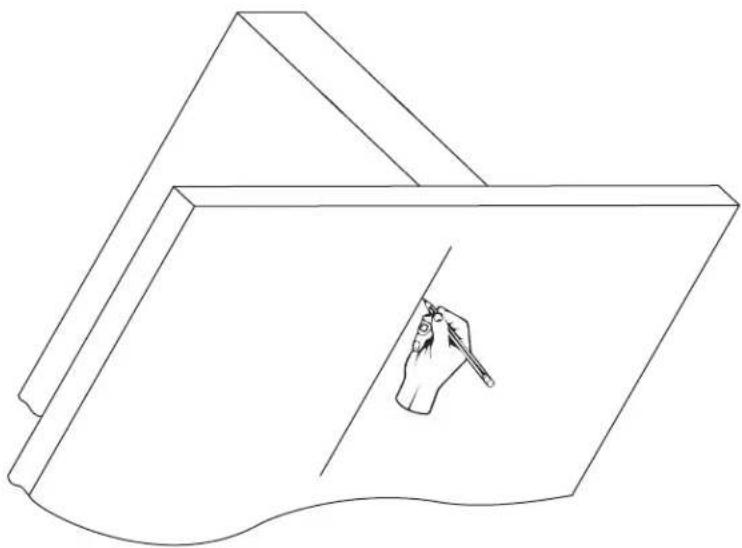
Using a straight edge, scribe a 5" long line along the center of the ceiling joist. (FIGURE A)
natural_image
Line drawing of a hand holding a pen, placed on a curved surface (no text or symbols)FIGURE A
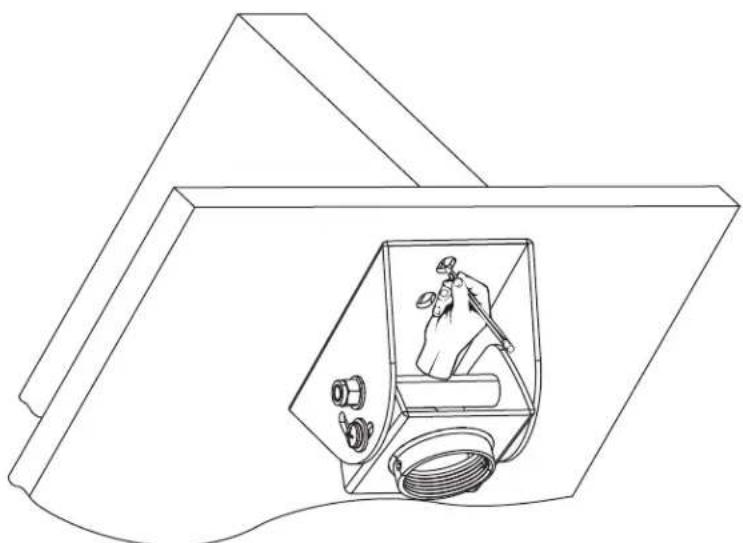
- Using the cathedral mount (A) as a template, align the mount with the centerline and mark the center points of the 3 mounting slots. (FIGURE B)
natural_image
Line drawing of a mechanical device with internal components and a tool, no text or symbols presentFIGURE B
WOOD JOIST CATHEDRAL CEILING INSTALLATION (CONTINUED)
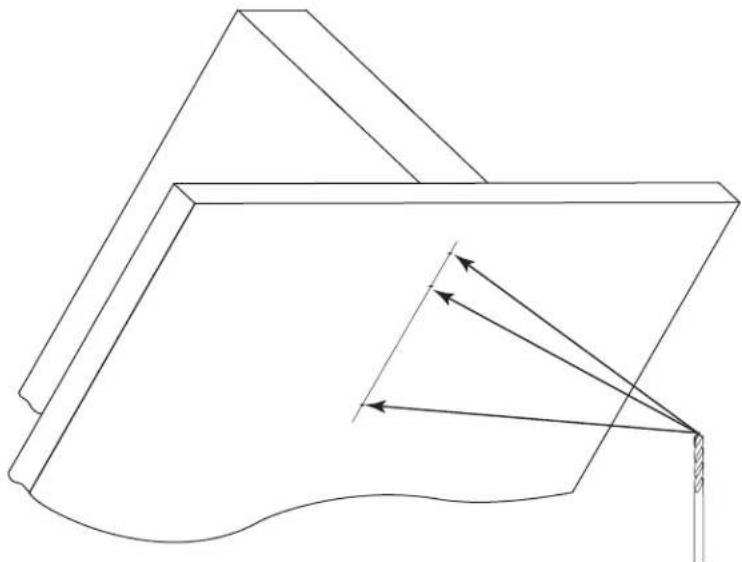
- Remove cathedral mount and using a 5/32" drill bit, drill a 2.5" deep pilot hole in each of the 3 marked center points. (FIGURE C)
natural_image
Pure geometric diagram showing a 3D object with internal lines and arrows, no text or symbols presentFIGURE C
-
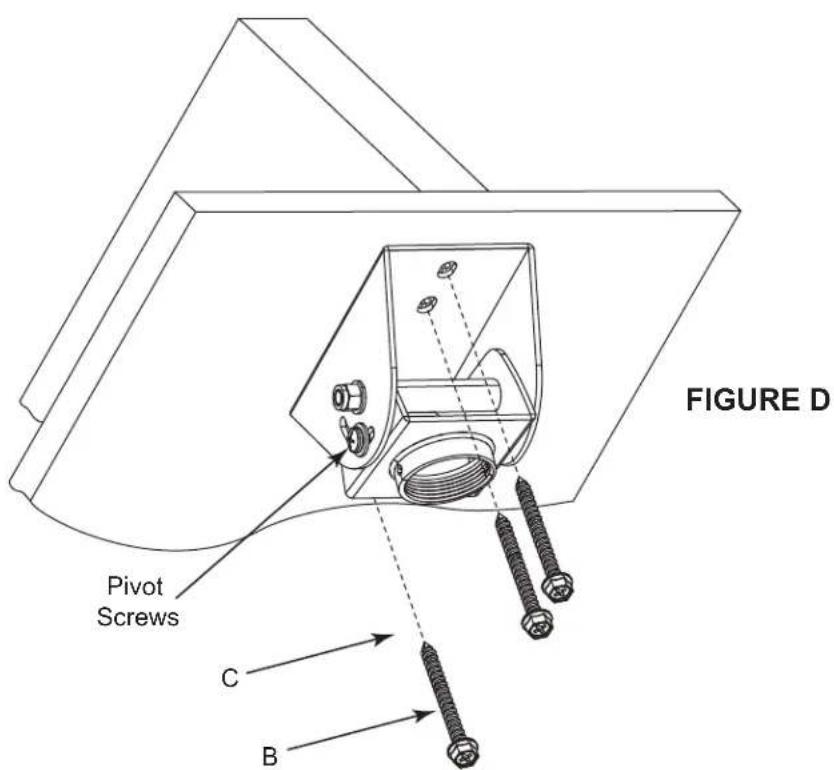
Loosen pivot screws on both sides of cathedral mount (A) to allow pipe swivel bracket to move freely. (FIGURE D)
-
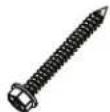
Using (3x) hex head screws (B), attach cathedral mount (A) to ceiling joist as shown.
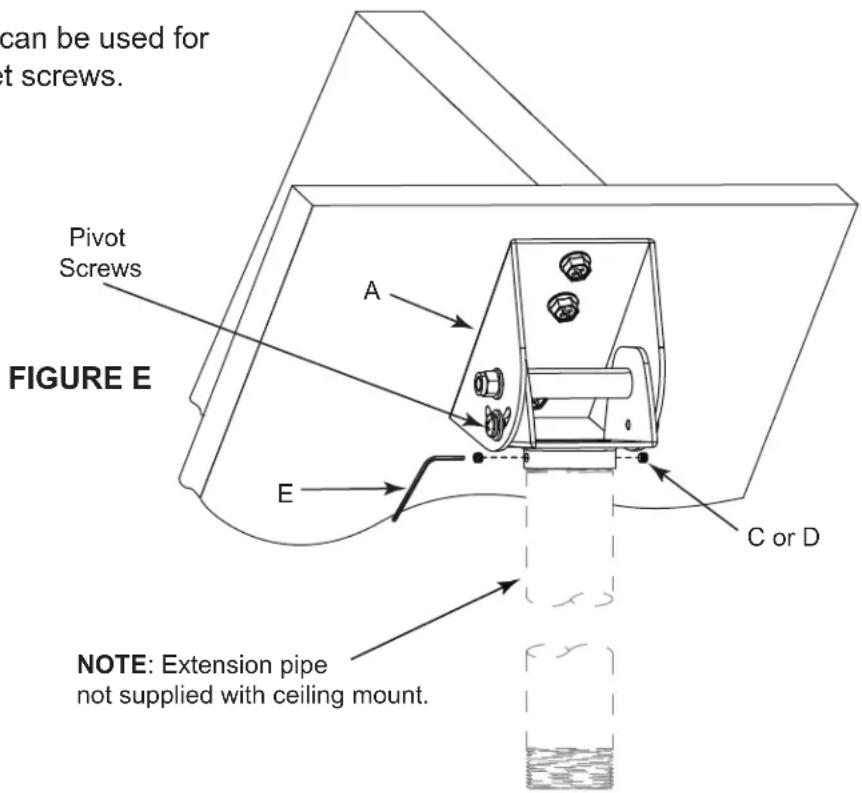
PIPE EXTENSION INSTALLATION (NOT SUPPLIED)
- To install 1 1/2' NPSM pipe extension to joist mount (A), thread pipe in as far as it will go. (FIGURE E)
- Insert (2x) set screws (C or D) into both sides of threaded collar and tighten using hex key (E) to prevent pipe from turning.
- With pipe hanging vertically, retighten both pivot screw to lock pipe swivel bracket in place.
NOTE: Hex wrench supplied can be used for both standard and security set screws.
WARRANTY
For warranty information, refer to http://www.middleatlantic.com/company/about-us.aspx#warranty
Corporate Headquarters
Corporate Voice: 973-839-1011 - Fax: 973-839-1976 / International Voice: +1 973-839-8821
Middle Atlantic Canada
Voice: 613-836-2501 - Fax: 613-836-2690
ca.middleatlantic.com - customerservicecanada@middleatlantic.ca
Factory Distribution
USA: NÍJ - CA - IL Canada: ON - BC
At Middle Atlantic Products we are always listening. Your comments are welcome.
Middle Atlantic Products is an ISO 9001 and ISO 14001 Registered Company.