TVRC45SABK - Remote control NEDIS - Free user manual and instructions
Find the device manual for free TVRC45SABK NEDIS in PDF.

| Product type | Replacement remote control for TV |
| Brand | Nedis |
| Model | TVRC45SABK |
| Dimensions (approx.) | 20 x 5 x 2 cm |
| Weight (with batteries) | Approximately 100 g |
| Power supply | 2 AAA batteries (not included) |
| Infrared range | Up to 8 meters |
| Main functions | TV control (power, volume, channels, menu, source), soundbar/audio device control, automatic code search, manual programming, customization of streaming buttons, button remapping, reset |
| Buttons | Power, volume +/-, menu, navigation (up/down/OK), source, mute, next/previous channel, numeric keys 0-9, streaming app buttons |
| Compatibility | TVs and soundbars of multiple brands (Samsung, LG, Philips, Sony, etc.) |
| Care and cleaning | Clean with a dry, soft cloth. Do not use harsh chemicals. Do not expose to water or moisture. |
| Safety | Do not open the product (no user-serviceable parts). Keep batteries out of reach of children. Do not use if damaged. Do not expose to water. |
| Spare parts and repairability | No user-serviceable parts. Batteries replaceable (AAA). |
| General information | Universal replacement remote control. Indoor use only. Not intended for professional use. Manufacturer's warranty. |
Frequently Asked Questions - TVRC45SABK NEDIS
User questions about TVRC45SABK NEDIS
0 question about this device. Answer the ones you know or ask your own.
Ask a new question about this device
Download the instructions for your Remote control in PDF format for free! Find your manual TVRC45SABK - NEDIS and take your electronic device back in hand. On this page are published all the documents necessary for the use of your device. TVRC45SABK by NEDIS.
USER MANUAL TVRC45SABK NEDIS
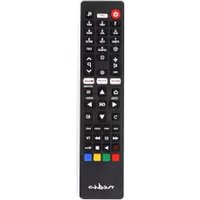
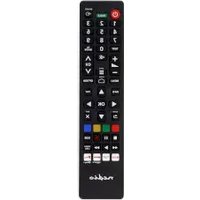
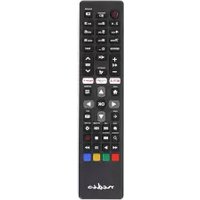
TV Remote Control to replace your original remote
TVRC45SABK | TVRC45LGBK | TVRC45PHBK | TVRC45SOBK | TVRC45PASHBK | TVRC45TCBK | TVRC45HIBK

ned.is/tvrc45sabk


ned.is/tvrc45lgbk

ned.is/tvrc45phbk


ned.is/tvrc45sobk

ned.is/tvrc45pashbk

ned.is/tvrc45tcbk


ned.is/ tvrc45hibk
EN
Quick start guide 12
DE
Kurzanleitung 17
FR
TVRC45PASHBK | TVRC45TCBK | TVRC45HIBK

For more information see the extended manual online: ned.is/tvrc45sabk | ned.is/tvrc45lgbk | ned.is/tvrc45phbk | ned.is/tvrc45sobk | ned.is/tvrc45pashbk | ned.is/tvrc45tcbk | ned.is/ tvrc45hibk
Intended use
The Nedis TVRC45SABK | TVRC45LGBK | TVRC45PHBK |
TVRC45SOBK | TVRC45PASHBK | TVRC45TCBK | TVRC45HIBK is a
replacement remote control for your original TV remote.
For more information, see chapter Specifications.
This product is intended for indoor use only.
Any modification of the product may have consequences for safety, warranty and proper functioning.
The product is not intended for professional use.
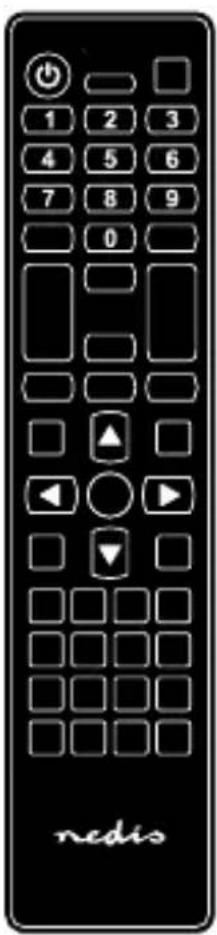
Main parts (image A)
1 LED indicator
2 On/off button
3 Volume up button
4 Volume down button
5 Menu button
6 Up button
7 OK button
8 Down button
9 Source / AV / input button
10 Mute button
11 Page / channel up button
12 Page / channel down button
13 Streaming app buttons
14 Button 1
Safety instructions
WARNING
- Ensure you have fully read and understood the instructions in this document before you install or use the product. Keep the packaging and this document for future reference.
- Do not let children play with the packaging material. Always keep the packaging material out of the reach of children.
- The manufacturer is not liable for consequential damages or for damages to property or persons caused by non-observance of the safety instructions and improper use of the product.
- Only use the product as described in this manual.
-
Do not open the product, there are no user serviceable parts inside.
-
Do not use the product if a part is damaged or defective. Replace a damaged or defective product immediately.
- Do not drop the product and avoid bumping.
- Do not expose the product to water, rain, moisture, or high humidity.
- Do not use aggressive chemical cleaning agents when cleaning the product.
Before first use
- Insert the two required AAA batteries (not included) into the battery compartment.
- Aim the remote at your device.
- Press the on/off button A2 or the mute button A10 to test the remote.
If your device switches on or mutes, the remote is ready for use.
If your device does not switch off or mute, follow the steps in the next chapter.
Automatic search for the TV
For TVRC45SABK / TVRC45LGBK / TVRC45PHBK /
TVRC45SOBK / TVRC45PASHBK / TVRC45TCBK
- Switch on the TV.
-
Press and hold the up button A⑥ and the down button A⑧ for 3 seconds.
The LED indicator A 1 lights up. -
Aim the remote at your device.
-
Press and hold the on/off button A 2 for 3 seconds.
The LED indicator A 1 flashes once every 3 seconds when a new code is used.
When the TV switches off, the is code correct.
- Press the OK button A⑦ to confirm.
The LED indicator A 1 switches off and the code is saved.
- Check if the buttons control your device. If not, repeat steps 1-6.
For TVRC45HIBK
- Switch on the TV.
-
Press and hold the on/off button A 2 and button 1 A 14 for 5 seconds.
The LED indicator A 1 blinks 3 times. -
Check if the buttons control your device. If not, repeat step 2.
If the buttons are still not working:
- Press and hold the on/off button A 2 and each of the following buttons consecutively for 5 seconds.
- The number buttons
- The volume up button

• The volume down button

• The page / channel up button A ^11
• The page / channel down button A12
The LED indicator A 1 blinks 3 times after each button combination is pressed.
- Check if the buttons control your device.
Automatic search for the sound bar/audio device
- Switch on your TV and the sound bar/audio device.
Make sure audio is playing when programming your sound bar/audio device.
- Press and hold the source / AV / input button A9 and the mute button A10 for 3 seconds.
The LED indicator A1 lights up.
-
Aim the remote at your device.
-
Press and hold the button corresponding to your sound bar/audio device brand for 3 seconds.
| Button First letter of the brand | |
| Volume up button A3 | A – F |
| Volume down button A4 | G – L |
| Page / channel up button A11 | M – R |
| Page / channel down button A12 | S – Z |
The LED indicator A 1 flashes once every 2 seconds when a new code is used.
When the volume of your device is muted, the correct code is within the batch of codes.
- Press the OK button A7 to confirm.
The LED indicator A 1 switches off and the code is saved.
- Check if the buttons control your device. If not, repeat steps 1-6.
Programming the product to the device manually
- Switch on your device.
Make sure audio is playing when programming your sound bar/audio device.
-
Scan the QR code on the front page to open the code list in the extended online manual.
-
Search for the code of your device in the code list.
-
Press and hold the menu button A 5 and the mute button
A10 for 3 seconds.
The LED indicator A 1 lights up.
- Enter the code from the code list.
If the LED indicator A 1 switches off, the code is correct.
If the LED indicator A 1 blinks 2 times then lights up, the code is declined. Repeat step 5 using another code.
-
Aim the remote at your device.
-
Press the on/off button A 2 or mute button A 10 to test if the remote functions correctly with your TV or soundbar/audio device.
-
Press the on/off button A 2 or the mute button A10.
If the device switches off or mutes, the product is ready for use.
If the device does not switch off or mute, repeat steps 4-5 using another code.
Disconnecting the soundbar/audio device from the remote
To reset the volume buttons A3410 to control the sound of your TV instead of your sound bar/audio device:
Press and hold the source / AV / input button A9 and the OK button A7 for 3 seconds.
The LED indicator A 1 flashes rapidly.
The audio code is deleted when the LED indicator A 1 switches off.
Customising streaming app buttons
-
Switch on the TV.
-
Press and hold the OK button A 7 and the mute button
A10 for 3 seconds.
The LED indicator A 1 lights up.
- Press and hold the streaming app button for 3 seconds.
The LED indicator A 1 blinks 2 times and lights up.
-
Launch the streaming app through the menu using the arrow keys and OK button A 7.
-
Press and hold the streaming app button for 3 seconds.
The LED indicator A 1 blinks 2 times and switches off.
The button is now mapped to the selected app and launches the app when pressed.
Reset streaming app buttons
-
Switch on the TV.
-
Press and hold the OK button A ⑦ and the mute button
A10 for 3 seconds.
The LED indicator A 1 lights up.
- Press and hold the streaming app button for 3 seconds.
The LED indicator A 1 blinks 2 times and lights up.
- Again, press and hold the streaming app button for 3 seconds.
The LED indicator A 1 switches off and the button is reset to factory default.
Remapping a button manually
URC = your replacement remote control; RC = your original remote control
-
Make sure the URC and the RC batteries are not empty.
-
Press and hold the on/off button A ② and the mute button A ⑩ of the URC for 3 seconds.
-
Hold both remotes close together. The infrared pointers of both remotes should be within 2-3 cm of each other.
-
Press the button on the URC that you want to remap. The LED indicator A 1 flashes rapidly.
-
Press the button on the RC that you want to remap to your URC.
The LED indicator A 1 blinks 3 times then blinks slowly. Repeat steps 4-5 to remap more buttons.
- Press and hold the on/off button A 2 and the mute button A 10 of the URC for 3 seconds to save the remapped buttons.
If you do not save, the newly remapped buttons will not work properly.
- Check if the remapped buttons work properly. If not, repeat steps 1-7.
You can remap a maximum of 5 buttons. After remapping 5 buttons, you need to overwrite previously remapped buttons.
Resetting all remapped buttons
Press and hold the on/off button A2 and the OK button A7 for 3 seconds.
LED indicator A 1 switches off and the buttons are reset to factory default.
Resetting the remote to factory settings
Press and hold the on/off button A2 and the source / AV / input button A9 for 3 seconds.
LED indicator A 1 switches off and the buttons are reset to factory default.
Disposal
The product is designated for separate collection at an appropriate collection point. Do not dispose of the product with household waste.
For more information, contact the retailer or the local authority responsible for the waste management.
DE Kurzanleitung
TV-Fernbedienung
TVRC45SABK | TVRC45LGBK | TVRC45PHBK | TVRC45SOBK |
TVRC45PASHBK | TVRC45TCBK | TVRC45HIBK

Weitere Informationen finden Sie in der erweiterten Anleitung online: ned.is/tvrc45sabk | ned.is/tvrc45lgbk | ned.is/tvrc45phbk | ned.is/tvrc45sobk | ned.is/tvrc45pashbk | ned.is/tvrc45tcbk | ned.is/ tvrc45hibk
TVRC45PASHBK | TVRC45TCBK | TVRC45HIBK

Pour plus d'informations, consultez le manuel détaillé en ligne : ned.is/tvrc45sabk | ned.is/tvrc45lgbk | ned.is/tvrc45phbk | ned.is/tvrc45sobk | ned.is/tvrc45pashbk | ned.is/tvrc45tcbk | ned.is/ tvrc45hibk
Utilisation prévue
and hold the streaming app button for 3
seconds.||||UNTRANSLATED_CONTENT_END|||
and hold the streaming app button for 3
seconds.||||UNTRANSLATED_CONTENT_END|||
press and hold the streaming app button for 3
seconds.||||UNTRANSLATED_CONTENT_END|||
TVRC45PASHBK | TVRC45TCBK | TVRC45HIBK

TVRC45PASHBK | TVRC45TCBK | TVRC45HIBK

TVRC45PASHBK | TVRC45TCBK | TVRC45HIBK

För ytterligare information, se den utökade manualen online: ned.is/tvrc45sabk | ned.is/tvrc45lgbk | ned.is/tvrc45phbk | ned.is/tvrc45sobk | ned.is/tvrc45pashbk | ned.is/tvrc45tcbk | ned.is/ tvrc45hibk
Avsedd användning
TVRC45PASHBK | TVRC45TCBK | TVRC45HIBK

Tilpasse appknapper for strømming
- Slå på TV-en.
- Trykk og hold inne OK-knappen A 7 og demp-knappen
A10 i 3 sekunder.
TVRC45PASHBK | TVRC45TCBK | TVRC45HIBK

A Nedis TVRC45SABK | TVRC45LGBK | TVRC45PHBK |
TVRC45PASHBK | TVRC45TCBK | TVRC45HIBK

TVRC45PASHBK | TVRC45TCBK | TVRC45HIBK

TVRC45PASHBK | TVRC45TCBK | TVRC45HIBK

Viac informácií nájdete v rozšírenom návode online: ned.is/tvrc45sabk | ned.is/tvrc45lgbk | ned.is/tvrc45phbk | ned.is/tvrc45sobk | ned.is/tvrc45pashbk | ned.is/tvrc45tcbk | ned.is/ tvrc45hibk
Určené použitie
Nedis TVRC45SABK | TVRC45LGBK | TVRC45PHBK | TVRC45SOBK | TVRC45PASHBK | TVRC45TCBK | TVRC45HIBK je náhradný dialkový ovládač pre originálny TV s dialkovým ovládaním.
TVRC45PASHBK | TVRC45TCBK | TVRC45HIBK

Více informací najdete v rozšířené příručce online: ned.is/tvrc45sabk | ned.is/tvrc45lgbk | ned.is/tvrc45phbk | ned.is/tvrc45sobk | ned.is/tvrc45pashbk | ned.is/tvrc45tcbk | ned.is/ tvrc45hibk
Zamýšlené použití
TVRC45PASHBK | TVRC45TCBK | TVRC45HIBK

Pentru informații suplimentare, consultați manualul extins, disponibil online: ned.is/tvrc45sabk | ned.is/tvrc45lgbk | ned.is/tvrc45phbk | ned.is/tvrc45sobk | ned.is/tvrc45pashbk | ned.is/tvrc45tcbk | ned.is/ tvrc45hibk