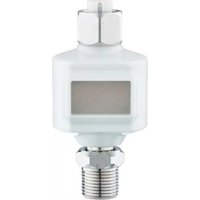
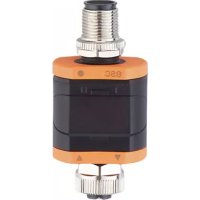
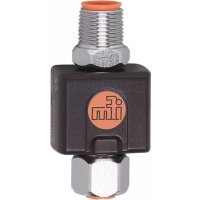
DP3222 - Electric converter IFM - Free user manual and instructions
Find the device manual for free DP3222 IFM in PDF.


User questions about DP3222 IFM
0 question about this device. Answer the ones you know or ask your own.
Ask a new question about this device
Download the instructions for your Electric converter in PDF format for free! Find your manual DP3222 - IFM and take your electronic device back in hand. On this page are published all the documents necessary for the use of your device. DP3222 by IFM.
USER MANUAL DP3222 IFM
Operating instructions
Converter 2 x 0...10 V / IO-Link (IP 69K)
DP3222
Contents
1 Preliminary note 3
1.1 Symbols used 3
1.2 Warnings.... 3
1.3 Safety symbol on the device 3
2 Safety instructions.... 4
3 Intended use.... 5
4 Function 6
4.1 Operating modes 6
4.2 Application as an IO-Link device 6
4.2.1 General information.... 6
4.2.2 Application example 7
4.2.3 IO Device Description (IODD) 7
4.3 Function diagrams.... 7
4.3.1 Single point mode 7
4.3.2 Window mode 8
4.3.3 Two point mode 8
4.3.4 Deactivated mode 8
5 Installation.... 10
6 Electrical connection.... 11
6.1 Input side 11
6.2 Connecting the device.... 11
6.2.1 Mounting the connector.... 12
6.2.1.1 Maximum cable length 12
7 Operating and display elements 13
7.1 LEDs 13
7.1.1 Visualisation of the voltage value at the input 13
8 Parameter setting 14
8.1 Parameters via IO-Link 14
8.1.1 Application-specific tag 14
8.1.2 Function Tag 14
8.1.3 Location Tag 14
8.1.4 internal_temperature – operating temperature microcontroller 14
8.1.5 operation_hours - operating hours 14
8.1.6 ModE — switch point mode ..... 14
8.1.7 LoGc - switch point logic 14
8.1.8 SP1 — switch point 1.... 15
8.1.9 SP2 - switch point 2.... 15
8.1.10 HyS - switch points hysteresis 15
8.1.11 Mean filter 15
9 Operation 16
10 Troubleshooting 17
11 Maintenance, repair and disposal 18
1 Preliminary note
You will find instructions, technical data, approvals and further information using the QR code on the unit / packaging or at documentation.ifm.com.
1.1 Symbols used
√ Requirement
Instructions
Reaction, result
[...] Designation of keys, buttons or indications
→ Cross-reference

Important note
Non-compliance may result in malfunction or interference.

Information
Supplementary note
1.2 Warnings
Warnings indicate the possibility of personal injury and damage to property. This enables safe product handling. Warnings are graded as follows:

WARNING
Warning of serious personal injury
▷ If the warning is not observed, fatal and serious injuries are possible.

CAUTION
Warning of minor to moderate personal injury
▷ If the warning is not observed, minor to moderate injuries are possible.
ATTENTION
Warning of damage to property
▷ If the warning is not observed, damage to property is possible.
1.3 Safety symbol on the device

Safety symbol on the device:
▶ Adhere to the operating instructions for the safe operation of the unit.
2 Safety instructions
- The unit described is a subcomponent for integration into a system.
- The system architect is responsible for the safety of the system.
-
The system architect undertakes to perform a risk assessment and to create documentation in accordance with legal and normative requirements to be provided to the operator and user of the system. This documentation must contain all necessary information and safety instructions for the operator, the user and, if applicable, for any service personnel authorised by the architect of the system.
-
Read this document before setting up the product and keep it during the entire service life.
- The product must be suitable for the corresponding applications and environmental conditions without any restrictions.
- Only use the product for its intended purpose (→ Intended use).
- If the operating instructions or the technical data are not adhered to, personal injury and/or damage to property may occur.
- The manufacturer assumes no liability or warranty for any consequences caused by tampering with the product or incorrect use by the operator.
• Installation, electrical connection, set-up, programming, configuration, operation and maintenance of the product must be carried out by personnel qualified and authorised for the respective activity. - Protect units and cables against damage.
- Replace damaged units, otherwise the technical data and safety will be impaired.
- Observe applicable documents.
3 Intended use
The unit is used to detect signals from a connected sensor or another device with an analogue output (0...10 V). It has two analogue voltage inputs.

Fig. 1: Inputs/outputs of the device
The unit operates as an "analogue/IO-Link converter".
A maximum of 11 V may be applied to each input. Otherwise, the accuracy of the respective other channel will be negatively affected.
If the LED IN1 / IN2 flashes and the IO-Link event "Process value above valid range" (0x8C10) is present, the accuracy of the other channel can no longer be guaranteed.
The device is suited for wet environments. Observe instructions in chapters "Installation" and "Electrical connection".
The unit is not suited for environments with particular requirements on mechanical stability (e.g. shock/vibration).
The unit is intended for indoor use only.
▶ Observe the operating conditions ( → Technical data at www.ifm.com).
4 Function
The unit provides the IO-Link process data according to the analogue input signals.
The unit is designed for half-duplex communication. So the following options are possible:
- Remote display: reading and displaying the current voltage value
- Remote parameter setting: reading and changing the current parameter setting
• IO-Link parameter setting: IO Device Description (IODD) (→ 7)
4.1 Operating modes
The following operating modes are available:
| Operating mode 1 | |
| Description | Operating mode for backwards compatibility Please note that this operating mode does not support all functionalities described in the instructions. |
| Application | To ensure compatibility if sensors are replaced |
| IODD designation | DP3222 |
| IO-Link device ID | 613d / 00 02 65 h |
| Operating mode 2 (default) | |
| Description | Operating mode on delivery |
| Application | Standard application |
| IODD designation | DP3222_Status_B |
| IO-Link device ID | 1428 d / 00 05 94 h |
4.2 Application as an IO-Link device
4.2.1 General information
The unit has an IO-Link communication interface which requires an IO-Link capable module (IO-Link master).
The IO-Link interface allows direct access to the process and diagnostic data and enables setting of the parameters of the unit during operation.
You will find further information about IO-Link and all the necessary information about the required IO-Link hardware and software at:
www.io-link.ifm
4.2.2 Application example

Fig. 2: Application example with IO-Link master
1: Analogue sensor
2: Converter IO-Link / 2 x 0...10 V
3: Fully bidirectional IO-Link communication
Remote parameter setting:
Reading and changing the parameter setting
4: IO-Link masters
5: Fieldbus (e.g. Profibus, Profinet etc.)
6: PLC
4.2.3 IO Device Description (IODD)
You will find the IODDs required for configuration of the IO-Link device as well as detailed information about the process data structure, diagnostic information and parameter addresses at documentation.ifm.com
4.3 Function diagrams
4.3.1 Single point mode

SP1: Switch-off point
SP1+H: Trigger point overvoltage
Fig. 3: NO (IO-Link parameter LoGc: high active)
If a set voltage is not reached, this is signalled as “low” by a bit in the input process data.

SP1: Switch-on point
SP1+H: Trigger point undervoltage
Fig. 4: NC (IO-Link parameter LoGc: low active)
If a set voltage is not reached, this is signalled as “high” by a bit in the input process data.

In operating mode 1, this function is not available.
4.3.2 Window mode

Fig. 5: NO (IO-Link parameter LoGc: high active)
SP1: Switch-on point window
SP1+H: Switch-off point
SP2: Switch-on point window
SP2-H: Switch-off point
If the set voltage window is not complied with, this is signalled as “low” by a bit in the input process data.

Fig. 6: NC (IO-Link parameter LoGc: low active)
SP1: Switch-off point window
SP1+H: Switch-on point
SP2: Switch-off point window
SP2-H: Switch-on point
If the set voltage window is not complied with, this is signalled as “high” by a bit in the input process data.

In operating mode 1, this function is not available.
4.3.3 Two point mode

Fig. 7: NO (IO-Link parameter LoGc: no / high active)
SP1: Trigger point overvoltage
SP2: Switch-off point
If a set voltage is not reached, this is signalled as “low” by a bit in the input process data.

Fig. 8: NC (IO-Link parameter LoGc: nc / low active)
SP1: Trigger point undervoltage
SP2: Switch-on point
If a set voltage is not reached, this is signalled as “high” by a bit in the input process data.

In operating mode 1, this function is not available.
4.3.4 Deactivated mode
NO (IO-Link parameter LoGc: high active)
The signal bit in the input process data is always signalled as "low".
NC (IO-Link parameter LoGc: low active)
The signal bit in the input process data is always signalled as “high”.

In operating mode 1, this function is not available.
5 Installation
ATTENTION
Higher shock ≥ IK06
▷ Damage possible
▷ Protection rating and, in wet environments, electrical protection might be impaired
▶ If necessary, the system creator must take external measures to protect the device depending on the requirements of the corresponding application.
▶ Replace damaged devices, otherwise the technical data and safety will be impaired.
The IP rating of the overall system depends on the protection ratings of the individual devices, the applied connection elements and the corresponding protective caps.
ATTENTION
No protection rating / no protection of the contacts without mounted connectors / protective caps.
▷ Inadmissible soiling / moisture possible.
▷ Disconnection of circuits / safety possibly impaired.
▷ Before installation / when replacing the device, maintain pollution degree 2.
▶ Disconnection / safety guaranteed.
▶ Connect the M12 connectors of the device ( → Electrical connection).
▶ Install the device so that the M12 connection parts and the device are protected from mechanical stress such as shock and vibration.
▶ If necessary, fix the device with cable ties.

The following applies to all types of mounting:
The responsibility for the compliance with the requirements concerning mounting of the device in the application with regard to shock, vibration, acceleration and weight lies with the system architect.
6 Electrical connection

The unit must be connected by a qualified electrician.
▶ Observe the national and international regulations for the installation of electrical equipment.

CAUTION
Use in wet environments
▷ Electric shock possible.
▶ Voltage derating required ( → Technical data).
The input and output circuits are insulated from each other and from device surfaces that could be touched with basic insulation according to IEC 61010-1 (secondary circuit with max. 32 V DC, supplied from the mains circuit up to 300 V of overvoltage category II).
The external wiring has to be carried out in a way that ensures the required separation from other circuits.
6.1 Input side
Operating voltage (SELV/PELV)

CAUTION
The input current of the operating voltage is not limited.
▷ No fire protection.
▶ Protect the circuit.
▶ Protect the sensor supply via the same fuse.
| Potential | M12 connector 1 | Fuse |
| L+ / supply voltage | Pin 1 | ≤ 2 A |
| C/Q IO-Link (if not protected via IO-Link master) | Pin 4 | ≤ 2 A |
Required tripping characteristic of the fuses:
Tfuse ≤ 120 s at max. 6.25 A (fire protection)
▶ Alternatively supply the device via a limited energy circuit according to IEC 61010-1 or class 2 according to UL1310.
6.2 Connecting the device
▶ Disconnect power.
▶ Connect the unit as follows:

Fig. 9: Electrical connection
1: 4-pole M12 connector
(IO-Link side)
• Pin 1: L+ / supply voltage
- Pin 2: not used
• Pin 3: L- / supply voltage
- Pin 4: C/Q IO-Link
2: 5-pole M12 socket
(sensor side)
- Pin 1: L+
• Pin 2: 0...10 V analogue input 2 - Pin 3: L-
• Pin 4: 0...10 V analogue input 1 - Pin 5: not used
The unit must not be externally supplied via the 5-pole M12 input socket ②.
Always use the provided connection cables to connect other devices.
See also application examples ( → Intended use)
6.2.1 Mounting the connector
The threaded connections in the device correspond to the M12 standard. To ensure compliance with the specified protection rating, only cables that comply with this standard may be used. In the case of self-assembled cables, the system manufacturer is responsible for the protection rating.
▶ Use connectors with gold-plated contacts.
▶ During installation, place the connectors vertically so that the coupling nut will not damage the thread.
▶ Observe the coding of the connectors during installation.
If connector in the device:
▶ Tighten the cable sockets according to the torque specifications indicated by the cable vendor. Maximum permissible tightening torque: 1.8 Nm
If sockets in the device:
▶ Tighten the cable plug using 1.3 ± 0.1 Nm.
▶ Provide all outgoing cables with suitable strain relief after a maximum of 200 mm. Observe the minimum bending radius of the cables ( → information from the cable manufacturer).
6.2.1.1 Maximum cable length
• Without IO-Link communication: 30 m on each side
• With IO-Link communication: 20 m on the master side
7 Operating and display elements

1: LED I
2: LED Power
3: LED II
7.1 LEDs
| LED | Colour | Status | Designation | |
| I | IN1 | yellow | on | Analogue value in the standard range:0...100 % (0...10 V) |
| flashing (2 Hz) | Analogue value in the range:>100 % (>10 V)* | |||
| Power | green | on | Voltage supply OK. Device in operating mode | |
| flashing (5 Hz) | Device supply undervoltage | |||
| off | Voltage supply off | |||
| II | IN2 | yellow | on | Analogue value in the standard range:0...100 % (0...10 V) |
| flashing (2 Hz) | Analogue value in the range:>100 % (>10 V)* | |||
Error signals and diagnostics → Troubleshooting
* Via IO-Link, an error signal is transmitted if value <11 V.
7.1.1 Visualisation of the voltage value at the input

8 Parameter setting
During parameter setting the unit remains in the operating mode. It continues its functions with the existing parameters until the parameter setting has been completed.
8.1 Parameters via IO-Link
8.1.1 Application-specific tag
Customer-specific application description, max. 32 characters long.
Value: “ *** ” / can be freely defined by the customer
8.1.2 Function Tag
Customer-specific application description, max. 32 characters long.
Value: “ *** ” / can be freely defined by the customer
8.1.3 Location Tag
Customer-specific application description, max. 32 characters long.
Value: “ *** ” / can be freely defined by the customer
8.1.4 internal_temperature – operating temperature microcontroller
Reads the data from the internal temperature sensor of the microcontroller.

In operating mode 1, this parameter is not available.
8.1.5 operation_hours – operating hours
Only counts full operating hours. Operating times of less than one full hour are not saved. Counter values are saved permanently.

In operating mode 1, this parameter is not available.
8.1.6 ModE — switch point mode
Setting of the switch point mode
• Single point mode ( → 7)
• Window mode (→ 8)
• Two point mode ( → 8)
- Deactivated mode (→ 8)

In operating mode 1, this parameter is not available.
8.1.7 LoGc – switch point logic
Setting of the switch point logic: Function diagrams ( → ☐ 7)
- High active = status bit is set to "high" (if "High active" activated)
- Low active = status bit is set to "low" (if "Low active" activated)

In operating mode 1, this parameter is not available.
8.1.8 SP1 – switch point 1
Threshold for the upper switch point
It always applies: SP1 > SP2

In operating mode 1, this parameter is not available.
8.1.9 SP2 – switch point 2
Threshold for the lower switch point
It always applies: SP2 < SP1

In operating mode 1, this parameter is not available.
8.1.10 HyS – switch points hysteresis
Setting of the hysteresis with respect to switch points SP1 and SP2: Function diagrams ( → ☐ 7).
Only active in the switch point modes "Single point mode" and "Window mode".

In operating mode 1, this parameter is not available.
8.1.11 Mean filter
Indicates the time during which the mean value of the measured value is generated. Duration in ms, min. 5 ms, max. 1000 ms.
9 Operation
The unit provides the IO-Link process data according to the analogue input signals.
10 Troubleshooting
| LED | Status | Error | Troubleshooting |
| Power | flashing (5 Hz) | Supply voltage too low | Check/correct the supply voltage. → Electrical connection |
| off | No supply voltage | Check/correct the supply voltage. → Electrical connection |
11 Maintenance, repair and disposal
The unit is maintenance-free.
▶ Carry out cleaning considering the technical data (protection rating) and the connection technology used.
▶ Cleaning agents must be checked by the system manufacturer / operator for their suitability for the device materials ( → Technical data) and the connection technology used.
▶ The cleaning agents must not damage the device materials.
▶ It is not possible to repair the unit.
▶ After use, dispose of the unit in an environmentally friendly way in accordance with the applicable national regulations.
- 1 PRELIMINARY NOTE
- 1.1 SYMBOLS USED
- 1.2 WARNINGS
- 1.3 SAFETY SYMBOL ON THE DEVICE
- 2 SAFETY INSTRUCTIONS
- 3 INTENDED USE
- 4 FUNCTION
- 4.1 OPERATING MODES
- 4.2 APPLICATION AS AN IO-LINK DEVICE
- 4.2.1 GENERAL INFORMATION
- 4.2.2 APPLICATION EXAMPLE
- 4.2.3 IO DEVICE DESCRIPTION (IODD)
- 4.3 FUNCTION DIAGRAMS
- 4.3.1 SINGLE POINT MODE
- 4.3.2 WINDOW MODE
- 4.3.3 TWO POINT MODE
- 4.3.4 DEACTIVATED MODE
- 5 INSTALLATION
- 6 ELECTRICAL CONNECTION
- 6.1 INPUT SIDE
- 6.2 CONNECTING THE DEVICE
- 6.2.1 MOUNTING THE CONNECTOR
- 6.2.1.1 MAXIMUM CABLE LENGTH
- 7 OPERATING AND DISPLAY ELEMENTS
- 7.1 LEDS
- 7.1.1 VISUALISATION OF THE VOLTAGE VALUE AT THE INPUT
- 8 PARAMETER SETTING
- 8.1 PARAMETERS VIA IO-LINK
- 8.1.1 APPLICATION-SPECIFIC TAG
- 8.1.2 FUNCTION TAG
- 8.1.3 LOCATION TAG
- 8.1.4 INTERNAL_TEMPERATURE – OPERATING TEMPERATURE MICROCONTROLLER
- 8.1.5 OPERATION_HOURS – OPERATING HOURS
- 8.1.6 MODE — SWITCH POINT MODE
- 8.1.7 LOGC – SWITCH POINT LOGIC
- 8.1.10 HYS – SWITCH POINTS HYSTERESIS
- 8.1.11 MEAN FILTER
- 9 OPERATION
- 10 TROUBLESHOOTING
- 11 MAINTENANCE, REPAIR AND DISPOSAL
Brand : IFM
Model : DP3222
Category : Electric converter