Elara LN05A - Speaker TRIANGLE - Free user manual and instructions
Find the device manual for free Elara LN05A TRIANGLE in PDF.
| Product type | Active amplified speaker with passive speaker |
| Brand | Triangle |
| Model | Elara LN05A |
| Power supply | Mains 100-240 V ~ 50/60 Hz |
| Power consumption | 80 W |
| Audio inputs | Bluetooth 4.0 aptX, RCA (Line/Phono), 3.5mm Jack, Optical, Coaxial |
| Audio output | Subwoofer (RCA) |
| Bluetooth connectivity | Bluetooth 4.0 with aptX codec, range approx. 10 m |
| Adjustment functions | Volume, Bass (±6 dB in 2 dB steps), Treble (±6 dB in 2 dB steps) |
| Remote control | Yes, with volume, bass, treble, source, Bluetooth playback control |
| Supplied accessories | Speaker feet, fixing screws, decoupling spikes, anti-slip pads, protective grilles, 5m speaker cable, power cable, remote control, registration flyer, user manual |
| Automatic standby | Yes, after 30 minutes without signal |
| Warranty | 2 years (subject to registration) |
| Maintenance and cleaning | Clean with a soft, dry, lint-free cloth. Do not use liquids. |
| Safety | Do not open the speaker (risk of electric shock). Unplug before moving. Avoid humidity and heat. |
| Source compatibility | Smartphone, tablet, computer, turntable, CD/DVD player, TV, etc. |
Frequently Asked Questions - Elara LN05A TRIANGLE
User questions about Elara LN05A TRIANGLE
0 question about this device. Answer the ones you know or ask your own.
Ask a new question about this device
Download the instructions for your Speaker in PDF format for free! Find your manual Elara LN05A - TRIANGLE and take your electronic device back in hand. On this page are published all the documents necessary for the use of your device. Elara LN05A by TRIANGLE.
USER MANUAL Elara LN05A TRIANGLE
MANUFACTURE ELECTROACOUSTIQUE
ELARA
ACTIVE SERIES

natural_image
Line drawing of two triangular speakers with circular speaker holes, no text or symbols presentOwner's manual & Warranty
SOMMAIRE / SUMMARY
MODE D'EMPLOI - FRANÇAIS 5
▶Unpacking 18
▶Assembly of the LN05A pedestal 19
▶Installation precautions 20
▶Powering 21
▶Speaker description 22
▶ Remote description 23
- Connecting sources 24
▶ Bass and treble adjustment / Auto standby feature 27
INFORMATIONS TECHNIQUES / TECHNICAL INFORMATIONS 28
INSTRUCTIONS DE SÉCURITÉ 30
GARANTIE / WARRANTY 32
MODE D'EMPLOI
FRANÇAIS
DÉBALLAGE
text_image
Diagram showing five types of electrical components with labels: screw, dome, bolt, and plate assembly.text_image
Diagram of a mechanical assembly with numbered components, likely illustrating a mounting or positioning setup.PRÉCAUTIONS D'INSTALLATION
natural_image
Pure electrical wiring diagram showing connections between two panels (no text or symbols)Mise sous tension
7 - Source jack 3.5mm
8 - Source RCA (line/phono)
9 - Source coaxiale
10 - Source optique
natural_image
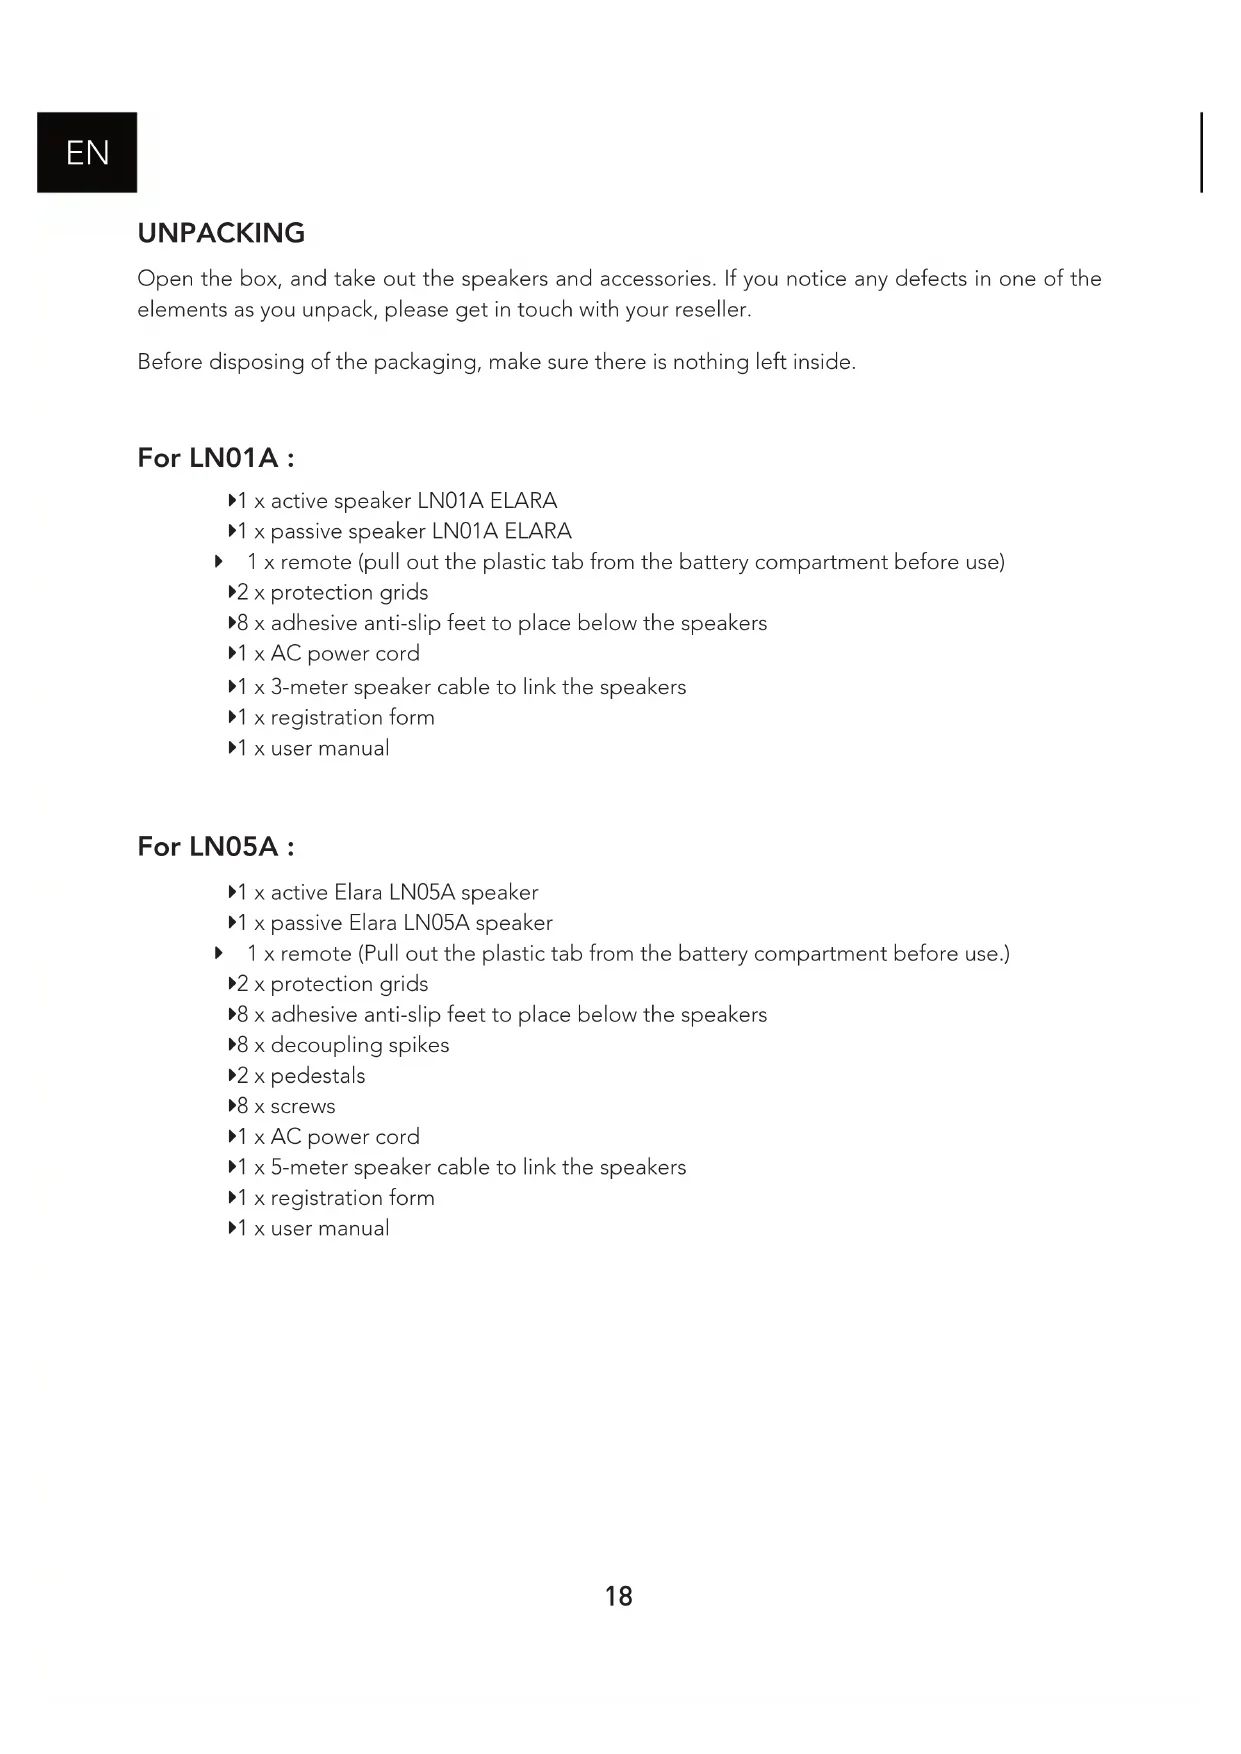
Pure electrical connector diagram showing two connected components with terminals (no text or symbols)ou
natural_image
Pure electrical circuit lines without any symbolsline phono
natural_image
Pure electrical connector diagram showing two connected cables (no text or symbols)Open the box, and take out the speakers and accessories. If you notice any defects in one of the elements as you unpack, please get in touch with your reseller.
Before disposing of the packaging, make sure there is nothing left inside.
For LN01A :
▶1 x active speaker LN01A ELARA
▶1 x passive speaker LN01A ELARA
▶ 1 x remote (pull out the plastic tab from the battery compartment before use)
▶2 x protection grids
▶8 x adhesive anti-slip feet to place below the speakers
▶1 x AC power cord
▶1 x 3-meter speaker cable to link the speakers
▶1 x registration form
▶1 x user manual
For LN05A :
▶1 x active Elara LN05A speaker
▶1 x passive Elara LN05A speaker
▶ 1 x remote (Pull out the plastic tab from the battery compartment before use.)
▶2 x protection grids
▶8 x adhesive anti-slip feet to place below the speakers
▶8 x decoupling spikes
▶2 x pedestals
▶8 x screws
▶1 x AC power cord
▶1 x 5-meter speaker cable to link the speakers
▶1 x registration form
▶1 x user manual
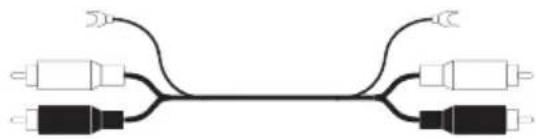
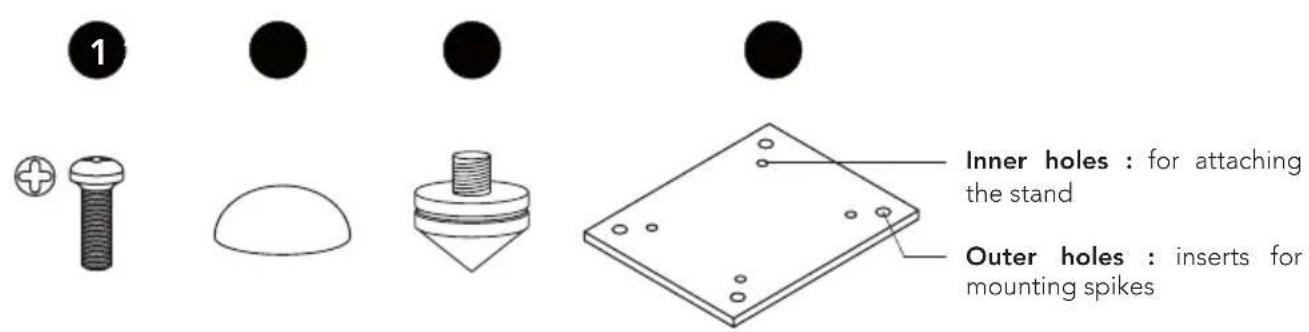
ASSEMBLY OF THE LN05A PEDESTAL
text_image
Inner holes : for attaching the stand Outer holes : inserts for mounting spikesx4 x4 x4 x1
Stand the speaker on the top on a non-abrasive surface.
Secure the pedestal by using the screws supplied.
On a rigid surface (wood, floor):
Stick the rubber pads 2 the 4 corners of the pedestal.
On a soft ground (carpet, rug):
Screw the spikes 3 the inserts of the pedestal.
text_image
Diagram of a mechanical assembly with numbered components, likely illustrating a mounting or positioning setup.INSTALLATION PRECAUTIONS
Before the installation
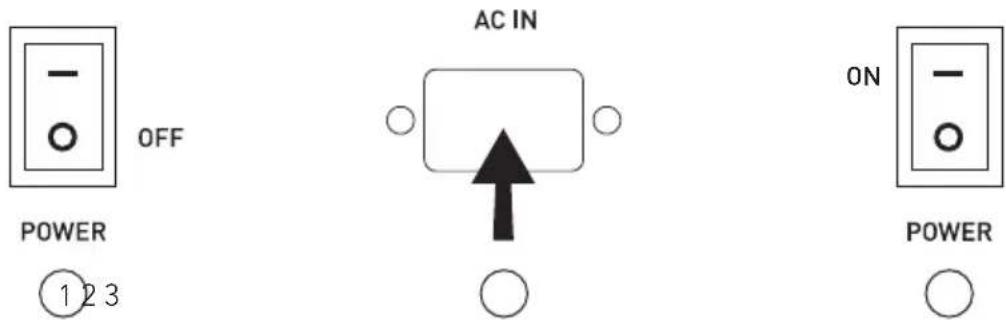
Before making any connections, turn off the devices. Be sure to always set the active speaker switch to OFF before removing or plugging connection cables. Do not plug in the power cord before all connections are made.
Moving the device
Always remove the power cord and disconnect the cables between all components when moving the device. This will prevent a short-circuit or the damage to the plugs or connection cables.
Before turning on the device
Check one last time if all the connections are correct.
Location to avoid
Install your speakers in a temperate place and avoid humid locations or direct sunlight.
Recycling
Protection of the environment: Your products contain valuable materials which can be recovered or recycled. Take them to the appropriate collection points.

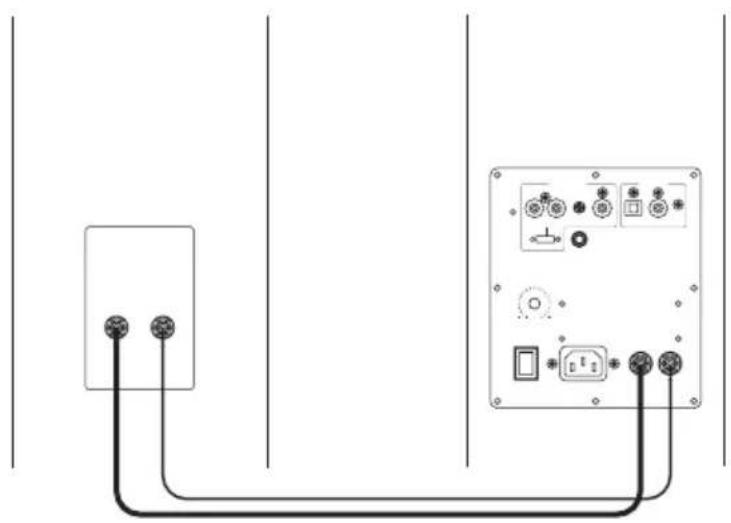
POWERING
Connecting the speakers
The ELARA active speakers must be interconnected with the provided cable. (Black cable mentioning: "High performance OFC cable").
Make sure that the speaker connection polarity is correct. The red and black terminals on the passive and active speakers must be connected respectively to one another. To help with the setup, the connection cable bears the mention 'TRIANGLE High performance OFC cable" and must be connected to the red terminal (+).
natural_image
Pure electrical wiring diagram showing connections between two panels (no text or symbols)Powering on
Once you have checked the amplifier on the active speaker is set to the "OFF" position, plug the power cord into the designated input and into an AC power outlet. The speakers are then ready for use and can be turned on.
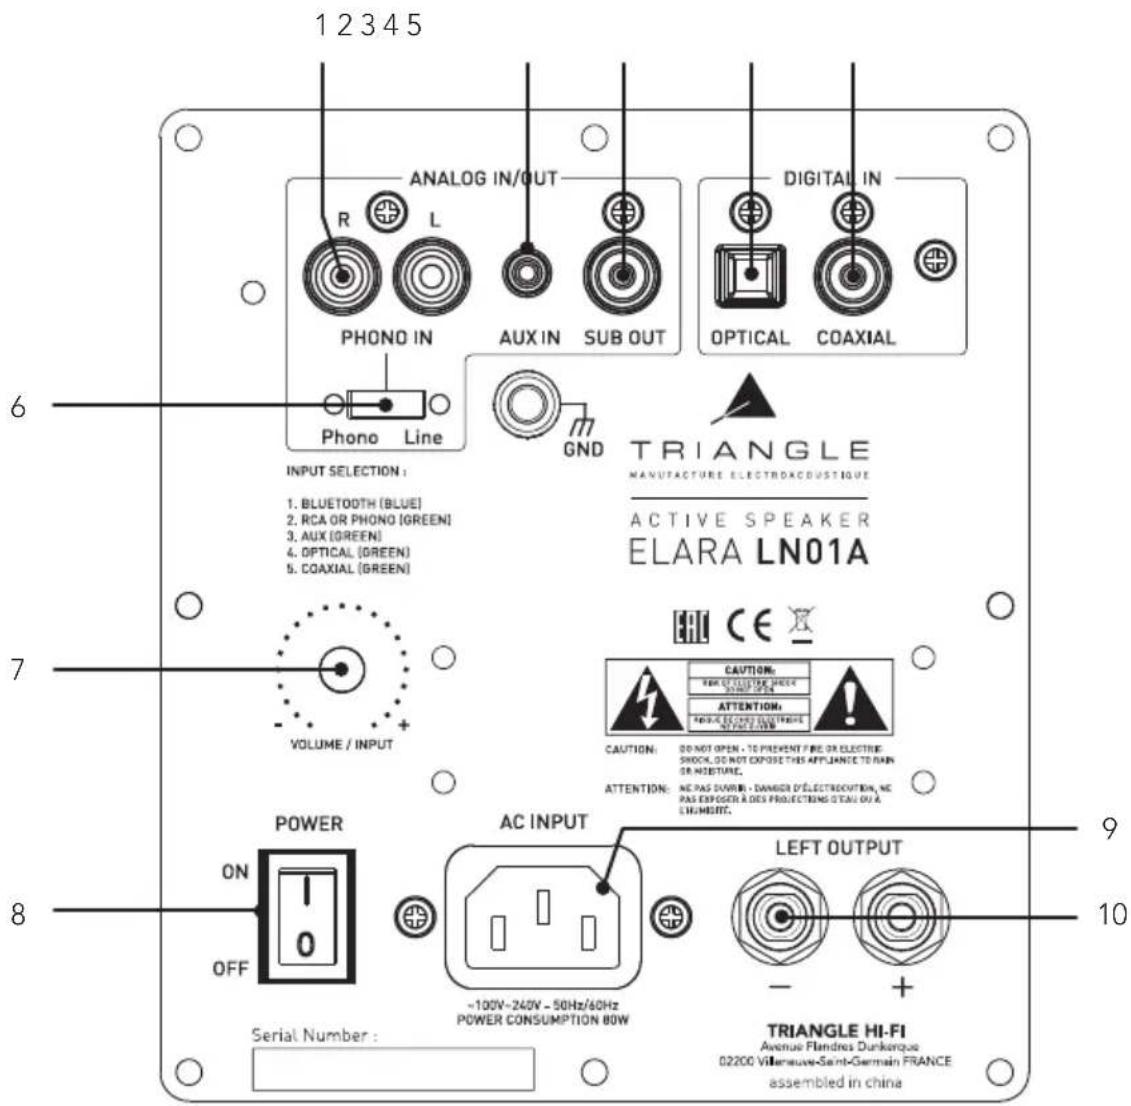
DESCRIPTION OF THE SPEAKER
- RCA input (line/phono)
- 3.5mm Jack auxiliary input
- Subwoofer output
- Optical input
- Coaxial input
- RCA switch (line/phono)
- Turn : Volume control
Press : Source selection :
- Bluetooth
- Line ou Phono (RCA)
- Auxiliaire
- Optique
-
Coaxial
-
Power switch
- AC outlet
- Terminal of the passive speaker
text_image
12345 ANALOG IN/OUT R L PHONO IN AUX IN SUB OUT PHONO Line DIGITAL IN OPTICAL COAXIAL GND TRIANGLE MANUFACTURE ELECTROACOUSTIQUE ACTIVE SPEAKER ELARA LN01A INPUT SELECTION : 1. BLUETOOTH (BLUE) 2. RCA OR PHONO (GREEN) 3. AUX (GREEN) 4. OPTICAL (GREEN) 5. COAXIAL (GREEN) VOLUME / INPUT CE CAUTION: RECOUSTING SHOCK ATTENTION: THERM ELECTRIC ELECTRONE NO PAZ ZONB CAUTION: DO NOT OPEN - TO PREVENT FIRE OR ELECTRIC SHOCK, DO NOT EXPOSE THIS APPLIANCE TO MAIN OR MOBETURE. ATTENTION: NO PAS DAVOUR - DAMPER D'ÉLECTROCUTION, NO PAS EXPOSER À DES PROJECTION ET LAU OU A LIEUMENT. POWER AC INPUT LEFT OUTPUT ON OFF -100V-240V - 50Hz/60Hz POWER CONSUMPTION 80W Serial Number : 9 10 TRIANGLE HI-FI Avenue Flandres Dunkenque 02200 Villeneuve-Saint-Germain FRANCE assembled in chinaDESCRIPTION OF THE REMOTE CONTROL
1 - Mute
2 - Standby/power on
3 - Skip backward
(Bluetooth mode only)
4 - Skip forward
(Bluetooth mode only)
5 - Play/pause a track
(Bluetooth mode only)
6 - Source: Bluetooth
7 - Source: 3.5mm jack
8 - Source: RCA (line/phono)
9 - Source: coaxial
10 - Source: optical
11 - Resetting bass, treble and volume adjustments
12 - Increasing/reducing bass
13 - Increasing/reducing treble
14 - Increasing/reducing volume

text_image
1 2 3 4 5 6 7 8 9 10 11 12 13 BASS TREBLE VOLUME TRIANGLE -When using the remote, always direct it towards the receiver on the front of the main speaker. The LED on the front panel blinks when the remote is being used.
CONNECTING SOURCES
The ELARA active speakers can be paired with a variety of sources. Here are the various options:
Connection via Bluetooth

Bluetooth™
This enables you to stream music wirelessly thanks to latest generation 4.0 A2DP aptX Bluetooth technology. AptX is a coding system which enables you to stream music to your Elara speakers via Bluetooth, delivering sound approaching CD-quality. The range is of about 10 meters, depending on the surroundings and obstacles within the path.
Elara active speakers lets you play music from any Bluetooth-enabled sources: smartphone, tablet, computer, etc. To do so:
▶ Slide the power switch on the back to the ON position to activate your Elara speakers.
▶ Select the "Bluetooth" input using the "INPUT" button on the back of the speaker or on the remote. The blue LED indicates that the source is connected via Bluetooth.
Press the "Bluetooth" button on your remote. The blue LED blinks, indicating that the system is seeking to connect to a Bluetooth-enabled device (smartphone, tablet...).
When you search on your Bluetooth device (refer to the user guide if needed), the speakers should appear under the name "LN01A" or "LN05A", you can then connect to this. Your speakers are now linked to your device and will reproduce the sound from the device. The connection will be made automatically next time you switch on your speakers if Bluetooth is selected and enabled on your device.
▶ If you wish to connect another device while the previous one is still connected, disable the Bluetooth connection from your formerly paired device or disconnect it directly from the Bluetooth menu. The LED will blink again, and the seeking mode will be activated.
- Elara active's Bluetooth process allows you to change track, play and pause directly from your remote, without using the connected device.
- Your Bluetooth device now controls your speakers and you can change the volume directly from this device.
Connection via an RCA cable

The RCA input enables you to connect your Elara active speakers to your TV, CD player, turntable or any other device. To do so:
- Plug the red and white connectors into "RCA INPUT" on the back of the speaker, minding the colours, and do the same on the source.
Select the "RCA" input using the remote or the "INPUT" button (volume button) on the back of the active speaker. (Source selecting order is indicated above the "INPUT" button.) The green LED indicates that the source is actually connected to the "RCA" input. Make sure the selector is switched to "LINE". Your system is ready to operate.
Connecting a turntable
To plug a vinyl player, push the "PHONO IN" switch to the left for the signal to pass through the phono chain. Connect the ground wire to the dedicated screw terminal on the back of your amplified speaker and to your turntable.
Connection via a 1/8-inch (3.5mm) jack cable

The jack input - for a 3.5mm jack cable - (AUX IN) enables you to connect your speakers to many devices: smartphone, audio player, tablet, computer, television, etc. To do so:
Plug one end of the jack connector into the "AUX INPUT" terminal and the opposite end into your device.
Select the "3.5" input using the remote or the "INPUT" button (volume button) on the back of the amplified speaker. (The source selecting order is indicated above the "INPUT" button.) The green LED indicates that the source is actually connected to the "AUX" input. Your system is ready to operate.
Connection via an optical cable

The optical input enables you to connect your ELARA speakers to any audio device with an optical output: audio player, DVD player, television, etc. To do so:
Plug one end of the optical cable into the back of the active speaker in the "OPTICAL" input and the opposite end into your device.
Select the "OPTICAL" input using the remote or the "INPUT" button (volume button) on the back of the active speaker. (The source selection order is indicated above the "INPUT" button.) The green LED indicates that the source is actually connected to the "OPTICAL" input. Your system is ready to operate.
Connection via a coaxial cable
The coaxial input enables you to connect your ELARA speakers to any audio device with a coaxial output: CD player, DVD/Blu-ray player, television, etc. To do so:

Plug one end of the coaxial cable into the back of the active speaker in the "COAXIAL" input and the opposite end into your device.
Select the "COAXIAL" input using the remote or the "INPUT" button (volume button) on the back of the active speaker. (The source selection order is indicated above the "INPUT" button.) The green LED indicates that the source is actually connected to the "COAXIAL" input. Your system is ready to operate.
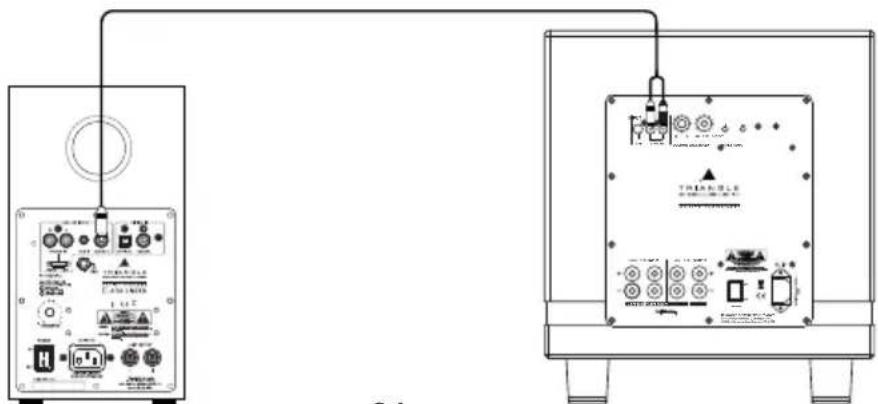
Connection of a subwoofer
The ELARA speakers include a subwoofer output allowing the connection of a subwoofer.

A RCA to 2 RCA cable (Y cable) must connect the SUB output of the ELARA speakers to the 2 LINE IN of the subwoofer. Set the subwoofer volume and cut-off frequency (Crossover) so that you get a proper sound coherence between the ELARA speakers and the subwoofer. Subwoofer sound needs to be heard without being too powerful.
text_image
Diagram showing two electronic equipment setups with labeled components and connections, including a speaker and a device labeled 'TRIANCE'.Your ELARA speakers have a band equalizer that enables you to adjust the low and high frequencies as you like.
Adjusting the amount of bass
6 positions available in 2dB steps over a range between 30 and 400Hz.
(-6dB, -4dB, -2dB, 0dB, +2dB, +4dB, +6dB).
The factory setting defaults to 0dB.
The low-frequency output will increase or decrease each time the remote control is pressed.
Adjusting the amount of treble
6 positions available in 2dB steps over a range between 2 and 30KHz.
(-6dB, -4dB, -2dB, 0dB, +2dB, +4dB, +6dB).
The factory setting defaults to 0dB.
The high-frequency output will increase or decrease each time the remote control is pressed.
When the speaker goes on standby, the settings will be stored for the next use.
To restore the factory presets, you just need to press the "RESET" button on the remote.
AUTO STANDBY FEATURE
If no signal is received for 30 minutes, the speakers will automatically switch to standby. To exit the standby mode, simply switch the speakers back on with the remote (see page 21).
CAUTION
To avoid the risk of electric shock, do not open the speaker.
ENCEINTES ELARA / ELARA SPEAKERS
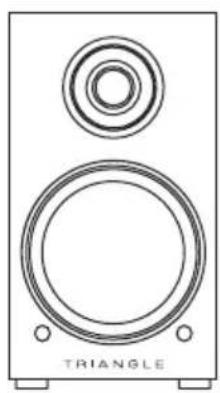
| Spécifications techniques Technical specifications | ELARA LN01A ELARA LN05A | |
| Type | Enceintes actives bass-reflex Active speakers | Enceintes actives bass-reflex Active speakers |
| Diamètre haut-parleurs Driver diameters | 13 cm 5" | 2 x 13cm 2x5" |
| Sensibilité enceintes Sensitivity | 89 dB/m 90 dB/m | |
| Bande passante Bandwidth (+/- 3dB) | 56 Hz - 22 KHz 47 Hz - 22 KHz | |
| Puissance Power handling | 2 x 50W 2 x 80W | |
| Entrées Inputs | RCA, AUX, Optical, Phono, Bluetooth 4.0 A2DP aptX | RCA, AUX, Optical, Phono, Bluetooth 4.0 A2DP aptX |
| Sortie Output | Caisson de grave Subwoofer | Caisson de grave Subwoofer |
| Dimensions | 165 x 235 x 291 mm 6.49 x 9.25 x 11.46 inches | 165 x 263 x 900 mm 6.49 x 10.35 x 35.43 inches |
| Dimensions avec socle Dimensions with pedestal | - | 230 x 290 x 921 mm 9.05 x 11.41 x 36.25 inches |
| Poids des enceintes Net weight | 9,5 kg 19.84 lbs | 27,3 kg 60.18 lbs |
| Poids avec packaging Gross weight (pair) | 11,2 kg 24.25 lbs | 31,3 kg 68.34 lbs |
natural_image
Line drawing of a speaker with two circular speakers and a top speaker, labeled 'TRIANGLE' at the base (no other text or symbols)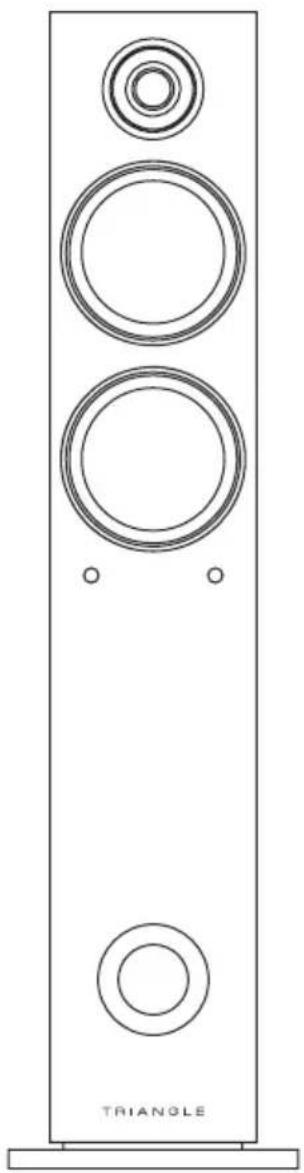
natural_image
Line drawing of a three-tiered speaker tower with circular speakers and a base labeled 'TRIANGLE' (no additional text or symbols)ELARA LN01A ELARA LN05A
INSTRUCTIONS DE SÉCURITÉ
WARNING: Read carefully all the safety instructions before using the device.
- Keep these safety instructions for future reference.
- Do not use this apparatus near water or liquid.
- Only clean with a dry and soft cloth.
- Make sure the openings (vents) on the device are not blocked.
- Do not install near any heat sources such as radiators, stoves, or any other apparatus (including amplifiers) that produce heat.
- Only use accessories specified by the manufacturer.
- Be sure that the stand/table/furniture is strong enough to support the apparatus (stand, shelf, furniture...).
- Protect the power cord from being walked on or pinched, particularly at the plugs, and protect the connector where it exits from the apparatus.
- Unplug the apparatus during lightning storms or when it's unused for long periods of time.
- The plug of the apparatus must fit with the outlet. Never modify the plug in any way. The apparatus should be connected to a mains socket outlet with protective earthing connection.
- Refer to your authorized TRIANGLE dealer or qualified service personnel if the apparatus is damaged in any way. For example, if the power cord or the wall outlet is damaged, liquid has been spilled or objects have fallen on the apparatus, the apparatus has been exposed to rain or moisture, does not operate normally, or has been dropped.

text_image
CAUTION RISK OF ELECTRIC SHOCK DO NOT OPENGARANTIE / WARRANTY
Thanks for buying a TRIANGLE product.
We want you to enjoy your purchase to the fullest. The first step is an easy registration of your product. By doing this, you will benefit from helpful tips, products support, special offers and 2 years warranty.
1- Online registration
Register your product easily online at the following address: http://register.trianglehifi.com/
2- Warranty card
You can also register your product and validate your warranty by filling the warranty card and sending it to:
TRIANGLE Hi-Fi
475 Avenue Flandres Dunkerque
02200 Villeneuve-Saint-Germain
FRANCE
Note on the warranty
Your TRIANGLE loudspeakers are warranted for 2 years. This warranty takes effect from the date of purchase and covers any manufacturing defect or damage your loudspeakers could suffer as a result of these same defects. This warranty is granted solely to the first owner of the product and is not transmittable in the case of resale. To validate your warranty, you will need to register online or mail the warranty coupon to TRIANGLE. Please note, this warranty is voided if any fault arises from ill-treatment or careless handling of the product.
The following are excluded from this warranty:
- A burned voice-coil caused by overloading the loudspeaker
- Any fault occurring from professional usage (public sound systems, PA systems, etc.)
- Any fault resulting from storage in areas of high humidity
• A pierced or torn membrane - A torn suspension
- Any fault resulting from a mechanical shock (e.g. if dropped or handled roughly)
- Any fault arising from servicing by anyone other than an authorized TRIANGLE service technician
• Damaged cabinets due to mishandling
www.trianglehifi.com
facebook.com/trianglehifi

instagram.com/trianglehifi

twitter.com/trianglehifi