
RCHW3610WF1001 - Alarm system HONEYWELL - Free user manual and instructions
Find the device manual for free RCHW3610WF1001 HONEYWELL in PDF.
| Product Type | Water and Freeze Leak Detector |
| Brand | Honeywell (Resideo) |
| Model | RCHW3610WF1001 |
| Power Supply | 3 AA batteries (included) |
| Connectivity | WiFi (2.4 GHz) and Bluetooth |
| Sensors | Water detection (by cable) and freeze detection (temperature) |
| LED Indicator | Blue (Bluetooth), Green (WiFi connected), Red (alert/failure) |
| Detection Cable Range | Expandable with accessory cables (sold separately) |
| Compatible App | Honeywell Home (iOS and Android) |
| Operating Temperature | Not specified, but suitable for indoor environments |
| Dimensions | Approximately 8 x 8 x 3 cm (without cable) |
| Weight | Approximately 150 g (batteries included) |
| Installation | On floor or wall (screw included) |
| Reset | Reset button (paperclip): 5s reset WiFi/Bluetooth, 15s factory reset |
| Main Functions | Water leak detection, freeze alert, high/low humidity alerts, temperature monitoring, smartphone notification |
| Maintenance and Cleaning | Wipe the detector and cable after a leak; replace batteries if necessary |
| Safety | FCC and IC compliant; 20 cm distance recommended |
| Spare Parts / Repairability | Detection cable sold separately; no user-serviceable parts |
| Warranty | Not specified, contact Resideo |
Frequently Asked Questions - RCHW3610WF1001 HONEYWELL
User questions about RCHW3610WF1001 HONEYWELL
0 question about this device. Answer the ones you know or ask your own.
Ask a new question about this device
Download the instructions for your Alarm system in PDF format for free! Find your manual RCHW3610WF1001 - HONEYWELL and take your electronic device back in hand. On this page are published all the documents necessary for the use of your device. RCHW3610WF1001 by HONEYWELL.
USER MANUAL RCHW3610WF1001 HONEYWELL
natural_image
Simple line drawing of a square object with a small protrusion and a small hole at the bottom (no text or symbols)WIFI® WATER LEAK AND FREEZE DETECTOR
CHW3610W, CHWES4, RCHW3610WF, RCHWES4
Installation Guide
Read and save these instructions
Need help?
• Web: www.resideo.com
• Phone: 1-800-468-1502
1 Download the Honeywell Home app
Search for Honeywell Home in the App Store or Google Play.
After downloading, launch the app, register (if necessary), go to Menu, and then go to Add New Device.


text_image
Download on the App Store GET IT ON Google play2 Install batteries
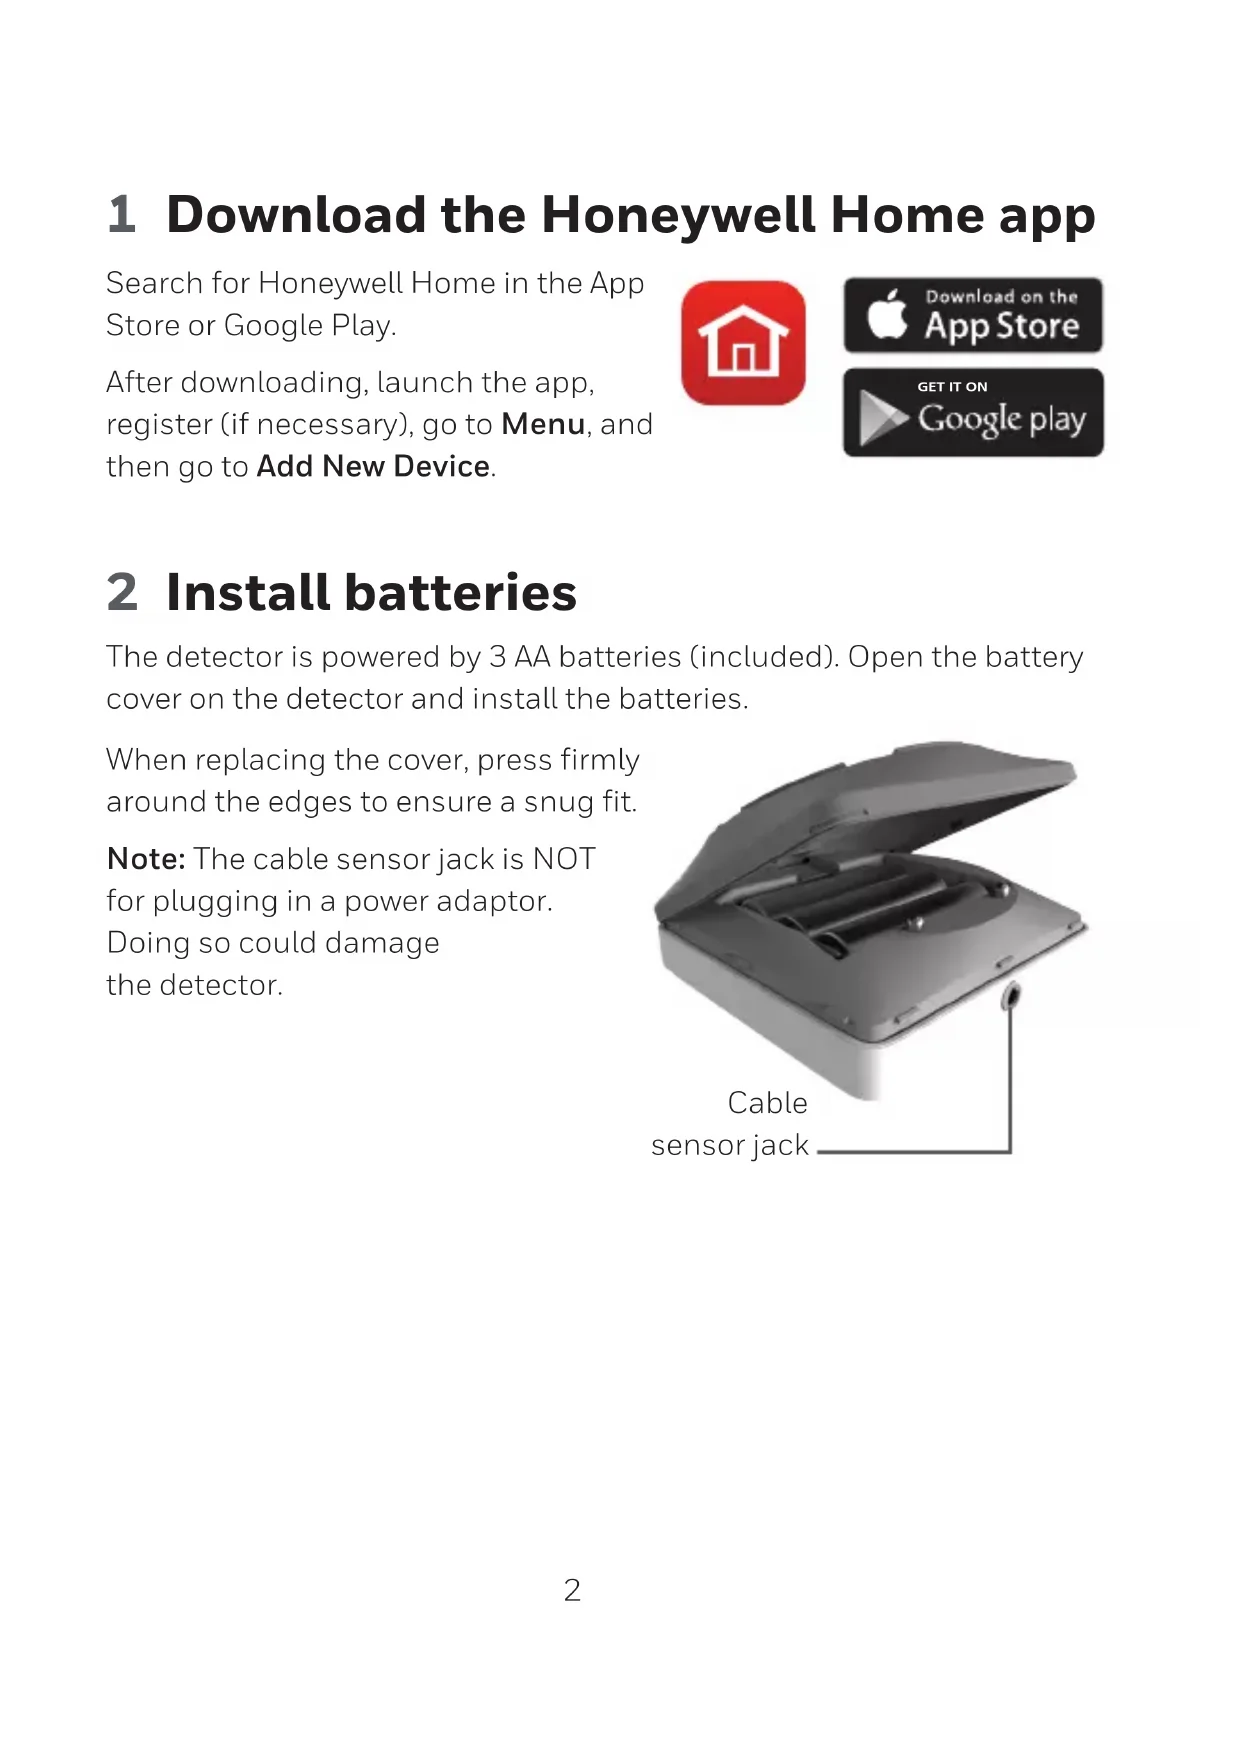
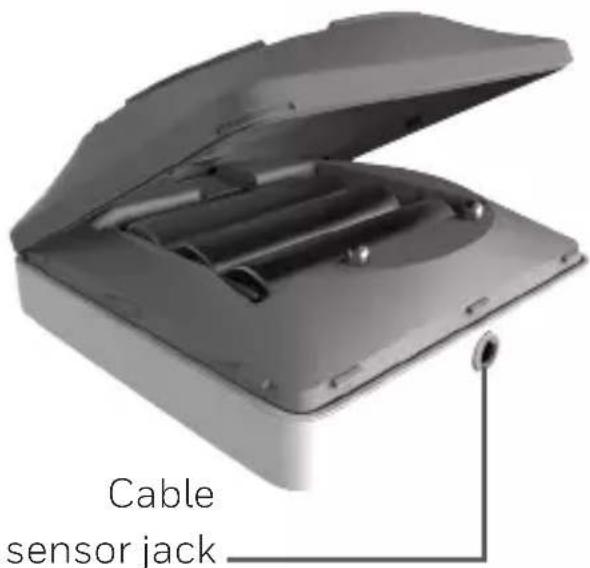
The detector is powered by 3 AA batteries (included). Open the battery cover on the detector and install the batteries.
When replacing the cover, press firmly around the edges to ensure a snug fit.
Note: The cable sensor jack is NOT for plugging in a power adaptor. Doing so could damage the detector.
text_image
Cable sensor jack3 Connect
Pair and name your detector
1 Under Add New Device, select Water Leak and Freeze Detector.
Note: Make sure Bluetooth is enabled on your mobile device and that the detector's LED is blinking blue. If it is not, see the Reset section.
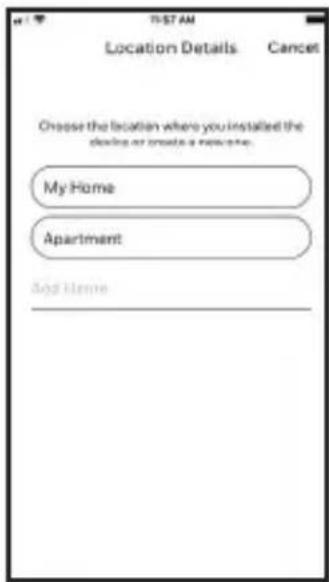
2 Provide a location for your detector. Press NEXT.
3 The detector will now pair with the app.
Note: If you have more than one detector, you will need to connect each detector individually.
4 An audible alert will sound and your detector's LED will turn solid blue to indicate your detector is paired. Press NEXT.
5 Create a custom name for the detector or select one from the list. Press NEXT.
text_image
T-57 AM Location Details Cancel Choose the location where you installed the design or create a new system. My Home Apartment Add Home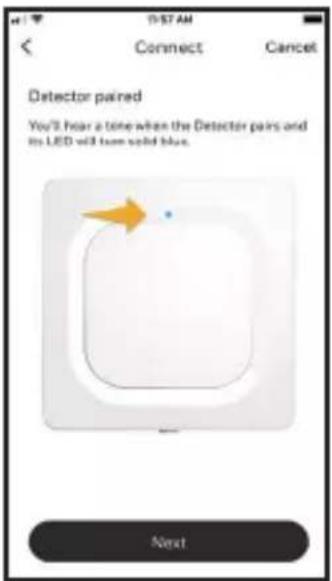
text_image
19:57 AM Connect Cancel Detector paired You'll hear a tone when the Detector pairs and its LED will turn solid blue. Next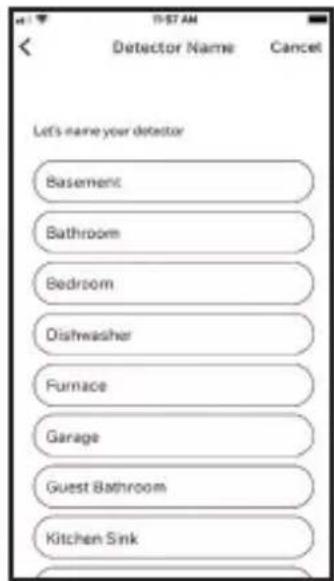
text_image
Let's name your detector Basement Bathroom Bedroom Dishwasher Furnace Garage Guest Bathroom Kitchen SinkConnect to WiFi
1 Choose your network from the list. Press NEXT.
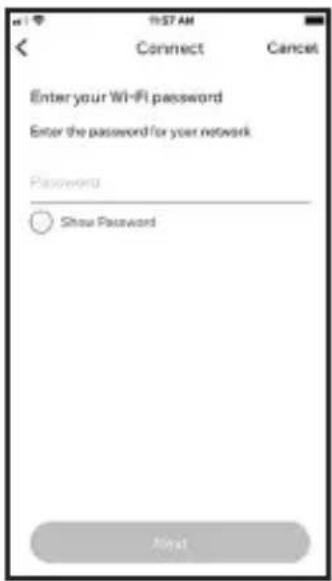
2 Enter your WiFi password, if necessary. Press NEXT.
3 When connected to WiFi, the LED will turn solid green for 5 minutes, then turn off to preserve battery life.
Note: If you remove and replace the detector's batteries, it will reconnect to your WiFi network automatically.
text_image
Enter your Wi-Fi password Enter the password for your network Password Show Password Next4 Configure
Continue to follow instructions in the app to configure your detector.
Select the alert levels you want for high and low humidity and temperature warnings, or keep the preset levels. Identify the people you want notified in case of an alarm. These settings can be updated at any time using the app.
text_image
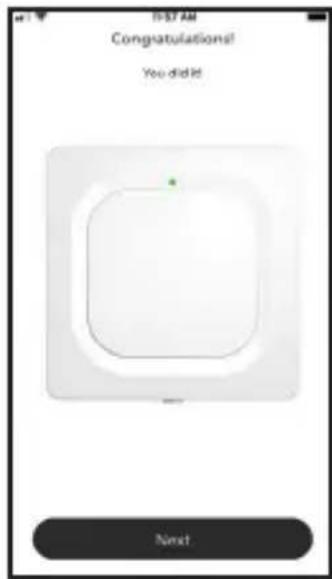
I-57 AM Congratulations! You did it Next5 Placement
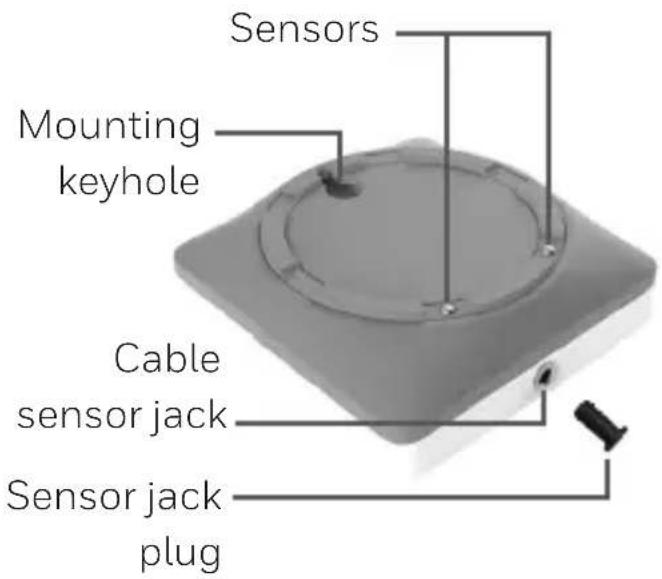
Place the bottom of your detector flat on the floor or a surface. For wall mounting, use the included screw and hang the detector on the bottom cover's mounting keyhole.
Optional cable sensor
To install the optional cable sensor, remove the sensor jack plug and insert the cable sensor. Insert the sensor jack plug at the end the cable sensor.
Accessory cable sensors (sold separately) can be connected to extend the cable and increase water sensing area.
The entire length of cable is an extended sensor. You can hang the detector from the wall or place both the detector and cable sensor on the floor.
Note: The cable sensor jack is NOT for plugging in a power adaptor. Doing so could damage the detector.
text_image
Sensors Mounting keyhole Cable sensor jack Sensor jack plugCommon uses
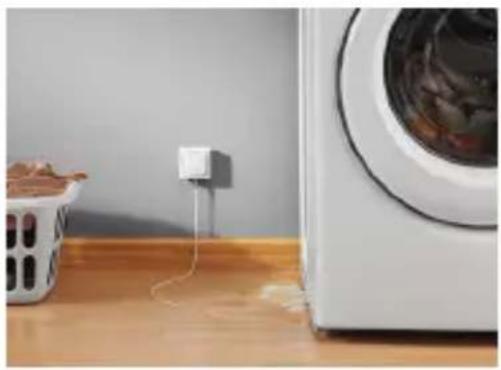
natural_image
Interior scene showing a washing machine connected to a power outlet, with a trash bin nearby (no visible text or symbols)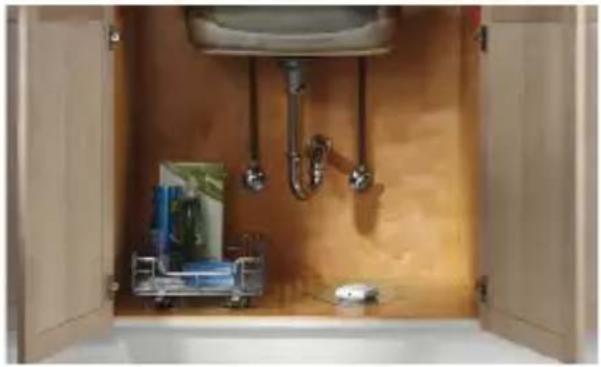
natural_image
Interior view of a bathroom with open doors, showing sink, toilet, and fixtures (no text or symbols visible)
natural_image
Interior scene with a broom, a clean water dispenser, and a wall-mounted power outlet (no visible text or symbols)Operation
Honeywell Home app experience
Below are a few examples of the Honeywell Home app screens you will see as you use the Water Leak and Freeze Detector.
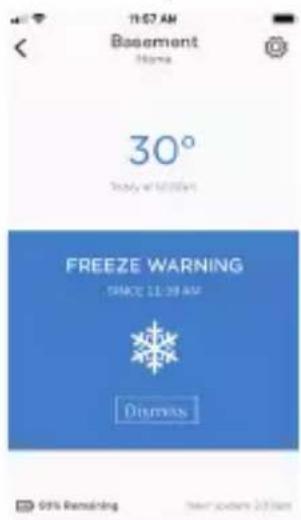
Leak detected by device
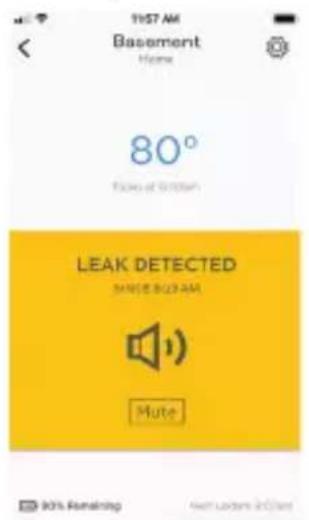
text_image
11:57 AM Basement Home 80° Flow of Dritten LEAK DETECTED MUTE BUDAN AM Mute 90% Remaining New Leaders in Japan30 day rolling
temperature trends
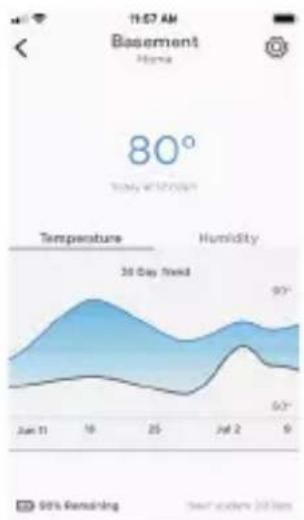
text_image
11:57 AM Basement Home 80° Today with 20 hours Temperature Humidity 30 Day Wind 90° 50° 9 Sun 11 18 25 Jul 2 9 50% Remaining New daily 20 hoursLow temperature detected by device
text_image
11:67 AM Basement Name: 30° Trinity at 24.00 PM FREEZE WARNING SPICE 11:30 AM DIMENSION 95% Remaining New version 2018WiFi connection failure
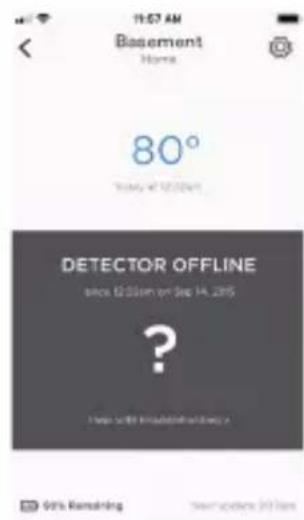
text_image
11:07 AM Basement Home 80° Today at 12:30pm DETECTOR OFFLINE since 12:30pm on Sep 14, 2015 ? Help will be installed.Reset
Use one end of a paperclip to press and hold into the reset hole for 5 seconds to reset WiFi, detector settings, and to re-start Bluetooth pairing. The LED will blink blue.
Press and hold the paperclip into the reset hole for 15 seconds to restore factory defaults. The LED will blink blue.
Status LED
The detector has an LED that gives device status.
LED Detector state
During installation
Blinking Blue Powering up and connecting to Bluetooth.
Solid Blue Paired with Bluetooth.
Blinking Green Connecting to WiFi network.
Solid Green Has power, WiFi connection, and is operating normally.
Note: LED turns off after 5 minutes to preserve battery life.
Solid Red Failed to connect to WiFi.
During operation
Blinking Red Detected a leak.
In case of an alert
To preserve battery life, it can take up to 1 minute for the detector to sense a leak.
You can mute the detector by pressing the Mute button in the app or removing the batteries or cable sensor from the detector. The mute command may take up to 1 minute to reach the detector.
After you've addressed the cause of the alert, wipe dry the detector and cable sensor and put them back in place. Replace batteries if they were removed.
FCC Regulations
§ 15.19 (a)(3)
This device complies with part 15 of the FCC Rules. Operation is subject to the following two conditions: (1) This device may not cause harmful interference, and (2) this device must accept any interference received, including interference that may cause undesired operation.
§ 15.21
Changes or modifications not expressly approved by the party responsible for compliance could void the user's authority to operate the equipment.
FCC Radiation Exposure Statement:
This equipment complies with FCC radiation exposure limits set forth for an uncontrolled environment. This equipment should be installed and operated with minimum distance 20cm between the radiator & your body.
IC Regulations
This device contains licence-exempt transmitter(s)/receiver(s) that comply with Innovation, Science and Economic Development Canada's licence-exempt RSS(s). Operation is subject to the following two conditions:
(1) This device may not cause interference, and
(2) This device must accept any interference, including interference that may cause undesired operation of the device.
IC Radiation Exposure Statement:
This equipment complies with IC RSS-102 radiation exposure limits set forth for an uncontrolled environment.
This equipment should be installed and operated with minimum distance 20cm between the radiator & your body.
The operation of this equipment is subject to the following two conditions: (1) this equipment or device may not cause harmful interference, and (2) this equipment or device must accept any interference, including interference that may cause undesired operation.

resideo
www.resideo.com
Resideo Technologies, Inc.
1985 Douglas Drive North, Golden Valley, MN 55422
1-800-468-1502
33-00381EFS-01 M.S. 11-20 | Printed in United States
© 2020 Resideo Technologies, Inc. All rights reserved.
The Honeywell Home trademark is used under license from Honeywell International, Inc.
This product is manufactured by Resideo Technologies, Inc. and its affiliates.
natural_image
Simple line drawing of a square object with a small protrusion and a dot on top (no text or symbols)DÉTECTEUR DE GEL ET DE FUITES D'EAU WIFI®
CHW3610W, CHWES4, RCHW3610WF, RCHWES4
Guide de démarrage
text_image
Download on the App Store GET IT ON Google playnatural_image
Exterior view of a gray open toolbox with internal compartments and a small cylindrical component inserted (no text or symbols visible)text_image
Location Details Cancel Choose the location where you installed the device or make a new one. My Home Apartment Add Home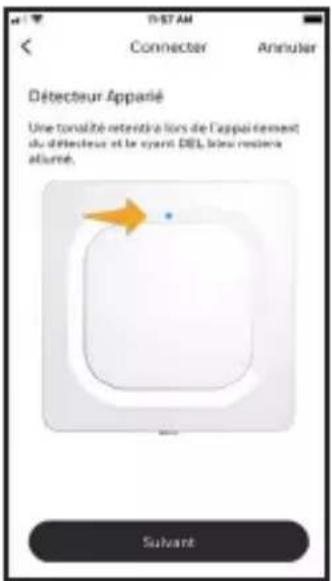
natural_image
White electrical outlet plug with a coiled cable, lying on a white surface (no text or symbols visible)natural_image
Interior scene with a washing machine connected to a power outlet, next to a wooden table with a trash bin (no visible text or symbols)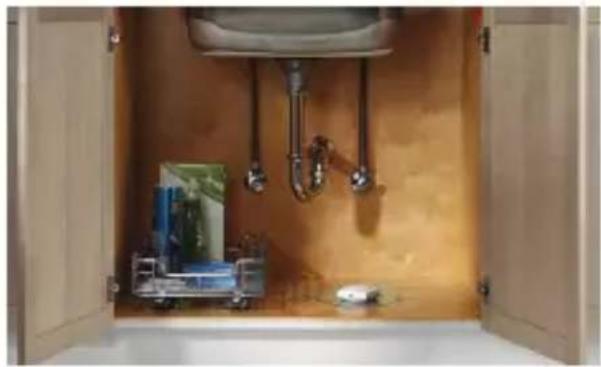
natural_image
Interior view of a bathroom with open doors, showing a sink with shower faucet and fixtures (no text or symbols visible)
natural_image
Interior scene with a broom, a white water dispenser, and a wall-mounted electrical outlet (no visible text or symbols)Fonctionnement
Resideo Technologies, Inc.
1985 Douglas Drive North, Golden Valley, MN 55422
1-800-468-1502
© 2020 Resideo Technologies, Inc. All rights reserved.
The Honeywell Home trademark is used under license from Honeywell International, Inc.
This product is manufactured by Resideo Technologies, Inc. and its affiliates.
natural_image
Simple line drawing of a square object with a small protrusion and a small hole at the bottom (no text or symbols)text_image
Download on the App Store GET IT ON Google playtext_image
as Conector del cableConector del cable sensor
3 Conecte
Conecte e identifique su detector
text_image
Location Details Cancel Choose the location where you installed the device or invited a new one. My Home Apartment Add Home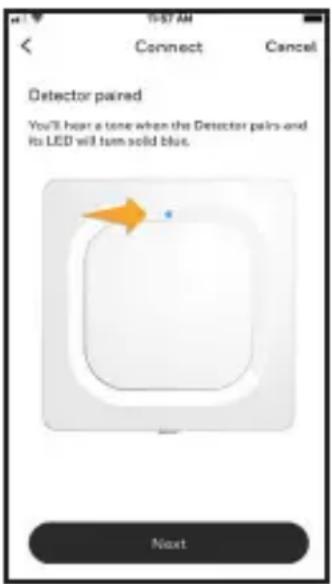
text_image
10:57 AM Connect Cancel Detector paired You'll hear a tone when the Detector pairs and its LED will turn solid blue. Next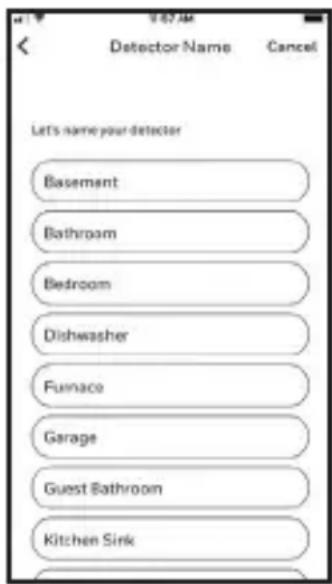
text_image
Let's name your detector Basement Bathroom Bedroom Dishwasher Furnace Garage Guest Bathroom Kitchen SinkConecte a WiFi
text_image
11:57 AM Connect Cancel Enter your Wi-Fi password Enter the password for your network Password Show Password Next4 Configure
text_image
Y-87 AM Congratulations! You did it! Next5 Colocación
natural_image
Interior scene showing a washing machine connected to a power outlet, with a trash bin nearby (no visible text or symbols)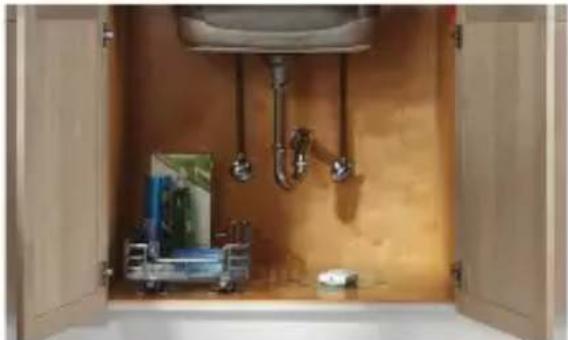
natural_image
Interior view of a bathroom with open doors, showing plumbing fixtures and a sink (no text or symbols visible)
natural_image
Interior scene with a broom, a cleaning brush, and a water heater on a surface (no visible text or symbols)Funcionamiento
text_image
15:37 AM Basement Home 80° Take off to reach LEAK DETECTED Since Red Ink Mate MOS Remaining Save Up Home Broadcaststext_image
80° Temperature Humidity 50 Day Trend 97° 97° 6/17 Jun 8 Jun 16 Jul 25 Jul 2 Jun 3 Jan 4 Sep 50% Remaining Next Updated Dollarstext_image
IN ST AM Basement None 30° Weather at 12:00 PM FREEZE WARNING S/NCE 15:00 PM Dismiss 90% Remaining Next screen buttonstext_image
11:07 AM Basement Home 80° Sunday at 5/12/2019 DETECTOR OFFLINE over 30 GB on Sep 14 2019 ? Help with uncleanishing > 90% Remaining Text update $6.55Reinicio
Resideo Technologies, Inc.
1985 Douglas Drive North, Golden Valley, MN 55422
1-800-468-1502
© 2020 Resideo Technologies, Inc. All rights reserved.
The Honeywell Home trademark is used under license from Honeywell International, Inc.
This product is manufactured by Resideo Technologies, Inc. and its affiliates.
text_image
Black and white barcode image with vertical lines on both sides33-00381EFS-01