F6 - Bike rack Hollywood Racks - Free user manual and instructions
Find the device manual for free F6 Hollywood Racks in PDF.
| Product Type | Rear Bike Rack |
| Brand | Hollywood Racks |
| Model | F6 Expedition-Rack |
| Maximum Load Capacity per Bike | 16 kg |
| Maximum Number of Bikes | 3 bikes |
| Total Supported Weight (max) | 48 kg (3 x 16 kg) |
| Vehicle Attachment | On tailgate or rear hatch using hooks and straps |
| Main Material | Steel (main frame and support arms) |
| Bike Orientation | Alternating (1st and 3rd driver handlebars, 2nd passenger handlebars) |
| Compatible Bike Type | Traditional bikes with top tube (no electric bikes) |
| Straps | 4 straps: 2 upper, 2 lower, 2 lateral + 1 tie-down strap of 2 m |
| Adjustability | Adjustable support arms with pins and knobs |
| Installation | Mount on solid trunk, tighten all straps before and after loading |
| Safety – Exhaust distance | Bike tires at least 30 cm from exhaust pipe |
| Safety – Verification | Regularly check strap tension during use |
| Safety – Installation restrictions | Do not install upper hooks on plastic, glass or fiberglass |
| Maintenance | Clean trunk surface before installation |
| Included accessories | Straps, hooks, knobs, pins, rubber cradles, tie-down strap |
| Compliance | Comply with local regulations (e.g., lights and license plate not obstructed) |
| Warning | Do not exceed maximum load, use at user's own risk |
Frequently Asked Questions - F6 Hollywood Racks
User questions about F6 Hollywood Racks
0 question about this device. Answer the ones you know or ask your own.
Ask a new question about this device
Download the instructions for your Bike rack in PDF format for free! Find your manual F6 - Hollywood Racks and take your electronic device back in hand. On this page are published all the documents necessary for the use of your device. F6 by Hollywood Racks.
USER MANUAL F6 Hollywood Racks
Installation Instructions for Hollywood F6 Expedition Bicycle Carrier
- Check the Fit Guide to make sure this product will work on your vehicle!
- Install the rack on structurally sound areas only.
- Never install the upper hooks to plastic, aluminum, glass or fiberglass.
- Clean the surface of the trunk and bumper prior to installation.
- Tighten all straps before and after mounting bicycles on the rack
- Weight capacity of the Expedition rack is 35 lb. per bike (do not exceed). Not to be used for Electric bikes.
- Keep the bicycle tires away from exhaust pipes (1 foot or 30cm) minimum.
- Check the rack, bikes and strap tightness regularly during use.
- Use caution and reduce speed on rough roads.
- Call us at 800-747-4085 if you have any installation questions.
Be sure that your vehicle has structurally sound trunk and bumper areas. Clean the trunk and bumper surfaces where the rack will rest.
Note: It may be necessary to look under your vehicle to determine the strength of the vehicle's bumper. Lower straps can be attached to lower trunk lid opening.
natural_image
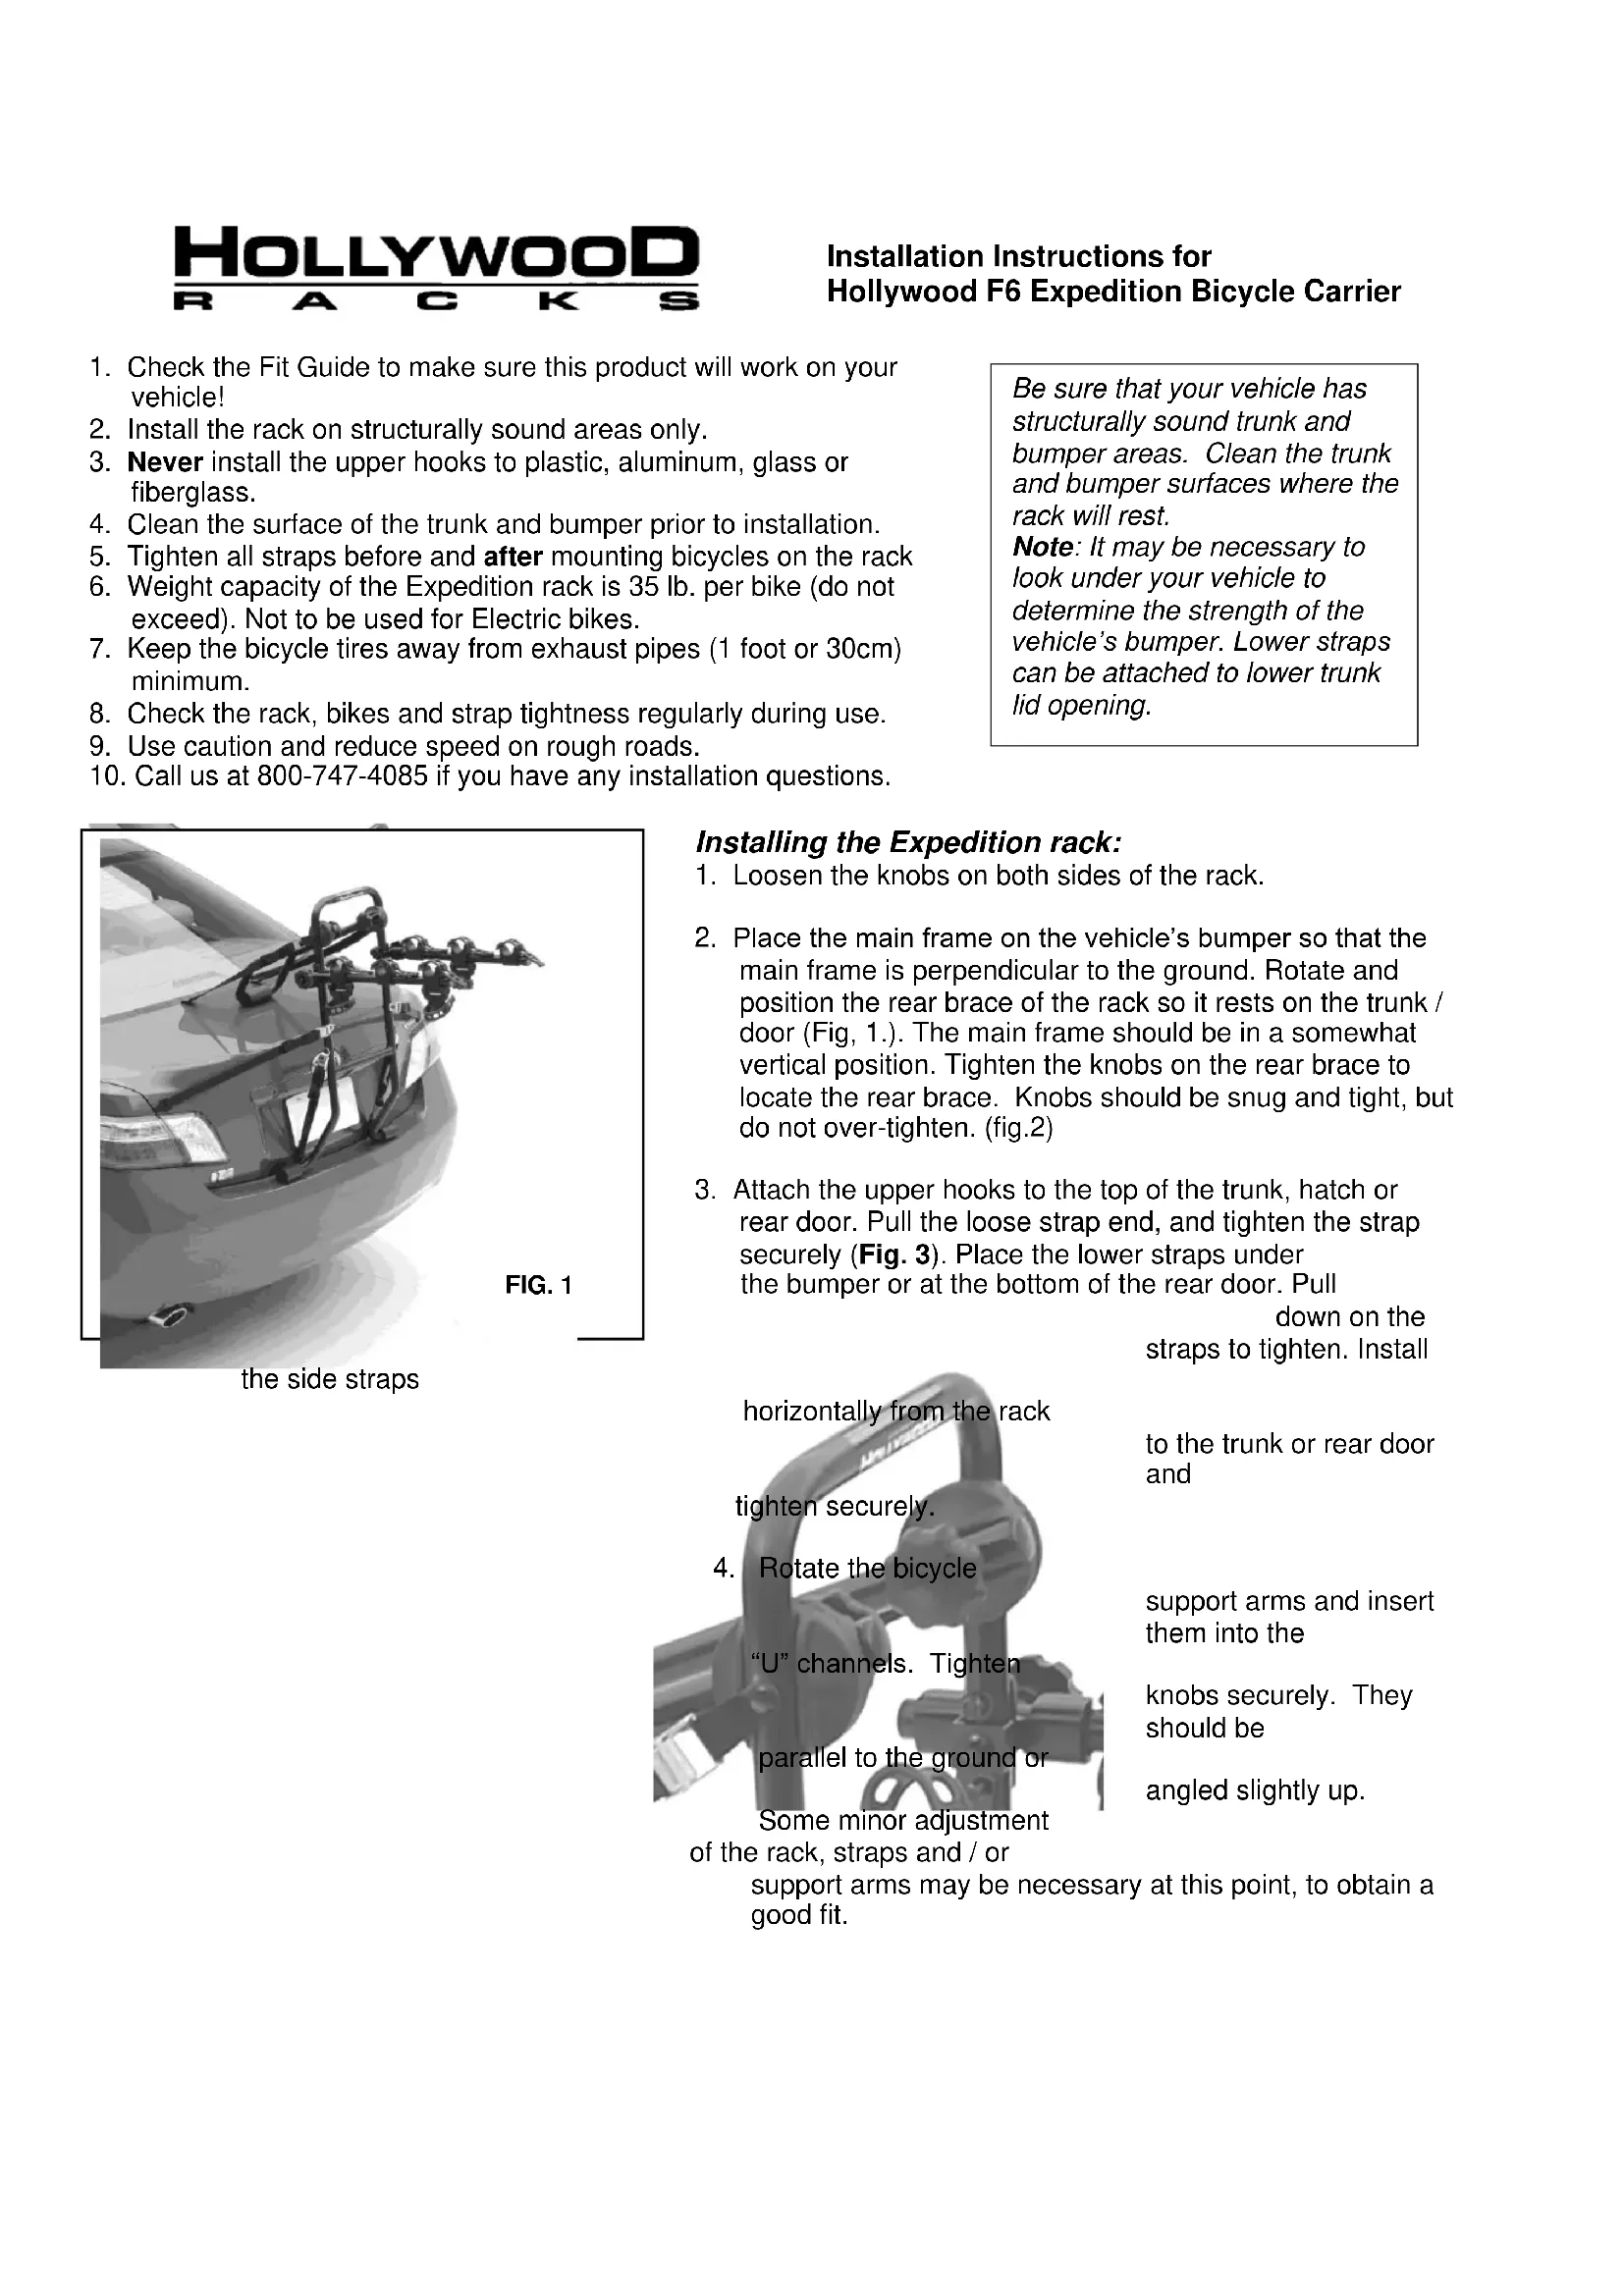
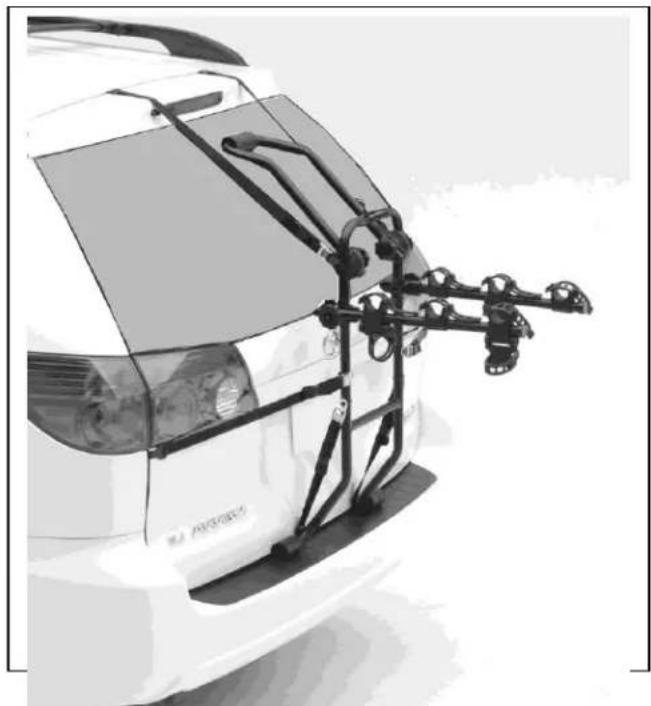
Side view of a car with mounted vehicle truss架 (no visible text or symbols)the side straps
Installing the Expedition rack:
- Loosen the knobs on both sides of the rack.
- Place the main frame on the vehicle's bumper so that the main frame is perpendicular to the ground. Rotate and position the rear brace of the rack so it rests on the trunk / door (Fig, 1.). The main frame should be in a somewhat vertical position. Tighten the knobs on the rear brace to locate the rear brace. Knobs should be snug and tight, but do not over-tighten. (fig.2)
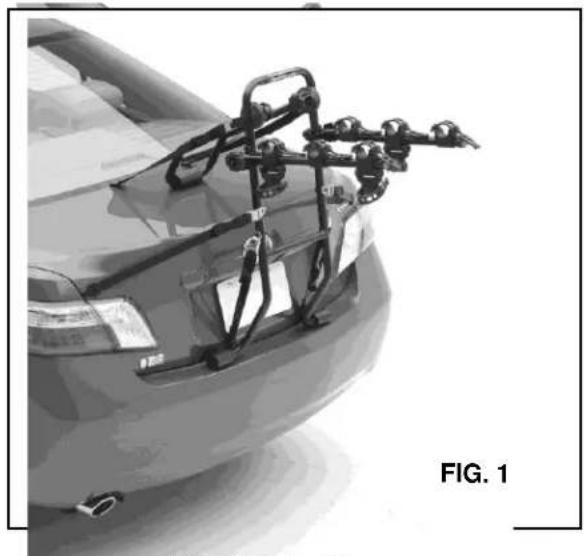
- Attach the upper hooks to the top of the trunk, hatch or rear door. Pull the loose strap end, and tighten the strap securely (Fig. 3). Place the lower straps under the bumper or at the bottom of the rear door. Pull
down on the
straps to tighten. Install
horizontally from the rack
tighten securely.
- Rotate the bicycle
"U" channels. Tighten
parallel to the ground or
Some minor adjustment
of the rack, straps and / or
support arms may be necessary at this point, to obtain a good fit.
to the trunk or rear door and
support arms and insert them into the
knobs securely. They should be
angled slightly up.
natural_image
Close-up of a hand using a tool to adjust or install a cable or cable component (no visible text or symbols)Installing bicycles on the Hollywood FO Expedition bumper rack:
Install the individual tie down straps on the cradles and anti-sway blocks.
The heaviest bicycle should be loaded on the rack first, with the lightest on the outside. Place the first bicycle on the inside cradles, closest to the main frame of the rack. The handlebars should be on the passenger's side of the vehicle. Rotate the crank arm so that it doesn't contact the vehicle.
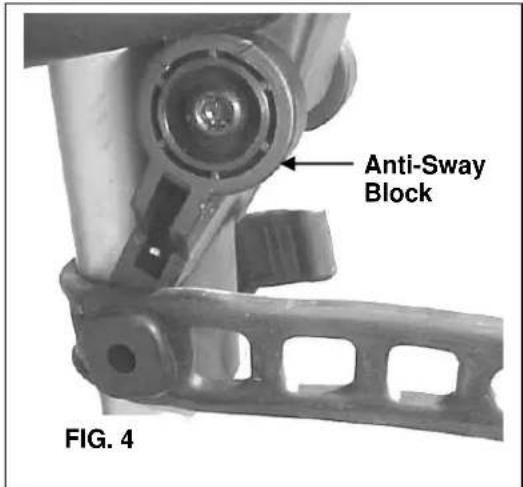
Pull the strap around the frame and hook it onto the small anchor on the other side of the cradle (Fig. 4). Note that it may be necessary to rotate the cradle and strap position to fit around the bicycle frame.
Pull the strap so that it's snug, but do not over-stretch the strap. Over-stretching the strap will not hold the bike on any better, and it may compromise the strength and life span of the strap. Adjust the other tie down straps accordingly.
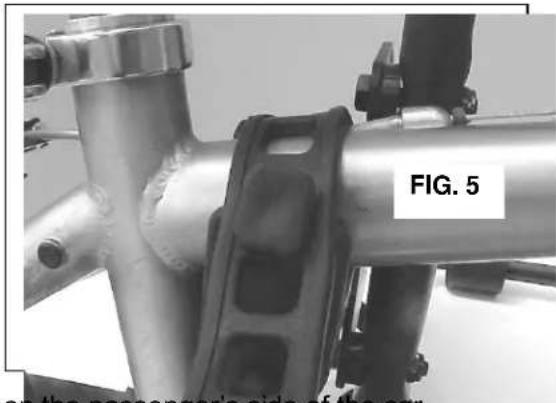
Use the Anti-Sway block that sits below one of the cradles (for each bike) to stabilize the bike by placing the strap around the seat tube (not seat post) of each bike (Fig. 5). You may need to rotate the Anti-Sway block, and in some cases you may need to remove it completely. This would be the case on very small bikes, or bikes with restricted mounting space due to creative frame design.
Install the second bicycle with the handlebars on the driver's side. Adjust the tie down straps as per the first bicycle. Repeat the installation for the third bicycle, with the handleba
natural_image
Close-up of a metallic mechanical component with flanged ends and a labeled section 'FIG. 5' (no readable text or symbols beyond label)VERY IMPORTANT: You must use the attached safety strap to secure the lower portions of ALL the bicycles to the rack. This strap must be routed behind the main frame, through the bicycle wheels and pulled tight. Tighten all straps before and after mounting the bicycles on the rack.
Tip: Women's bicycles, children's bicycles, and small frame size bikes, can be mounted on the rack by placing the bicycles on the support arms under the bicycle's down tube and behind the seat tube.
To fold the support arms down: loosen the knobs on the outside of the rotating pivot to which the arms are mounted. A few turns of the knob should be sufficient to allow the arms to pulled out slightly. When arms are released by loosening the knobs, rotate them to the vertical position and retighten the knobs securely.
Removing and storing the F6 Expedition bicycle rack:
- After removing bicycles, lift up on the release tabs of the lower buckles. Unhook the straps from the bumper / door.
- Loosen the knobs and lower the support arms to their folded position.
- Retighten the knobs.
- Lift the release tab on the side and top straps and remove hooks and straps from vehicle.
Caution: This bicycle rack is designed to carry three (3) conventional bicycles. Do not attempt to carry motorcycles, scooters, mopeds, motorized wheelchairs, or other heavy objects. Always check the condition of the straps and stitching and replace as necessary.
natural_image
Side view of a white car with mounted airbags and a multi-lane rack attachment (no visible text or symbols)
natural_image
Black-and-white photo of a bicycle on a vehicle chassis, parked outdoors (no visible text or symbols)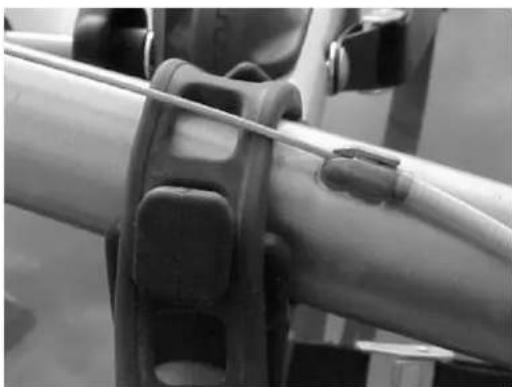
natural_image
Close-up of a pipe joint with visible steel clamps and bolts (no text or symbols)Attach rubber straps under cables
natural_image
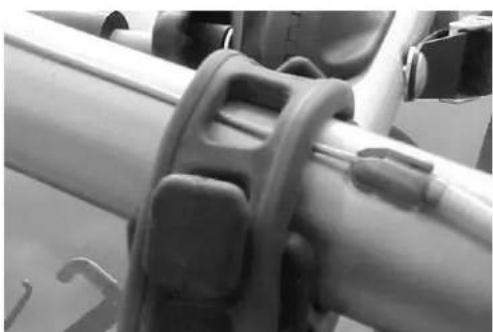
Close-up of a mechanical component with attached clamps and tubing (no visible text or symbols)Not like this!
MANUAL DE ISTALACION PARA LA F6 EXPEDITION PORTA BICICLETAS
This bicycle carrier has been designed to attach securely to most vehicles. It is the user's responsibility to insure the safe and proper installation of this product. Improper attachment or installation of this product may result in damages 7 your bicycles, vehicle, or vehicles following behind you. If the pads of this rack (or any rack) are resting against glass or a structurally soft panel, be aware that this may cause damage to your vehicle. The manufacturer of this product will not extend the warranty to any damages not attributable to a defect in materials and workmanship. The fit guide printed in this manual is intended as a general reference only. On going changes in vehicle design, materials and finishes used on motor vehicles make it the user's responsibility to determine the use of this product. Do not attach hooks to aluminum, glass, fiberglass, moldings, spoilers or carbon fiber parts. Please check the Fit Guide on the back page prior to installation!
If the make and model of your cars is listed as a "No Fit," check with your dealer about installation assistance, exchange for another model that will fit, or refund. This guide is not complete due to continuous changes in automotive design. For answers to questions, call our customer service department at: 800-747-4085
Mon.-Fri. from 7:00AM–3:00PM Pacific time OR Email us anytime at info@hollywoodracks.com
Limited Lifetime Warranty (effective January 1, 2008):
Hollywood Racks will warrant its car racks and accessories during the time that an original retail purchaser owns the product subject to the exclusions and limitations of this warranty. Hollywood Racks will remedy defects in materials and workmanship by repairing or replacing (at its option) the complete rack or a defective part without charge for labor or parts. Hollywood Racks may elect (at its option) to issue a refund equal to the purchase price paid for the product.
This warranty does not cover problems caused by normal wear and tear including (but not limited to) weather, scratches, dents, rust, accidents, unlawful vehicle operation, misuse, abuse, neglect, theft, unauthorized modifications, or unauthorized repair. No warranty is given for defects resulting in incorrect assembly, incorrect installation onto the vehicle, installation on a "no fit" vehicle, incorrect attachment of bicycles onto the rack, or overloading of the rack's weight restrictions. This warranty terminates if the original retail purchaser transfers the product to any other person.
If a product is believed to be defective, the original retail purchaser should contact either the original retailer or Hollywood Racks directly at 800-747-4085 or at info@hollywoodracks.com
Disclaimer of Liability: Repair or replacement of a defective product or the issuance of a refund or credit (as determined by Hollywood Racks) is a purchaser's exclusive remedy under this warranty. Damage to a purchaser's vehicle, cargo, bicycles and or to any other person is excluded. This warranty is expressly made in lieu of any and all other express warranties, whether oral or written.
Hollywood Racks shall not be liable for any direct, indirect, consequential, incidental, special, punitive or any other damages in connection with the purchase, use or handling of this product.
Some states do not allow the exclusion or limitation of consequential or incidental damages and the above limitation may not apply to you. This warranty gives you specific legal rights and you have other rights, which vary from state to state.