
B3 Style MB3000 - Nose trimmer REMINGTON - Free user manual and instructions
Find the device manual for free B3 Style MB3000 REMINGTON in PDF.
| Product type | Nose and beard trimmer |
| Brand | Remington |
| Model | B3 Style MB3000 |
| Power source | 2 AAA batteries (alkaline) |
| Number of lengths | 17 adjustable positions |
| Cutting range | From 0.4 mm to 18 mm |
| Blade material | Stainless steel |
| Washable blades | Yes, removable |
| Cutting guide | Adjustable, removable |
| Recommended use | Dry hair |
| Cleaning | Blades under running water, body not washable |
| Batteries included | 2 AAA batteries |
| Included accessories | Storage case |
| Dimensions (approx.) | 15 cm |
| Weight (approx.) | 100 g |
| Safety | Do not immerse, do not use if damaged |
| Operation | On/off button, adjustment wheel |
| Battery type | Non-rechargeable alkaline recommended |
Frequently Asked Questions - B3 Style MB3000 REMINGTON
User questions about B3 Style MB3000 REMINGTON
0 question about this device. Answer the ones you know or ask your own.
Ask a new question about this device
Download the instructions for your Nose trimmer in PDF format for free! Find your manual B3 Style MB3000 - REMINGTON and take your electronic device back in hand. On this page are published all the documents necessary for the use of your device. B3 Style MB3000 by REMINGTON.
USER MANUAL B3 Style MB3000 REMINGTON
natural_image
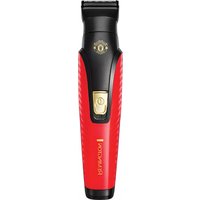
Black Remington brand hairbrush with textured body and control buttons (no text or symbols on body)

Thank you for buying your new Remington ^® product. Please read these instructions carefully and keep them safe. Remove all packaging before use.

IMPORTANT SAFEGUARDS
- This appliance can be used by children aged from 8 years and above and persons with reduced physical, sensory or mental capabilities or lack of experience and knowledge if they have been supervised/instructed and understand the hazards involved. Children shall not play with the appliance. Cleaning and user maintenance shall not be done by children unless they are older than 8 and supervised. Keep the appliance and cable out of reach of children under 8 years.
- The body of this appliance is not washable or water resistant. Do not put the appliance in liquid.
- Do not use this product if it is not working correctly, if it has been dropped or damaged, or dropped in water.
- Do not use attachments other than those we supply.
- This appliance is not intended for commercial or salon use.
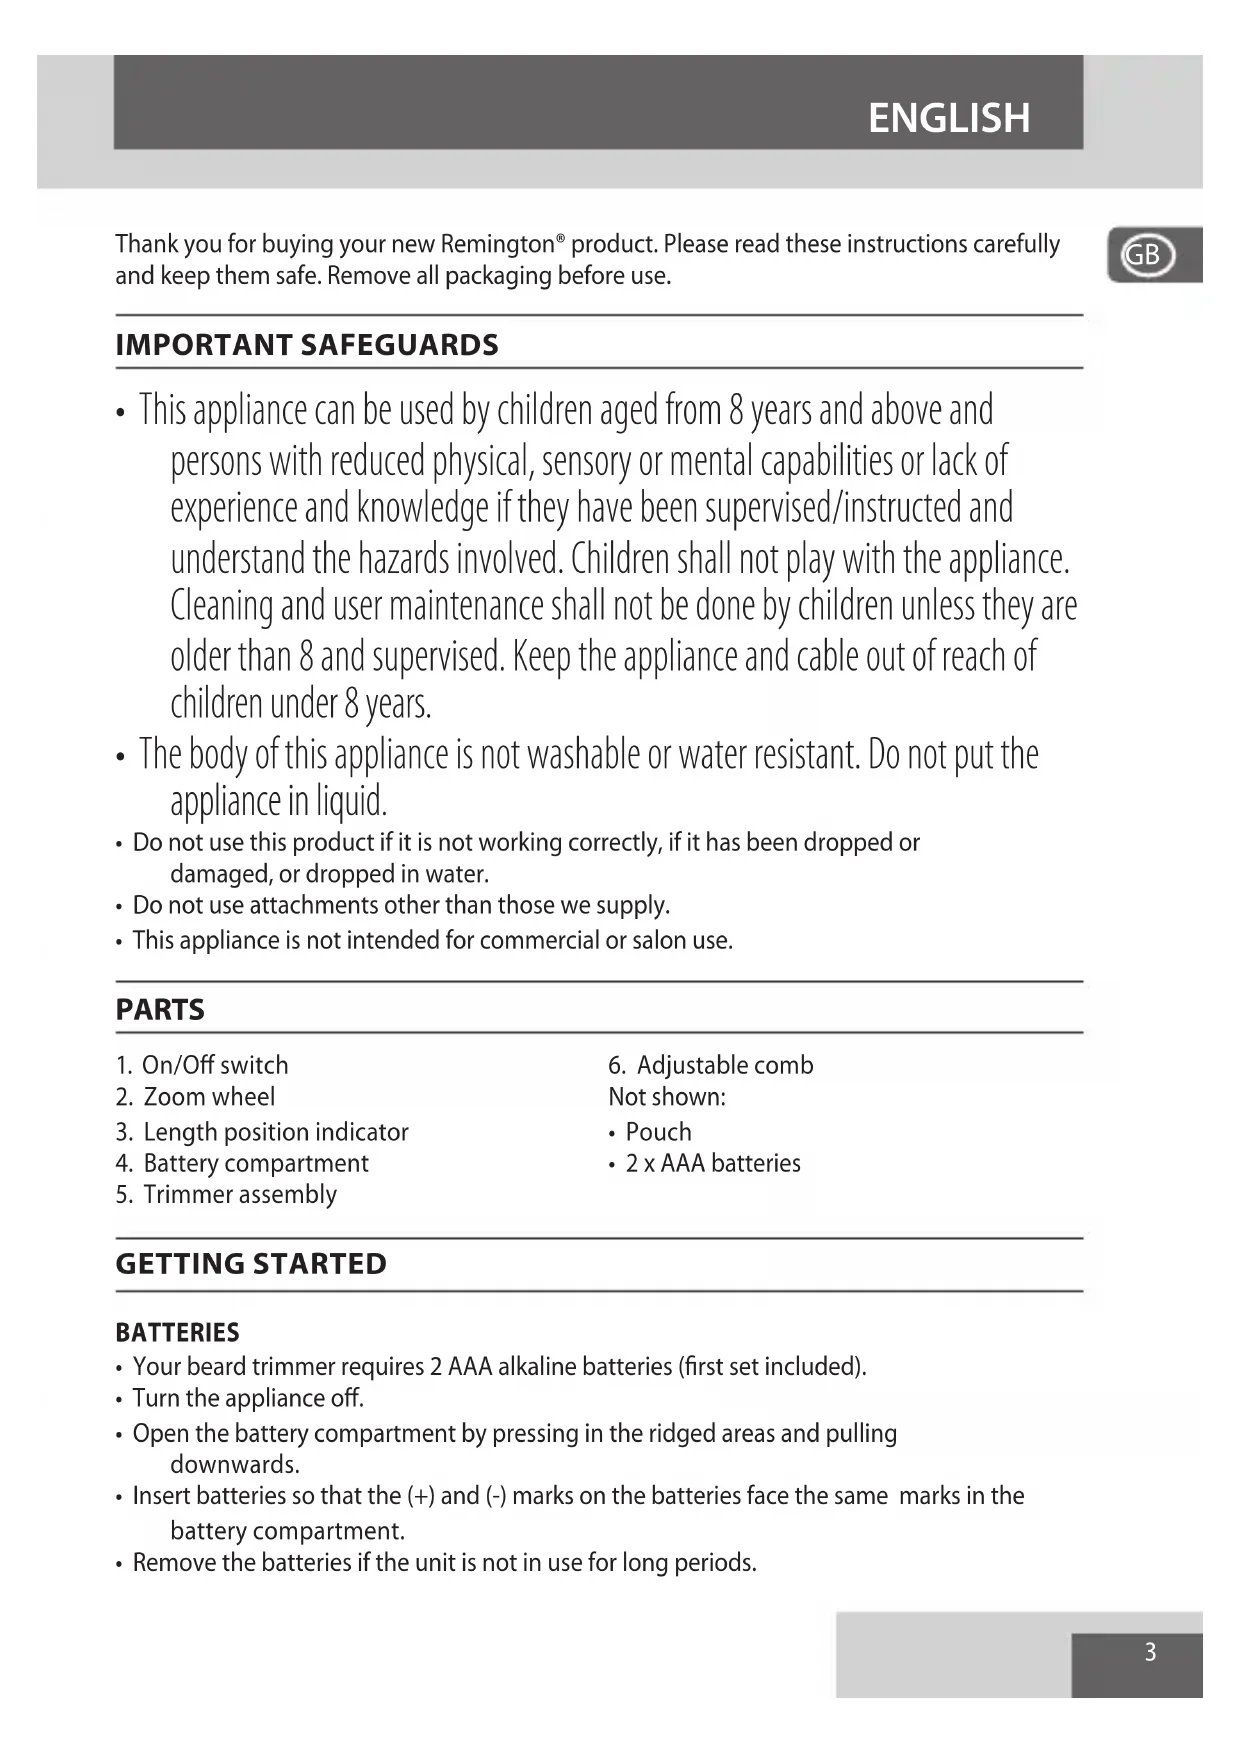
PARTS
- On/Off switch
- Zoom wheel
- Length position indicator
- Battery compartment
-
Trimmer assembly
-
Adjustable comb
Not shown:
- Pouch
- 2 x AAA batteries
GETTING STARTED
BATTERIES
- Your beard trimmer requires 2 AAA alkaline batteries (first set included).
- Turn the appliance off.
- Open the battery compartment by pressing in the ridged areas and pulling downwards.
- Insert batteries so that the (+) and (-) marks on the batteries face the same marks in the battery compartment.
- Remove the batteries if the unit is not in use for long periods.
• Non-rechargeable batteries are not to be recharged.
- Different types of batteries or new and used batteries are not to be mixed.
- Batteries are to be inserted with the correct polarity.
- Exhausted batteries are to be removed from the appliance and safely disposed of.
- The supply terminals are not to be short-circuited.
INSTRUCTIONS FOR USE
FITTING THE ADJUSTABLE COMB
- Hold the trimmer in one hand with your thumb firmly on the zoom wheel to keep it from turning. Ensure the length position indicator is at 0.4.
- Slide the comb down the grooves until it clicks into place.
- The comb can only be attached one way.
ADJUSTING THE TRIM LENGTH
- The trimmer comb can be adjusted to give you 17 different trim lengths simply by turning the wheel to the desired setting.
- Select the comb length by rotating the zoom wheel upwards to increase the length and downwards to decrease the length. Please see the table below for the different length increments.
- The wheel will click into place as it reaches each setting and the setting number will appear on the length position indicator.
| Setting Cutting Length | |
| 0.4 0.4 mm | |
| 1 1 mm | |
| 1.5 1.5 mm | |
| 2 2 mm | |
| 2.5 2.5 mm | |
| 3 3 mm | |
| 3.5 3.5 mm | |
| 4 4 mm | |
| 4.5 4.5 mm | |
| 5 5 mm | |
| 6 6 mm | |
| 8 8 mm | |
| 10 10 mm | |
| 12 12 mm | |
| Setting Cutting Length | |
| 14 14 mm | |
| 16 16 mm | |
| 18 18 mm | |

Note: trimmer comb must be attached to the product in order to use the hair length selector.
TO THIN AND TAPER THE BEARD/MOUSTACHE
- Fit the adjustable comb.
- Use the zoom wheel to set the comb to the desired length setting.
- The setting will appear on the length position indicator. If you are trimming for the first time start with the maximum trimming length setting.
- Turn the unit on.
- Place the flat top of the trimmer comb against the skin.
- Slowly slide through the hair. Repeat from different directions as necessary.
- If hair builds up in the trimmer comb during the trimming process, switch the unit off, pull the comb and brush the hair off.
Note: Use the beard trimmer without the adjustable comb for trimming hair close to the skin. This will trim hair to 1 mm, holding the blades perpendicular to the skin will trim hair to 0.4 mm.
TRIMMING THE NAPE OF YOUR NECK
Note: you will need a hand mirror for this operation if performing it alone.
- Remove the adjustable comb.
- Use your fingers to lift the hair at the base of your head up off the neck. Your index finger should be covering the roots of the hairs you are lifting to prevent accidental removal by the beard trimmer.
- Using your other hand, hold the trimmer to the base of your neck with the cutting unit facing up and move the trimmer up the length of the neck until it touches your finger covering the hair roots at the base of your head.
- Be sure to move the unit slowly when performing this operation and to keep the roots at the base of your head out of the way of the trimmer.
TO DEFINE THE BEARD/MOUSTACHE LINE
- Hold the trimmer with the trimmer blade facing you.
- Start with the edge of beard/moustache line and gently lower the trimmer blade onto your skin.
- Use motions towards the edge of the beard/moustache line to trim to desired locations in facial area and away from beard in neck area.
BLADE RELEASE
- Ensure the trimmer is switched off.
- Remove the adjustable comb.
- Remove the blades by pushing your thumb upwards under the blades and move the blade set away from the trimmer body.
- To reattach the blades, align the back of the blades with the back housing at the top of the trimmer and push down until the blade set clicks into place.
TIPS FOR BEST RESULTS
- Beard, moustache and sideburn hairs should be dry.
- Avoid using lotions before use.
- Comb your hair in the direction that it grows.
- To ensure long lasting performance of the trimmer, clean the blades and unit regularly.
- Do not use harsh or abrasive cleaners on the unit or blades.
- This product has washable blades. Ensure the blades are detached from the trimmer before washing the blades.
- Wash the blades under a running tap to remove any hair clippings.
• After rinsing under a tap ensure the blades are dry. - Please note the main body of the trimmer is not washable and should be kept away from water.
- After each use, it is recommended to clean hair from the blades either by rinsing the blades or using a cleaning brush.
- We recommend that you oil the blades regularly. Add a few drops on all gliding surfaces, the cutting area and back pads of the blades.
RECYCLING
To avoid environmental and health problems due to hazardous substances, appliances and rechargeable and non-rechargeable batteries marked with one of these symbols must not be disposed of with unsorted municipal waste. Always dispose of electrical and electronic products and, where applicable, rechargeable and non-rechargeable batteries, at an appropriate official recycling/collection point.
UW APPARAAT VERZORGEN
EN IYI SONUÇLAR IÇIN IPUÇLARI
natural_image
Solid gray rectangular shape with no text, symbols, or discernible features
natural_image
Solid gray rectangular shape with no text, symbols, or discernible featuresRef. No. MB3000
Type No. MB01A
Remington ^® is a Registered Trade Mark of Spectrum Brands, Inc., or one of its subsidiaries
VARTA Consumer Batteries GmbH & Co. KGaA, Alfred-Krupp-Str. 9, 73479 Ellwangen, Germany www.remington-europe.com
- IMPORTANT SAFEGUARDS
- PARTS
- GETTING STARTED
- BATTERIES
- INSTRUCTIONS FOR USE
- FITTING THE ADJUSTABLE COMB
- ADJUSTING THE TRIM LENGTH
- TO THIN AND TAPER THE BEARD/MOUSTACHE
- TRIMMING THE NAPE OF YOUR NECK
- TO DEFINE THE BEARD/MOUSTACHE LINE
- BLADE RELEASE
- TIPS FOR BEST RESULTS
- RECYCLING
- UW APPARAAT VERZORGEN
- EN IYI SONUÇLAR IÇIN IPUÇLARI
- Ref. No. MB3000
- Type No. MB01A
Brand : REMINGTON
Model : B3 Style MB3000
Category : Nose trimmer