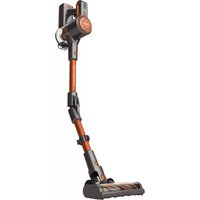
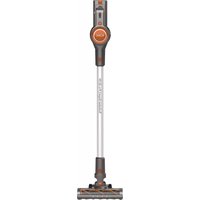
Turbobat Power AE2505 - Vacuum Cleaner SOLAC - Free user manual and instructions
Find the device manual for free Turbobat Power AE2505 SOLAC in PDF.
| Product type | Cordless stick vacuum |
| Brand | Solac |
| Model | Turbobat Power AE2505 |
| Power supply | Rechargeable lithium battery |
| Recommended initial charge time | 6 hours |
| Standard charge time | Approximately 4 to 5 hours |
| Battery level indicator | 3 indicator lights |
| Number of speeds | 2 (ECO/TURBO) |
| Motorized brush | Spiral brush |
| Motor filter type | EPA filter (high efficiency) |
| Outlet filter | Washable |
| Dustbin capacity | Not specified |
| Included accessories | Crevice tool and upholstery brush, extra-long crevice tool, telescopic tube, wall mount/charging base, charger |
| Mount type | Wall mount with charging base |
| Filter maintenance | Clean/replace every 50 hours of use or if suction decreases |
| Recommended charging temperature | Between 4°C and 40°C |
| Maximum storage temperature | 40°C |
| Use | Do not vacuum water, liquids, hot embers, or sharp objects |
| Safety | Do not use on people or animals; keep out of reach of children |
Frequently Asked Questions - Turbobat Power AE2505 SOLAC
User questions about Turbobat Power AE2505 SOLAC
0 question about this device. Answer the ones you know or ask your own.
Ask a new question about this device
Download the instructions for your Vacuum Cleaner in PDF format for free! Find your manual Turbobat Power AE2505 - SOLAC and take your electronic device back in hand. On this page are published all the documents necessary for the use of your device. Turbobat Power AE2505 by SOLAC.
USER MANUAL Turbobat Power AE2505 SOLAC
natural_image
White DC vacuum cleaner with attached circuit board (no visible text or symbols)EN Cordless Stick vacuum cleaner Instructions for use
text_image
M G P N J F I L O B H E1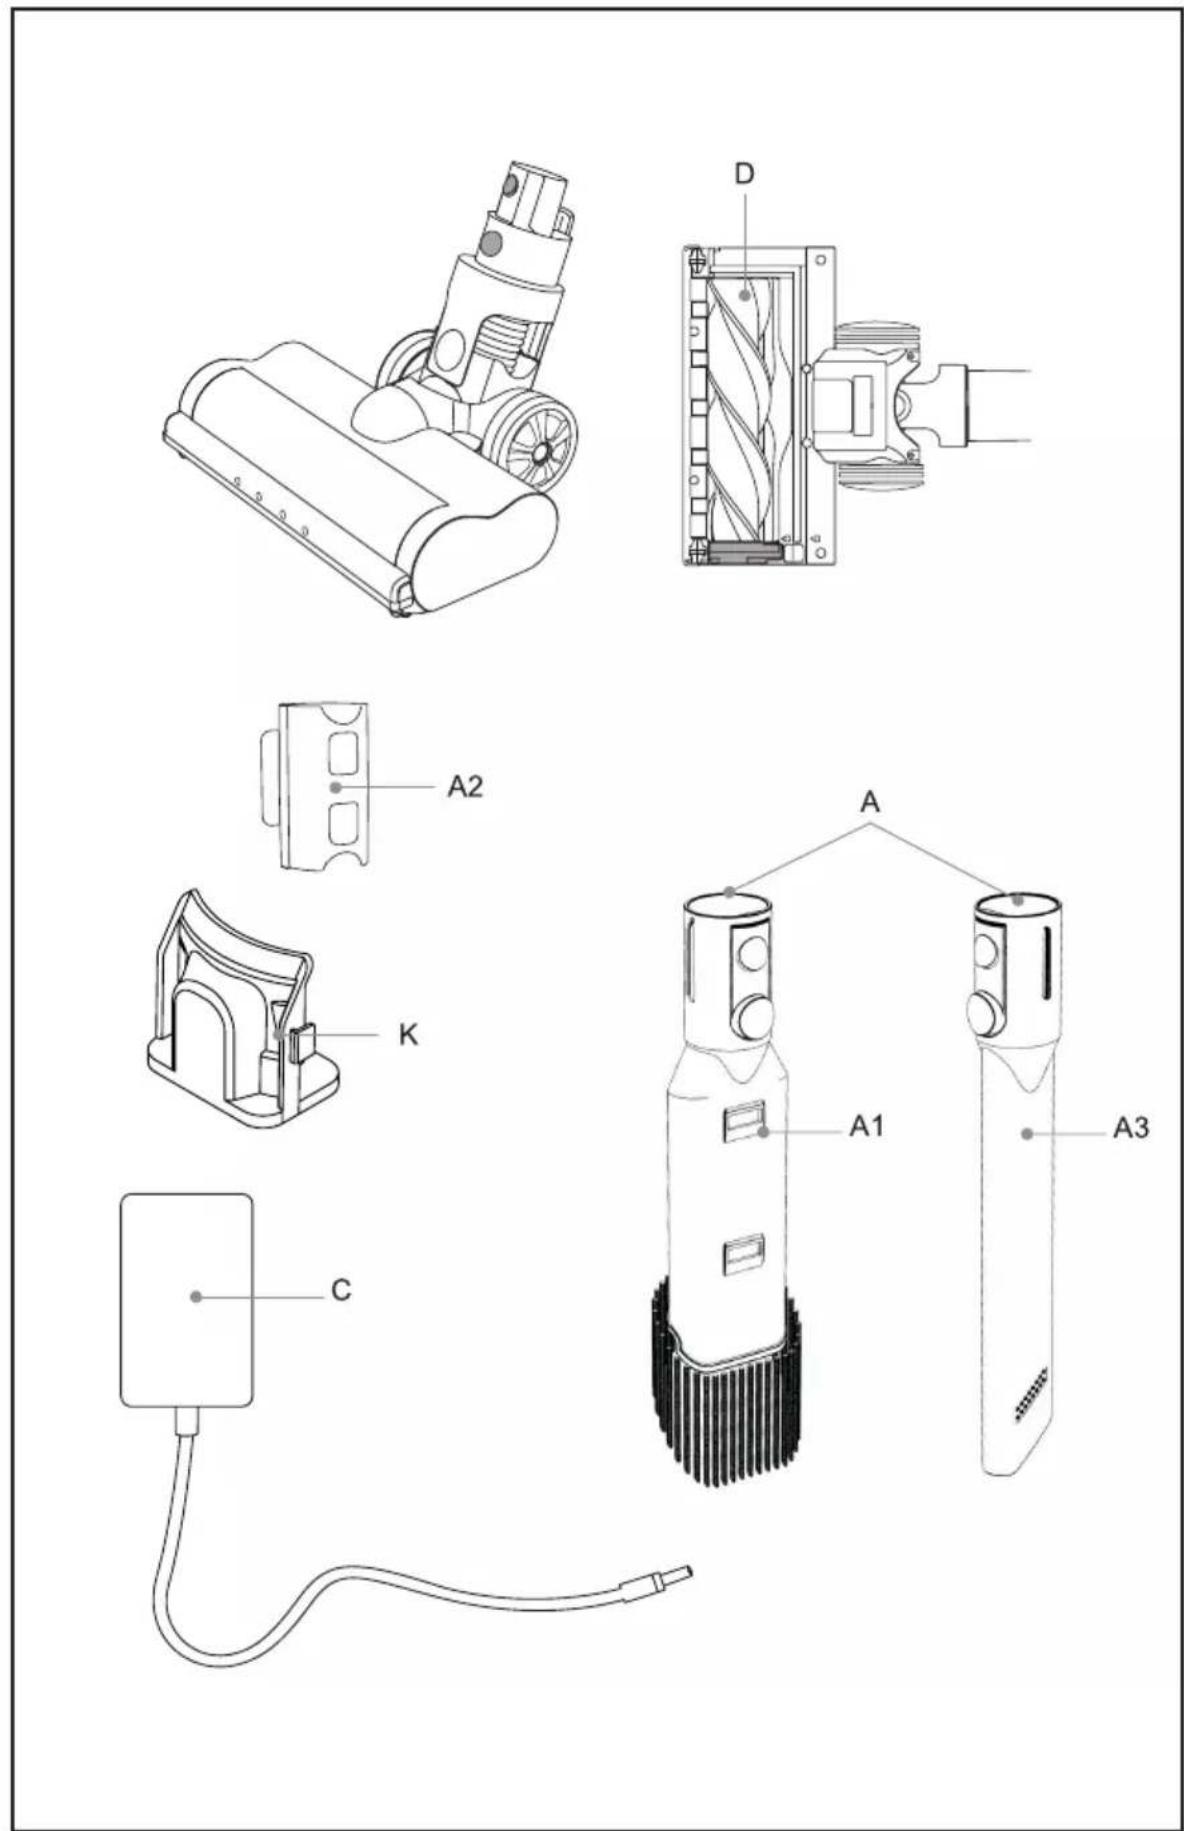
text_image
Technical diagram of a handheld device with labeled components including a brush, housing, and power supply unit.Fig. 1
text_image
Click ClickFig. 2
natural_image
Line drawing of a handheld device with a cable inserted, showing internal components and a downward arrow indicating motion (no text or symbols)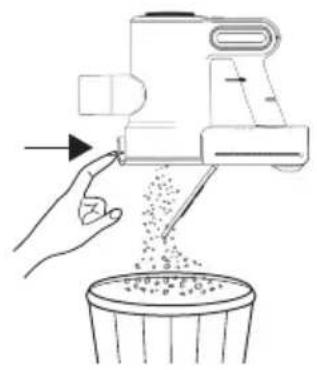
natural_image
Illustration of a hand using a blender to lift granular material into a trash bin (no text or symbols)Fig. 3
natural_image
Line drawing of two hands operating a handheld device (no text or symbols)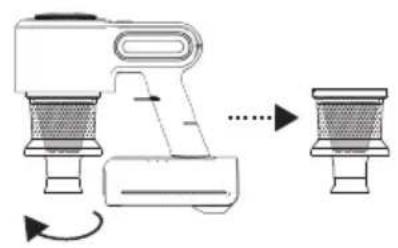
natural_image
Diagram of a hand pump mechanism with two side views showing internal components and rotation arrows (no text or labels)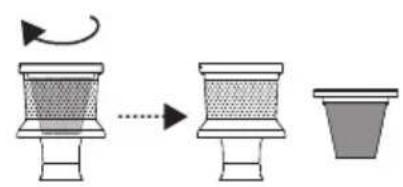
text_image
Diagram illustrating a mechanical or structural transformation process with labeled stages and directional arrows indicating motion.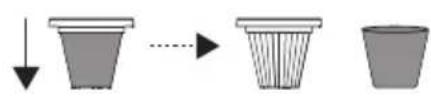
natural_image
Diagram showing a drop in a container followed by an arrow to a striped cup, then a separate empty cup (no text or symbols)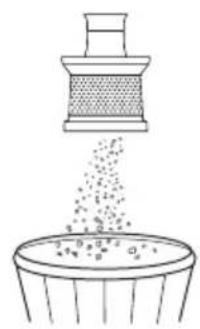
text_image
Diagram illustrating a chemical process with a container and a funnel pouring particles into it, labeled with chemical formulas.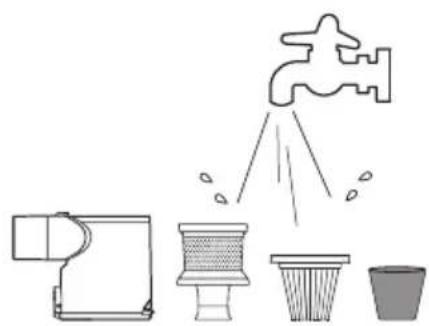
natural_image
Illustration of four household appliances: a kitchen fan, a shower tube, a bucket, and a faucet (no text or symbols)Fig. 3
...
Fig. 4
natural_image
Line drawing of a hand pressing down on a mechanical device (no text or symbols)
text_image
E2Fig. 5
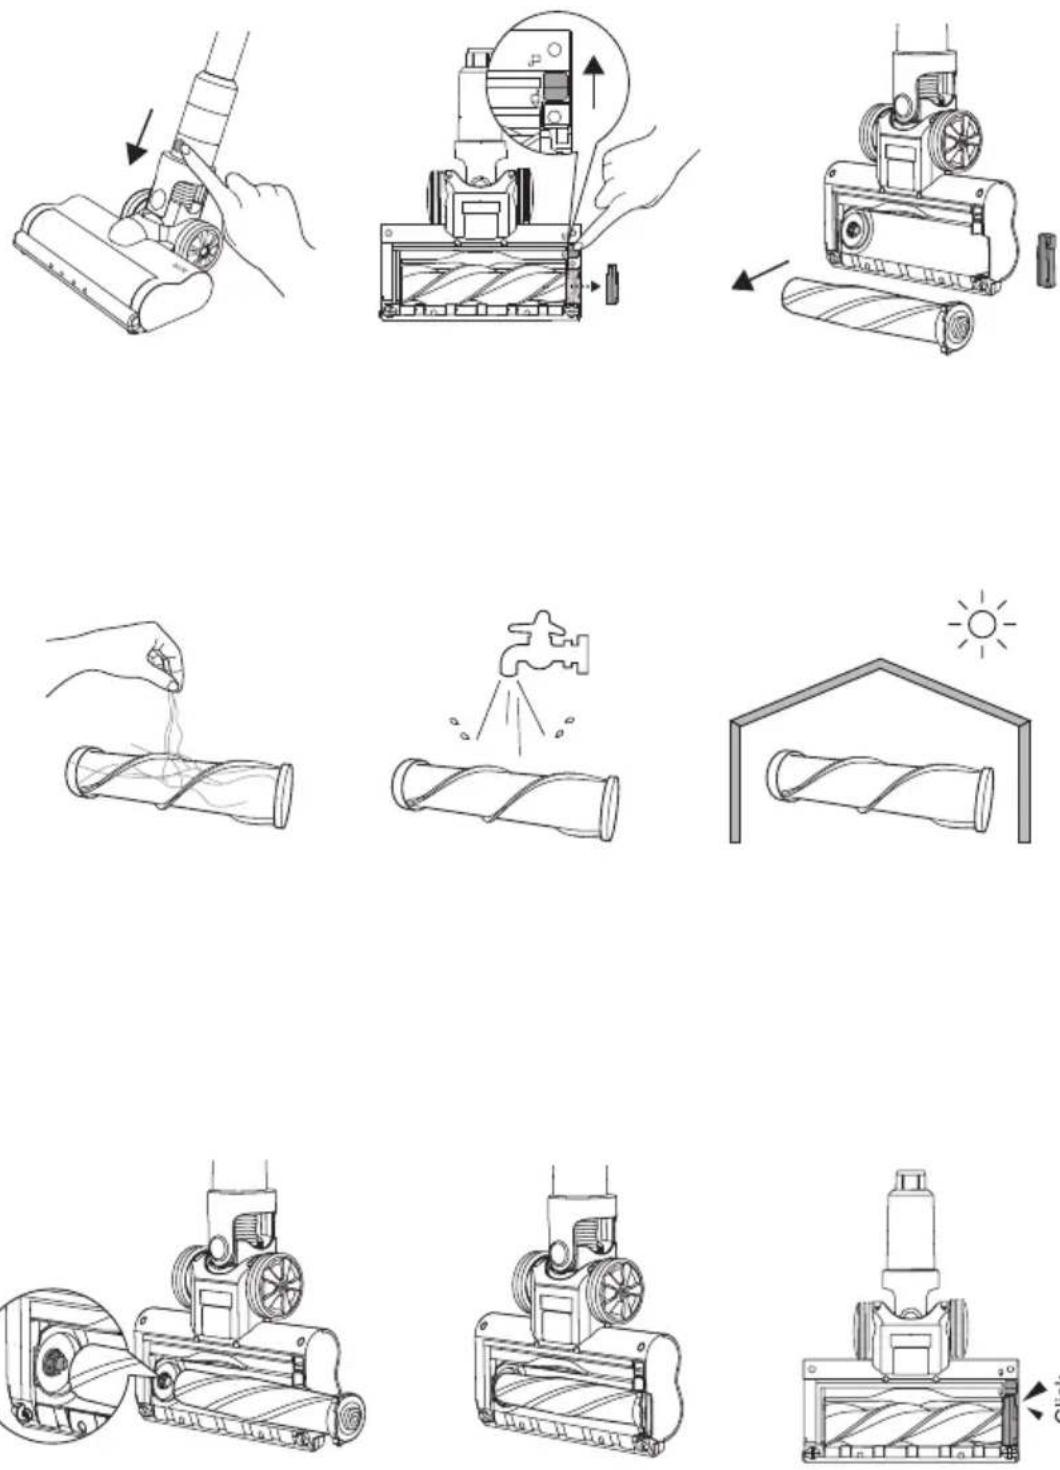
Fig. 6
natural_image
Two line drawings of a device with a handle, showing a change in the arrow from left to right (no text or symbols present)ESPAÑOL
AE2505
ASPIRADOR ESCOBA
DESCRIPCIÓN
A. Accesorios
Downloaded by: pd-oliana on 12-09-2022 12:50 CEST
A1 Lance and multiuse brush A2 Tube accessories support A3 Extralong lance
B. Extension tube
C. Power supply
D. Motorized turbobrush Spiral
E. Filter
E1 Motor filter E2 Outlet filter
F. Battery indicator
G. Button to open outlet filter
H. Body
I. Dust tank
J. Lithium batteries
K. Wall bracket and charging base
L. Button to open the lower lid of the tank.
M. Speed indicator button
N. Battery removal button
O. Button to remove the extension tube
P. ON/OFF and ECO/TURBO selector button
If the model of your appliance does not have the accessories described above, they can also be bought separately from the Technical Assistance Service.
USE AND CARE:
- Do not use the appliance if the parts or accessories are not properly fitted.
- Do not use the appliance if the accessories or consumables attached to it are defective. Replace them immediately.
- Do not use the appliance to gather up water or any other liquid.
- Do not use the appliance if the on/off switch does not work.
- Respect the MAX level indicator.
- Store this appliance out of reach of children
and/or persons with physical, sensory or reduced mental or lack of experience and knowledge.
- Do not work on areas where there are metal objects, such as nails and/or screws.
- Never vacuum hot or sharp objects (cigarette butts, ashes, nails, etc.).
- Do not open the battery/ies under any circumstances whatsoever.
- The battery/ies should be stored at a temperature of below 40^ C.
- Never leave the appliance connected and unattended if is not in use. This saves energy and prolongs the life of the appliance.
- Do not use the appliance on any part of the body of a person or animal.
- Do not use the appliance with pets or animals.
- Recharge the battery/ies only with the charger supplied by the manufacturer. A charger that is suitable for one type of battery may cause explosion or fire hazard when used with other battery/ies.
- Use the device only with the battery/ies for which has been specifically designed. The use of any other battery/ies can cause an explosion or fire hazard.
INSTALLATION
- Be sure to remove all packaging material from inside the appliance.
ASSEMBLING THE WALL BRACKET:
- The appliance has a charging base (K) which must be fixed to the wall.
- Fix the wall bracket as you think appropriate, using plugs, screws, and adhesive...
- Make sure that the bracket is firmly fixed; it should be able to support twice the weight of the appliance.
- Fit the appliance into the wall support.
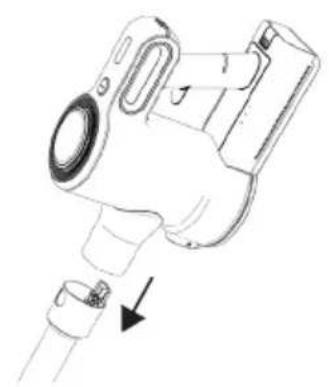
CHARGING THE BATTERY:
- Caution: A new battery is not fully charged and must therefore be charged before the appliance is used for the first time.
- Charge the battery at an atmospheric temperature of between 4 and 40°C.
- Connect the power supply in the product connector located in rear part above the handle.
- A pilot light will come on to indicate that the charger is ready to begin charging the battery.
- Approximately 4 to 5 hours are needed for a
complete charge of the battery. Never attempt to over-charge the battery (although it is recommended that the first charge of the battery be of 6 hours in duration).
- The pilot light will come on to indicate that the charger is charging the battery.
- When the battery is charged disconnect the charger from the mains supply.
- NB: Do not use the appliance while it is connected to the charger.
HOW TO CHECK THE BATTERY'S CHARGE LEVEL:
- Press the ON/OFF button (P), the pilot lights that indicate if it is charged will light up.
- If all three pilot lights come on this means that the appliance is fully charged.
- If no pilot light lights up, this means that the battery is completely flat.
- NB: For a long battery life, it is advisable to charge the battery, only, when it has run out completely.
INSTRUCTIONS FOR USE
BEFORE USE:
- Make sure that product's packaging has been removed.
- Before using this product for the first time, it is important to make a full charge of batteries.
- Prepare the appliance according to the function you wish to use:
USE:
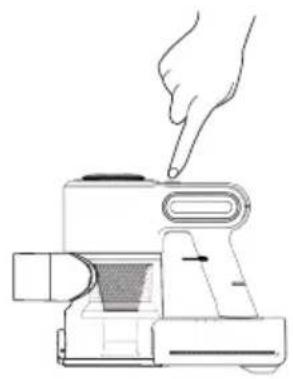
- Turn the appliance on, by using the on/off button.
- Select the desired speed pressing repeatedly the speed selector (P). This function is very useful, as it makes it possible to adapt the speed of the appliance to the type of work that needs to be done.
FITTING AN ACCESSORY TO THE HAND VACUUM:
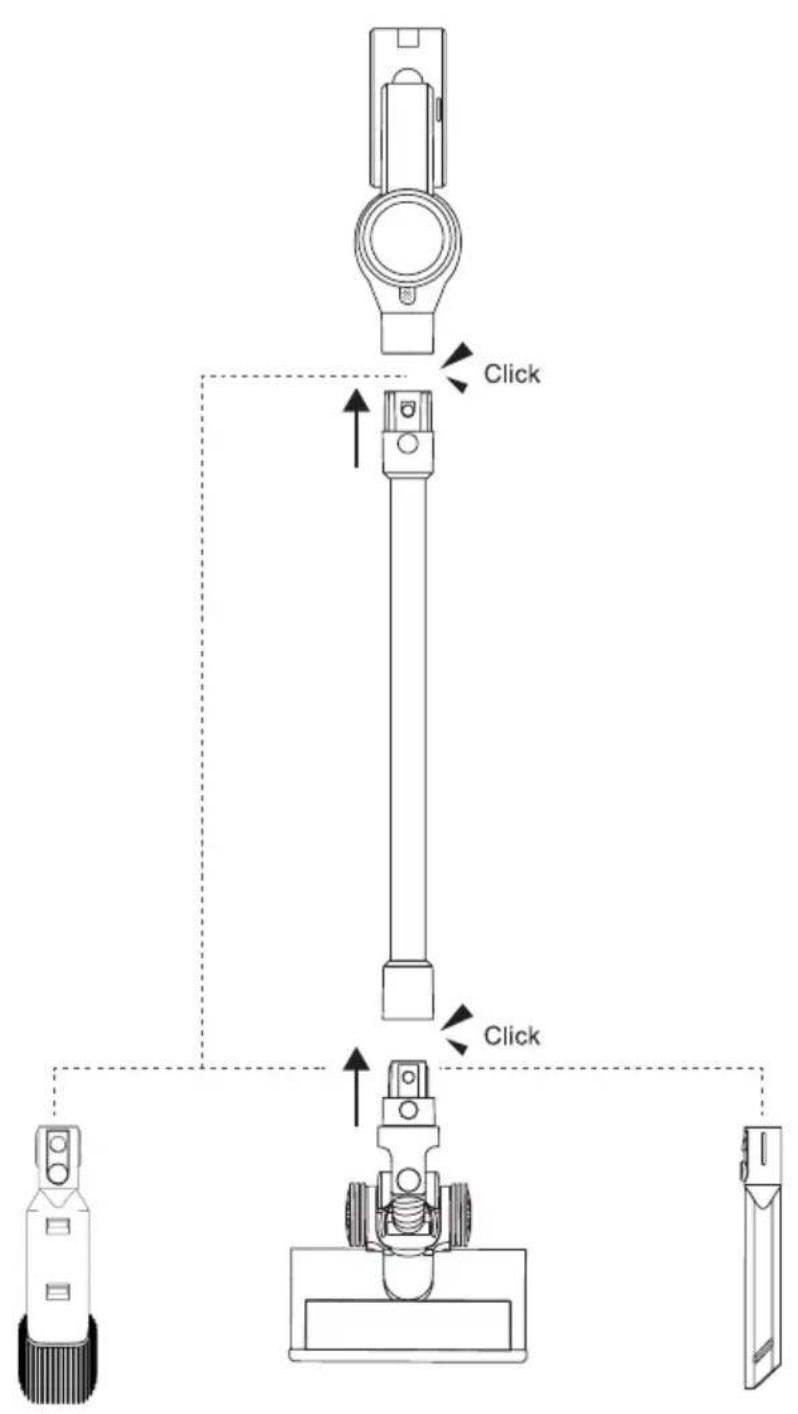
- The hand vacuum is designed in such a way that it allows the following accessories to be fitted: (use the combination that best meets your requirements). (Fig.1).
- Furniture brush: Equipped with a brush at the end, which brushes the surface as it is used.
- Crevice nozzle: Specially designed for getting into cracks and difficult corners.
- We can insert the accessories into the tube.
ONCE YOU HAVE FINISHED USING THE APPLIANCE:
- Turn the appliance off using the on/off button.
- Clean the appliance.
CLEANING
- Disconnect the battery charger from the mains and allow it to cool before undertaking any cleaning task.
- Clean the equipment with a damp cloth with a few drops of washing-up liquid and then dry.
- Do not use solvents, or products with an acid or base pH such as bleach, or abrasive products, for cleaning the appliance.
- Never submerge the appliance in water or any other liquid or place it under running water.
EMPTYING THE DUST BOX: (FIG.2)
- Empty the dust box when it is full (observation facilitated by transparent windows), or when vacuuming power is notably reduced.
- First detach the extension tube by pressing the button (O).
- Open the lid of the dust box press the button to open the lower tank cover (L) located in the front of the handle and empty the contents into the appropriate waste disposal receptacle.
- Check the condition of the dust box filter.
CHANGING THE FILTERS:
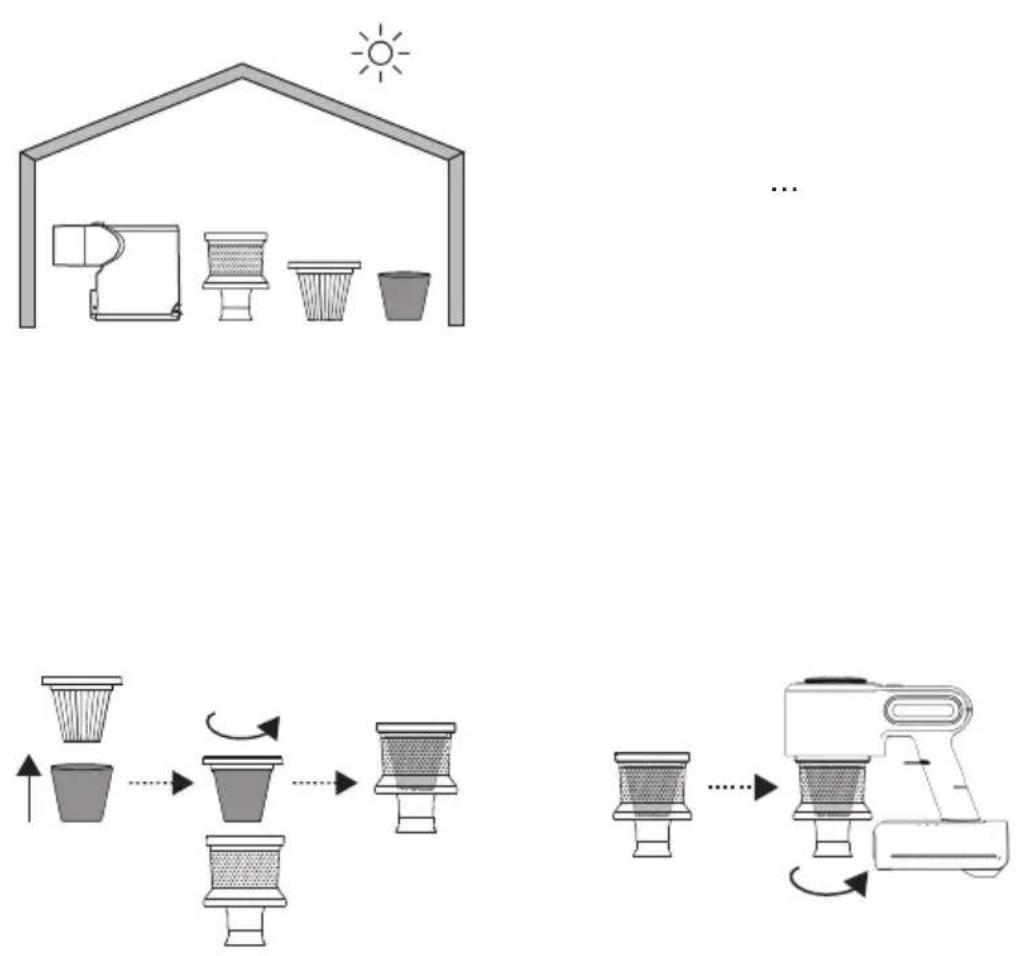
- Dust tank EPA filter (high efficiency air filter that efficiently retains spores, ash, sawdust, pollen...), it is advisable to change it a least once a year or after every 50 hours of use, or if its potency diminishes remarkably.
TO REMOVE THE FILTERS: (FIG.3)
MOTOR FILTER:
- Open the dust bin by pressing the dust tank opening button (L)
- Extract the cyclone by turning to the left, as indicated by the arrow and the padlocks located on the cyclone.
- Remove the EPA filter from its anchor by turning the filter to the left, as indicated by the arrow and the padlocks.
- Wash the different filters and let them air dry.
- To reassemble the filter, proceed with the above
instructions, in reverse order.
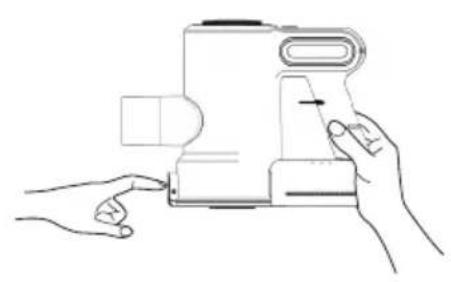
OUTLET FILTER: (FIG.4)
- Press the button to open the outlet filter lid (G) and pull out the filter from the anchorage
- Wash the filter and let it air dry.
CLEANING THE ROTARY BRUSH:
- To remove the brush:
- At the bottom of the brush, move the tab located at the bottom of the brush towards the open padlock to disengage the roller and pull to remove it. (Fig. 5).
- Remove the brush and clean.
- To reassemble, follow the above instructions but in reverse.
SUPPLIES:
- Supplies can be acquired from distributors and authorised establishments (such as filters, shoe brush and battery set) for your appliance model.
- Always use original supplies, designed specifically for your appliance model.
- These supplies are available in specialist shops.
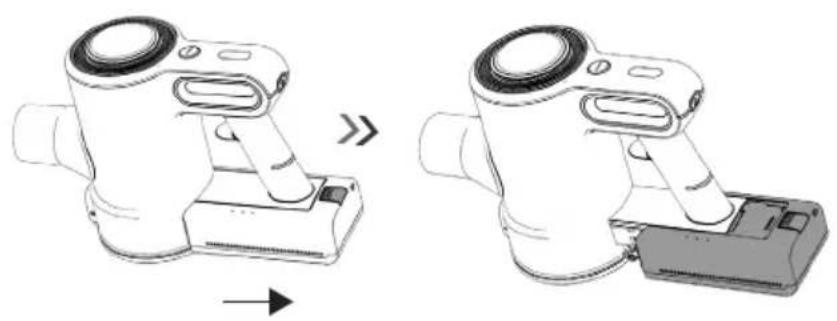
HOW TO REMOVE THE BATTERIES FROM THE DEVICE:
- CAUTION: It is important that the batteries are fully discharged prior to its withdrawal from the apparatus.
- CAUTION: the appliance must be disconnected from the supply mains when removing the batteries.
To remove the batteries, once the life of the appliance, proceed as follows:
- Remove the battery from the product by pressing the battery removal button (N) and pulling it out. (Fig.6)
FRANÇAIS
AE2505
ASPIRATEUR BALAI
DESCRIPTION
A. Accessoires
J. Akumulatory litowe
Downloaded by: pd-oliana on 12-09-2022 12:50 CEST
WYMIANA FILTRÓW:
Downloaded by: pd-oliana on 12-09-2022 12:50 CEST
- Napájací kábel zapojte do konektora v zriadení, ktorý sa nachádza na zadnej strane batérie.
- Zapnutá svetelná kontrolka signalizuje, že nabíjačka je pripravená na nabíjanie batérie.
- Na úplné nabitie batérie je potrebných približne 4 až 5 hodín. Batériu nikdy neprebíjajte (hoci sa odporúča, aby prvé nabíjanie batérie trvalo 6 hodín).
- Zapnutá svetelná kontrolka signalizuje, že nabíjačka nabíja batériu.
- Po skončení nabíjania batérie nabíjačku odpojte od elektrickej siete.
- POZNÁMKA: Toto zariadenie nepoužívajte, ked' je pripojené k nabíjačke.
AKO SKONTROLOVAŤ ÚROVEŇ NABITIA BATÉRIE:
Downloaded by: pd-oliana on 12-09-2022 12:50 CEST
Downloaded by: pd-oliana on 12-09-2022 12:50 CEST
Downloaded by: pd-oliana on 12-09-2022 12:50 CEST
Downloaded by: pd-oliana on 12-09-2022 12:50 CEST
الصعب
Downloaded by: pd-oliana on 12-09-2022 12:50 CEST
This product enjoys the recognition and protection of the legal guarantee in accordance with current legislation. To enforce your rights or interests you must go to any of our official technical assistance services.
You can find the closest one by accessing the following web link: http://solac.com
You can also request related information by contacting us by phone.
You can download this instruction manual and its updates at http://solac.com
DE) GARANTIE UND TECHNIS- CHER SERVICE
Big distribution society
4 Rue 13 Lot Smara, Oulfa,
Casablanca
(+212) 522 89 40 21
ME) MONTENEGRO - EUROPE
Rastovac bb, 81400
Niksic
+382 40 217 055
Unit 25 & 26, San Croy Office Park, Die Agora
Road, Croydon, Kempton Park, 1619
Johannesburg
(+27) 011 392 5652
sOlac
www.solac.com