R0600S - Air-conditioner LG - Free user manual and instructions
Find the device manual for free R0600S LG in PDF.
| Product Type | Window Air Conditioner |
| Brand | LG |
| Model | R0600S |
| Category | Window Air Conditioner |
| Power Supply | 125 V, 15 A, 60 Hz with grounding |
| Approximate Dimensions | Width 56-91 cm, Height 38 cm, Depth 47 cm |
| Estimated Net Weight | Approximately 30 kg |
| Installation Type | In a double-hung window |
| Main Functions | Cooling, ventilation, dehumidification |
| Operating Modes | Cool, Fan, Dry |
| Fan Speeds | Low and High |
| Remote Control | Yes, with batteries (2 standard batteries) |
| Timer | Programmable On/Off from 1 to 12 hours |
| Energy Saver | Yes: fan stops with compressor |
| Thermostat | Adjustable from 16°C to 30°C (in 1°C increments) |
| Air Filter | Washable, clean every 2 weeks |
| Air Flow Direction | Adjustable horizontally and vertically |
| Safety | Grounding required, three-prong cord |
| Warranty | 1 year parts and labor, 5 years compressor |
| Customer Service | 1-888-LG-CANADA (542-2623) |
Frequently Asked Questions - R0600S LG
User questions about R0600S LG
0 question about this device. Answer the ones you know or ask your own.
Ask a new question about this device
Download the instructions for your Air-conditioner in PDF format for free! Find your manual R0600S - LG and take your electronic device back in hand. On this page are published all the documents necessary for the use of your device. R0600S by LG.
USER MANUAL R0600S LG
- Please read the operating instructions and safety precautions carefully and thoroughly before installing and operating your room air condition.
- Please retain this owner's manager for future reference after reading it thoroughly.
Safety Precautions....3
Before Operation....7
Introduction 8
Symbols Used in this Manual 8
Features 8
Electrical Safety 9
Temporary Use of an
Adapter 10
Temporary Use of an
Extension Cord 10
Installation 11
Window Requirements 12
Size 12
Select the best location....12
Preparation of Chassis 13
Unit Installation 14
Operating Instructions .....16
Location and function
of Controls....16
Remote Control Operations .....17
Remote Controller 18
Additional Features.... 19
Air Direction 19
Drain Pipe....19
Maintenance and Service ..... 20
Air Filter 20
Cleaning the Air Conditioner.....20
How to Remove the
Front Grille 21
Common Problems and
Solutions....22
Troubleshooting....23

FOR YOUR RECORDS
Write the model and serial numbers here:
Model #
Serial #
You can find the numbers on a label on the side of the product.
Dealer's Name
Date Purchased
■ Staple your receipt to this page in the event you need it to prove date of purchase or for warranty issues.

READ THIS MANUAL
Inside you will find many helpful hints on how to use and maintain your air conditioner properly. Just a little preventive care on your part can save you a great deal of time and money over the life of your air conditioner.
You'll find many answers to common problems in the chart of troubleshooting tips. If you review our chart of
Troubleshooting Tips first, you may not need to call forservice at all.

PRECAUTION
- Contact an Authorized Service Center for repair or maintenance of this unit. Call 1-800-243-0000 to locate the nearest ASC.
• The air conditioner is not intended for use by young children or invalids without supervision. - Young children should be supervised to ensure that they do not play with the air conditioner.
- If the power cord requires replacement, have an Authorized Servicer install an exact replacement part.
- Installation work must be performed in accordance with the National Electric Code by qualified nad authorized personnel only.
natural_image
Simple line drawing of people enjoying a meal at a table with sun and palm trees in the background (no text or symbols)To prevent injury to the user or other people and property damage, the following instructions must be followed.
■ Incorrect operation due to ignoring instructions will cause harm or damage. The seriousness the following indications.
Because of the weight of the product, it is recommended that you have a helper to assist in the installation.
WARNING
This symbol indicates the possibility of death or serious injury.
CAUTION
This symbol indicates the possibility of injury or damage to properties only.
■ Meanings of symbols used in this manual are as shown below.
 | Be sure not to do. |
 | Be sure to follow the instruction. |
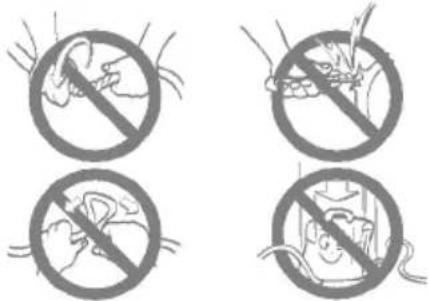
WARNING
Installation
- Improper assembly or installation may cause incorrect operation, including injury, fire, and electric shock hazards.
natural_image
Illustration of a distressed computer monitor with warning symbol (no text or labels)Do not use the power cord near flammable gas or combustibles such as gasoline, benzene, thinner, etc.
- It ma cause explosion or fire.
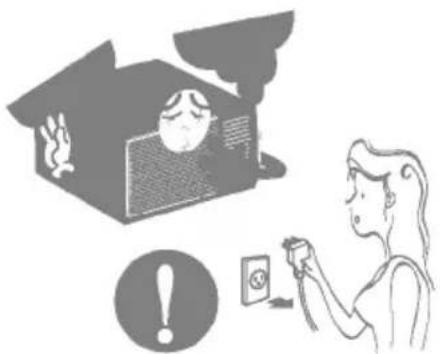
natural_image
Illustration of a person inside a box and a gas cylinder with 'Gas' label, no text or symbols present- It may cause fire and electric shock.
- It may cause failure and electric shock.
natural_image
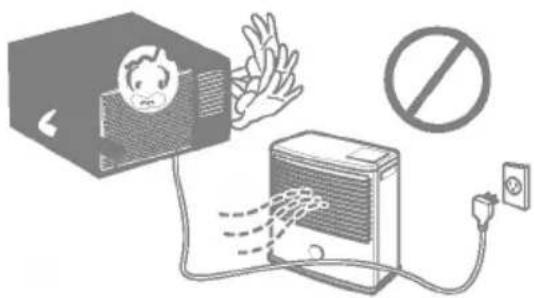
Illustration of a person reacting to a child inside a box, with no visible text or symbolsOperation
- Otherwise, it will cause electric shock or fire.
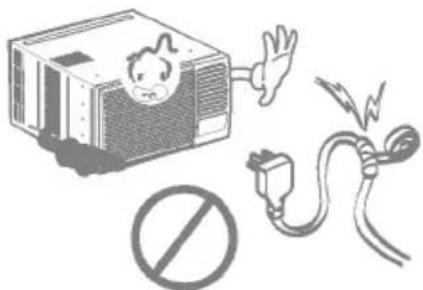
Do not operate or stop the unit by inserting or pulling out the power plug.
- It will cause electric shock or fire.
- It will cause electric shock or fire.
natural_image
Illustration of a computer with a warning icon and electrical plug, no text or symbols present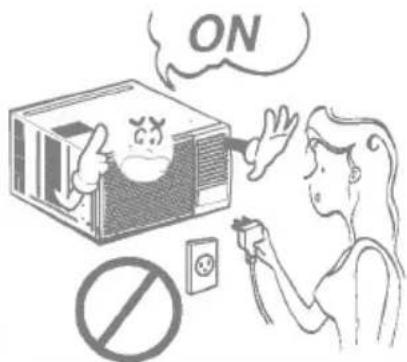
- It will cause electric shock or fire.
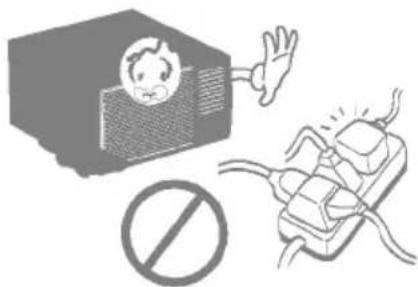
Use the air conditioner on a single outlet circuit. (See page 7.) Do not share the outlet with other appliances.
- It will cause electric shock or fire.
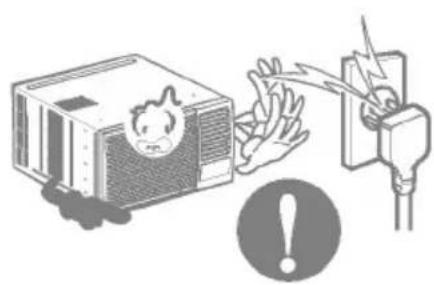
- No grounding may cause electric shock.
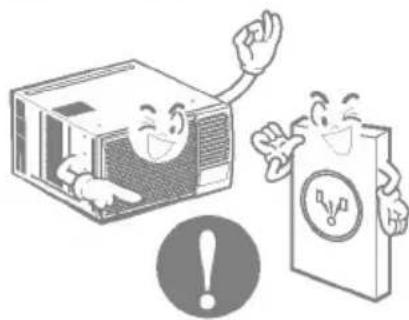
natural_image
Illustration of two cartoon characters, one holding a computer and the other holding a document with a warning symbol (no text or labels)Unplug the unit if strange sounds, odors, or smoke come from it.
- It may cause fire and electric shock.
Do not operate with wet hands or in damp environment.
- It will cause electric shock.
natural_image
Illustration of a person using a device to interact with a house, with an exclamation mark and smokestack (no text or symbols)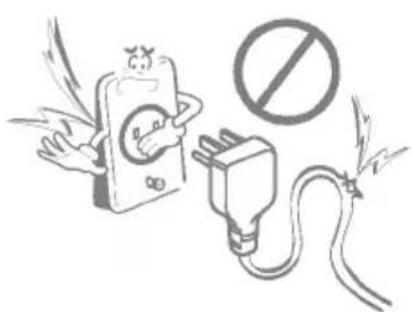
natural_image
Illustration of a cartoon phone emitting exhaust smoke next to an electrical plug with a prohibition symbol (no text present)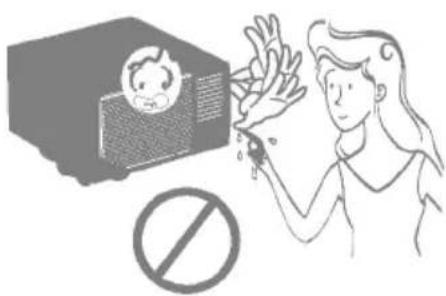
natural_image
Illustration of a child reacting to a photoelectric effect with a prohibition symbol (no text or labels)- The air conditioner must be operated in a enclosed area to be most effective
natural_image
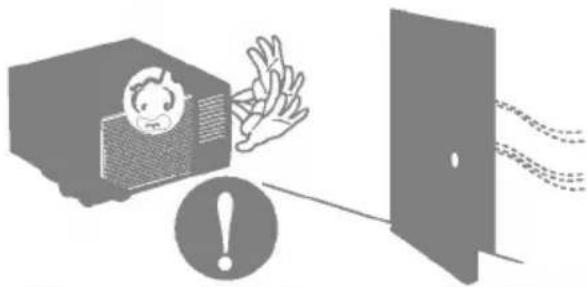
Illustration of a person reacting to a shock from a TV, with an exclamation mark and dashed lines indicating sound or motion (no text or symbols)If water enters the product, turn off the power switch of the main body of appliance. Contact service center after taking the opower plug out from the socket.
- It will cause electric shock or failure of machine.
natural_image
Illustration of a person reacting to a computer screen with raindrops, and a man in a suit talking on the phone (no text or symbols present)- It may cause explosion, fire, and burn.
natural_image
Illustration showing a smiling face inside a box and a woman looking out of a window with clouds (no text or symbols)- Water may enter the unit and degrade the insulation. It may cause an electric shock.
natural_image
Illustration showing a baby with a phone emitting smoke, a hand holding a bottle, and a person holding a device (no text or symbols present)
CAUTION
Installation
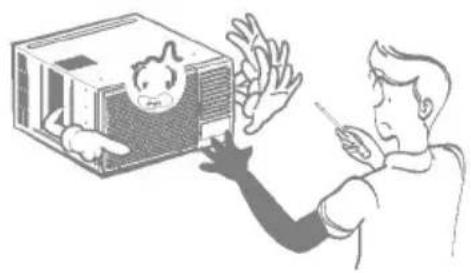
Never touch the metal parts of the unit when removing the filter.
• They are sharp and may cause injury.
natural_image
Illustration of a person reacting to a device with a prohibition symbol (no text or labels present)- It may cause failure of appliance or performance deteriorate.
natural_image
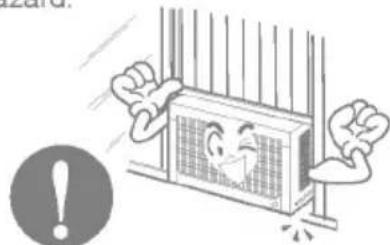
Illustration of a box with a hand holding a cigarette and a prohibition symbol (no text or labels)Ensure that the outer case is not damaged by age or wear.
- If the outer case is damaged, it must be repaired or replaced immediately. Leaving it damaged could result in the air conditioner falling out of the window, creating a safety hazard.
natural_image
Cartoon illustration of a window with a smiling face and raised fists, next to an exclamation mark (no text or symbols)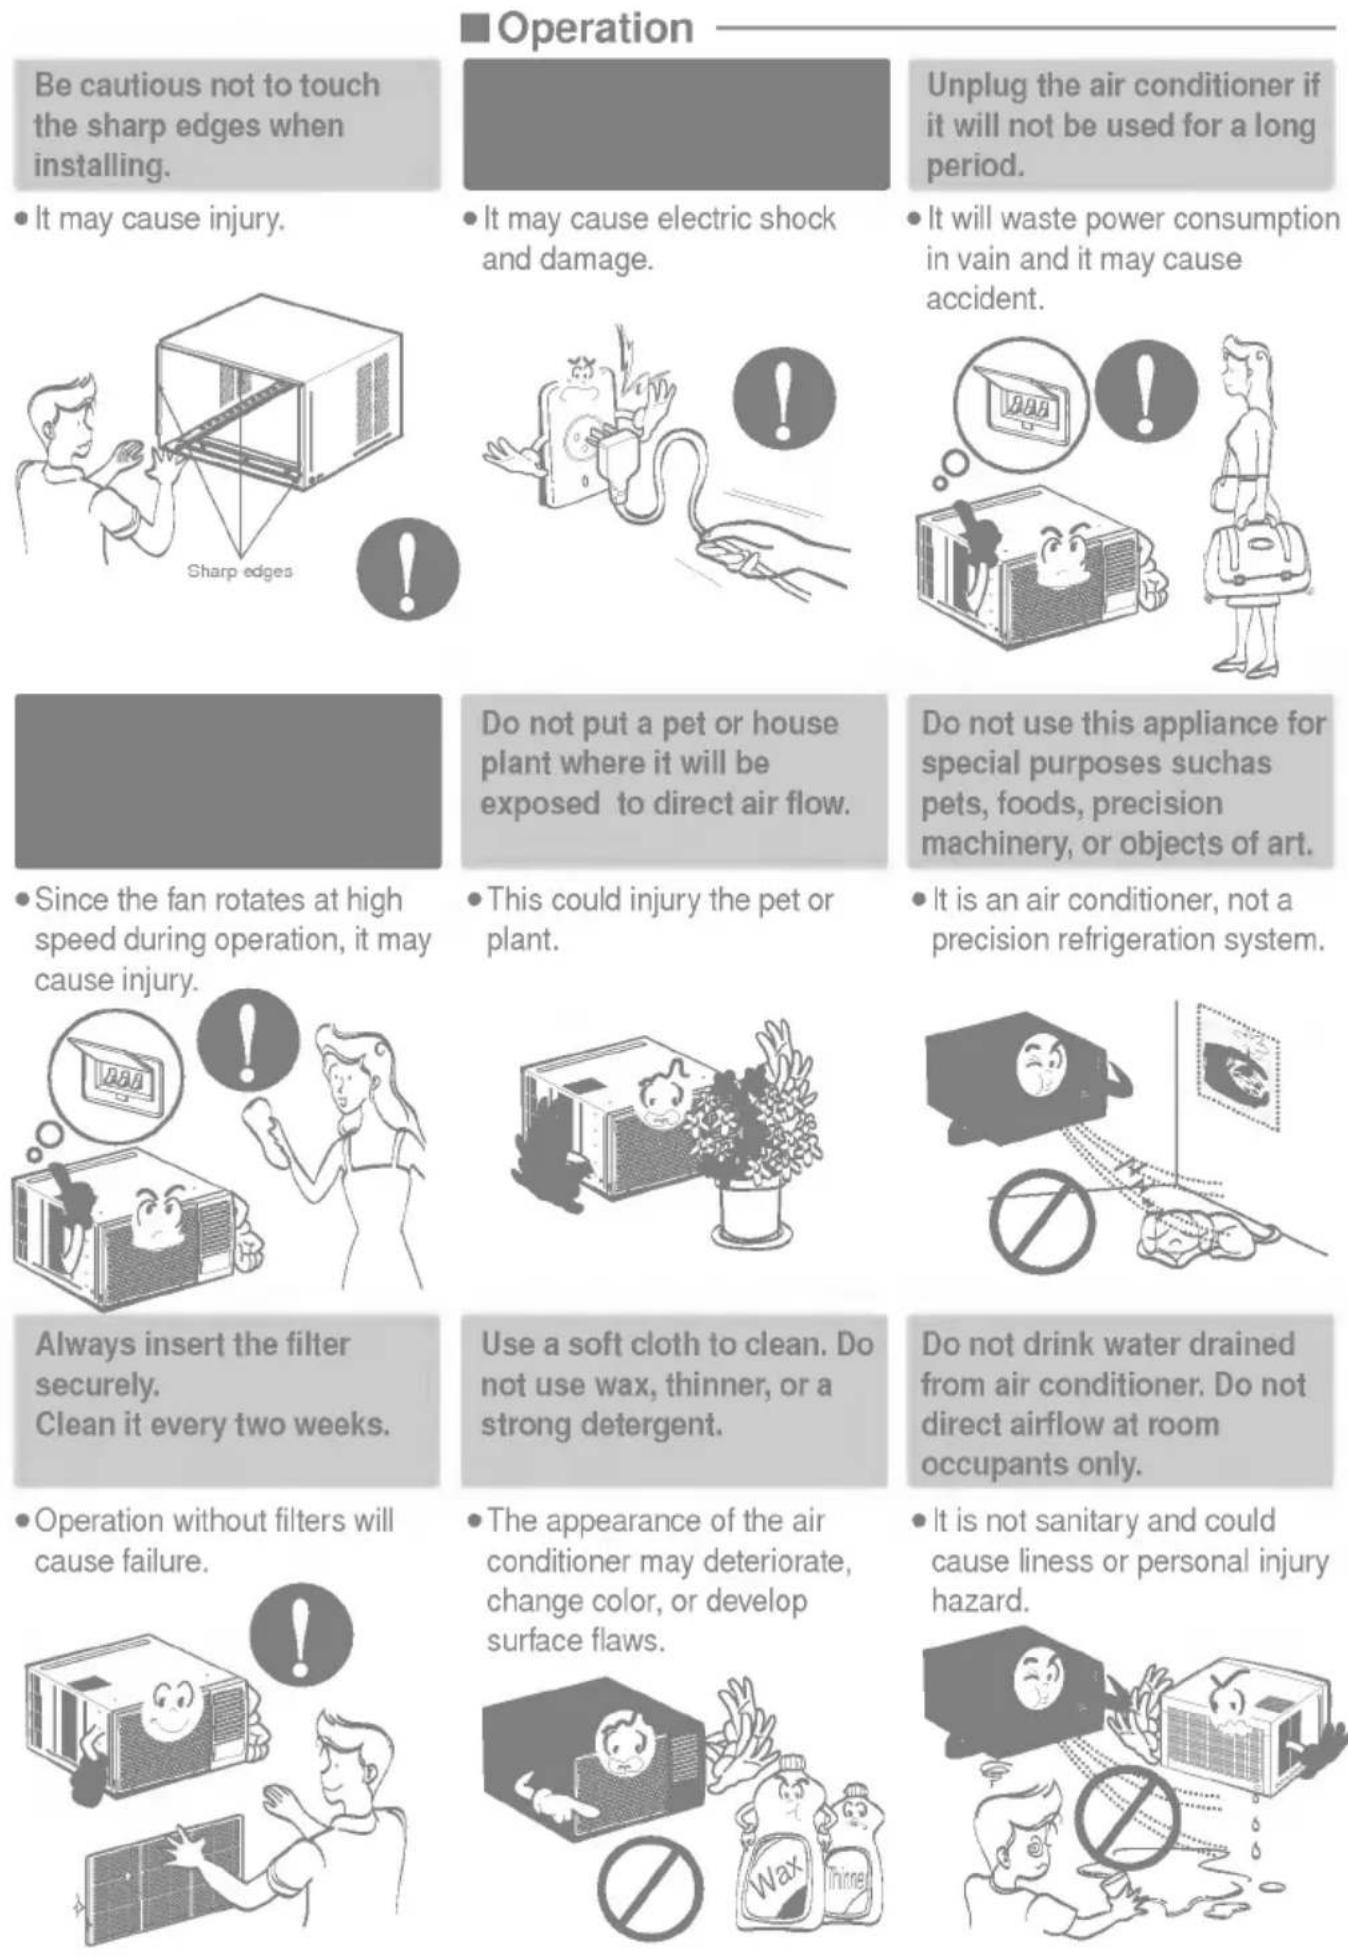
Operation
Be cautious not to touch the sharp edges when installing.
- It may cause injury.
- It may cause electric shock and damage.
Unplug the air conditioner if it will not be used for a long period.
- It will waste power consumption in vain and it may cause accident.
Do not put a pet or house plant where it will be exposed to direct air flow.
- Since the fan rotates at high speed during operation, it may cause injury.
• This could injury the pet or plant.
Do not use this appliance for special purposes such as pets, foods, precision machinery, or objects of art.
- It is an air conditioner, not a precision refrigeration system.
Always insert the filter securely. Clean it every two weeks.
• Operation without filters will cause failure.
Use a soft cloth to clean. Do not use wax, thinner, or a strong detergent.
- The appearance of the air conditioner may deteriorate, change color, or develop surface flaws.
Do not drink water drained from air conditioner. Do not direct airflow at room occupants only.
- It is not sanitary and could cause liness or personal injury hazard.
Preparing for one
- Plug in the power plug properly.
- Use a dedicated circuit. Overloading the line could create a fire hazard.
- Do not use an extension cord. See page 10 for more details.
- Do not start/stop operation by plugging/unplugging the power cord.
- If the power cord is damaged and requires replacement, have an Authorized Servicer install an exact replacement part.
Usage
- Being ew for an extended period of time could behazardous to your health.
Do not expose occupants, pets, or plants to directw for extended periods of time. - Due to the possibility of oxygen deficiency, ventilate the room when used together with stoves or other heating devices.
- Do not use this air conditioner fposes (e.g. preserving precision devices, food, pets, plants, and art objects). Such usage could damage the items.
- The air conditioner is a consumer comfort appliance, not a precision climatecontrol system.
Cleaning and maintenance
- Do not touch the metal parts of the unit when remo.Injuries canoccur when handling sharp metal edges.
- Do not use water to clean inside the air conditioner. Exposure to water can destroy the insulation, leading to possible electric shock.
- When cleaning the unit, first make sure that the power and breaker are turned off. The fan rotates at a very high speed during operation.
There is a possibility of injury if the unit's power is accidentally triggered on while cleaning inner parts of the unit.
Service
For repair and maintenance, contact an Authorized Service Center. See the warranty page for details or call 1-888-LG-CANADA(5422623). Have your model number and serial number available. They should be written on page 2 of this manual.
6. This Used in this Manual

This symbol alerts you to the risk of electric shock.

This symbol alerts you to hazards that could cause harm to theair conditioner.

This symbol indicates special notes.
Fig. 125

WARNING: This appliance should be installed in accordance with the National Electric Code.

WARNING: This appliance must be properly grounded.
The power cord of this appliance is equipped with a three-prong grounding plug. To minimize the risk of electric shock, use the plug with a standard three-slot grounding wall power outlet. If the power outlet does not include a grounding slot, have a qualified electrician replace the outlet before you use the room air conditioner.

WARNING: Changing the outlet without making the appropriate wiring changes will create an unsafe condition that could result in fire or electrical shock. Refer all such work to a licensed and qualified electrician.


WARNING: Do not cut or remove the grounding prong from the power plug.

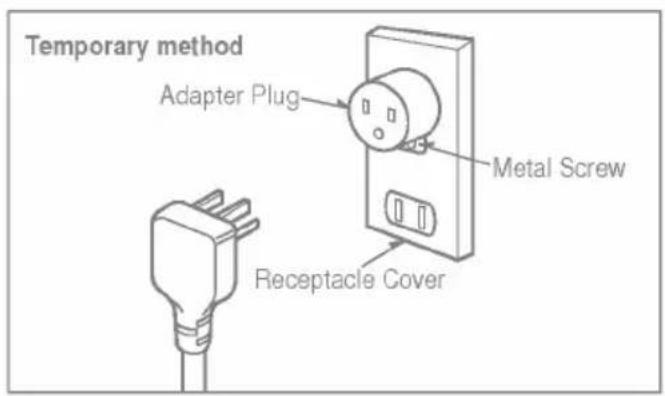
WARNING: Attaching the adapter ground terminal to the wall receptacle cover screw does not ground the appliance unless the cover screw is metal and not insulated, and the wall receptacle is grounded through the house wiring.

WARNING: If you have any doubt whether the air conditioner is properly grounded, have the wall receptacle and circuit checked by a qualified electrician.
Temporary Use of Adapter
We strongly discourage the use of an adapter due to potential safety hazards. For temporary connections, use only a UL-listed adapter, available from most local hardware stores. Ensure that the large slot in the adapter is aligned with the large slot in the receptacle for a proper polarity connection.
To disconnect the power cord from the adapter, use one hand on each to avoid damaging the ground terminal. Avoid frequently unplugging the power cord as this can lead to eventual ground terminal damage.

WARNING: Never use the appliance with a broken adapter.
Temporary Use of Extension Cord
We strongly discourage the use of an extension cord due to potential safety hazards. For temporary situations, use only CSA certified and UL listed 3-wire grounded extension cords, rated 15 A, 125 V.
| Type A:16EA(SCREW) | Type B:3EA(SCREW) | Type C:5EA(SCREW) | |||
 |  |  | |||
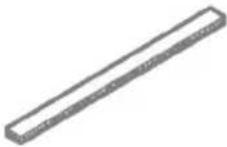
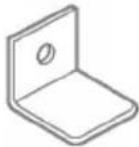
| Type D:2EA(NUT) | Type E:2EA(FRAME CURTAIN) | Type F:2EA(SILL SUPPORT) | Type G:2EA(BOLT) | ||
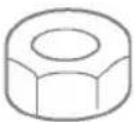 |  | 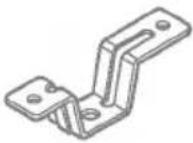 | 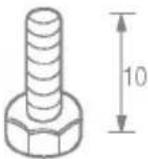 | ||
| Type H:1EA(FOAM-STRIP) | Type I:1EA(UPPER GUIDE) | Type J:1EA(FOAM-PE) | Type K:2EA(FRAME-GUIDE) | ||
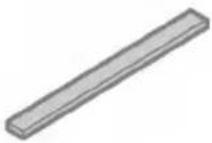 | 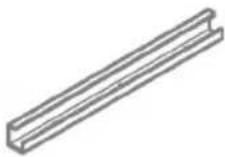 |  | 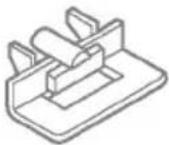 | ||
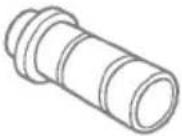
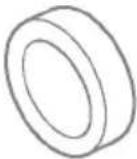
| Type L:1EA(WNDCW LOCKING BRACKET) | Type M:1EA(FOAM-PE) | Type N:1EA(DRAIN JOINT PIPE) | Type O:1EA(DRAIN WASHER) | ||
 |  |  |  | ||
Have the following tools available for installation:
* Screwdriver (Slotted and Phillips)
* Knife
* Pencil
* Ruler
* Hammer
* Level
Window Require
Size
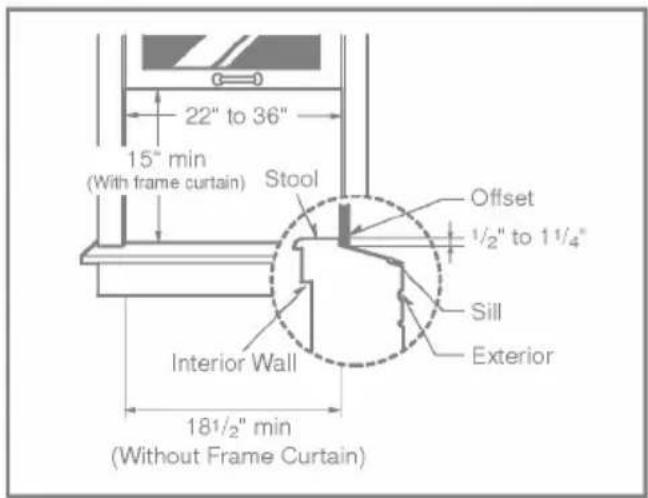
This room air conditioner is designed for installation in standard double-hung windows with actualopening widths from 22" to 36".
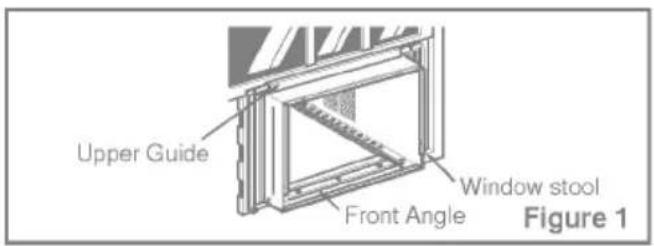
The upper and lower window sash must open sufficiently to allow a clear vertical opening of 15" from the bottom of the upper sash to the window stool.

WARNING: This product is a WINDOW AIR CONDITIONER.
As such, a standard single-hung or double-hung window is required for proper installation. Non-window installations, including using sleeves, holes in walls, and other installations are not recommended.
Select the best location
- To prevent vibration and noise, make sure the unit is installed securely and firmly
- Install the unit where the sunlight does not shine directly on the unit.
- The outside of the cabinet must extend outward for at least 11" and there should be no obstacles, such as a fence or wall, within 20" from the back of the cabinet because it will prevent heat radiation of condenser. Restriction of outside air will greatly reduce the cooling efficiency of the air conditioner.
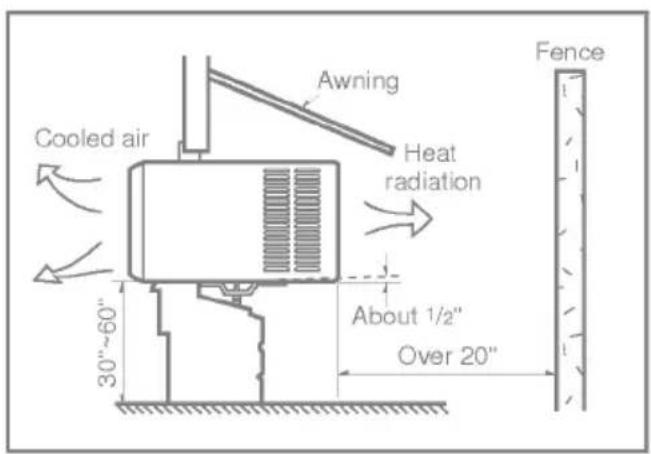
All side louvers of the cabinet must remain exposed to the outside of the structure.
- Install the unit a little slanted so the back is slightly lower than the front (about 1/2").
This will force condensed water to flow to the outside.
- Install the unit with the bottom about 30"\~60" above the floor level.
Preparation of C#173
- Remove the screws which fasten the cabinet at both sides and at the back.
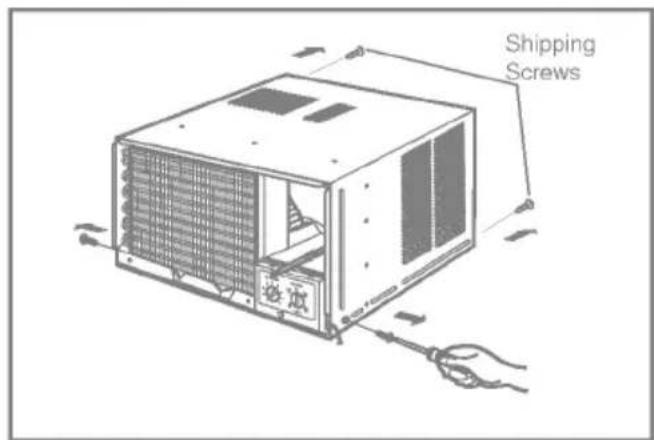
- Slide the unit from the cabinet by gripping the base pan handle and pulling forward while bracing the cabinet.
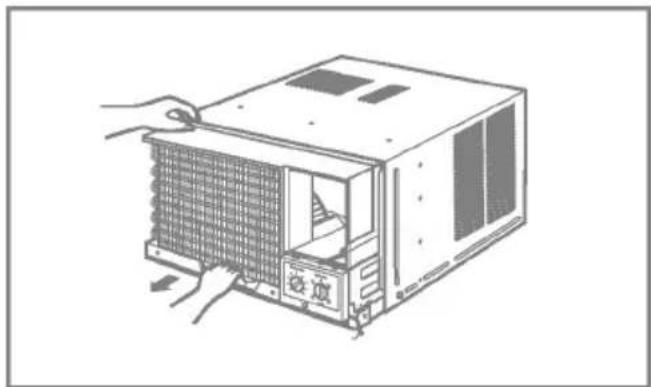
natural_image
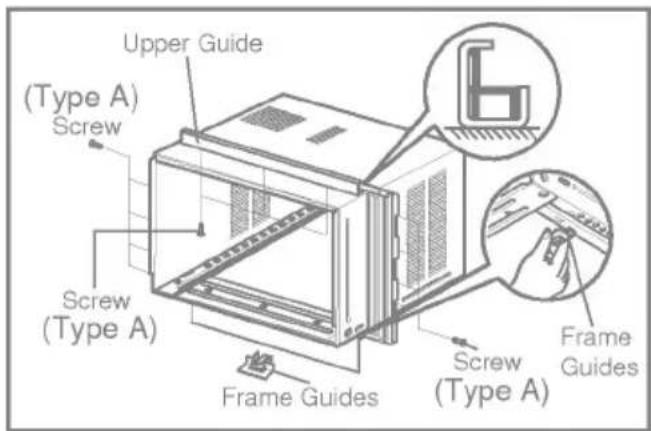
Illustration of a computer tower with a grid-patterned front panel and a door, being handled by hands (no text or symbols)- Cut the window sash seal to the proper length. Peel off the backing and attach the Foam-Pe to the underside of the window sash.
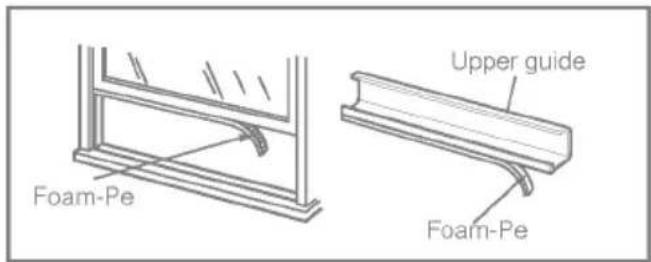
-
Remove the backing from the top Upper Guide Foam-PE and attach it to the bottom of the Upper Guide
-
Attach the Upper Guide onto the top of the cabinet with 3 Type A screws.
-
Insert the Frame Guides into the bottom of the cabinet.
-
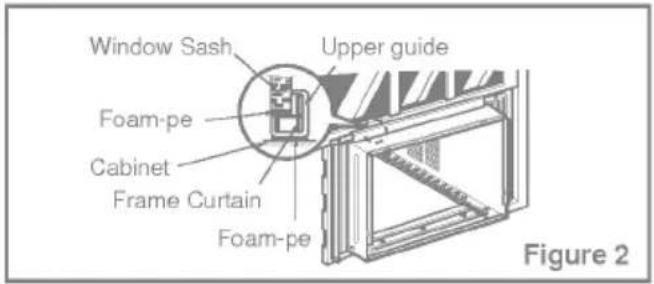
Insert the Frame Curtain into the Upper Guide and Frame Guides.
-
Fasten the curtains to the unit with 4 Type A screws.
Unit Installation

Caution: During the following step, hold unit firmly until window sash is lowered to top channel behind side panel frames. Personal injury or property damage may result if unit falls from window.
- Open the window. Mark a line on center of the window stool (or desired air conditioner location). Carefully place the cabinet on the window stool and align the center mark on the bottom front with the center line marked in the window stool.
- Pull the bottom window sash down behind the upper guide until it meets.
☐: Do not pull the window sash down so tightly that the movement of Frame Curtain is restricted.
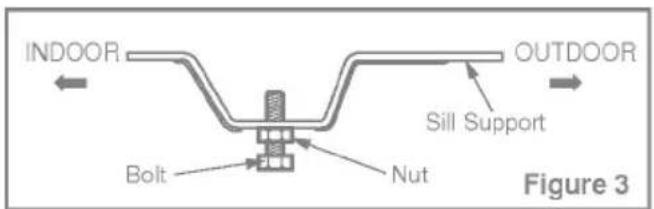
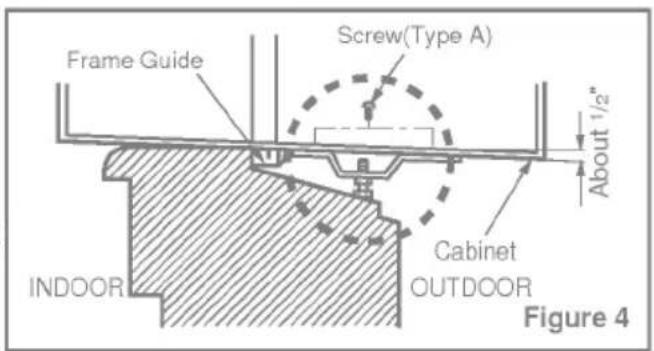
- Loosely assemble the sill support using the parts in Figure 3.
- Select the position that will place the sill support near the outer most point on sill (See Figure 4)
: Be careful when you install the cabinet (Frame Guides will be broken easily).
- Attach the sill support to the cabinet track hole in relation to the selected position using 2 Type A screws in each support(See Figure 4).
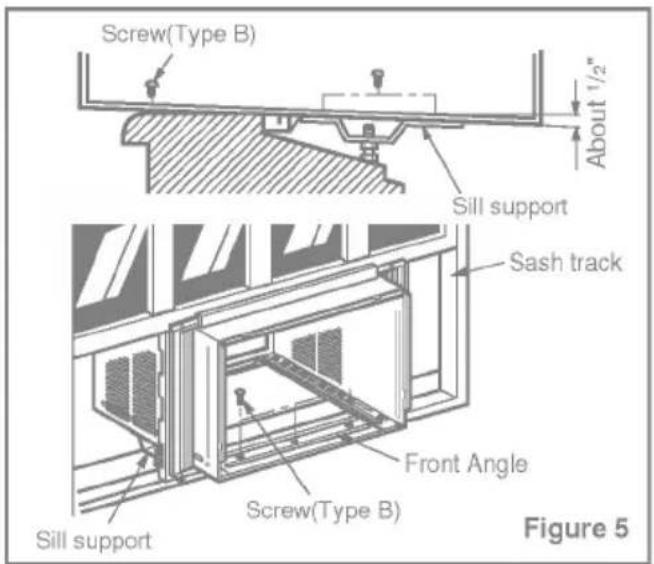
- The cabinet should be installed with a very slight tilt (about 1 /2") downward toward the outside (See Figure 5). Adjust the bolt and the nut of sill support for balancing the cabinet.
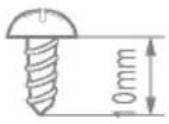
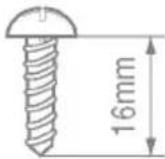
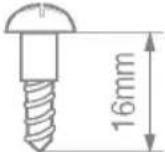
- Attach the cabinet to the window stool by driving the screws (Type B:Length sixteen millimeters and below.) through the front angle into window stool.
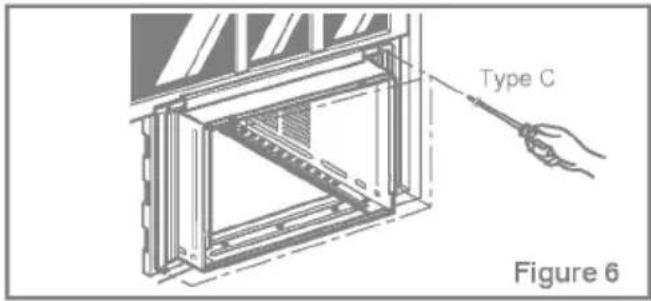
- Pull each Frame curtain fully to each window sash track, and repeat step 2.
- Attach each Frame Curtain the window sash using screws (Type C).
(See Figure 6)
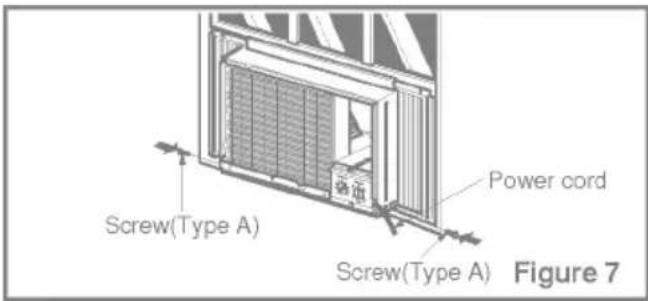
☐ : DO NOT DRILL A HOLE IN THE BOTTOM PAN. The unit is designed to operate with approximately 1/2" of water in bottom pan. - Slide the unit into the cabinet.
(See Figure 7)
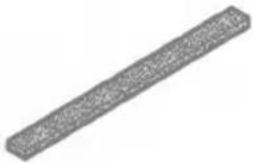
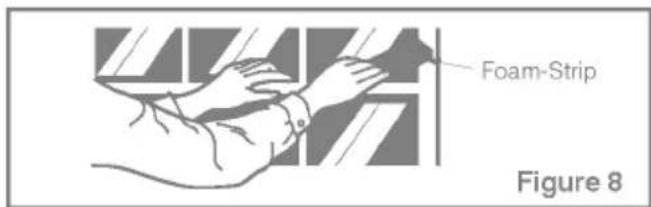
: For security purpose, reinstall screws(Type A) at cabinet's sides. - Cut the Foam-Strip to the proper length and insert between the upper window sash and the lower window sash. (See Figure 8)
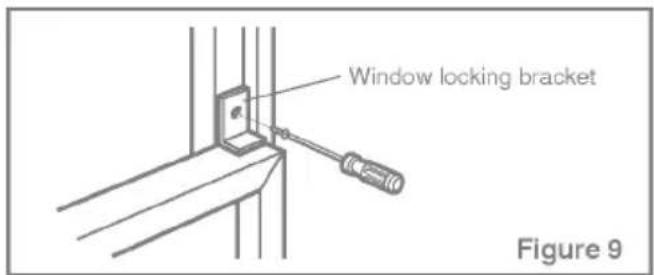
- Attach the Window Locking Bracket with a Type C screw. (See Figure 9)
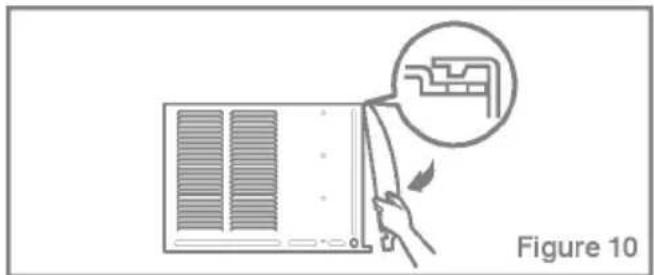
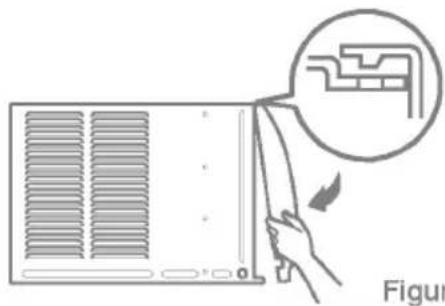
- Attach the front grille to the cabinet by inserting the tabs on the grille into the tabs on the front of the cabinet. Push the grille in until it snaps into place. (See Figure 10)
- Lift the inlet grille and secure it with a Type A screw through the front grille. (See Figure 11)
- Window installation of room air conditioner is now completed. See ELECTRICAL DATA for attaching power cord to electrical outlet.
natural_image
Diagram showing a hand holding a panel with a magnified inset of a mechanical component, labeled Figure 10 (no text or symbols on the diagram itself)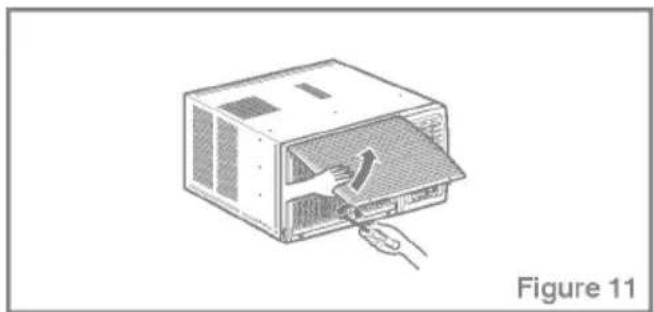
natural_image
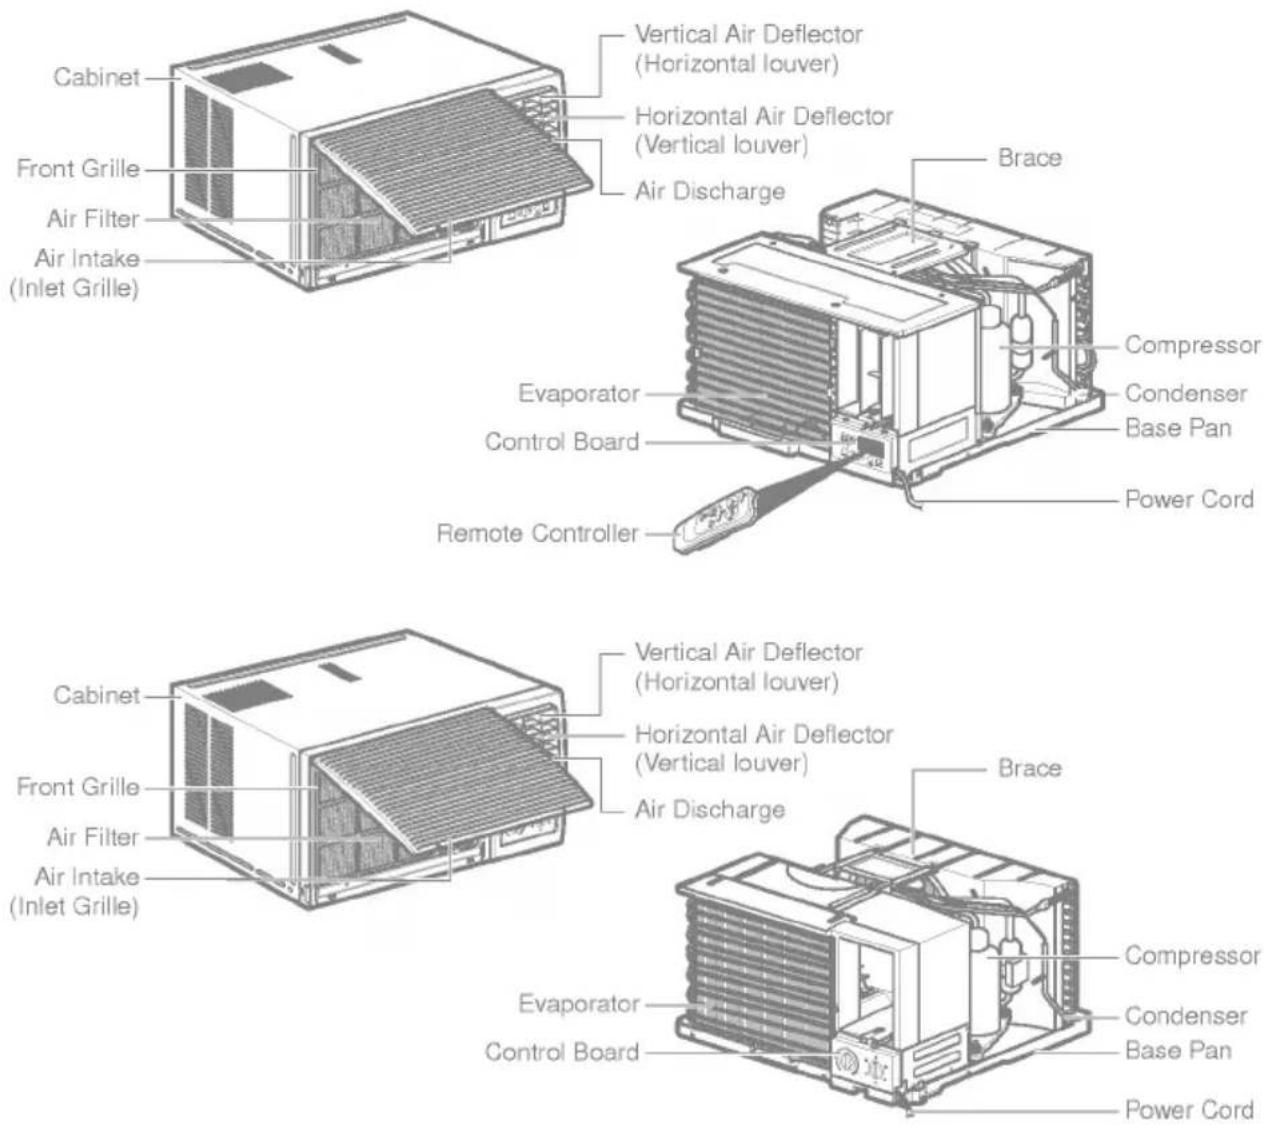
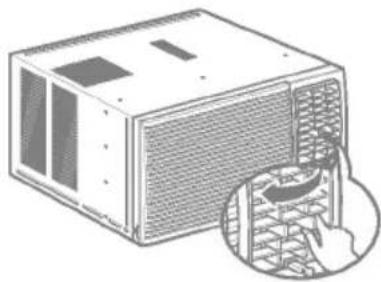
Illustration of a computer case with a hand inserting a cable into the opening (no text or symbols)Location and Function of Controls

CAUTION: If you turn off the air conditioner or switch from cooling to the fan, wait at least 3 minutes before setting to cooling again.
Operation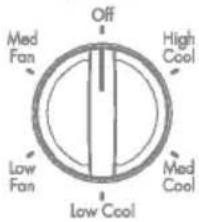 | Off - Turns air conditioner off.Med Fan - Med speed fan operation without cooling.Low Fan - Low speed fan operation without cooling.High Cool - Cooling with high speed fan operation.Med Cool - Cooling with med speed fan operation.Low Cool - Cooling with low speed fan operation. |
Thermostat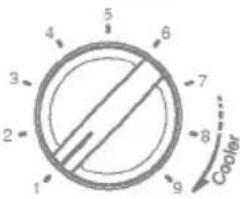 | This automatically controls the temperature of the indoor air.Turn the knob so that arrow points to the larger marks for greater cooling.Point the arrow to the smaller marks for more moderate cooling.(i.e. the higher the number, the greater the cooling) |
FOR NORMAL COOLING
- Turn the operation switch to the High Cool or the Low Cool setting.
- Set the thermostat control to the desired temperature mark (the mid-point is a good starting position). If the room temperature is not satisfactory after a reasonable time, adjust the control to a cooler or warmer setting, as appropriate.
FOR MAXIMUM COOLING
- Turn the operation switch to the High Cool setting.
- Set the thermostat control to the largest temperature mark.
- Turn the operation switch to the Low Cool setting.
- Set the thermostat control as needed.
Remote Control Nations
The controls look like this:
Controls
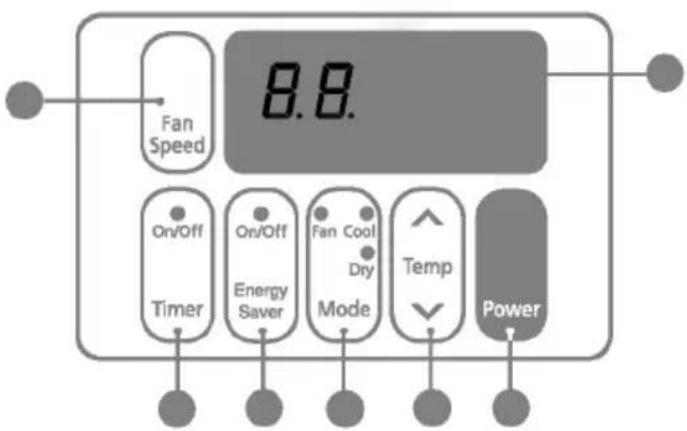
Power
• To turn the Set ON, push the button. To turn the Set OFF, push the button again.
• This button takes priority over any other buttons.
- When you first turn it on, the Set is on the High cool mode and the temp. at 22°C
● Temperature Setting
- This button can automatically control the temperature of the room. The temperature can be set within a range of 60°F to 86°F by 1 F. (16°C to 30°C by 1°C) Select the lower number for lower temperature of the moon.
Mode
- Evertime you push this button, it will toggle between COOL, FAN, and DRY.
● Energy Saver
- The fan stops when the compressor stops cooling. - Approximately every 3 minutes the fan will turn on and check the room air to determine if cooling is needed.
ON/OFF Timer
- Stopping Operation
• Each press of the button cycles through the options in this order: 1 Hour → 2 Hours → 3 Hours → 4 Hours → 5 Hours → 6 Hours → 7 Hours → 8 Hours → 9 Hours → 10 Hours → 11 Hours → 12 Hours → CANCE.
- The set temperature will be raised 1°C after 30 minutes and again after another 30 minutes.
- Starting Operation
• Each press of the button cycles through the options in this order: 1 Hour → 2 Hours → 3 Hours → 4 Hours → 5 Hours → 6 Hours → 7 Hours → 8 Hours → 9 Hours → 10 Hours → 11 Hours → 12 Hours → CANCE.
● Fan Speed
- Pressing the Fan Speed button toggles between Low and High speeds.
● Remocon Signal Receiver
Remote Control

CAUTION: The Remote Controller will not function properly if strong light strikes the sensor window of the air conditioner or if there are obstacles between the Remote Controller and the air conditioner.
Power
• To turn the Set ON, push the button. To turn the Set OFF, push the button again.
• This button takes priority over any other buttons.
- When you first turn it on, the Set is on the High cool mode and the temp. at 22°C
Temperature Setting
- This button controls the room temperature setting in a range between 16^ and 30^ in 1 increments.
Fan Speed
- Pressing the Fan Speed button toggles between Low and High speeds.
On/Off Timer
- Stopping Operation
• Each press of the button cycles through the options in this order: 1 Hour → 2 Hours → 3 Hours → 4 Hours → 5 Hours → 6 Hours → 7 Hours → 8 Hours → 9 Hours → 10 Hours → 11 Hours → 12 Hours → CANCE.
- The set temperature will be raised by 1°C after 30 minutes and again after another 30 minutes.
- Starting Operation
• Each press of the button cycles through the options in this order: 1 Hour → 2 Hours → 3 Hours → 4 Hours → 5 Hours → 6 Hours → 7 Hours → 8 Hours → 9 Hours → 10 Hours → 11 Hours → 12 Hours → CANCE.
Energy Saver
The fan stops when the compressor stops cooling.
- Approximately every 3 minutes the fan will turn on and check the room air to determine if cooling is needed.
Cool/Fan/Dry
- Everytime you push this button, It will toggle between COOL, FAN and DRY.
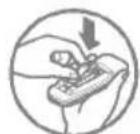
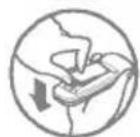
How to Insert Batteries
- Remove the cover from the back of the remotecontroller
- Insert two batteries. Be sure of the polarity when installing the batteries. Be sure that both batteries are new.
- Re-attach the cover.
Do not use recharge ablebatteries. Such batteries er from standard dry cellsin shape, dimensions, and performance.
Remove the batteries from the remote controller if the airconditioner is not going to be used for an extended length of time.
Additional Featu
Air Direction
The direction of air can be controlled wherever you want to cool by adjusting the horizontal louver and the vertical louver.
• HORIZONTAL AIR-DIRECTION CONTROL
The horizontal air direction is adjusted by rotating the vertical louver right or left.
• VERTICAL AIR-DIRECTION CONTROL
The vertical air direction is adjusted by rotating the horizontal louver forward or backward.
natural_image
Illustration of a computer unit with a magnified inset showing a hand inserting a component (no text or symbols present)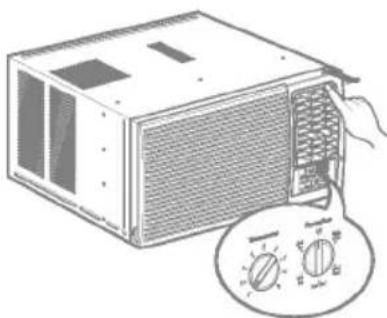
natural_image
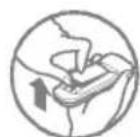
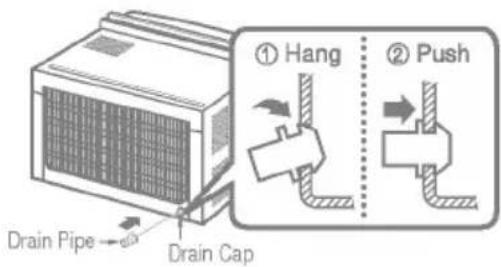
Illustration of a computer unit with a hand inserting a fan into the front panel, accompanied by a circular dial indicator (no text or symbols on the device itself)Drain Pipe
In humid weather, excess water may cause the Base Pan to over flow.
Todrain the water, remove the Drain Cap and secure the Drain Pipe to the rear hole of the Base Pan.
Press the drain pipe into the hole by pushing down and a way from the fins to avoid injury.
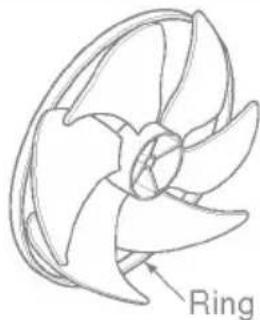
This air conditioner is equipped with aslinger fan.(See drawing, below.) The fan has an outer ring that runs in the water that collects in the base panif it gets deep. That condensate is thenpicked up by the fan and expelled through the condenser, making the air conditioner more efficient.
natural_image
Line drawing of a mechanical component with labeled 'Ring' (no other text or symbols)
CAUTION: Be careful when inserting the drain pipe. Push away from the sharp fin area to avoid slipping injuring yourself.
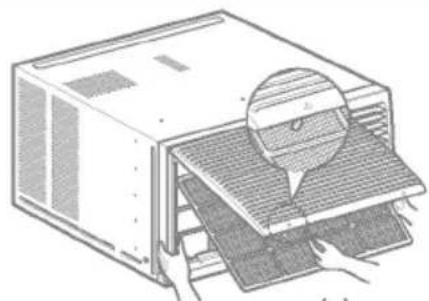
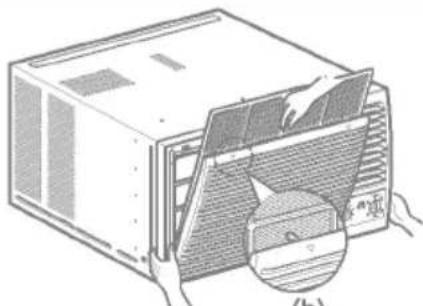
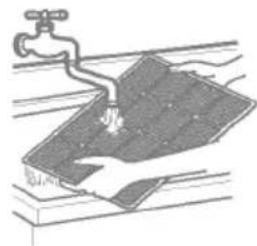
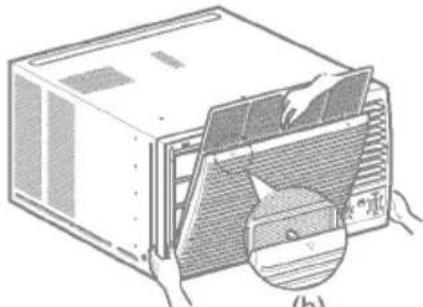
Air Filter
Check the air filter at least twice a month to see if cleaning is necessary. Trapped particles in the filter can build up and block the air flow, reducing cooling capacity and causing an accumulation of frost on the evaporator. To clean the air filter:
natural_image
Illustration of a computer tower with hands installing or adjusting the base panel (no text or symbols visible)(a)
natural_image
Illustration of a computer unit with hands installing or maintaining a fan panel, showing internal structure and a magnified inset (no text or symbols)(b)
natural_image
Illustration of a faucet spraying water onto a surface with a hand holding a tool (no text or symbols)(c)
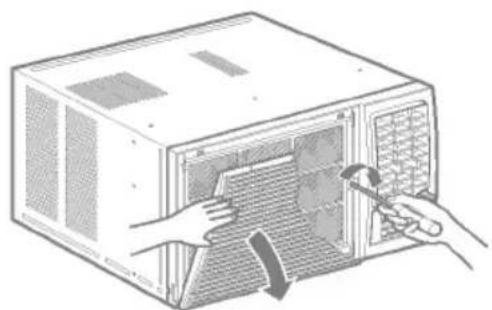
- Lift the inlet grille.
- Remove the air filter from the front grille by pulling the air filter up slightly.
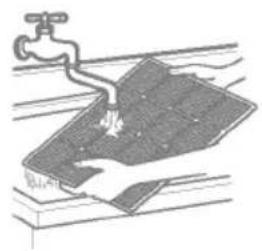
- Wash the filter using lukewarm water below 40 °C (104 °F).
- Gently shake the excess water from the filter and replace.
☐ :DO NOT operate the air conditioner without a filter because dirt and lint will clog it and reduce performance.
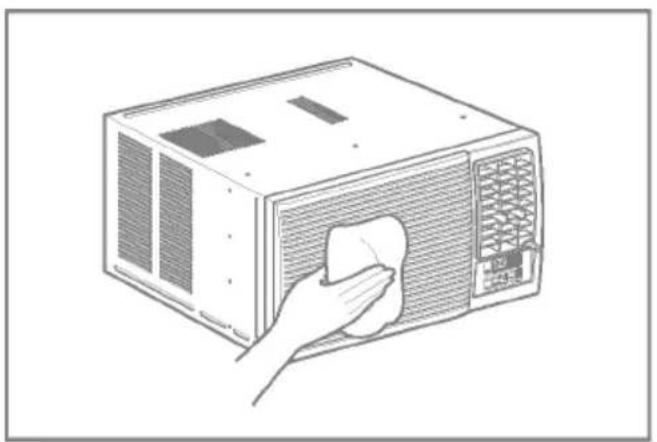
Cleaning The Air Conditioner
The front grille and Inlet grille may be wiped with a cloth dampened in a mild detergent solution. The cabinet may be washed with mildsoap or detergent and lukewarmwater, then polished with Liquid Waxfor Appliances.
To ensure contin use peak efficiency, the condenser coils (outside of unit) should be checked periodically and cleaned if clogged with soot or dirt from the atmosphere.
natural_image
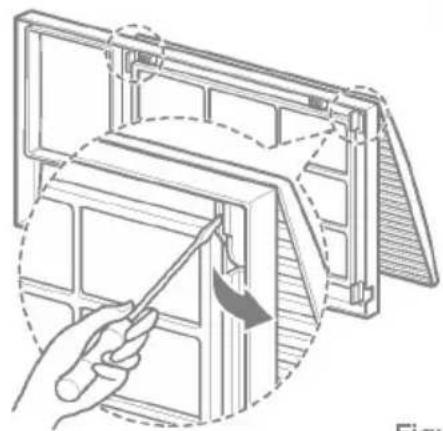
Line drawing of a hand cleaning a microwave oven with a cloth (no text or symbols)How to Remove Front Grille
- If you want to pull out the filter upward, open the inlet grille slightly.
Turn inside out the front grille.
Disassemble the inlet grille from the front grille with separating the hinged part by inserting a "-" type screw-driver tip.
Rotate the inlet grille 180 degrees and insert the hooks into the lower holes of front grille.
Then, insert the filter.
(See Figure12, 13)
natural_image
Diagram of a hand using a tool to adjust or install a component, showing structural components without any text or symbols.Figure 12
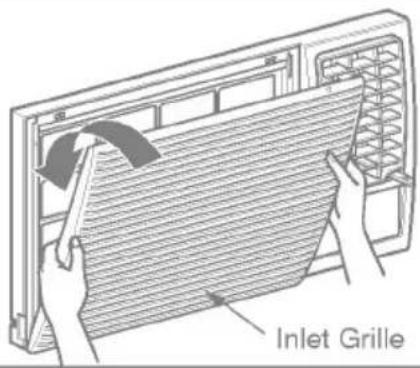
Figure 13
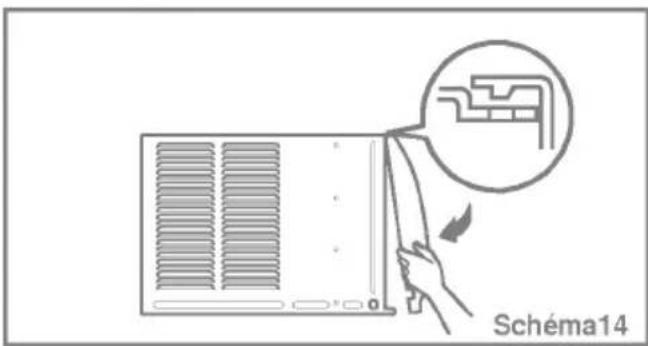
- Attach the front grille to the cabinet by inserting the tabs on the grille into the tabs on the front of the cabinet. Push the grille in until it snaps into place. (See Figure14)
natural_image
Diagram of a person inserting a component into an air conditioner unit, with no text or symbols present.Figure 14
-
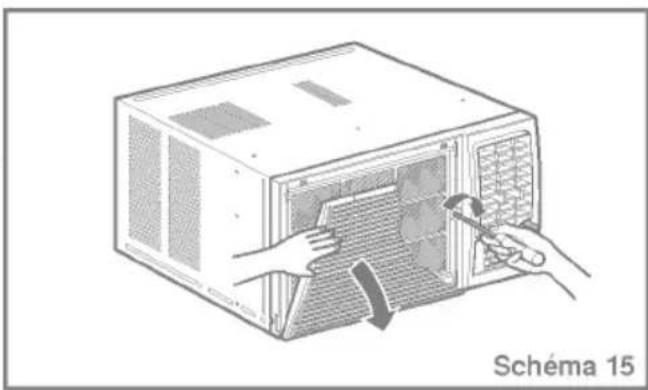
Lift the inlet grille and secure it with a type A screw through the front grille. (See Figure 15)
-
If you want to pull out the filter downward, use the reversible inlet grille without change. (The grille is already assembled for that way.)
natural_image
Illustration of hands installing or adjusting a microwave oven with a tool (no text or symbols visible)Figure 15
Problems and Solutions
Before Calling for Service
If you have problems with your air conditioner, read the following information and try to solve the problem. If you cannot find a solution, turn off the air conditioner and contact your dealer.
Air conditioner does not operate
- Ensure that the air conditioner is plugged into a proper outlet.
- Check the fuse or circuit breaker.
- Check whether the voltage is unusually high or low.
Air does not feel cold enough on the cooling setting
- Ensure that the temperature settings are correct.
- Check to see if the air filter is clogged with dust If so, clean the filter.
- Ensure that the air flow from the outside is not obstructed and that there is a clearance of over 20" between the back of the air conditioner and the wall or fence behind it.
- Close all doors and windows and check for any source of heat in the room.
Before calling for service, please review the following list of common problems and solutions.
The air conditioner is operating normally when:
- You hear a pinging noise. This is caused by water being picked up by the fan on rainy days or in highly humid conditions. This feature is designed to help remove moisture in the air and improve cooling efficiency. See the section on Slinger Fan, page 19.
- You hear the thermostat click. This is caused by the compressor cycle starting and stopping.
- You see water dripping from the rear of the unit. Water may be collected in the base pan in highly humid conditions or on rainy days. This water overflows and drips from the rear of the unit.
- You hear the fan running while the compressor is silent. This is a normal operational feature.
#n #reshooting
The air conditioner may be operating abnormally when:
| Air conditioner does not star | The air conditioner is unplugged. | Make sure the air conditioner plug is pushed completely into the outlet. |
| The fuse is blown/circuit breaker is tripped. | Check the house fuse/circuit breaker box and replace the fuseor reset the breaker. | |
| Power failure. | If power failure occurs, turn themode control to Off.When power is restored, wait 3 minutes to restart the air conditioner to prevent tripping ofthe compressor overload. | |
| Air conditioner does not cool as it should | Airflow is restricted. | Make sure there are no curtains, blinds, or furniture blocking the front of the air conditioner. |
| The thermostat may not be set high enough. | Turn the knob to a higher number.The highest setting provides maximum cooling. | |
| The air filter is dirty. | Clean the filter at every 2 weeks.See the care and Maintenance section. | |
| The room may have been hot. | When the air conditioner is first turned on, you need to allow time for the room to cool down. | |
| Cold air is escaping. | Check for open furnace floor registers and cold air returns. | |
| Cooling coils have iced up. | See Air Conditioner Freezing Up below. | |
| Air conditioner freezing up | Ice blocks the air flow and stops the air conditioner from cooling the room. | Set the mode control at High Fan or High Cool with thermostat at 1or 2. |
* You can refer to the Energy Star program in detail at www.energystar.gov.
Précautions....25
natural_image
Illustration of people enjoying a picnic at a table with sun and palm trees in the background (no text or symbols)natural_image
Illustration of a server rack with a monitor and warning symbol (no text or labels)natural_image
Illustration of a child peeking from behind a computer monitor, with hands reaching out (no text or symbols)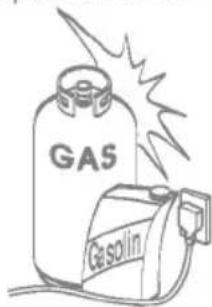
natural_image
Illustration of a person using a computer to interact with a crying child (no text or symbols present)■ Fonctionnement
natural_image
Illustration of a cartoon character inside a computer connected to an electrical plug and warning symbol (no text or labels)natural_image
Illustration of a child inside a movie box and a broken phone with a prohibition symbol (no text or labels)natural_image
Illustration of a phone with wings and a plug, accompanied by a prohibition symbol (no text or labels)natural_image
Illustration of a person reacting to a TV screen with an exclamation mark, next to a door with smoke trail (no text or symbols)natural_image
Illustration showing a smiling face pointing at a computer screen, an exclamation mark, and a woman looking out of a window (no text or symbols)natural_image
Illustration showing a child inside a microwave with a hand holding a phone, and a person holding a prohibition sign (no text or symbols present)
PRECAUTION
Installation
natural_image
Illustration of a box with a hand holding a bag, next to an open trash bin and a prohibition symbol (no text or labels)natural_image
Illustration of a hand holding an electrical plug connected to a device with a warning symbol (no text or labels present)natural_image
Illustration of a person standing beside a computer monitor and a person with a backpack, both with thought bubbles containing a small screen icon (no text or symbols present)natural_image
Illustration of a woman reacting to a photo of a smiling child inside a box, with thought bubbles showing a screen and an exclamation mark (no text or symbols)natural_image
Illustration of a small animal-shaped container next to a potted plant with flowers (no text or symbols)natural_image
Illustration of a person reacting to a device with a prohibition symbol, no text or symbols presentMise en route
natural_image
Illustration of a computer case with a hand inserting a cable into the front panel (no text or symbols visible)natural_image
Illustration of a computer case with a hand inserting a cable into the opening (no text or symbols)● Power. Alimentation
natural_image
Illustration of a computer unit with a hand inserting a fan into the air gap (no text or symbols)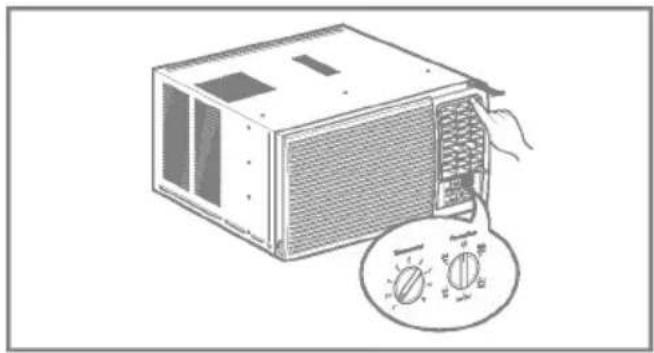
natural_image
Illustration of a microwave oven with a rotary dial and fan (no text or symbols)natural_image
Illustration of a computer oven with hands installing or adjusting the interior panel (no text or symbols visible)(a)
natural_image
Illustration of a computer unit with hands installing or removing the panel, showing internal structure and a magnified inset (no text or symbols)(b)
natural_image
Illustration of a hand cleaning a tiled surface with a faucet (no text or symbols)(c)
:DO NOT operate the air conditioner without a filter because dirt and lint will clog it and reduce performance.
NETTOYER LE CLIMATISEUR
natural_image
Line drawing of a hand cleaning a microwave oven with a cloth (no text or symbols)Comment retiree mobile de frontal
natural_image
Diagram of a hand using a tool to adjust or install a device panel, labeled 'Schéma 12' (no text on diagram itself)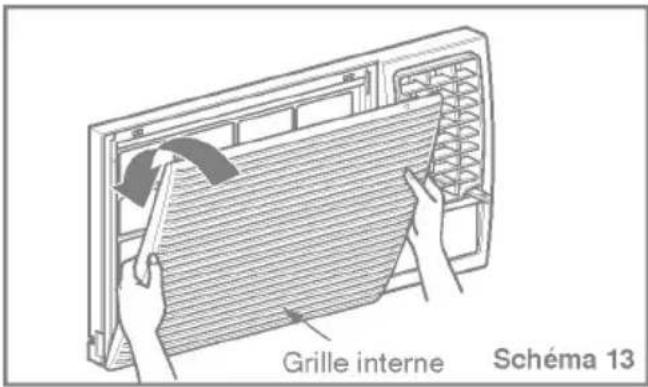
natural_image
Illustration of hands installing or adjusting a microwave oven into a rack (no text or symbols visible)Should your product prove to be defective in materials or workmanship under normal use during the warranty period listed below, which warranty period runs from the original date of purchase, LG Electronics will, at its option, repair or replace the product at no charge to you.
The warranty is valid only to the original purchaser of the product, during the warranty period, as long as it is in Canada.
GoldStar Room Air Conditioner Warranty Period
| Components | Parts | Labor |
| All Parts | 1 Years | 1 Years (In-Home Service) |
| Compressor | 5 Years | 1 Years (In-Home Service) |
No other warranty is applicable to this product. THE DURATION OF ANY IMPLIED WARRANTIES, INCLUDING THE IMPLIED WARRANTY OF MERCHANTABILITY, IS LIMITED TO THE DURATION OF THE EXPRESS WARRANTY HEREIN. LG ELECTRONICS SHALL NOT BE LIABLE FOR THE LOSS OF USE OF THE PRODUCT, INCONVENIENCE, LOSS OR ANY OTHER DAMAGES, DIRECT OR CONSEQUENTIAL, ARISING OUT OF THE USE OF OR INABILITY TO USE, THIS PRODUCT OR FOR ANY BREACH OF ANY EXPRESS OR IMPLIED WARRANTY, INCLUDING THE IMPLIED WARRANTY OF MERCHANTABILITY OR FITNESS FOR A PARTICULAR PURPOSE, APPLICABLE TO THIS PRODUCT.
Some Provinces or Territories do not allow for the exclusion or limitation of incidental or consequential damages of limitations on how long an implied warranty lasts; so these limitations or exclusions may not apply to you.
This warranty gives you, (the original purchaser) specific legal rights and you may also have other rights, which vary from province to province or territory to territory.
THE ABOVE WARRANTY DOES NOT APPLY TO:
- Service trips to your home to deliver and pickup, install, instruct or replace house fuses, or connect house wiring or plumbing, or correction of unauthorized repairs.
- Damage to the product caused by accident, pest, fire, floods or acts of God.
- Repairs when your GoldStar product is used in other that normal, single-family household use or contrary to the instructions outlined in the product's owners manual.
- Damage resulting from accident, alteration, misuse, abuse, or improper installation or maintenance.
- Products with altered or removed serial numbers.
If the product is installed outside the normal service area, any cost of transportation involved in the repair of the product, or the replacement of a defective part, shall be borne by you (the owner).
CUSTOMER ASSISTANCE INFORMATION:
| To obtain Warranty Coverage: | Retain your Bill of Sale to prove the date of purchase.A copy of your Sales Receipt must be submitted when warranty service is provided.This warranty is invalid if the factory applied serial number has been altered or removed from the product. |
| To obtain Product or Customer Service Assistance: | Call 1-888-LG-CANADA (542 2623)Press the appropriate menu option, and have your product model and serial numbers and your postal code ready. |
| To obtain the nearest Authorized Service Center: | Access our web-site at: www.LG.ca (Service Option) or Call 1-888-LG-CANADA (542 2623)Press the appropriate menu option, have your product model & serial numbers & your postal code ready. |