25058 - Toys Plum - Free user manual and instructions
Find the device manual for free 25058 Plum in PDF.

User questions about 25058 Plum
0 question about this device. Answer the ones you know or ask your own.
Ask a new question about this device
Download the instructions for your Toys in PDF format for free! Find your manual 25058 - Plum and take your electronic device back in hand. On this page are published all the documents necessary for the use of your device. 25058 by Plum.
USER MANUAL 25058 Plum
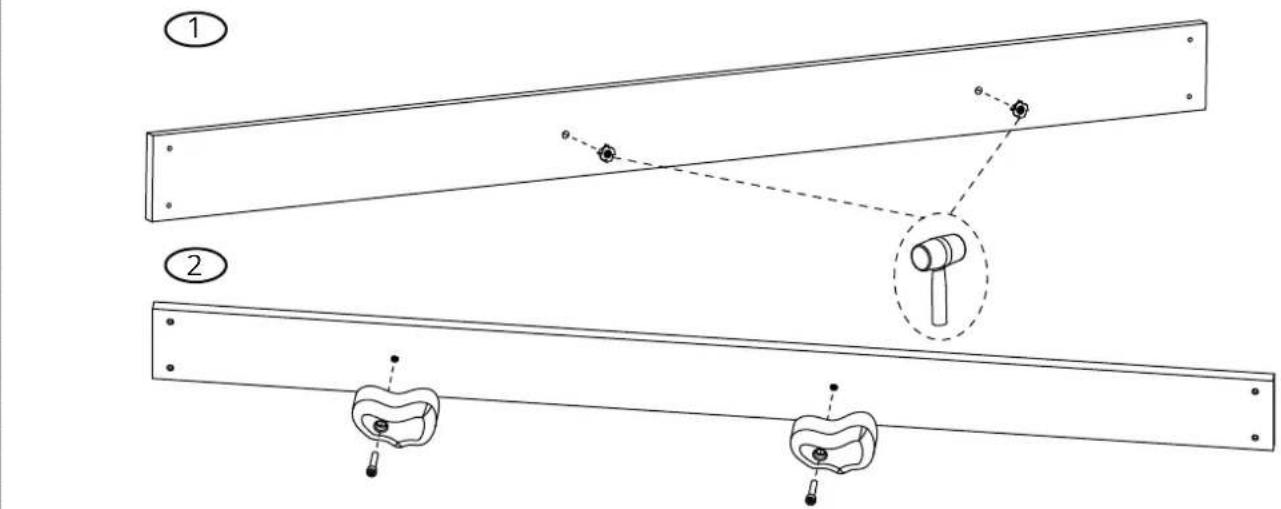
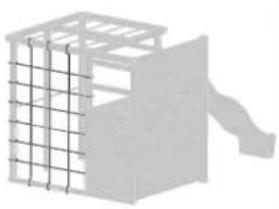
Climbing Cube Play Centre Assembly Instructions
natural_image
Wooden playground structure with camouflage pattern and climbing rope, no visible text or symbols

WARNING:
Assembly by an adult.
ATTENTION:
EN Thank you for purchasing from Plum® Plum® are the playtime specialists providing the fuel for imaginations to flourish. For over 30 years we've been inspiring fun across the globe. We are passionate about encouraging play in a fun yet safe environment, allowing children freedom of play and parents peace of mind.
To ensure the safety of you, the installer and your children, it is important that these instructions are read fully before commencing the positioning and installation of this product.
Timber Advice
This product has been made from premium timber. Great care has been taken in selecting, treating and machining the timber before it is presented to you. Timber is a natural product and as such may experience changes throughout the course of its life. This means it may:
- Develop openings (gaps, slits, apertures, cracks, splits) along the line of the grain. These openings are due to the difference in moisture content between the internal and outer surfaces of the timber. This is to be expected, is totally acceptable and will not affect the integral strength, life or guarantee of the product.
- Warp and distort its shape. Any distortion will be slight and will not affect the safety or enjoyment of this product.
- Fade as the timber reacts with sunlight. The timber should be treated with a proprietary product to act as a protective barrier, i.e. a water repellent, on an annual basis.
- After first year of service treat product with a good quality treatment safe for children's use.
Biocidal Products Regulations EU 528/2012
Wolmanit Cx-10 treated wood is a treated article that incorporates biocidal products: Copper hydroxide carbonate/II/boric acid. They protect wood against decay/rot/insect attack. Keep away from food, drink and animal feeding stuffs.
Routine Maintenance
During long periods of non use (particularly during the winter) it is suggested that attachments such as swings are dismantled and stored in a dry environment. This will prolong the life of such attachments.
WARNING!
Minimum user age 3+ years · Adult assembly required · Adult supervision required at all times · Maximum user weight 50kg · Only for domestic use · Outdoor use only · Not suitable for children under 36 months - small parts, choking hazard - fall hazard · Retain assembly instruction for future use · Place on a level surface at least 2m from any structure or obstruction such as fence, garage, house, overhanging branches, laundry lines or electrical wires · Must not be installed over concrete, asphalt or any other hard surface · The anchor is to be fitted to prevent any lifting of the frame during use · It is advised that on a regular basis (i.e. at the beginning of the season and monthly thereafter) all main parts/fixings are checked as secure, well oiled (if metallic), have no sharp points/edges and are intact. Replace, oil and/or tighten when necessary. Failure to do so may result in an injury or hazard · Any attachments such as swings, chains, ropes, etc must be regularly examined for evidence of deterioration. Replace any attachments if there are signs of deterioration. Failure to do so may result in an injury or hazard · Please do not make any modifications to the product, it may result in an injury or hazard · Do not overtighten nuts and screws as this may cause them to shear and potentially cause structural failure · It may be appropriate to ensure that the slide is not facing the main direction of the sun to prevent the surface being uncomfortably warm · Please keep animals at a safe distance from this product.

natural_image
Grid of black-and-white icons representing various tools (shovels, ladder, flashlight, screwdriver, hammer, drill, wrench) without any text or labels.
natural_image
Black-and-white photo of a smiling boy with a painted face on her cheek, swinging on a rope in an outdoor playground setting (no text or symbols visible)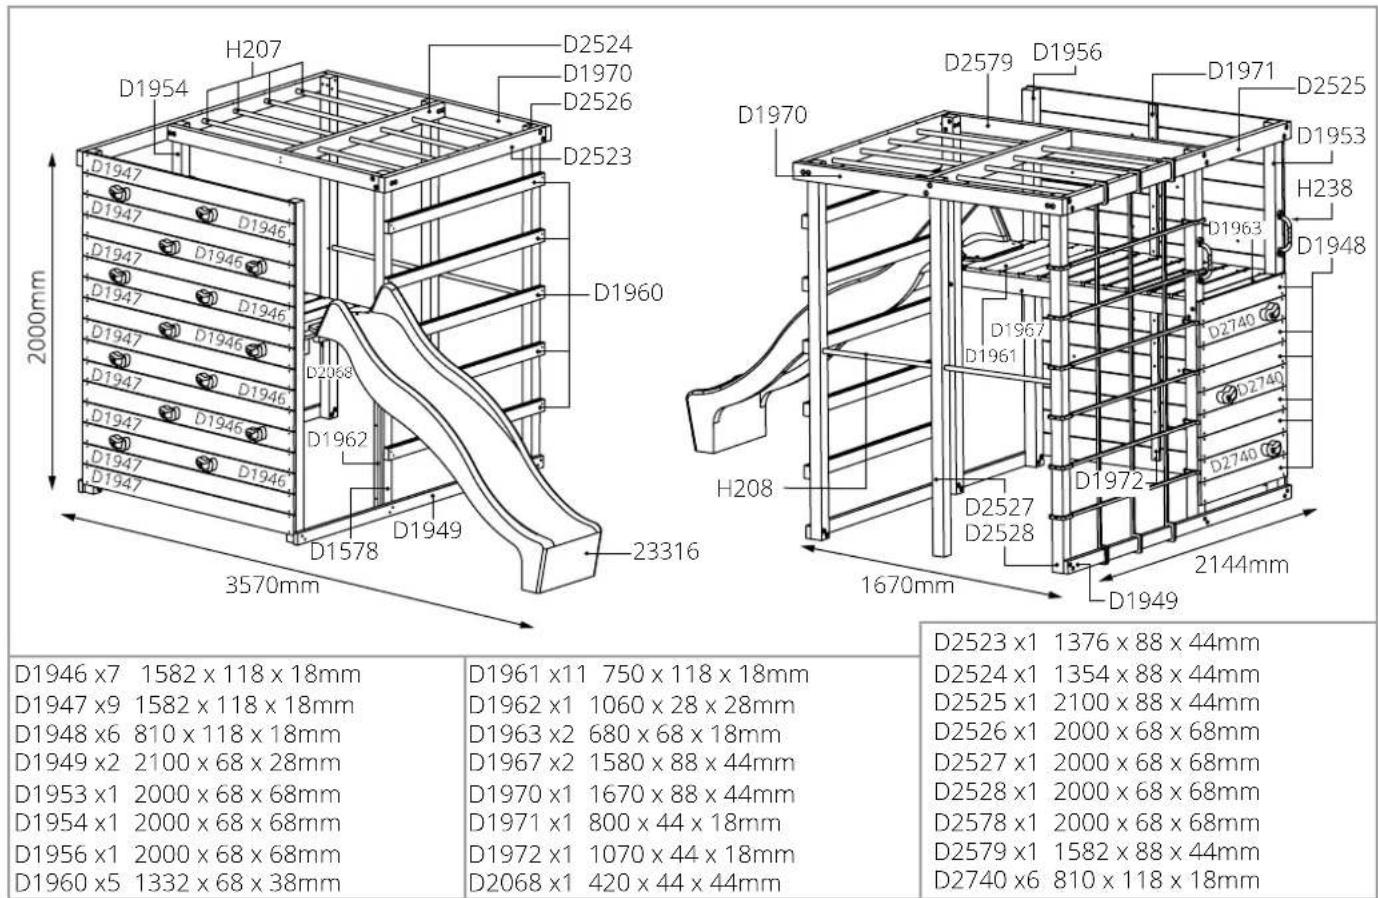
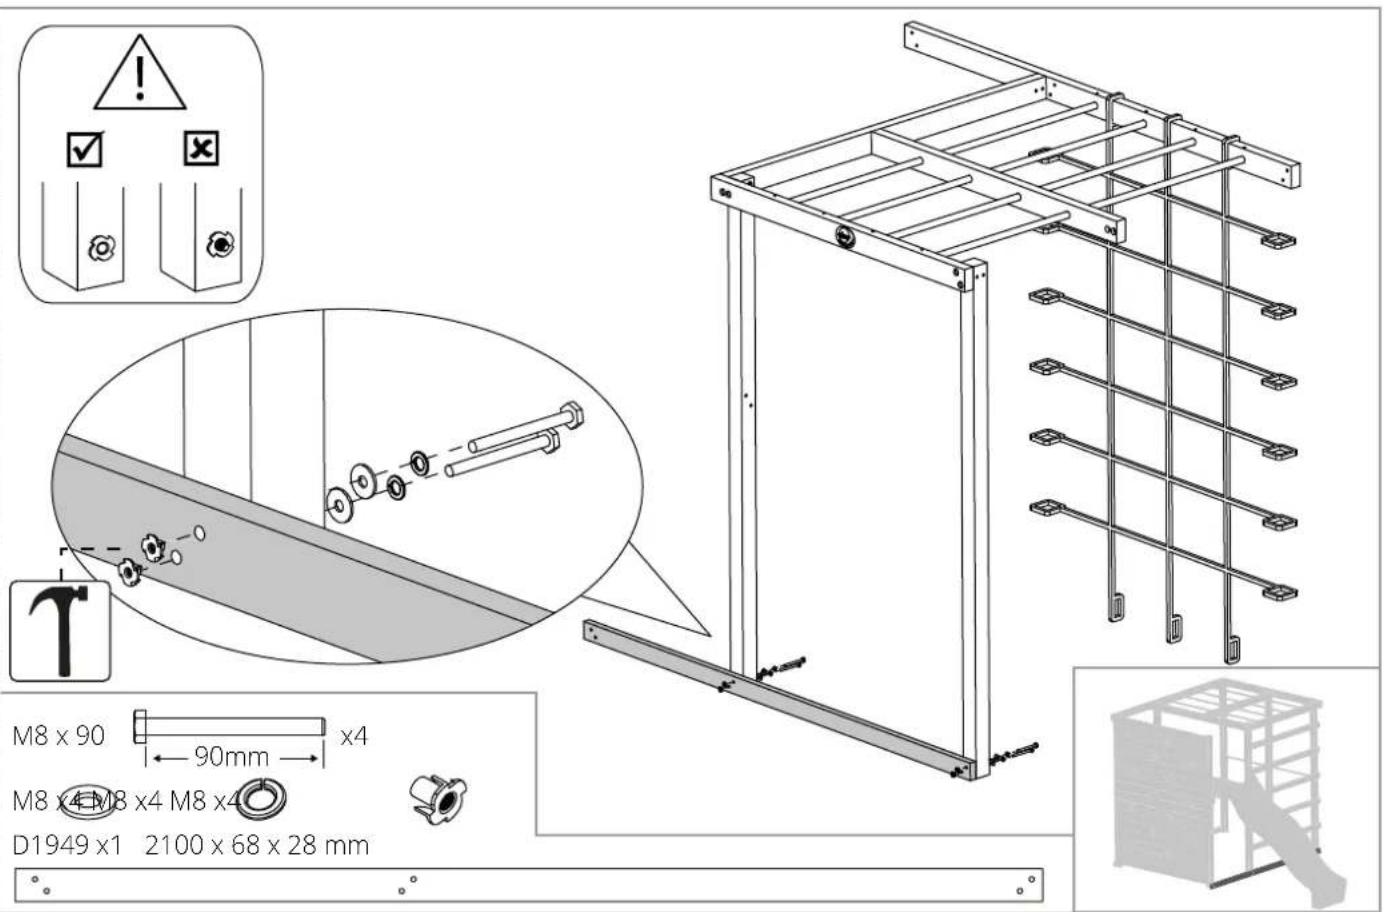
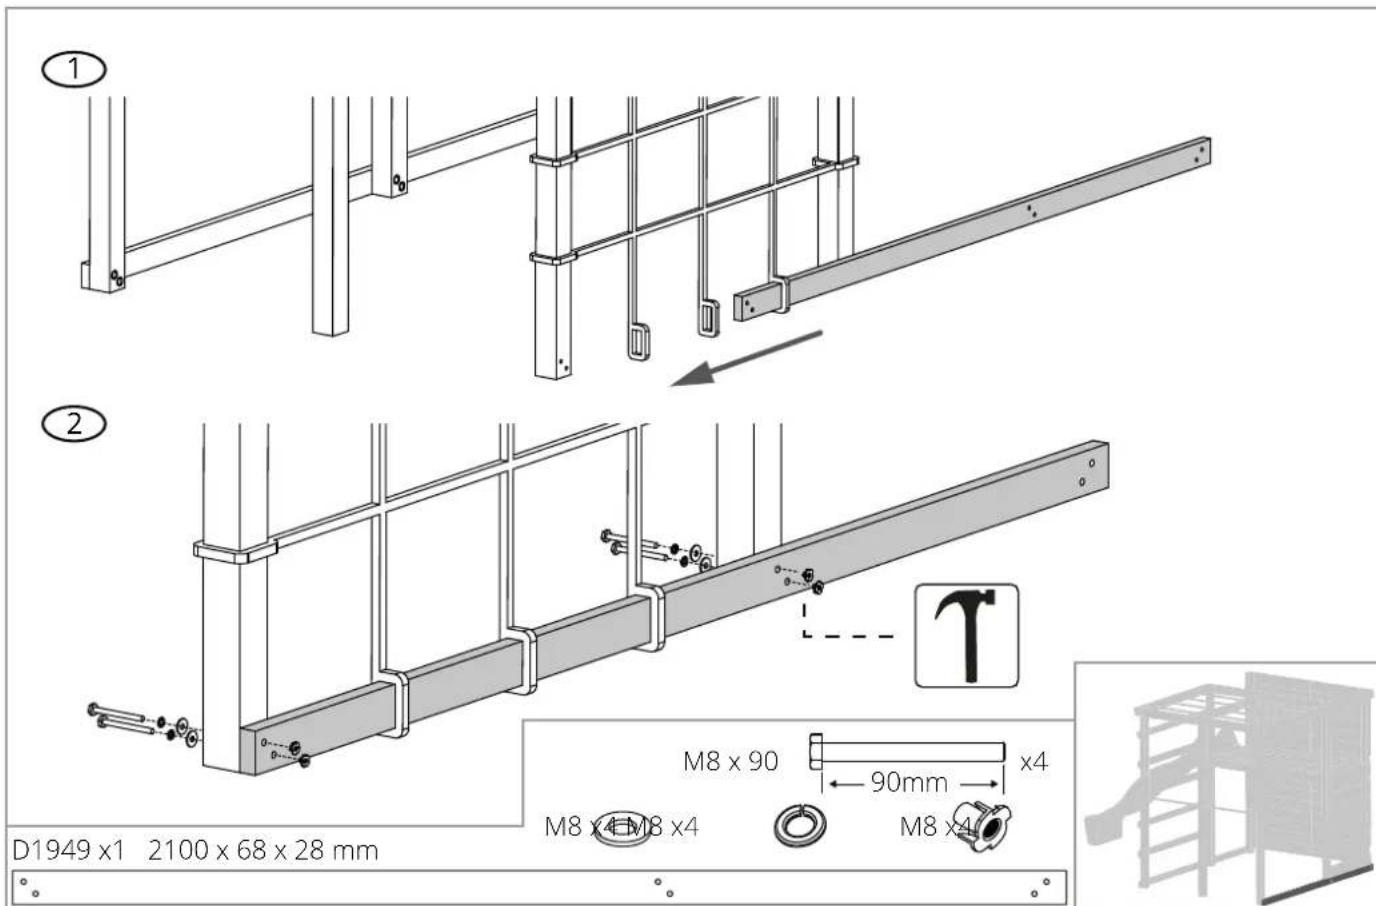
| 1 | D1949 x2 82.68 x 2.68 x 1.10 in (2100 x 68 x 28 mm) | |||||
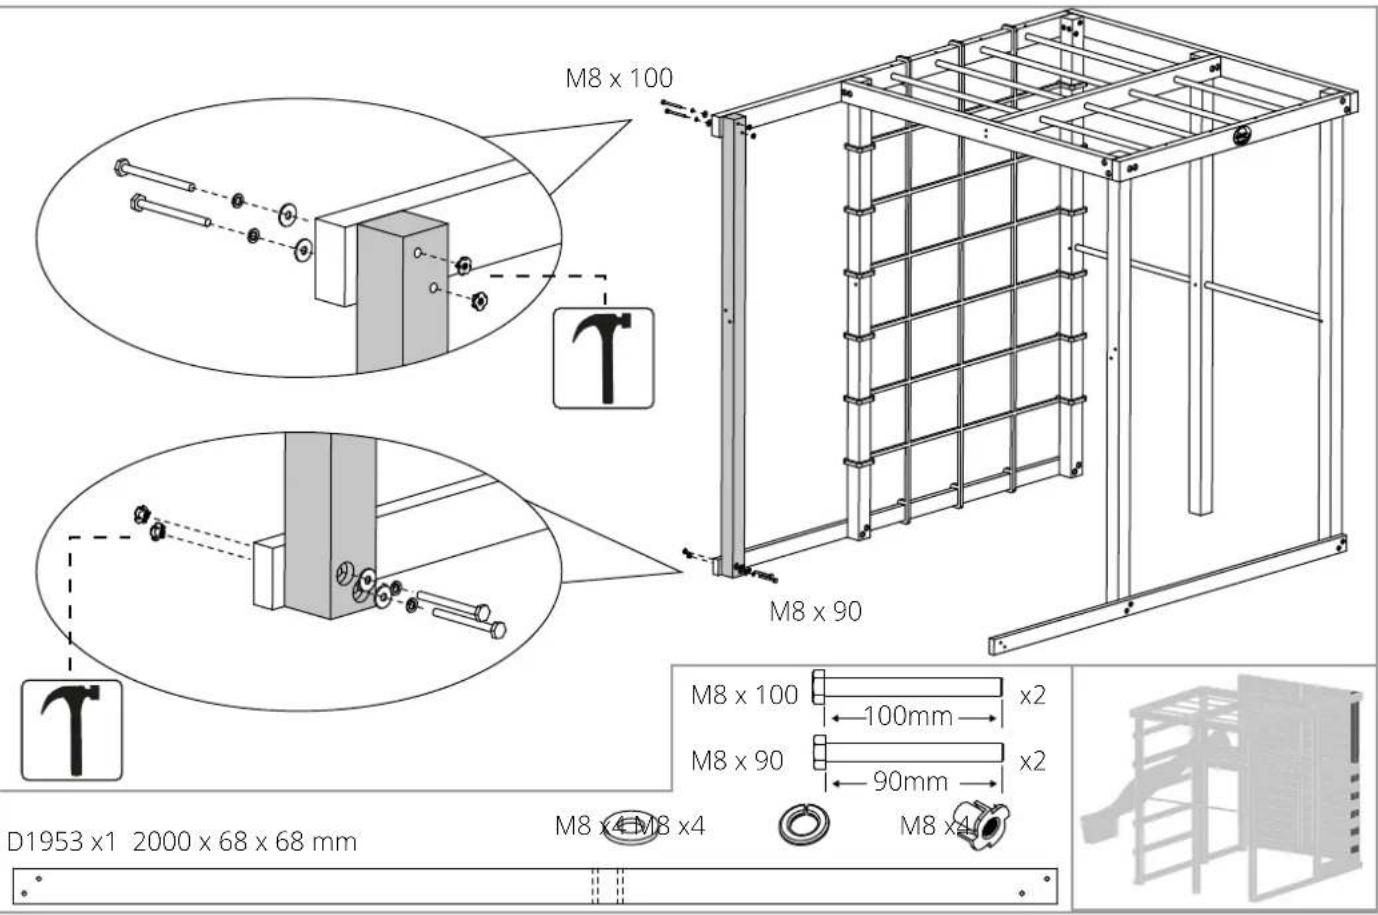
| D1953 x1 78.74 x 2.68 x 1.10 in (2000 x 68 x 68 mm) | ||||||
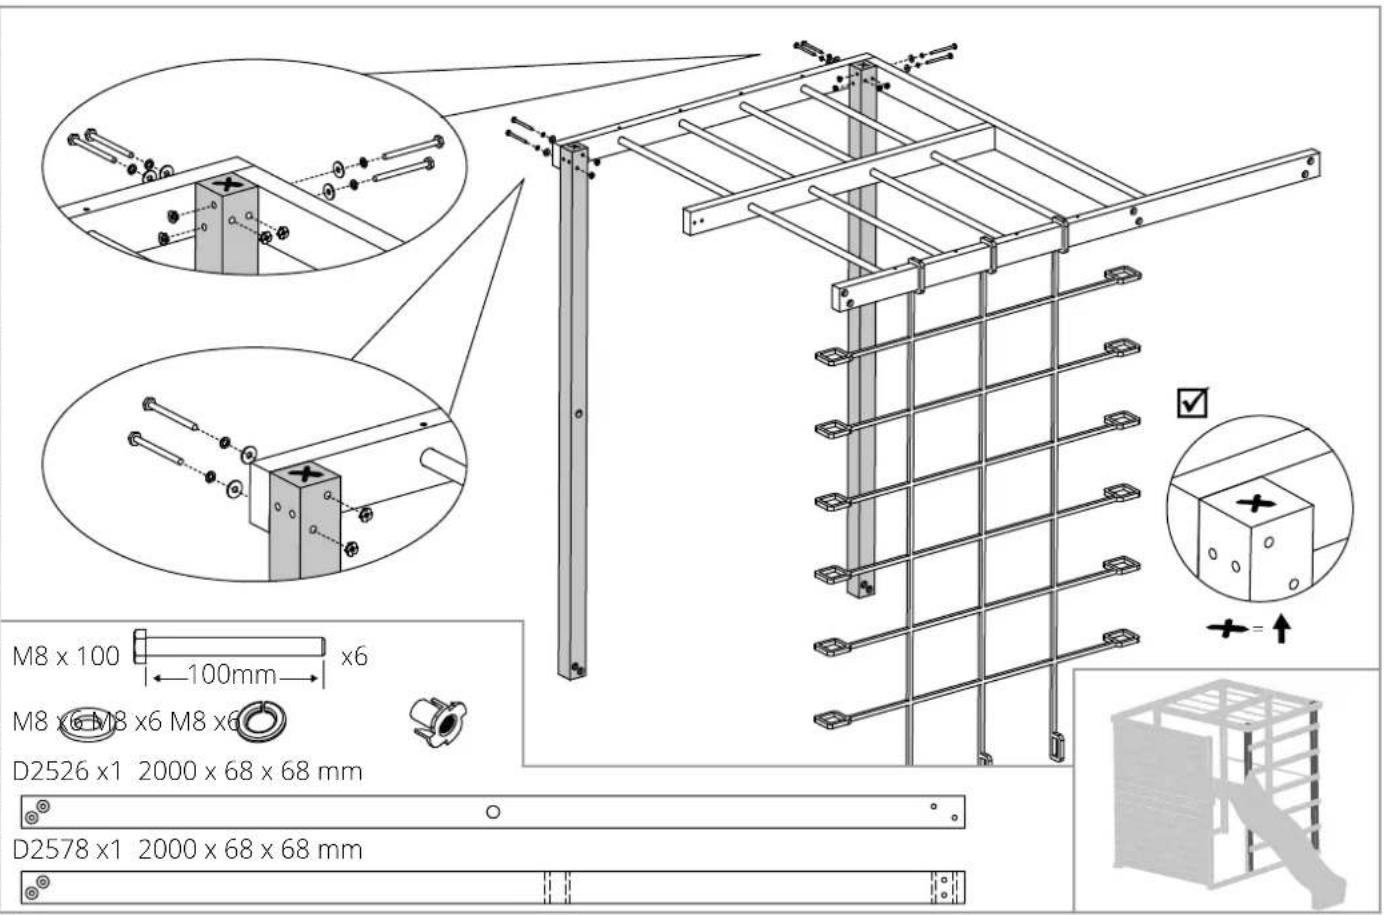
| D2526 x1 78.74 x 2.68 x 1.10 in (2000 x 68 x 68 mm) | ||||||
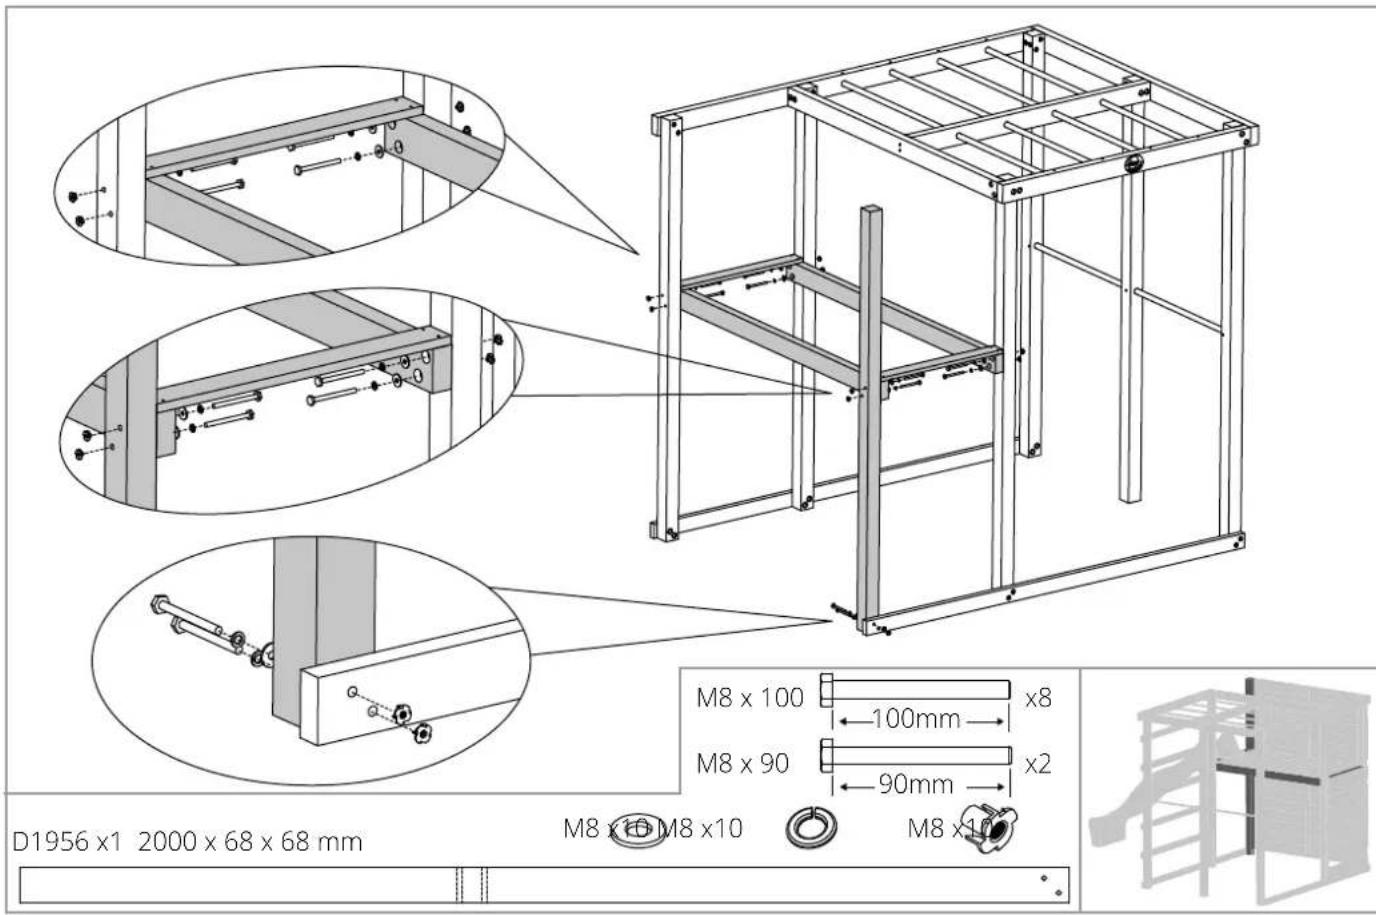
| D1956 x1 78.74 x 2.68 x 1.10 in (2000 x 68 x 68 mm) | ||||||
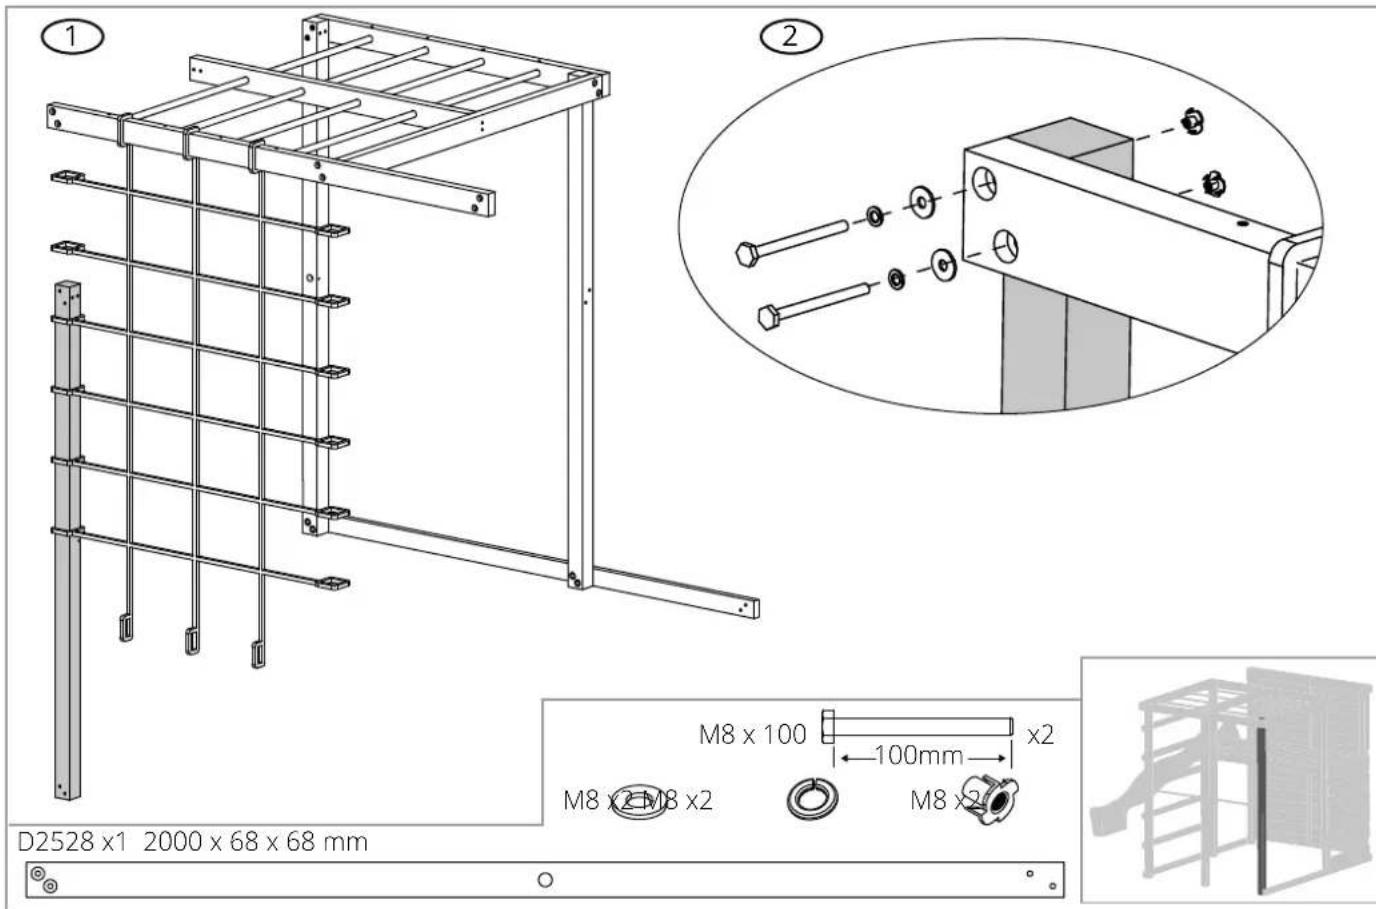
| D2528 x1 78.74 x 2.68 x 1.10 in (2000 x 68 x 68 mm) | ||||||
| 2 | D2525 x1 82.68 x 3.46 x 1.73 in (2100 x 88 x 44 mm) | |||||
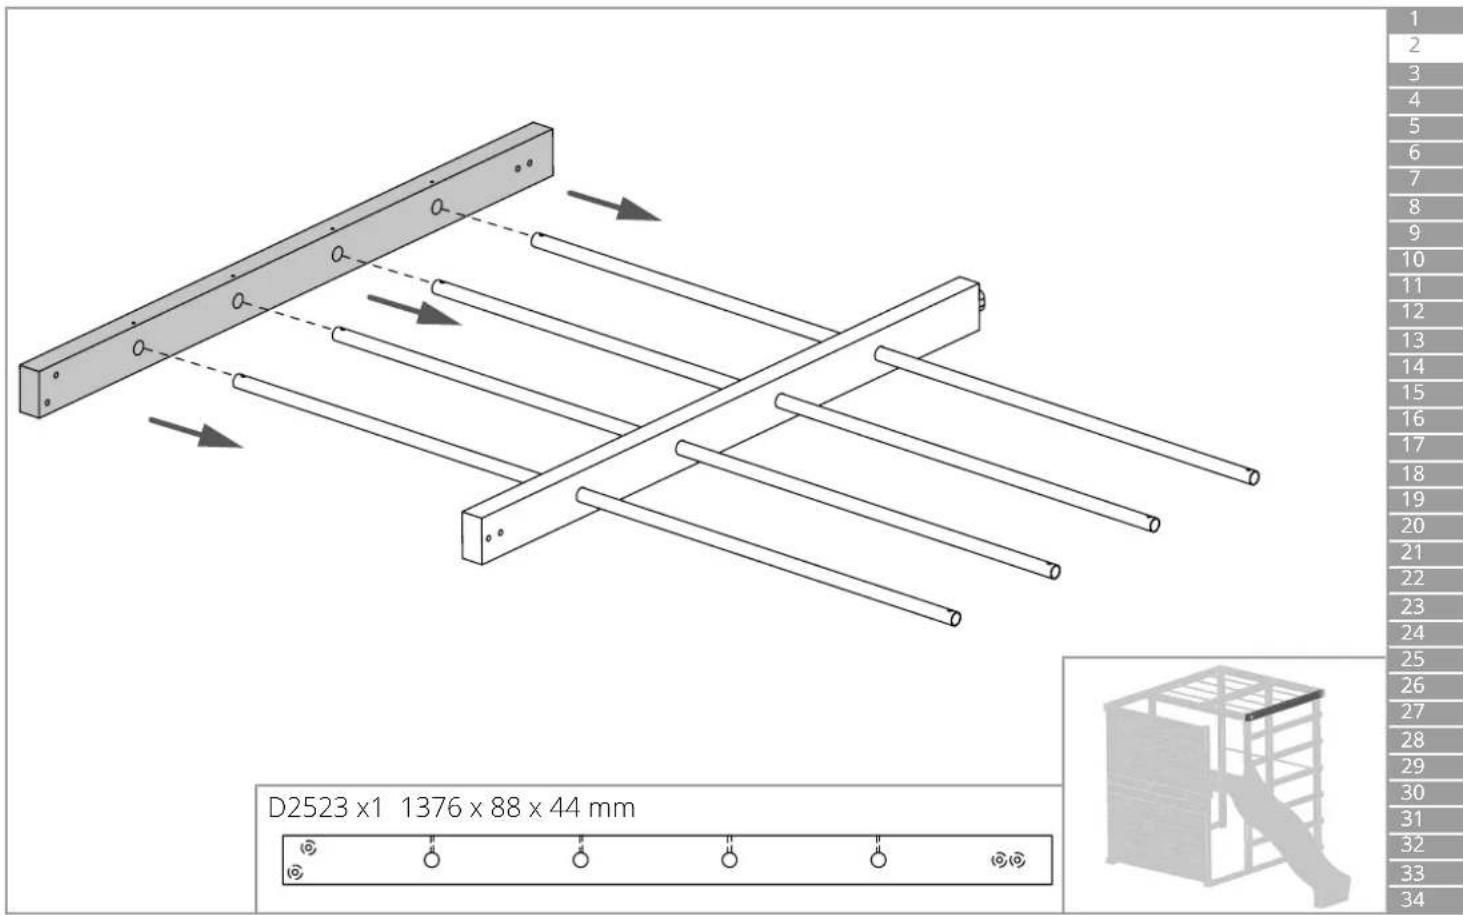
| D2523 x1 54.17 x 3.46 x 1.73 in (1376 x 88 x 44 mm) | ||||||
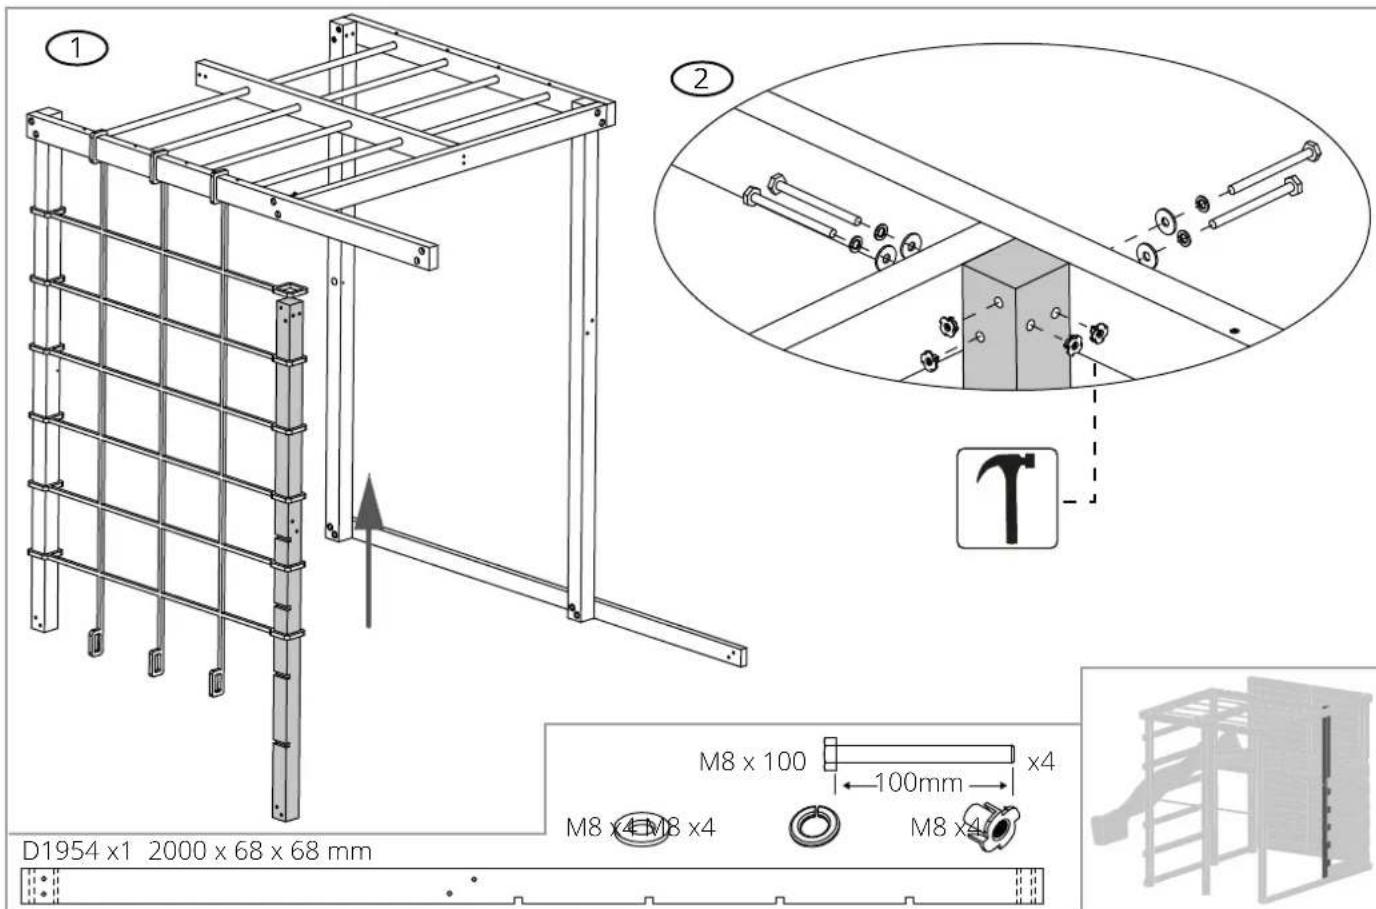
| D1954 x1 78.74 x 2.68 x 1.10 in (2000 x 68 x 68 mm) | ||||||
| D2578 x1 78.74 x 2.68 x 1.10 in (2000 x 68 x 68 mm) | ||||||
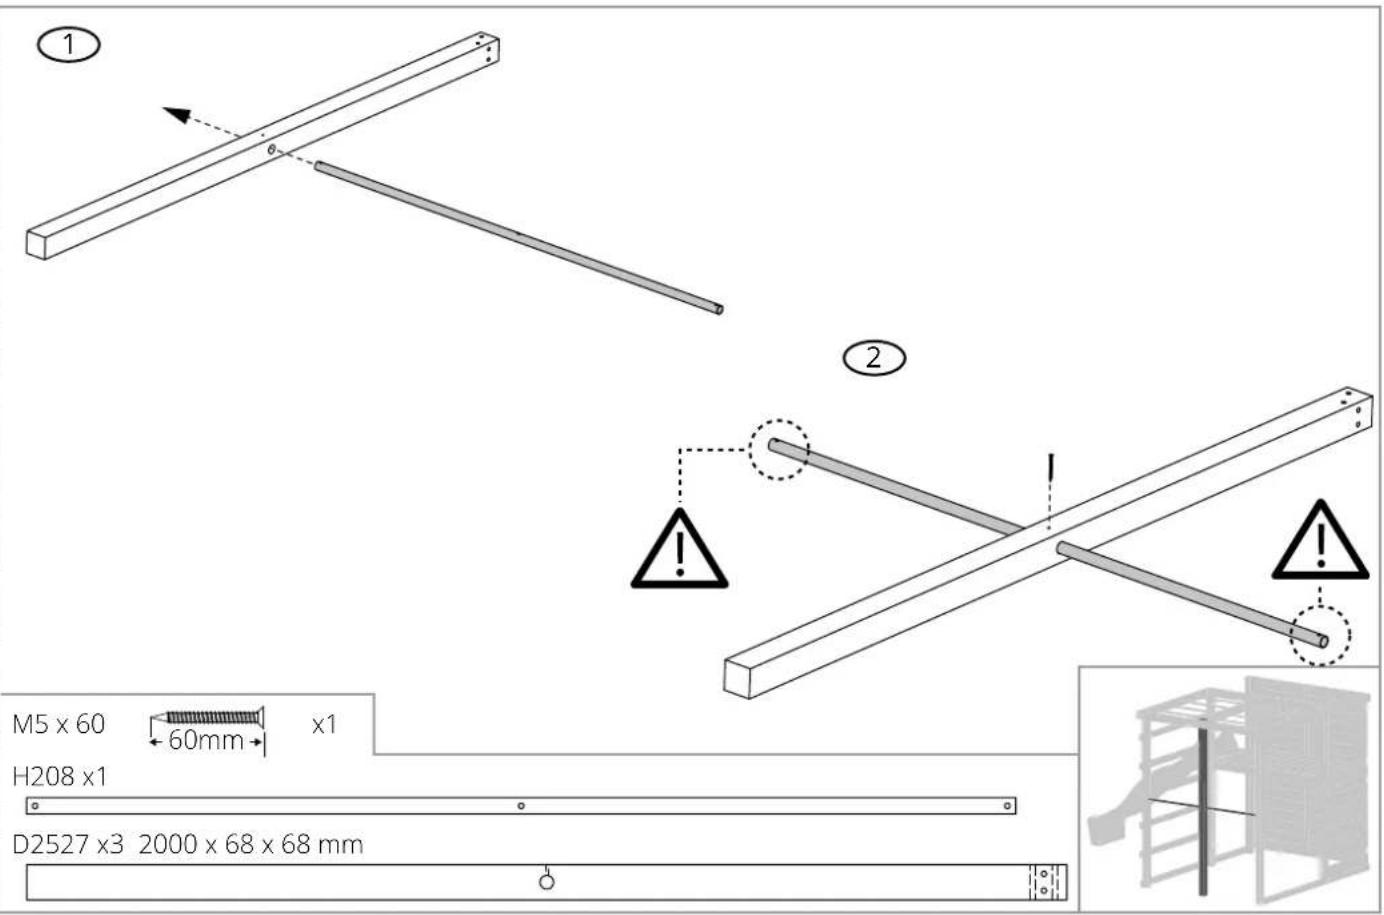
| D2527 x1 78.74 x 2.68 x 1.10 in (2000 x 68 x 68 mm) | ||||||
| 3 | D1960 x5 52.44 x 2.68 x 1.50in (1332 x 68 x 38 mm) | |||||
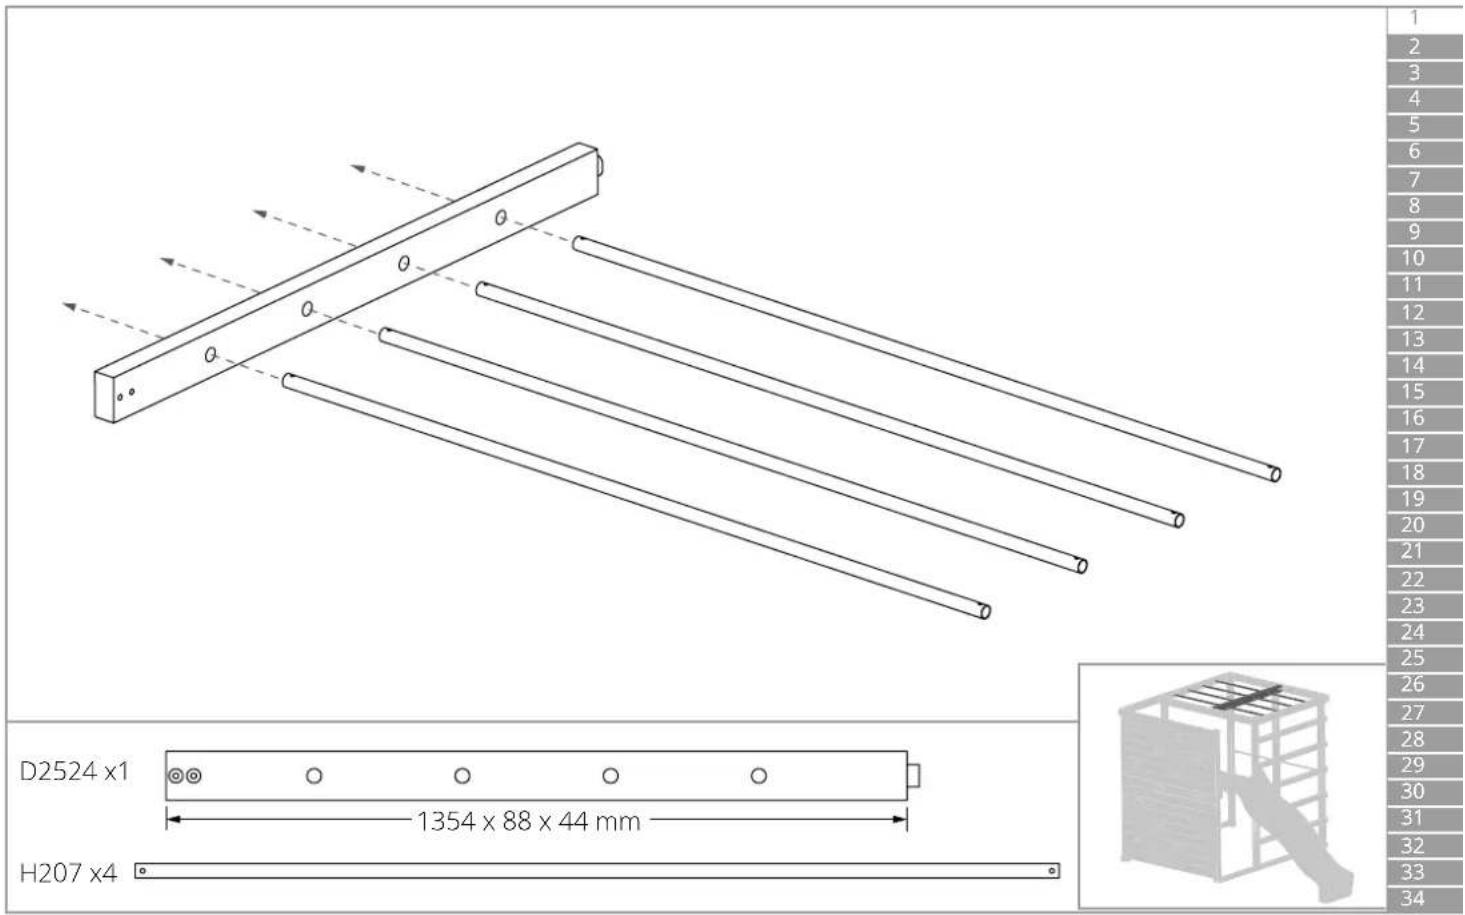
| D2524 x1 53.31 x 3.46 x 1.73 in (1354 x 88 x 44 mm) | ||||||
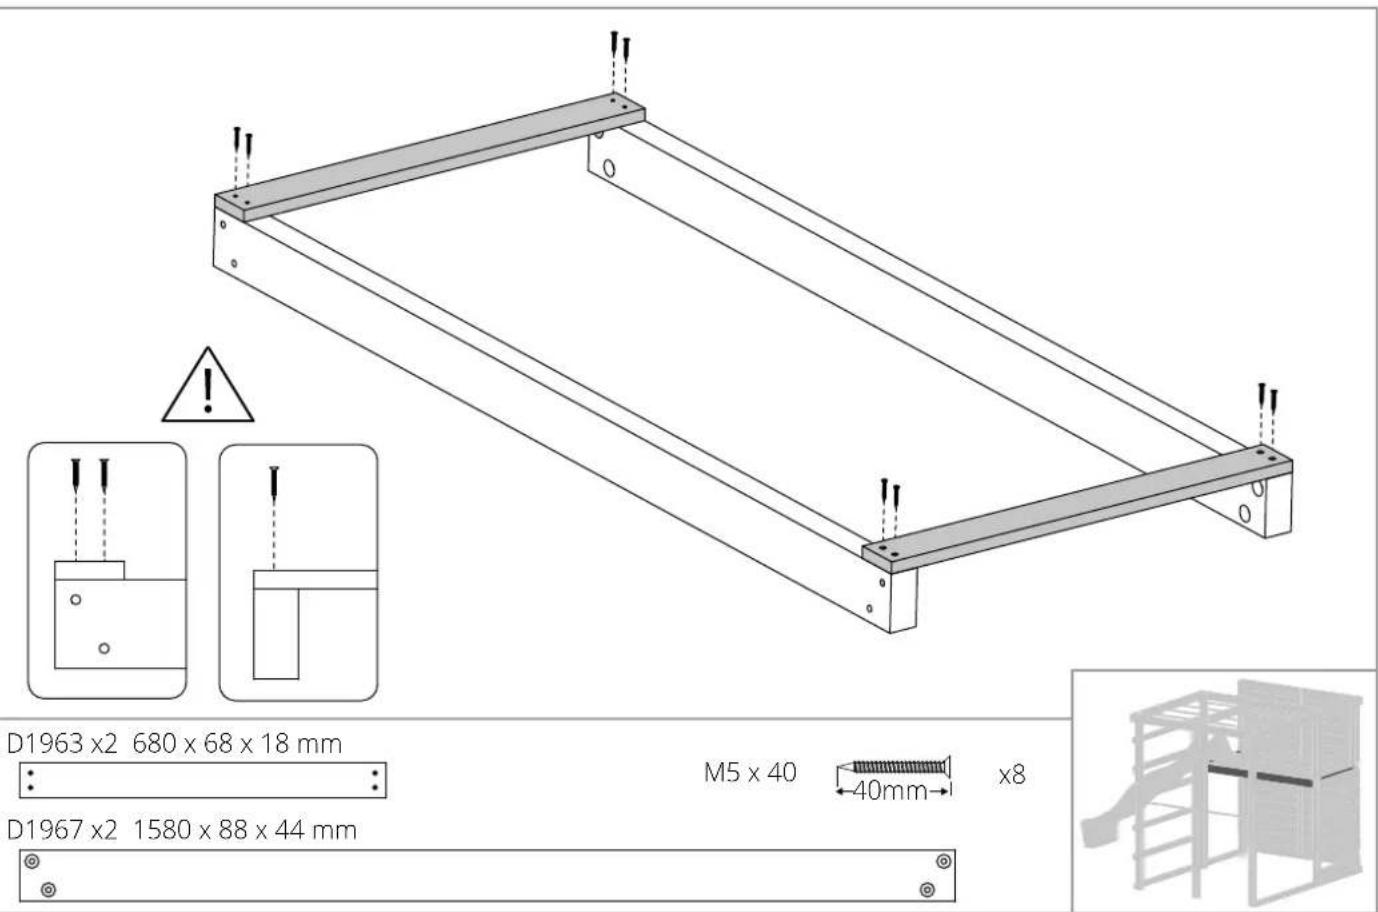
| D1967 x2 62.20 x 3.46 x 1.73 in (1580 x 88 x 44 mm) | ||||||
| D2579 x1 62.28 x 3.46 x 1.73 in (1582 x 88 x 44 mm) | ||||||
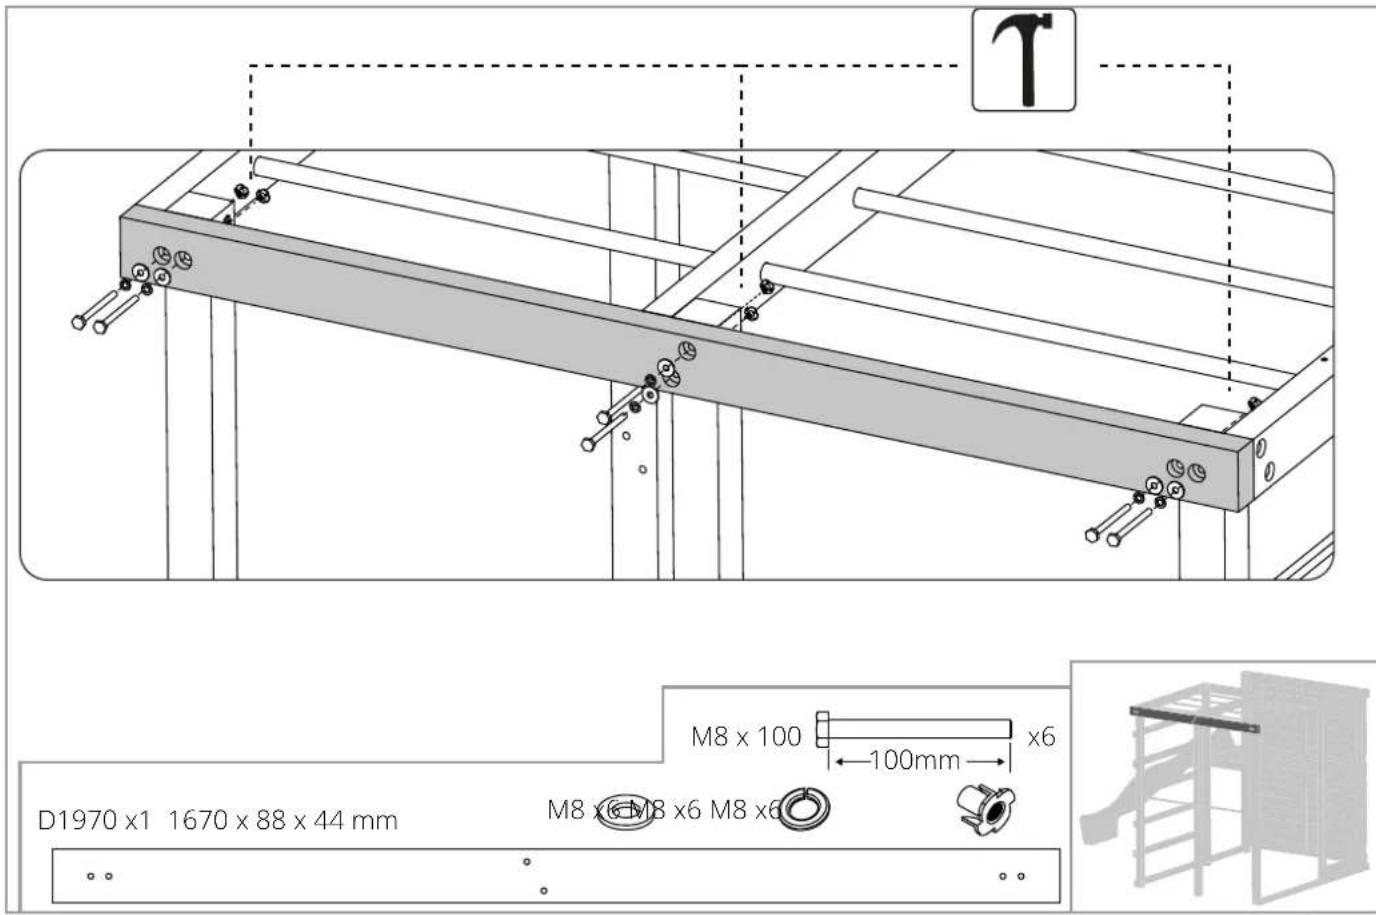
| D1970 x1 65.75 x 3.46 x 1.73 in (1670 x 88 x 44 mm) | ||||||
 | D1946 x5 62.28 x 7.40 x 0.71 in (1582 x 118 x 18 mm) | |||||
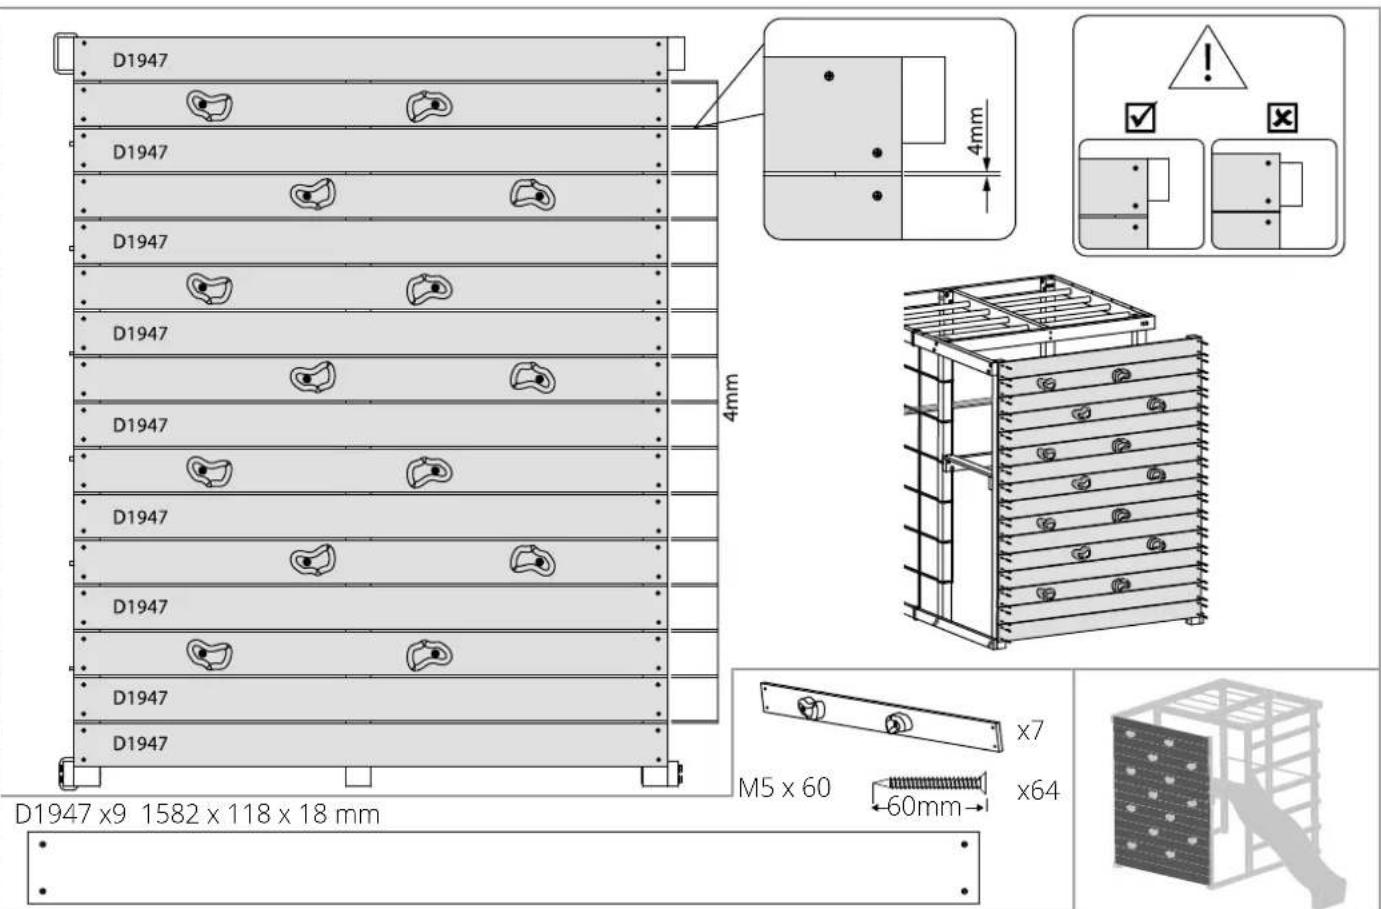
| D1947 x9 62.28 x 7.40 x 0.71 in (1582 x 118 x 18 mm) | ||||||
| 5 | M5 x 40(1.57in)  x52 x52 | M5 x 70(2.76in)  x8 x8 | ||||
M5 x 30(1.18in) 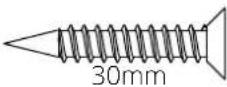 x16 x16 | M5 x 60(2.36in)  x96 x96 | |||||
M5 x 30(1.18in) 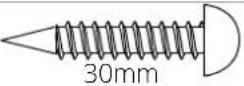 x15 x15 | M5 x 50(1.97in) 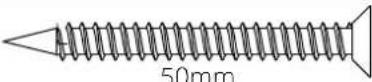 x26 x26 | |||||
M8 x 100(3.94in) 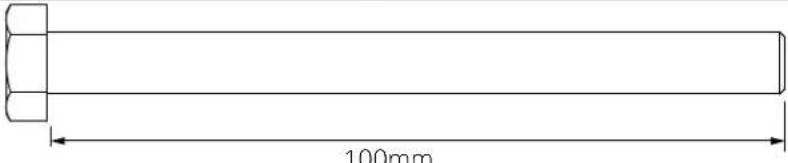 x30 x30 | ||||||
(3.54in) 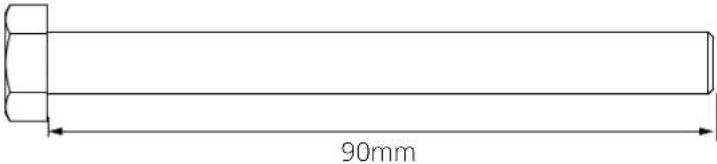 x12M8 Washer-smallx15 x12M8 Washer-smallx15 | ||||||
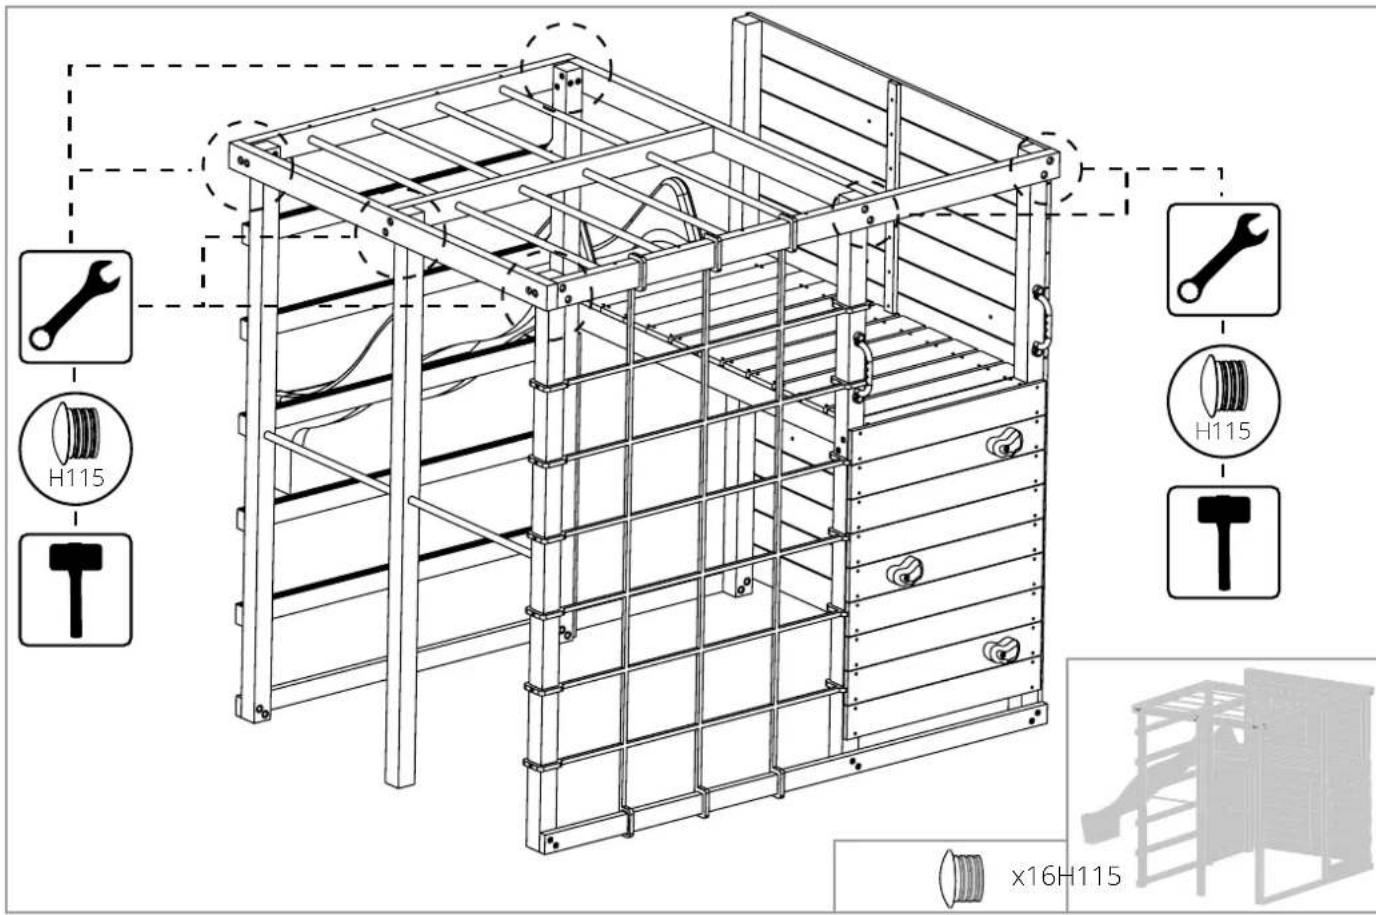
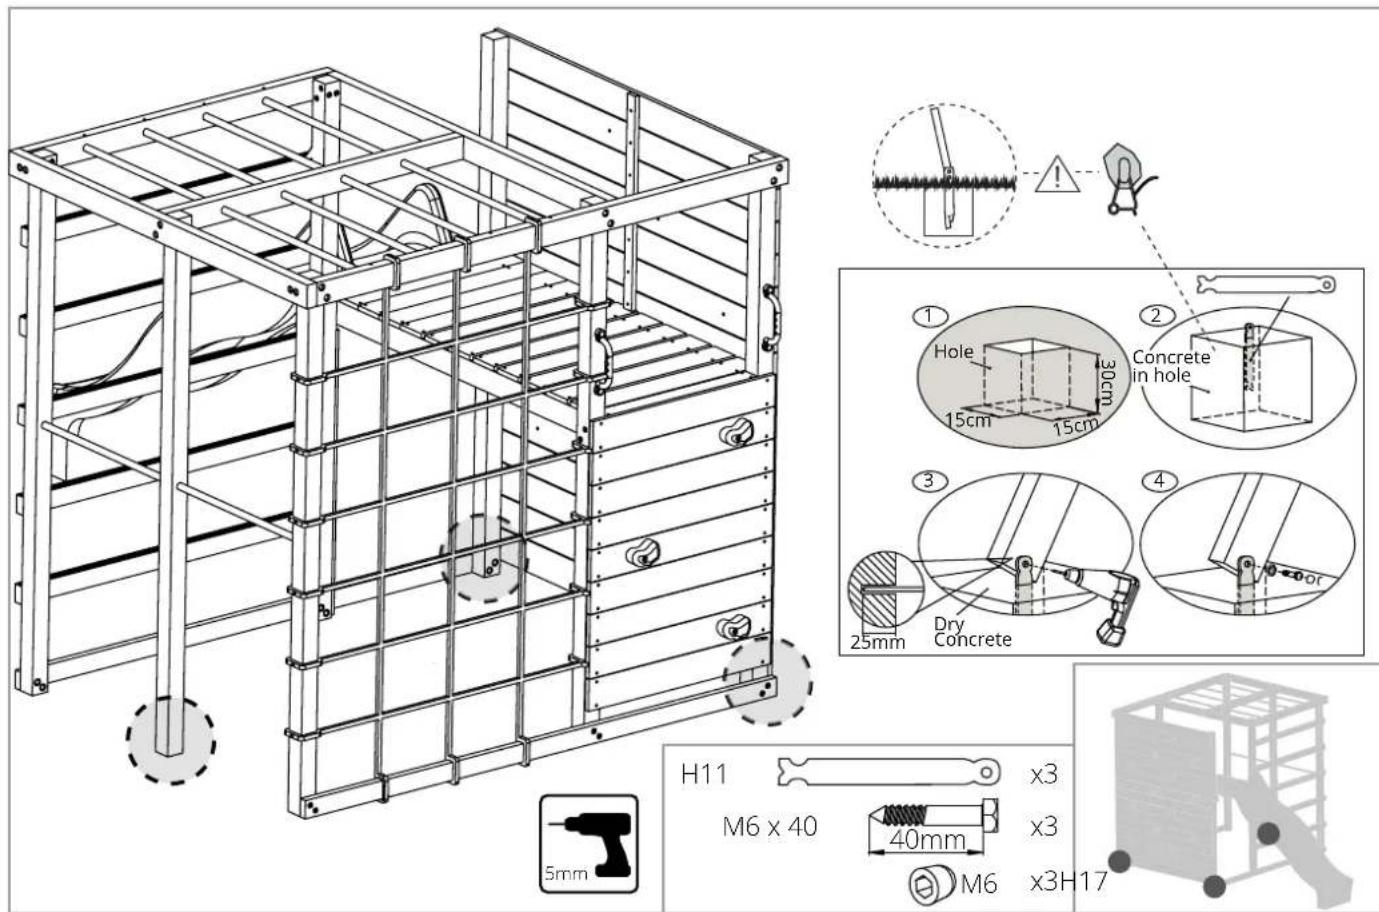
H11  x3 x3 | H115  x16 x16 | |||||
M6  x3 H17 x3 H17  x3 x3 | ||||||
M8  x42 x42 | M8 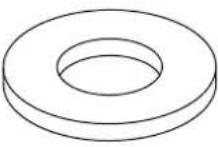 x42 x42 | M8  x42 x42 | ||||
| D1946 x2 62.28 x 7.40 x 0.71 in (1582 x 118 x 18 mm) | ||||||
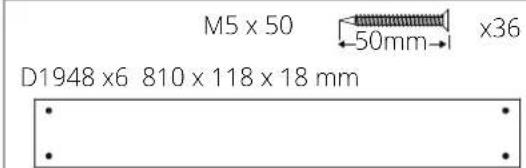
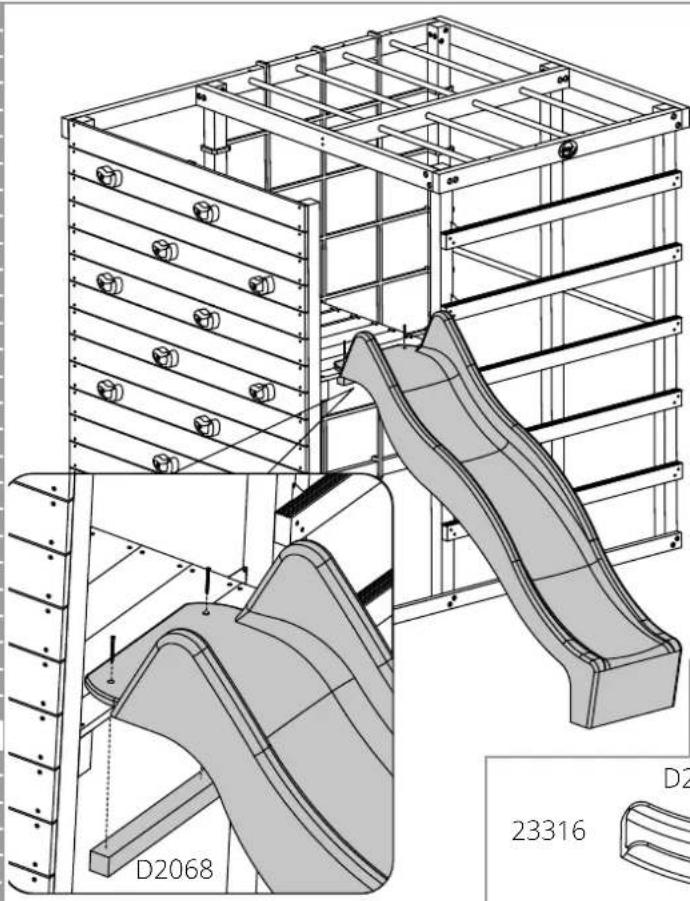
| D1948 x6 31.89 x 4.65 x 0.71 in (810 x 118 x 18 mm) | D2068 x1 17.32 x 1.73 x 1.73 in(440 x 44 x 44 mm) | |||||
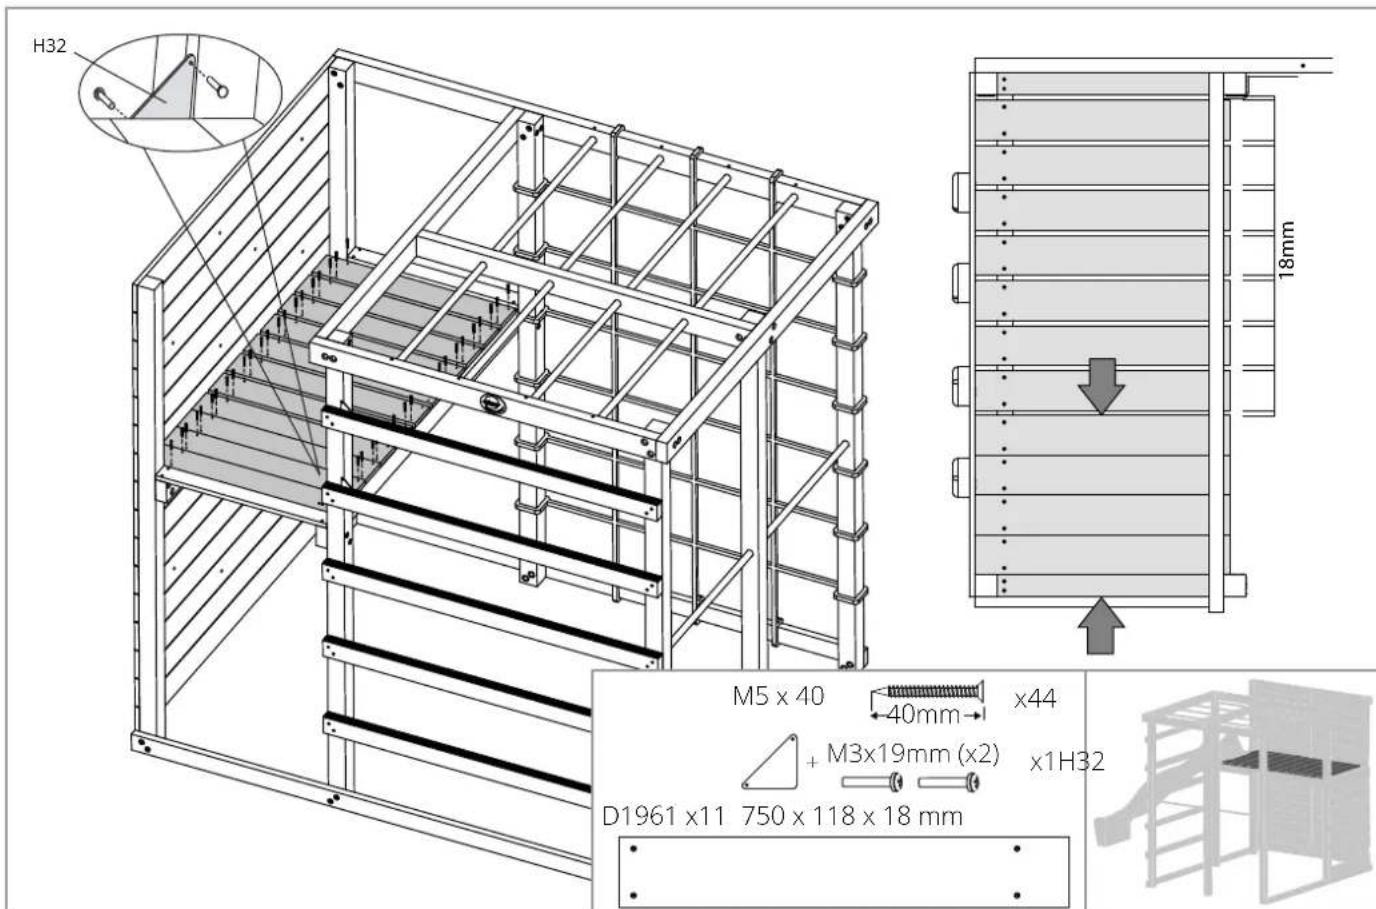
 | D1961 x11 29.53 x 4.65 x 0.71 in (750 x 118 x 18 mm) | |
D1962 x1 41.73 x 1.10 x 1.10 in (1060 x 28 x 28 mm) | ||
D1971 x1 31.50 x 1.73 x 0.71 in (800 x 44 x 18 mm) | ||
D1972 x1 42.13 x 1.73 x 0.71 in (1070 x 44 x 18 mm) | ||
(680 x 68 x 18 mm)D1963 x2 26.77 x 2.68 x 0.71 in | ||
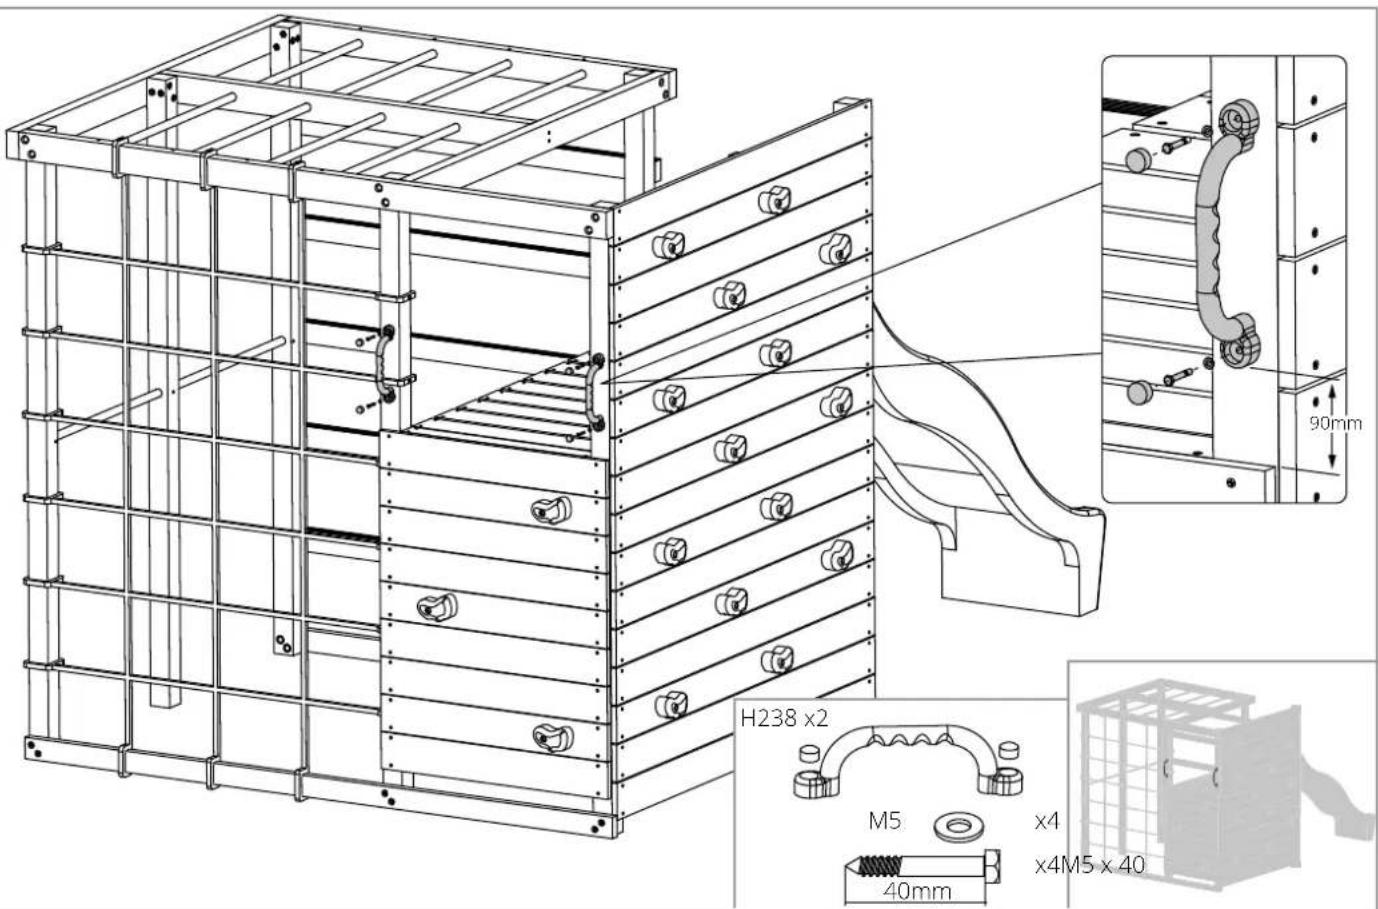
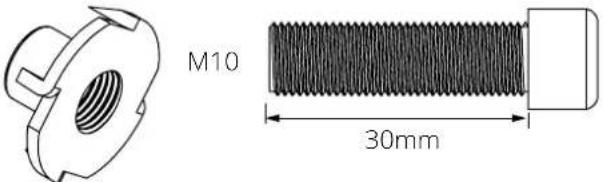 M10 M10  x17M10 x17M10 | H238 x2  x4M6 x 40M5 x4M6 x 40M5  x4 x4 | |
 |  | |
 x3 x3  M3x19mm (x2) M3x19mm (x2) | M6 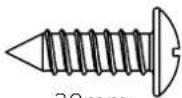 x21zumm x21zumm | |
 |  | |
 | ||
 | 23311 x1  | |
 |   | M5 x 30(1.97in) 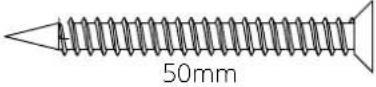 x12 x12 |
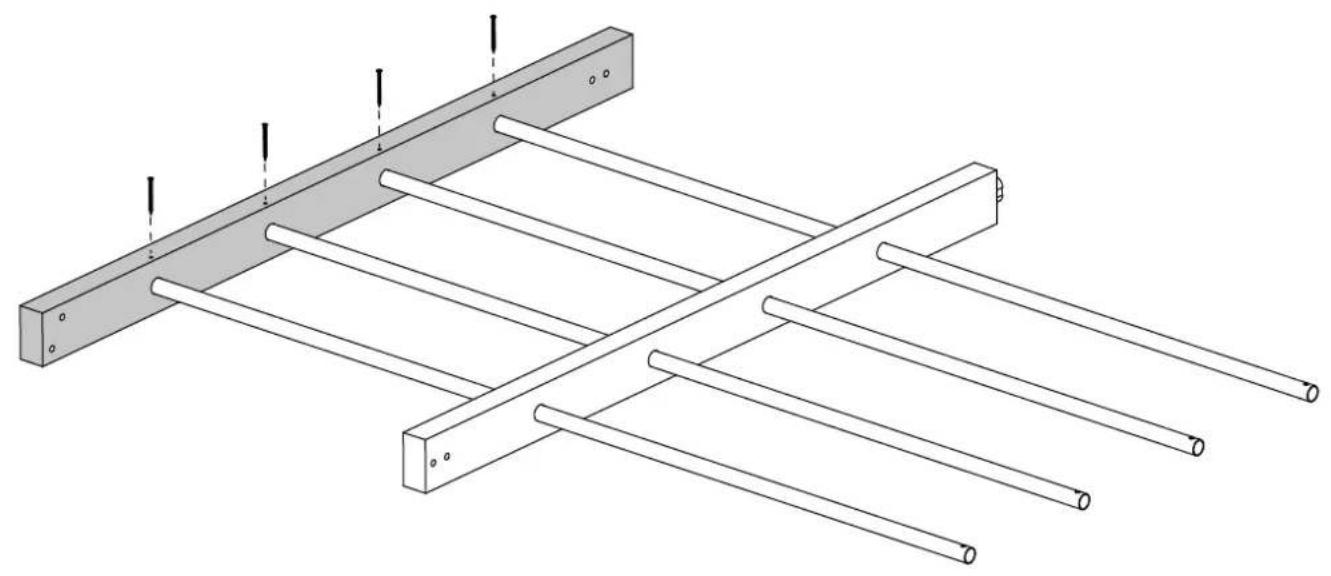
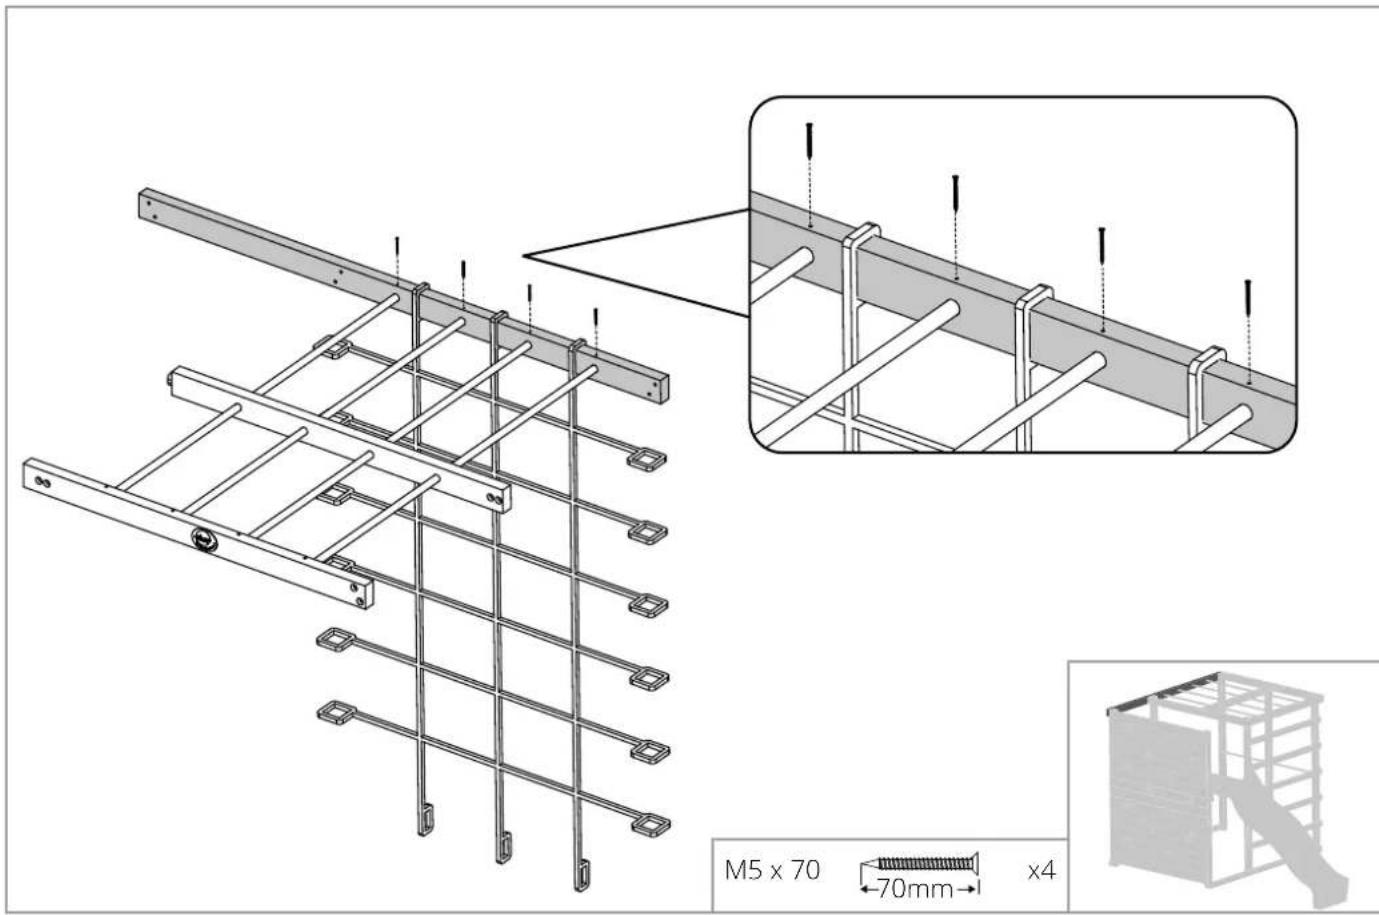
natural_image
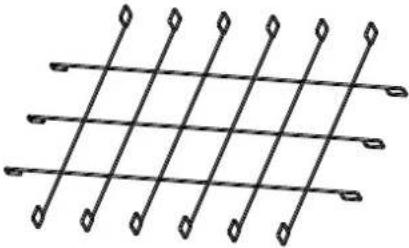
Technical line drawing of a metal frame structure with multiple parallel rods and mounting holes (no text or symbols)M5 × 70
x4
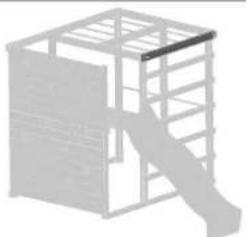
natural_image
Simple line drawing of a wooden structure with a slide and ladder (no text or symbols)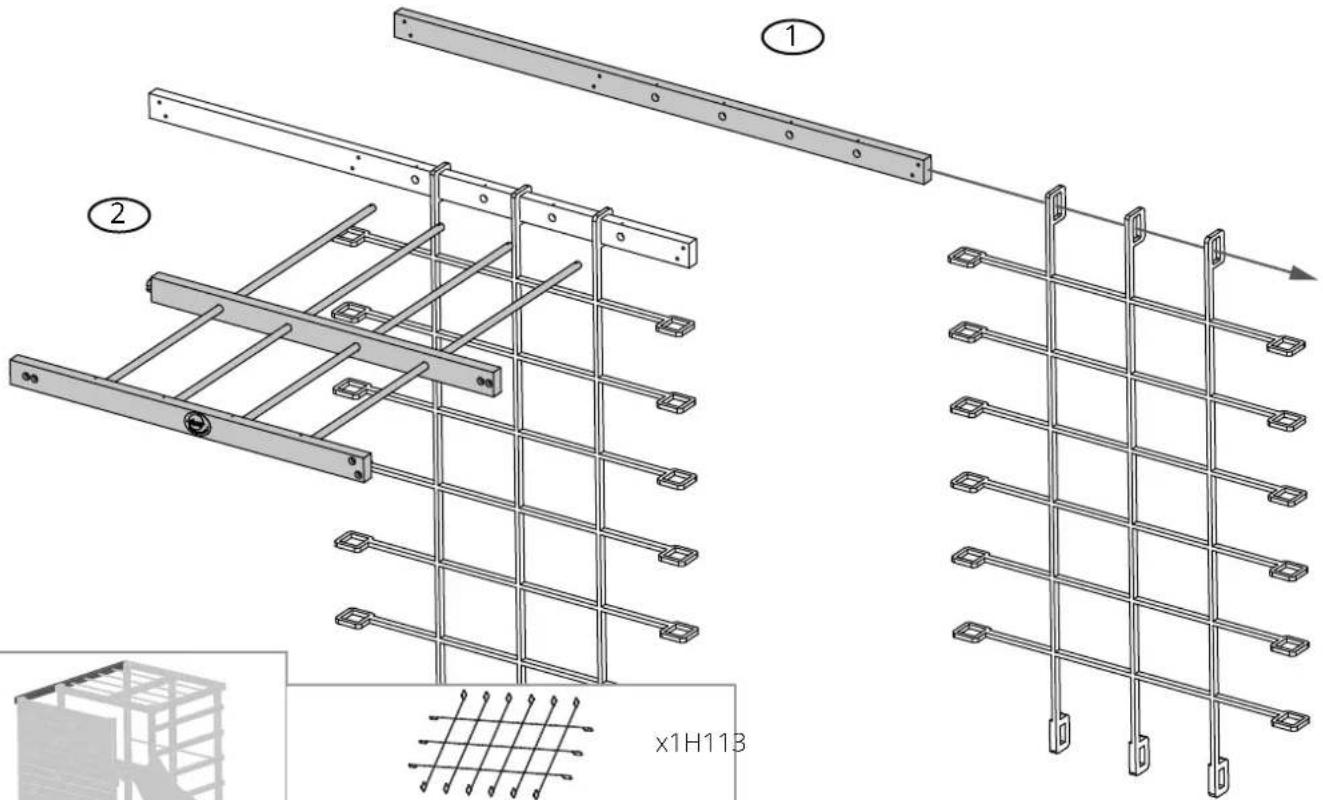
D2525 x1 2100 x 88 x 44 mm


D1946 x7 1582 x 118 x 18mm

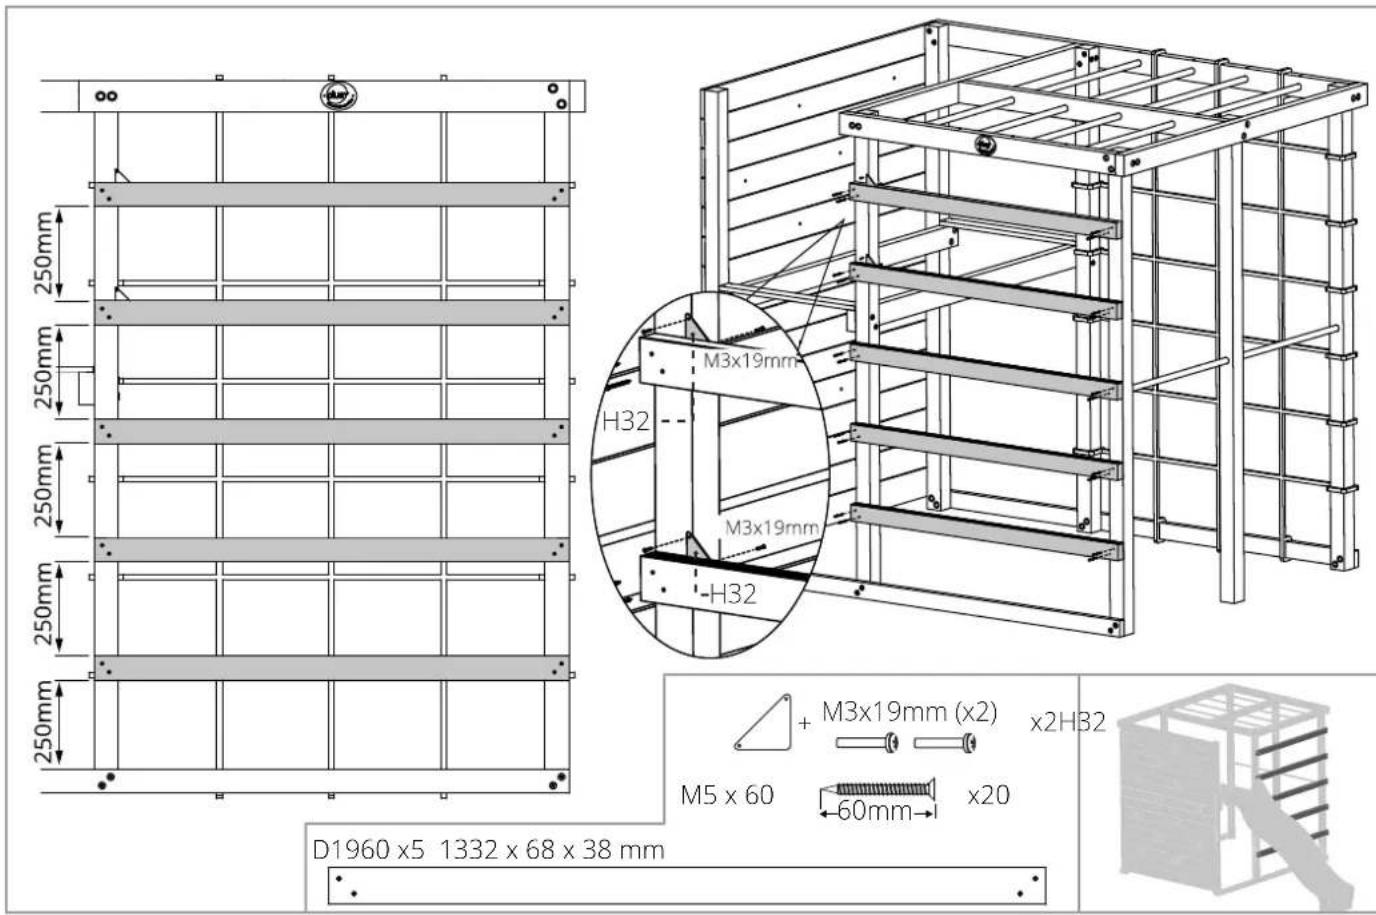
D1960×5 1332×68×38 mm
• • • •
natural_image
Technical line drawing of a multi-level metal shelving unit with structural supports and doorways (no text or symbols)M8 Washer-small

x15
M5 × 30
x15
natural_image
3D diagram of a modular structure with grid and slanted panel (no text or symbols)
D2740×3 810×118×18 mm

natural_image
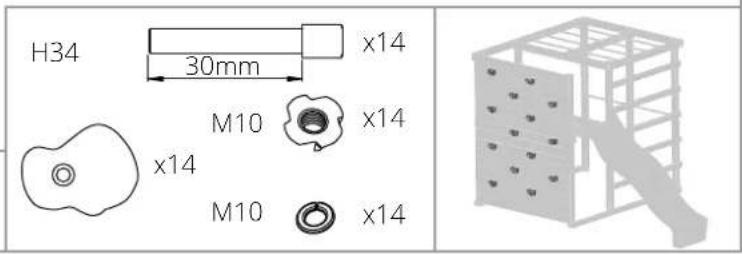
Empty rectangular frame with four small dots at corners (no text or symbols)H34
M10

×3
M10

natural_image
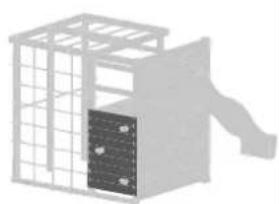
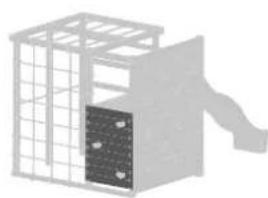
3D rendering of a gray wire cage with a black interior panel and a protruding rod (no text or symbols)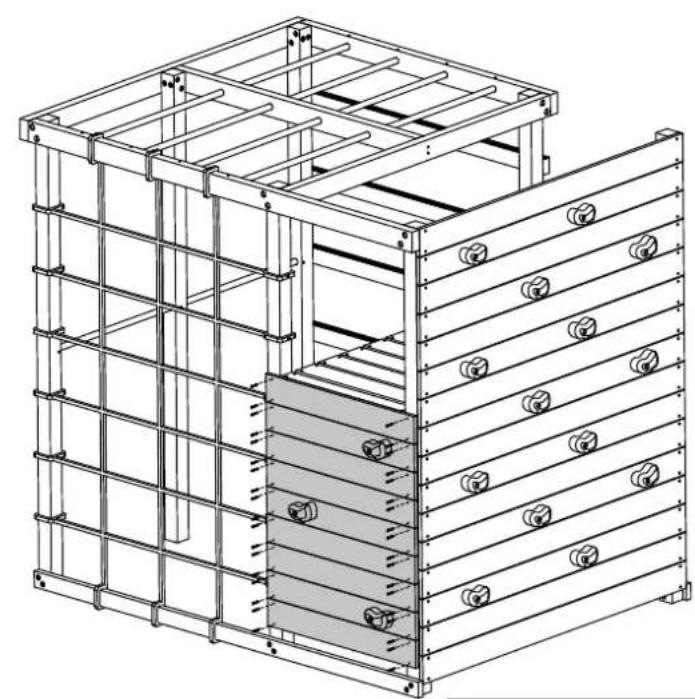
natural_image
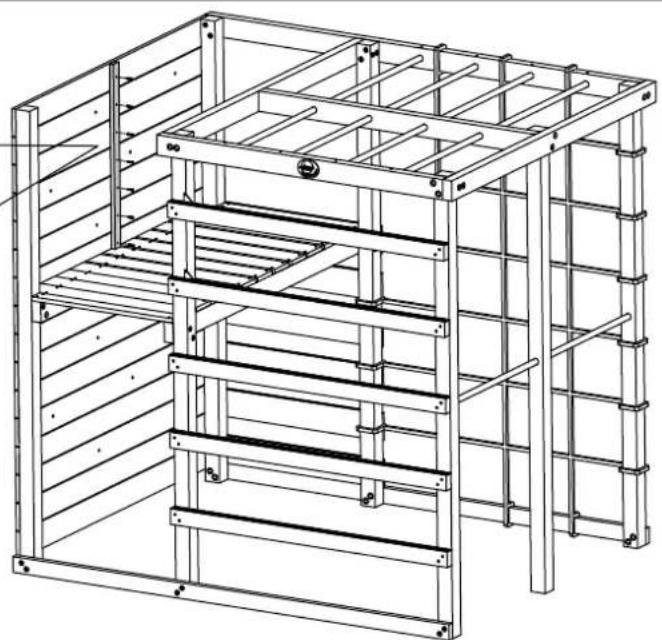
Technical line drawing of a modular shelving unit with metal framework and internal compartments (no text or symbols)
natural_image
3D rendering of a gray wire cage with a black panel and a door, no text or symbols visible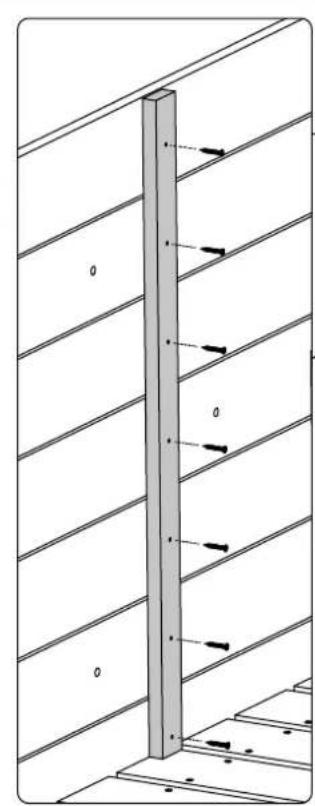
natural_image
Technical diagram of a vertical wooden structure with diagonal bracing and horizontal supports (no text or symbols)
natural_image
Technical line drawing of a multi-level metal shelving unit with ladder and frame structure (no text or symbols)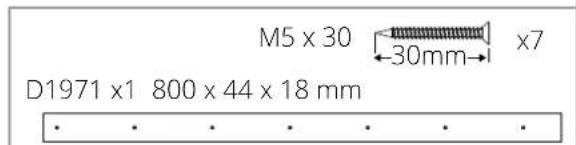
natural_image
3D wireframe model of a modular structure with ladder and frame (no text or symbols)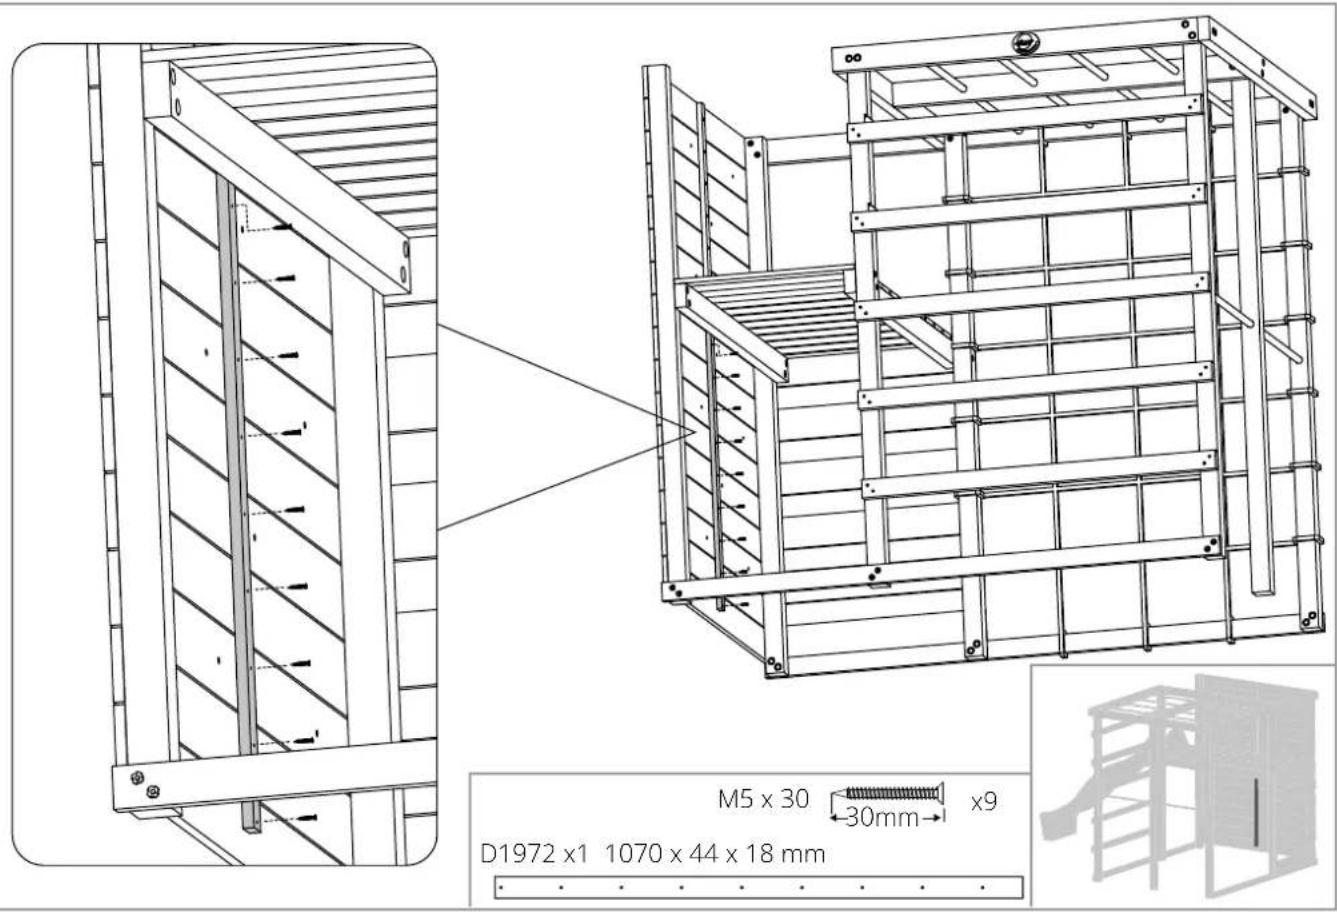
natural_image
Technical line drawing of a mechanical assembly with a sliding slide and structural framework (no text or symbols)
natural_image
Pure technical diagram showing a mechanical assembly with no visible text, numbers, or symbols.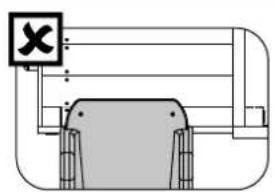
natural_image
Pure diagram of a mechanical or electrical component with no visible text, numbers, or symbols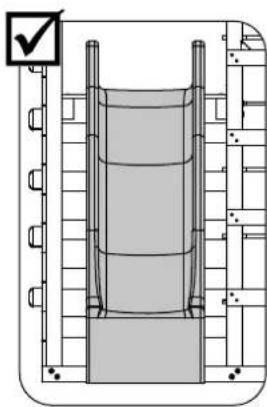
natural_image
Technical line drawing of a mechanical assembly with no visible text or symbols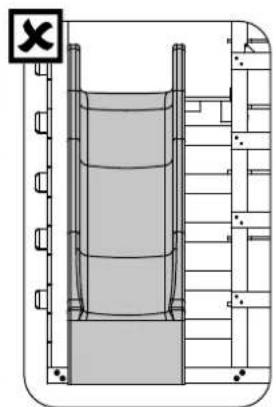
natural_image
Technical line drawing of a mechanical assembly with no visible text or symbols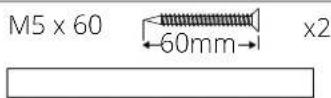
natural_image
Simple line drawing of a coiled ribbon or cable (no text or symbols)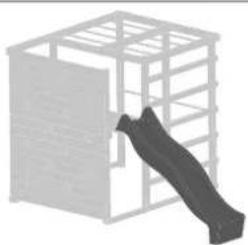
natural_image
3D rendered image of a wooden structure with a black slanted slide beside it (no text or symbols)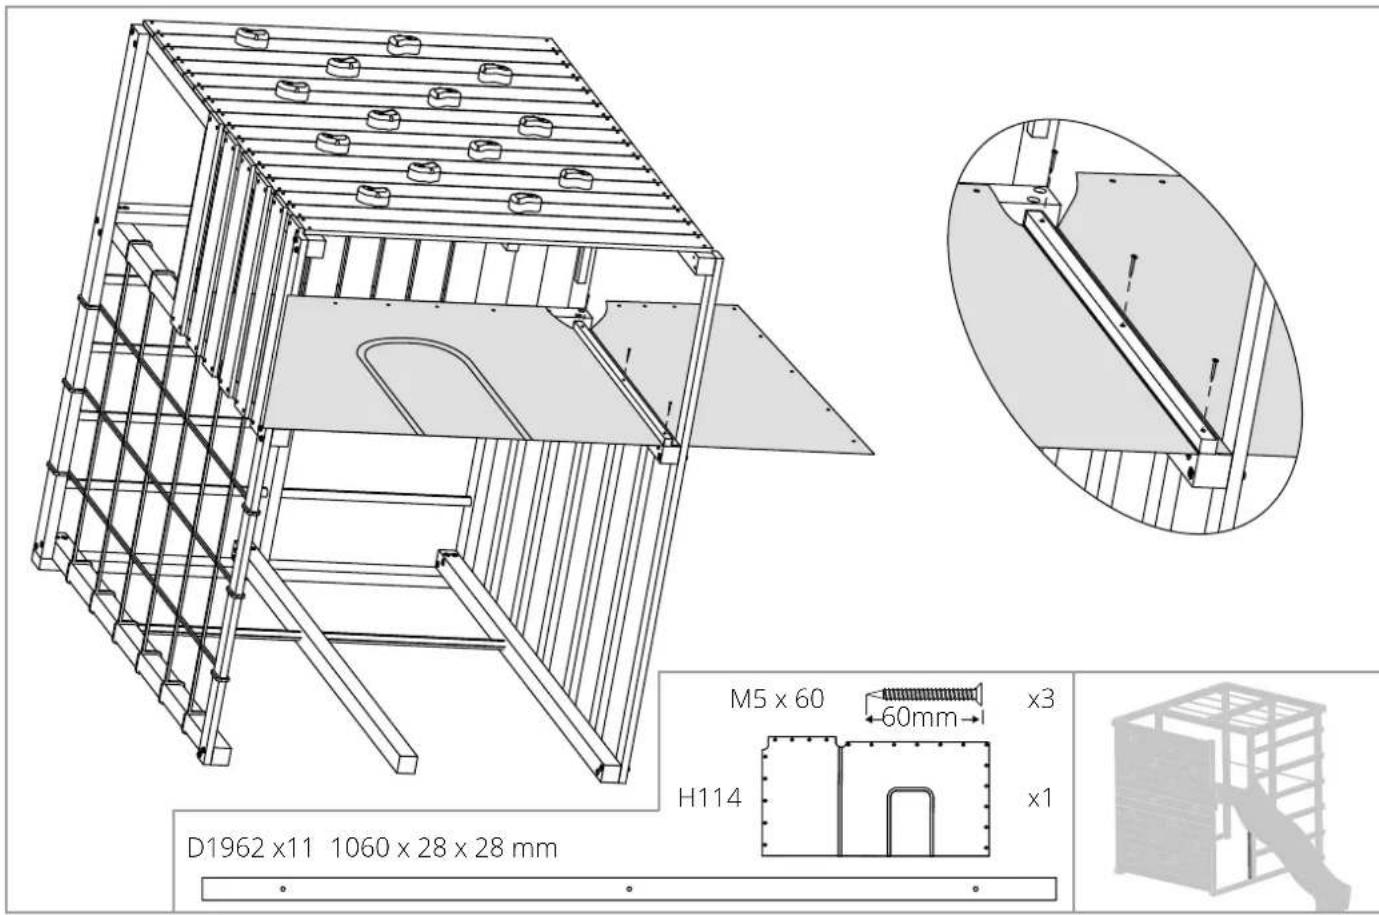
D1962 x11 1060 x 28 x 28 mm
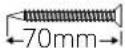
M5 × 60
60mm
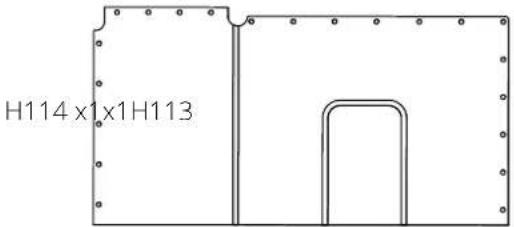
H114
x3
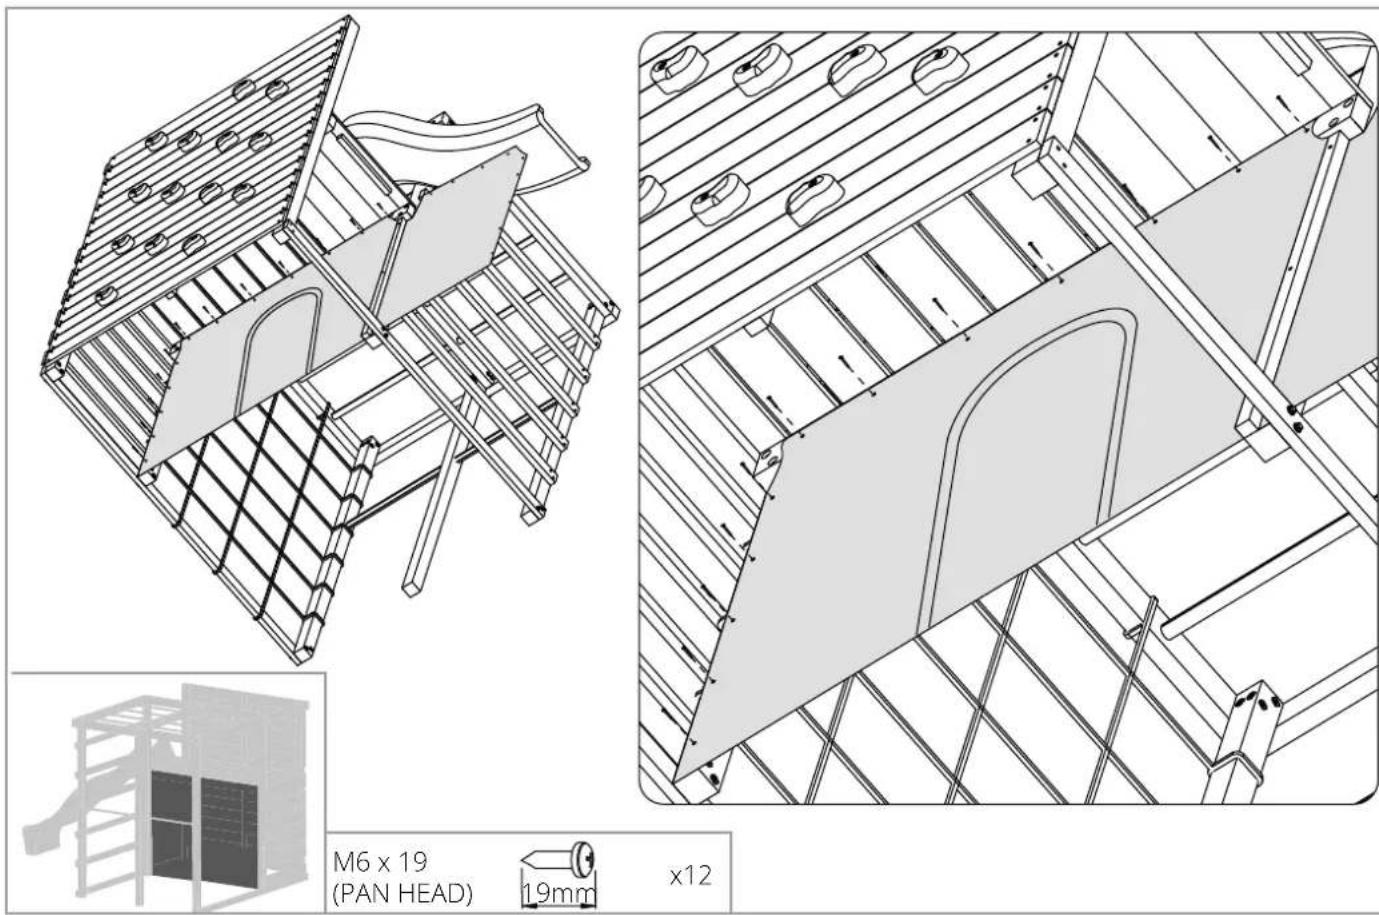
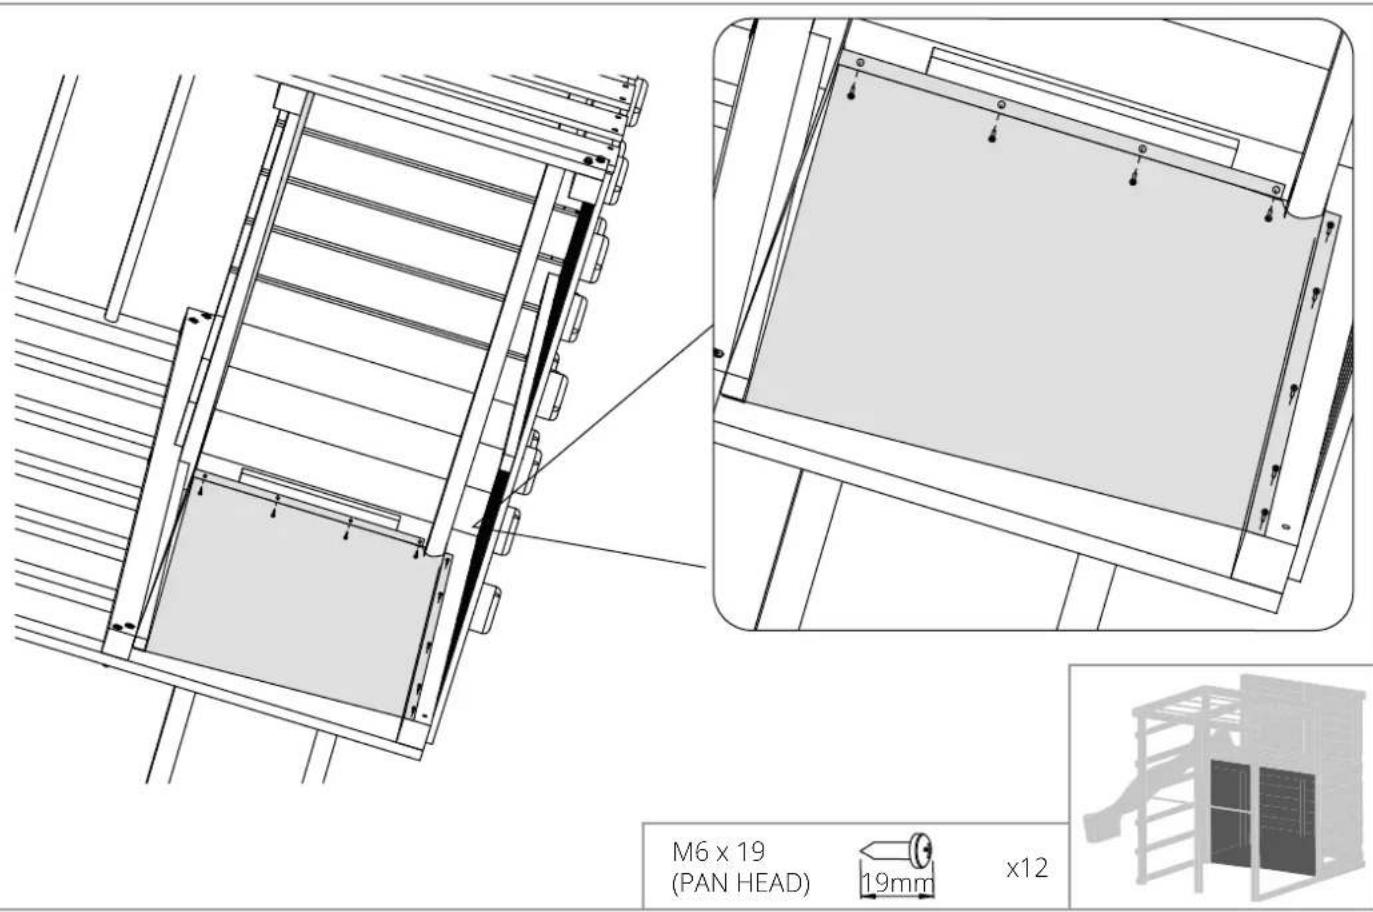
M6×19
(PAN HEAD)
x12
Installation Instructions
- Place the equipment on level ground, not less than 6 ft (1.8 m) from any structure or obstruction such as a fence, garage, house, overhanging branches, laundry lines, or electrical wires.
- Do not install home playground equipment over concrete, asphalt, packed earth, grass, carpet, or any other hard surface. A fall onto a hard surface can result in serious injury or death to the equipment user.
- To prevent serious injury, children must not use the equipment until properly installed.
- It is recommended that bolts are tightened before use.
- Ensure all bolts are tightened flush to the member.
Maintenance Instructions
1. At the beginning of each play season:
- Tighten all hardware.
- Lubricate all metallic moving parts per manufacturer's instructions.
- Check all protective coverings on bolts, pipes, edges, and corners. Replace if they are loose, cracked, or missing.
- Check all moving parts including swing seats, ropes, cables, and chains for wear, rust, or other deterioration. Replace as needed.
- Check metal parts for rust. If found, sand and repaint using a nonlead-based paint meeting the requirements of 16 CFR 1303.
- Check all wood members for deterioration and splinters. Sand down splinters and replace deteriorating wood members.
- Reinstall any plastic parts, such as swing seats or any other items that were removed for the cold season.
- Rake and check depth of loose fill protective surfacing materials to prevent compaction and to maintain appropriate depth. Replace as necessary.
2. Once a month during play season:
-
Lubricate all metallic moving parts per manufacturer's instructions.
-
Check all moving parts including swing seats, ropes, cables, and
chains for wear, rust, or other deterioration. Replace as needed.
3. Twice a month during play season:
- Tighten all hardware.
- Check all protective coverings on bolts, pipes, edges, and corners. Replace if they are loose, cracked, or missing.
- Rake and check depth of loose fill protective surfacing materials to prevent compaction and to maintain appropriate depth. Replace as necessary.
4. At the end of each play season
- Remove plastic swing seats and other items as specified by the manufacturer and take indoors or do not use.
- Rake and check depth of loose fill protective surfacing materials to prevent compaction and to maintain appropriate depth. Replace as necessary.
5. At the end of each play season or when the temperature drops below 32^ F:
- Remove plastic swing seats and other items as specified by the manufacturer and take indoors or do not use.
- Rake and check depth of loose fill protective surfacing materials to prevent compaction and to maintain appropriate depth. Replace as necessary.
6. Owners shall be responsible for maintaining the legibility of the warning labels.
SECTION 4 OF THE CONSUMER PRODUCT SAFETY COMMISSION'S OUTDOOR HOME PLAYGROUND SAFETY HANDBOOK
X2.1 Select Protective Surfacing—One of the most important things you can do to reduce the likelihood of serious head injuries is to install shock-absorbing protective surfacing under and around your play equipment. The protective surfacing should be applied to a depth that is suitable for the equipment height in accordance with ASTM Specification F1292. There are different types of surfacing to choose from; whichever product you select, follow these guidelines:
X2.1.1 Loose-Fill Materials:
X2.1.1.1 Maintain a minimum depth of 9 in. (229 mm) of loose-fill materials such as wood mulch/chips, engineered wood fiber (EWF), or shredded/recycled rubber mulch for equipment up to 96 in. (2438 mm) high; and 9 in. (229 mm) of sand or pea gravel for equipment up to 60 in.
(1524 mm) high. NOTE: An initial fill level of 12 in. (305 mm) will compress to about a 9 in. (229 mm) depth of surfacing over time. The surfacing will also compact, displace, and settle, and should be periodically refilled to maintain at least a 9 in. (229 mm) depth.
X2.1.2 Use a minimum of 6 in. (152 mm) of protective surfacing for play equipment less than 48 in. (1219 mm) in height. If maintained properly, this should be adequate. (At depths less than 6 in. (152 mm), the

WARNING!
protective material is too easily displaced or compacted.)
NOTE: Do not install home playground equipment over concrete, asphalt, or any other hard surface. A fall onto a hard surface can result in serious injury to the equipment user. Grass and dirt are not considered protective surfacing because wear and environmental factors can reduce their shock absorbing effectiveness. Carpeting and thin mats are generally not adequate protective surfacing. Ground level equipment – such as a sandbox, activity wall, playhouse or other equipment that has no elevated play surface – does not need any protective surfacing.
X2.1.3 Use containment, such as digging out around the perimeter and/or lining the perimeter with landscape edging. Don't forget to account for water drainage.
X2.1.3.1 Check and maintain the depth of the loose-fill surfacing material. To maintain the right amount of loose-fill materials, mark the correct level on play equipment support posts. That way you can easily see when to replenish and/or redistribute the surfacing.
X2.1.3.2 Do not install loose fill surfacing over hard sur-faces such as concrete or asphalt.
X2.1.5 Placement—Proper placement and maintenance of protective surfacing is essential. Be sure to:
X2.1.5.1 Extend surfacing at least 72 in. (1829 mm) from the equipment in all directions.
X2.1.5.2 For to-fro swings, extend protective surfacing in front of and behind the swing to a distance equal to twice the height of the top bar from which the swing is suspended.
X2.1.5.3 For tire swings, extend surfacing in a circle whose radius is equal to the height of the suspending chain or rope, plus 6 ft in all directions.
Operating Instructions
- Observing the following statements and warnings reduces the likelihood of serious or fatal injury.
- We recommend that only two children, 50kg weight max each, to play on the product at the same time.
- Recommending on-site adult supervision for children of all ages.
- Warning the owner to instruct children not to walk close to, in front of, behind, or between moving items.
- Warning the owner to instruct children not to use the equipment in a manner other than intended.
- Warning the owner not to allow children to wear inappropriate items, such as but not limited to, loose fitting clothing, hood and neck drawstrings, scarves, cord-connected items, capes and ponchos. These items can cause death by strangulation.
- Warning the owner to instruct children not to climb when the equipment is wet.
- Warning the owner to check the openings between rollers and sliding surfaces of roller slides for foreign materials that could be potentially hazardous to users.
- Warning the owner to verify that suspended climbing ropes, chain, or cable are secured at both ends.
- Warning the owner to verify that suspended climbing ropes, chain, or cable cannot be looped back on itself.
- Warning the owner to instruct children not to attach items to the playground equipment that are not specifically designed for use with the equipment, such as, but not limited to, jump ropes, clothesline, pet leashes, cables and chain as they may cause a strangulation hazard.
- Warning the owner to instruct children to remove their bike or other sports helmet before playing on the playground equipment.
- Warning the owner to dress children with wellfitting and full foot enclosing footwear. Examples of inappropriate footwear are clogs, flip flops, and sandals.
- Never add extra length to chain or rope. The chains or ropes provided are the maximum length designed for the product.
Surface selection instructions
- Loose-Fill Materials should be placed under the product and 9 in. (229 mm) out in all directions.
- Use a minimum of 6 inches of protective surfacing for play equipment less than 4 feet in height. If maintained properly, this should be adequate.
- Use containment, such as digging out around the perimeter and/or lining the perimeter with landscape edging. Don't forget to account for water drainage.
- Check and maintain the depth of the loose-fill surfacing material. To maintain the right amount of loose-fill materials, mark the correct level on play equipment support posts. That way you can easily see when to replenish and/or redistribute the surfacing.
- Do not install loose fill surfacing over hard surfaces such as concrete or asphalt.
Disposal Instructions
To dispose of the item, first disassemble it. Dispose of it in such a way that no unreasonable hazards will exist at the time that the item is discarded.

natural_image
Simple line drawing of a light bulb with radiating lines (no text or symbols)WORK WITH US
We are always looking for new innovations and ideas to grow our brand.
If you have an idea or concept, please visit www.plumplay.co.uk/inventors
natural_image
Black-and-white photo of a person crouching on wooden steps with ropes, wearing traditional headwear (no text or symbols visible)Distributed in North America by:
B4Adventure
Denver CO, 80216
Customer Service:
www.plumplay.com/contact-us-com
Plum Products Ltd,
The Cliff, Middle Street, Ingham,
Lincolnshire, LN1 2YQ, UK
Tel: +44 (0) 344 880 5302
Fax: +44 (0) 152 273 0379
Email: contactus@plumproducts.com
www.plumplay.co.uk
Plum Products Australia Pty Ltd,
Suite 303, 156 Military Road,
Neutral Bay, NSW 2089, Australia
Tel:(02)89682200
Email: Aushelpdesk@plumproducts.com
www.plumplay.com.au
Plum Products Hong Kong Ltd
Suite 1015, 10th Floor,
Chinachem Golden Plaza,
77 Mody Road, TST East, Kowloon,
Hong Kong
www.plumplay.com
Copyright Plum Products 2020