
Wicked - Smartphone Plum - Free user manual and instructions
Find the device manual for free Wicked Plum in PDF.


| Product Type | Smartphone |
| Brand | Plum |
| Model | Wicked |
| Operating System | Android (likely version 6.0 or earlier) |
| Display | 5.5 inch TFT LCD |
| Resolution | 540 x 960 pixels |
| Processor | Quad-core 1.3 GHz |
| RAM | 1 GB |
| Internal Storage | 8 GB |
| Expandable Storage | microSD up to 32 GB |
| Rear Camera | 5 MP with LED flash |
| Front Camera | 2 MP |
| Battery | 2000 mAh removable |
| Network | GSM 850/900/1800/1900 MHz |
| SIM Card | Dual SIM (Mini-SIM) |
| Dimensions | 145 x 72 x 10 mm |
| Weight | 150 g |
| Wi-Fi | 802.11 b/g/n |
| Bluetooth | 4.0 |
| GPS | Yes |
| Audio | 3.5 mm headphone jack, FM radio |
| Power Supply | 5V/1A charger |
| Care | Wipe with a soft, dry cloth |
| Safety | Do not expose to water; use original accessories |
| Spare Parts | Battery and charger available |
Frequently Asked Questions - Wicked Plum
User questions about Wicked Plum
0 question about this device. Answer the ones you know or ask your own.
Ask a new question about this device
Download the instructions for your Smartphone in PDF format for free! Find your manual Wicked - Plum and take your electronic device back in hand. On this page are published all the documents necessary for the use of your device. Wicked by Plum.
USER MANUAL Wicked Plum
Read the following contents carefully before using your phone
Charge the battery
Your battery has not charged at the factory. Never take out the battery when charging, because it might destroy your phone.
You can only use charger and USB data cable attached in package.
Choose appropriate tariff scheme
When you use your phone, it may consume mass of Network data traffic. We strongly recommended you to consult to operator tariff scheme before using your phone.
Learn about Privacy Act
Some countries has set strict regulations for phone calls recording method and timing. So we suggest you that it's a better way to learn about related laws of the country before using phone recording.
Setting Your Phone
When you power on your phone at the first time, please add a Company Account by "Setting"--"Account and Synchronization" to synchronize Emails、Calendar and Contacts. Please be sure to log in your Google Account so that you can use some Google Applications such as Gmail and Android Market and so on.
Home Screen
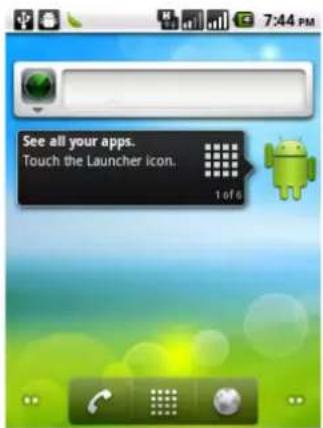
You can change wallpapers , add practical Widgets to home screen and setapplication Shortcuts lightly for your phone.
Touch Home screen and hold, then accession option window will be displayed.


natural_image
Snow-covered mountain landscape under a clear blue sky, with three inset photos showing different landscape views (no text or symbols on the landscape itself)Home Screen personalization
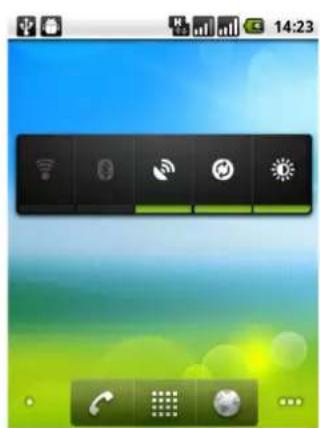
There are five apps. for customization which can be switched by sliding your fingers left and right. Touch and hold to display the whole five apps. It can be displayed on screen when you select one of them.
Touch and hold in blank on home screen ,various of individualization widgets will pop-up on the screen.


natural_image
Mobile phone screenshot showing a framed photo of a garden scene with flowers and trees against a blue sky background (no text or symbols)
natural_image
Digital clock with green hands on black face against blue and green gradient background (no text or symbols)Connect to Network
You can connect to network through data connection or Wi-Fi.
Data connection
When you power on your phone at the first time(you should insert SIM card to SIM1 slot), it will connect data service of operator automatically. If you insert both two SIM cards, data connection default will be on SIM1.
Wi-Fi
- Press Menu in lower left of home screen interface.
- Select settings > Wireless&Network.
- Select Wi-Fi to turn on Wi-Fi.

- Select Wi-Fi settings, and then choose the available Wi-Fi network.
Contacts
If you have added and logged in your Account, Contacts App. Will also display contacts in your account.
Even though there are many contacts in your SIM card, you just need one step to import all contacts to your phone.
- On home screen, select Contacts

- Touch Menu, click More>Import/Export>import contacts from SIM Card/SD card.
If you have logged in exchange account, please select the account of the contact person you will import.
- Touch menu, then select Import ALL.
Add contacts:
- On home screen, select Contacts

-
Touch menu, select New contact, then input contact information in related field.
-
After finishing inputting, select Done to save contact.
If you have logged in your account, you can receive and send E-mails
directly by selecting Gmail

home screen.
You also can set and manage other E-mail account such as POP3, IMAP or Exchange by using E-mail Application.
- On home screen, select E-mail

- After inputting Email Address and password, select Manual setup to choose the type of Email account.
If it dose not display the menu, please select Menu>Account and touch Menu> Add Account, and then choose type of Email account after input Email address and password.
- Follow instructions on screen, and finish Email account setting.
![8:12 PM Inbox (0) sprocom...mail.com Re: 回复 : H - 原始邮件 发件... Me .. Hua... [Imap]/Sent 12/26/2011 Re:H - g 原始邮件 发件人: ... 8 7 No BO Y, ... [Imap]/Sent 12/6/2011](/content/2026/06/1248676/images/98b7b28f2c165dfc3abda7e321c227c8e6a7e32e35b5cd2cca7095ce3121477d.jpg)
You can check all Email account at the same site instead of switching in different Email account through Email application.
Messaging
You can compose messages of SMS and MMS by using Messaging to keep in touch with important persons in your life.
On home screen, select Messaging ,all sent and received messageswill be classified orderly as contact name and phone number to all opened
messaging folders.


contacts classified interface
messages reciprocation interface
Slip on the screen quickly to swipe dialogue list up and down.
➢ Choose contact name or phone number to look in messages reciprocation.
Type message in the Type to compose field, then select send in right side to send messages.
Call Function
Dialing Mode
You can make a call from dialing interface, besides, you can also make a call with number from text messages or Emails you choose or select contact person from Contacts, and select dial key 📁 to make a phone
call.
Most of the SIM card have been setted a PIN code by operator. Please input PIN CODE then click Done when requested. If input wrong PIN code three times in succession, SIM card will be locked immediately. Don't worry! You can ask for operator to search out your PUK code (PIN code unlock key).
You can protect your phone from unauthorized users by setting the PIN code or entering a password.
Enable or Disable SIM card PIN
When PIN code is enabled, you are required to enter the PIN code before making a call.
a) Go to Application Drawer > Settings > Location & Security.
b) On the SIM card lock tab, select Set up SIM card lock.
c) Tap Lock SIM card to use PIN to use the phone. Check to enable, uncheck to disable.
d) Enter the current PIN code.
e) To change the PIN code, select Change PIN.
f) Enter the old PIN code.
g) Enter the new PIN code and confirm.
Setup Screen Lock
You can set up a lock for your screen in form of Pattern, PIN code or
password.
a) Go to Settings > Location & Security
b) Set up screen lock
c) Select a desired form (Pattern, PIN code or password)
Make a call from dialing interface
-
Touch on Home screen to enter dialing interface.
-
Input a couple of numbers on dialing keypad, available numbers and contact list will be displayed on the interface.
If input a wrong number, please click 📁 to erase. Hold 📁 to erase all numbers.
-
Click close keypad and check if there are more available contacts or numbers.
-
Slip on the list up and down slowly to look through screening list.
-
Please choose any method in the following to make a call:
- Click phone numbers in contact list or click after contact name.
- Click after input right number.
During communicating or dialing time, calling status will be displayed on screen.
Camera
You can use camera to capture camera photos and videos to record journeywhen you are on a business trip or have a travel.
Attention: please ensure that you have insert memory card before using, because all pictures and videos will be saved in memory card. Access the
main menu and select Camera

to capture images.
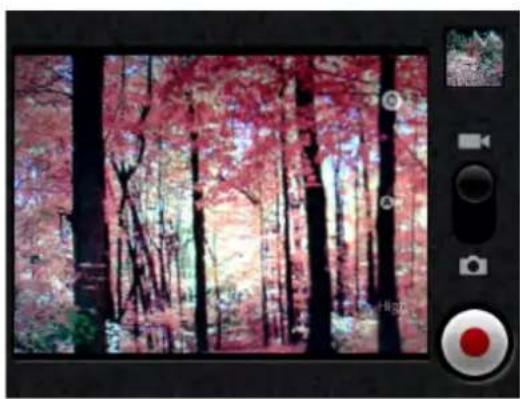
There are two camera modes in the following:

natural_image
Scenic garden scene with blooming pink flowers and willow trees, captured via camera interface (no text or symbols)image mode
natural_image
Photo of a forest scene with vibrant red and pink autumn foliage, captured in a smartphone camera interface (no text or symbols on the image itself)camcorder mode


switch between storage place camera and camcorder white balance adjusting
- Take a picture - video quality option - setting - take a video record
Take pictures
- Enter image mode.
- Setting picture size and quality.
-
Setting white balance.
-
Press to take a picture.

natural_image
Close-up of two glossy red cherries on a green background, displayed within a camera interface (no text or symbols on the cherries themselves)DV-recording
- Enter camera mode, drag to camcorder mode.

-
Setting video quality and other settings such as white balance and color tone and so on.
-
Aim at your target with viewfinder.
-
Press to start recording. Recorded time will be displayed on lower left quarter of the screen.
-
Press to end record.

natural_image
Photo of a forest path with blooming pink flowers and green trees, captured by a camera interface (no text or symbols on the scene itself)FM Radio
You can listen in to broadcasts you like in any time and any place with FM.
➢ Please insert a headset before start FM, because the headset is necessary to serve as antenna.
- Insert the headset attached active the radio.
with phone, and select to

- Click

to

search radio station forward and backward automatically.
- Click

to

fine-tuning for current frequency and the amplitude-frequency is 0.1Mhz
-
Click the numbers displayed on lower part of the screen to save current frequency.
-
Select one of saved radio station to switch to the selected station.
-
Click Menu>settings in FM interface to set audio mode: stereo or mono; Also you can choose loudspeaker or headset to play.
-
Press side volume key to adjust the radio volume.
-
Click back key on bottom of screen to exit FM.
-
Click to back to home screen and make FM play in backstage.

BT
Turn on and turn off BT
-
Access Settings by entering the main menu>settings>Wireless & networks.
-
Turn on or turn off BT.
If you want to turn on and turn off BT easily, access Settings by entering the main menu>Notifications>click.
Change device name
Device name can make other BT device identify your phone.
- Press menu key>settings>Wireless & networks.
- Select BT settings(Please turn on BT)
-
Select Device name.
-
Input device name you want, then click OK.
Connect BT headset
You can listen to music and make calls through BT earphone.
Your BT earphone have to support A2DP when listen to music and make calls.
You have to make your BT earphone discoverable before connect it. So that your phone can search the earphone. Please reference earphone user manual to learn about how to set.
- Access Settings by entering the main menu>settings>Wireless & networks.
- Select BT settings(Please turn on BT)
- Ensure to make device discoverable.
- Click Scan for devices, your phone will start scanning BT devices in available range.
- Select your earphone name when it display, then your phone will try to match your earphone.
- If match failed, please input match password.
When BT earphone connected to your phone, the icon

will be
displayed on status bar. you can listen to music and make calls with
your BT earphone.
Send documents through BT
You can send data to other phones or devices which have BT function.
-
You can send the following types of data:
-
images and videos
- music
-
contacts
-
Steps to send data:
- Photos:after capturing pictures, click 📄 when preview.
• Pictures or videos: 1. Click on home screen, select images & videos.
-
Touch and hold image you want to send, click share.
-
Select BT.
• Music : In music player interface, select
- Contact: 1. Touch and hold the contact in Contacts
interface, select share. -
In Contacts interface, select menu>More>BT to
choose contacts. -
When system advise you to turn on BT, please turn on it with instructions.
-
If you did not match receiving device, please select Scan for devises.
-
Select receiving device name.
-
Accept match application between sending device and receiving device when pop-up instruction.
-
(Receiving documents in receiving device (there has to be a memory card in receiving device).
Map and location
Location settings
You have to enable unknown source before search locations on your phone.
- On home screen, click menu key>settings>location and safety
- Select one or two options of the following:
Through Wi-Fi: You can use Wi-Fi or GPRS to search approximate location.
Through GPS: search accurate GPS location. But it may consume more power and can only be used in clear atmosphere.
Google map
With Google map, you can track your current location, check current traffic condition and particular direction of your destination.
▶ Only when you activate GPRS or Wi-Fi, you can use Google map.
If you will use Google map to find a location, you have to activate GPS positioning.
➢ Google map is not cover all countries and cities.
Open Google map, select to display your current location which mark by in blue.
Settings
You can customize all settings in Settings option. On home screen, select Menu>Settings.
Wireless & network: Set Wi-Fi, data connectivity and BT and so on. Switches between two SIM cards and Fly mode.
- Calling: Set services such as call, call divert and so on.
➢ Voice commands: Set ring tone and adjust volume and so on.
➢ Display: Display settings, autorotation, luminance and so on.
➢ Location and safety: GPS settings, screen auto lock and PIN code setting.
- Applications: Manage your applications. stop and uninstall ans so on.
Account and synchronization: Log in your Google account and Exchange account.
Manage synchronization and other settings of account.
Right of privacy: Select some settings for back-up and restore factory default.
➢ SD card and memory: Check the internal storage space and memory card available space.
To remove the memory card from the phone, be sure to uninstall memory card on this screen.
➢ Language and keyboard: Set the system language, as well as manage your installed input methods.
➢ Voice input and output: Setting the voice input language.
If you have install text to speech application then you can use this option to set text to speech.
- Accessibility: These settings are available only if you have installed the application of auxiliary functions.
Date and time: Set the date, time, time zone and date or time format.
➢ Touch Calibration: To make touch screen calibration
About phone: Check the phone information, such as: type, version, battery and so on.
- Read the following contents carefully before using your phone
- Setting Your Phone
- Home Screen
- Data connection
- Wi-Fi
- Contacts
- Messaging
- Call Function
- Dialing Mode
- Enable or Disable SIM card PIN
- Setup Screen Lock
- Make a call from dialing interface
- Camera
- Take pictures
- DV-recording
- FM Radio
- BT
- Turn on and turn off BT
- Change device name
- Connect BT headset
- Send documents through BT
- Map and location
- Google map
- Settings
Brand : Plum
Model : Wicked
Category : Smartphone