
BBQF2000 - Barbecue PROLINE - Free user manual and instructions
Find the device manual for free BBQF2000 PROLINE in PDF.
| Product type | Electric barbecue |
| Brand | Proline |
| Model | BBQF2000 |
| Power supply | 230 V ~ 50-60 Hz |
| Power | 2000 W |
| Maximum water capacity | 1.9 L |
| Use | Outdoor and indoor (domestic applications) |
| Grid material | Metal (metal grid and small grid) |
| Main functions | Grilling with grid height adjustment (3 positions) |
| Safety | Safety switch, automatic shutdown if control unit leaves the body, recommended 30 mA RCD |
| Cleaning | Grids washable in warm soapy water; base and heating element wiped with a damp cloth; do not immerse |
| Weight | Approximately 5 kg (estimate) |
| Dimensions (L x W x H) | Approximately 50 x 40 x 30 cm (estimate) |
| Spare parts | Metal grid, small grid, oil deflector, water tray, heating element, support tubes |
Frequently Asked Questions - BBQF2000 PROLINE
User questions about BBQF2000 PROLINE
0 question about this device. Answer the ones you know or ask your own.
Ask a new question about this device
Download the instructions for your Barbecue in PDF format for free! Find your manual BBQF2000 - PROLINE and take your electronic device back in hand. On this page are published all the documents necessary for the use of your device. BBQF2000 by PROLINE.
USER MANUAL BBQF2000 PROLINE
GRILLE VIANDE BBQF2000
PROLINE
natural_image
Black outdoor grill with metal legs and grating, placed on a wooden deck in a modern living room with potted plants and white furniture (no text or symbols visible)MANUEL D'UTILISATION HANDLEIDING
TABLE DES MATIÈRES
MISES EN GARDE IMPORTANTES...... p. 02
DESCRIPTION DU PRODUIT...... p. 05
ASSEMBLAGE...... p. 06
AVANT LA PREMIÈRE UTILISATION...... p. 10
UTILISATION DE VOTRE BARBECUE...... p. 10
NETTOYAGE ET ENTRETIEN...... p. 13
SPÉCIFICATIONS...... p. 13
MISE AU REBUT ...... p. 14

MISES EN GARDE IMPORTANTES
MERCI DE BIEN VOULOIR LIRE LES CONSIGNES DE SÉCURITÉ ATTENTIVEMENT AVANT D'UTILISER L'APPAREIL ET CONSERVER POUR RÉFÉRENCE ULTÉRIEURE.
AVERTISSEMENTS
natural_image
Technical line drawings of a mechanical component with internal structure and mounting holes (no text or symbols)natural_image
Technical line drawing of a mechanical device with three views: top view, middle view, and bottom view (no text or symbols)
natural_image
Close-up of a dark, textured surface with two rectangular cutouts and a small rectangular block at the bottom (no text or symbols visible)natural_image
Close-up of a mechanical component with cutouts and grooves (no visible text or symbols)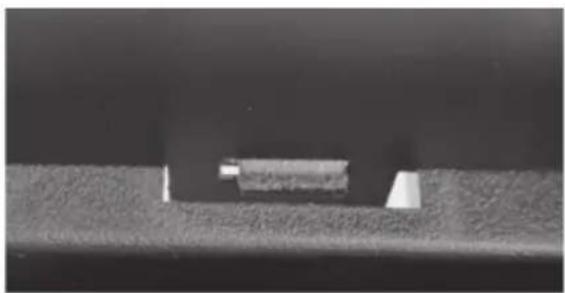
natural_image
Close-up of a small white object embedded in a textured gray surface, possibly a material sample or component (no visible text or symbols)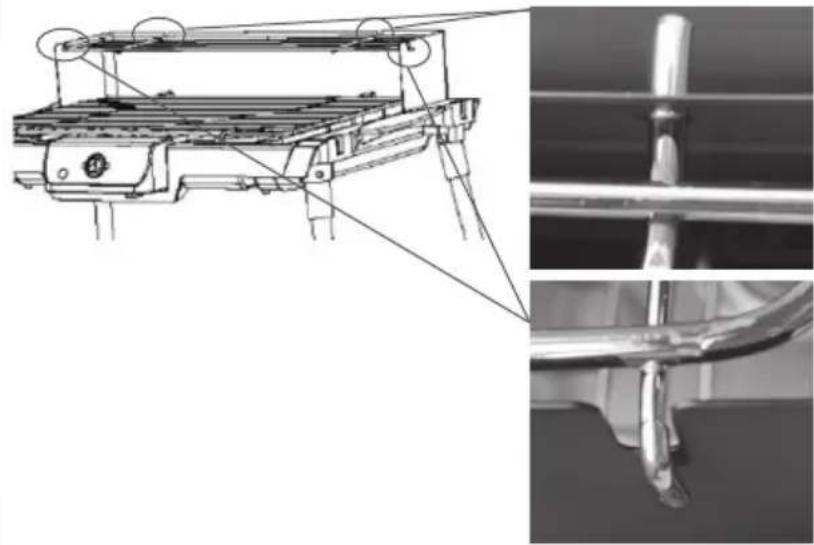
natural_image
Technical line drawing of a mechanical assembly with three views (top, front, side), no visible text or symbols.natural_image
Technical line drawing of a mechanical component with four vertical rods and a central rectangular base (no text or symbols)natural_image
Technical line drawing of a structural frame with vertical supports and a grid-patterned base (no text or symbols)
natural_image
Close-up of a metallic cylindrical pipe with a circular hole, showing surface texture and no text or symbols.natural_image
Close-up of a metal screw and pin against a wooden surface (no text or symbols visible)natural_image
Close-up of a metallic mechanical component with metal brackets and a handle (no visible text or symbols)natural_image
Line drawing of a four-legged table with a metal frame and top panel (no text or symbols)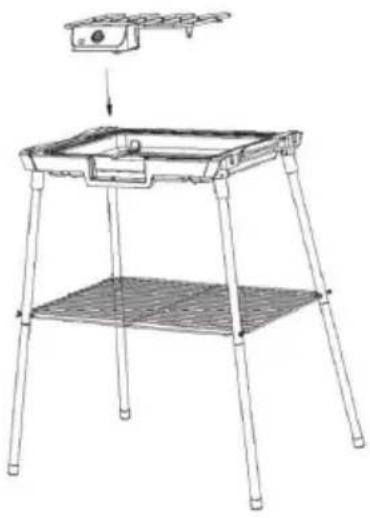
natural_image
Line drawing of a four-legged outdoor table with a small container on top (no text or symbols)natural_image
Line drawing of a portable outdoor grill with a gridded base and top shelf (no text or symbols)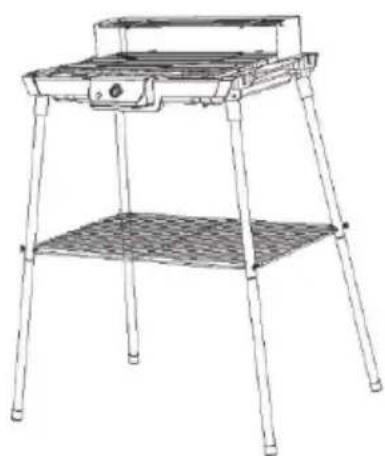
natural_image
Line drawing of a four-legged outdoor table with a flat top and metal legs (no text or symbols)
AVANT LA PREMIÈRE UTILISATION
natural_image
Close-up of a mechanical component with a metallic tool inserted, showing a rectangular cutout (no text or symbols visible)natural_image
Exterior view of a modern barbed grill with meat and fried food being poured into it (no text or symbols visible)Hotline Darty France
natural_image
Close-up of a mechanical component with three circular holes and a rectangular base (no visible text or symbols)natural_image
Technical line drawing of a mechanical component with two views (top and side), showing internal structure without any text or symbols.natural_image
Technical line drawing of a mechanical assembly with a component labeled (no text or symbols present)
natural_image
Technical line drawing of a portable heating device with cooling fins and a roof cover (no text or symbols)natural_image
Close-up of a mechanical component with a metallic hook inserted into a textured rectangular block (no visible text or symbols)natural_image
Technical line drawing of a mechanical device with three views: top view, middle view, and bottom view (no text or symbols)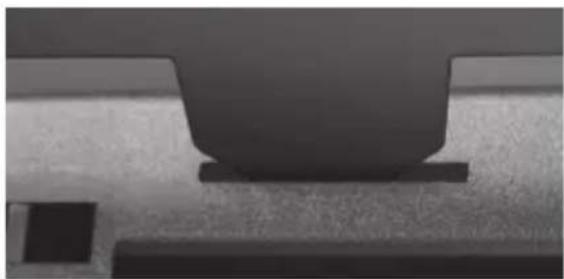
natural_image
Close-up of a mechanical component with a central rectangular block and flange, resting on textured surface (no visible text or symbols)natural_image
Close-up of a mechanical component with cutouts and textured surfaces (no visible text or symbols)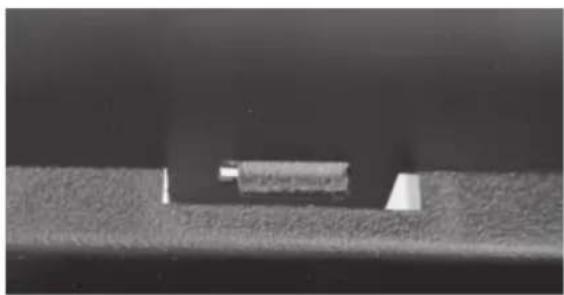
natural_image
Close-up of a metallic component with a small rectangular cutout and a triangular edge, resting on a textured surface (no text or symbols visible)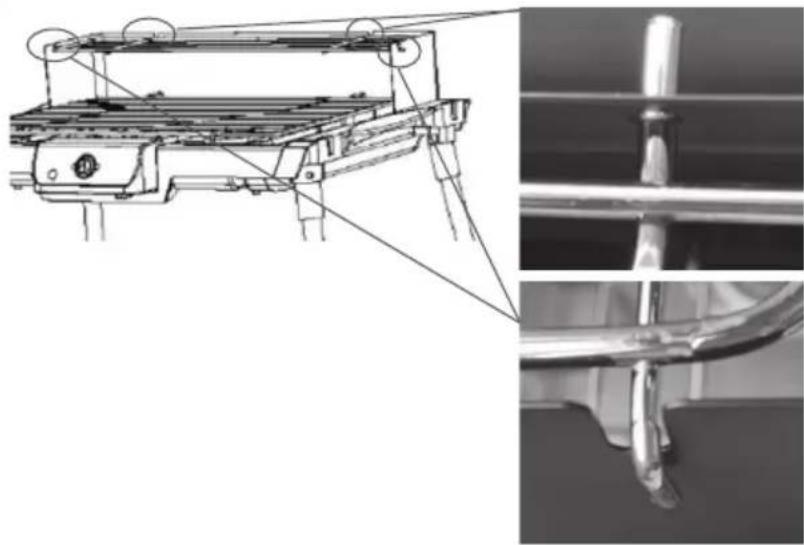
natural_image
Technical line drawing of a mechanical assembly with two views: top shows internal components, bottom shows close-up of a metallic component (no text or symbols)natural_image
Technical line drawing of a mechanical component with four vertical rods and a central base (no text or symbols)natural_image
Technical line drawing of a structural support frame with vertical rods and a flat panel (no text or symbols)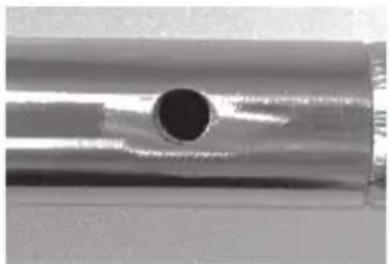
natural_image
Close-up of a metallic cylindrical object with a central hole (no text or symbols visible)natural_image
Close-up of a metal screw with a threaded shaft, mounted on a wooden surface (no text or symbols visible)natural_image
Close-up of a metallic mechanical component with metal rods and a handle (no visible text or symbols)natural_image
Line drawings of a two-tier outdoor table setup with legs and a tray, showing structural changes (no text or symbols)natural_image
Line drawings of two different outdoor cookware or table setups, shown from different angles (no text or symbols present)
natural_image
Close-up of a mechanical component with a metallic tool inserted into a rectangular block (no visible text or symbols)natural_image
Grilled outdoor grill with meat and a metal pitcher pouring liquid from a container (no text or symbols visible)IMPORTANT SAFETY INSTRUCTIONS
PLEASE READ THE FOLLOWING SAFETY WARNINGS AND THE INSTRUCTIONS CAREFULLY BEFORE USING THE APPLIANCE AND KEEP FOR FUTURE REFERENCE.
WARNINGS
- This appliance is intended to be used in household and similar applications such as:
- staff kitchen areas in shops, offices and other working environments;
- farm houses;
- by clients in hotels, motels and other residential type environments;
- bed and breakfast type environments.
- If the supply cord is damaged, it must be replaced by the manufacturer, its service agent or similarly qualified persons in order to avoid a hazard.
- CAUTION: In order to avoid a hazard due to inadvertent resetting of the thermal cut-out, this appliance must not be supplied through an external switching device, such as a timer, or connected to a circuit that is regularly switched on and off by the utility.
- This appliance can be used by children aged from 8 years and above and persons with reduced physical, sensory or mental capabilities or lack of experience and knowledge if they have been given supervision or instruction concerning use of the appliance in a safe way and understand the hazards involved. Children shall not play with the appliance.
Cleaning and user maintenance shall not be made by children unless they are older than 8 and supervised.
- Keep the appliance and its cord out of reach of children less than 8 years.
- The appliance is not intended to be operated by means of an external timer or separate remote-control system.
- The temperature of accessible surfaces may be high when the appliance is operating.
- Regarding the instructions for cleaning surfaces in contact with food, refer to the section "Cleaning and Maintenance" on page EN-41 of the manual.
- The outer surface may get hot when the appliance is operating.
- WARNING: Charcoal or similar combustible fuels must not be used with this appliance.
- Do not place the appliance in or near hot gas or electric burner, or permit to touch a heated oven or mini oven.
- The surfaces are liable to get hot during use.
- The maximum quantity of water to be poured into the appliance is 1,9 L.
- The appliance is suitable for outdoor use.
- The supply cord should be regularly examined for signs of damage, and if the cord is damaged, the appliance must not be used.
- The appliance must be supplied through a residual current device (RCD) having a rated residual operating current not exceeding 30 mA.
- The appliance is to be connected to a socket-outlet having an earthing contact.
PRECAUTIONS
- Switch off and unplug the appliance from the mains socket when not in use, before fitting or removing attachments, or before cleaning.
- Do not pull the plug out by the cord.
- Do not let the power cord hang over the edge of a table or counter, or touch hot surfaces.
- Do not use the appliance for anything other than its intended use.
- Please ensure that the appliance is used on a stable, level and heat resistant surface.
- Do not use the appliance near explosives or flammable materials.
-
Never leave the appliance unattended during use.
-
Do not allow the appliance to come into contact with flammable materials such as paper, walls, draperies, towels, chemicals, etc.
- Do not move the appliance while it is in use. Allow the appliance to cool before moving or storing it.
- Certain parts of the appliance may become hot during use. Refrain from touching these areas so as not to burn yourself.
- Make sure that the appliance and the power cable never come into contact with hot devices such as hotplate or naked flames.
- Make sure your hands are dry when you touch the appliance, the power cable or the plug.
- Do not immerse the appliance, the power cord or plug in water or any other liquid.
- Children should be supervised to ensure that they do not play with the appliance.
- Ensure that no flammable materials are placed above or next to the appliance, and the appliance shall be kept at least 30cm away from the wall.
- The temperature control shell is equipped with a safety switch. When the temperature control shell leaves the main body, the electric heating tube will not heat.
- Do not use a metal scouring pad to clean the appliance. Fragments of metal could come loose and touch the appliance's electrical parts causing it to short circuit.

PRODUCT DESCRIPTION
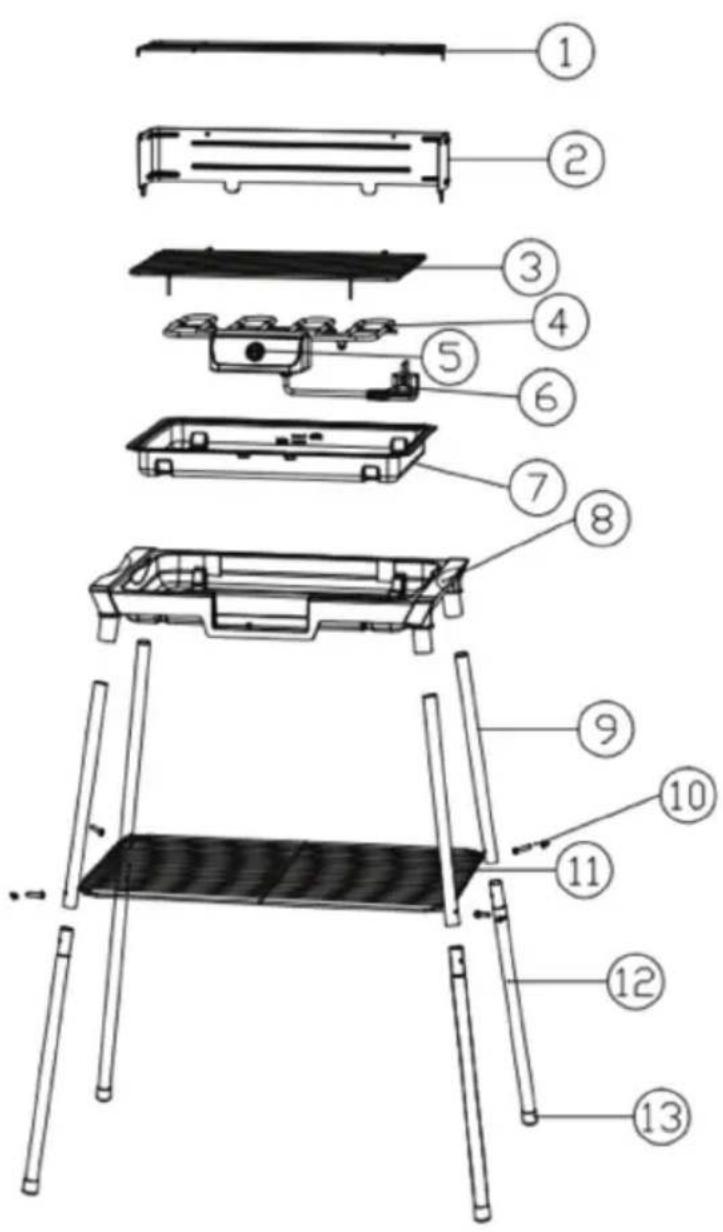
- Small food grid
- Oil baffle
- Wire rack
- Heating element
- On/Off switch
- Power cord with plug
-
Water tray
-
Grill base
- Upper support tubes
- Screws and nuts
- Tray
- Lower support tubes
- Tube covers

ASSEMBLY
- Place the grill base on a dry, level surface.
- Place the water tray in the grill base.
natural_image
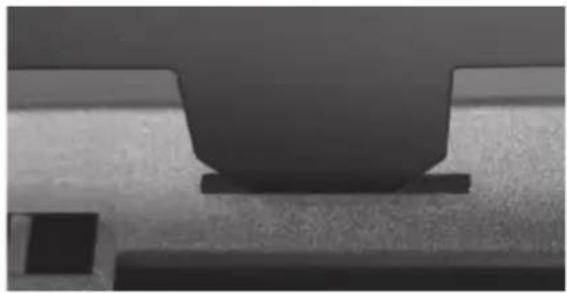
Close-up of a mechanical component with three circular holes and a rectangular base (no visible text or symbols)One side of the water tray has dents.
Ensure this side with dents are aligned with the groove of the grill base.
natural_image
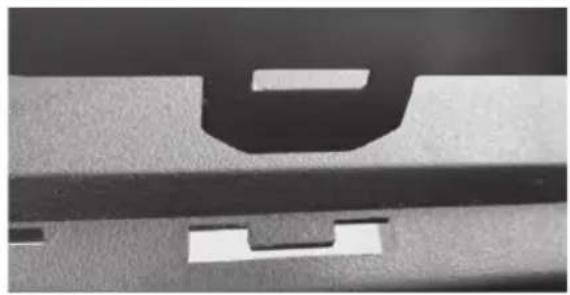
Technical line drawing of a mechanical device with two views: top shows a rectangular component, bottom shows a frame structure (no text or symbols)- Place the heating element onto the grill base.
natural_image
Technical line drawing of a mechanical assembly with a component and a circular detail (no text or symbols)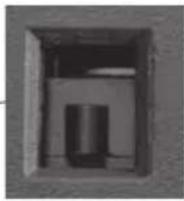
Ensure the groove on the underside of the heating element is aligned with the protrusion on the grill base.
If the heating element is correctly placed onto the grill base, a click will be heard.
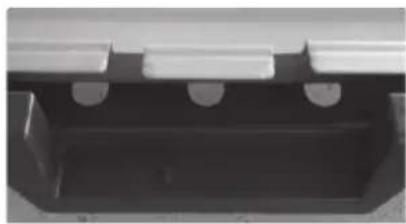
- Place the wire rack onto the grill base.
natural_image
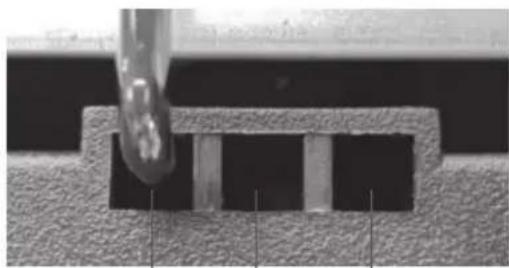
Line drawing of a portable heating device with cooling fins and a roof cover (no text or symbols)Medium rack position (deeper dent)
natural_image
Close-up of a mechanical component with a metallic tool inserted, showing internal structure and mounting holes (no text or symbols visible)High rack position (shallow dent)
Low rack
position
(deepest dent)
FR
NL
EN
ES
PT
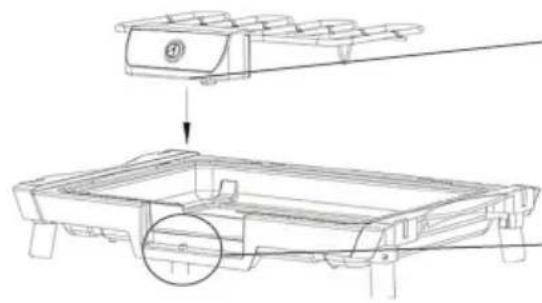
- Insert the oil baffle into the grill base. Attach the small food grid to the oil baffle.
natural_image
Technical line drawing of a mechanical assembly with three views: top view, middle view, and bottom view (no text or symbols)A. Insert two tabs on the long side of oil baffle into the slots of the grill base.
natural_image
Close-up of a mechanical component with two flanges and a central depression (no visible text or symbols)B. Insert two tab on both short sides of oil baffle into the slots of the grill base.
natural_image
Close-up of a mechanical component with cutouts and a central slot (no visible text or symbols)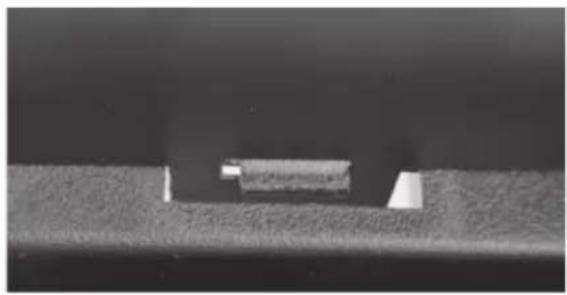
natural_image
Close-up of a metallic surface with a small rectangular indentation and a triangular indentation (no text or symbols visible)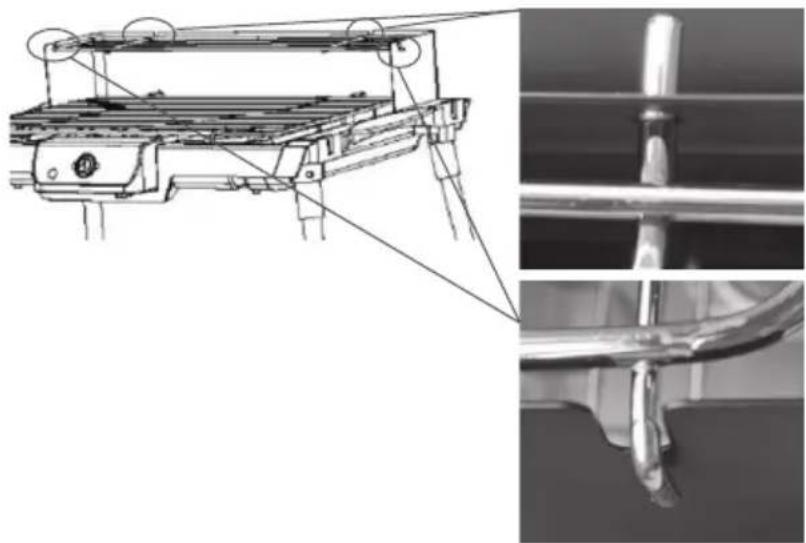
natural_image
Technical line drawing of a mechanical device with attached components and close-up views (no text or symbols)First, insert the pins of small food grid into the holes of the oil baffle.
Then, place the hooks on both sides of small food grid into the dents of oil baffle.
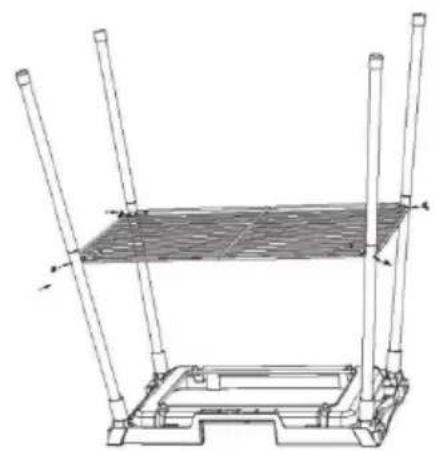
You can also use this barbecue grill on a stand.
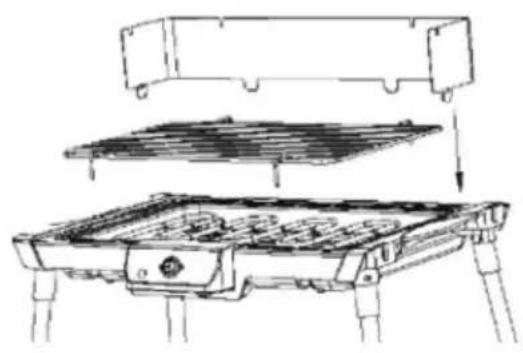
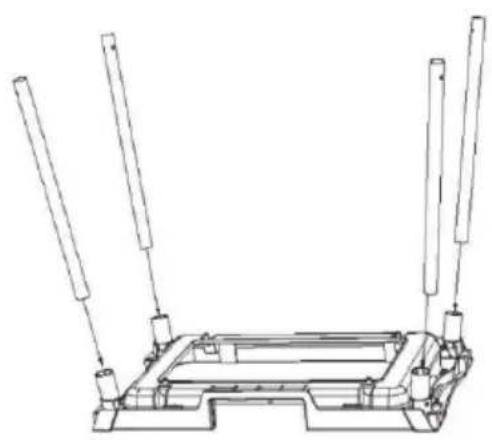
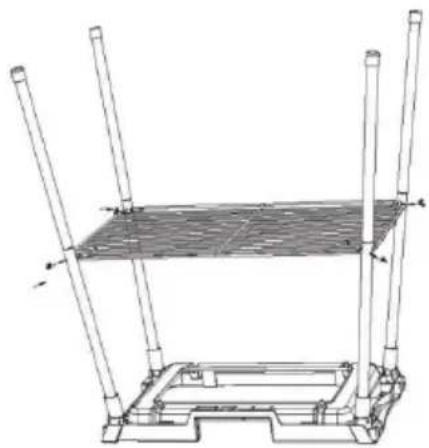
- Mount four upper support tubes to the grill base.
natural_image
Technical line drawing of a mechanical component with four vertical rods and a central base (no text or symbols)- Connect the grid, upper support tubes and lower support tubes together with supplied screws and wing nuts.
natural_image
Technical line drawing of a mechanical support structure with vertical rods and a flat plate (no text or symbols)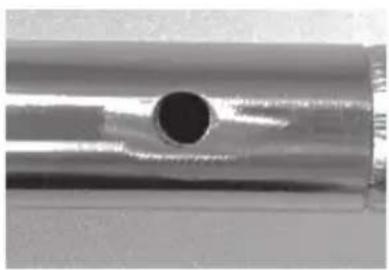
natural_image
Close-up of a metallic cylindrical object with a central hole and flange (no text or symbols visible)A. Connect the upper and lower support tubes together, ensuring the holes are aligned.
natural_image
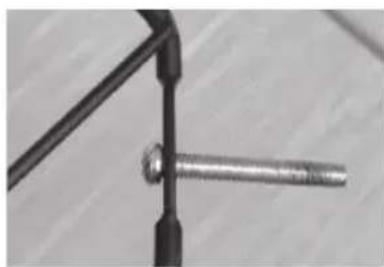
Close-up of a metal screw with a threaded shaft, mounted on a wooden surface (no text or symbols visible)B. Insert the screws through the holes on the corners of the grid.
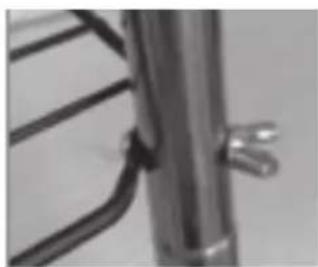
natural_image
Close-up of a metal mechanical component with two protruding joints (no visible text or symbols)C. Insert the screws through the holes of tubes and secure by screwing the wing nuts.
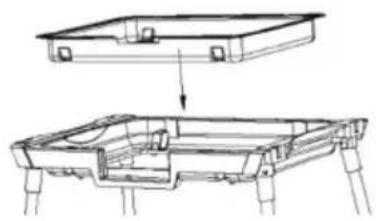
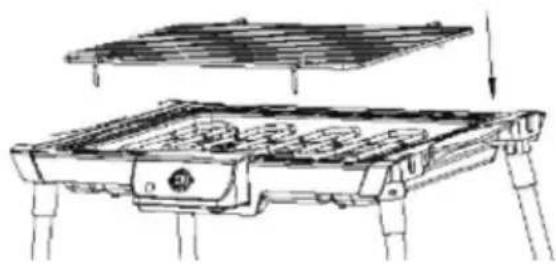
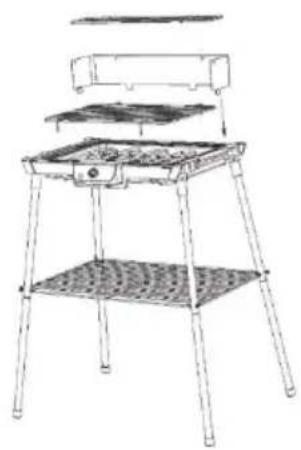
- Place the water tray into the grill base.
- Place the heating element onto the water tray.
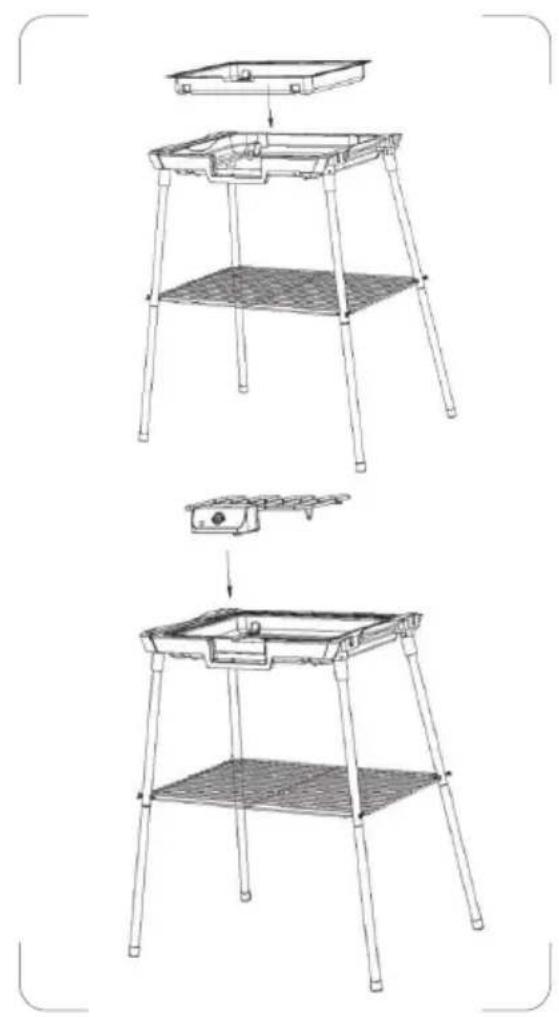
natural_image
Line drawings of a two-tier outdoor table setup with legs and a tray, showing structural changes (no text or symbols)- Install the wire rack and oil baffle on the grill base.
Install the small food grid on the oil baffle.
Ensure that the appliance is places on a dry level surface before use.
natural_image
Line drawing of a four-legged outdoor picnic table with grilles and a tray (no text or symbols)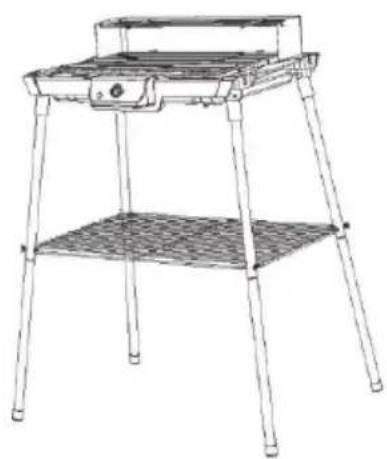
natural_image
Line drawing of a four-legged outdoor table with a flat top and mesh base (no text or symbols)
BEFORE FIRST USE
Remove all packaging material and any sticker.
Wash the wire rack and small food grid in warm soapy water. Rinse and dry thoroughly.

USING YOUR BARBECUE
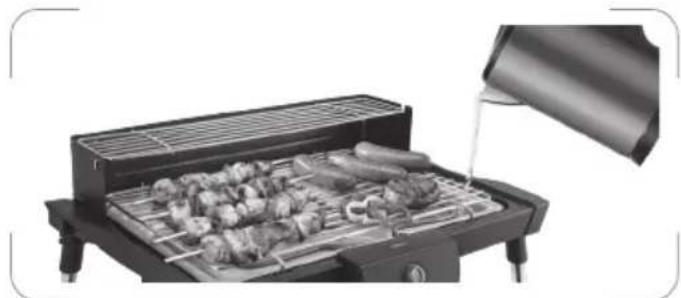
- Add water before use.

WARNING: Never use the grill without the water tray in place. The water-filled tray is used to catch drippings and help reduce smoke while grilling.
- Ensure that the On/Off switch is set to the "O" position.
- Plug your barbecue grill in a suitable mains socket.
-
Switch on the grill by setting the switch to the "I" position.
-
The indicator light on the switch will illuminate.
-
When you use the grill for the first time, it may produce some smoke. This is normal.
-
Place the food you would like to barbecue on the wire rack.
- You can adjust the rack to the desired height.
Use the medium and high rack positions for slower grilling.

natural_image
Close-up of a mechanical component with a metallic tool inserted, showing internal structure (no text or symbols visible)Use the low rack position to quickly grill food.
WARNING: Do not use any fuels such as charcoal and wood in the barbecue grill.
- Maintain the water level between the MIN and MAX levels as indicated on the tray.
- When filling with water, be careful not to let water come into direct contact with the heating element.
natural_image
Exterior view of a modern outdoor grill with meat and utensils, pouring liquid from a container (no text or symbols visible)- Never use plates, trays or aluminum foil beneath the food. The grilling time depends on the thickness of food. Turn the food from time to time.
- When you finish grilling food, set the On/Off switch to the "O" position.
• The indicator light on the switch will go out.
-
Take food off the wire rack.
-
Disconnect the power cord from the mains socket.
- Always let the barbecue grill cool down completely before diassembling and cleaning.

CLEANING AND MAINTENANCE
- Remove the power plug from the mains socket and let the appliance cool down completely before cleaning.
- Remove the small food grid, oil baffle, wire rack, heating element and water tray.
- Wipe the heating element with a dry cloth.
- Wipe the grill base with a slightly damp cloth.
- Never immerse the heating element and grill base in water or any other liquid.
- Empty the water tray. Clean the wire rack, small food grid, oil baffle and water tray in warm soapy water with a cloth or sponge. Rinse and dry thoroughly.
- Do not use abrasive or chemical cleaning agent.

SPECIFICATIONS
Ratings: 230V\~50-60 Hz 2000W
DISPOSAL
As a responsible retailer we care about the environment. As such we urge you to follow the correct disposal procedure for the appliance and packaging materials. This will help conserve natural resources and ensure that it is recycled in a manner that protects health and the environment.
You must dispose of this appliance and its packaging according to local laws and regulations.
Because this appliance contains electronic components, the appliance and its accessories must be disposed of separately from household waste when the appliance reaches its end of life.
Contact your local authority to learn about disposal and recycling.
The appliance should be taken to your local collection point for recycling. Some collection points accept appliance free of charge.
We apologise for any inconvenience caused by minor inconsistencies in these instructions, which may occur as a result of product improvement and development.
Etablissements Darty & fils ©, 129 Avenue Gallieni, 93140 Bondy, France 13/12/2021
INDICE
MEDIDAS DE SEGURIDAD IMPORTANTES...... p. 44
DESCRIPCIÓN DEL PRODUCTO...... p. 47
MONTAJE...... p. 48
ANTES DE USAR POR PRIMERA VEZ...... p. 52
CÓMO USAR SU BARBACOA...... p. 52
LIMPIEZA Y MANTENIMIENTO...... p. 55
ESPECIFICACIONES...... p. 55
ELIMINACIÓN...... p. 56

natural_image
Close-up of a black plastic component with three circular holes, possibly part of a mechanical or electronic component (no visible text or symbols)natural_image
Technical line drawing of a mechanical housing component, showing top and side views (no text or symbols)natural_image
Technical line drawing of a mechanical assembly with a top view and a side view showing internal components (no text or symbols)
natural_image
Technical line drawing of a portable heating device with cooling unit and top panel (no text or symbols)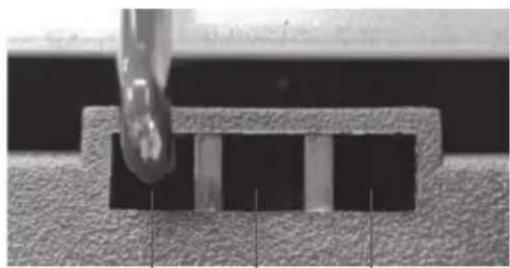
natural_image
Close-up of a mechanical component with a metallic tool inserted, showing internal structure (no text or symbols visible)natural_image
Technical line drawing of a mechanical device with three views: top view, middle view, and bottom view (no text or symbols)natural_image
Close-up of a dark, flat object placed on a textured surface (no visible text or symbols)natural_image
Close-up of a mechanical component with cutouts and a rectangular slot (no text or symbols visible)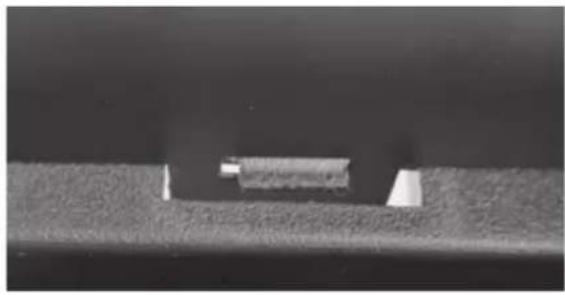
natural_image
Close-up of a metallic component with a small rectangular feature embedded in a textured surface (no visible text or symbols)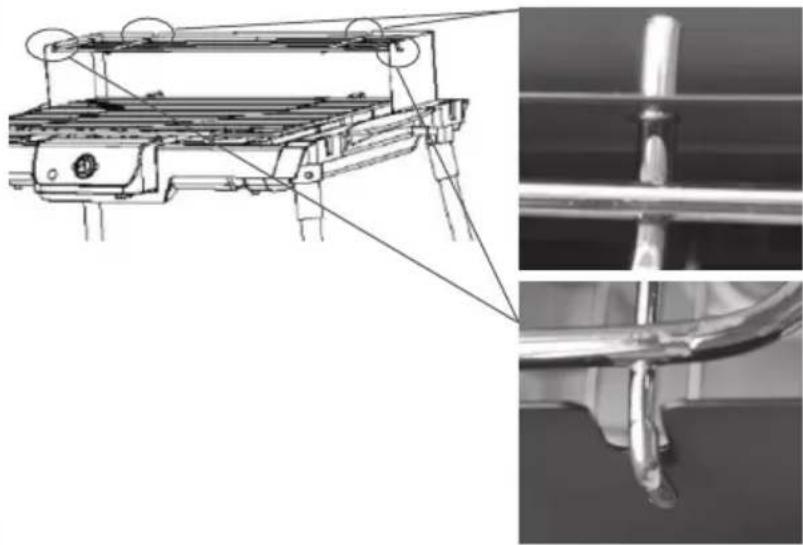
natural_image
Technical diagram of a mechanical device with attached components and a close-up view of a metallic tool tip (no text or symbols present)natural_image
Technical line drawing of a mechanical component with four vertical rods and a central rectangular base (no text or symbols)natural_image
Technical line drawing of a structural frame with vertical supports and a grid-patterned base (no text or symbols)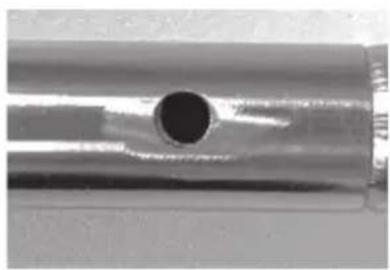
natural_image
Close-up of a metallic cylindrical object with a central hole (no text or symbols visible)natural_image
Close-up of a metal screw fastener inserted into a cylindrical rod (no text or symbols visible)natural_image
Close-up of a metallic mechanical component with ribbed structure and lever (no visible text or symbols)natural_image
Line drawings of a two-tier outdoor table setup with legs and a tray, showing structural changes (no text or symbols)natural_image
Line drawings of two outdoor picnic tables with grilles and metal legs (no text or symbols)
ANTES DE USAR POR PRIMERA VEZ
natural_image
Metal mesh grid structure with no text or symbols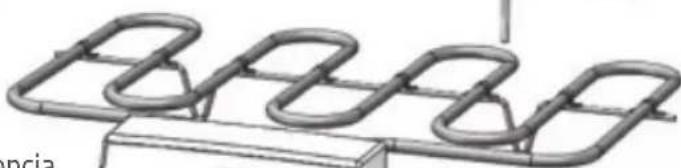
natural_image
Pure mechanical component diagram without any text, numbers, or symbolsnatural_image
Close-up of a hand holding an eggplant, with no visible text or symbols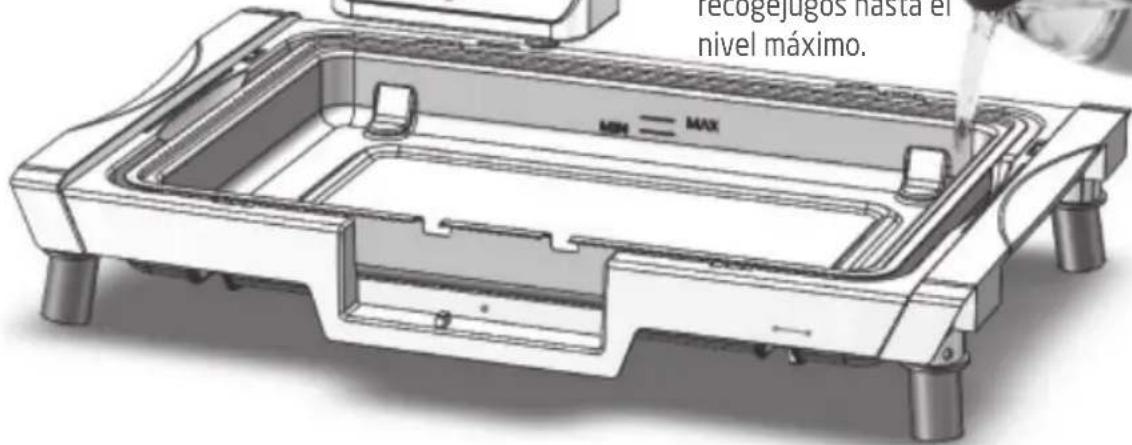
natural_image
Close-up of a mechanical component with a metallic tool inserted, showing a rectangular block and textured surface (no text or symbols visible)natural_image
Grilled outdoor grill with meat and vegetables being poured into it (no text or symbols visible)natural_image
Close-up of a mechanical component with three circular holes and a rectangular base (no visible text or symbols)natural_image
Technical line drawing of a mechanical component with an open top view and internal structure (no text or symbols)natural_image
Technical line drawing of a mechanical assembly with exploded view and close-up details (no text or symbols)natural_image
Technical line drawing of a portable stove or heating unit with cooling fans and a roof cover (no text or symbols)
natural_image
Close-up of a mechanical component with a metallic tool inserted, showing internal striped structure (no text or symbols visible)natural_image
Technical line drawing of a mechanical assembly with three views (top, front, side), showing internal components and alignment (no text or symbols)
natural_image
Close-up of a mechanical component with a dark top and rectangular base, no visible text or symbolsnatural_image
Close-up of a mechanical component with cutouts and grooves (no visible text or symbols)
natural_image
Microscopic view of a material cross-section showing a rectangular indentation on a textured surface (no text or symbols visible)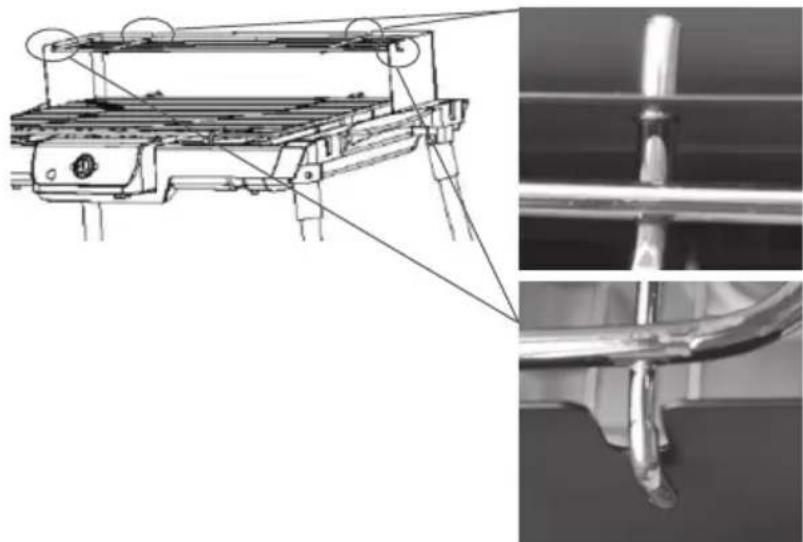
natural_image
Technical line drawing of a mechanical assembly with two views: top shows a bracket and plate, bottom shows a tool tip (no text or symbols)natural_image
Technical line drawing of a mechanical component with four vertical rods and a central base (no text or symbols)- Ligue a grelha, tubos de suporte superiores e tubos de suporte inferiores uns aos outros com os parafusos e porcas de asas fornecidos.
natural_image
Technical line drawing of a structural frame with vertical supports and a grid-patterned base (no text or symbols)
natural_image
Close-up of a metallic cylindrical pipe with a circular hole (no text or symbols visible)natural_image
Close-up of a metal screw and threaded rod against a wooden surface (no text or symbols visible)natural_image
Close-up of a metallic mechanical component with metal brackets and a handle (no visible text or symbols)natural_image
Line drawings of a four-legged outdoor table setup with a small device on top (no text or symbols)natural_image
Line drawing of a four-legged outdoor grill with a gridded base and top shelf (no text or symbols)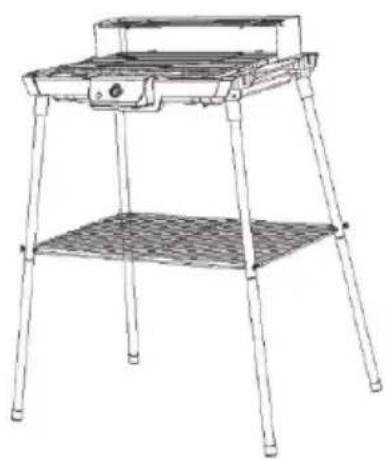
natural_image
Line drawing of a four-legged outdoor table with a gridded base and top panel (no text or symbols)
natural_image
Close-up of a mechanical component with a metallic tool inserted, showing a rectangular block and textured surface (no text or symbols visible)natural_image
Grilled outdoor grill with meat and a ladle pouring liquid from a container (no text or symbols visible)EU Declaration of Conformity
Product Description:
natural_image
Black outdoor grill table with metal legs and a gridded base (no text or symbols visible)Marque –
Brand /Merk /Marca:
Proline
The object of the declaration described above is in conformity with the relevant Union harmonisation legislation:
Low Voltage Directive (LVD)
Eco design requirements for energy-related products (ErP)
RoHS
EMC:
EN IEC 55014-1:2021
EN IEC 55014-2:2021
EN IEC 61000-3-2:2019+A1:2021
EN 61000-3-3:2013+A1:2019
LVD :
EN 60335-1:2012+A11:2014+A13:2017+A1:2019+A14:2019+A2:2019
EN 60335-2-9:2003+A1:2004+A2:2006+A12:2007+A13:2010
EN 60335-2-78:2003+A1:2008
EN 62233:2008
ErP :
(EC) No 1275/2008
(EU) No 801/2013
(EU) 2016/2282
EN 50564:2011
This declaration of conformity is drawn up under the sole responsibility of the manufacturer.
The person responsible for this declaration is:
Place, Date / Lieu :
PROLINE
Etablissements Darty & fils ©, 129 Avenue Gallieni, 93140 Bondy, France


- GRILLE VIANDE BBQF2000
- PROLINE
- TABLE DES MATIÈRES
- MISES EN GARDE IMPORTANTES
- MERCI DE BIEN VOULOIR LIRE LES CONSIGNES DE SÉCURITÉ ATTENTIVEMENT AVANT D'UTILISER L'APPAREIL ET CONSERVER POUR RÉFÉRENCE ULTÉRIEURE.
- AVERTISSEMENTS
- AVANT LA PREMIÈRE UTILISATION
- Hotline Darty France
- IMPORTANT SAFETY INSTRUCTIONS
- PLEASE READ THE FOLLOWING SAFETY WARNINGS AND THE INSTRUCTIONS CAREFULLY BEFORE USING THE APPLIANCE AND KEEP FOR FUTURE REFERENCE.
- WARNINGS
- PRECAUTIONS
- PRODUCT DESCRIPTION
- ASSEMBLY
- BEFORE FIRST USE
- USING YOUR BARBECUE
- CLEANING AND MAINTENANCE
- SPECIFICATIONS
- DISPOSAL
- INDICE
- ANTES DE USAR POR PRIMERA VEZ
- Marque –
- EMC:
- LVD :
- ErP :
Brand : PROLINE
Model : BBQF2000
Category : Barbecue