
Camedia D590 Zoom - Camera OLYMPUS - Free user manual and instructions
Find the device manual for free Camedia D590 Zoom OLYMPUS in PDF.
| Product type | Digital camera |
| Brand | Olympus |
| Model | Camedia D590 Zoom |
| Power source | Lithium-ion battery LI-12B, charger LI-10C |
| Optical zoom | 3× |
| Digital zoom | 4× (continuous total zoom 12×) |
| LCD screen | 1.8 inches |
| Storage media | xD-Picture Card (16 MB to 512 MB) |
| Scene modes | 10 modes (including Night, Self-portrait, Kitchen) |
| Connectivity | USB, TV output, PictBridge |
| Video recording | Yes |
| Built-in flash | Yes |
| Box contents | Camera, LI-12B battery, LI-10C charger, USB cable, strap, CD-ROM (advanced manual), warranty card |
| Safety instructions | Do not expose to water, use only recommended accessories |
| Cleaning | Unplug before cleaning, use a damp cloth |
| Supplied software | OLYMPUS Master (on CD-ROM) |
Frequently Asked Questions - Camedia D590 Zoom OLYMPUS
User questions about Camedia D590 Zoom OLYMPUS
0 question about this device. Answer the ones you know or ask your own.
Ask a new question about this device
Download the instructions for your Camera in PDF format for free! Find your manual Camedia D590 Zoom - OLYMPUS and take your electronic device back in hand. On this page are published all the documents necessary for the use of your device. Camedia D590 Zoom by OLYMPUS.
USER MANUAL Camedia D590 Zoom OLYMPUS
natural_image
Illustration of a silver Olympus digital camera with lens and control buttons (no text or symbols on body)Contents
Unpacking the box contents....3
What can this camera do? ....4
Safety precautions ....7
General precautions....7
FCC Notice ....8
Attaching the strap ....10
Charging the battery....11
Loading and removing the battery....12
Loading the battery ....12
Removing the battery....13
Inserting and removing the card....15
xD-Picture Card ....15
Inserting the card ....16
Removing the card....18
Power on/off....19
When taking pictures (Shooting mode)....19
When viewing pictures (Playback mode) ......20
Holding the camera correctly ....21
Taking still pictures....22
Playing back still pictures....26
Information on OLYMPUS Master....27
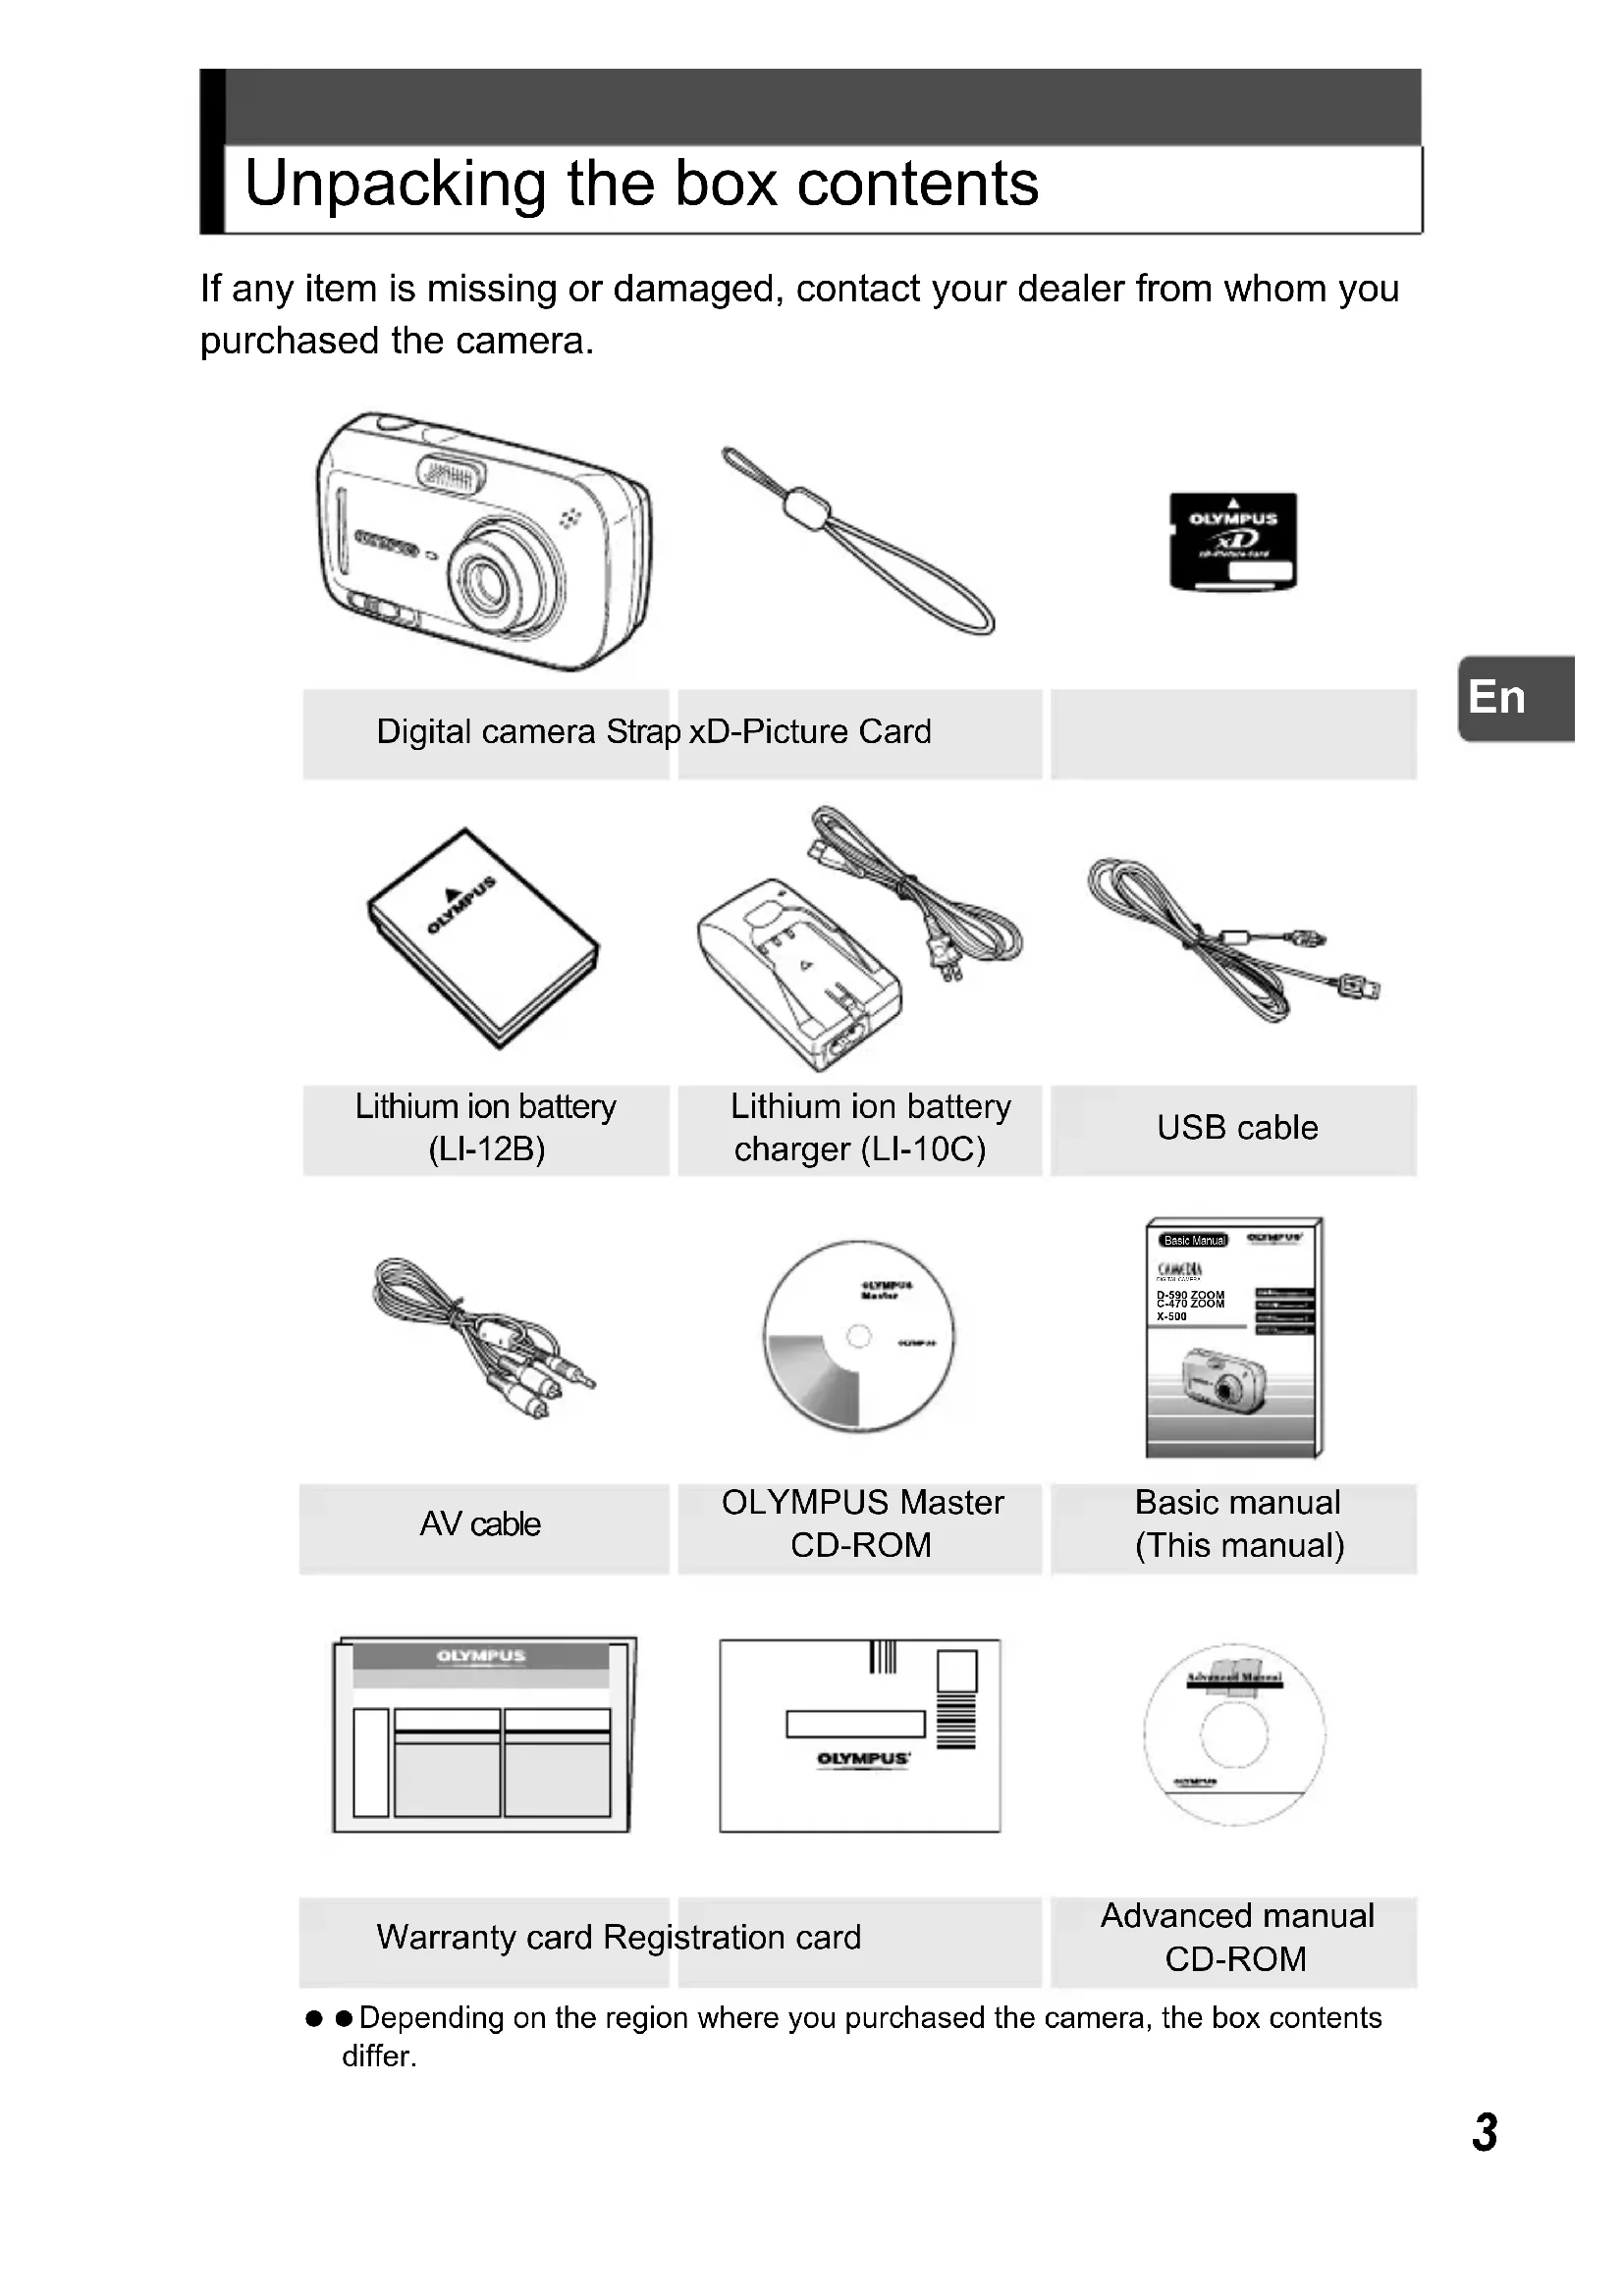
Unpacking the box contents
If any item is missing or damaged, contact your dealer from whom you purchased the camera.

Digital camera Strap xD-Picture Card

text_image
OLYMPUSLithium ion battery (LI-12B)

natural_image
Line drawing of a battery pack connected to a cord of cable (no text or symbols)Lithium ion battery charger (LI-10C)

natural_image
Coiled cable with connectors, no visible text or symbolsUSB cable

natural_image
Line drawing of a bundle of three connected audio/video cables (no text or symbols)AV cable

text_image
GLYMP24 Master GCOMP 24OLYMPUS Master CD-ROM

text_image
Basic Manual CAMERA D-590 ZOOM C-470 ZOOM X-500Basic manual (This manual)

text_image
OLYMPUSWarranty card Registration card

text_image
OLYMPUS'Advanced manual CD-ROM
- Depending on the region where you purchased the camera, the box contents differ.
What can this camera do?
The camera has 10 shooting scene modes.
Just choose a desired shooting scene mode and press the shutter button to take pictures. The camera does all the rest.
NIGHT SCENE SELF PORTRAIT CUISINE

natural_image
Nighttime cityscape with illuminated skyscrapers and a waterfront scene (no visible text or signage)
natural_image
Black-and-white photo of two smiling people outdoors, no visible text or symbols
natural_image
Close-up of a bowl filled with cooked meat and vegetables (no visible text or symbols)INDOOR LANDSCAPE + PORTRAIT LANDSCAPE

natural_image
Group of people dining together at a table, smiling (no visible text or symbols)
natural_image
Black-and-white photo of two people posing on a mountain peak with snow-capped peaks in the background (no text or symbols visible)
natural_image
Black-and-white landscape photo of a snow-capped mountain reflected in calm water, surrounded by evergreen trees (no text or symbols visible)
natural_image
Line drawing of a digital camera with control panel and display screen (no text or symbols)You can frame, take, and view your shots all on the very clear 1.8" monitor.

Pictures that you take will be recorded on the xD-Picture Card.
You can take a series of pictures for a panorama.

natural_image
Panoramic black-and-white landscape of five prominent rock formations in a desert landscape (no text or symbols visible)You can take successive pictures.
You can also record movies.

natural_image
Three black-and-white photos showing a person riding a bicycle on a dirt path, with no visible text or symbols.
natural_image
Black and white photo of a bird in flight over water, no visible text or symbols
The camera can play back the pictures on TV.

natural_image
Line drawing of a device with connectors and a cable inserted, showing internal components (no text or symbols)When the camera is connected to a computer or printer...

Image data stored on the card can be transmitted or played back by installing supplied CD-ROM.
Connect the camera to a PictBridge compatible printer, and you can print your pictures without the use of a computer.
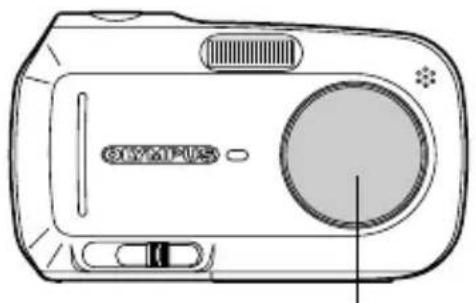
Use the 3x optical zoom and digital zoom (total 12x seamless zoom) to get up close to the subject.

natural_image
Black-and-white photo of a field with blooming flowers and trees, no visible text or symbols1x Optical

natural_image
Black-and-white photo of a windmill in operation with blurred floral background (no text or symbols visible)3x Optical 12x (Total seamless zoom)

natural_image
Close-up of a windmill with multiple blades and a central mast (no visible text or symbols)For the details of the operation and advanced use of the camera, see the separate Advanced manual (PDF on included CD-ROM) which also describes about the installation of the software provided, error messages and troubleshooting.
For customers in North and South America
For customers in USA
Declaration of Conformity
Model Number : D-590 ZOOM, C-470 ZOOM, X-500
Trade Name : OLYMPUS
Responsible Party : OLYMPUS IMAGING AMERICA INC.
Address : Two Corporate Center Drive, PO Box 9058, Melville, NY 11747-9058 U.S.A.
Telephone Number : 1-631-844-5000
Tested To Comply With FCC Standards
FOR HOME OR OFFICE USE
This device complies with Part 15 of the FCC rules. Operation is subject to the following two conditions:
(1) This device may not cause harmful interference.
(2) This device must accept any interference received, including interference that may cause undesired operation.
For customers in Canada
This Class B digital apparatus meets all requirements of the Canadian Interference-Causing Equipment Regulations.
For customers in Europe

“CE” mark indicates that this product complies with the European requirements for safety, health, environment and customer protection. “CE” mark cameras are intended for sales in Europe.
Trademarks
• IBM is a registered trademark of International Business Machines Corporation.
- Microsoft and Windows are registered trademarks of Microsoft Corporation.
• Macintosh is a trademark of Apple Computer Inc.
- All other company and product names are registered trademarks and/or trademarks of their respective owners.
- The standards for camera file systems referred to in this manual are the “Design Rule for Camera File System/DCF” standards stipulated by the Japan Electronics and Information Technology Industries Association (JEITA).
- This manual describes about the basic operations of taking pictures and playing back the pictures taken. For detailed functions and operations, please read the Advanced manual (CD-ROM).
- Please thoroughly read the manuals before using the camera. When you plan to take important pictures while travelling abroad for instance, make sure if the camera functions properly by taking a few trial pictures.
● The monitor screen shots and the camera illustrations used in the manuals may differ from the actual ones.
Safety precautions
Before using this camera, please thoroughly read the precautions hereinunder as well as “Precautions” for use shown in the Advanced manual.

CAUTION
RISK OF ELECTRIC SHOCK DO NOT OPEN

CAUTION: TO REDUCE THE RISK OF ELECTRICAL SHOCK, DO NOT REMOVE COVER (OR BACK). NO USER-SERVICEABLE PARTS INSIDE. REFER SERVICING TO QUALIFIED OLYMPUS SERVICE PERSONNEL.

Lightning flash with an arrowhead, enclosed in a triangle, alerts you to the presence of uninsulated voltage points inside the product which could cause a serious electrical shock.

An exclamation mark enclosed in a triangle alerts you to important operating and maintenance instructions in the documentation provided with the product.
WARNING!
TO AVOID THE RISK OF FIRE OR ELECTRICAL SHOCK, NEVER EXPOSE THIS PRODUCT TO WATER OR OPERATE IN A HIGH HUMIDITY ENVIRONMENT.
General precautions
- Read All Instructions — Before you use the product, read all operating instructions.
- Save These Instructions — Save all safety and operating instructions for future reference.
- Heed Warnings — Read carefully and follow all warning labels on the product and those described in the instructions.
- Follow Instructions — Follow all instructions provided with this product.
- Cleaning — Always unplug this product from the wall outlet before cleaning. Use only a damp cloth for cleaning. Never use any type of liquid or aerosol cleaner, or any type of organic solvent to clean this product.
- Attachments — For your safety, and to avoid damaging the product, use only accessories recommended by Olympus.
- Water and Moisture — Never use this product around water (near a bathtub, kitchen sink, laundry tub, wet basement, swimming pool or in the rain).
- Location — To avoid damage to the product and prevent personal injury, never place this product on an unstable stand, tripod, bracket, table or cart. Mount only on a stable tripod, stand, or bracket. Follow the instructions that describe how to safely mount the product, and use only the mounting devices recommended by the manufacturer.
-
Power Sources — Connect this product only to the power source described on the product label. If you are not sure about the type of power supply in your home, consult your local power company.
Refer to your operating instructions for information on using the product with a battery. -
Grounding, Polarization — If this product can be used with a specified AC adapter, the adapter may be equipped with a polarized alternating current line plug (a plug with one blade wider than the other). This safety feature allows the plug to fit into the power outlet only one way. If you cannot insert the plug into the wall outlet, pull it out, reverse it, and then reinsert it. If the plug still fails to fit, contact an electrician and have the receptacle replaced.
- Protecting the Power Cord — The power supply cord should be placed so it will not be walked on. Never put a heavy object on the power cord or wrap it around the leg of a table or chair. Keep the area around the power cord connection points, at the power outlet, and at the product connection, free of all AC adapter or accessory power cords.
● Lightning — If a lightning storm occurs while using a specified AC adapter, remove it from the wall outlet immediately. To avoid damage from unexpected power surges, always unplug the AC adapter from the power outlet and disconnect it from the camera when the camera is not in use. - Overloading — Never overload wall outlets, extension cords, power strips, or other power connection points with too many plugs.
- Foreign Objects, Liquid Spillage — To avoid personal injury caused by fire or electrical shock from contact with internal high voltage points, never insert a metal object into the product.
Avoid using the product where there is a danger of spillage. - Heat — Never use or store this product near any heat source such as a radiator, heat register, stove, or any type of equipment or appliance that generates heat, including stereo amplifiers.
- Servicing — Refer all servicing to qualified personnel. Attempting to remove the covers or disassemble the product, could expose you to dangerous high voltage points.
- Damage Requiring Service — If you notice any of the conditions described below while using a specified AC adapter, unplug it from the wall outlet and refer servicing to qualified service personnel:
a) Liquid has been spilled onto the product or some other object has fallen into the product.
b) The product has been exposed to water.
c) The product does not operate normally despite following operating instructions. Adjust only the controls described in the operating instructions as improper adjustment of other controls could damage the product and require extensive repair work by a qualified technician.
d) The product has been dropped or damaged in any way.
e) The product exhibits a distinct change in performance. - Replacement Parts — When replacement parts are required, make sure that the service center uses only parts with the same characteristics as the originals, as recommended by the manufacturer. Unauthorized substitution of parts could result in fire, electrical shock, or create other hazards.
● Safety Check — Upon completion of servicing or repairs, ask the service technician to perform safety checks to determine that the product is in good working order.
FCC Notice
● ● Radio and Television Interference
Change or modifications not expressly approved by the manufacturer may void the user's authority to operate this equipment. This equipment has been tested and found to comply with the limits for a Class B digital device, pursuant to Part 15 of the FCC Rules. These limits are designed to provide reasonable protection against harmful interference in a residential installation.
This equipment generates, uses, and can radiate radio frequency energy and, if not installed and used in accordance with the instructions, may cause harmful interference to radio communications.
However, there is no guarantee that interference will not occur in a particular installation. If this equipment does cause harmful interference to radio or television reception, which can be determined by turning the equipment off and on, the user is encouraged to try to correct the interference by one or more of the following measures:
- Adjust or relocate the receiving antenna.
- Increase the distance between the camera and receiver.
- Connect the equipment to an outlet on a circuit different from that to which the receiver is connected.
- Consult your dealer or an experienced radio/TV technician for help. Only the OLYMPUS-supplied USB cable should be used to connect the camera to USB-enabled personal computers (PC).
Any unauthorized changes or modifications to this equipment would void the user's authority to operate.
Legal and other notices
- Olympus makes no representations or warranties regarding any damages, or benefit expected by using this unit lawfully, or any request from a third person, which are caused by the inappropriate use of this product.
- Olympus makes no representations or warranties regarding any damages or any benefit expected by using this unit lawfully which are caused by erasing picture data.
Disclaimer of Warranty
- Olympus makes no representations or warranties, either expressed or implied, by or concerning any content of these written materials or software, and in no event shall be liable for any implied warranty of merchantability or fitness for any particular purpose or for any consequential, incidental or indirect damages (including but not limited to damages for loss of business profits, business interruption and loss of business information) arising from the use or inability to use these written materials or software or equipment. Some countries do not allow the exclusion or limitation of liability for consequential or incidental damages, so the above limitations may not apply to you.
- Olympus reserves all rights to this manual.
WARNING
- Unauthorized photographing or use of copyrighted material may violate applicable copyright laws. Olympus assumes no responsibility for unauthorized photographing, use or other acts that infringe upon the rights of copyright owners.
Copyright Notice
- All rights reserved. No part of these written materials or this software may be reproduced or used in any form or by any means, electronic or mechanical, including photocopying and recording or the use of any type of information storage and retrieval system, without the prior written permission of Olympus. No liability is assumed with respect to the use of the information contained in these written materials or software, or for damages resulting from the use of the information contained therein. Olympus reserves the right to alter the features and contents of this publication or software without obligation or advance notice.
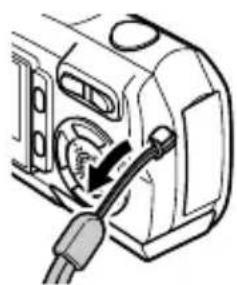
Attaching the strap
1
Thread the strap through the strap eyelet as shown.

text_image
StrapEn
2
Pull the strap tight, making sure that it is securely fastened and does not come loose.
natural_image
Diagram of a mechanical device with a cable inserted, showing internal components and a directional arrow (no text or symbols)
Caution
- Do not swing the camera around by the strap or pull the strap with excessive force as this may cause the strap to break.
- Attach the strap correctly so that it does not come off. Olympus is not responsible for any damages if the strap is attached incorrectly and the camera is dropped.
Charging the battery
This camera uses an Olympus lithium ion battery (LI-12B).
The battery is not fully charged when the camera is purchased. Fully charge the battery before first use.
Charging time Approx. 2 hours
1
Plug in the power cord in the sequence indicated by ① and ②.

text_image
Lithium ion battery charger (LI-10C) Power cord for the battery charger AC wall outletEn
2
Place the battery in the battery charger.
The indicator on the charger lights red and charging begins.
Insert as indicated by the arrow.

text_image
Lithium ion battery (LI-12B)Charging is finished when the indicator turns green.

Tips
● ● The LI-10B Olympus lithium ion battery (sold separately) can also be used.

Caution
● Use only the specified charger.
● We recommend that you keep a spare battery (sold separately) with you if you are planning to use the
camera for long periods or in a cold region.
● The charger can be used within the range of AC100V to AC240V (50/60Hz). Do not use voltage converters sold in stores traveling overseas as this could damage your charger.
- When using the charger abroad, you may need a plug adapter to convert the plug to the shape of the electrical outlet. For details, ask at your local electrical shop or travel agent.

text_image
Charge indic Red: Char Green: CharCharge indicator
Red: Charging
Green: Charging is finished.
Loading and removing the battery
This camera uses an Olympus lithium ion battery.
Check the following items before loading or removing the battery:
①The lens barrier is closed.
②The monitor is off.
natural_image
Line drawing of a digital camera with a circular lens and buttons (no text or symbols)
natural_image
Line drawing of a digital camera with display screen and control panel (no text or symbols)①Lens barrier ②Monitor
Loading the battery
1
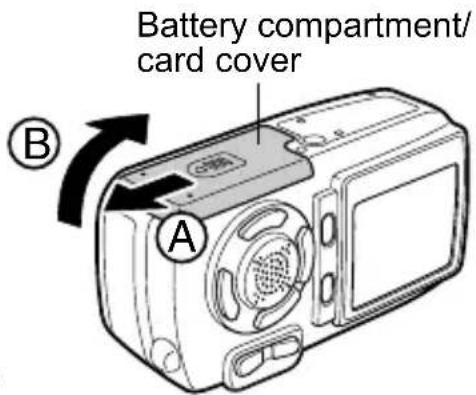
Slide the battery compartment/card cover in the direction of Ⓐ.
The cover is unlocked and opens in the direction of Ⓑ.

Caution
- Be sure to slide the cover using the ball of your finger. Do not use your fingernails as this may cause injury.

text_image
A BBattery compartment/ card cover
2
Orient the battery as shown. Insert the battery into the slot until the battery is locked in position with the battery lock knob.

Caution
- If the battery is not correctly oriented and inserted, the battery compartment/card cover will not close.

text_image
Battery Battery lock knob3
Close the battery compartment/ card cover in the direction of Ⓒ, and slide in the direction of Ⓓ.

text_image
Diagram of a device with labeled parts (C, D) and directional arrow indicating rotation or movement
Tips
- Do not try to forcibly close the cover. The cover closes easily when the battery is properly oriented and inserted. If the cover does not close easily, check the orientation of the battery.
- For the number of storable pictures when a fully charged new battery is used, see the "6. Appendix, Camera specifications" of the separate Advanced manual (CD-ROM).

Caution
● Power is consumed continuously during the conditions described below. This may drain the battery power more quickly.
• Repeated zoom adjustments.
- Repeated auto-focus by depressing the shutter button half-way.
- The camera is connected to a computer or printer.
Removing the battery
1
Slide the battery compartment/card cover in the direction of Ⓐ.
The cover is unlocked and opens in the direction of Ⓑ.

text_image
A B
Caution
- Be sure to slide the cover using the ball of your finger. Do not use your fingernails as this may cause injury.
2
Slide the battery lock knob in the direction of the arrow.
The battery will eject partially.

text_image
Diagram of a device with labeled components and an inset showing a device's internal structure.Battery lock knob
En
3
Pull the battery out.

natural_image
Diagram of a device with an arrow indicating upward movement, showing internal components and housing (no text or symbols)4
Close the battery compartment/ card cover in the direction of Ⓒ, and slide in the direction of Ⓓ.

text_image
Diagram of a device with labeled parts (C, D) and directional arrow indicating rotation or movementInserting and removing the card
xD-Picture Card
This camera uses an xD-Picture Card to record pictures. “Card” in the manuals refer to the xD-Picture Card. Pictures recorded and stored on the picture card can be erased or transferred and edited on a computer.

text_image
OLYMPUS xD xD-Picture CardYou can use this space to briefly describe the contents of the picture card.
En

natural_image
Pure electrical circuit lines without any symbolsThese are the contacts for reading the camera signals. Do not touch the gold area.
Compatible cards xD-Picture Card (16MB to 512MB)

Caution
- ● This camera may not recognize a non-Olympus card or a card that was formatted on another device (such as a computer). Before use, be sure to format the card on this camera. For details, see the Advanced manual (CD-ROM) supplied separately.
- If a non-Olympus card is used, some functions of this camera cannot be performed. We recommend that you use Olympus cards for this camera.
Inserting the card
This camera stores image data on an xD-Picture Card. No pictures can be stored unless a card has been inserted in the camera.
Check the following items before inserting or removing the card:
①The lens barrier is closed.
②The monitor is off.

natural_image
Line drawing of a digital camera with lens, buttons, and screen (no text or symbols)
natural_image
Line drawing of a digital camera with display screen and control panel (no text or symbols)①Lens barrier ②Monitor
1
Slide the battery compartment/card cover in the direction of Ⓐ.
The cover is unlocked and opens in the direction of Ⓑ.

Caution
- Be sure to slide the cover using the ball of your finger. Do not use your fingernails as this may cause injury.
text_image
Battery compartment/ card cover A B2
Orient the card and insert it into the spring-loaded card slot as shown.
The card will lock into place when fully inserted.

Tips
- Push the card in as far as it will go.

text_image
Card ST-MARIDEn

Caution
● The card can only be inserted one way; inserting it with incorrect orientation or obliquely may cause damage to the connectors and the card may get stuck in the camera.
- If the card is not fully inserted in place, the pictures may not be stored on the card.
3
Close the battery compartment/ card cover in the direction of Ⓒ, and slide in the direction of Ⓓ.

text_image
Diagram of a device with labeled parts (C, D) and directional arrow indicating rotation or movementRemoving the card
1
Open the battery compartment/card cover.
En
2
Push the card all the way in to unlock it, then release your finger slowly to let the card eject slowly.
The card will eject partially.

Caution
- Do not push the card in with a hard or pointed item such as a ballpoint pen.
● ● Releasing your finger quickly after pushing the card in may cause it to shoot out of the slot.

natural_image
Line drawing of a device with a black arrow pointing to a component, no text or symbols present3
Remove the card.

Caution
● ● Never open the battery compartment/card cover while the camera is turned on. Such action could destroy all the data on the card. Once destroyed, data cannot be restored.
- Do not place any sticker on the picture cards. Doing so may cause the picture card get stuck in the camera and will not eject.

natural_image
Diagram of a device with an arrow indicating upward movement, showing internal components and a CD-ROM logo (no text or symbols on the device itself)Power on/off
The camera can be turned on by different operation in “shooting mode” or “playback mode.”

Tips
- When you use the camera for the first time, the message saying [Y/M/D] appears on the monitor. For the details of the setting procedure, see the separate Advanced manual (CD-ROM).

Caution
● ● Never open the battery compartment/card cover, or connect or disconnect the battery or AC adapter while the camera is turned on. Such actions could destroy all the data on the card. Once destroyed, data cannot be restored.
When taking pictures (Shooting mode)
How to turn the camera on

Slide the power switch to ON.
The lens barrier opens, the lens extends, and the subject is displayed on the monitor.
If the lens does not extend even when the lens barrier is opened, there is a possibility that the power switch is not fully set to the ON position. Slide the power switch to the ON position correctly.

text_image
ON OFF Power switch Monitor
Tips
● To save battery power, the camera automatically enters the sleep mode and stops operation after about 3 minutes of non-operation. Press any button such as the zoom button to activate the camera again.
- To save battery power, the camera automatically turns off after about 15 minutes of non-operation. To recover the function, slide the power switch to the OFF position by following “How to turn the camera off,” then turn the camera on again.
How to turn the camera off

Slide the power switch until it slightly clicks. After retracting the lens, slide the power switch to the OFF position.
The monitor turns off.

text_image
ON • OFF Stop sliding the switch. After retracting the lens ON • OFF Slide to OFF.
Caution
- Do not slide the power switch directly to the OFF position. Doing so may cause damage to the camera.
When viewing pictures (Playback mode)
How to turn the camera on

When the power switch is set to the OFF position, press the playback (▶) button.
The picture you have just taken is displayed.

Tips
● ● To save battery power, the camera
automatically turns off after about 3 minutes of non-operation.
- If the playback button is pressed in shooting mode, the camera can display the pictures (QUICK VIEW).
To return to shooting mode, press the playback button or press the shutter button half-way down.
Playback (▶) button

text_image
QUICK VIEW ON • OFF MonitorHow to turn the camera off

Press the playback (▶) button again.
The monitor turns off.

text_image
QUICK VIEWHolding the camera correctly
When taking pictures, hold the camera firmly with both hands while keeping your elbows at your sides to prevent the camera from moving. It may cause camera movement, extending your arms or not keeping your elbows at your sides.
Horizontal grip

natural_image
Line drawings of two hands holding a digital camera, no text or symbols presentVertical grip

natural_image
Line drawings of two hands holding a digital camera, no text or symbols presentIncorrect grip

natural_image
Line drawing of two hands holding a game controller (no text or symbols)Keep your fingers and the strap away from the lens, flash, and microphone.
Taking still pictures
The following section describes how to take pictures using the monitor.

text_image
Green lamp Flash standby/ flash charging Card access mark HQ2272-1104 AF target markFor details regarding the display on the monitor, please refer to the Advanced manual (CD-ROM).
1
Slide the power switch to ON.
When power is turned on, the lens barrier opens, the lens extends, and the monitor turns on automatically.
If the lens does not extend even when the lens barrier is opened, there is a possibility that the power switch is not fully set to the ON position. Slide the power switch to the ON position correctly.

text_image
ON OFF Power switch Monitor2
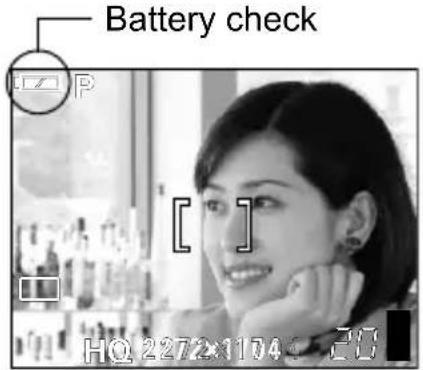
Confirm on the monitor that the battery check indicator is (green).
text_image
Battery check HQ 2272×1104 20En
Battery check
The battery check indicator changes as follows.
Lights (Green) Pictures can be taken.

text_image
Lights (Red)The battery is running low. Replace with a charged battery or charge the battery.
[BATTERY EMPTY] is displayed.
The battery is exhausted. Replace with a charged battery or charge the battery.
3
Place the AF target mark on the subject.
The number of remaining pictures is displayed on the monitor.

Tips
If the monitor is hard to see:
● Bright light, such as direct sunlight, may cause vertical lines to appear on the monitor screen.
- When you point the camera lens toward a bright subject, lines like beams of light (smears) may appear on the image in the monitor. This does not affect recorded pictures.

text_image
AF target mark Number of ____ shootable still pictures4
Press the shutter button half-way.
When the focus and exposure are locked, the green lamp lights steadily.

natural_image
Line drawing of a hand pressing down on a digital camera module (no text or symbols)
Tips
- When the flash is going to fire, the flash standby indicator lights.
- If the green lamp blinks, this means that the focus is not yet locked. Press the shutter button half-way again.
5
Press the shutter button all the way (fully) down to take the picture.
The picture is stored on the card.

natural_image
Line drawing of a hand pressing down on a digital camera module (no text or symbols)
Tips
- The card access mark (↔) on the monitor blinks red while the picture is being stored on the card.
- ● Never open the battery compartment/card cover, or connect or disconnect the battery or AC adapter while the card access mark (↔) on the monitor is blinking. The picture just taken may not be stored and also the data of the pictures stored on the card may be lost.
● Memory gauge
The memory gauge lights up when you take a picture. While the gauge is lit, the camera is storing the picture on the card. When the memory gauge is fully lit (as shown on right), no more pictures can be taken. Wait until the gauge turns off before taking the next picture.

text_image
HQ 2272×1704Memory gauge

To turn the camera off, slide the power switch until it slightly clicks. After retracting the lens, slide the power switch to the OFF position.
The monitor turns off.

text_image
ON • OFF Stop sliding the switch. After retracting the lens ON • OFF Slide to OFF.En

Caution
- Do not slide the power switch directly to the OFF position. Doing so may cause damage to the camera.
Playing back still pictures
When the playback mode is activated, the last picture taken is displayed on the monitor.
1
When the power switch is set to the OFF position, press the playback (▶) button.
Playback mode is selected and the last picture taken is displayed on the monitor.
Playback (▶) button

text_image
QUICK VIEW ON • OFF Monitor
Tips
● In shooting mode, pressing the playback button displays the pictures. (QUICK VIEW)
● ● The shooting information on the monitor disappears after 3 seconds.
2
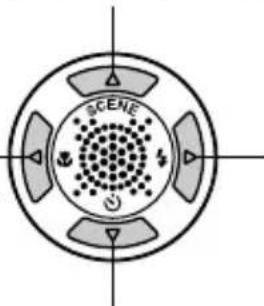
Press ⬆, ⬇, ⬇ or ⭕ (arrow pads) to switch the pictures.
Jumps to the picture 10 frames back.
Displays the — previous picture.
text_image
SCENEDisplays the next picture.


natural_image
Technical line drawing of a digital camera module with no visible text or symbolsJumps to the picture 10 frames ahead.
3
Press the playback (▶) button to turn the camera off.

Tips
- If the picture is displayed by pressing the playback button while taking pictures, the mode can be changed back to shooting mode by the following operation.
Press the playback button or press the shutter button half-way down.
Information on OLYMPUS Master
The OLYMPUS Master is an application software for editing and controlling the pictures taken with the camera on your computer.
Using this software, you can sort and control various pictures taken just like you could with photo albums. Also, you can easily transfer the pictures from the camera then edit or print them as you like.
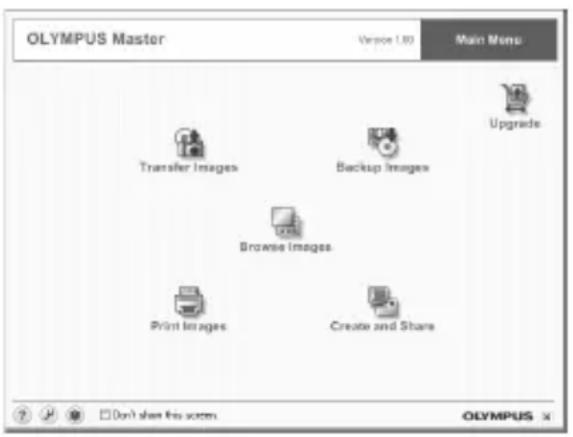
text_image
OLYMPUS Master Version 1.00 Main Menu Transfer Images Backup Images Upgrade Browse Images Print Images Create and Share Don't share this screen OLYMPUS xIn the separate Advanced manual, the following detailed information is available.
Note: The Advanced manual is located on the CD-ROM.
• Installing OLYMPUS Master.
- Connecting the camera to your computer.
- Transferring the pictures from the camera to your computer.
- Playing back the pictures and movies on your computer.
On OLYMPUS Master, you can register the users of the camera and OLYMPUS Master on-line. When you have registered the users, you can get information of the software and firmware.
For the detailed operations of the OLYMPUS Master, refer to the “Help” section and the operation manual of the OLYMPUS Master provided.
Table des matières
natural_image
Line drawing of a digital camera with lens and control buttons (no text or symbols)
natural_image
Simple line drawing of a pair of scissors or clips (no text or symbols)
Courroie xD-Picture Card
natural_image
Line drawing of a battery pack connected to a coiled cable (no text or symbols)
natural_image
Coiled cable with connectors and connectors (no text or symbols visible)natural_image
Line drawing of a coiled cable with three connectors (no text or symbols)
text_image
OLYMPUS Master
text_image
Basic Manual OCEMUS CUMEN D-590 ZOOM G-470 ZOOM X-500Manuel de base (Ce manuel)
Câble AV
CD-ROM
OLYMPUS Master

text_image
OLYMPUS
text_image
OLYMPUS
text_image
Advanced Manual STANDARDnatural_image
Nighttime cityscape with illuminated skyscrapers and a waterfront scene (no visible text or signage)
natural_image
Black-and-white photo of two smiling people in front of a classical building (no visible text or symbols)
natural_image
Close-up of a bowl filled with cooked meat and vegetables (no visible text or symbols)INTERIEUR PAYSG + PORTRT PAYSAGE

natural_image
Group of people dining together at a table, smiling (no visible text or symbols)
natural_image
Black-and-white photo of two people posing on a mountain peak with snow-capped peaks in the background (no text or symbols visible)
natural_image
Black-and-white landscape photo of a snow-capped mountain reflected in a calm lake, surrounded by evergreen trees (no text or symbols visible)
natural_image
Line drawing of a digital camera with control panel and display screen (no text or symbols)natural_image
Panoramic black-and-white landscape of five prominent rock formations in a desert landscape (no text or symbols visible)natural_image
Three black-and-white photos of a person riding a bicycle on a dirt path, no visible text or symbols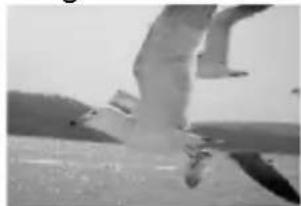
natural_image
Person performing a high kick on ice, wearing safety gear (no visible text or symbols)
natural_image
Line drawing of a device with connectors and a cable inserted, showing internal components (no text or symbols)natural_image
Black-and-white photo of a field with blooming flowers and trees, no visible text or symbolsOptique 1×

natural_image
Black and white photo of a windmill in the foreground with floral patterns in the background (no text or symbols visible)Optique 3× 12× (zoom total continu)

natural_image
Close-up of a windmill with multiple blades and a central mast (no visible text or symbols)RISQUE D'ELECTROCUTION NE PAS OUVRIR

ATTENTION : POUR REDUIRE LE RISQUE D'ELECTROCUTION, NE RETIREZ PAS LE COUVERCLE (OU L'ARRIERE). CE PRODUIT NE RENFERME AUCUNE PIECE SUSCEPTIBLE D'ETRE REPAREE PAR VOS SOINS. TOUTE REPARATION DOIT ETRE EXCLUSIVEMENT CONFIEE A UN TECHNICIEN OLYMPUS AGREE.

natural_image
Diagram of a car interior showing a plug inserted into the air gap (no text or symbols present)
Remarque
natural_image
Technical line drawing of a mechanical device with internal components and a labeled arrow (no text or symbols)text_image
Diagram showing a power cord connected to an outlet with two switches, labeled with number ②natural_image
Line drawing of a digital camera with a circular lens and buttons (no text or symbols)
natural_image
Line drawing of a digital camera with display screen and control panel (no text or symbols)text_image
Diagram of a device with labeled parts C, D, and an arrow indicating rotation or change.? Conseils
text_image
Diagram of a device with labeled ports and an inset showing a device's internal structure with an arrow pointing to the port.natural_image
Diagram of a device's internal components, showing a lid with an arrow pointing to a component (no text or symbols present)4
text_image
Diagram of a digital camera with labeled parts and directional arrows indicating rotation or change.text_image
OLYMPUS xD xD-Picture Cardnatural_image
Pure electrical circuit lines without any symbolsnatural_image
Line drawing of a digital camera with lens, buttons, and screen (no text or symbols)
natural_image
Line drawing of a digital camera with display screen and control panel (no text or symbols)text_image
Diagram of a device with labeled parts (C, D) and directional arrow indicating rotation or movementRetrait de la carte
1
natural_image
Line drawing of a device with a black arrow pointing to a component, no text or symbols present
Remarque
natural_image
Diagram of a device with an upward arrow indicating a component or operation, no text or symbols present.
Remarque
natural_image
Line drawing of two hands holding a digital camera (no text or symbols)
natural_image
Line drawing of two hands holding a digital camera (no text or symbols visible)Position verticale

natural_image
Line drawing of two hands holding a handheld device (no text or symbols)
natural_image
Line drawing of two hands holding a digital flip phone (no text or symbols visible)Prise incorrecte

natural_image
Line drawing of two hands holding a game controller (no text or symbols)natural_image
Line drawing of a hand pressing down on a digital camera module (no text or symbols)
Conseils
natural_image
Line drawing of a hand pressing down on a device with a digital camera (no text or symbols)
Conseils
natural_image
Technical line drawing of a camera module with circular dial and labeled components (no text or symbols)3
natural_image
Coiled cable with connectors and connectors (no text or symbols visible)Cable USB

text_image
Basic Manual COMPU® COMERA D-590 ZOOM C-470 ZOOM X-500Manual básico (este manual)

text_image
Advanced Microcal Microcyclicnatural_image
Nighttime cityscape with illuminated skyscrapers and a waterfront (no visible text or signage)
natural_image
Black-and-white photo of two smiling people in front of a classical building (no visible text or symbols)
natural_image
Close-up of a bowl filled with cooked meat and vegetables (no visible text or symbols)INTERIORES PAIS. + RETR. PAISAJE

natural_image
Group of people dining together at a table, smiling (no visible text or symbols)
natural_image
Black-and-white photo of two people posing on a mountain peak with snow-capped peaks in the background (no text or symbols visible)
natural_image
Black-and-white landscape photo of a snow-capped mountain reflected in a calm lake, surrounded by evergreen trees (no text or symbols visible)
natural_image
Line drawing of a digital camera with control panel and display screen (no text or symbols)natural_image
Panoramic black-and-white landscape of five ancient rock formations in a desert landscape (no text or symbols visible)natural_image
Three black-and-white photos showing a person riding a bicycle on a dirt path, with no visible text or symbols.natural_image
Black and white photo of a person in flight with wings extended, no visible text or symbols
natural_image
Line drawing of a device with connectors and a cable inserted, showing internal components (no text or symbols)natural_image
Black-and-white photo of a field with blooming flowers and trees in the background (no visible text or symbols)Óptico 1×

natural_image
Black-and-white photo of a windmill in the foreground with floral patterns in the background (no text or symbols visible)Óptico 3× 12× (Zoom total)

natural_image
Close-up of a windmill with multiple blades and a central mast (no visible text or symbols)natural_image
Diagram of a car interior showing a plug inserted into the air gap (no text or symbols present)
Nota
text_image
Diagram showing a power cord connected to an 10-pin socket, with labeled connection point ②natural_image
Line drawing of a digital camera with a circular lens and buttons (no text or symbols)
natural_image
Line drawing of a digital camera with display and control panel (no text or symbols)① Cubreobjetivo ② Monitor
text_image
Diagram of a device with labeled parts (C, D) and directional arrows indicating rotation or movement.
Sugerencias
text_image
Diagram of a device with an open lid and labeled ports, showing internal components and directional arrows.natural_image
Diagram of a device with a black arrow pointing to a component, showing internal structure without any text or symbols.4
text_image
Diagram of a digital camera with labeled parts C and D, showing directional arrow indicating rotation or change.text_image
OLYMPUS xD xD-Picture Cardnatural_image
Simple line drawing of a rectangular device with vertical stripes and a handle (no text or symbols)natural_image
Line drawing of a digital camera with lens, screen, and buttons (no text or symbols)
natural_image
Line drawing of a digital camera with display screen and control panel (no text or symbols)① Cubreobjetivo ② Monitor
1
text_image
Diagram of a device with labeled parts C and D, showing directional arrows indicating rotation or movement.natural_image
Line drawing of a device with a black arrow pointing to a component, no text or symbols present
Nota
natural_image
Diagram of a device with a CD inside, showing internal components and an upward arrow (no text or symbols)
Nota
natural_image
Line drawing of two hands holding a digital camera (no text or symbols)
natural_image
Line drawing of two hands holding a digital camera (no text or symbols visible)Sujeción vertical

natural_image
Line drawing of two hands holding a digital camera (no text or symbols)
natural_image
Line drawing of two hands holding a digital flip phone (no text or symbols visible)Sujeción incorrecta

natural_image
Line drawing of two hands holding a game controller (no text or symbols)text_image
HQ 2272×1104.5 28natural_image
Line drawing of a hand pressing down on a digital camera module (no text or symbols)
Sugerencias
natural_image
Line drawing of a hand pressing down on a car dashboard with a digital camera (no text or symbols)
Sugerencias
natural_image
Technical line drawing of a digital camera module with no visible text or symbols3
text_image
OLYMPUS Master Menu principal Actualizer Transfer to Indigenes Copy to Emporidad Navegar Imprimir Create y compartirnatural_image
Line drawing of a battery pack connected to a coiled cable (no text or symbols)natural_image
Coiled cable with connectors and connector ends, no visible text or symbolsUSB-Kabel

natural_image
Line drawing of a cable with three connectors (no text or symbols)AV-Kabel

text_image
OLYMPUS Mastertext_image
Advanced Manual e-10g/1mnatural_image
Nighttime cityscape with illuminated skyscrapers and a waterfront scene (no visible text or signage)INNENAUFNAHME

natural_image
Black-and-white photo of two smiling people in front of a classical building (no visible text or symbols)LAND./PORTRÄIT LANDSCHAFT

natural_image
Close-up of a bowl filled with cooked meat and vegetables (no visible text or symbols)
natural_image
Group of people dining together at a table, smiling and enjoying (no visible text or signage)
natural_image
Black-and-white photo of two people posing on a mountain peak with snow-capped peaks in the background (no text or symbols visible)
natural_image
Black-and-white landscape photo of a snow-capped mountain reflected in a calm lake, surrounded by evergreen trees (no text or symbols visible)De

natural_image
Line drawing of a digital camera with control panel and display screen (no text or symbols)natural_image
Panoramic black-and-white landscape of five ancient rock formations in a desert landscape (no text or symbols visible)natural_image
Three black-and-white photos of a person riding a bicycle on a dirt path, no visible text or symbols
natural_image
Black and white photo of a person standing on water with blurred background (no visible text or symbols)
natural_image
Line drawing of a camera module with attached cables and connectors (no text or symbols)natural_image
Black-and-white photo of a field of flowers with trees in the background (no visible text or symbols)1× optischer Zoom

natural_image
Black-and-white illustration of a windmill in operation with surrounding flowers (no text or symbols)natural_image
Black and white photo of a windmill with multiple blades and a tower structure (no visible text or symbols)natural_image
Diagram of a car interior showing a plug inserted into the air gap (no text or labels)De
Hinweis
natural_image
Line drawing of a digital camera with a circular lens and buttons (no text or symbols)
natural_image
Line drawing of a digital camera with display screen and control panel (no text or symbols)text_image
Diagram of a device with labeled parts (C, D) and directional arrow indicating rotation or change.
Tipps
natural_image
Diagram of a device with a highlighted internal component and an arrow indicating upward motion (no text or symbols present)4
text_image
Diagram of a digital camera with labeled parts (C, D) and directional arrow indicating rotation or change.natural_image
Line drawing of a digital camera with lens, buttons, and screen (no text or symbols)natural_image
Line drawing of a digital camera with display screen and control buttons (no text or symbols)1
text_image
Diagram of a device with labeled parts (C, D) and directional arrow indicating rotation or movementEntfernen der Karte
natural_image
Line drawing of a device with a black arrow pointing to a component, no text or symbols presentHinweis
natural_image
Diagram of a device with an arrow indicating upward movement, showing internal components and a CD inside (no text or symbols)text_image
LCD-Monitor
Tipps
natural_image
Line drawing of two hands holding a digital camera (no text or symbols)
natural_image
Line drawing of two hands holding a digital camera (no text or symbols visible)Hochformat

natural_image
Line drawing of two hands holding a handheld device (no text or symbols)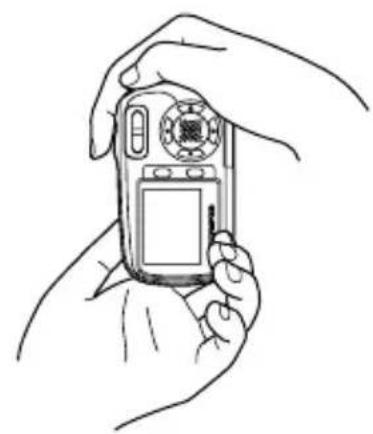
natural_image
Line drawing of two hands holding a digital flip phone (no text or symbols visible)natural_image
Line drawing of two hands holding a game controller (no text or symbols)text_image
LCD-Monitor2
natural_image
Line drawing of a hand pressing down on a digital camera module (no text or symbols)
Tipps
text_image
Diagram showing a hand pressing a button on a digital camera, with Chinese text labels indicating the device's function.
Tipps
natural_image
Technical line drawing of a device rear panel and front view (no text or symbols)3
Shinjuku Monolith, 3-1 Nishi-Shinjuku 2-chome, Shinjuku-ku, Tokyo, Japan
OLYMPUS IMAGING AMERICA INC.
Two Corporate Center Drive, PO Box 9058, Melville, NY 11747-9058, U.S.A. Tel. 631-844-5000
Technical Support (USA)
24/7 online automated help: http://www.olympusamerica.com/support Phone customer support: Tel. 1-888-553-4448 (Toll-free)
Our phone customer support is available from 8 am to 10 pm (Monday to Friday) ET
E-Mail: distec@olympus.com
Olympus software updates can be obtained at: http://www.olympus.com/digital
OLYMPUS EUROPA GMBH
Premises: Wendenstrasse 14-18, 20097 Hamburg, Germany Tel: +49 40-23 77 3-0 / Fax: +49 40-23 07 61
Goods delivery:Bredowstrasse 20, 22113 Hamburg, Germany
Letters: Postfach 10 49 08, 20034 Hamburg, Germany
European Technical Customer Support:
Please visit our homepage http://www.olympus-europa.com or call our TOLL FREE NUMBER*: 00800 - 67 10 83 00
for Austria, Belgium, Denmark, Finland, France, Germany, Italy, Luxemburg, Netherlands, Norway, Portugal, Spain, Sweden, Switzerland, United Kingdom
- Please note some (mobile) phone services/provider do not permit access or request an additional prefix to +800 numbers.
For all not listed European Countries and in case that you can't get connected to the above mentioned number please make use of the following
CHARGED NUMBERS: +49 180 5 - 67 10 83 or +49 40 - 237 73 899
Our Technical Customer Support is available from 9 am to 6 pm MET (Monday to Friday)