se:do - Chair Sedus - Free user manual and instructions
Find the device manual for free se:do Sedus in PDF.
| Product Type | Swiveling Office Chair |
| Brand | Sedus |
| Model | se:do |
| Maximum Supported Weight | 130 kg |
| Seat Height Adjustment | Yes, via button under seat (pull up to lower or raise) |
| Backrest Height Adjustment | Yes, by pressing on the seat and pushing upward |
| Lumbar Curve (option) | Adjustable by pressing upper/lower buttons |
| Mesh Lumbar Support Depth (option) | Adjustable by swiveling the cushion |
| Backrest Tilt | Dynamic position or lockable via button |
| Backrest Tension | Adjustable via rotary knob |
| Seat Depth (option) | Sliding via hold button |
| Seat Tilt (option) | Via swivel lever |
| Standard Armrests (option) | Adjustable in height and width (Torx TX40 key) |
| 3D Armrests (option) | Adjustable in height, depth, orientation (360° swivel, up to 15°) |
| Headrest (option) | Adjustable in height and tilt |
| Hanger (option) | Removable, to be placed on the headrest support |
| Caster Type | Hard for carpet (standard) or soft for other floors |
| Maintenance | Consult www.sedus.com for cleaning polypropylene parts and upholstery |
| Safety | Do not use as step stool, do not sit on armrests |
Frequently Asked Questions - se:do Sedus
User questions about se:do Sedus
0 question about this device. Answer the ones you know or ask your own.
Ask a new question about this device
Download the instructions for your Chair in PDF format for free! Find your manual se:do - Sedus and take your electronic device back in hand. On this page are published all the documents necessary for the use of your device. se:do by Sedus.
USER MANUAL se:do Sedus
natural_image
Three identical gray robot head icons with red triangular heads, arranged horizontally (no text or symbols)

natural_image
Silhouette of an office chair with adjustable armrests and wheels (no text or symbols)Congratulations! You have chosen a high-quality Sedus product. We hope you enjoy your se:do office swivel chair.
English ▶ Page 3 - 4
Français ▶ Page 5 - 6
Nederlands ▶ Pagina 7 - 8
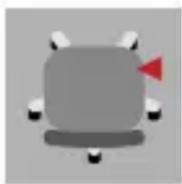
A Height of the seat
Lowering the seat: 1. Sit down on the seat 2. Pull the lever upwards (the seat will drop slowly) 3. Releasing the lever at the desired height will lock the position
▶ Raising the seat: 1. Stand up 2. Pull the lever upwards (the seat will rise slowly) 3. Releasing the lever at the desired height will lock the position
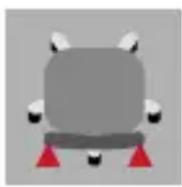
B Height of backrest
▶ Increasing the height of the backrest: 1. Place load on seat 2. Using both hands, grip the backrest from below and push upwards 3. Release once at the desired height = lock in position
▶ Release lock: 1. Push backrest all the way up, and the lock will release
2. Move backrest all the way down

C Inflation of the lumbar curve (optional)
Lumbar curve activation: 1. Pump on the upper button until the desired curvature is reached 2. Press on the lower button to reduce the lumbar curvature

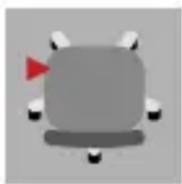
D Depth of lumbar support on mesh versions (optional)
- Disengage backrest 2. Turn inlay to increase or decrease support
E Angle of the backrest
Adjusting the backrest dynamically: 1. Pull the lever upwards and release it 2. Lean against the backrest 3. The backrest is free-floating
Locking the backrest into position: 1. Lean back until the backrest reaches the desired angle 2. Press the lever down and release it to lock the backrest into position
F Strength of the backrest pressure
- Adjusting the backrest dynamically 2. Exert only slight pressure on the seat and backrest 3. Crank the quick adjustment mechanism downwards until the desired position is achieved (greater backrest pressure) or upwards (lesser backrest pressure)
G Depth of the seat (optional)
- Press the finger plate and hold it fast 2. Push the cushion to the desired position 3. Release the finger plate, and the seat will engage

H Seat angle (optional)
- Stand up 2. Swivel the lever backwards and lock into place (chair tilts 4° forwards) or swivel downwards and lock into place (seat moves back into its original position)
I Adjusting the basic armrests (optional)
Height: 1. Press the button underneath the armrest, lift or lower the armrest
2. Release the button, the armrest locks into place
Adjustable seat width: 1. Loosen the screws slightly with a Torx key (TX40) 2. Position the armrests 3. Retighten the screws
J Adjusting the 3D armrests (optional)
Height: 1. Press the button, lift or lower the armrest 2. Release the button to engage the armrest
Depth: Push the armrest cover backwards or forwards to engage
Swivelling armrest covers: up to 15^ inwards and outwards; also swivels 360^ with more force; a 180^ turn changes the width between the armrests
Adjustable seat width: 1. Loosen the screws slightly with a Torx key (TX40) 2. Position the armrests 3. Retighten the screws

K Adjustment of the headrest (optional)
Adjusting the headrest height: Push the headrest to the desired height (it is continuously adjustable)
▶ Headrest angle: Adjust the tilt of the headrest as desired
L Mounting the clothes hanger (optional)
Hook the clothes hanger in at the tapered position on the telescopic neckrest adjustment and press it down.
User notes
Correct use
This office swivel chair is designed for a user weight of up to 130 kg and may only be used for the purpose intended while exercising due care and attention. Using it inappropriately (e.g. as a stepladder, sitting on the armrests or placing extreme weight on one side) could result in accidents.
Castors
Before using the product for the first time, please remove the coloured transport protection. Different castors are available, for the sake of your safety and for use on different types of flooring in accordance with safety regulations: Hard castors for soft floors (standard). Soft castors for hard floors are optional. Changing castors: this might be necessary, for instance, after moving office, or after the installation of a new floor surface – simply pull out the castors and push new ones in.
Further information
Information on fitting and exchanging armrests as well as on cleaning plastic parts and upholstery can be found on the internet at www.sedus.com