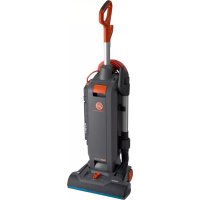
WindTunnel 3 UH72630 - Vacuum Cleaner HOOVER - Free user manual and instructions
Find the device manual for free WindTunnel 3 UH72630 HOOVER in PDF.
Download the instructions for your Vacuum Cleaner in PDF format for free! Find your manual WindTunnel 3 UH72630 - HOOVER and take your electronic device back in hand. On this page are published all the documents necessary for the use of your device. WindTunnel 3 UH72630 by HOOVER.
USER MANUAL WindTunnel 3 UH72630 HOOVER
Thank you for choosing a HOOVER
product. Please enter the complete model and Manufacturing Code in the spaces provided MODEL MFG. CODE Hint: Attach your sales receipt to this owner s manual Verification of date of purchase may be required for warranty service of your HOOVER
product Be sure to register your product online at Hoover com or call 1 800 944 9200 to register by phone Visit Hoover com for additional video instructions for assembly and maintenance If you need assistance: Visit our website at hoover com Follow the authorized dealer locator link to find the Hoover
authorized dealer nearest you or call 1 800 944 9200 for an automated referral of Hoover
authorized dealer locations (U S only) or to speak with a customer service representative; Mon Fri 8am 7pm EST PLEASE DO NOT RETURN THIS PRODUCT TO THE STORE. CONTENTS3
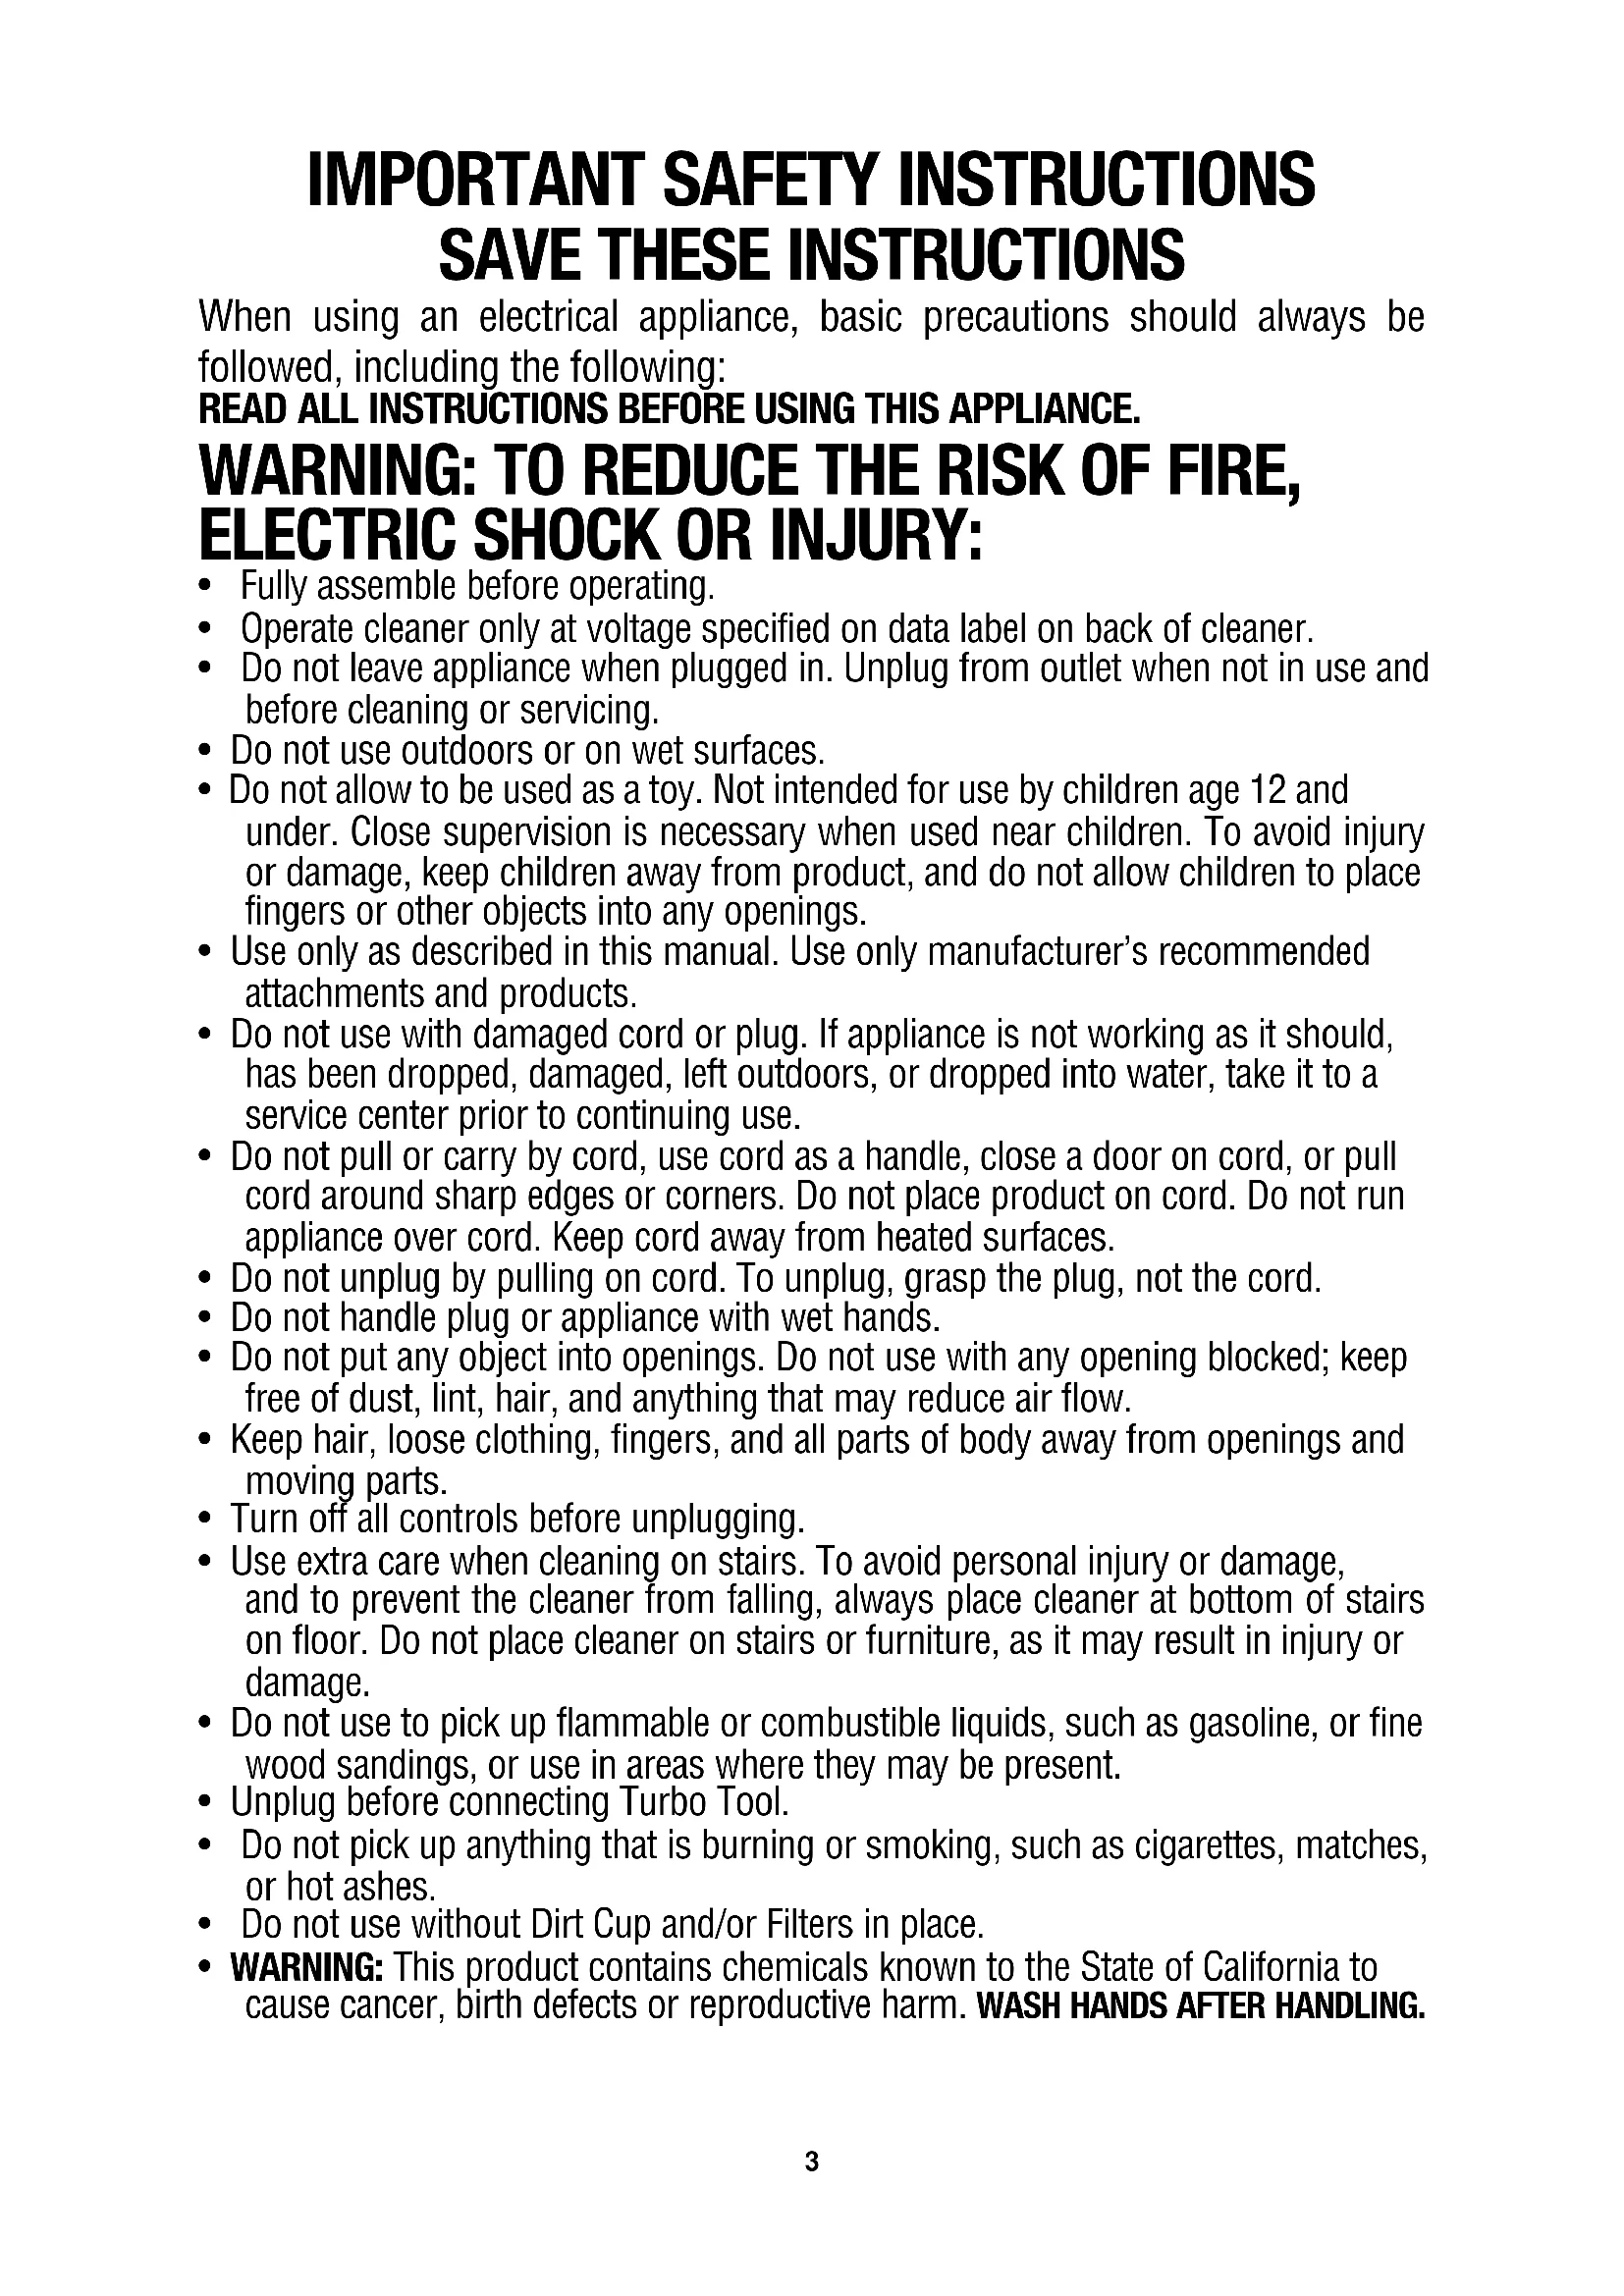
IMPORTANT SAFETY INSTRUCTIONS
SAVE THESE INSTRUCTIONS
When using an electrical appliance, basic precautions should always be followed, including the following: READ ALL INSTRUCTIONS BEFORE USING THIS APPLIANCE.
- Fully assemble before operating.
- Operate cleaner only at voltage specified on data label on back of cleaner.
- Do not leave appliance when plugged in. Unplug from outlet when not in use and before cleaning or servicing.
- Do not use outdoors or on wet surfaces.
- Do not allow to be used as a toy. Not intended for use by children age 12 and under. Close supervision is necessary when used near children. To avoid injury or damage, keep children away from product, and do not allow children to place fingers or other objects into any openings.
- Use only as described in this manual. Use only manufacturer’s recommended attachments and products.
- Do not use with damaged cord or plug. If appliance is not working as it should, has been dropped, damaged, left outdoors, or dropped into water, take it to a service center prior to continuing use.
- Do not pull or carry by cord, use cord as a handle, close a door on cord, or pull cord around sharp edges or corners. Do not place product on cord. Do not run appliance over cord. Keep cord away from heated surfaces.
- Do not unplug by pulling on cord. To unplug, grasp the plug, not the cord.
- Do not handle plug or appliance with wet hands.
- Do not put any object into openings. Do not use with any opening blocked; keep free of dust, lint, hair, and anything that may reduce air flow.
- Keep hair, loose clothing, fingers, and all parts of body away from openings and moving parts.
- Turn off all controls before unplugging.
- Use extra care when cleaning on stairs. To avoid personal injury or damage, and to prevent the cleaner from falling, always place cleaner at bottom of stairs on floor. Do not place cleaner on stairs or furniture, as it may result in injury or damage.
- Do not use to pick up flammable or combustible liquids, such as gasoline, or fine wood sandings, or use in areas where they may be present.
- Unplug before connecting Turbo Tool.
- Do not pick up anything that is burning or smoking, such as cigarettes, matches, or hot ashes.
- Do not use without Dirt Cup and/or Filters in place.
- WARNING: This product contains chemicals known to the State of California to cause cancer, birth defects or reproductive harm. WASH HANDS AFTER HANDLING.CAUTION: TO REDUCE THE RISK OF DAMAGE:
- Avoid picking up hard, sharp objects with this product, as they may cause damage.
- Store appropriately indoors in a dry place. Do not expose machine to freezing temperatures.
- Do not use sharp objects to clean out hose as they can cause damage.
- With brushroll on, do not allow cleaner to sit in one location for an extended period of time, as damage to floor can result.
- To reduce the risk of electric shock, this appliance has a polarized plug (one blade is wider than the other). This plug will fit in a polarized outlet only one way. If the plug does not fit fully in the outlet, reverse the plug. If it still does not fit, contact a qualified electrican to install the proper outlet. Do not change the plug in any way. 4ATTACH HANDLE POSITION TOOLS (varies per model)
A HandleB Vacuum BaseC Pet Turbo Tool/Turbo Tool*D Crevice ToolE Telescoping WandF Screw (for assembly)G Dirt CupH Pet Upholstery Tool* Articulating Upholstry Tool*J Articulating Dusting Tool*K Extra Filter**Varies per modelRemove all parts from carton and identify each item shown Make sure all parts are located before disposing of packing materialsAdditional parts may be ordered at Hoovercom or call 1 800 944 9200
Note: Remove the screw located in the vacuum base and set aside until instruction 1 31 2 nsert handle section into vacuum base Push down firmly 1 3 Using a Phillips screwdriver fasten (1) screw behind handle into vacuum base
1 4 Place bottom of dirt cup into vacuum body first Pivot cup into vacuum Dirt cup is secure when you hear a click 1 5 Attach bottom of Turbo Tool (A) and pivot into Air powered Tool Clip until secure1 6 Place Crevice Tool into Wand and slide into tool storage area on left back side (B) of vacuum and place Upholstery Tool or Articulating Tool on right back side (C) of vacuum as shown
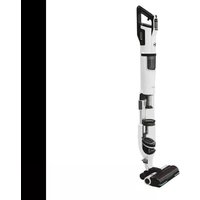
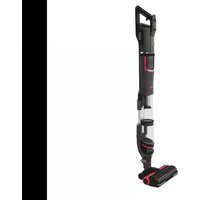
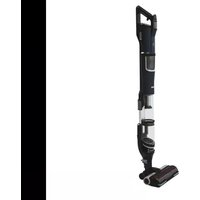
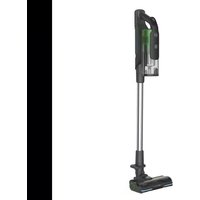
Actual model may vary from images shown.
A2.1 VACUUM DESCRIPTION 2 2 Plug cord into electrical outlet To turn vacuum ON push ON/OFF switch once To turn vacuum OFF push switch again2 3 For optimal cleaning performance on bare floors and carpet with pile deeper than 1 brushroll should be turned off The vacuum is shipped with the brushroll in the ON position To turn brushroll OFF for Suction Only Mode step on pedal (A)
1 Handle2 ON/OFF Switch3 Dirt Cup Release Button4 Carry Handle5 Dirt Cup6 Stair Cleaning Handle7 Headlight*8 Height Adjustment 9 Furniture Guard 10 Brushroll On/Off Pedal (Suction Only Mode)11 Filter made with HEPA media and Carbon Filter* Access12 Rinsable Filter Access13 System Check ndicator14 Turbo Tool ** 15 Crevice Tool (inside wand) 16 Telescoping Wand17 Hose18 Handle Release Pedal19 Hose Tube20 Hose Release Button21 Dusting/ Upholstery Tool**22 Cord23 Air Valve Dial
SUCTION ONLY MODE/ BRUSHROLL SHUT-OFFON-OFF SWITCH
*Available on select models only**Varies per modelfor bare floors and very high pile carpet Actual model may vary from images shown.Pedal (A) is inactive when the cleaner is in the upright position IMPORTANT Brushroll should be in off position for cleaning of high pile carpet deeper than 1 CAUTION
2 8 To adjust height setting TURN knob (A) to desired height settingFor maximum cleaning performance the following carpet height settings are recommended: •Barefloorsetting(1):forbarefloors •Lowsetting(2):foralltypesofcarpet •Higher settings: for very deep pile carpet where easier pushing effort is desired while maintaining good cleaning performance f the vacuum is difficult to push turn knob to the next higher setting
CARPET HEIGHT ADJUSTMENT
IMPORTANT TRANSPORTING CLEANER 2 6 To move your cleaner from room to room put handle in upright position tilt cleaner back on rear wheels and push forward
2 7 The handle of your cleaner has two positions: 1) Upright for storage and when using cleaning tools 2) Operating position for general operation on carpets and floorsStep on handle release pedal to lower handle
2 9 To operate dial TURN dial (A) to desired position until it clicksHOSE position is for cleaning with hose and/or toolsFLOOR position is for general floor cleaning thru nozzleVacuum will only pick up debris by the Hose/Tools when the valve dial is placed into “HOSE position Valve dial must be returned to “FLOOR position in order to pick up debris thru the floor Nozzle
FLOOR HOSE IMPORTANT
Actual model may vary from images shown.8 A Use Upholstery Tool to clean upholstered furniture and carpeted stairsB Turbo Tool may be used for upholstered furniture and carpeted stairsC Telescoping Wand is used to give extra length to your hoseD Crevice Tool may be used in tight spaces corners and along edgesE Articulating Tool may be used to clean hard to reach areas such as ceiling fans and bookshelvesTools allow for cleaning surfaces above the floor and for reaching hard to clean areasThe vacuum is ready for tool use when handle is in upright position
(Tools may vary per model) REMOVING HOSE
(Tools may vary per model) 3 3 Attach tool or wand to the hose (A)Attach tool to wand (B) by pushing it firmly onto the wandTwist wand or tool slightly to tighten or loosen the connectionTo extend wand twist counter clockwise to the unlocked position extend wand & twist clockwise until tight Reverse to collapse
Unplug before connecting Air Powered Hand Tool
To clean Hose and Turbo Tool wipe with a damp cloth DO NOT submerge in water Other cleaning tools may be washed in warm water with a mild detergent Rinse and air dry 24 hours before using
Not to be used for grooming a pet3 2 When using cleaning tools place cleaner handle in the upright position The agitator brushroll will not rotate when the cleaner is in the upright position To remove hose for tool use press the hose release button and pull hose end outTo lock back into place push hose into hose tube until you hear a click3 3 Set air valve for desired use Hose Floor Turn valve back counterclockwise to FLOOR position until it clicks (A) IMPORTANT Vacuum will only pick up debris by the Hose/Tools when the valve dial is placed into “HOSE position Valve dial must be returned to “FLOOR position in order to pick up debris thru the floor NozzleFLOOR HOSE
Actual model may vary from images shown.3 4 Lift vacuum by Stair Cleaning Handle and position on stairs Clean forward to back Never leave the vacuum standing on stairs when not cleaning3 5 Use the Hose and Turbo Tool (Tool varies per model) for stair cleaning When using tools always ensure handle is in upright position3 6 Wrap cord around hooks for convenient storage Attach the plug end to the cord
Use extra care when cleaning on stairs To avoid personal injury or damage and to prevent the cleaner from falling always place cleaner at bottom of stairs on floor Do not place cleaner on stairs or furniture as it may result in injury or damage When using tools always ensure handle is in upright position
Actual model may vary from images shown.10
Familiarize yourself with these home maintenance tasks as proper use and care of your vacuum will ensure continued cleaning effectiveness f appliance is not working as it should has been dropped damaged left outdoors or dropped into water take it to a service center prior to continuing use 4 1 The System Check ndicator located at (A) alerts you to possible system performance issuesAny other servicing should be done by an authorized service representative4 2 To maintain optimal performance empty the dirt cup before the dirt cup reaches the max line (A) Place the vacuum in the upright position before removing the dirt cup When to Empty DIRT CUP WARNING
To reduce the risk of personal injury Unplug before cleaning or servicing Do not use vacuum without dirt cup or filters in placeVery fine materials such as face powder or cornstarch may seal the filter and cause a reduction in performance When using the vacuum for this type of dust empty the cup and clean the filters often
PROBLEM POSSIBLE CAUSE POSSIBLE SOLUTION
f System Check ndicator is red:1 Rinsable filter and/or filter made with HEPA media is dirty1 Clean rinsable filter and/or filter made with HEPA media reference pg 11 2 Dirt cup is full and/or clogged 2 Empty dirt cup reference pg 11 3 Brushroll and/or hose is clogged3 Check hose for clogging reference pg 13 Check brushroll for clogging reference pg 124 Valve dial may be partially turned and not in proper mode4 Turn valve dial to HOSE or FLOOR mode reference pg 7 A Thermal Protector has been designed into your cleaner to protect it from overheating When the thermal protector activates the cleaner will stop running f this happens proceed as follows: 1 Turn cleaner OFF and unplug it from the electrical outlet 2 Empty dirt cup 3 nspect the nozzle inlet hose connector hose dirt cup inlet cyclonic filter rinsable filter and HEPA filter for any obstructions Clear obstructions if presentWhen cleaner is unplugged and motor has cooled for 30 minutes the thermal protector will deactivate and cleaning may continuef the thermal protector continues to activate after following the above steps your cleaner needs servicing NOTICE
Actual model may vary from images shown.11
How to Empty 4 3 Press dirt cup release button (A) and pivot cup out4 4 Hold dirt cup over trash receptacle push dirt cup door release lever (B) to open dirt cup door (C)Close dirt cup door (C) Press firmly to secure at front (D)
4 5 Place bottom of dirt cup into vacuum body first Pivot dirt cup into vacuum body and press firmly until it locks into place To maintain optimal performance filters should be cleaned at least every two months under normal use Rinsable Filter: How to Clean Remove dirt cup as described in Fig 4 3 4 6 Pull up on dirt cup latch to open4 7 Pull on filter by the pocket to remove rinsable filterHold filter under running water for at least two minutes to remove dirt and debris Squeeze filter twice while underwater Remove from water and squeeze a final time to remove excess water FILTERS: When to Clean
To reduce the risk of personal injury Unplug before cleaning or servicing Do not use vacuum without dirt cup or filters in place
IMPORTANT Allow filter to dry completely before replacing Dry filter on edge so air circulates on both sides of filter This may take up to 48 hoursReplace filter with pocket and graphics facing upClose lid securely by pushing until it clicksReplace dirt cup as described in Fig 4 5 When used and maintained properly your Rinsable Filter should not need replacement within the warranty period f desired additional filter is available at Hoover com or call 1 800 944 9200 Ask for Hoover Part No. 304087001 What to Buy: Rinsable Filter
4 8 With fingers in slots pull filter frame (A) straight out Hold filter over a trash receptacle and tap out dirt and debrisSlide back into position on vacuum
What to Buy: Filter Made With HEPA Media When used and maintained properly your Filter should not need replacement within the warranty period f desired additional filter is available at Hoover com or call 1 800 944 9200 Ask for Hoover Part No. 305687001 IMPORTANT DO NOT R NSE OR WASH THE F LTER MADE W TH HEPA MED A Filter Made With HEPA Media: How to Clean WARNING
To reduce the risk of personal injury Unplug before cleaning or servicing Do not use vacuum without dirt cup or filters in place WARNING
Actual model may vary from images shown.12 Cyclonic Filter Assembly: How to Clean
What to Buy: Carbon Filter Carbon Filter may need to be replaced more often to maintain optimal odor absorbing effectiveness Additional filter is available at Hoover com or call 1 800 944 9200 Ask for Hoover
Carbon Filter : How to Clean (Available on select models only).Your Carbon Filter is located on the underside of the Filter made with HEPA media IMPORTANT DO NOT R NSE OR WASH the Carbon Filter BRUSHROLL: How to Clean 4 13 Turn vacuum over so bottom side is facing up and remove the (6) screws (A)4 14 Pivot out bottom plate away from hidden latch (B) and remove any debris and/or hair from the brushroll4 15 Reposition bottom plate aligning latch (B) and fastening all (6) screws (A) Press firmly at latch (B) area to ensure that it is properly latched
To reduce the risk of injury from moving parts Unplug before servicingReplace dirt cup as described in Fig 4 5
To reduce the risk of personal injury Unplug before cleaning or servicing Do not use vacuum without dirt cup or filters in place WARNING
Remove dirt cup as described in Fig 4 34 9 Twist filter assembly (A) counter clockwise Remove assembly from dirt cup4 10 Dirt and debris can be cleaned from the filter assembly with the Dusting/ Upholstery Tool 4 11 f further cleaning of the internal filter assembly is required turn dust skirt (B) counterclockwise to remove 4 12 Grab dirt cup shroud (C) pull straight off and clean with dusting/upholstery toolAfter cleaning replace dirt cup shroud (C) onto inside edge of filter assembly and align Place skirt (B) onto shroud align (4) slots with (4) tabs and turn clockwise to lockPlace the filter assembly (4 9 A) on the dirt cup aligning (3) tabs on filter with (3) slots on dirt cup (B) and twist it clockwise to secure into position Actual model may vary from images shown.13 HOSE: How to Clean
To reduce the risk of personal injury Unplug before cleaning or servicing4 16 To remove hose for tool use press the hose release button (A) and pull hose end out Clear away debris or obstructions from hose Do not use sharp objects to clean out hose as they can cause damage To lock back into place push hose into hose tube until you hear a click
Removing Lens Press Handle Release Pedal and place handle in low position4 20 Using a Phillips screwdriver remove (2) screws as shown and lift off lens Installing Bulb 4 21 Pull old bulb straight out of socket Push new bulb straight into socket until locked in place Do not use excessive force when installing bulbDo not twist or turn bulb when installing bulb Replacing Lens 4 22 Reposition lens and secure with screws What to Buy: Headlight Additional bulbs may be ordered at Hoovercom or call 1 800944 9200 Ask for Hoover Part No. 27313-107. HEADLIGHT: How to Replace WARNING
To reduce the risk of electric shock Unplug before cleaning or servicing(available on select models only) WARNING
4 17 Clean the Turbo Tool by removing the two screws (A) located on the bottom cover with a Phillips head screwdriver4 18 Remove the bottom cover (B) Clean out any debris or hair from the brushroll and turbine fan 4 19 Replace the bottom cover insert and tighten the (2) screws
TURBO TOOL: How to Clean (Tool varies per model)
To reduce the risk of injury from moving parts Unplug vacuum before servicing
Actual model may vary from images shown.14 BELT The belt is located under the bottom plate of the vacuum and should be checked from time to time to be sure it is in good condition When To Replace How To Replace 4 23 Turn vacuum over so bottom side is facing up and remove the (6) screws (A)4 24 Pivot out bottom plate away from hidden latch (B)4 25 Remove used belt from brushroll (C) then from motor shaft (metal rod) (D) and discard Replace belt if it is stretched cut or broken To check the belt refer to Fig 4 26 4 28
To reduce the risk of injury from moving parts Unplug before servicing4 26 With lettering on outside of belt slide new belt over motor shaft (metal rod) (E)4 27 Remove any debris and/or hair from the brushroll Then slip other end of belt around area of brushroll without bristles (F) With belt in place pull and slide brushroll into nozzle making sure that the brushroll end caps are in the correct orientation4 28 Reposition bottom plate aligning latch (B) and fastening all (6) screws (A)Press firmly at latch (B) area to ensure that it is properly latched
What to Buy: Belt Use only genuine HOOVER belts with your vacuum When purchasing a new belt for models with Brushroll On/Off (Suction Only Mode) ask for Flat Belt HOOVER part No. 562289001 or AH20065f desired additional belts can be purchased at Hoover com or 1 800 944 9200 IMPORTANT Rotate brushroll manually to make sure belt is not twisted
LUBRICATION: The motor and brushroll are equipped with bearings which contain sufficient lubrication for their lifetime The addition of lubricant could cause damage Do not add lubricant to motor or brushroll Actual model may vary from images shown.15
f a minor problem occurs it usually can be solved quite easily when the cause is found by using the checklist below Any other servicing should be done by an authorized service representative f appliance is not working as it should has been dropped damaged left outdoors or dropped into water take it to a service center prior to continuing use WARNING
To reduce the risk of personal injury Unplug before cleaning or servicing
PROBLEM POSSIBLE CAUSE POSSIBLE SOLUTION
Vacuum won’t run 1 Power cord not firmly plugged into outlet 1 Plug unit in firmly 2 Blown fuse or tripped breaker 2 Check fuse or breaker in home Replace fuse/reset breaker in home 3 Thermal Protector activated 3 Unplug and allow vacuum to cool for 30min (This willl reset the thermal protector) System Check Indicator has turned red
Vacuum won’t pick up
Low suction 1 Rinsable Filter and/ or Filter made with HEPA media is dirty 1 Clean Rinsable Filter and or Filter made with HEPA media Pg 11 2 Dirt cup full and/ or clogged 2 Empty dirt cup Pg 10 3 Broken or worn belt 3 Replace belt Pg 14 4 Brushroll and/ or Hose clogged 4 Check Hose Pg 13 Check Brushroll Pg 12 5 Carpet height setting is incorrect 5 Set Carpet Height Adjustment to appropri ate setting for carpet being cleaned Pg 7 6 Suction Only Mode is ON 6 Step on Brushroll ON/OFF Pedal to turn Suction Only Mode OFF Pg 6 7 Valve dial may be partially turned and/or not in proper mode 7 Turn valve dial to FLOOR or HOSE mode Pg 7 Dust escaping from vacuum 1 Dirt cup full 1 Empty dirt cup Pg 10 2 Dirt cup not installed correctly 2 Review Dirt Cup removal & replacement Pg 11 3 Hose not installed correctly 3 Review Hose installation Pg 8 4 Rinsable and/ or Filter made with HEPA media not installed completely 4 Review Filter Removal and Cleaning Pg
Headlight not working 1 Bulb burnt out 1 Replace bulb Pg 13 2 Loose electrical wires 2 Call 1 800 944 9200 for nearest authorized Hoover
dealer Vacuum is difficult to push or won’t move forward 1 Carpet height setting is incorrect 1a Set Carpet Height Adjustment knob to appropriate setting for carpet being cleaned Pg 7 2 Brushroll is activated 2 For very high pile carpet deeper than 1 turn brushroll off Turbo Tool brushroll won’t turn 1 Too much pressure being applied to tool 1 Continue using tool applying light pressure 2 Blockage 2 Remove blockage 3 Low vacuum suction 3 Check items under “Vacuum won t pick up or Low suction 4 Valve dial may be partially turned and/or not in proper mode 4 Turn valve dial to FLOOR or HOSE mode Pg 7 Smoky/burning smell detected 1 Belt broken or stretched 1 Replace brushroll belt Pg 14 2 Brushroll is clogged 2 Clear/ remove debris from brushroll Pg
To obtain approved Hoover
service and genuine Hoover
parts locate the nearest Authorized Hoover
Warranty Service Dealer (Depot) by:
- CheckingtheYellowPagesunder“VacuumCleaners or“Household
- Visitourwebsiteathoover com(U S Customers)orhoover ca(Canadiancustomers) Follow the service center link to find the service outlet nearest you
nc Company in Glenwillow for service This will only result in delay If you need further assistance: To speak with a customer service representative call 1 800 944 9200; Mon Fri 8am 7pm EST Always identify your vacuum by the complete model number when requesting information or ordering parts (The model number appears on the bottom of the vacuum ) PLEASE DO NOT RETURN TH S PRODUCT TO THE STORE
WHAT THIS WARRANTY COVERS
When used and maintained in normal household use and in accordance with the Owner s Manual your HOOVER
product is warranted against original defects in material and workmanship for a full five years from date of purchase (the “Warranty Period ) During the Warranty Period Hoover
will provide labor and parts at no cost to you to correct any such defect in products purchased in the United States U S Military Exchanges and Canada
HOW TO MAKE A WARRANTY CLAIM
f this product is not as warranted take or send the product to either a Hoover
Authorized Warranty Service Dealer along with proof of purchase For an automated referral to authorized service outlets in the U S A phone: 1 800 944 9200 OR visit Hoover
online at www hoover com For additional assistance or information concerning this Warranty or the availability of warranty service outlets phone the Hoover
This Warranty does not cover: use of the product in a commercial operation (such as maid janitorial and equipment rental services) brushroll belt improper maintenance of the product damage due to misuse acts of God nature vandalism or other acts beyond the control of Hoover
owner s acts or omissions use outside the country in which the product was initially purchased and resales of the product by the original owner This warranty does not cover pick up delivery transportation or house calls However if you mail your product to a Hoover
Authorized Warranty Service Dealer cost of shipping will be paid one way This warranty does not apply to products purchased outside the United States including its territories and possessions outside a U S Military Exchange and outside of Canada This warranty does not cover products purchased from a party that is not an authorized retailer dealer or distributor of Hoover
This Warranty is not transferable and may not be assigned This Warranty shall be governed and construed under the laws of the state of Ohio The Warranty Period will not be extended by any replacement or repair performed under this Warranty TH S WARRANTY S THE EXCLUS VE
OF ANY K ND OR NATURE TO OWNER OR ANY PARTY CLA M NG THROUGH OWNER
WHETHER BASED N CONTRACT
NEGL GENCE TORT OR STR CT PRODUCTS L AB L TY OR AR S NG FROM ANY CAUSE WHATSOEVER Some states do not allow the exclusion of consequential damages so the above exclusion may not apply to you This warranty gives you specific rights; you may also have others that vary from state to statewww.hoover.com