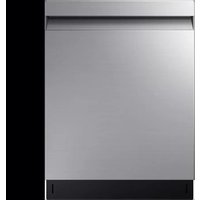
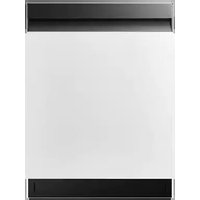
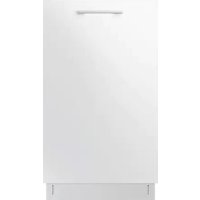
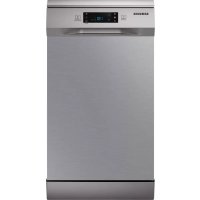
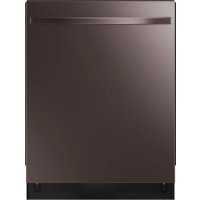
DW60M5070FG - Dishwasher SAMSUNG - Free user manual and instructions
Find the device manual for free DW60M5070FG SAMSUNG in PDF.

User questions about DW60M5070FG SAMSUNG
0 question about this device. Answer the ones you know or ask your own.
Ask a new question about this device
Download the instructions for your Dishwasher in PDF format for free! Find your manual DW60M5070FG - SAMSUNG and take your electronic device back in hand. On this page are published all the documents necessary for the use of your device. DW60M5070FG by SAMSUNG.
USER MANUAL DW60M5070FG SAMSUNG
DW60M5070FS DW60M5070FW DW60M5050FS DW60M5050FW Dishwasher user manual imagine the possibilities Thank you for purchasing this Samsung product. DD81-02615B-04 DW5500M_DD81-02615B-04_EN.indd 1DW5500M_DD81-02615B-04_EN.indd 1 2020-10-15 5:29:542020-10-15 5:29:542_ Safety instructions Safety instructions Congratulations on your new Samsung dishwasher. This manual contains important information on the installation, use and care of your appliance. Please take time to read this manual to take full advantage of your dishwasher’s many benefits and features. WHAT YOU NEED TO KNOW ABOUT SAFETY INSTRUCTIONS Please read this manual thoroughly to ensure that you know how to safely and eciently operate the extensive features and functions of your new appliance and retain it at a safe place near the appliance for your future reference. Use this appliance only for its intended purpose as described in this user manual. Warning and important safety instructions in this manual do not cover all possible conditions and situations that may occur. It is your responsibility to use common sense, caution, and care when installing, maintaining, and operating your dishwasher. Because the following operating instructions cover various models, the characteristics of your dishwasher may dier slightly from those described in this manual and not all warning signs may be applicable. If you have any questions or concerns, contact your nearest service center or find help and information online at www.samsung.com.
IMPORTANT SAFETY SYMBOLS AND PRECAUTIONS
Important safety symbols WARNING Hazards or unsafe practices that may result in severe personal injury and/or property damage. CAUTION Hazards or unsafe practices that may result in personal injury and/or property damage. CAUTION To reduce the risk of fire, explosion, electric shock, or personal injury when using your dishwasher, follow these basic safety precautions: Do NOT attempt. Do NOT disassemble. Do NOT touch. Follow directions explicitly. Unplug the power plug from the wall socket. Make sure the appliance is grounded to prevent electric shock. Call the service centre for help. Note These warning symbols are here to prevent injury to you and others. Please follow them explicitly. Keep these instructions in a safe place and ensure that new users are familiar with the content. Pass them on to any future owner. To reduce the risk of fire, electric shock, or injury to persons when using your appliance, follow basic precautions, including the following: WARNING DW5500M_DD81-02615B-04_EN.indd 2DW5500M_DD81-02615B-04_EN.indd 2 2020-10-15 5:30:012020-10-15 5:30:01Safety instructions _3
1. This appliance is not to be used by persons (including
children) with reduced physical, sensory or mental capabilities, or lack of experience and knowledge, unless they have been given supervision or instruction concerning use of the appliance by a person responsible for their safety.
2. For use in Europe: This appliance can be used by
children aged from 8 years and above and persons with reduced physical, sensory or mental capabilities or lack of experience and knowledge if they have been given supervision or instruction concerning use of the appliance in a safe way and understand the hazards involved. Children shall not play with the appliance. Cleaning and user maintenance shall not be made by children without supervision.
3. Children should be supervised to ensure that they do not
play with the appliance.
4. If the supply cord is damaged, it must be replaced by
the manufacturer, its service agent or similarly qualifi ed persons in order to avoid a hazard.
5. The new hose-sets supplied with the appliance are to be
used and that old hose-sets should not be reused.
6. For appliances with ventilation openings in the base, that
a carpet must not obstruct the openings.
7. For use in Europe: Children of less than 3 years should
be kept away unless continuously supervised. DW5500M_DD81-02615B-04_EN.indd 3DW5500M_DD81-02615B-04_EN.indd 3 2020-10-15 5:30:012020-10-15 5:30:014_ Safety instructions
8. CAUTION: In order to avoid a hazard due to inadvertent
resetting of the thermal cut-out, this appliance must not be supplied through an external switching device, such as a timer, or connected to a circuit that is regularly switched on and o by the utility.
9. This appliance is intended to be used in household and
similar applications such as: – sta kitchen areas in shops, o ces and other working environments; – farm houses; – by clients in hotels, motels and other residential type environments; – bed and breakfast type environments.
10. The door should not be left in the open position since
this could present a tripping hazard.
11. WARNING: Knives and other utensils with sharp points
must be loaded in the basket with their points down or placed in a horizontal position. Safety instructions DW5500M_DD81-02615B-04_EN.indd 4DW5500M_DD81-02615B-04_EN.indd 4 2020-10-15 5:30:012020-10-15 5:30:01Safety instructions _5
INSTRUCTIONS WHEN USING YOUR DISHWASHER
This dishwasher is not designed for commercial use. It is intended for use in domestic households and in similar working and residential environments such as:
- Oces and showrooms and by residents in establishments such as:
- Hostels and guest houses. It must only be used as a domestic appliance as specified in these user manual, for cleaning domestic crockery and cutlery. Any other usage is not supported by the manufacturer and could be dangerous. The manufacturer cannot be held liable for damage resulting from incorrect or improper use or operation. Do not use solvents in the dishwasher. Danger of explosion. Do not inhale or ingest dishwasher detergent. Dishwasher detergents contain irritant or corrosive ingredients which can cause burning in the nose, mouth and throat if swallowed, or inhibit breathing. Consult a doctor immediately if detergent has been swallowed or inhaled. Avoid leaving the door open unnecessarily, as you could trip over it. Do not sit or lean on the opened door. This could cause the dishwasher to tip and be damaged, and you could get injured. Only use detergent and rinse aid formulated for domestic dishwashers. Do not use washing‐up liquid. Do not use the strong acid cleaning agent. Do not fill the rinse aid reservoir with powder or liquid detergent. This will cause serious damage to the reservoir. Inadvertently filling the salt reservoir with powder or liquid dishwasher detergent will damage the water softener. Make sure you have picked up the correct packet of dishwasher salt before filling the salt reservoir. Please only use special coarse grained dishwasher salt for reactivation, as other salts may contain insoluble additives which can impair the functioning of the softener. In an appliance with a cutlery basket (depending on model), cutlery is cleaned and dried more if placed in eciently the basket with the handles downwards. However, to avoid the risk of injury, place knives and forks etc. with the handles upwards. Plastic items which cannot withstand being washed in hot water, such as disposable plastic containers, or plastic cutlery and crockery should not be cleaned in the dishwasher. The high temperatures in the dishwasher may cause them to melt or lose shape. On models with Delay Start function, make sure that the dispenser is dry before adding detergent. Wipe dry if necessary. Detergent will clog if poured into a damp dispenser and may not be thoroughly dispersed. Knives and other utensils with sharp points must be loaded in the basket with their points down or placed in a horizontal position. WARNING WARNING CAUTION CAUTION CAUTION CAUTION CAUTION WARNING DW5500M_DD81-02615B-04_EN.indd 5DW5500M_DD81-02615B-04_EN.indd 5 2020-10-15 5:30:012020-10-15 5:30:016_ Safety instructions
INSTRUCTIONS FOR PROTECTING YOUR CHILDREN
This appliance is not a toy! To avoid the risk of injury, keep children well away and do not allow them to play in or around the dishwasher or to use the controls. They will not understand the potential dangers posed by it. They should be supervised whenever you are working in the kitchen. There is also a danger that children playing might shut themselves in the dishwasher. This appliance can be used by children aged from 8 years and above and persons with reduced physical, sensory or mental capabilities or lack of experience and knowledge if they have been given supervision or instruction concerning use of the appliance in a safe way and understand the hazards involved. Children shall not play with the appliance. Cleaning and user maintenance shall not be made by children without supervision. Older children may only use the dishwasher when its operation has been clearly explained to them and they are able to use it safely, recognising the dangers of misuse. KEEP CHILDREN AWAY FROM DETERGENTS! Dishwasher detergents contain irritant and corrosive ingredients which can cause burning in the mouth, nose and throat if swallowed, or inhibit breathing. Keep children away from the dishwasher when the door is open. There could still be detergent residues in the cabinet. Consult a doctor immediately if your child has swallowed or inhaled detergent.
INSTRUCTIONS FOR INSTALLING YOUR DISHWASHER
Before setting up the appliance, check it for any externally visible damage. Under no circumstances should you use a damaged appliance. A damaged appliance could be dangerous. The dishwasher must only be plugged into the electricity supply via a suitable switched socket. The electrical socket must be easily accessible after the dishwasher is installed so that it can be disconnected from the electricity supply at any time. (Refer to the “Parts and features” section on page 10.) There must be no electrical sockets behind the dishwasher. Danger of overheating and fire risk if the dishwasher were to be pushed up against a plug. The dishwasher must not be installed under a hob. The high radiant temperatures which are sometimes generated by a hob could damage the dishwasher. For the same reason it should not be installed next to open fires or other appliances which give o heat, such as heaters etc. Do not connect the dishwasher to the mains supply until it has been fully installed and any adjustment has been made to the door springs. Before connecting the appliance, check that the connection data on the data plate (voltage and connected load) match the mains electricity supply. If in any doubt, consult a qualified electrician. The electrical safety of this appliance can only be guaranteed when continuity is complete between it and an eective grounding system. It is most important that this basic safety requirement is present and regularly tested and where there is any doubt the electrical system in the house should be checked by a qualified electrician. The manufacturer cannot be held liable for the consequences of an inadequate grounding system (e.g. electric shock). WARNINGWARNINGWARNINGWARNINGWARNINGCAUTIONWARNINGWARNINGCAUTION Safety instructions DW5500M_DD81-02615B-04_EN.indd 6DW5500M_DD81-02615B-04_EN.indd 6 2020-10-15 5:30:012020-10-15 5:30:01Safety instructions _7 Do not connect the appliance to the mains electricity supply by a multi‐socket unit or an extension lead. These do not guarantee the required safety of the appliance (e.g. danger of overheating). This appliance may only be installed in mobile installations such as ships if a risk assessment of the installation has been carried out by a suitably qualified engineer. The plastic housing of the water connection contains an electrical component. The housing must not be submerged in water. There are electrical wires in the hose of Aqua-Stop. Never cut the water inlet hose, even if it is too long. Installation, maintenance and repairs may only be carried out by a suitably qualified and competent person in strict accordance with current national and local safety regulations. Repairs and other work by unqualified persons can be dangerous. The manufacturer cannot be held liable for unauthorised work. The integrated waterproof system oers protection from water damage, provided the following conditions are met:
- The dishwasher is correctly installed and plumbed in.
- The dishwasher is properly maintained and parts are replaced where it can be seen that this is necessary.
- The stopcock has been turned o when the appliance is not used for a longer period of time (e.g. during holidays).
- The waterproof system will work even if the appliance is switched o. However, the appliance must remain connected to the electricity supply. A damaged appliance can be dangerous. If the dishwasher gets damaged, switch it o at the mains and call your dealer or the service department. Unauthorised repairs could result in unforeseen dangers for the user, for which the manufacturer cannot accept liability. Repairs should only be undertaken by an approved service technician. Faulty components must only be replaced by original spare parts. Only when these parts are fitted can the safety of the appliance can be guaranteed. Always disconnect the dishwasher from the electrical supply for maintenance work (switch o at the wall socket and remove the plug). If the connection cable is damaged it must be replaced with a special cable, available from the manufacturer. For safety reasons, this must only be fitted by the service department or an authorised service technician. In countries where there are areas which may be subject to infestation by cockroaches or other vermin, pay particular attention to keeping the appliance and its surroundings in a clean condition at all times. Any damage which may be caused by cockroaches or other vermin will not be covered by the guarantee. In the event of a fault or for cleaning purposes, the appliance is only completely isolated from the electiricity supply when:
- it is switched o at the wall socket and the plug is withdrawn, or
- it is switched o at the mains, or
- the mains fuse is disconnected, or
- the screw-out fuse is removed (in countries where this is applicable). Do not make any alterations to the appliance, unless authorised to do so by the manufacturer. CAUTION CAUTION CAUTION WARNING CAUTION WARNING CAUTION DW5500M_DD81-02615B-04_EN.indd 7DW5500M_DD81-02615B-04_EN.indd 7 2020-10-15 5:30:022020-10-15 5:30:028_ Safety instructions Never open the casing/housing of the appliance. Tempering with electrical connections or components and mechanical parts is highly dangerous and can cause operational faults or electric shock. While the appliance is under guarantee, repairs should only be undertaken by a service technician authorised by the manufacturer. Otherwise the guarantee will be invalidated. When installing the product, make sure there is space at the top, left, right and back of the product to ensure proper ventilation. If there is insucient space between the product and the sink, it may damage the sink or allow mold to grow. Make sure that your dishwasher’s hardness level setting is correct as your area. (Refer to the “Water softener mode (Water hardness level setting)” section on page 14.) CAUTION CAUTION Safety instructions DW5500M_DD81-02615B-04_EN.indd 8DW5500M_DD81-02615B-04_EN.indd 8 2020-10-15 5:30:022020-10-15 5:30:02Contents _9 Contents
10 Dishwasher features 12 Control panel 13 Displays
USING THE DETERGENT AND WATER
14 Water softener mode (Water hardness level setting) 15 Loading the salt into the softener 16 Using detergent 17 Using rinse aid 17 Adjusting the amount of rinse aid 18 How to use the Multi tab option
LOADING THE DISHWASHER RACKS
19 Loading the upper basket 21 Loading the lower basket 21 Folding spikes of lower basket 22 Cutlery(silverware) tray 24 For washing in the dishwasher the following cutlery/dishes WASHING PROGRAMMES
25 Turning on the appliance 25 Change the programme 26 At the end of the wash cycle 27 Wash cycle table
28 Cleaning the filters 29 Cleaning the spray arms 29 Cleaning the door 29 Caring for the dishwasher 29 Protect against freezing 30 How to maintain your dishwasher
SETTING UP YOUR DISHWASHER
31 Water supply and drain 33 Connection of drain hoses 33 Position the appliance 33 Start of dishwasher
34 Built under, Semi built in, Fully built in Dishwasher TROUBLESHOOTING
43 Specifications 43 Product dimension DW5500M_DD81-02615B-04_EN.indd 9DW5500M_DD81-02615B-04_EN.indd 9 2020-10-15 5:30:022020-10-15 5:30:0210_ Parts and features Parts and features DISHWASHER FEATURES Front & Rear view (DW60M5070)
Front & Rear view (DW60M5050)
1 POWER Press this button to turn on your dishwasher: the screen lights up. 2 Program To select washing program press this button. 3 Half load For small amount of loading items, press the Half load button to save energy. 4 Control lock This option allows you to lock the buttons on the control panel so children cannot accidentally start the dishwasher by pressing the buttons on the panel. To lock and unlock the buttons on the control panel, hold down the Control lock button for three (3) seconds. 5 Display window Running indicator, delay time, information codes and etc. 6START To start a cycle, press the START button before closing the door. *Reset : To cancel a currently running cycle and drain the dishwasher, press and hold the START button for three (3) seconds. Once the dishwasher is reset, select a cycle and option, and then press START to restart the dishwasher. 7 Delay start Press this button to set the delayed hours for washing. You can delay the start of washing up to 24 hours. One press on this button delays the start of washing by one hours. 8 Hygiene Push the Hygiene button for the best possible hygiene in your dishwasher. This function is available with all program except Quick Wash and Pre Wash. 9 Multi tab To select Multi tab option which needs salt and rinse aid but a Multi tab tablet. This function is available with all program except Auto, Quick Wash and Pre Wash.
- When the door is open only the POWER button will operate.
- You can select options (Multi tab, Delay start and/or Half load) before starting a cycle. IMPORTANT: To get the best performance from your dishwasher, read all the operating instructions before using it for the first time. Parts and features DW5500M_DD81-02615B-04_EN.indd 12DW5500M_DD81-02615B-04_EN.indd 12 2020-10-15 5:30:052020-10-15 5:30:05Parts and features _13
01 PARTS AND FEATURES
DISPLAYS DW60M5070FS/DW60M5070FW/DW60M5050FS/DW60M5050FW
1 Program icons Press the Program button to select each program. Intensive Heavily soiled items include pots and pans Auto wash Lightly to heavily soiled daily using items, automatic detection of the amount of soils. (DW60M5070) Normal For normally soiled loads, such as pots, plates, glasses, and lightly soiled pans. (DW60M5050) ECO Normally soiled daily using items, with reduced energy and water consumptions. Express Normal daily used items, with short cycle time. Quick Wash Lightly soiled with very short cycle time. (DW60M5070) Delicate Lightly soiled delicate items. Pre Wash Cold water rinse for removing dirt before running another program. (DW60M5070) 2 Display Display the remaining time, information code, or delay time. 3 Refill indicators If Rinse or Salt Refill indicator is lit, it means rinse or salt is needed to refill. Rinse Refill indicator If Rinse or Salt Refill indicator is lit, it means rinse or salt needs to be refilled. To refill the rinse reservior, refer to the “Filling the rinse aid reservoir” section on page 17. Salt refill indicator If the “Salt Refill” indicator is lit, it means the dishwasher is low on dishwasher salt and needs to be refilled. To refill the salt reservior, refer to the “Loading the salt into the softener” section on page 15. DW5500M_DD81-02615B-04_EN.indd 13DW5500M_DD81-02615B-04_EN.indd 13 2020-10-15 5:30:062020-10-15 5:30:0614_ Using the detergent and water softener Using the detergent and water softener WATER SOFTENER MODE (WATER HARDNESS LEVEL SETTING) The dishwasher is designed to allow for adjusting the amount of salt consumed based on the hardness of the water used. This is intended to optimise the level of salt consumption. To set the salt consumption, proceed as below:
1. Switch on the appliance;
2. Press the Program button for more than 5 seconds to start the water softener set model within 60
seconds after the appliance was switched on;
- Press the Program button to select the proper set according to your local environment, the sets will change in the following sequence: H1 H2 H3 H4 H5 H6; It is recommended that adjustments should be made in accordance with the following table.
- The manufactory setting: H3 (EN 50242)
3. Wait for 5 seconds to end the set up model.
WATER HARDNESS Selector Position Salt consumption (gram/cycle) º dH º fH º Clark mmol/l 0-5 0-9 0-6 0-0.94 H1 0 6-11 10-20 7-14 1.0-2.0 H2 9 12-17 21-30 15-21 2.1-3.0 H3 12 18-22 31-40 22-28 3.1-4.0 H4 20 23-34 41-60 29-42 4.1-6.0 H5 30 35-55 61-98 43-69 6.1-9.8 H6 60 1 dH (German degree) = 0.178 mmol/l 1 Clark (British degree) = 0.143 mmol/l 1 fH (French degree) = 0.1 mmol/l Contact your local water board for information on the hardness of your water supply. WATER SOFTENER The hardness of the water varies from place to place. If hard water is used in the dishwasher, deposits may form on dishes and utensils. The appliance is equipped with a special softener that uses a salt specifically designed to eliminate lime and minerals from the water. [Deposits on utensils] DW5500M_DD81-02615B-04_EN.indd 14DW5500M_DD81-02615B-04_EN.indd 14 2020-10-15 5:30:062020-10-15 5:30:06Using the detergent and water softener _15
USING THE DETERGENT AND WATER SOFTENER
LOADING THE SALT INTO THE SOFTENER
Always use salt intended for use with dishwasher. The salt container is located beneath the lower rack and should be filled as follows: ATTENTION
- Only use salt specifically designed for use in dishwashers. All other types of salt not specifically designed for use in a dishwasher, especially table salt, will damage the water softener. In case of damages caused by the use of unsuitable salt the manufacturer does not give any warranty nor is liable for any caused damages.
- Only fill with salt just before starting one of the complete washing programs. This will prevent any grains of salt or salty water, which may have been split, remaining of the bottom of the machine for any period of time, which may cause corrosion.
- After the first wash cycle the control panel light expires.
1. Remove the lower basket and then unscrew and remove the cap from
the salt container. Open Open
2. If you are fi lling the container for the fi rst time, fi ll 2/3 of its volume with water (around 1 liter).
3. Place the end of the funnel (supplied) into the hole and introduce about
1.5 kg of salt. It is normal for a small amount of water to come out of
4. Carefully screw the cap back on.
5. Usually, the salt warning light will be o after the salt container is fi lled with salt.
- The salt container must be refilled when the salt warning light on the control panel comes on. Although the salt container is filled enough, the indicator light may not switch o until the salt fully dissolves. If there is no salt warning light on the control panel, you can judge when to load the salt into the softener by the cycles that the dishwasher has run.
- If a lot of salt is spilt inside the dishwasher, run a pre wash program to reduce the spillage. DW5500M_DD81-02615B-04_EN.indd 15DW5500M_DD81-02615B-04_EN.indd 15 2020-10-15 5:30:062020-10-15 5:30:0616_ Using the detergent and water softener USING DETERGENT All dishwasher cycles require detergent in the detergent compartment. Add the correct amount of detergent for the selected cycle to ensure the best performance. CAUTION: Use dishwasher detergent only. Regular detergent produces too much foam, which may decrease the dishwasher’s performance or cause it to malfunction.
WARNING: Do not swallow dishwasher detergent. Avoid breathing in the fumes. Dishwasher
detergent contains irritants and caustic chemicals that can induce respiratory conditions. If you have swallowed dishwasher detergent or inhaled the fumes, seek medical attention immediately.
WARNING: Keep dishwasher detergent out of the reach of children.
Filling the detergent dispenser
1. Open the detergent dispenser fl ap by pushing the detergent
dispenser release catch. The flap is always open at the end of a dishwashing cycle.
2. Add the recommended amount of detergent to the main
wash detergent compartment.
3. Close the fl ap by sliding it to the left and then pressing it
down. There is no separate button that is specific to using tablet detergents.
4. For better cleaning result, especially if you have very dirt items, add small amount (about 8 g)
of detergent on the door. That will act in prewash phase. Using the detergent and water softener DW5500M_DD81-02615B-04_EN.indd 16DW5500M_DD81-02615B-04_EN.indd 16 2020-10-15 5:30:082020-10-15 5:30:08Using the detergent and water softener _17
USING THE DETERGENT AND WATER SOFTENER
Filling the rinse aid reservoir When the Rinse Refill indicator lights up on the control panel, refill with rinse aid. Your dishwasher has been designed to use liquid rinse aid only. Using a powdered rinse aid will clog the reservoir opening and cause the dishwasher to malfunction. Rinse aid improves the drying performance of the dishwasher. CAUTION: Do not add regular detergent to the rinse aid reservoir.
1. Remove the rinse aid reservoir cap by lifting up the handle.
Adding rinse aid to tablet detergents will improve drying performance.
2. Fill the rinse aid reservoir with rinse aid.
Use the viewing port when filling the rinse aid reservoir. CAUTION: Do not fill the reservoir above the maximum level. Excess rinse aid can overflow during the wash cycle.
3. Close the cap after all.
ADJUSTING THE AMOUNT OF RINSE AID
You can adjust the amount of rinse aid by below sequence. As good drying performance as you set the higher number.
1. Switch on the dishwasher.
2. Press the Program button for fi ve seconds, within 60 seconds from turning on the dishwasher.(same
with Softener setting mode)
3. Press the Delay start button to enter the Rinse aid setting mode.
4. The LCD shows the present rinse level. (between d1~d5)
5. Press the Program button to select the amount of rinse aid you want. the sets will change in the
following sequence; d1 d2 d3 d4 d5 d1. (The default level is d4.)
6. Select the amount of rinse aid and wait for 5 seconds to complete the setup.
DW5500M_DD81-02615B-04_EN.indd 17DW5500M_DD81-02615B-04_EN.indd 17 2020-10-15 5:30:102020-10-15 5:30:1018_ Using the detergent and water softener HOW TO USE THE MULTI TAB OPTION Your dishwasher has a Multi tab option which does not need salt and rinse aid but a 3 In1 tablet. This option can select on Intensive, Eco program only. The Multi tab setting is only for use with Multi tab tablets. If using Multi tab tablet without this option, the appliance will not get its best performance.
2. Close the lid and press until it locks in place.
When using Multi tab compact combination detergents ensure that the lid can be closed correctly. ATTENTION: Keep all detergents in a safe place out of children’s reach. Always add the detergent in the dispenser just before starting the dishwasher. Using the detergent and water softener DW5500M_DD81-02615B-04_EN.indd 18DW5500M_DD81-02615B-04_EN.indd 18 2020-10-15 5:30:102020-10-15 5:30:10Loading the dishwasher racks _19
03 LOADING THE DISHWASHER RACKS
Loading the dishwasher racks For best performance of the dishwasher, follow these loading guidelines. Features and appearance of racks and silverware baskets may vary from your model. Attention before or after loading the dishwasher racksScrape o any large amounts of leftover food. It is not necessary to rinse the dishes under running water. Place objects in the dishwasher in the following order:1. Items such as cups, glasses, pots/pans, etc. are stood upside down.2. Curved items, or those with recesses, should be at a slant so that water can run o.3. Ensure they are stacked securely and can not tip over.4. Ensure they do not prevent the spray arms from rotating while washing takes place.Very small items should not be washed in the dishwasher as they could easily fall out of the racks.Removing the dishesTo prevent water dripping from the upper basket into the lower basket, we recommend that you empty the lower basket first and then the upper basket.
LOADING THE UPPER BASKET
The upper basket is designed to hold more delicate and lighter dishware such as glasses, coee and tea cups and saucers, as well as plates, small bowls and shallow pans (as long as they are not too dirty).Position the dishes and cookware so that they will not get moved by the spray of water. Always place glasses, cups & bowls upside down.
DW60M5070(14 place setting)DW60M5050(13 place setting) Cups
Saucers Glasses Small serving bowl Medium serving bowl Large serving bowl Knives Forks Soup spoons DW5500M_DD81-02615B-04_EN.indd 19DW5500M_DD81-02615B-04_EN.indd 19 2020-10-15 5:30:112020-10-15 5:30:1120_ Loading the dishwasher racks Adjusting the Upper Basket The height of the upper basket can be adjusted in order to create more space for large utensils both for the upper/lower basket.
1. To lower the upper rack, press the “A”
levers located at the left and right sides of the upper basket and push the upper basket downwards slightly at the same time.
2. To raise the upper rack, just pull the
upper basket upwards without operating any levers. CAUTION: We recommend adjusting the height of the upper basket before loading dishes into the basket. If you adjust the the basket after loading the dishes, you may damage the dishes. To lower position To upper position Loading the dishwasher racks DW5500M_DD81-02615B-04_EN.indd 20DW5500M_DD81-02615B-04_EN.indd 20 2020-10-15 5:30:122020-10-15 5:30:12Loading the dishwasher racks _21
03 LOADING THE DISHWASHER RACKS
LOADING THE LOWER BASKET
We recommend that you place large items which are most dicult to clean in to the lower rack: pots, pans, lids, serving dishes and bowls, as shown in the figure to the right. It is preferable to place serving dishes and lids on the side of the racks in order to avoid blocking the rotation of the top spray arm. Pots, serving bowls, etc. must always be placed top down. Deep pots should be slanted to allow water to flow out. The bottom rack feature fold down tine rows so that larger or more pots and pans can be loaded.
DW60M5070 (14 place setting) DW60M5050 (13 place setting)
Long items, serving cutlery, salad servers and big knives should be placed on the shelf so that they do not obstruct the rotation of the spray arms.
FOLDING SPIKES OF LOWER BASKET
For better stacking of pots and pans, the spikes can be folded down and/or removable tine as show in the picture below. DW60M5050 DW60M5070 DW5500M_DD81-02615B-04_EN.indd 21DW5500M_DD81-02615B-04_EN.indd 21 2020-10-15 5:30:132020-10-15 5:30:1322_ Loading the dishwasher racks
CUTLERY(SILVERWARE) TRAY
Silverware should be placed in the cutlery tray with handles at the bottom: The spoon should be loaded individually into the appropriate slots, especially long utensils should be placed in the horizontal position at the front of the upper basket. DW60M5070
- Do not let any item extend through the bottom.
- Always load sharp utensils with the sharp point down! Loading the dishwasher racks DW5500M_DD81-02615B-04_EN.indd 22DW5500M_DD81-02615B-04_EN.indd 22 2020-10-15 5:30:152020-10-15 5:30:15Loading the dishwasher racks _23
03 LOADING THE DISHWASHER RACKS
- Do not let any item extend through the bottom.
- Always load sharp utensils with the sharp point down! DW5500M_DD81-02615B-04_EN.indd 23DW5500M_DD81-02615B-04_EN.indd 23 2020-10-15 5:30:162020-10-15 5:30:1624_ Loading the dishwasher racks FOR WASHING IN THE DISHWASHER THE FOLLOWING CUTLERY/ DISHES Not suitable Limited suitability Plastic items that are not heat resistant. Older cutlery with glued parts that is not temperature resistant. Bonded cutlery items or dishes. Pewter or Copper items Lead crystal glass. Steel items subject to rusting. Wooden platters. Items made from synthetic fibres. Some types of glasses can become dull after a large number of washes. Silver and aluminium parts have a tendency to discolour during washing. Glazed patterns may fade if machine washed frequently. Do not try and wash items soiled with cigarette ash, candle wax, lacquer or paint. If you buy new dishes please make sure that they are suitable for dishwashers. Please do not overload your dishwasher. Do not use any dish that are not suitable for dishwashers. This is important for good results and for reasonable energy consumption. When loading the dishes and cutlery Dishes and cutlery must not impede the rotation of the spray arms. Load hollow items such as cups, glasses, pans etc. with the opening downwards so that water cannot collect in the container or a deep base. Dishes and items of cutlery must not lie inside one another, or cover each other
- To avoid damage to glasses, they must not touch.
- Load large items which are most dicult to clean into the lower rack.
- The upper rack is designed to hold more delicate and lighter dishware such as glasses, coee and tea cups. ATTENTION Long bladed knives stored in an upright position are a potential hazard! Long and/or sharp items of cutlery such as carving knives must be positioned horizontally in the upper basket. Damage to glassware and other dishes. Possible causes Suggested remedy
- Type of glass or manufacturing process. Chemical composition of detergent.
- Water temperature and duration of dishwasher programme.
- Use glassware or porcelain dishes that have been marked dishwasher-proof by the manufacturer.
- Use a mild detergent that is described as kind of dishes If necessary, seek further information from detergent manufacturers.
- Select a programme with as low a temperature.
- To prevent damage, take glass and cutlery out of the dishwasher as soon as possible after the programme has ended. Loading the dishwasher racks DW5500M_DD81-02615B-04_EN.indd 24DW5500M_DD81-02615B-04_EN.indd 24 2020-10-15 5:30:162020-10-15 5:30:16Washing programmes _25 04 WASHING PROGRAMMES Washing programmes
TURNING ON THE APPLIANCE
Starting a cycle wash1. Draw out the lower and upper basket, load the dishes and push them back.. It is recommended to load the lower basket fi rst, then the upper one (see the section entitled “Loading the dishwasher racks”).
2. Pour in the detergent (see the section entitled “Using the detergent and water softener”).
3. Insert the plug into the socket. The power supply is 220-240 V~, 50 Hz, the specifi cation of the socket
is 10A 250 VAC. Make sure that the water supply is turned on to proper pressure.4. Close the door, press the POWER button, to switch on the machine.A click could be heard when the door is closed perfectly. When the washing is over, you can shut o the switch by pressing POWER button.
CHANGE THE PROGRAMME
1. A cycle that is underway can only be modifi ed if it has only been running for a short time. Otherwise, the
detergent may have already been released, and the appliance may have already drained the wash water. If this is the case, the detergent dispenser must be refi lled (see the section entitled “Filling the detergent dispenser”).
2. Press POWER button or START button for 3 seconds to cancel the programme, and turn on it again,
then you can change the programme to the desired cycle setting.If you open the door during a wash cycle, the machine will pause. The program light will stop blinking and the buzzer will beep every minute unless you close the door. After you close the door, the machine will keep on working after 3 seconds automatically.If your model has broken memory function, the machine will go on to finish the selected program after the power cut. Adding dishes A forgotten dish can be added at any time before the detergent dispenser opens.1. Open the door a little to stop the washing.2. After the spray arms stop working, you can open the door completely.3. Add forgotten dishes.4. Close the door, the dishwasher will work after ten seconds.WARNING: It is dangerous to open the door when washing, because the hot water may scald you. If the door is opened while the dishwasher is running, a safety mechanism is activated and stops the cycle. DW5500M_DD81-02615B-04_EN.indd 25DW5500M_DD81-02615B-04_EN.indd 25 2020-10-15 5:30:172020-10-15 5:30:1726_ Washing programmes AT THE END OF THE WASH CYCLE When the working cycle has finished, the buzzer of dishwasher will beep shortly, then stop. In the digital display appears “0”, only in this case the programme has ended.
1. Switch o the dishwasher by pressing the POWER button.
2. Turn o the water tap!
Open the door carefully. Hot steam may escape when the door is opened!
- Hot dishes are sensitive to knocks. The dishes should be allowed to cool down around 15 minutes before removing from the appliance.
- Open the dishwasher’s door, leave it and wait a few minutes before removing the dishes. In this way they will be cooler and the drying will be improved.
- Unloading the dishwasher. It is normal that the dishwasher is wet inside. Empty the lower basket first and then the upper one. This will avoid water dripping from the upper basket onto the dishes in the lower one. Washing programmes DW5500M_DD81-02615B-04_EN.indd 26DW5500M_DD81-02615B-04_EN.indd 26 2020-10-15 5:30:172020-10-15 5:30:17Washing programmes _27 04 WASHING PROGRAMMES
CLEANING THE FILTERS
Filtering system For your convenience, we have placed the drain pump and filtering system within easy reach inside the tub. There are three components of the filtering system: the main filter, the coarse filter, and the fine filter.
1. Main fi lter: Food and soil particles trapped by this fi lter are
pulverized by a special jet on the lower spray arm and washed down the drain.
2. Coarse fi lter: Larger items, such as pieces of bone or glass, that
could clog the drain are trapped in the coarse fi lter. To remove an item caught in this fi lter, gently squeeze the tabs on top of this fi lter and lift it out.
3. Fine fi lter: This fi lter holds soil and food residue in the sump area
and prevents it from being redeposited on the dishes during a cycle.
ATTENTION: Do not put the fine filter upside down. Filter assembly For best performance and results, the filter assembly must be cleaned. The filter eciently removes food particles from the wash water, allowing it to be recirculated during the cycle. For this reason, it is a good idea to remove the larger food particles trapped in the filter after each wash cycle by rinsing the semicircular filter and cup under running water. To remove the filter assembly, turn it in anti-clockwise direction and lift the filter assembly up. The entire filter assembly should be cleaned regularly. To clean the coarse filter and the fine filter, use a cleaning brush. Then, reinsert the entire assembly in the dishwasher, positioning in its seat, pressing downward, turning it clockwise direction. Open Open The dishwasher must never be used without the filters. Improper replacement of the filter may reduce the performance level of the appliance and damage dishes and utensils.
WARNING: Never run the dishwasher without the filters in place. When cleaning the filters,
do not damage them. Otherwise the filters may not perform as intended and poor wash results or damage to the internal parts may be encountered. DW5500M_DD81-02615B-04_EN.indd 28DW5500M_DD81-02615B-04_EN.indd 28 2020-10-15 5:30:172020-10-15 5:30:17Cleaning and care _29
05 CLEANING AND CARE
CLEANING THE SPRAY ARMS
It is necessary to clean the spray arms regularly as hard water residue can clog the spray arm jets and bearings. To remove the middle spray arm, hold the nut, rotate the arm clockwise to remove it. To remove the lower spray arm, pull out the spray arm upward. Wash the arms in warm and soapy water and use a soft brush to clean the jets. Replace them after rinsing them thoroughly. Open
To clean the edge around the door, you should use only a soft warm, damp cloth. Also, never use abrasive cleaners or scouring pads on the outer surfaces because they will scratch the finish. Some papers towels can also scratch or leave marks on the surface.
WARNING: Never use a spray cleaner to clean the door panel for it could damage the door lock and
electrical components. It is not advised to use the abrasive agent or some paper towel because of the risk of scratching or leaving spots on the stainless steel surface.
CARING FOR THE DISHWASHER
To clean the control panel use a lightly damp cloth then dry thoroughly. To clean the exterior use a good appliance polish wax. Never use sharp objects, scouring pads or harsh cleaners on any part of the dishwasher.
PROTECT AGAINST FREEZING
If your dishwasher is left in an unheated place during the winter:
1. Cut o electrical power to the dishwasher.
2. Turn o the water supply and disconnect the water inlet pipe from the water valve.
3. Drain water from the inlet pipe and water valve. (Use a pan to catch the water)
4. Reconnect the water inlet pipe to the water valve.
5. Remove the fi lter in the tub the bottom and use a sponge sock up water.
- After Every Wash After every wash, turn o the water supply to the appliance and leave the door slightly ajar so that moisture and odours not trapped inside.
- Remove the Plug Before cleaning or performing maintenance, always remove the plug from the socket.
- No Solvents or Abrasive cleaning To clean the exterior and rubber parts of the dishwasher, do not use solvents or abrasive cleaning products. use only a cloth and warm soapy water. To remove spots or stains from the surface of the interior, Use a cloth dampened with water and a little white vinegar, or a cleaning product made specifically for dishwashers.
- When You Go on Holiday When you go on holiday, it is recommended that you run a wash cycle with the dishwasher empty and then remove the plug from the socket, turn o the water supply and leave the door of the appliance slightly ajar. This will help the seals last longer and prevent odours from forming within the appliance.
- Moving the Appliance If the appliance must be moved, try to keep it in the vertical position. If absolutely necessary, it can be positioned on its back.
- Seals One of the factors that cause odours to form in the dishwasher is food that remains trapped in the seals. Periodic cleaning with a damp sponge will prevent this from occurring. Cleaning and care DW5500M_DD81-02615B-04_EN.indd 30DW5500M_DD81-02615B-04_EN.indd 30 2020-10-15 5:30:172020-10-15 5:30:17Setting up your dishwasher _31
06 SETTING UP YOUR DISHWASHER
Setting up your dishwasher WARNING : Electrical shock hazardDisconnect electrical power before installing dishwasher.Failure to do so could result in death or electrical shock. ATTENTION: The installation of the pipes and electrical equipments should be done by professionals. About electricity connecting CAUTION, for personal safety:DO NOT USE AN EXTENSION CORD OR AN ADAPTER PLUG WITH THIS APPLIANCE.DO NOT, UNDER ANY CIRCUMSTANCES, CUT OR REMOVE THE THIRD GROUNDING PRONG FROM THE POWER CORD. Electrical requirements
- An 220-240 V~, 50 Hz fuse or a circuit breaker.• An individual branch circuit serving your dishwasher. Grounding instructions Insure proper ground exists before useThis appliance must be grounded. In the event of a malfunction or breakdown, grounding will reduce the risk of electric shock by providing a path of least resistance of electric current. This appliance is equipped with a cord having an equipment-grounding conductor and a grounding plug. The plug must be plugged into an appropriate outlet that is installed and grounded in accordance with all local codes and ordinances.WARNING: Improper connection of the equipment grounding conductor can result in the risk of an electric shock. Check with a qualified electrician or service representative if you are in doubt whether the appliance is properly grounded. Do not modify the plug provided with the appliance.
WATER SUPPLY AND DRAIN
Cold water connection Connect the cold water supply hose to a threaded 3/4 (inch) connector and make sure that it is fastened tightly in place.If the water pipes are new or have not been used for an extended period of time, let the water run to make sure that the water is clear. This precaution is needed to avoid the risk of the water inlet to be blocked and damage the appliance.Provided water supply hose has the aqua-safe system. Ensure that water supply hose’s aqua-safe pipe is connected to the faucet. DW5500M_DD81-02615B-04_EN.indd 31DW5500M_DD81-02615B-04_EN.indd 31 2020-10-15 5:30:172020-10-15 5:30:1732_ Setting up your dishwasher Hot water connection The water supply to the appliance can also be connected to the house hot water line (centralized system, heating system), as long as it does not exceed a temperature of 60 °C. In this case, the wash cycle time will be shortened by about 15 minutes and the wash eciency slightly reduced. The connection must be made to the hot water line following the same procedures as those for the connection to the cold water line. Positioning the appliance Position the appliance in the desired location. The back should rest against the wall behind it, and the sides, along the adjacent cabinets or wall. The dishwasher is equipped with water supply and drain hoses that can be positioned to the right or the left to facilitate proper installation. How to drain excess water from hoses If the sink is 1000 mm higher from the floor, the excess water in hoses cannot be drained directly into the sink. It will be necessary to drain excess water from hoses into a bowl or suitable container that is held outside and lower than the sink. Water outlet Connect the water drain hose. The drain hose must be correctly fitted to avoid water leaks. Ensure that the water inlet hose is not kinked or squashed. Extension hose If you need a drain hose extension, Use a similar size and quality drain hose. It must be no longer than 4 metres; otherwise the cleaning eect of the dishwasher could be reduced. Syphon connection The waste connection must be at a height of between 40 cm (minimum) and 100 cm (maximum) from the bottom of the dishwasher. The water drain hose should be fixed by a hose clip. Aqua-safe The Aqua-safe System is a safety valve system, preventing water leaks. If the water inlet hose starts to leak anytime, the safety valve cuts o the running water. If the water inlet hose or the safety valve is damaged, remove and replace it. Do not enlarge or shorten the inlet hose. Setting up your dishwasher DW5500M_DD81-02615B-04_EN.indd 32DW5500M_DD81-02615B-04_EN.indd 32 2020-10-15 5:30:172020-10-15 5:30:17Setting up your dishwasher _33
Insert the drain hose into a drain pipe with a minimum diameter of 4 cm, or let it run into the sink, making sure to avoid bending or crimping it. The top of the hose must be at a height between 40 and 100 cm. The free end of the hose must not be immersed in water to avoid the back flow of it. NOTE The top of the hose must be at a height between 40 and 100 cm.The free end of the hose must not be immersed in water.Drain pipe40 mmCounterMin. 400 mmMax 1000 mm
POSITION THE APPLIANCE
Position the appliance in the desired location. The back should rest against the wall behind it, and the sides, along the adjacent cabinets or walls. The dishwasher is equipped with water supply and drain hoses that can be positioned either to the right or the left sides to facilitate proper installation. Levelling the Appliance Once the appliance is positioned for levelling, the height of the dishwasher may be altered via adjustment of the screwing level of the feet. In any case, the appliance should not be inclined more than 2°.
The following should be checked before starting the dishwasher.
1. the dishwasher is level and fi xed
2. the inlet valve is opened
3. There is no leakage at the connections of the conducts
4. the wires are tightly connected
5. the power is switched on
6. the inlet and drain hoses are not knotted
7. All packaging materials and printings have been taken out of the dishwasher
ATTENTION: After installation please put this manual in a safe place. The contents of this manual can be useful to users. DW5500M_DD81-02615B-04_EN.indd 33DW5500M_DD81-02615B-04_EN.indd 33 2020-10-15 5:30:172020-10-15 5:30:1734_ Installing your dishwasher Installing your dishwasher BUILT UNDER, SEMI BUILT IN, FULLY BUILT IN DISHWASHER Be sure that you or your installer follow these instructions closely so that your new dishwasher works properly and that you’re not at risk of injury when washing dishes. New installation If the dishwasher is a new installation, most of the installation work must be done before the dishwasher is moved into place. Replacement If the dishwasher is replacing an old dishwasher, you must check the exising dishwasher connections for compatibility with the new dishwasher. Replace the existing connections as necessary. STEP 1. SELECTING THE BEST LOCATION FOR THE DISHWASHER The installation position of dishwasher should be near the existing inlet and drain hoses and power cord. One side of the cabinet sink should be chosen to facilitate the connection of drain hoses of the dishwasher.
1. Choose a place near the sink to facilitate the installation of inlet and drain hoses.
2. Less than 5mm between the top of dishwasher and cabinet and the outer door aligned to cabinet.
minimum minimum Electrical, drain Electrical, drain and water supply and water supply line entrances line entrances Space between cabient Space between cabient bottom and floor bottom and floor 600 minimum 600 minimum
3. If dishwasher is in stalled at the corner of the cabinet, there
should be some space when the door is opened. cabinet Dishwasher Dishwasher Door of Door of Dishwasher Dishwasher Minimum space of 50 mm Depending on where your electrical outlet is, you may need to cut a hole in the opposite cabinet side. DW5500M_DD81-02615B-04_EN.indd 34DW5500M_DD81-02615B-04_EN.indd 34 2020-10-15 5:30:182020-10-15 5:30:18Installing your dishwasher _35
07 INSTALLING YOUR DISHWASHER
STEP 2. CHECKING WATER SUPPLY AND ELECTRICAL
- The water supply line pressure must be between 0.04-1.0 MPa.
- Supply cold water only. Make sure that the water temperature does not exceed 60 ˚C.
- Do not supply hot water. Otherwise, the product may malfunction.
- Use a rated power of 220-240 V~, 50 Hz.
- Install the product while the power cord is unplugged.
- Use a power outlet with a maximum allowable current of 16 A. (The maximum current for this dish washer is 11 A.)
- When powering the dishwasher, ensure that your power supply has: - An 220-240 V~, 50 Hz fuse or circuit breaker. - An individual branch circuit serving your dishwasher.
- After the installation, check if the power cord is not bent or damaged.
- Ensure that the water supply valve is turned o before connecting the water supply line to the dishwasher.
- Seal the water supply line connections using teflon tape or sealing compound to stop any water leakage.
STEP 3. PREPARING THE CUSTOM PANEL
(FOR FULLY BUILT IN AND SEMI BUILT IN DISHWASHER) The custom panel should be processed in accordance with the illustrated dimensions.
Fully built in Semi built in CAUTIONWARNING DW5500M_DD81-02615B-04_EN.indd 35DW5500M_DD81-02615B-04_EN.indd 35 2020-10-15 5:30:182020-10-15 5:30:1836_ Installing your dishwasher Fully built in
1. Install the hook on the custom wooden panel and put the hook into the slot of the outer door
2. After positioning of the panel, fi x the panel onto the outer door by screws and bolts.
CAUTION: Use a custom panel between 3~7 kg. Take away the four short screws. Pin up the four long screws. Semi built in
1. Magical paster A and magical paster B be disjoined on, magical paster A on the custom
wooden panel and felted magical paster B of the outer door of dishwasher.
2. After positioning of the panel, fi x the panel onto the outer door by screws and bolts.
CAUTION: Use a custom panel between 3~6 kg. Magical Paster Magical Paster Take away the four short screws. Pin up the four long screws. Installing your dishwasher DW5500M_DD81-02615B-04_EN.indd 36DW5500M_DD81-02615B-04_EN.indd 36 2020-10-15 5:30:182020-10-15 5:30:18Installing your dishwasher _37
07 INSTALLING YOUR DISHWASHER
STEP 4. TENSION ADJUSTMENT OF THE DOOR SPRING (FOR FULLY BUILT IN AND SEMI BUILT IN DISHWASHER)
1. The door springs are set at the factory to the proper tension for the outer door. If custom wooden panel
are installed, you will have to adjust the door spring tension. Rotate the adjusting screw to drive the adjustor to strain or relax the steel cable.
2. Door spring tension is correct when the door remains horizontal in the fully opened position yet rises to
1. Install the furniture door to the outer door of the dishwasher using the brackets provided. Refer to the
template for positioning of the brackets. (For Fully built in and Semi built in dishwasher)
2. Adjust the tension of the door springs by using an Allen key turning in a clockwise motion to tight en the
left and right door springs. Failure to do this could cause damage to your dishwasher. (For Fully built in and Semi built in dishwasher)
3. Connect the inlet hos e to the cold water supply.
4. Connect the drain hose. Refer to diagram.
5. Connect the power cord.
6. A x the condensation strip under the work surface of cabinet. Please ensure the condensation strip is
fl ush with edge of work surface.
7. Place the dishwasher into position.
8. Level the dishwasher. The rear food can be adjusted from the front of the dishwasher by turning the
Allen screw in the middle of the base of dishwasher use an Allen key. To adjust the front feet, use a fl at screw driver and turn the front feet until the dishwasher is level.
9. The dishwasher must be secured in place. There are two ways to do this:
A. Normal work surface : Put the installation hook into the slot of the side plane and se cure it to the work surface with the wood screws. B. Marble or granite work top : Fix the side with Screw. Installing your dishwasher DW5500M_DD81-02615B-04_EN.indd 38DW5500M_DD81-02615B-04_EN.indd 38 2020-10-15 5:30:182020-10-15 5:30:18Installing your dishwasher _39
Check level front to back Check level side to side ƸťUĮǮĘ
UĮǮĘ Dishwasher must be level for proper dish rack operation and wash performance.
1. Place a spirit level on door and rack track inside the tub as shown to check that the dishwasher is level.
2. Level the dishwasher by adjusting the three levelling legs individually.
3. When level the dishwasher, please pay attention not to let the dishwasher tip over.
If the height of the leg is not high enough, use extra feet. DW5500M_DD81-02615B-04_EN.indd 39DW5500M_DD81-02615B-04_EN.indd 39 2020-10-15 5:30:192020-10-15 5:30:1940_ Troubleshooting Troubleshooting The manufacturer, following a policy of constant development and up-dating of the product, may make modifications without giving prior notice.
BEFORE CALLING FOR SERVICE
PROBLEM POSSIBLE CAUSE WHAT TO DO
Dishwasher doesn’t run
- Fuse blown or the circuit breaker tripped.
- Replace fuse or reset circuit breaker. Remove any other appliances sharing the same circuit with the dishwasher.
- Power supply is not turned on.
- Make sure the dishwasher is turned on and the door is closed securely. Make sure the power cord is properly plugged into the wall socket.
- Water pressure is low. • Check that the water supply is connected properly and the water is turned on. Drain pump doesn’t stop
- Overflow. • The system is designed to detect an overflow. When it does, it shuts o the circulation pump and turns on the drain pump. Noise • Some audible sounds are normal.
- Sound from soft food shredding action and detergent cup opening.
- Utensils are not secure in the baskets or something small has dropped into the basket.
- To ensure everything is secured in the dishwasher.
- Motor hums. • Dishwasher has not been used regularly. If you do not use it often, remember to set it to fill and pump out every week, which will help keep the seal moist. Suds in the tub • Improper detergent. • Use only the special dishwasher detergent to avoid suds.
- If this occurs, open the dishwasher and let suds evaporate.
- Add 1 gallon of cold water to the tub. Close and latch the dishwasher, then start the “soak” wash cycle to drain out the water. Repeat if necessary.
- Spilled rinse agent. • Always wipe up rinse agent spills immediately. Stained tub interior • Detergent with colorant was used.
- Make sure that the detergent is the one without colorant. Dishes are not dried • Rinse agent dispenser is empty.
- Make sure that the rinse agent dispense is filled. Dishes and flatware not clean
- Improper program. • Select a more intensive wash program.
- Improper rack loading. • Make sure that the action of the detergent dispenser and spray arms are not blocked by large dishware. DW5500M_DD81-02615B-04_EN.indd 40DW5500M_DD81-02615B-04_EN.indd 40 2020-10-15 5:30:192020-10-15 5:30:19Troubleshooting _41 08 TROUBLESHOOTING
PROBLEM POSSIBLE CAUSE WHAT TO DO
Spots and filming on glasses and flatware
1. Extremely hard water.
4. Improper loading.
5. Old or damp powder
detergent. To remove spots from glassware:
3. Choose the longest cycle.
4. Start the dishwasher and allow it to run
for about 18 to 22 minutes, then it will be in the main wash.
5. Open the door to pour 2 cups of white
vinegar into the bottom of the dishwasher.
6. Close the door and let the dishwasher
complete the cycle. If the vinegar does not work: Repeat as above, except use 1/4 cup (60 ml) of citric acid crystals instead of vinegar. Cloudiness on glassware
- Combination of soft water and too much detergent.
- Use less detergent if you have soft water and select a shortest cycle to wash the glassware and to get them clean. Yellow or brown film on inside surfaces
- Tea or coee stains. • Using a solution of 1/2 cup of bleach and 3 cups warm water to remove the stains by hand.
WARNING: Wait for 20 minutes after
a cycle to allow heating elements cool down before cleaning interior; Failing to follow this instruction may result in injury.
- Iron deposits in water can cause an overall film.
- Contact a water softener company to install specialist water filtration system on the water supply. White film on inside surface
- Hard water minerals. • Clean the interior, use specialist dishwasher cleaner or use a damp sponge with dishwasher detergent and wear rubber gloves. Never use any other cleaner than dishwasher detergent for the risk of foaming or suds. Detergent cup lid won’t latch
- Dial is not in the OFF position.
- Turn the Dial to OFF position and slide the door latch to the left. Detergent left in dispenser
- Dishes block detergent dispenser.
- Re-loading the dishes properly. Steam • Normal phenomenon. • There is some steam coming through the vent by the door latch during drying and water draining. Black or gray marks on dishes
- Aluminum utensils have rubbed against dishes.
- Use a mild abrasive cleaner to eliminate those marks. Water standing in the bottom of the tub
- This is normal. • A small amount of clean water around the outlet on the tub bottom keeps the water seal lubricated. DW5500M_DD81-02615B-04_EN.indd 41DW5500M_DD81-02615B-04_EN.indd 41 2020-10-15 5:30:192020-10-15 5:30:1942_ Troubleshooting
PROBLEM POSSIBLE CAUSE WHAT TO DO
Dishwasher leaks • Overfill dispenser or rinse aid spills.
- Be careful not to overfill the rinse aid dispenser. Spilled rinse aid could cause overusing and lead to overflowing. Wipe away any spills with a damp cloth.
- Dishwasher isn’t level. • Make sure the dishwasher is level. Buttons are not working on power on state
- Door is open. • When door is opened, buttons are not working except POWER button. Close the door and press the button.
- Control lock function is selected.
- When selected Control lock function, buttons are not responded. To unlock this function, hold down the Control lock button for three (3) seconds. Also, Control lock function is released when power cord is reconnected. The result of washing performance may be caused by a power supply issue. Try another program before contacting for service. INFORMATION CODES When a fault occurs, the appliance will display information codes to warn you. Codes Meanings Possible Causes 4C Water supply check Faucets is not opened, or water intake is restricted,or water pressure is too low LC Leakage Some element of dishwasher leaks. HC Not reaching required temperature Malfunction of heating element PC Divider valve failed Divider valve failed
Failure of communication between main PCB with sub PCB Open circuit or break wiring for the communication bC2 Button pressed long time Button pressed 30 seconds
WARNING: If overflow occurs, turn o the main water supply before calling a service. If there is water
in the base pan because of an over fill or small leak, the water should be removed before restarting the dishwasher. Troubleshooting DW5500M_DD81-02615B-04_EN.indd 42DW5500M_DD81-02615B-04_EN.indd 42 2020-10-15 5:30:192020-10-15 5:30:19Appendix _43 09 APPENDIX Appendix SPECIFICATIONS Model DW60M5070FS/DW60M5070FW DW60M5050FS/DW60M5050FW Type Free Standing Power 220-240 V~, 50 Hz Water pressure 0.04 - 1.0 Mpa Rated power usage 1760-2100 W Hot water connection Max 60 °C Dry type Condensed dry system Wash type Rotating nozzle spray Dimensions (Width x Depth x Height) 598 x 600 x 845 mm Wash capacity DW60M5070 14 place setting DW60M5050 13 place setting Weight DW60M5070F* Unpacked 53 kg DW60M5050F* Unpacked 49 kg PRODUCT DIMENSION
DW60M5070FS/DW60M5070FW DW60M5050FS/DW60M5050FW DW5500M_DD81-02615B-04_EN.indd 43DW5500M_DD81-02615B-04_EN.indd 43 2020-10-15 5:30:192020-10-15 5:30:1944_ For standard test DW60M5070 The information for comparability test as follows:
- Washing capacity: 14 place settings
- Test standard: EN 50242, MS EN 50242/EN 60436
- Position of upper basket: to lower position
- Additional options: None
- Rinse aid setting: d5
- Water softener setting: H3
- Dosage of the standard detergent: pre/wash 5 g + main/wash 30 g
- For the arrangement of the items, refer below figures <Upper basket> <Lower basket> <Silverware basket>
- Washing capacity: 13 place settings
- Test standard: EN 50242, MS EN 50242/EN 60436
- Position of upper basket: to lower position
- Additional options: None
- Rinse aid setting: d5
- Water softener setting: H3
- Dosage of the standard detergent: pre/wash 5 g + main/wash 27.5 g
- For the arrangement of the items, refer below figures <Upper basket> <Lower basket> <Silverware basket>
Supplier SAMSUNG Model name DW60M5050** DW60M5070** Rated Capacity (place setting)
Energy eciency class
Annual energy consumption, (AE c) (kWh/year)
Power consumption in o mode, P o (W)
Power consumption in left-on mode, P l (W)
Annual water consumption, (AW c) (L/year)
Drying eciency class, A (most ecient) to G (least ecient)
Eco Programme time for the standard cycle, (min)
Duration of the left-on mode, (T l) (min)
Model DW60M5070FS / DW60M5070FW / DW60M5050FS / DW60M5050FW Fully built-in Built-under Yes Free standing Yes Semi built in
1) based on 280 standard cleaning cycles using cold water fill and the consumption of the low power
modes. Actual energy consumption will depend on how the appliance is used.
2) based on 280 standard cleaning cycles. Actual water consumption will depend on how the
3) ‘Standard programme’ is the standard cleaning cycle to which the information in the label and the
fi che relates, that this programme is suitable to clean normally soiled tableware, and that it is the most e cient programme in terms of combined energy and water consumption.
4) The wash time varies depending on the pressure and temperature of the supplied water.
A motor that sucks the water remaining on the floor of the dishwater and infects water using high pressure through the internal water passages to the top Middle and lower nozzles.
The pump that drains the polluted water from the dishwater generated while the dishwater is running.
The healer is located on the water passages inside the dishwasher. It heats the flowing water to increase wash eciency.
Measure the amount of supplied water by counting the pulses of the hall IC located at the next of the inlet valve.
Located at the output end of the sump inside the dishwasher. It turns the flow of the water that goes to the bottom part of the dishwasher on or o. (This model does not have this part)
The location where the detergent and rinse aids are stored so they can be used by the dishwasher. The dispenser automatically supplies detergent and rinse aids to the inside of the dishwasher when they are needed.
An internal case mode of stainless steel that makes up the basic framework of the dishwasher.
The place inside the dishwasher where water is collected. The injected water gathers here after circulation. The sump Assy is connected to the circulation motor and drain pump.
An internal case made of stainless steel that makes up internal part of the front door.
10. Base Assy A plastic part that makes up the basic bottom framework.
11. Basket Assy The upper and lower racks where dishes can be loaded.
12. Middle/Lower Nozzles
Washes dishes by rotating and injecting the supplied water through the water passage at high pressure.
A passage that adjusts the air pressure by connecting the pressure of the inside air which is expanded at high temperature during wash and rinse cycles and the outside air pressure.
14. Door Lock Switch
Detects whether the door of the dishwasher is open or closed if the door is open while the dishwasher is running the cycle is temporary stopped. DW5500M_DD81-02615B-04_EN.indd 47DW5500M_DD81-02615B-04_EN.indd 47 2020-10-15 5:30:212020-10-15 5:30:21QUESTIONS OR COMMENTS? COUNTRY CALL OR VISIT US ONLINE AT EGYPT 08000-7267864
DW60M5070FS/DW60M5070FW/DW60M5050FS/DW60M5050FW DW60M5070 DW60M5050
DW60M5070 (14 couverts) DW60M5050 (13 couverts)
PROBLÈME CAUSE POSSIBLE SOLUTION
PROBLÈME CAUSE POSSIBLE SOLUTION
PROBLÈME CAUSE POSSIBLE SOLUTION
DW60M5070FS/DW60M5070FW/DW60M5050FS/DW60M5050FW
DW60M5070FS/DW60M5070FW DW60M5050FS/DW60M5050FW
DW60M5070FS / DW60M5070FW / DW60M5050FS / DW60M5050FW ﻞﻣﺎﻜﻟﺎﺑ ﺔﺠﻣﺪ