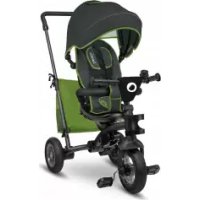
Tris - Stroller Lionelo - Free user manual and instructions
Find the device manual for free Tris Lionelo in PDF.


| Brand | Lionelo |
| Model | Tris |
| Product type | Evolving tricycle with push handle |
| Recommended age | 1.5 to 5 years |
| Maximum basket load | 2 kg |
| Number of wheels | 3 |
| Safety harness | 3-point harness |
| Canopy | Yes, adjustable tilt |
| Parent handle | Yes, height adjustable |
| Footrest | Two positions: for small and tall children |
| Freewheel function | Yes, pedals can be disengaged from front wheel |
| Handlebar lock | Yes, allows locking or releasing steering |
| Brakes | Independent rear brakes operated by foot |
| Reclining backrest | Yes, 5 positions and foldable forward |
| Folding | Yes, with main folding button |
| Frame material | Metal frame |
| Cleaning | Damp cloth for frame, hand wash at 30°C for fabrics |
| Spare parts | Only from Lionelo authorized supplier |
| Warranty | Legal warranty of conformity |
Frequently Asked Questions - Tris Lionelo
User questions about Tris Lionelo
0 question about this device. Answer the ones you know or ask your own.
Ask a new question about this device
Download the instructions for your Stroller in PDF format for free! Find your manual Tris - Lionelo and take your electronic device back in hand. On this page are published all the documents necessary for the use of your device. Tris by Lionelo.
USER MANUAL Tris Lionelo
natural_image
Model of a two-story tricycle with a canopy and matching seat, no visible text or symbols on the vehicle itself.A
B
1
natural_image
Black handheld device with articulated arms and a small mechanical component, isolated on white background (no text or symbols visible)2
natural_image
Close-up of a black bicycle handle and tire assembly with a gray arrow indicating motion direction (no text or symbols)3
natural_image
Close-up of a black motorcycle drivetrain with a hand operating the wheel (no text or symbols visible)4
natural_image
Close-up of a bicycle tire mounted on a connecting metal bracket with a battery pack attached (no text or symbols visible)5
natural_image
Close-up of a black athletic device with two side panels and a textured head (no visible text or symbols)6
natural_image
Close-up of a red mechanical component mounted on a vehicle chassis (no visible text or symbols)7
natural_image
Close-up of a robotic hand wearing a smart glasses with illuminated buttons and a small electronic device (no visible text or symbols)8
natural_image
Mechanical assembly diagram showing a component with a grid-like structure and an arrow indicating motion (no text or symbols)9
natural_image
Close-up of a hand adjusting a black mechanical component (no visible text or symbols)10
natural_image
Close-up of a car seatbelt with visible mechanical components and a red indicator light (no text or symbols)11
natural_image
Close-up of a mechanical device with a black lever and textured fabric, showing a white arrow pointing to a component (no text or symbols visible)12
natural_image
Close-up of a bicycle seatbelt mechanism with a red clamp and black frame (no text or symbols visible)13
natural_image
Close-up of a motorcycle's front wheel and side-mounted brake feet (no text or symbols visible)14
natural_image
Close-up of a black industrial lampshade with a small handle and arrow indicator (no text or symbols)15
natural_image
Close-up of a hand pressing down on a black circular mechanical component, with no visible text or symbols.16
natural_image
Close-up of a hand holding a black cylindrical device with a red button, no visible text or symbolsDear Customer!
In case of any questions or comments on the purchased product, please contact us:
help@lionelo.com
Producer:
BrandLine Group Sp. z o. o.
Note! Keep this manual for future reference.
Please read this manual before you start using the product to see all its functions and use them in accordance with intended use. A failure to follow the manual may pose a threat to your child!
- The product is intended for children aged 1,5-5.
- Never leave your child unattended.
- Before you use the product, make sure all locking mechanisms have been locked.
- To avoid injuries, make sure your child is away when you assemble or disassemble the product
- Do not let your child play with this product.
- Check if saddle fixing elements have been properly attached before you use them.
- This product is not intended for running or roller-skating.
● A failure to follow the procedures included in this manual may lead to serious bodily injuries. - If the tricycle is somehow damaged, stop using it immediately and contact the seller.
- Do not let your child stand up when being in the tricycle.
- The child must always be secured with belts.
- The product is intended for one child only.
- It is permissible to use spare parts supplied by the manufacturer only.
- The accessories not approved by the manufacturer should not be used.
- All tricycle components must be checked regularly to make sure they are operational.
- Do not hang or put any heavy items on the tricycle frame as it may cause it to fall down and injure the child.
- When putting the child in or taking it out, the brake must be locked.
- The product must be kept away from fire and sources of heat.
- The maximum shopping basket capacity is 2kg
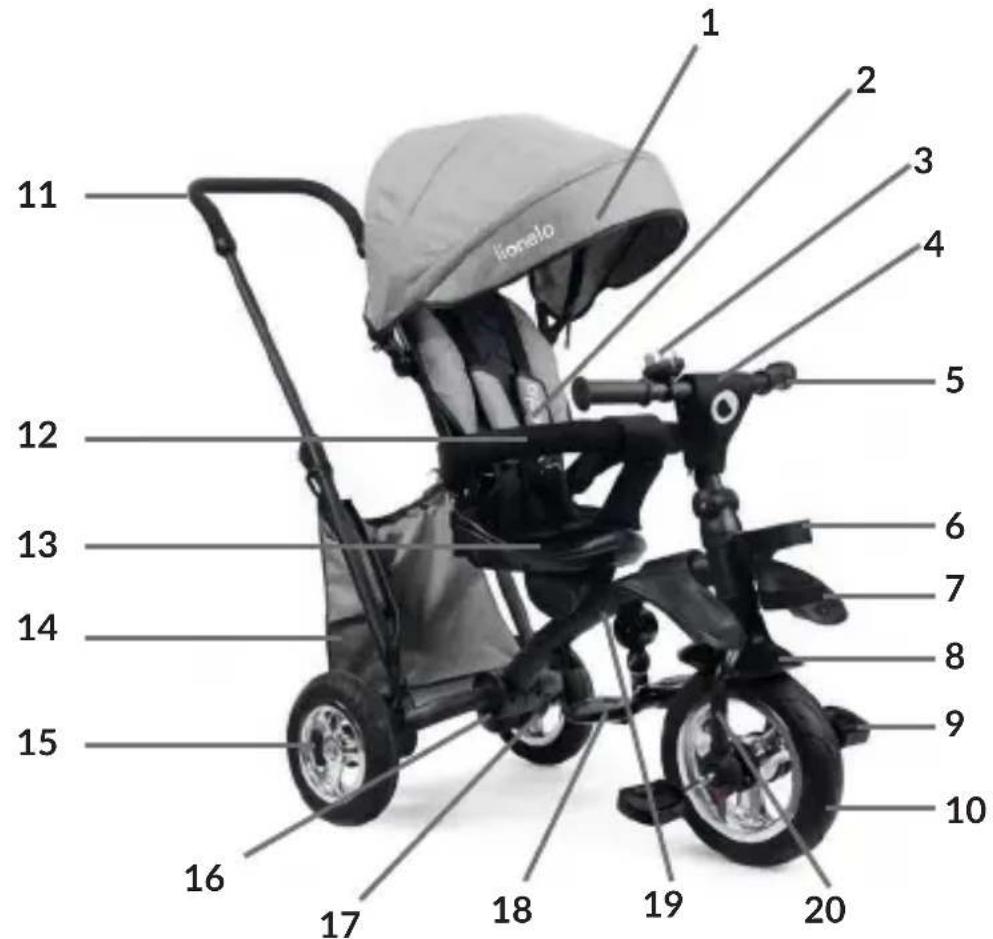
Description (A):
- Sunshade 11. Parent's handle
- 3-point safety belts 12. Bow
- Bell 13. Saddle
- Handlebars body 14. Bag
- Handlebars
- Mug holder
- Younger child footrest
- Mudguard 18. Older
- Pedal 19. Frame
- Front wheel 20. Forks
How to use:
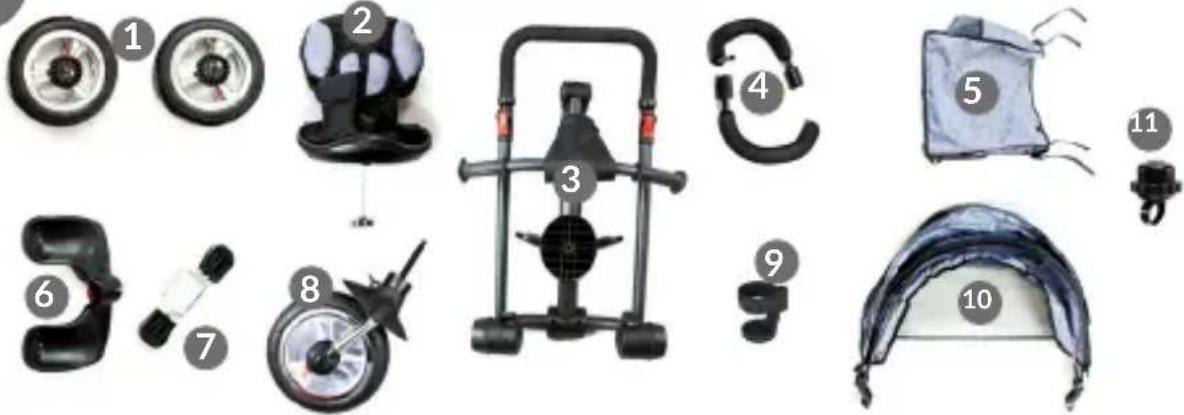
ELEMENTS (B):
Rear wheels (B1) Saddle with a backrest and shank with a nut (B2) Frame with handlebars and older child footrest (B3) Bow (B4) Bag (B5) Young child footrest (B6) Pedals (B7) Front wheel (B8) Mug holder (B9) Sunshade (B10) Bell (B11)
How to assemble the tricycle
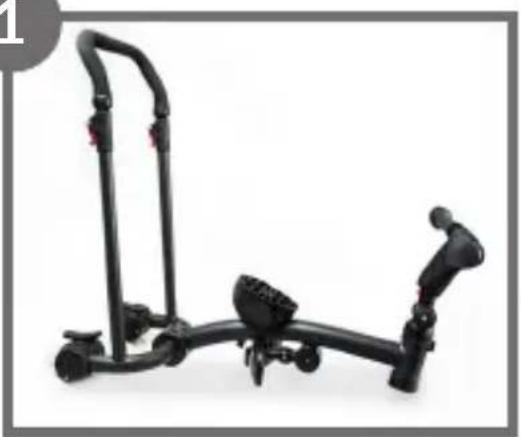
- Take the frame out and unfold (B3). If you can hear a „click”, it means it has been unfolded properly.
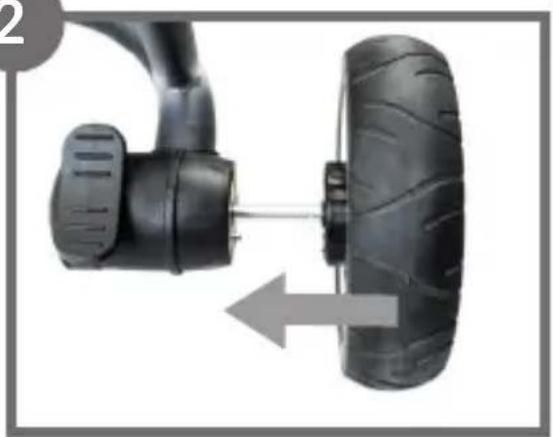
- Assemble rear wheels (B1) in dedicated spots at the back of the frame. If you can hear a „click”, it means they have been fixed properly. Make sure the wheels are secured properly – try to push them out.
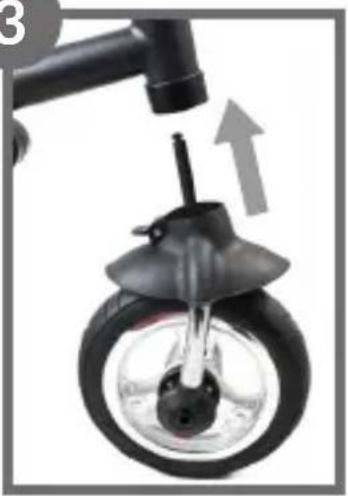
- Assemble a front wheel (B8) at the front of the frame by inserting it in the dedicated hole. If you can hear a „click”, it means it has been fixed properly.
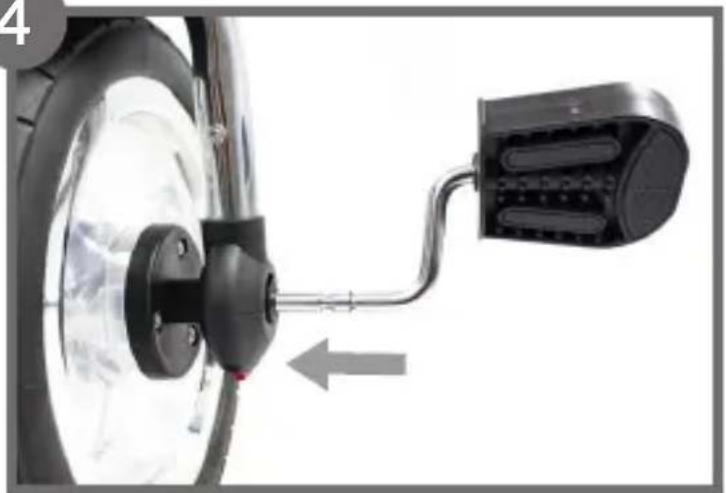
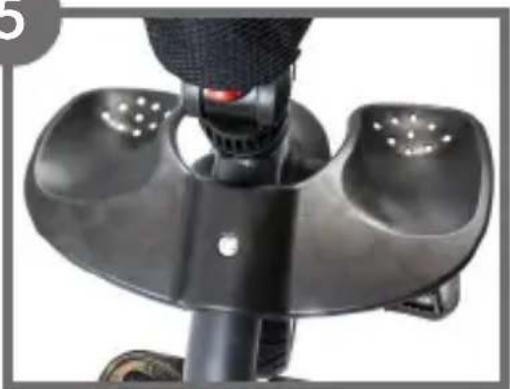
- Next attach both pedals (B7) to the front wheel by inserting them into the holes (see: How to lock pedals). Assemble the footrest (B6) as presented in the photograph – on the frame, between the handlebars and saddle.
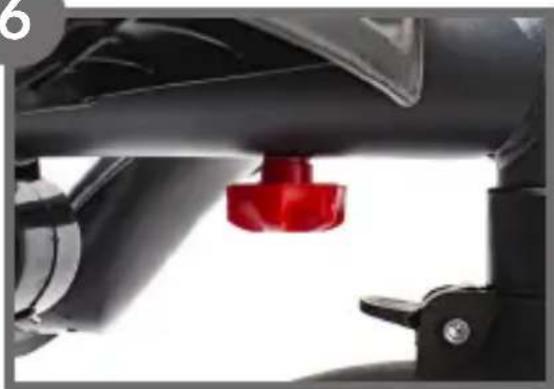
- Screw the footrest in the frame with the use of a red nut.
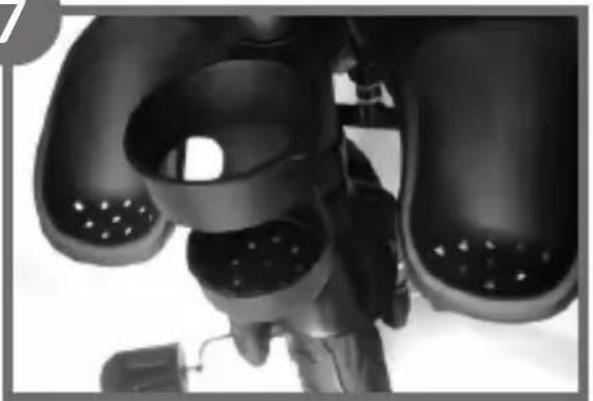
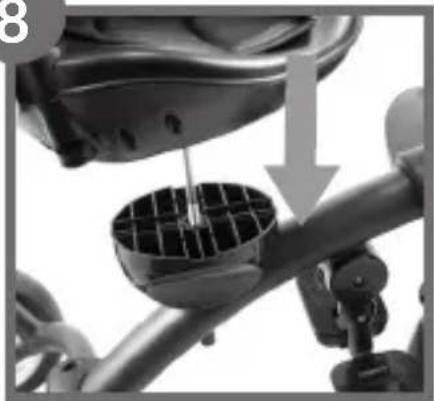
- Fix the mug holder (B9) at the front of the frame. Place the saddle (B2) on the frame – pull a metal shank through it.
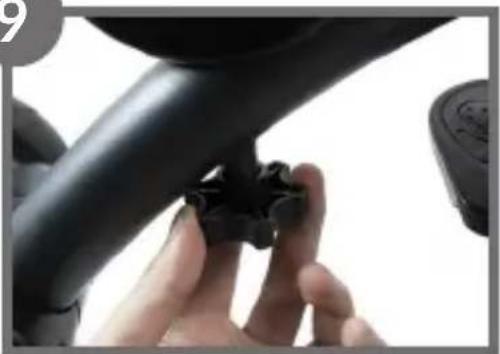
- Screw in the shank on the other side of the frame with the use of black nut.
- Put the belt cushion through a bow and join it together.
- Fix the sunshade (B10) on the saddle brackets which stick out on both sides. In order to adjust the inclination of the sunshade, pull evenly the brackets to the outside and set the inclination angle.
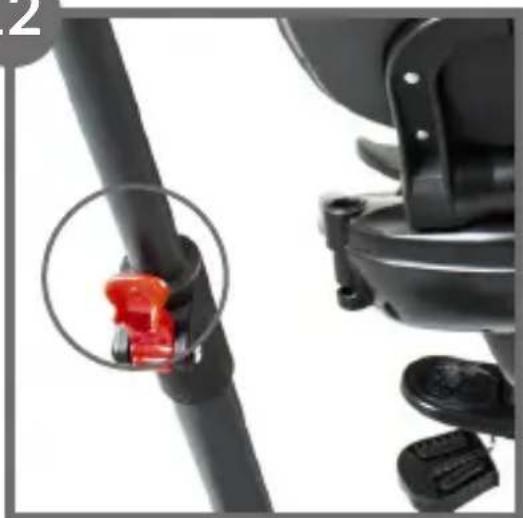
- Adjust the parent's handle height by unlocking the red lock buttons on both sides of the frame, and lock them again after the adjustment
Handle height adjustment
Adjust the height of the bracket for the parent by unlocking the red lock buttons on both sides of the frame, and after adjusting, lock them again.
How to adjust a saddle backrest
To change position of the saddle, press the red button at the back of the backrest. Keeping this button pressed, set the backrest at the desired position. When you release the button, the saddle backrest will lock in the selected position. The adjustment is gradual (at 5 levels) and for transportation purposes allows folding the saddle in the opposite direction – to the front.
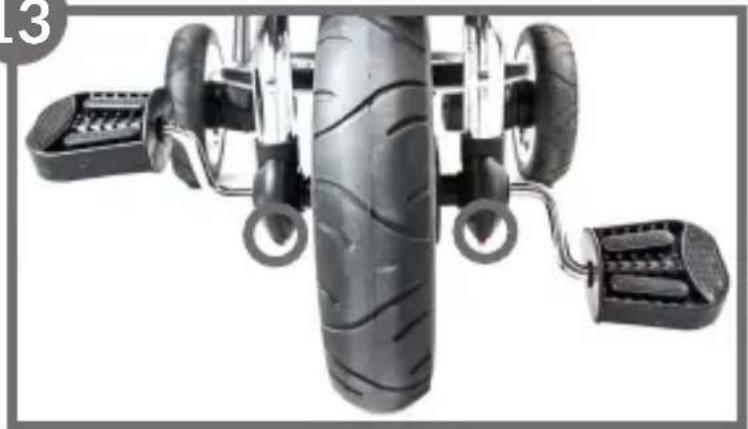
How to lock pedals - freewheel feature (13)
A tricycle has a freewheel feature.
When using this feature, a child may pedal regardless of the tricycle speed.
To choose this configuration, press a red button at the entrance to pedal and then insert the pedal in this hole. At this moment you can release the red button.
Push the pedal until you can hear a „click” which suggests locking. In this position it will not be coordinated with the wheel and will not cause it to move.
If you wish move of pedals to cause move of wheel, press the red button again. Press the metal bar un it resists. You may need to rotate the pedal around its axis to make it get deeper. Release the red butto If your child uses a tricycle alone, make sure that the freewheel function is disabled.
How to lock/unlock the handlebarsy (14)
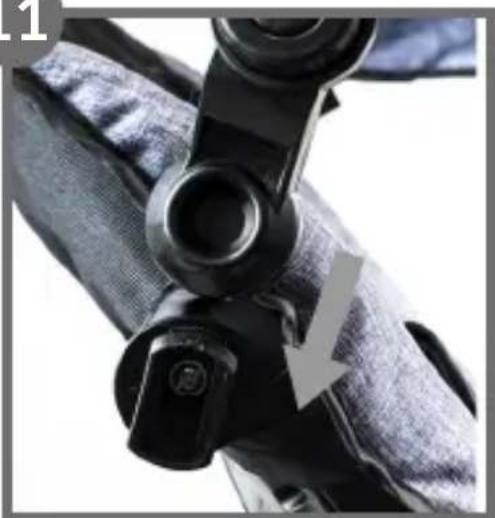
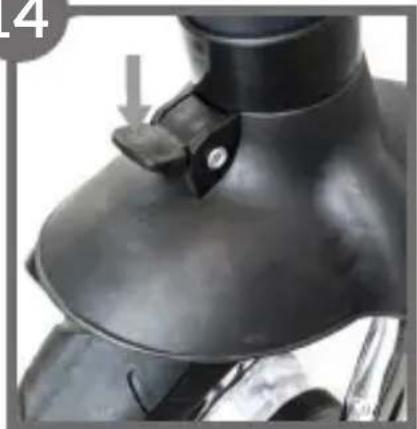
To lock/unlock the handlebars, switch the black lever on the mudguard. The wheel must be positioned straight, and a distinctive click will signal proper completion of the process. The lever directed downwards will unite the handlebars with the wheel. When you slide it upwards, it will be unlocked and allow the child to use the handlebar regardless of direction of riding.
How to lock rear wheels
To lock the rear wheels, press brake pedals by both wheels. Slide them downwards to lock the wheel or upwards to unlock it. Both brakes are independent.
How to fold and unfold an older child footrest
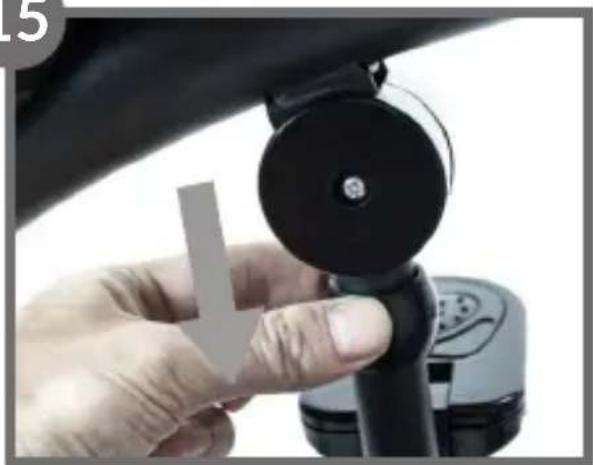
To fold or unfold the child footrest, push the black frame downwards and set the footrest in the desired position. You can fold pedals to vertical position by pushing towards the frame (15).
How to disassemble the tricycle
In order to fold the device, do as follows:
- Undo the saddle and remove it.
- Undo the footrest by the handlebars and remove it. Hide the second footrest under the saddle.
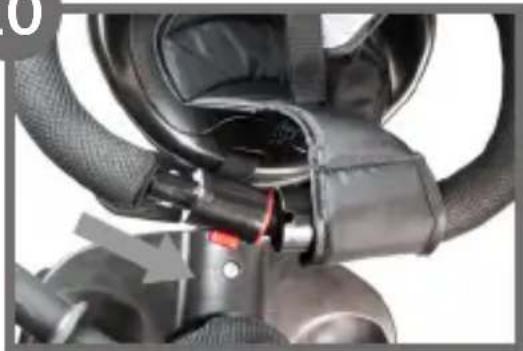
- Fold the handlebars by sliding the red button on the handlebars upwards.
- Take the front wheel out – press a black button on the internal side of the front frame firmly.
- Disconnect both rear wheels – each of them has a silver lock button just next to a brake which must be released in the first place.
- Fold the handle.
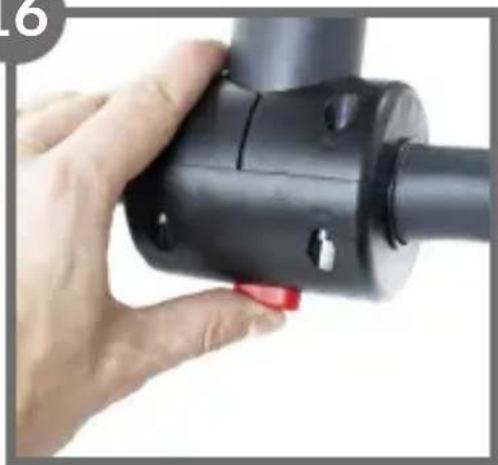
- Fold the frame – to do so, first press the main folding button presented in the photo (16) and make the movement opposing the unfolding movement.
How to disassemble the tricycle for transportation purposes
If you want to transport the device, follow the steps below:
- Hide the child footrest.
- Undo the bow by pressing a red button on it.
- Fold the handlebars by sliding the red button on the handlebars upwards.
- Press the red button at the back of the saddle backrest. Keep this button pressed and push the backrest forward by resting it against previously folded handlebars.
- Fold the sunshade.
- Fold the parent's handle by unlocking red lock buttons on both sides of the frame, and lock them again after adjustment.
- Take the bag off.
- Fold the device. To do so, press the main folding button presented in the photograph and make a move opposing the unfolding move.
- Do up the bow for the sake of safety.
How to clean and maintain
- Check the tricycle and take care of its technical condition on a regular basis so that it does not pose a threat to your child.
- Wash the tricycle with a soft cloth. Do not immerse the tricycle in water and do not pour water on it to clean it.
- Regularly check the tricycle for loose items or damaged parts. It is forbidden to use the tricycle if its parts are defective.
- Fabric cover might be hand – washed (max 30°C).
- You can apply oil on tricycle linking elements (e.g. frame, handlebar hinges).
The pictures are for reference only. The real design of the products may differ from the pictures presented.
PL
Drogi Kliencie!
BrandLine Group Sp. z o.o.
BrandLine Group Sp. z o.o.

- Dear Customer!
- Producer:
- Note! Keep this manual for future reference.
- Description (A):
- How to use:
- ELEMENTS (B):
- How to assemble the tricycle
- Handle height adjustment
- How to adjust a saddle backrest
- How to lock pedals - freewheel feature (13)
- How to lock/unlock the handlebarsy (14)
- How to lock rear wheels
- How to fold and unfold an older child footrest
- How to disassemble the tricycle
- How to disassemble the tricycle for transportation purposes
- How to clean and maintain
- Drogi Kliencie!
Brand : Lionelo
Model : Tris
Category : Stroller