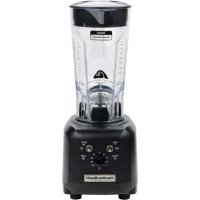
Tango HBH450R - Blender HAMILTON BEACH - Free user manual and instructions
Find the device manual for free Tango HBH450R HAMILTON BEACH in PDF.



| Product Type | Bar blender / commercial use |
| Brand | Hamilton Beach |
| Model | Tango HBH450R |
| Container Capacity | 1.42 L (48 oz) |
| Container Material | Polycarbonate |
| Power Supply | 120 V ~ 60 Hz or 230 V ~ 50 Hz (depending on model) |
| Functions | 2 speeds (High/Low), pulse (Pulse), timer |
| Safety | Grounding required; safety lid; sharp blades; automatic shutdown |
| Daily Maintenance | Inspect container and cutting assembly for worn or damaged blades |
| Weekly Maintenance | Check cord insulation and plug; rotate cutting mechanism by hand |
| Sanitizing | Bleach solution (15 ml per 3.8 L water) for 2 minutes at low speed |
| Replacement Parts (Container) | Part Number 6126-450 |
| Replacement Parts (Cutting Assembly) | Part Number 98450 |
| Warranty | 2 years or 15,000 cycles (parts and labor) |
| Technical Support | 866-285-1087 or 910-693-4277 (Mon-Fri 8 a.m.-5 p.m. EST) |
Frequently Asked Questions - Tango HBH450R HAMILTON BEACH
User questions about Tango HBH450R HAMILTON BEACH
0 question about this device. Answer the ones you know or ask your own.
Ask a new question about this device
Download the instructions for your Blender in PDF format for free! Find your manual Tango HBH450R - HAMILTON BEACH and take your electronic device back in hand. On this page are published all the documents necessary for the use of your device. Tango HBH450R by HAMILTON BEACH.
USER MANUAL Tango HBH450R HAMILTON BEACH
natural_image
Line drawing of a Hamilton Beach commercial blender with control knobs and a handle (no text or symbols on the device itself)Model HBH450
Bar blender
Operation Manual
Page 2
Modèle HBH450
Mélangeur de bar
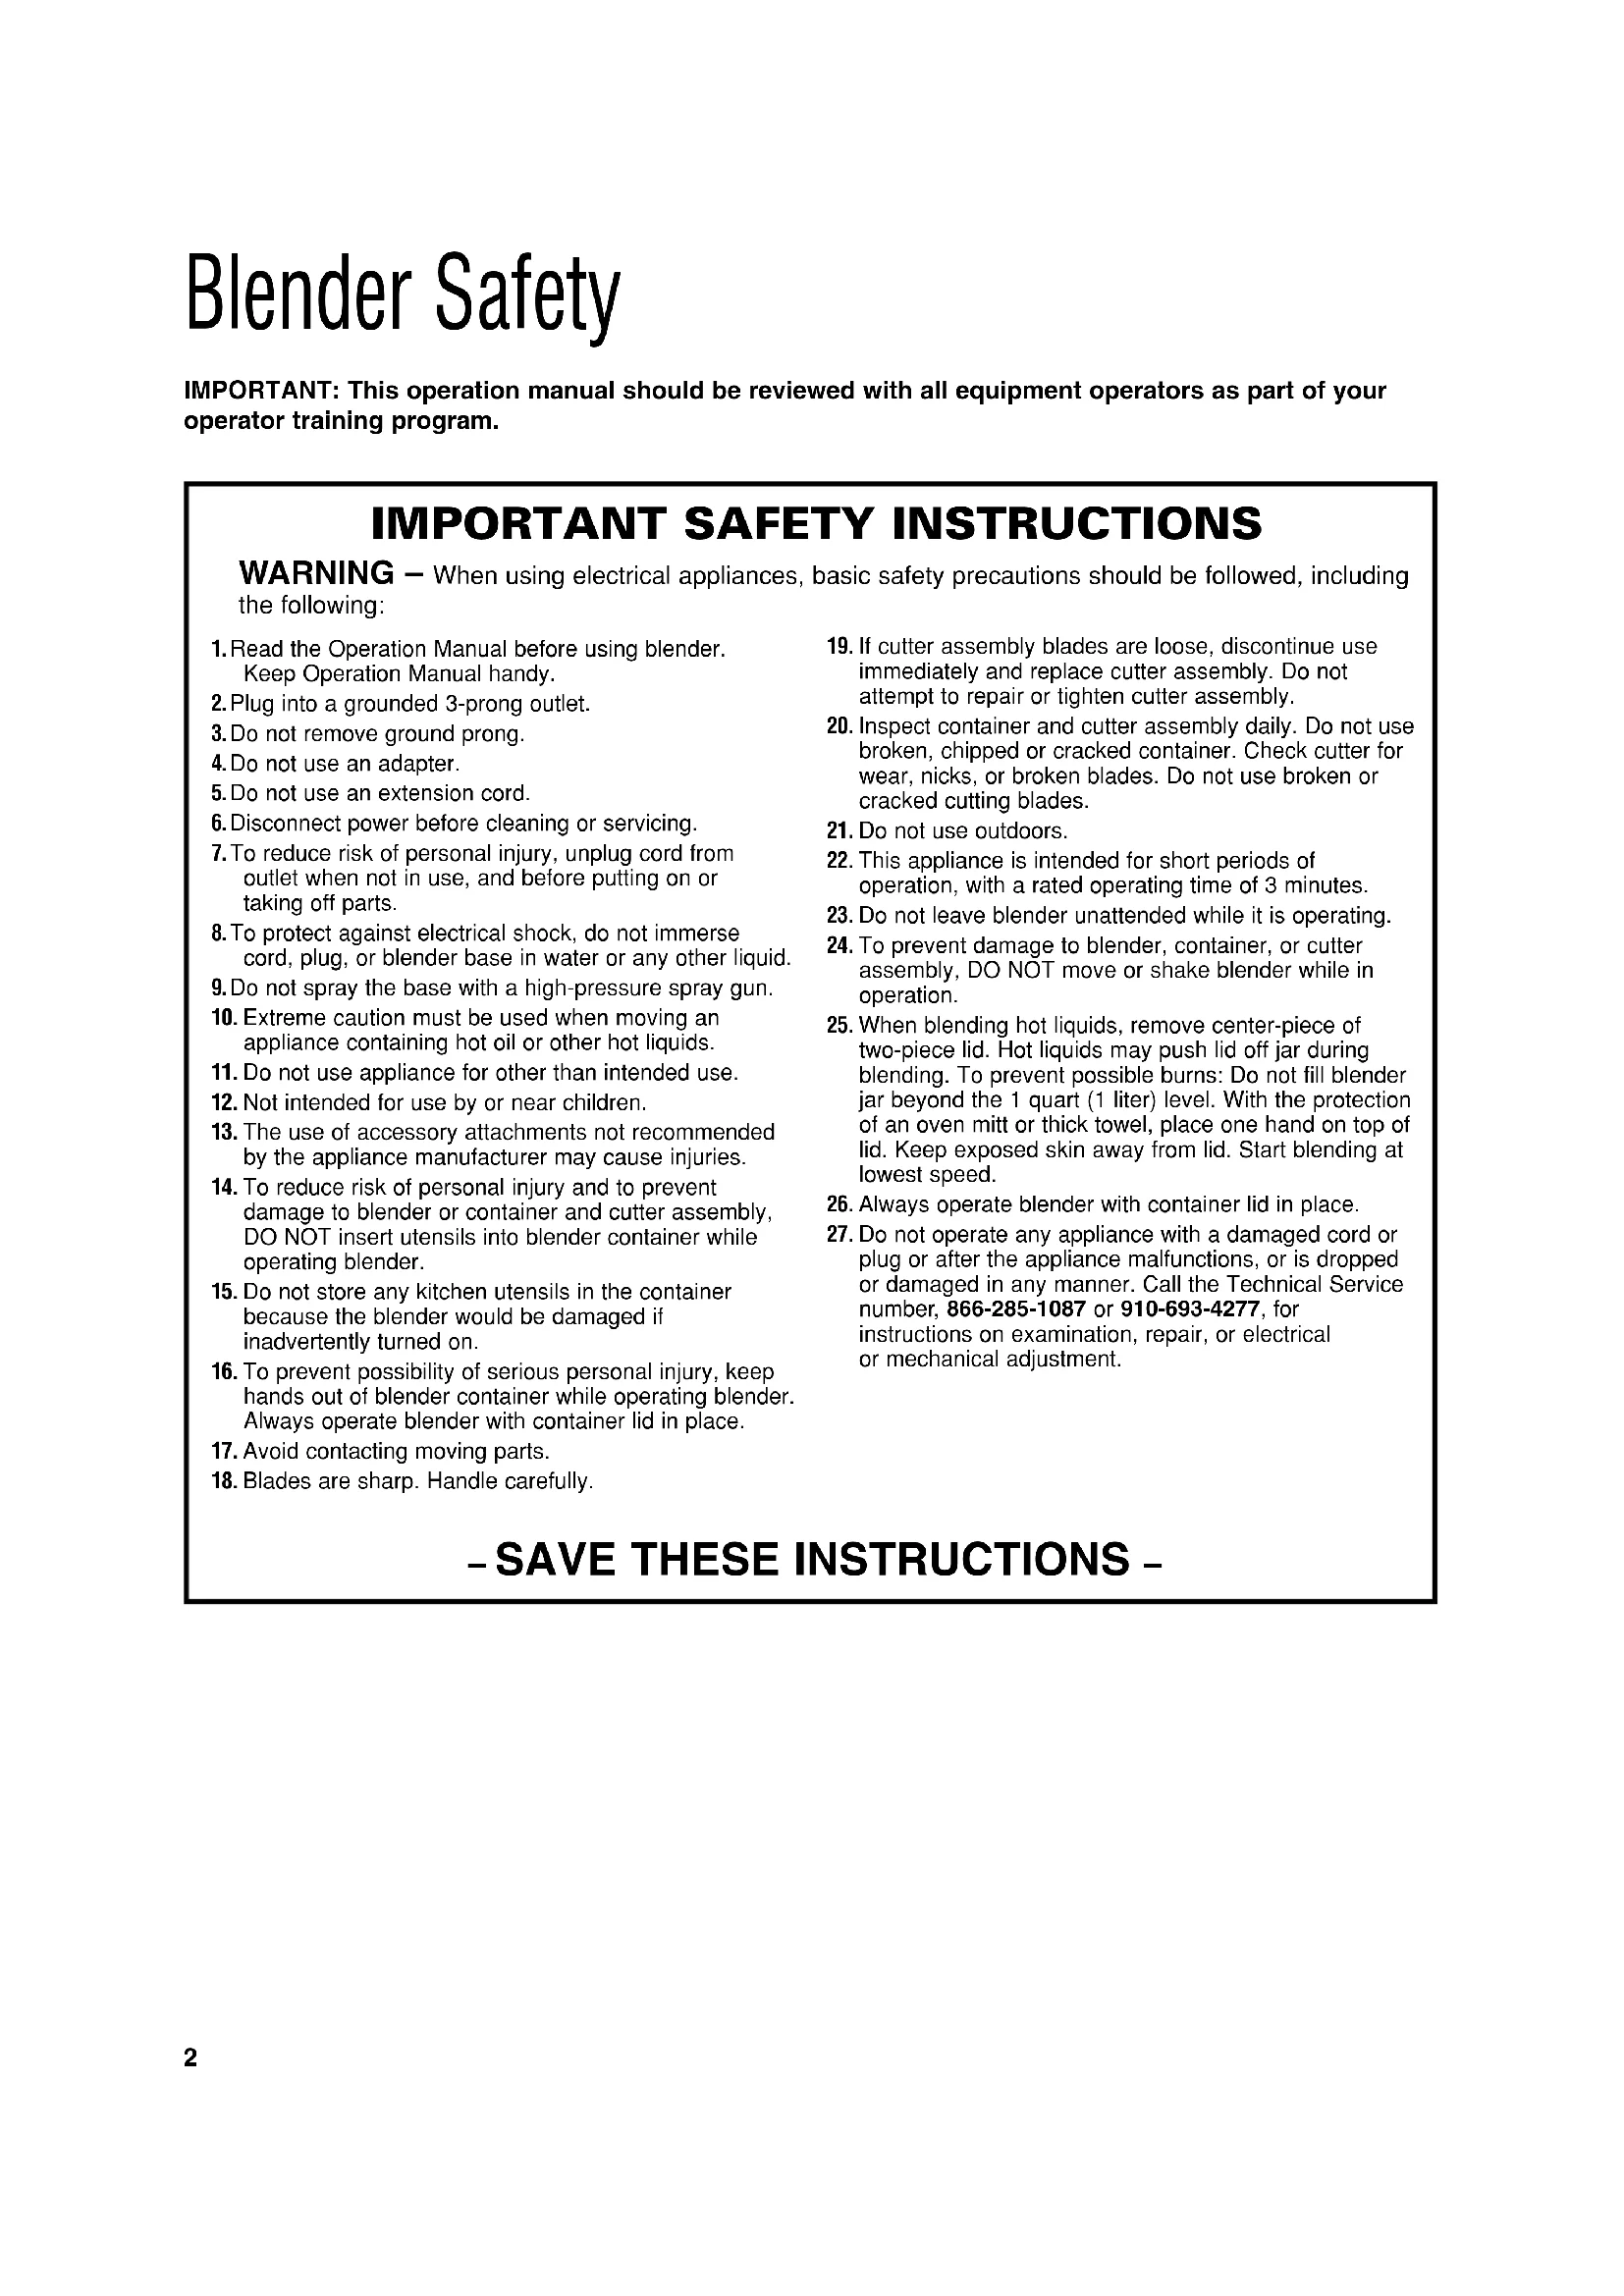
IMPORTANT: This operation manual should be reviewed with all equipment operators as part of your operator training program.
IMPORTANT SAFETY INSTRUCTIONS
WARNING — When using electrical appliances, basic safety precautions should be followed, including the following:
- Read the Operation Manual before using blender. Keep Operation Manual handy.
- Plug into a grounded 3-prong outlet.
- Do not remove ground prong.
- Do not use an adapter.
- Do not use an extension cord.
- Disconnect power before cleaning or servicing.
- To reduce risk of personal injury, unplug cord from outlet when not in use, and before putting on or taking off parts.
- To protect against electrical shock, do not immerse cord, plug, or blender base in water or any other liquid.
- Do not spray the base with a high-pressure spray gun.
- Extreme caution must be used when moving an appliance containing hot oil or other hot liquids.
- Do not use appliance for other than intended use.
- Not intended for use by or near children.
- The use of accessory attachments not recommended by the appliance manufacturer may cause injuries.
- To reduce risk of personal injury and to prevent damage to blender or container and cutter assembly, DO NOT insert utensils into blender container while operating blender.
- Do not store any kitchen utensils in the container because the blender would be damaged if inadvertently turned on.
- To prevent possibility of serious personal injury, keep hands out of blender container while operating blender. Always operate blender with container lid in place.
- Avoid contacting moving parts.
-
Blades are sharp. Handle carefully.
-
If cutter assembly blades are loose, discontinue use immediately and replace cutter assembly. Do not attempt to repair or tighten cutter assembly.
- Inspect container and cutter assembly daily. Do not use broken, chipped or cracked container. Check cutter for wear, nicks, or broken blades. Do not use broken or cracked cutting blades.
- Do not use outdoors.
- This appliance is intended for short periods of operation, with a rated operating time of 3 minutes.
- Do not leave blender unattended while it is operating.
- To prevent damage to blender, container, or cutter assembly, DO NOT move or shake blender while in operation.
- When blending hot liquids, remove center-piece of two-piece lid. Hot liquids may push lid off jar during blending. To prevent possible burns: Do not fill blender jar beyond the 1 quart (1 liter) level. With the protection of an oven mitt or thick towel, place one hand on top of lid. Keep exposed skin away from lid. Start blending at lowest speed.
- Always operate blender with container lid in place.
- Do not operate any appliance with a damaged cord or plug or after the appliance malfunctions, or is dropped or damaged in any manner. Call the Technical Service number, 866-285-1087 or 910-693-4277, for instructions on examination, repair, or electrical or mechanical adjustment.
- SAVE THESE INSTRUCTIONS -
Safety Alert Symbols
The following safety alert symbols are used throughout this manual to alert you to the safety hazards described below.


Electrical Shock Hazard Disconnect power before cleaning blender base. Failure to follow these instructions can result in death or electrical shock.

Electrical Shock Hazard
Plug into a grounded outlet.
Do not remove ground.
Do not use an adapter.
Do not use an extension cord.
Failure to follow these instructions can result in death, fire, or electrical shock.

Cut Hazard
Always place lid on container when blending.
Do not put hands, spoons, or other utensils in container when blending.
Failure to follow these instructions can result in broken bones, cuts, or other injuries.

Burn Hazard
Always use caution when blending hot contents.
Failure to follow these instructions can result in burns.
Sanitizing
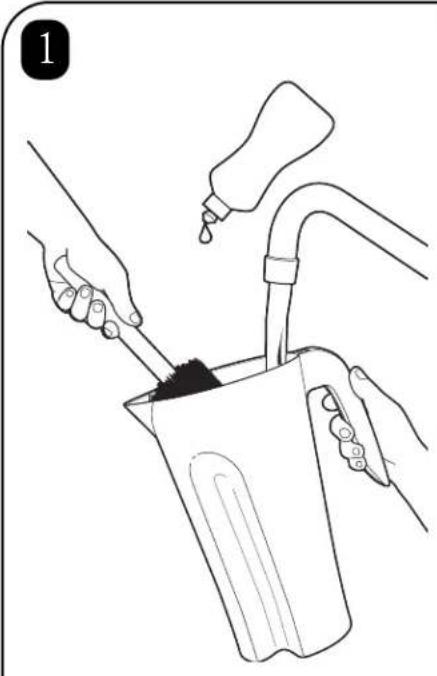
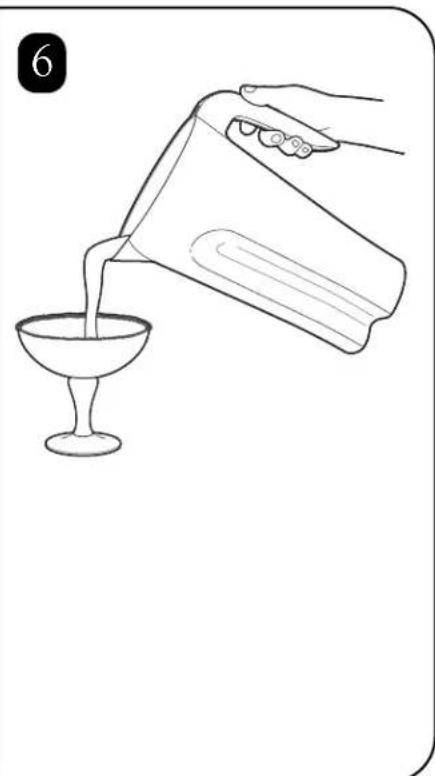
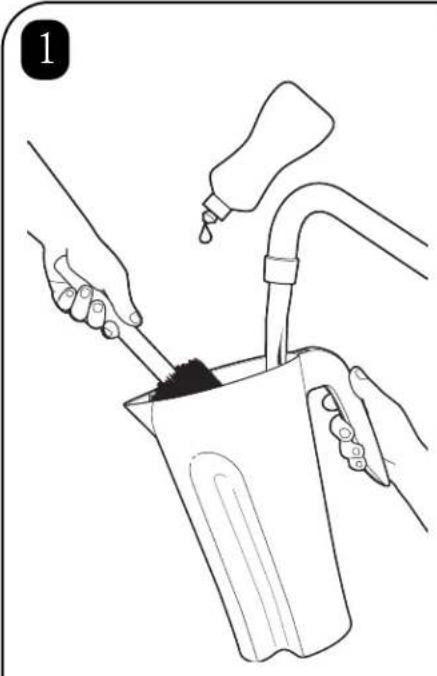
Sanitize using 1 tablespoon (15 ml) of household bleach per 1 gallon (3.8 liter) of clean, cool water (60°F/16°C), mixed according to the instructions on the bleach.
- Fill container with sanitizing solution, replace lid and filler cap and run on LOW speed for 2 minutes. Empty container.
- Wipe exterior with soft cloth dampened with sanitizing solution.
- Immerse lid and filler cap in sanitizing solution for 2 minutes.
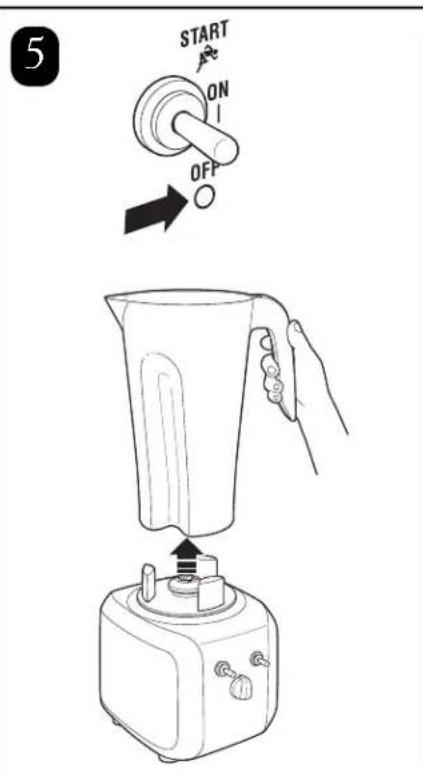
- Place empty container on base and run on HIGH speed for 2 seconds to remove any moisture from the cutter assembly.
- When ready to use, rinse with clean water.
Technical Service
For assistance or replacement parts, call our Technical Service number:
866-285-1087 or 910-693-4277
8 a.m. – 5:00 p.m. EST Monday – Friday
www.commercial.hamiltonbeach.com
Replacement Parts
The following components are subject to wear and should be replaced at least yearly. We recommend keeping a replacement container and cutter on hand.
| Part Description | Part Number |
| 48 oz. polycarbonate container 6126-450 | |
| Cutter assembly 98450 |
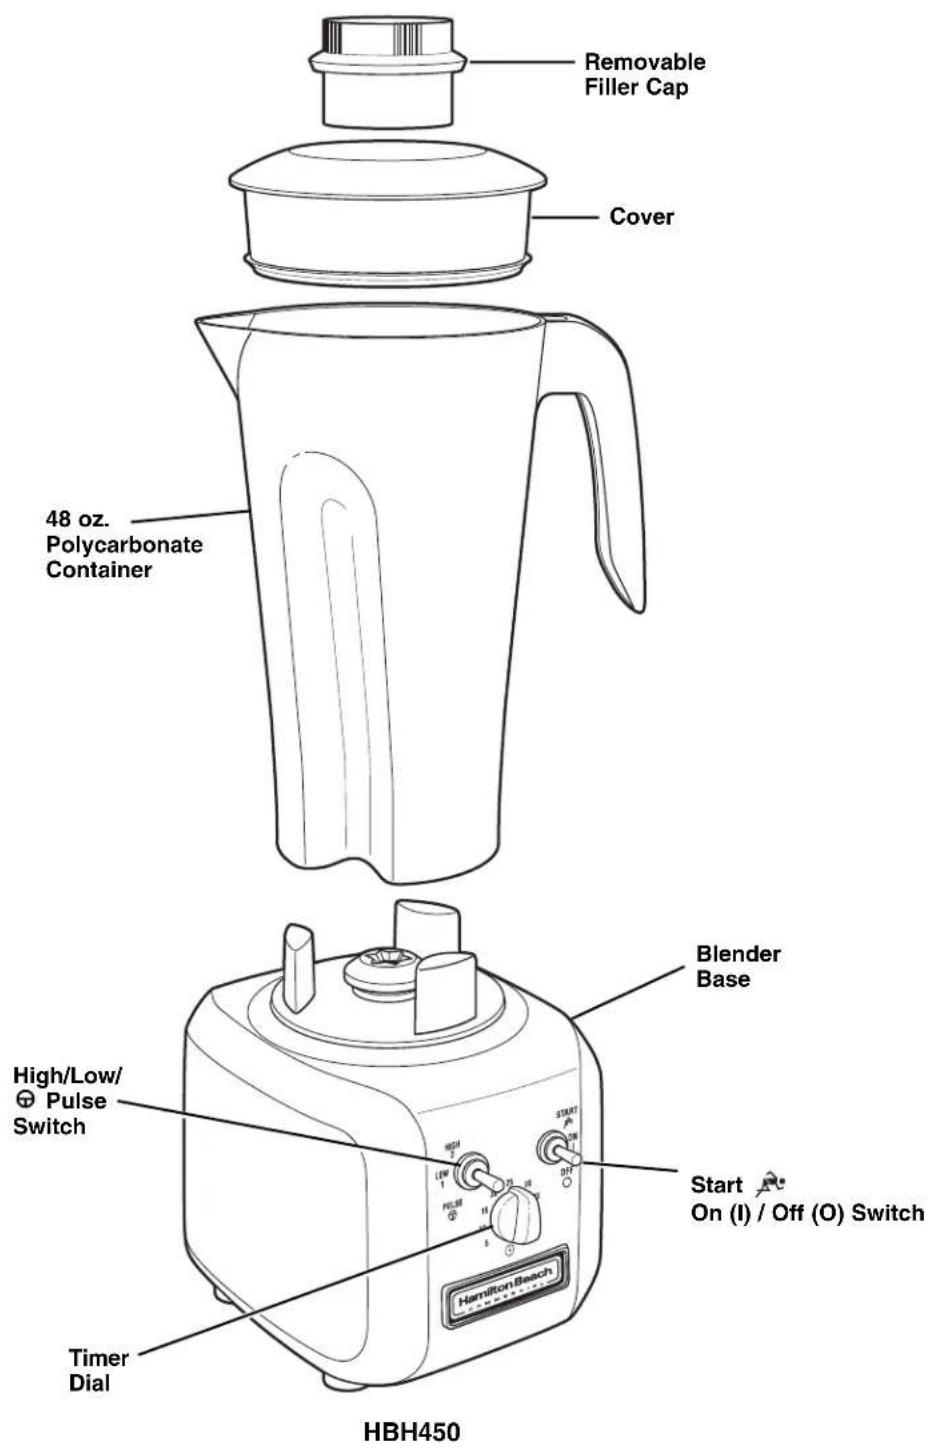
Parts and Features
The parts and features for the Tango Series blenders are shown on this page. Become familiar with all parts and features before using your blender.
Your Tango Series blender is designed for blending and mixing beverages.
NOTE: The blender is not designed to crush ice. Ice cubes made in most icemakers may be added to liquid ingredients in the blender to make daiquiris or similar drinks.
Power Requirements
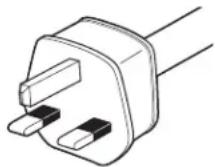
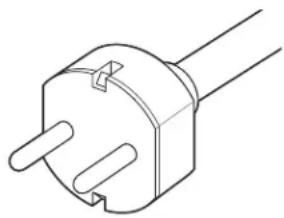
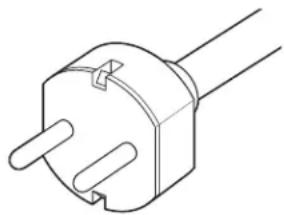
Use a fused electric outlet for the blender. Depending on the model of your blender, the plug will look like one of the following to meet power requirements:
120 VAC, 60Hz

natural_image
Line drawing of a straight electrical outlet plug (no text or symbols)230 VAC, 50Hz

natural_image
Line drawing of a three-pin electrical plug (no text or symbols)UK 230 VAC, 50Hz
Blender Operation – Quick Start Guide
- Read Important Safety Instructions and Warnings before use.
- Place the blender on a dry, level surface.
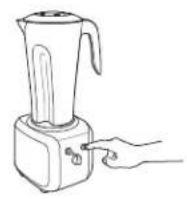
- Make sure the power switch is in the "off" or O position. Plug the blender into a grounded electrical outlet.
-
Place the container on the base with ingredients and container lid in place.
-
Set the controls to your preference.
- Move the power switch to the "on" or I position.
- Move the ON/OFF switch to the START position. Release the switch; blending will stop automatically after the desired time.



natural_image
Line drawing of a kitchen blender being placed into a toaster (no text or symbols)
natural_image
Line drawing of a blender being placed with food using a spoon (no text or symbols)
natural_image
Line drawing of a blender with a hand pressing down on top, showing the lid and base (no text or symbols)
flowchart
graph TD
    A["High 2"] --> B["LOW 1"]
    B --> C["PULSE"]
    D["High 2"] --> E["LOW 1"]
    E --> F["PULSE"]
    G["START ON 1"] --> H["ON 1"]
    I["START ON 1"] --> J["OFF"]
    K["OR"] --> L["Low 1"]
    M["HIGH 2"] --> N["PULSE"]
    style A fill:#f9f,stroke:#333
    style D fill:#f9f,stroke:#333
    style G fill:#f9f,stroke:#333
    style K fill:#f9f,stroke:#333
    style M fill:#f9f,stroke:#333


natural_image
Line drawing of a hand pouring liquid from a glass bowl into a container (no text or symbols)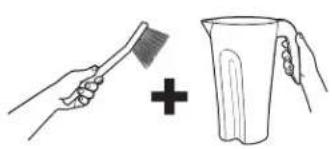
natural_image
Illustration showing a hand brushing a tooth next to a glass with a plus sign (no text or symbols)
natural_image
Line drawing of hands using a tool to clean or wash a container with a piping bag (no text or symbols)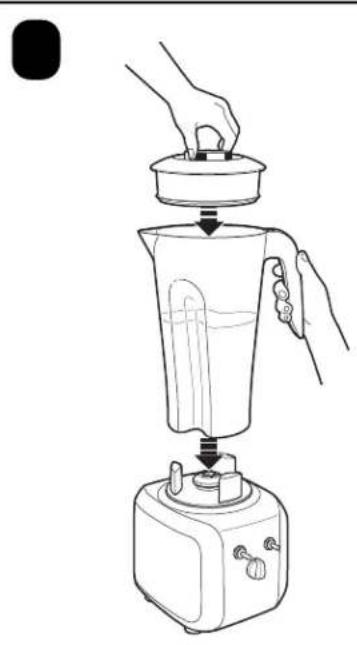
natural_image
Line drawing of a blender being placed into a kitchen appliance (no text or symbols)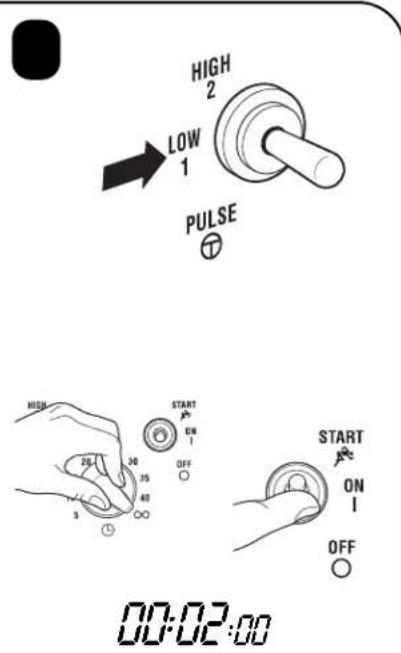

natural_image
Two-step line drawing showing hands pouring liquid from a container into a cup (no text or symbols)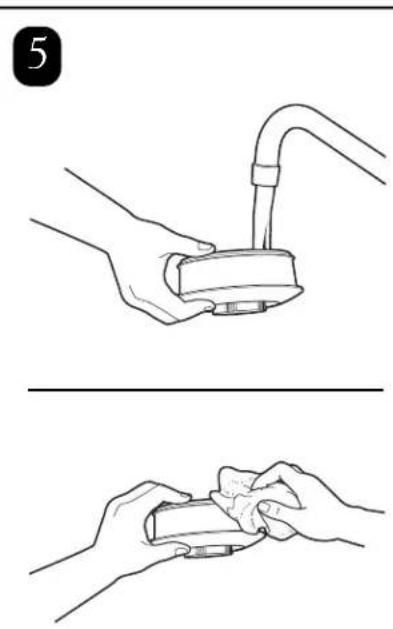
natural_image
Illustration showing two steps of a hand holding a device, with no visible text or symbols.
Replacing the Cutter Assembly


Troubleshooting Guide
| Problem . . . Solution . . | |
| Blender fails to start or stops while it is running and cannot be restarted | Check to see if unit is securely plugged into an electric outlet.Check to see if the integrated circuit breaker has tripped and reset it, if needed.Check to see if the fuse for the electric outlet has blown or if a circuit breaker has tripped.If the motor stops during operation due to overheating, unplug and allow the unit to cool down for 15 minutes. Plug unit back after 15 minutes to resume normal operation. |
| Ingredients will not mix properly | Check to see if enough liquid has been added to the ingredients. Mixture should be fluid and free-running at all times.Solid pieces are too large. Pieces should not exceed 1" cubes.Container is too full. Do not fill past highest graduation marking.Cutter unit blades are not sharp or are damaged. Inspect container and cutter assembly daily. Replace cutter assembly at least every 90 days or sooner if cutter assembly appears worn or damaged.Check to see if cutter assembly is installed properly.Select speed to create a fluid blend. |
Maintenance
Inspect the blender and its various parts and replace as follows:
| Daily | Unplug the blender and remove the container from the base, and then inspect the container and cutter unit assembly for wear, nicks, and broken or loose blades. Replace if necessary. If the blades are loose, discontinue use immediately and replace the blades. Do not attempt to repair or tighten the cutter assembly. See “Technical Service”. |
| Weekly | Unplug the blender, and then inspect the power cord insulation and power plug for cracks. Refer to “Technical Service” for repair or replacement. |
| Quarterly | Replace the container and cutter assembly at least every 90 days. See “Technical Service”. |
Product Warranty
This Warranty supersedes all other Product Warranties
LIMITED WARRANTY
This product is warranted to be free from defects in material and workmanship for a period of two (2) years or 15,000 cycles, whichever comes first, from the date of original purchase, except as noted below. During this period, we will repair or replace this product, at our option.
THE FOREGOING WARRANTY IS IN LIEU OF ANY OTHER WARRANTY OR CONDITION, WHETHER EXPRESS OR IMPLIED, WRITTEN OR ORAL INCLUDING WITHOUT LIMITATION ANY STATUTORY WARRANTY OR CONDITION OF MERCHANTABILITY OR FITNESS FOR A PARTICULAR PURPOSE, ANY LIABILITY IS EXPRESSLY LIMITED TO AN AMOUNT EQUAL TO THE PURCHASE PRICE PAID, AND ALL CLAIMS FOR SPECIAL, INCIDENTAL AND CONSEQUENTIAL DAMAGES ARE HEREBY EXCLUDED.
There is no warranty with respect to parts subject to wear, including without limitation: motor brushes, container and cutter assembly, clutches, bristle brushes, funnel, stainless steel cup, agitators, carafes, etc. This warranty extends only to the original purchaser and does not include any condition resulting from abuse, misuse, neglect, unauthorized repair, or use not in conformity with the printed directions. Always use this product in accordance with the printed directions. This warranty gives you specific legal rights and you may also have other legal rights which vary from state to state, or province to province. Some states do not allow limitations on implied warranties or special, incidental or consequential damages, so the foregoing limitations may not apply to you.
If you have a claim under this warranty please contact our TECHNICAL SERVICE DEPARTMENT at 1-866-285-1087 or 910-693-4277. (For faster service please have model, series, and type numbers ready for operator to assist you.) Reasonable proof of date of purchase must be presented; otherwise the effective date of the warranty will be based upon the date of manufacture plus ninety (90) days. You are responsible for paying shipping and handling charges to return the product to us.
Hamilton Beach Brands, Inc. Commercial Technical Service 261 Yadkin Road Southern Pines, NC 28387

Two-Year Express Care Service Program \*
* Available only to end users located in the continental U.S., Alaska, and Hawaii
Hamilton Beach Commercial understands that your foodservice equipment is a crucial element in the profitability of your business. If your equipment breaks down, you would like repair that's quick, convenient, and dependable. That's why we provide the Express Care Service Program for this product while it's under the Product Warranty. You'll find that it's better for your bottom line and your peace of mind.
Follow these three easy steps for quick, convenient and dependable ECSP repairs:
Step One: Dial 1-866-285-1087 toll-free to speak to a member of our highly trained technical service staff (hours Monday – Friday 8:00 AM – 5:00 PM EST). We will make an initial phone diagnosis.
Step Two. If it is determined that minimal on-site maintenance cannot be performed, Hamilton Beach Commercial will ship a replacement product to your location.
Step Three: Once the replacement unit is received, you send the troubled unit back to Hamilton Beach Commercial (we'll provide the box and supporting materials to return the unit). Hamilton Beach Commercial will pay the freight cost for the returned unit.
NOTE: The warranty of the replacement unit will be prorated based on the time period remaining on the replaced unit.
Notes
natural_image
Line drawing of an electrical outlet plug (no text or symbols)natural_image
Line drawing of a three-pin electrical plug (no text or symbols)230 VCA 50Hz
natural_image
Line drawing of a dual-pin electrical plug (no text or symbols)
natural_image
Line drawing of a kitchen blender being placed into a toaster (no text or symbols)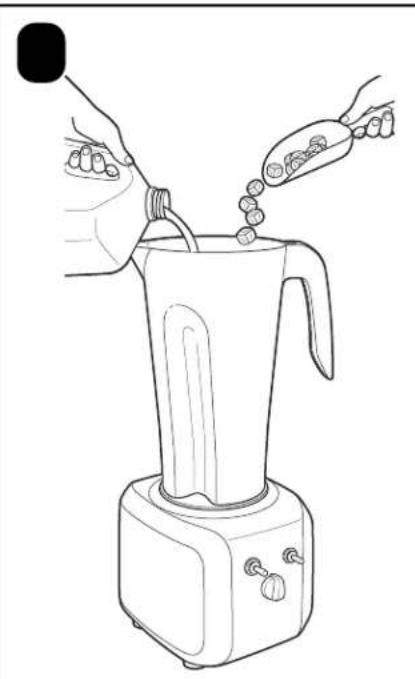
natural_image
Line drawing of a blender being placed with food using a spoon (no text or symbols)
natural_image
Line drawing of a blender with a hand pressing down on top, showing the lid and base (no text or symbols)
flowchart
graph TD
    A["Start"] --> B{OR}
    B -->|High 2| C["PULSE"]
    B -->|Low 1| D["HIGH 2"]
    D --> E["PULSE"]
    E --> F["START ON OFF"]
    F --> G["OK"]
    G --> H["OFF"]
    H --> I["OK"]
    I --> J["PULSE"]
    J --> K["OR"]
    style A fill:#f9f,stroke:#333
    style B fill:#ccf,stroke:#333
    style C fill:#cfc,stroke:#333
    style D fill:#fcc,stroke:#333
    style E fill:#cff,stroke:#333
    style F fill:#ffc,stroke:#333
    style G fill:#cfc,stroke:#333
    style H fill:#fcc,stroke:#333
    style I fill:#ffc,stroke:#333
    style J fill:#cfc,stroke:#333
    style K fill:#fcc,stroke:#333

natural_image
Line drawing of a hand pouring liquid from a glass bowl into a container (no text or symbols)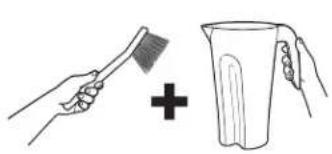
natural_image
Illustration showing a hand brushing a tooth next to a mug with a plus sign (no text or symbols)
natural_image
Line drawing of hands using a tool to clean or wash a container with a water droplet (no text or symbols)
natural_image
Line drawing of a blender being placed into a square kitchen appliance (no text or symbols)

natural_image
Two-step line drawing showing hands pouring liquid from a container into a cup (no text or symbols)
natural_image
Illustration showing two steps of a hand holding a device, with no visible text or symbols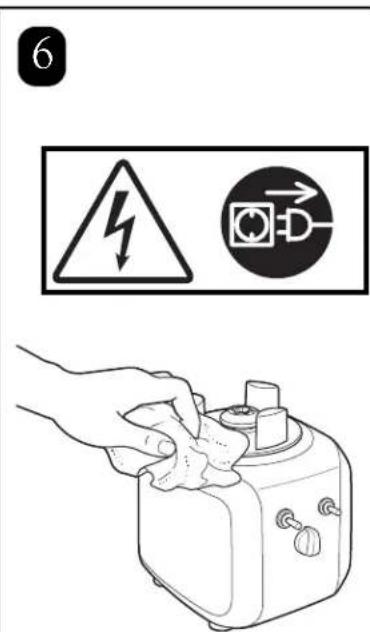
natural_image
Mechanical component diagram showing a screwdriver inserted into a cylindrical housing (no text or symbols)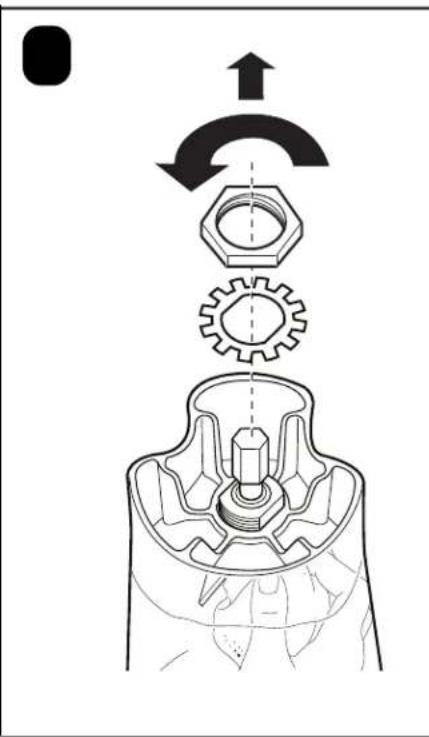
natural_image
Mechanical assembly diagram showing gear and nut components with directional arrows (no text or labels)
natural_image
Illustration showing a hand holding a tool to press down a curved object, with an arrow indicating motion (no text or symbols)
natural_image
Illustration of a hand holding a tool to press down a curved object, no text or symbols present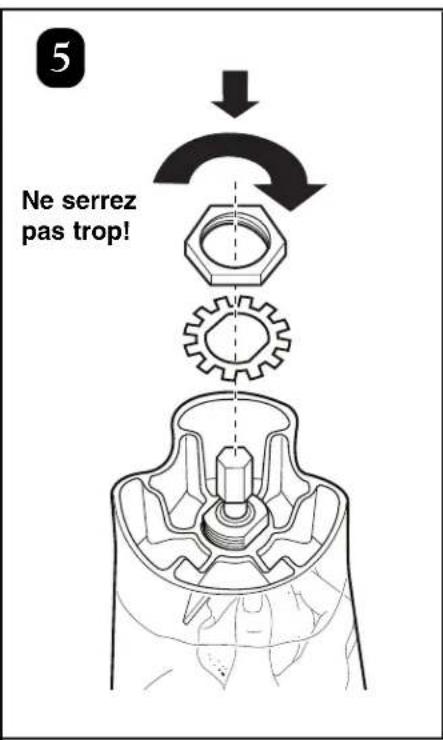

natural_image
Diagram of a mechanical component with a tool and arrow indicating rotation (no text or symbols)En cas de panne
Hamilton Beach Brands, Inc.
Commercial Technical Service
261 Yadkin Road
Southern Pines, NC 28387

Two-Year Express Care Service Program \*
8 a.m. – 5:00 p.m. EST Lunes – Viernes
www.commercial.hamiltonbeach.com
Piezas de Repuesto
natural_image
Line drawing of an electrical outlet plug (no text or symbols)Clavija a tierra
230 VAC, 50Hz

natural_image
Line drawing of a three-pin electrical plug (no text or symbols)230 VAC, 50Hz
natural_image
Line drawing of a dual-pin electrical plug (no text or symbols)
natural_image
Line drawing of a blender being placed into a square kitchen appliance (no text or symbols)
natural_image
Line drawing of a blender being placed with food using a spoon (no text or symbols)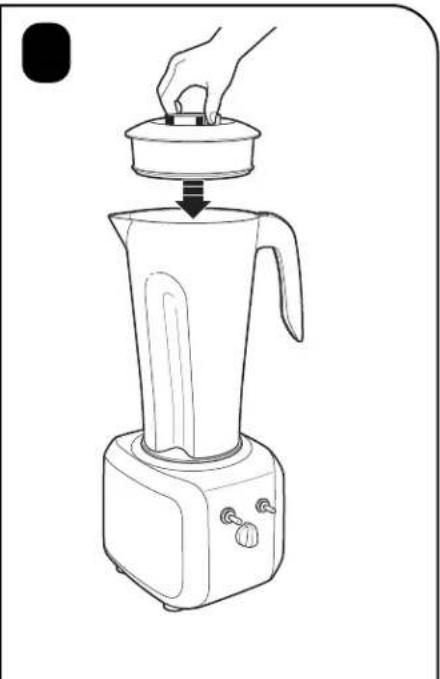
natural_image
Line drawing of a blender with a hand pressing down on top, showing the lid and base (no text or symbols)
flowchart
graph TD
    A["Start"] --> B{OR}
    B -->|High 2| C["PULSE"]
    B -->|Low 1| D["HIGH 2"]
    D --> E["PULSE"]
    E --> F["START ON OFF"]
    F --> G["HIGH 2"]
    G --> H["PULSE"]
    H --> I["OR"]

    style A fill:#f9f,stroke:#333
    style B fill:#ccf,stroke:#333
    style C fill:#cfc,stroke:#333
    style D fill:#fcc,stroke:#333
    style E fill:#cff,stroke:#333
    style F fill:#ffc,stroke:#333
    style G fill:#fcc,stroke:#333
    style H fill:#cff,stroke:#333
    style I fill:#ffc,stroke:#333

natural_image
Line drawing of a hand pouring liquid from a glass bowl into a container (no text or symbols)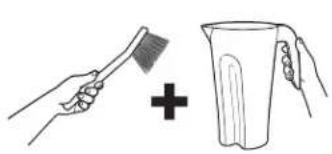
natural_image
Illustration showing a hand brushing a tooth next to a mug with a plus sign (no text or symbols)

natural_image
Line drawing of hands using a tool to clean or wash a container with a piping bag (no text or symbols)
natural_image
Line drawing of a blender being filled with liquid, showing hands operating the lid and base (no text or symbols)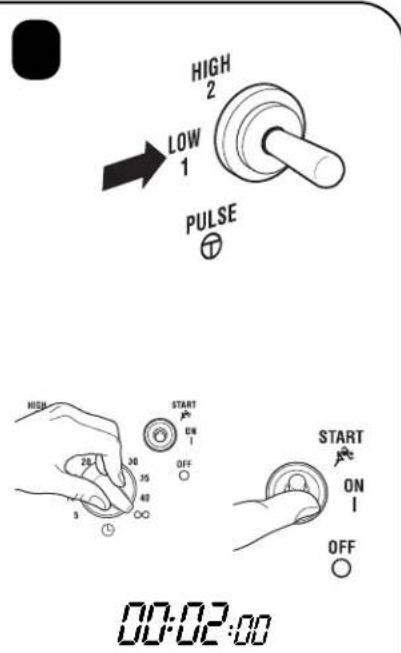

natural_image
Illustration showing two steps of a hand pouring liquid from a container into a cup (no text or symbols)
natural_image
Illustration showing two steps of a hand holding a device with a tube, no text or symbols present
natural_image
Technical diagram of a mechanical switch mechanism with a screwdriver, showing internal components and motion direction (no text or labels)
natural_image
Mechanical assembly diagram showing a valve mechanism with gears and a hex nut, no text or symbols present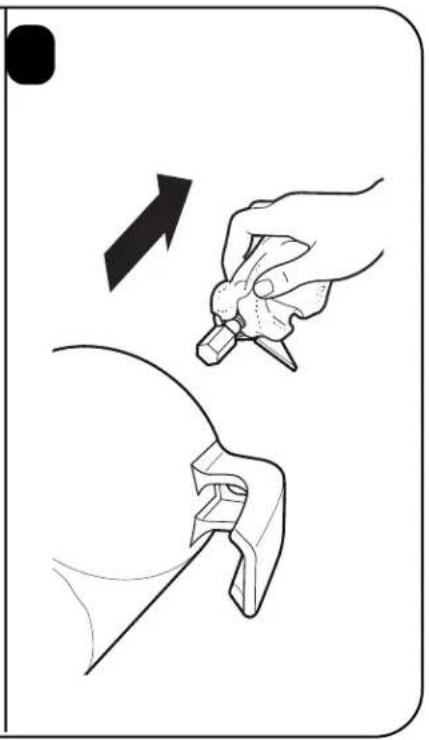
natural_image
Illustration of a hand using a tool to lift a small object, with an arrow indicating direction (no text or symbols)
natural_image
Illustration of a hand holding a tool over a curved object, with an arrow indicating direction (no text or symbols)
natural_image
Diagram of a mechanical component with a tool and arrow indicating rotation (no text or symbols)Hamilton Beach Brands, Inc. Commercial Technical Service 261 Yadkin Road Southern Pines, NC 28387


- Model HBH450
- Modèle HBH450
- IMPORTANT SAFETY INSTRUCTIONS
- Safety Alert Symbols
- Electrical Shock Hazard
- Cut Hazard
- Burn Hazard
- Sanitizing
- Technical Service
- Replacement Parts
- Parts and Features
- Power Requirements
- Blender Operation – Quick Start Guide
- Replacing the Cutter Assembly
- Troubleshooting Guide
- Maintenance
- Product Warranty
- LIMITED WARRANTY
- Two-Year Express Care Service Program \*
- Follow these three easy steps for quick, convenient and dependable ECSP repairs:
- Notes
- En cas de panne
- Piezas de Repuesto
Brand : HAMILTON BEACH
Model : Tango HBH450R
Category : Blender