AirBreeze 510UV - Air purifier Laserliner - Free user manual and instructions
Find the device manual for free AirBreeze 510UV Laserliner in PDF.
User questions about AirBreeze 510UV Laserliner
0 question about this device. Answer the ones you know or ask your own.
Ask a new question about this device
Download the instructions for your Air purifier in PDF format for free! Find your manual AirBreeze 510UV - Laserliner and take your electronic device back in hand. On this page are published all the documents necessary for the use of your device. AirBreeze 510UV by Laserliner.
USER MANUAL AirBreeze 510UV Laserliner
natural_image
White laserliner device with digital display and 'Laserliner' branding (no additional text or symbols visible)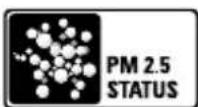


Laserliner
Laserliner
!
natural_image
Close-up of a white plug inserted into a wall socket, with a black arrow pointing to the socket (no text or symbols visible)
natural_image
Illustration of a hand inserting a heat sink into a power heater (no text or symbols)a
natural_image
Illustration of hands installing or removing a device into a portable air conditioner unit (no text or symbols visible)b
natural_image
Line drawing of a white electronic device with ventilation slots and a closed lid (no text or symbols)
C

d

natural_image
Illustration of hands installing or adjusting a device into a portable air conditioner unit (no text or symbols visible)e
Laserliner
natural_image
Line drawing of a mechanical device with a handle and internal components (no text or symbols)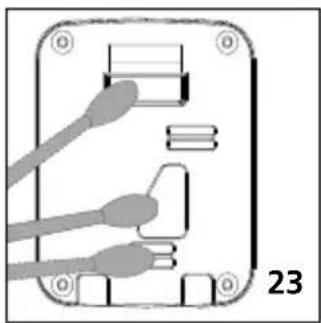
natural_image
Diagram of an electronic device with labeled pins and connectors (no readable text or symbols)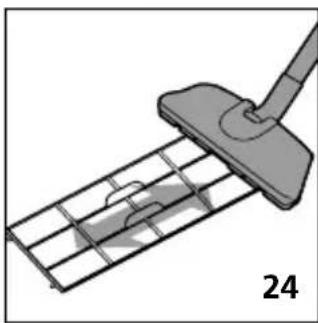
natural_image
Diagram of a cleaning or cleaning tool interacting with a grid-patterned metal panel (no text or symbols)
Completely read through the operating instructions, the „Warranty and Additional Information“ booklet as well as the latest information under the internet link at the end of these instructions. Follow the instructions they contain. These documents must be kept in a safe place and passed on together with the device.
Intended use
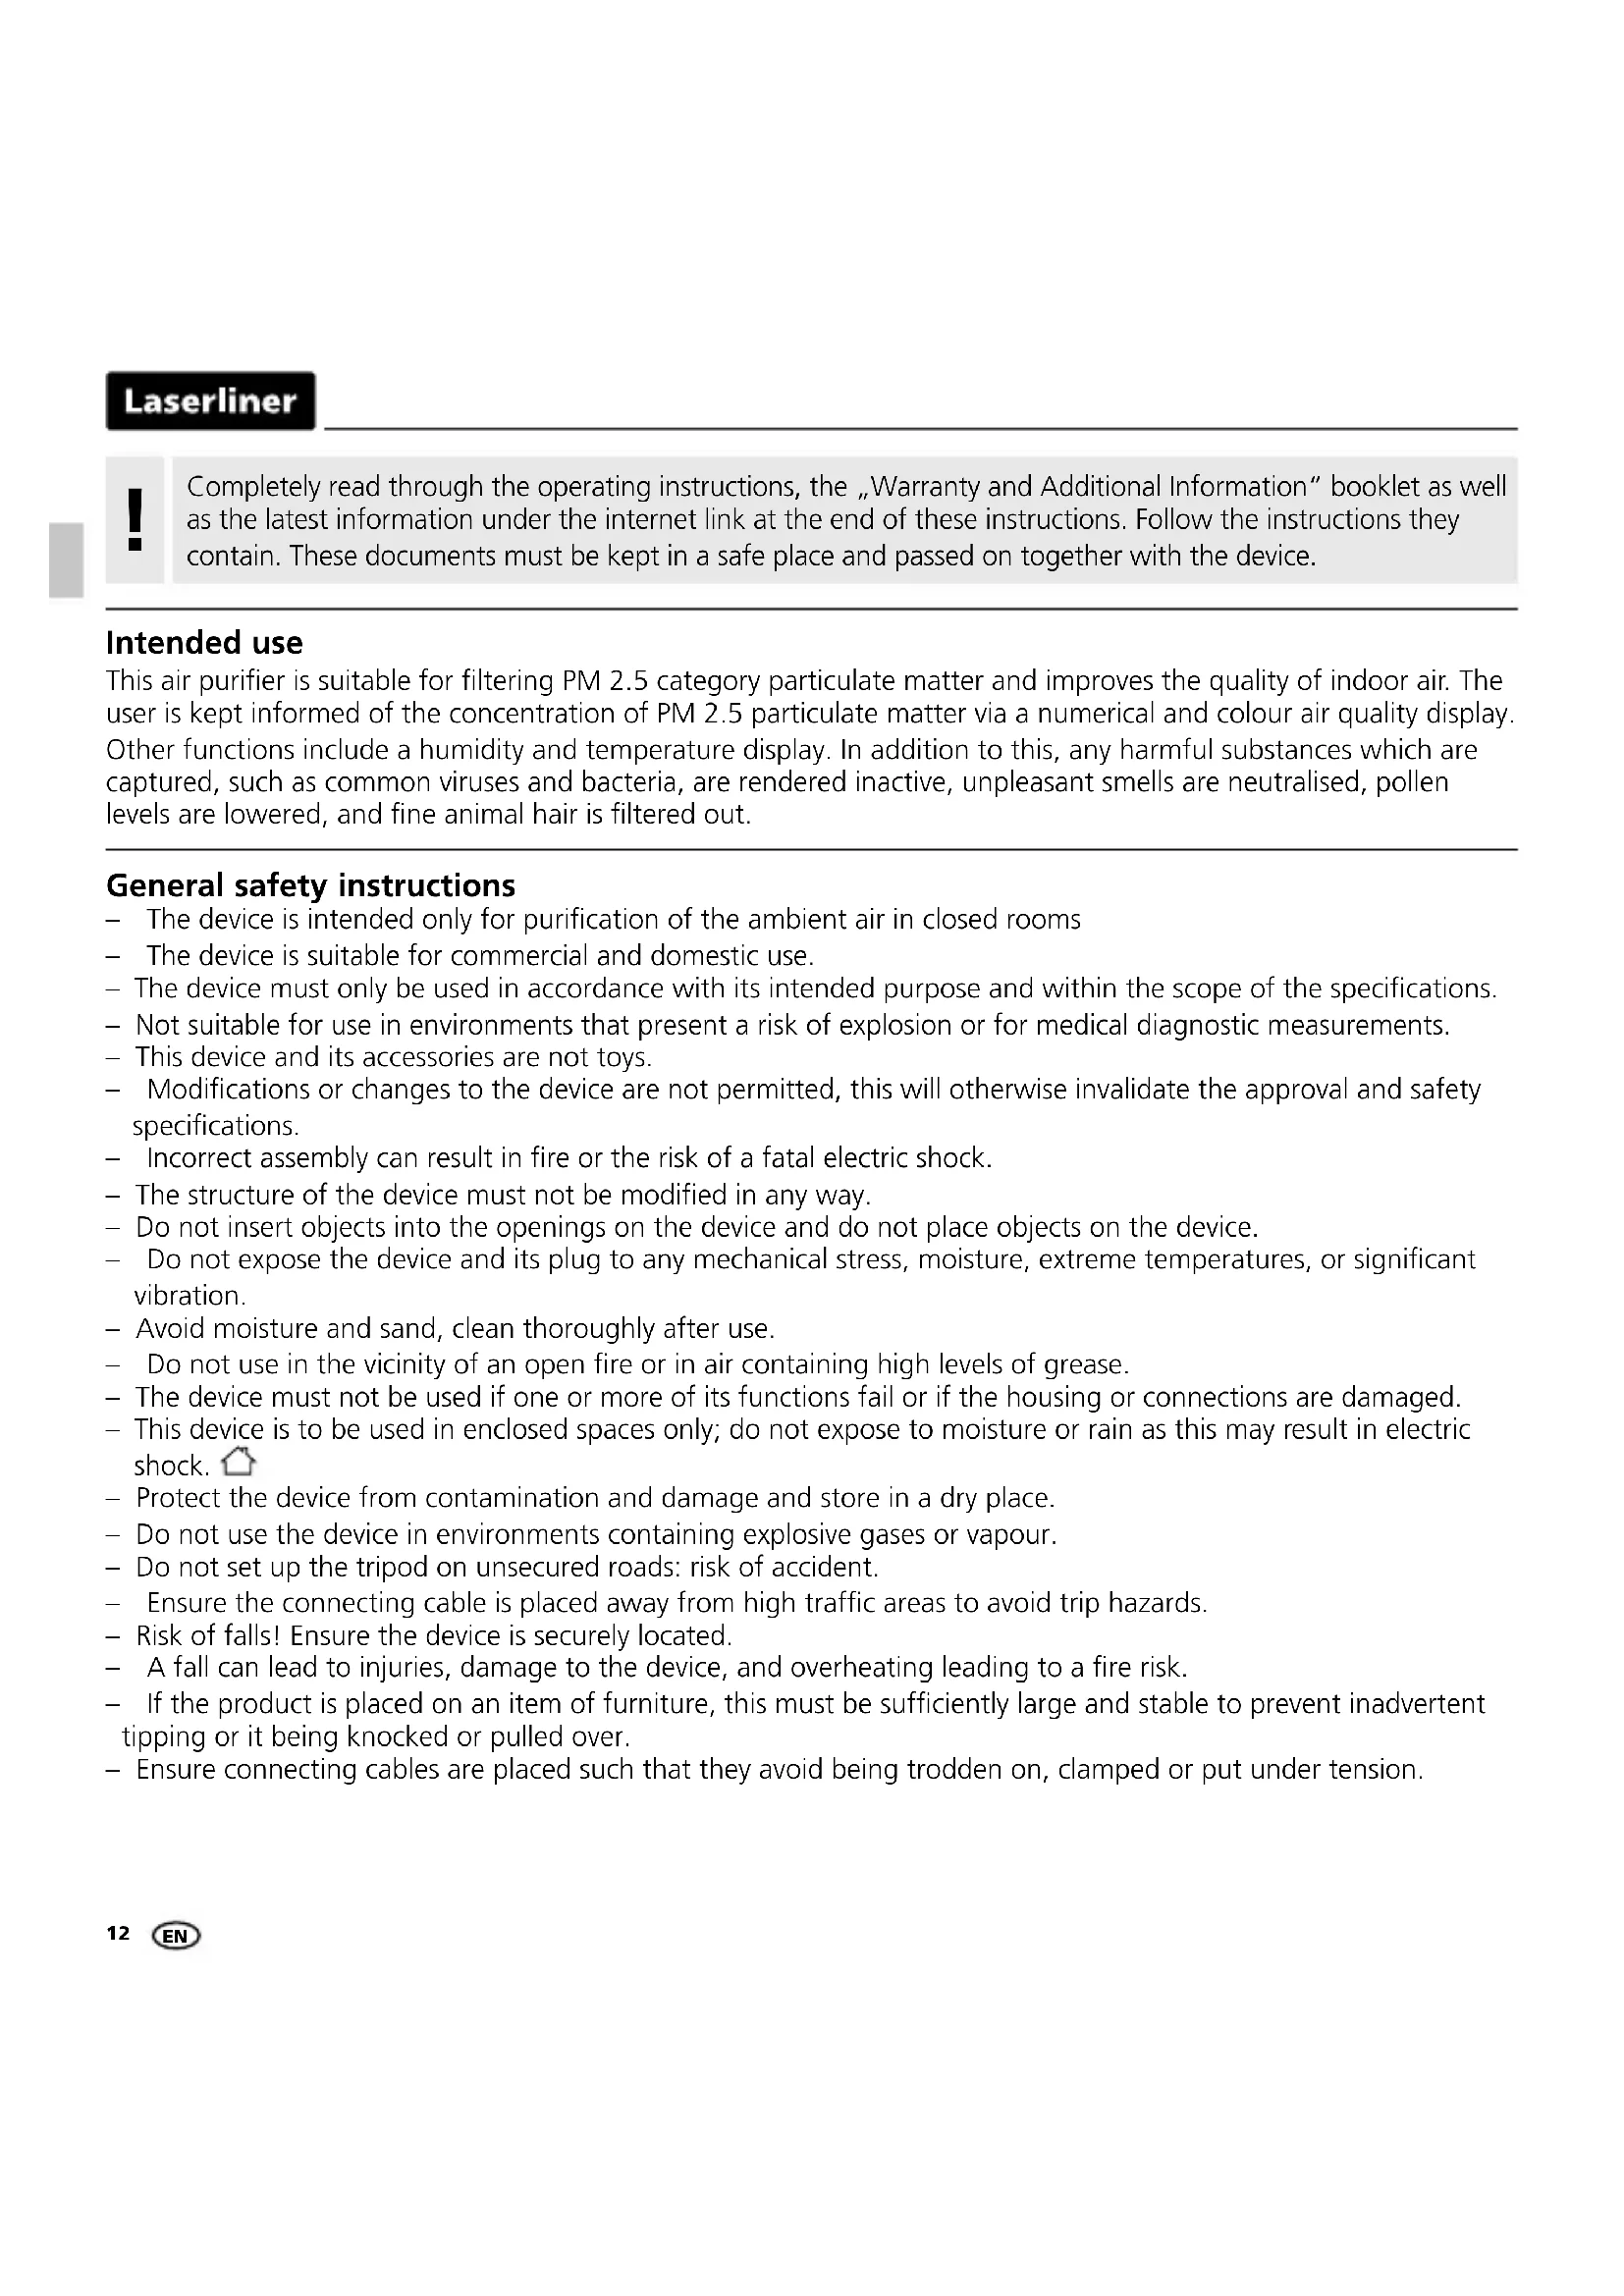
This air purifier is suitable for filtering PM 2.5 category particulate matter and improves the quality of indoor air. The user is kept informed of the concentration of PM 2.5 particulate matter via a numerical and colour air quality display. Other functions include a humidity and temperature display. In addition to this, any harmful substances which are captured, such as common viruses and bacteria, are rendered inactive, unpleasant smells are neutralised, pollen levels are lowered, and fine animal hair is filtered out.
General safety instructions
- The device is intended only for purification of the ambient air in closed rooms
- The device is suitable for commercial and domestic use.
- The device must only be used in accordance with its intended purpose and within the scope of the specifications.
- Not suitable for use in environments that present a risk of explosion or for medical diagnostic measurements.
- This device and its accessories are not toys.
- Modifications or changes to the device are not permitted, this will otherwise invalidate the approval and safety specifications.
- Incorrect assembly can result in fire or the risk of a fatal electric shock.
- The structure of the device must not be modified in any way.
- Do not insert objects into the openings on the device and do not place objects on the device.
- Do not expose the device and its plug to any mechanical stress, moisture, extreme temperatures, or significant vibration.
- Avoid moisture and sand, clean thoroughly after use.
- Do not use in the vicinity of an open fire or in air containing high levels of grease.
- The device must not be used if one or more of its functions fail or if the housing or connections are damaged.
- This device is to be used in enclosed spaces only; do not expose to moisture or rain as this may result in electric shock.
- Protect the device from contamination and damage and store in a dry place.
- Do not use the device in environments containing explosive gases or vapour.
- Do not set up the tripod on unsecured roads: risk of accident.
- Ensure the connecting cable is placed away from high traffic areas to avoid trip hazards.
– Risk of falls! Ensure the device is securely located. - A fall can lead to injuries, damage to the device, and overheating leading to a fire risk.
- If the product is placed on an item of furniture, this must be sufficiently large and stable to prevent inadvertent tipping or it being knocked or pulled over.
-
Ensure connecting cables are placed such that they avoid being trodden on, clamped or put under tension.
-
Do not lay the mains cable under carpets, floor coverings, or furniture/other devices. Fire risk!
- Take particular care to protect the plug connections to the device and sockets.
- The device is intended for use on a secure, flat surface.
- Risk of overheating! Do not block or cover any of the ventilation openings on the device during operation.
- Do not use in the vicinity of open flames or other heat sources (heating systems, ovens, amplifiers, etc.). Overheating has a detrimental effect on the service life and can represent a risk of fire.
- Always disconnect the device from the power supply during thunder storms or if the device is left unused for an extended period of time.
- The mains plug must always be easily accessible.
- When removing a plug from a socket, always pull the plug and never the cable in order to avoid electric shocks and the risk of fire due to damage.
– Clean the mains plug at regular intervals. - Ensure the mains plug is always fully inserted into the socket.
- Deposits and connections can lead to short circuits, overheating, and the risk of fire.
- Ensure your hands are dry when handling the mains cable and plug.
- Disconnect the device from the mains immediately if any of the following circumstances occur:
- a switch, the display or a function is no longer working correctly.
- an RCD, circuit breaker or a fuse has blown.
- the mains cable or plug has overheated.
- the device is making unusual noises or vibrations or emitting unusual smells.
- any other unusual responses or defects.
- Disconnect from the mains before changing the filter or cleaning the device.
- Do not operate the air purifier without a filter.
– The filters must be removed from their packaging before fitting. - The device indicates when the filter needs to be changed but can still be operated normally with this display.
– Typical incorrect uses to be avoided by users:
- Use: - in wet areas (such as bathrooms, sanitary areas)
- as storage, particularly placement of containers filled with liquids.
- in the immediate vicinity of wet objects
- outside the permitted environmental conditions
- outside
- in explosive or flammable atmospheres
- Covering the ventilation openings.
- Inserting conductive objects into the ventilation slots.
- Tampering with or bypassing safety equipment.
- If safety instructions are ignored, this can result in electric shocks, burns and/or severe injury.

Observe the safety instructions. Ignoring the safety instructions puts people, the environment and the product at risk.
Laserliner
Safety instructions
Using artificial, optical emission (OStrV)
- The device has a UV-C light source with a wave length of 253.7 nm to sterilise the air.
- Appropriate technical measures ensure the UV-C radiation cannot escape, even if the housing is open.
– Damage to the housing can lead to dangerous UV-C radiation escaping. - UV-C radiation can damage eyes and skin even in low doses. Devices which are obviously damaged must not beoperated. Do not look into the light source.
- Read the maintenance instructions before opening the device.
- Disconnect the device from the mains before replacing the UV-C light source.
The UV-C light source must be disposed of separately.
Safety instructions
Dealing with electromagnetic disturbances
- The device complies with the provisions and limit values for safety and electromagnetic compatibility in accordance with the Low Voltage Directive (LVD) 2014/35/EU and the Electromagnetic Compatibility (EMC) Directive 2014/30/EU.
– Umarex GmbH & Co KG hereby declares that the electronic device AirBreeze 510UV complies with the requirements and other conditions of the European Low Voltage Directive 2014/35/EU (LVD) and the EMC Directive 2014/30/EU. The complete text of the EC declaration of conformity is available at the following internet address:
https://laserliner.com
- Local operating restrictions – for example, in hospitals, aircraft, petrol stations or in the vicinity of people with pacemakers – may apply. Electronic devices can potentially cause hazards or interference or be subject to hazards or interference.
text_image
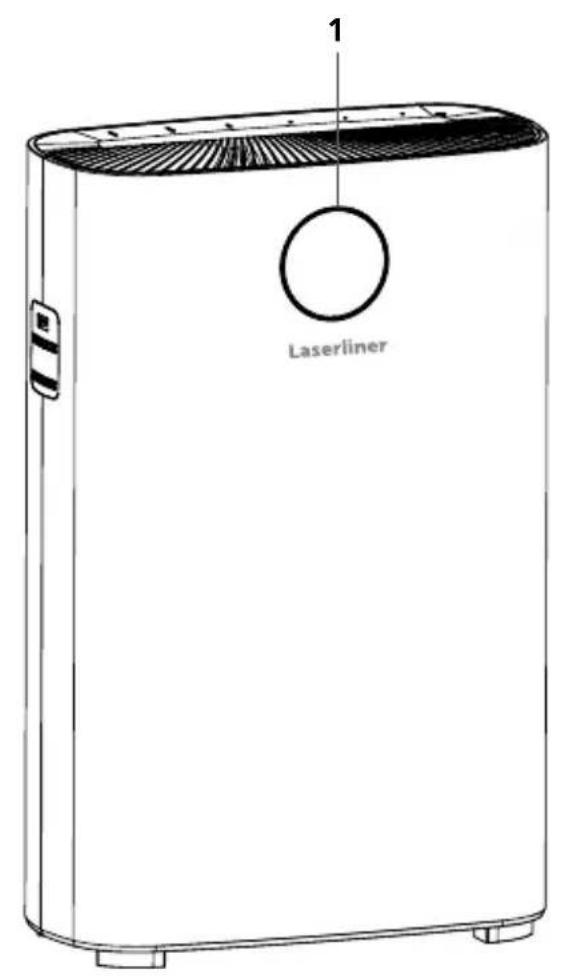
1 Laserliner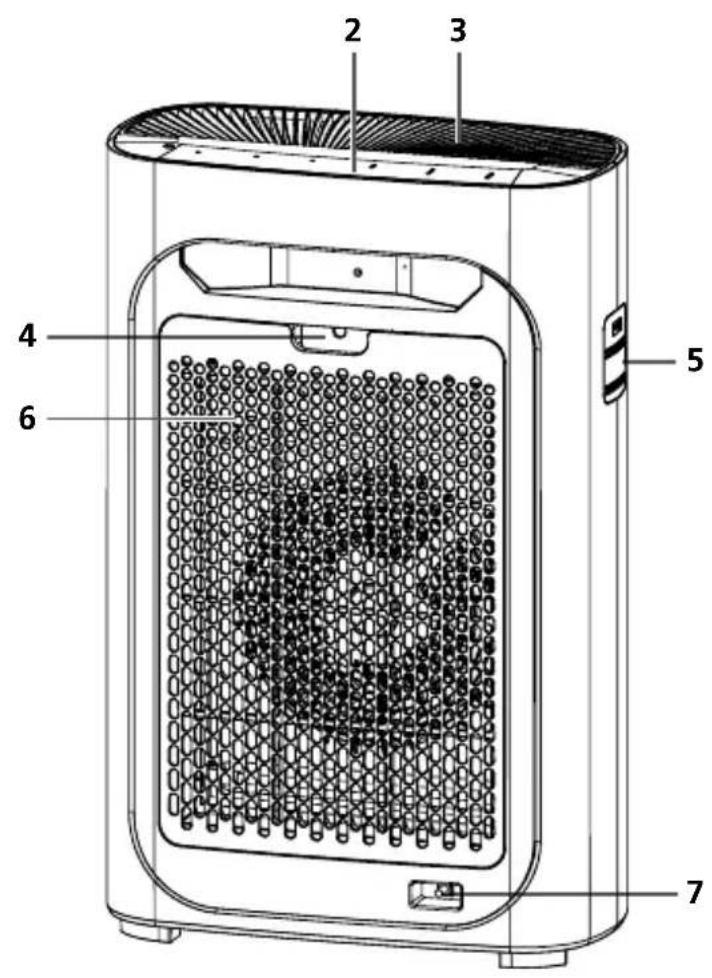
text_image
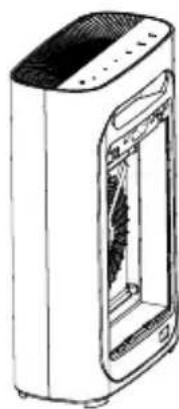
2 3 4 5 6 7Warning signals
Risk of electric shockHot surface
1 The air quality is indicated with a colour readout and the PM 2.5 value, temperature and humidity are automatically updated on the display
2 Control panel
3 Air outlet
4 Opening to remove the filter cover
5 Air quality sensor
6 Filter cover
7 Mains connection
Laserliner
text_image
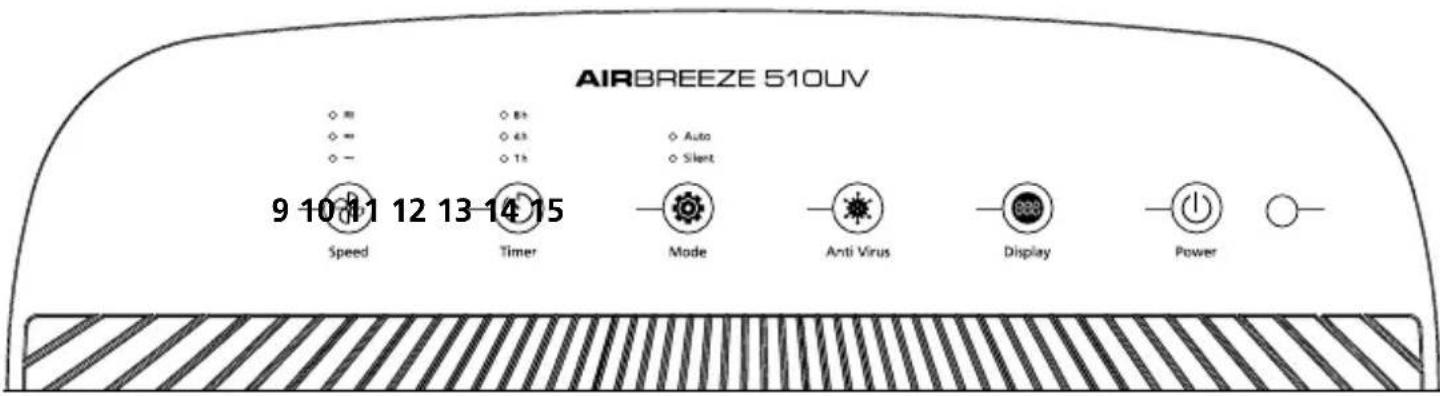
AIRBREEZE 510UV 9 10 11 12 13-14 15 Speed Timer Mode Anti Virus Display Power9 Fan speed
10 Timer function 13 Display light ON/OFF button
11 Automatic and night mode
12 UV-C radiation ON/OFF button
Filter reset button


text_image
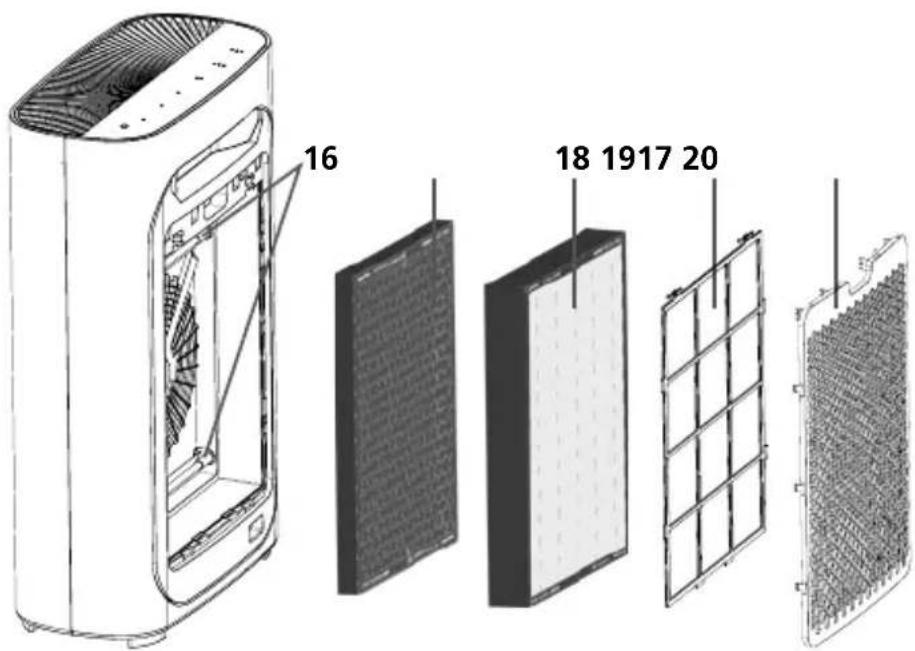
16 18 1917 2014 ON/OFF button
15 Sleep mode brightness sensor
16 UV-C disinfection lamp: inhibits the propagation of common bacteria and viruses
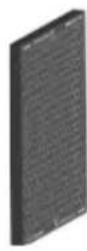
17 Activated carbon filter
18 HEPA13 filter
19 Pre-filter
20 Filter cover
Filter
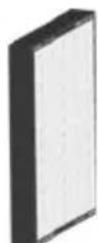
The UV-C disinfection lamp (16) inhibits the propagation of many common bacteria and viruses. The activated carbon filter (17) removes volatile organic compounds (VOCs) and gases from the air. Particles injurious to health, including particulate matter, pollen, dust mites and smoke particles, are removed by the HEPA13 filter (18). The pre-filter (19) prevents the ingress of particles larger than 2.5 mm. This extends the service life of the filter behind it.
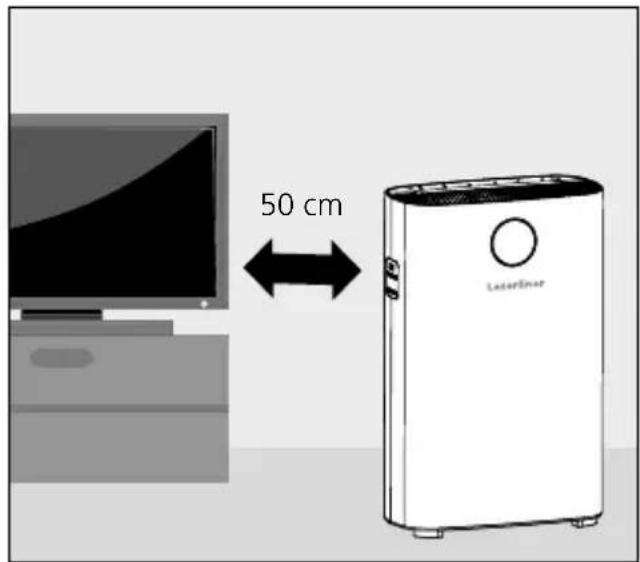
1 Correct setup of the air purifier
Ensure the purifier is positioned at least 50 cm to the side and 10 cm to the rear away from adjacent objects and electrical devices. The performance of radios and televisions can be negatively affected if their mains plug is plugged into the same socket strip as the air purifier's mains plug. Use a separate power source for this reason. To ensure perfect operation, do not cover the air purifier or build constructions above it.
text_image
50 cm LaserEner2 Operation
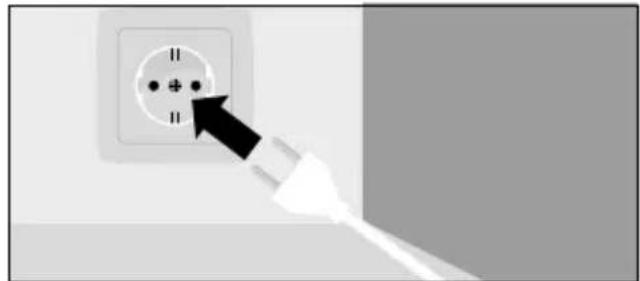
Insert the mains plug into the socket. The stand-by light shines red after a short tune has been played and all the displays flash twice. Automatic mode is activated by pressing the ON/OFF button (14).
natural_image
Close-up of a white plug inserted into a wall socket, with a black arrow pointing to the socket (no text or symbols visible)
The air quality display flashes when the device is started. The correct PM value is displayed after five seconds. The air quality is detected as automatic mode starts up.
Laserliner
3 Functions

Adjusting the fan speed
Four fan speeds can be selected.

Set timer
Press the button (10) to activate the automatic shutdown after 1, 4 or 8 hours.

Sleep mode
In sleep mode, the light sensor is activated which assesses the ambient light level. If the light level is low, all lit displays on the device are dimmed and the fan is also automatically set to its lowest speed.

UV-C function (including ionisation)
Press the Anti-virus button (12) to start UV-C radiation and disinfection. Press and hold the button for five seconds to start the ioniser.

Display lighting
To switch the air quality colour display on and off, press the Display button (13).
Filter reset
To reset the filter saturation display, press and hold the Display button (13) for 5 seconds. This function is only available after the device has registered the filter has been changed.
4 Explanation PM 2.5
PM 2.5 fine particulate matter includes industrial emissions which can penetrate deep into the respiratory tract due to their extremely small size, causing long-term damage to the lungs.
| PM 2.5 0 ~ 50 μg/m | 3 | 50 ~ 100 μg/m3 | 100 ~ 150 μg/m3 | 150 μg/m3~ |
| Coloured indicator blue | green purple red | |||
| Status perfect good normal poor | ||||

Note: Press the Display button (13) if you want to switch off the air quality display.
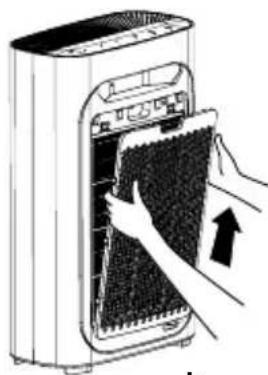
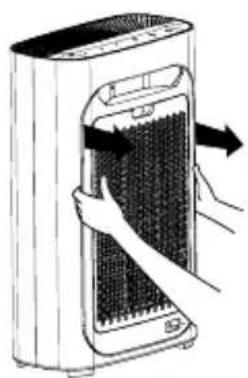
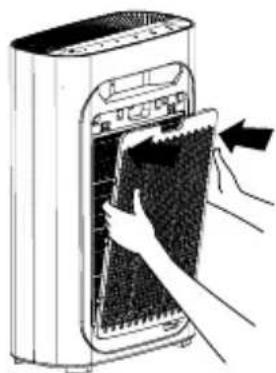
5 Fitting the filters before the device is used for the first time
- Put the air purifier on a flat surface and remove all packaging.
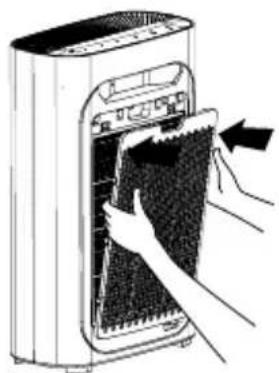
- Remove the filter cover by pulling the tabs on the top (a + b).
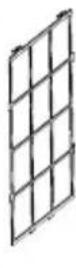
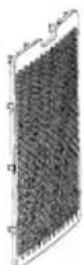
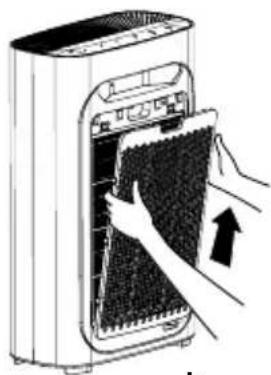
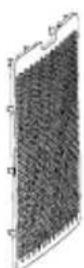
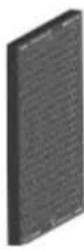
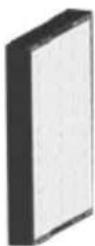
- Remove the pre-filter, the HEPA13 filter, and the activated carbon filter in that order by pulling the tabs (d) provided for this purpose.
- Remove all packaging from the filter.
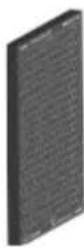
- Refit the activated carbon filter, HEPA13 filter, and pre-filter (c). Make sure the pre-filter is firmly seated at all six locking points.
- Refit the filter cover in the lower openings. Push the filter cover carefully forwards into the locking points until is if firmly seated (e).
6 Changing the filter
- A flashing Display button (13) indicates the filter is due for replacement.
- Switch off the air purifier and disconnect from the mains.
- Remove the filter cover by pulling the tabs on the top (a + b).
- Remove the pre-filter, the HEPA13 filter, and the activated carbon filter in that order by pulling the tabs (d) provided for this purpose.
- Remove all packaging from the new filter before installing.
- Fit the activated carbon filter, HEPA13 filter, and pre-filter (c). Make sure the pre-filter is firmly seated at all six locking points.
- Refit the filter cover in the lower openings. Push the filter cover carefully forwards into the locking points until is if firmly seated (e).
natural_image
Illustration of a hand inserting a grid into a power heater (no text or symbols)a
natural_image
Illustration of hands installing or removing a device into a portable air conditioner unit (no text or symbols visible)b

natural_image
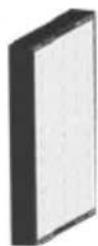
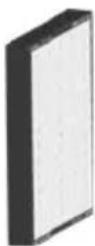
Line drawing of a white electronic device with ventilation slots and a closed lid (no text or symbols)
C


d

natural_image
Illustration of hands installing or removing a device into a portable air conditioner unit (no text or symbols visible)e
Laserliner
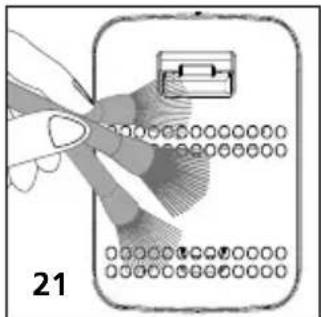
7 Cleaning the air quality sensor
Clean the air purifier every two months with a soft brush (21) to ensure optimum performance. Remove the protective cover (22) and carefully clean the inlet and outlet of the air quality sensor with a moist cotton bud (23). When using the air purifier in very dusty conditions, clean the device more frequently.
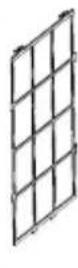
8 Cleaning the pre-filter
Use a soft brush or a vacuum cleaner to remove dirt particles (24). The filter can also be cleaned with just water or soapy water. Ensure the filter is completely dry before refitting in the air purifier.
natural_image
Illustration of a hand holding a device with a grid pattern and a small inset showing a device (no text or symbols)
natural_image
Technical line drawing of a mechanical component with no visible text or symbols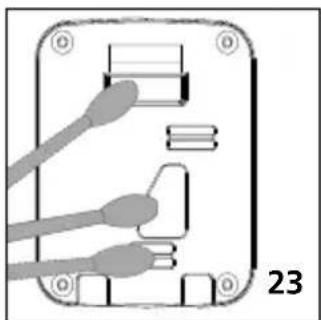
natural_image
Diagram of a device with labeled ports and cables, no readable text or symbols present
natural_image
Diagram of a mop handle gripping a grid structure, labeled with number 24 (no text or symbols on the diagram itself)
Note: Use a low setting on the vacuum cleaner to avoid damage to the pre-filter.
Information on maintenance and care
Clean the housing with a damp cloth and do not use cleaning agents, scouring agents and solvents. Cleaning and/or maintenance work may only be carried out when the device has been disconnected from the mains. Protect the device from contamination and damage and store in a dry place.
Energy use and environmental considerations
State-of-the-art, energy-efficient technology has been fitted in this device to conserve increasingly scarce natural resources in our environment. This means that incorrect usage can increase energy consumption. Switch the device off if the air quality is already good, there is external ventilation, or there are no people in the room. Remove the mains plug if the device is not in use for extended periods.
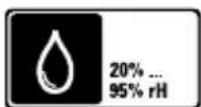
| Technical data (Subject to technical changes without notice. Rev22W28) | |
| Variable Concentration of particular matter PM2.5, Ambient temperature, Humidity | |
| Fine particulate matter | |
| Measuring range | 0...5000 μg/m3 |
| Accuracy | 25 μg/m3 |
| Ambient temperature | |
| Measuring range | 0...50°C |
| Accuracy | ±0.5°C |
| Disposal | 1°C |
| Humidity | |
| Measuring range (relative) | 20...95%rH |
| Accuracy (absolute) | ±3%rH |
| Disposal | 5%rH |
| Sensor type | Fine particular matter, temperature, humidity |
| Power supply | Mains voltage 230V / 50 Hz |
| Operating conditions | 0°C ... 60°C, max. humidity, 75% rH, no condensation |
| Storage conditions | -10°C ... 60°C, max. humidity, 85% rH, no condensation |
| Cable length | 1,5 m |
| Dimensions (W x H x D) | 460 x 710 x 230 mm |
| Weight 10000 g | |
EU and UK directives and disposal
This device complies with all necessary standards for the free movement of goods within the EU - and the UK.
This product, including accessories and packaging, is an electrical appliance that must be recycled in an environmentally appropriate manner in accordance with European and UK directives on waste electrical and electronic equipment, batteries and packaging, in order to recover valuable raw materials.
Further safety and supplementary notices at: https://laserliner.com

text_image
CE —Laserliner
!
natural_image
Close-up of a white plug inserted into a wall socket with a black arrow pointing to it (no text or symbols visible)
natural_image
Illustration of a hand inserting a grid into a power heater (no text or symbols)a

natural_image
Illustration of hands installing or removing a device into a portable air conditioner unit (no text or symbols visible)b

natural_image
Line drawing of a white air purifier unit with ventilation slots and control panel (no text or symbols)
C


d

natural_image
Illustration of hands installing or removing a device into a portable air conditioner unit (no text or symbols visible)e
Laserliner
natural_image
Illustration of a hand holding a pen and a device with circular components, labeled '21' (no text or symbols on the diagram itself)
natural_image
Line drawing of a device with a tray and internal components, labeled '22' (no text or symbols on the diagram itself)
natural_image
Diagram of an electronic device with labeled pins and connectors (no readable text or symbols)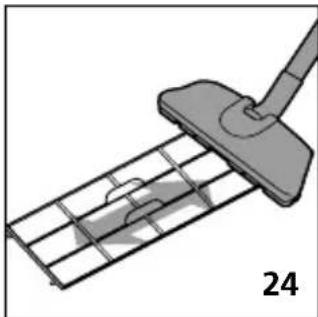
natural_image
Diagram of a cleaning or cleaning tool interacting with a grid-patterned metal tray (no text or symbols)
natural_image
Close-up of a hand inserting a plug into a wall-mounted power outlet (no text or symbols visible)
natural_image
Illustration of a hand inserting a component into a power heater (no text or symbols)a

natural_image
Illustration of hands installing or removing a device into a portable air conditioner unit (no text or symbols visible)b

natural_image
Line drawing of a white air purifier unit with ventilation slots and internal compartments (no text or symbols)
C


d
natural_image
Illustration of hands installing or removing a device into a portable air conditioner unit (no text or symbols visible)e
Laserliner
natural_image
Illustration of a hand holding a device with a grid pattern and a lock icon, no text or symbols present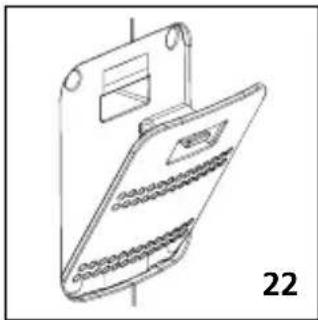
natural_image
Line drawing of a device with a tray and internal components, labeled '22' (no text or symbols on the diagram itself)
natural_image
Diagram of a device rear panel with connectors and labeled pins (no readable text or symbols)
natural_image
Diagram of a cleaning or cleaning device with a handle and grid array (no text or symbols)
natural_image
Close-up of a white plug inserted into a wall socket with a black arrow pointing to the socket (no text or symbols visible)
natural_image
Illustration of a hand inserting a grid into a power heater (no text or symbols)a

natural_image
Illustration of hands installing or removing a device into a portable air conditioner unit (no text or symbols visible)b

natural_image
Line drawing of a white air purifier unit with ventilation slots and internal structure (no text or symbols)
C


d

natural_image
Illustration of hands installing or removing a device into a portable air conditioner unit (no text or symbols visible)e
Laserliner
natural_image
Illustration of a hand holding a pen, interacting with a device panel (no text or symbols visible)
natural_image
Line drawing of a device with a tray and internal components, labeled '22' (no text or symbols on the diagram itself)
natural_image
Diagram of an electronic device with labeled pins and connectors (no readable text or symbols)
natural_image
Diagram of a cleaning or cleaning tool interacting with a grid-patterned metal grate (no text or symbols)
natural_image
Close-up of a white electrical outlet with a black arrow pointing to it, no text or symbols visible
natural_image
Illustration of a hand inserting a grid into a power heater (no text or symbols)a

natural_image
Illustration of hands installing or adjusting a grid device into a portable air conditioner unit (no text or symbols visible)b
natural_image
Line drawing of a portable air purifier unit with ventilation slots and control panel (no text or symbols)
C


d
natural_image
Illustration of hands installing or removing a device into a portable air conditioner unit (no text or symbols visible)e
Laserliner
natural_image
Line drawing of a device with a tray and internal components, labeled '22' (no text or symbols on the diagram itself)
natural_image
Diagram of an electronic device with labeled pins and connectors (no readable text or symbols)
natural_image
Diagram of a cleaning or cleaning tool interacting with a grid-patterned metal grate (no text or symbols)
natural_image
Black-and-white photo of a laser air purifier in a modern kitchen setting, with no visible text or symbols on the device itself.