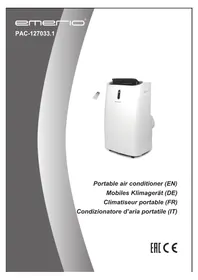
PAC127033.1 - Air Conditioning Emerio - Free user manual and instructions
Find the device manual for free PAC127033.1 Emerio in PDF.



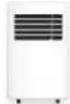
| Product type | Portable monoblock air conditioner |
| Brand | Emerio |
| Model | PAC127033.1 |
| Dimensions (approx.) | 35 x 35 x 70 cm |
| Weight (approx.) | 28 kg |
| Power supply | 220-240 V ~ 50 Hz |
| Rated power (cooling) | 1560 W / 6.9 A |
| Rated power (heating) | 1300 W / 5.8 A |
| Cooling capacity | 4100 W |
| Heating capacity | 3220 W |
| Refrigerant | R290 (propane) |
| Energy class (cooling) | A |
| Noise (cooling / heating) | 65 dB(A) |
| Recommended room area | ≥ 13 m² |
| Main functions | Cooling, heating, dehumidification, ventilation |
| Additional modes | Sleep, oscillation, timer (1-24h), Wi-Fi |
| Fan speeds | Low, medium, high, auto |
| Remote control | Yes (AAA 2x1.5V batteries) |
| Cleaning and maintenance | Washable air filters every 2 weeks |
| Safety | Automatic shutdown, overload protection, auto defrost, leak detection |
| Spare parts available | Filter, remote control, exhaust hose, window kit |
| Warranty | 2 years |
| Repairability | Call a certified technician |
Frequently Asked Questions - PAC127033.1 Emerio
User questions about PAC127033.1 Emerio
0 question about this device. Answer the ones you know or ask your own.
Ask a new question about this device
Download the instructions for your Air Conditioning in PDF format for free! Find your manual PAC127033.1 - Emerio and take your electronic device back in hand. On this page are published all the documents necessary for the use of your device. PAC127033.1 by Emerio.
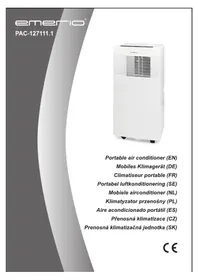
USER MANUAL PAC127033.1 Emerio
natural_image
White industrial air purifier with control panel and digital display (no visible text or symbols)Portable air conditioner (EN)
Instruction manual – English ...... - 2 -
Before use make sure to read all of the below instructions in order to avoid injury or damage, and to get the best results from the appliance. Make sure to keep this manual in a safe place. If you give or transfer this appliance to someone else make sure to also include this manual.
In case of damage caused by user failing to follow the instructions in this manual the warranty will be void. The manufacturer/importer accepts no liability for damages caused by failure to follow the manual, a negligent use or use not in accordance with the requirements of this manual.
- Read and save these instructions. Attention: pictures in the IM are for reference only.
- This appliance can be used by children aged from 8 years and above and persons with reduced physical, sensory or mental capabilities or lack of experience and knowledge if they have been given supervision or instruction concerning use of the appliance in a safe way and understand the hazards involved.
- Children shall not play with the appliance.
- Cleaning and user maintenance shall not be made by children without supervision.
- If the supply cord is damaged, it must be replaced by the manufacturer, its service agent or similarly qualified persons in order to avoid a hazard.
- Indoor use only.
- Do not use the unit in an area: near to source of fire; where oil is likely to splash; exposed to direct sunlight; where water is likely to splash; near a bath, a laundry, a shower or a swimming pool.
- Never insert your fingers, rods into the air outlet. Take special care to warn children of these dangers.
-
Keep the unit upward while transport and storage, for the compressor locates properly.
-
Before cleaning or moving the appliance, always turn off and disconnect the power supply.
- To avoid the possibility of fire disaster, the appliance shall not be covered.
- All the air-conditioner sockets must comply with the local electric safety requirements. If necessary, please check it for the requirements.
- The appliance shall be installed in accordance with national wiring regulations.
- Contact authorized service technician for repair or maintenance of this unit.
- Do not pull, deform or modify the power supply cord, or immerse it in water. Pulling or misuse of the power supply cord can result in damage to the unit and cause electrical shock.
- Compliance with national gas regulations shall be observed.
- Servicing shall only be performed as recommended by the equipment manufacturer. Maintenance and repair requiring the assistance of other skilled personnel shall be carried out under the supervision of the person competent in the use of flammable refrigerants.
- Do not operate or stop the unit by inserting or pulling out power plug, it may cause electric shock or fire due to heat generation.
- Unplug the unit if strange sounds, smell, or smoke comes from it.
- Always plug the appliance into an earthed plug socket.
- In case of any damage, please turn off the switch, disconnect the power supply, and contact an authorized service center for repair.
- Do not use means to accelerate the defrosting process or to clean, other than those recommended by the manufacturer.
- Do not use an extension cord or an adapter plug.
-
Do not touch the aluminum fins behind the air inlet.
-
The exhaust hose assembly shall be protected from the physical damage and shall not be installed in an unventilated space, if that space is smaller than 13 m^2 .
- The appliance shall be stored in a room without continuously operating ignition sources (for example: open flames, an operating gas appliance or an operating electric heater.)
- Do not pierce or burn.
- Be aware that refrigerants may not contain an odour.
- This appliance contains R290 refrigerant gas. R290 is a refrigerant gas that complies with the European directives on the environment. Do not puncture any part of the refrigerant circuit.
- If the appliance is installed, operated or stored in an unventilated area, the room must be designed to prevent to the accumulation of refrigerant leaks resulting in a risk of fire or explosion due to ignition of the refrigerant caused by electric heaters, stoves, or other sources of ignition.
- The appliance must be stored in such a way as to prevent mechanical failure.
- Individuals who operate or work on the refrigerant circuit must have the appropriate certification issued by an accredited organization that ensures competence in handling refrigerants according to a specific evaluation recognized by associations in the industry.
- Repairs must be performed based on the recommendation from the manufacturing company. Maintenance and repairs that require the assistance of other qualified personnel must be performed under the supervision of an individual specified in the use of flammable refrigerants.
- Regarding the instructions for repairing appliances containing R290, please kindly refer to below paragraphs.
- Always let the appliance rest for at least 2 hours after moving it from one location to another.
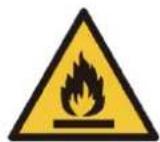
Warning: Risk of fire / Flammable materials.

Read instruction manuals.

Operator's manual; operating instructions.
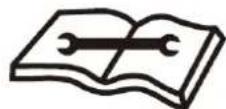
Service indicator; read technical manual.
Warning: Keep ventilation openings clear of obstruction. Warning: The appliance shall be stored in a well-ventilated area where the room size corresponds to the room area as specified for operation.
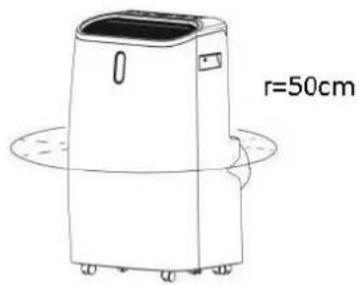
The required distance around the unit should be at least 50 cm.
Appliance shall be installed, operated and stored in a room with a floor area larger than 13 m ^2 .
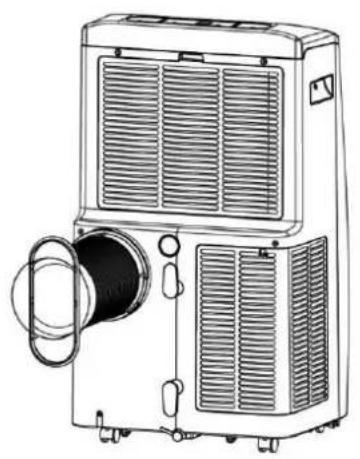
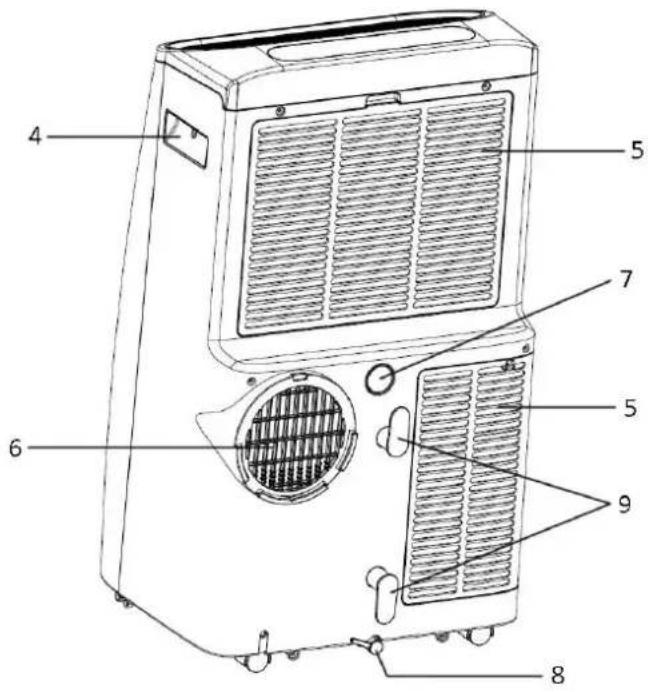
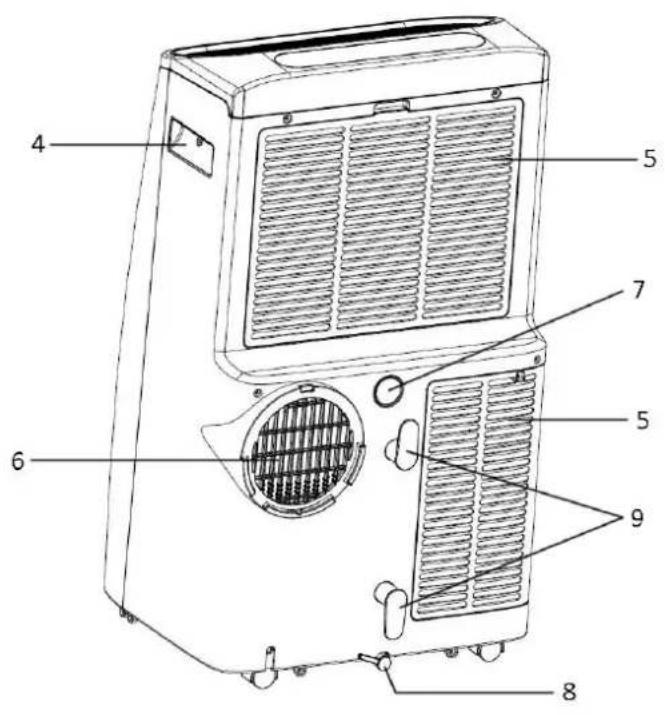
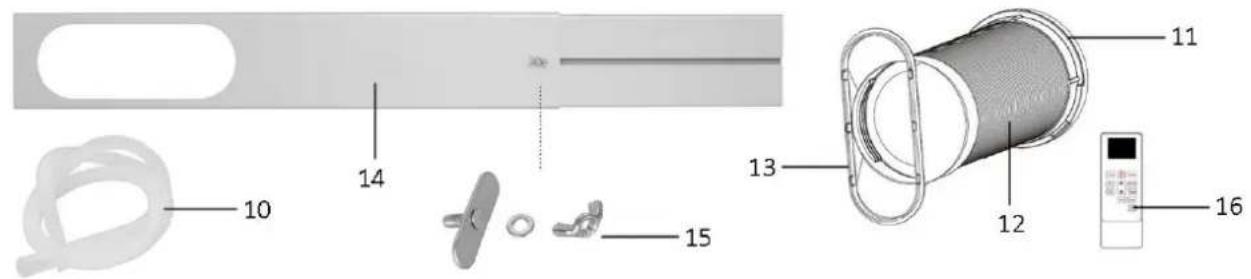
PARTS DESCRIPTION
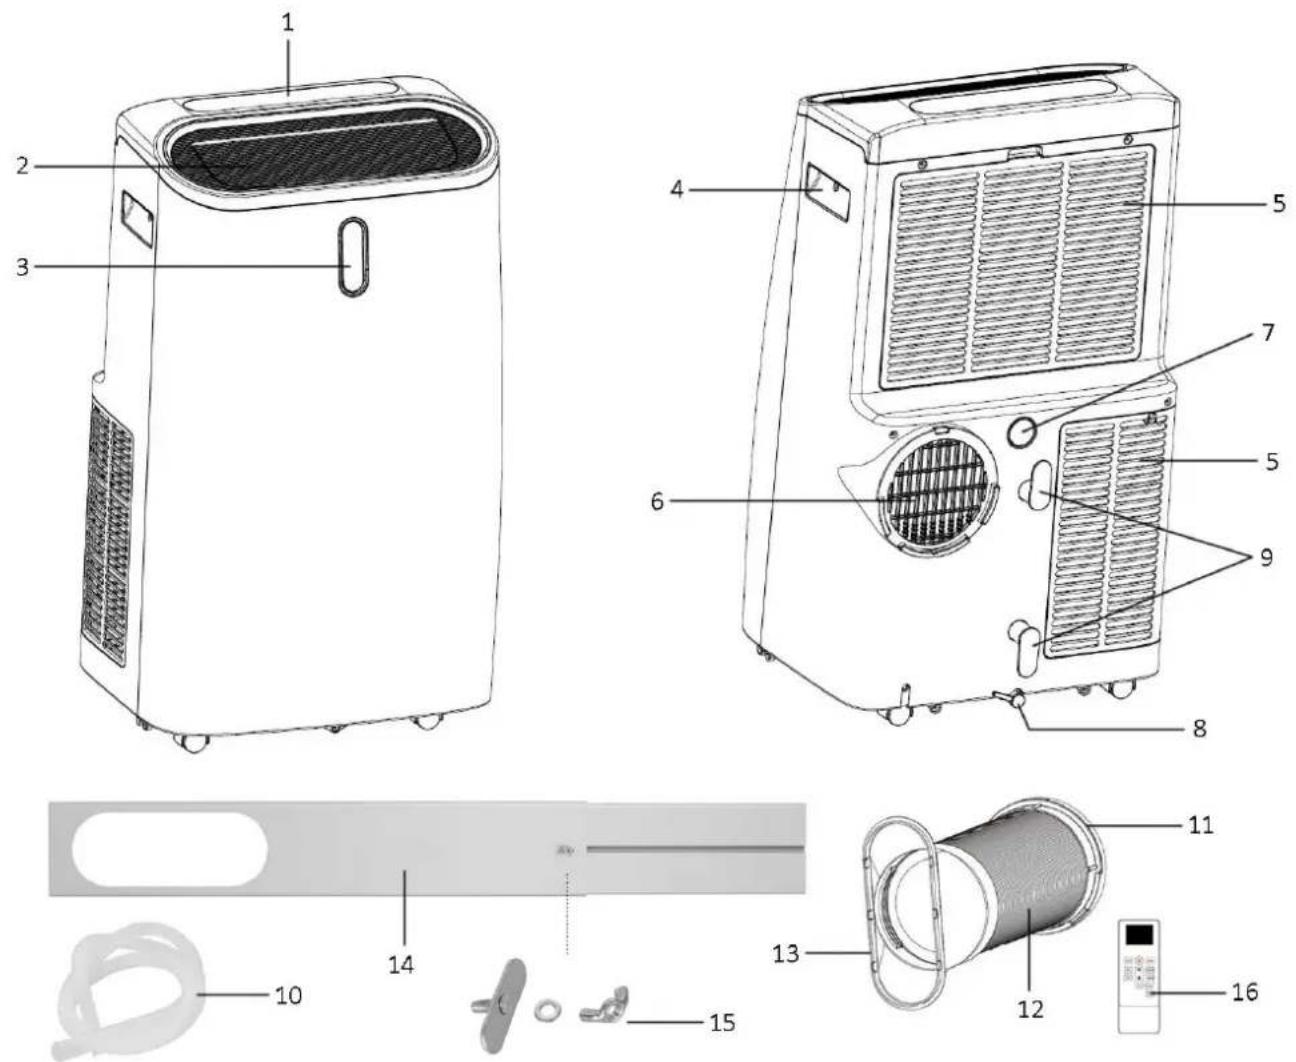
- Control panel
- Air outlet with adjustable louver
- Front digital display
- Handle
- Air inlet (with filter cover)
- Air exhaust outlet
- Upper drain port (inserted by a stopper)
- Lower drain port (inserted by a stopper)
- Power cord storage
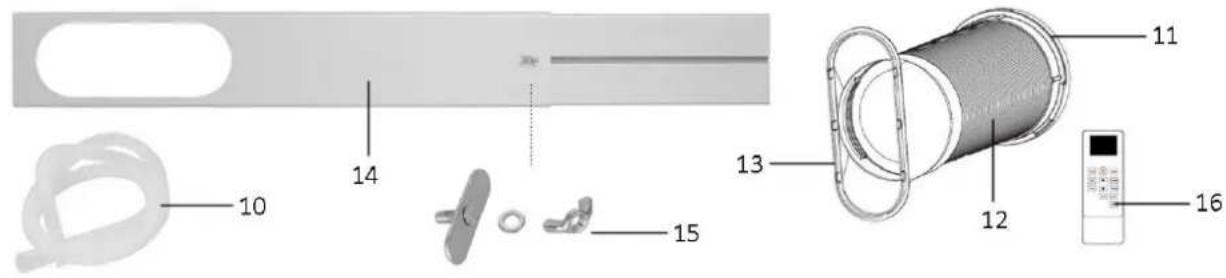
- Drainage hose for upper drain port only
- Hose connector
- Exhaust hose
- Window kit adapter
- Window kit
- Window kit screw / washer / butterfly nut
- Remote control
Control panel

- Power button
- Mode button
- Sleep button
- Temperature/timer increasing button
- Temperature/timer decreasing button
- Digital display
- Swing button
- Fan speed button
- Timer button
A. Power indicator light
B. Cooling mode indicator light
C. Drying mode indicator light
D. Fan mode indicator light
E. Heating mode indicator light
F. Sleep indicator light
G. Swing indicator light
H. High speed indicator light
I. Medium speed indicator light
J. Low speed indicator light
K. Wi-Fi indicator light
L. Timer-ON indicator light
Remote control
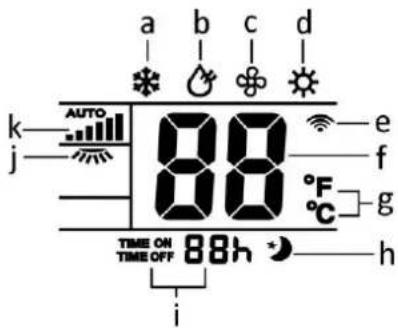
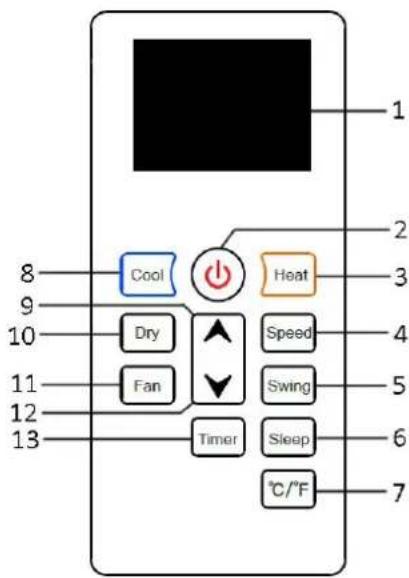
This unit has a remote control. At the back of the remote control, slide off the battery compartment cover, put two 1.5 V AAA batteries into the compartment (pay attention to the poles), and then place back the cover. If it is not in use for a long time, please take the batteries out of the remote control. Keep the batteries out of reach of small children. The functions of the buttons on the remote control are listed below.
- Digital display
a. Cooling mode
b. Drying mode
c. Fan mode
d. Heating mode
e. Wi-Fi indicator
f. Temperature display
g. Temperature unit
h. Sleep mode
i. Timer display
j. Swing function
k. Fan speed
- Power button
- Heating mode button
- Fan speed button
- Swing button
- Sleep button
- °C/°F conversion button
- Cooling mode button
- Temperature/timer increasing button
- Drying mode button
- Fan mode button
- Temperature/timer decreasing button
- Timer button
INSTALLATION
The appliance requires being vented outside so that the exhaust air can escape the room which coming from the appliance contains waste heat and moisture.
Do not replace or extend the exhaust hose which will result in decreased efficiency, even worse shut down the unit due to low back pressure.
- The unit shall be installed on a flat surface where the air outlet would not be blocked. To ensure the proper air circulation, the required free space around the unit should be at least 50 cm.
• The unit shall not be installed in a laundry room.
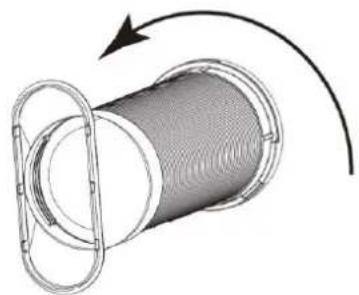
- Connect the hose connector to one end of the exhaust hose. Connect the window kit adapter to the other end of the exhaust hose.
natural_image
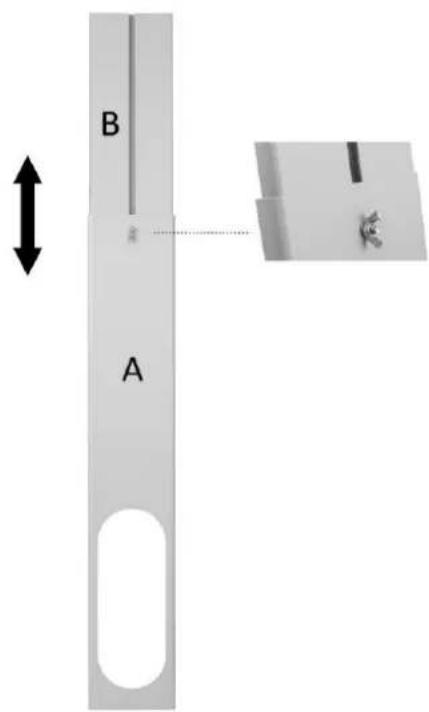
Diagram of a cylindrical mechanical component with a curved arrow indicating rotation or force direction (no text or symbols)- To assemble the window kit: make the board B slide beneath the board A; make the provided screw go through the small hole on board A while the flat side of the screw is embedded into the center groove of board B. Adjust the boards to the desired length fitting your window; screw on the washer and then the butterfly nut above to fix the connection of boards.
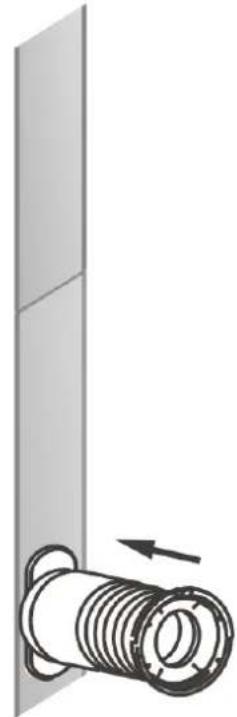
- Connect the exhaust hose onto the window kit by inserting the window kit adaptor into its place on board A.
natural_image
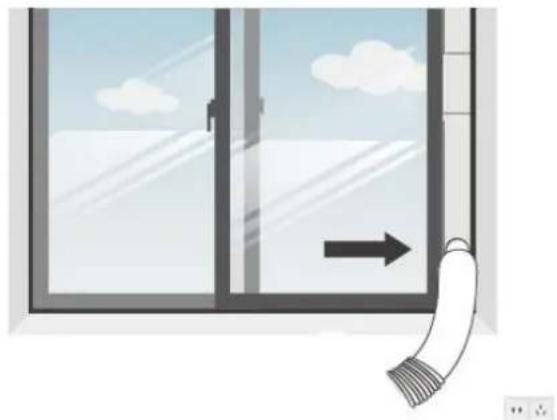
Diagram of a mechanical assembly with a cylindrical component and an arrow indicating direction (no text or symbols)- Close your window to secure the window kit in place. It is recommended that the gap between the window kit and the sides of window should be sealed off for a maximum efficiency.
natural_image
Illustration of a window with a scroll wheel and an arrow pointing right, no text or symbols present- Attach the hose connector onto the air exhaust outlet at the back of the unit.
- Adjust the length of the flexible exhaust hose, avoiding bends in the hose. Place the appliance near an appropriate electrical outlet.
natural_image
Line drawing of a portable air conditioner unit with ventilation grilles and control knobs (no text or symbols)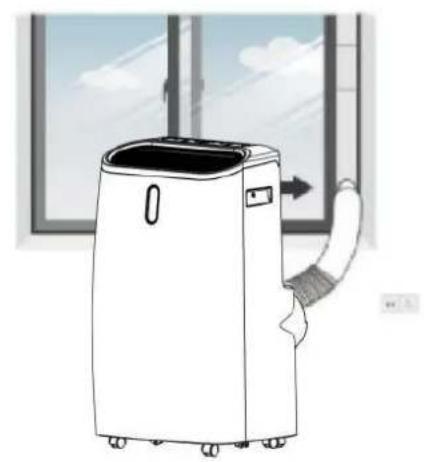
natural_image
Line drawing of a portable air conditioner unit with airflow path and window view (no text or symbols)OPERATION
*Always let the appliance rest for at least 2 hours after moving it from one location to another.
Before use, check up whether the exhaust hose has been mounted properly. Plug in the appliance.
1. Power button
Press the power button to turn on the appliance. The appliance will start to work.
Press the power button again, the appliance will be turned off.
2. Mode function
- Use the control panel: Press the mode button to choose your desired working mode among cooling, drying, fan and heating mode. The corresponding indicator light will turn on when the specific mode is selected.
- Use the remote control: Press the buttons directly on the remote control to choose your desired working mode. The corresponding indicator light will turn on when the specific mode is selected.
Note: The symbol “✿”/“✿” will illuminate on the front digital display to indicate the cooling / heating mode is selected. No symbol for drying or fan mode.
1) Cooling mode
When the room temperature is higher than the set temperature, the compressor starts to run.
When the room temperature is lower than the set temperature, the compressor stops and the fan operates at the set speed.
Note: When the compressor is working, the unit will vibrate slightly. This is normal and harmless.
2) Drying mode
The fan runs at low speed. The fan speed and temperature cannot be adjusted.
The compressor will work according to the room temperature as following:
| >25°C | The compressor will stop after 15 minutes of running and then run again after 3 minutes. |
| 20°C ≤ room temperature ≤ 25°C | The compressor will stop after 10 minutes of running and then run again after 3 minutes. |
| 15°C < room temperature < 20°C | The compressor will stop after 6 minutes of running and then run again after 3 minutes. |
| room temperature ≤ 15°C | The compressor will stop running and run again once the room temperature ≥ 17°C. |
3) Fan mode
The adjustment of temperature in fan mode is not effective.
In fan mode, the room air is circulated but not cooled.
4) Heating mode
When the room temperature is higher than the set temperature, the unit will stop the heating function. When the room temperature is lower than the set temperature, the unit will start the heating function.
3. Sleep button (only active in cooling mode and heating mode)
Press the sleep button to activate the sleep mode. The sleep indicator light turns on.
In sleep mode, the appliance automatically runs in low fan speed which cannot be changed.
- Under cooling mode: The set temperature increases by 1^ C per hour for the first two hours and then keep unchanged.
- Under heating mode: the set temperature decreases by 1^ C per hour for the first two hours and then keep unchanged.
After working 12 hours under sleep mode, the appliance will turn off automatically.
4. Temperature/timer increasing button & temperature/timer decreasing button
The temperature adjustment is only effective in the cooling mode and heating mode.
Press the button “▲”/“▼” to set your desired room temperature from 16°C to 32°C. The buttons can also be used for timer adjustment during timer setting. The value will be increased/decreased by 1 (°C/hour) for each press.
Note: In cooling or heating mode, the set temperature will be shown on the digital display; in fan or drying mode, the room temperature will be shown on the digital display.
5. Swing button
Press the swing button to activate the swing function, and the cover above the air outlet will swing slowly. To stop the swing, just press the button again.
6. Fan speed button
Press the fan speed button to select low speed, medium speed or high speed. The corresponding indicator light of fan speed will turn on. By the remote control, users can also select the "AUTO" speed under which the unit will adjust the fan speed automatically according to the room temperature.
Note: In drying mode, the fan speed cannot be selected. In heating mode, the fan speed will be adjusted automatically between low and high according to the temperature around the air outlet.
7. Timer button
Auto-ON setting
- When the appliance is OFF, press the timer button, the digital display will flash "00".
- Press the timer increasing or decreasing button to select a desired auto-ON time from 1 to 24 hours. The digital display will flash for several seconds, then the timer setting is confirmed. The timer-ON indicator light will illuminate.
- The appliance will automatically turn on once the select time passed.
Auto-OFF setting
- When the appliance is ON, press the timer button, the digital display will flash "00".
- Press the timer increasing or decreasing button to select a desired auto-OFF time from 1 to 24 hours. The digital display will flash for several seconds, then the timer setting is confirmed. The timer-ON indicator light will illuminate. The digital display will turn back to the temperature.
- The appliance will automatically turn off once the select time has passed.
To change the timer, press the timer button and press the button “▲”/“▼” to change the value, when it is set to 0 hour (“00”), the timer will be canceled and the timer-ON indicator light will turn off.
Note:
- To shift the temperature unit between Celsius and Fahrenheit, long press the mode button for 3 seconds when the appliance is on, or simply press the °C/°F conversion button on the remote control.
All the pictures are only for reference. Please see the real product for detailed information.
AUTOMATIC DEFROST
Under low room temperatures, the frost may build up at the evaporator during operation. The unit will automatically start defrosting and the indicator light of the power button will blink. The defrost control sequence is below:
When the unit is operating in cooling, heating or drying mode, and the evaporator coil temperature is below -1^ C, the compressor will stop operating for 10 minutes until the coil temperature rises up to 7^ C. The unit will then restart to work.
OVERLOAD PROTECTION
In the event of a power loss, to protect the compressor there is a 3-minute delay until the compressor restarts.
DRAIN WATER
Manual drainage:
There is condensing water recycling hidden in this appliance. The condensing water is partly kept recycling between the condenser and the water tray inside the appliance. When the water level rises to the upper level, the water-full code “Ft” will be shown on the digital display to remind of draining water.
Please cut off the power supply, move the appliance to a suitable place, pull out the stopper in the lower drain port to drain the water completely. After the draining, insert back the stopper to the lower drain port, otherwise the appliance may leak and make your room wet.
Continuous drainage:
For continuous use of the drying mode, heating mode or cooling mode, please use the provided drain hose to drain the water continuously. Please cut off the power supply and pull out the stopper in the upper drain port. Connect the provided drain hose to the upper drain port and drain water into a bucket. Make sure the outlet of the hose is over the bucket and the water could freely flow out of the unit.
Wi-Fi CONNECTION GUIDE (The guide for the APP may not be updated regularly due to software version upgrade or other reasons. This instruction is used as a guide only. Below mobile phone interface uses English version in iOS as an example.):
- Place the appliance within 5 meters to your router.
- Search "Smart Life – Smart Living" in App Store (for iOS) or Google play (for Android), or directly scan the QR code below, to download the application "Smart Life".

-
Sign up or log in to your account on the APP. Tap the "+" at right top or button "Add Device" to add your device.
-
Find "Large Home Appliances" and tap the icon "Portable Air Conditioner (Wi-Fi)".
Large Home Ap...
Small Home Appliances
Air Conditioner (NB-IoT)
Portable Air Conditioner (Wi-Fi)
Air conditioner (Wi-Fi)
You will get the prompt that asks you to use the 2.4 GHz Wi-Fi network. Note that the 5 GHz Wi-Fi is not supported by this application. Enter your Wi-Fi password and connect to the Wi-Fi. You will get Fig.1.
-
Now check if the Wi-Fi indicator light is blinking. If not, long press the timer button for 5 seconds on the control panel until the Wi-Fi indicator light blinks.
-
Tap "Next" on Fig.1. You will get Fig.2 that asks you to check the status of the indicator light.
If the Wi-Fi indicator light blinks quickly, tap "Blink Quickly". Wait until you get Fig.4 and then tap "Done" at the top right corner. Now you can operate your device in the control interface Fig.5. Tap buttons to set your appliance.
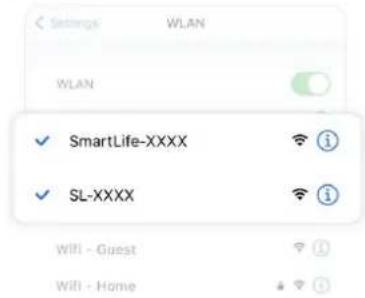
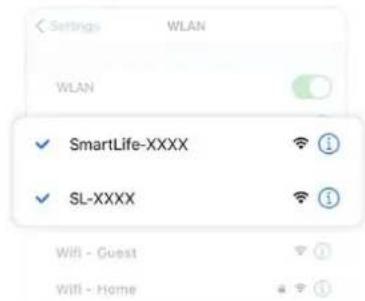
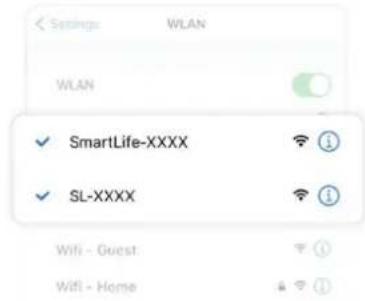
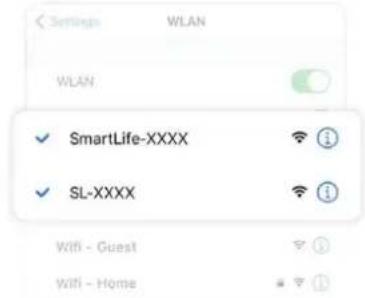
If the Wi-Fi indicator light blinks slowly, tap "Blink Slowly". Continue to tap "Go to Connect" in Fig. 3 to connect your mobile phone to the device's hotspot "SmartLife-XXXX". After the hotspot has been connected, go back to the App. Wait until you get Fig.4 and then tap "Done" at the top right corner. Now you can operate your device in the control interface Fig.5. Tap buttons to set your appliance.
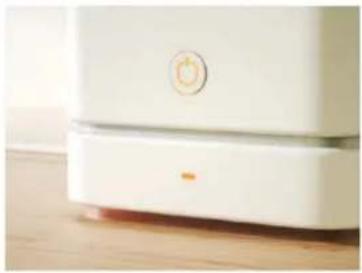
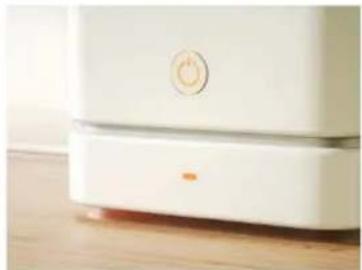
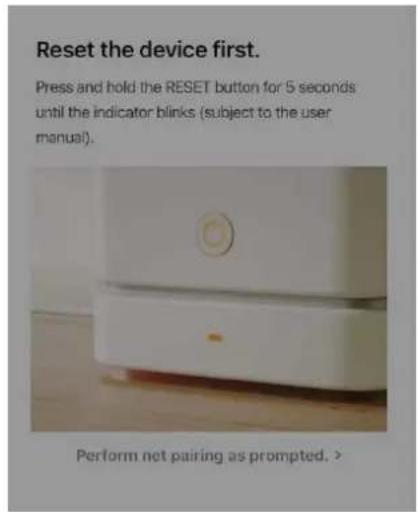
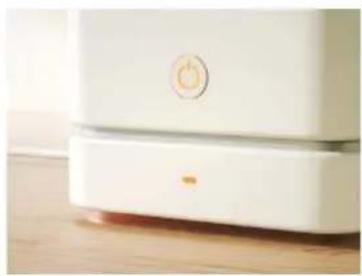
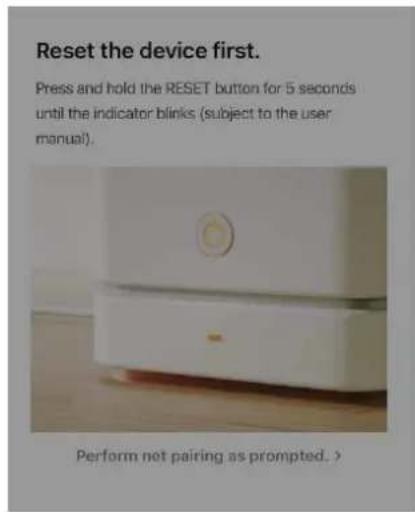
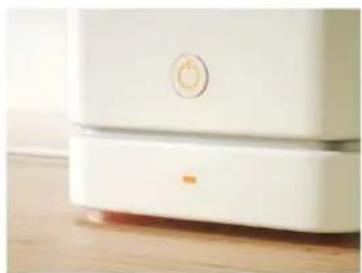
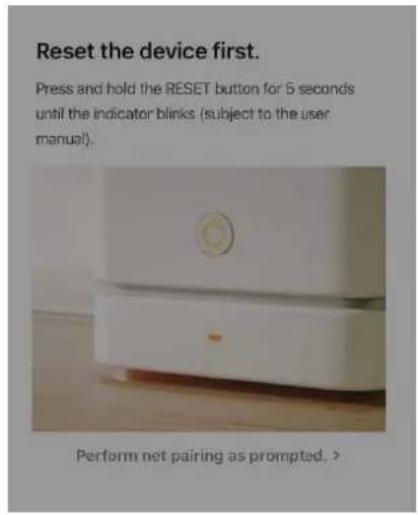
Reset the device first.
Press and hold the RESET button for 5 seconds until the indicator blinks (subject to the user manual).
natural_image
Close-up of a white appliance with a circular button and orange flame, placed on a wooden surface (no text or symbols visible)Perform net pairing as prompted.
Reset the device first.
Press and hold the RESET button for 5 seconds until the indicator blinks (subject to the user manual).
natural_image
Close-up of a white appliance with a power button and red mark on the base (no visible text or symbols)Perform net pairing as prompted.
Connect your mobile phone to the device's hotspot
- Connect the phone to the hotspot shown below.
- Go back to the app and continue to add devices.
Local Network AccessDevice might not be able to be connected if the access if not enabled.
Check the status of the indicator light:

Fig.1
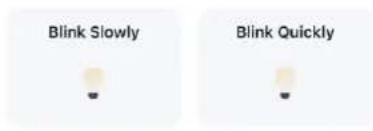
Fig.2

Fig.3
Added.

Air Condition-A012_B
Device added successfully
Done
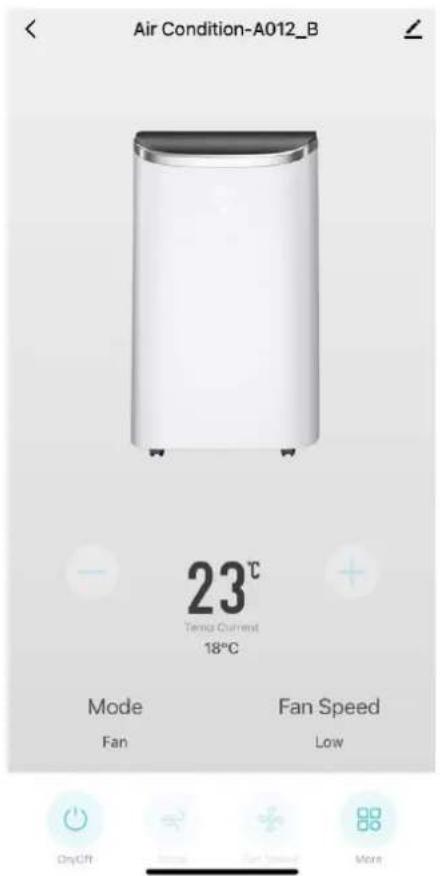
Fig.5
Fig.4
More functions:
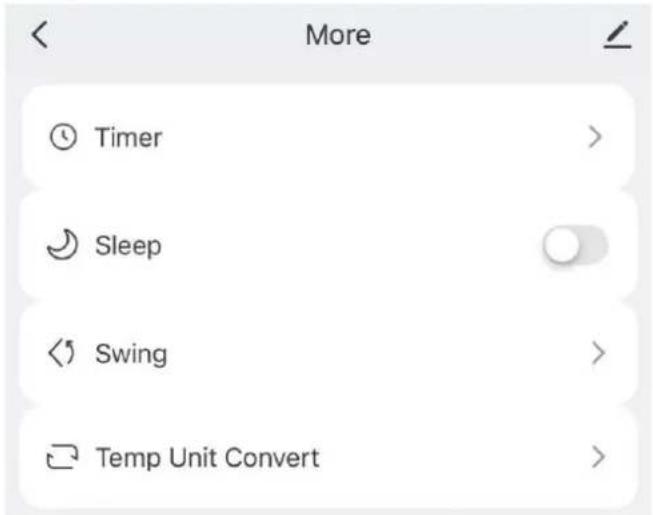
Tap the button "More", you can set the timer, sleep mode, swing function, and temperature unit conversion in °C/°F.
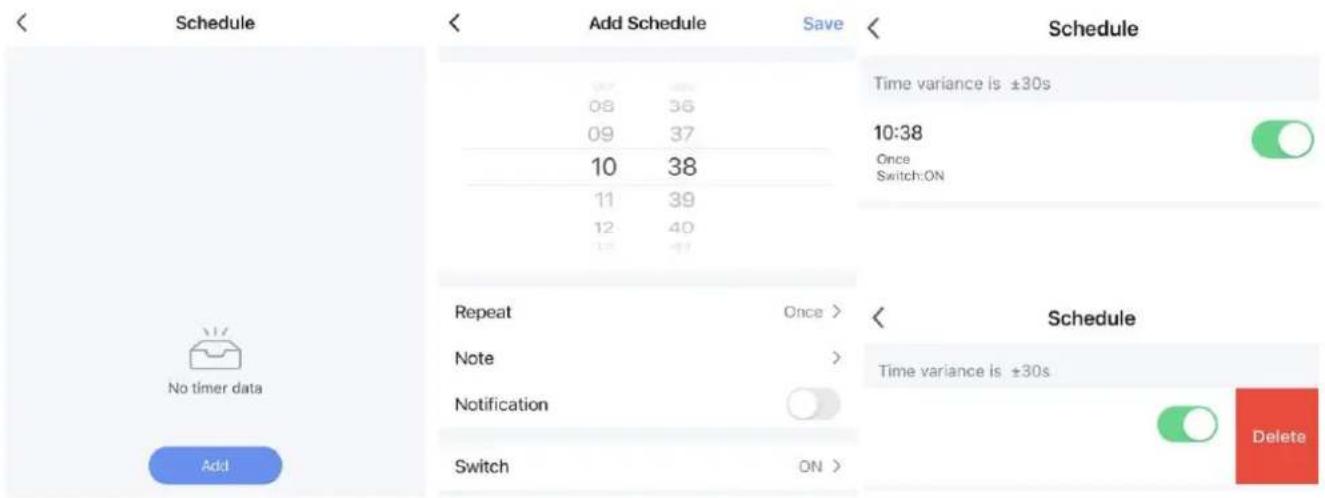
To set a timer, you need to add a schedule. After setting save the schedule by tapping "Save" at the top right corner. To delete the timer, slide the corresponding line to the left and tap "Delete".
Note:
- When the network environment for the appliance has been changed, it requires to be reconfigured.
- When the Wi-Fi indicator light blinks, the appliance is waiting to be paired. When the Wi-Fi indicator light illuminates still, the Wi-Fi has been connected. When the Wi-Fi indicator light goes out, the Wi-Fi has been shut off.
CLEANING AND MAINTENANCE
- Before cleaning or taking off any parts, be sure to disconnect the appliance from any electric supply outlet.
• Do not use gasoline or other chemicals to clean the appliance. - Do not wash the appliance directly.
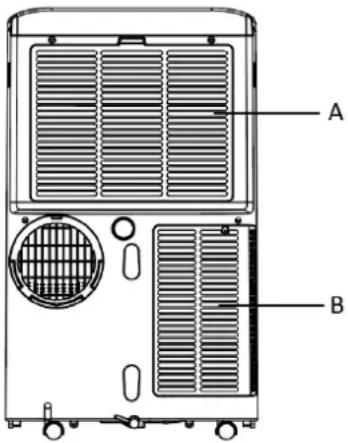
Clean the air filters (every two weeks)
Dust collects on the filters and restricts the airflow. The restricted airflow reduces the efficiency of the system and if the filter becomes blocked it can cause damage to the unit.
The air filters require regular cleaning. They are removable for easy cleaning. Do not operate the unit without air filters, or the evaporator (behind the air filter) may be contaminated.
- Remove the air filters A and B from the back of the unit by a screw driver.
- Use a vacuum cleaner to suck the dust from the filters.
- Turn the filters over and rinse them under the running water. Let the water run through the filters in the opposite direction of the air flow.
- Set aside and allow the filters to air dry completely before reinstalling.
Warning! Do not touch the evaporator surface with bare-hand, or it could cause injury to your fingers.
Clean the Surface
First clean the surface with a neutral detergent and wet cloth, and then wipe it with a dry cloth.
STORAGE
Long-Term Storage: If you will not use the unit for an extended period of time (more than a few weeks) it is best to clean the unit and dry it out completely. Please store the unit per the following steps:
- Unplug the unit and remove the exhaust hose and window kit. Store with the unit.
- Drain the remaining water from the unit.
- Clean the filters and let the filters dry completely in a shaded area.
- Re-install the filters.
- The unit must be kept in upright position when in storage.
- Keep the machine in ventilating, dry, non-corrosive gas and safe place indoors.
Attention:
The evaporator inside the machine has to be dried out before the unit is packed to avoid component damage and molds. Unplug the unit and place it in a dry open area for days to dry it out. Another way to dry the unit is to turn on the machine, adjust it to low-wind ventilation mode, and maintain this state until the drainage pipe becomes dry, so as to keep the inside of the body in a dry state and prevent it from mildewing.
TROUBLESHOOTING
| Troubles | Possible Causes | Solutions |
| The appliance is not running. | Check if the power is connected securely. | Connect the power properly. |
| Check if the water full code “Ft” displayed. | Drain the water. | |
| Normal operation of the appliance requires an ambient temperature in 5 °C – 35 °C. | Check the room temperature. When the room temperature is back to the range (5 °C – 35 °C), the appliance can be operated normally. | |
| Not cool enough in cooling mode | The doors or windows are not closed. | Make sure all the windows and doors are closed. |
| There are heat sources inside the room. | Remove the heat sources if possible. | |
| The air exhaust hose is not connected or blocked. | Connect or clean the air exhaust hose. | |
| Temperature setting is too high. | Reset the temperature. | |
| Air inlet or outlet is blocked. | Clean the air inlet or outlet. | |
| Noisy | The ground is not level or not flat enough. | Place the appliance on a flat, level surface if possible. |
| Check if there are any parts loose and vibrating. | Secure and tighten the parts. | |
| The sound comes from the flowing of the refrigerant inside the appliance. | It is normal. | |
| Code “E0” on the digital display | Communication faults between the main PCB and the display board. | Check the wire hardness of the display board. Contact authorized service technician for repair. |
| Code “E1” on the digital display | Room temperature sensor failed. | Replace the room temperature sensor. Contact authorized service technician for repair. |
| Code “E2” on the digital display | Evaporator temperature sensor failed. | Replace evaporator temperature sensor. Contact authorized service technician for repair. |
| Code “Ft” on the digital display | Water-full warning | Drain out the water. |
TECHNICAL DATA
Below data for your operating reference
| Model | PAC-127033.1 |
| Rated voltage | 220-240V |
| Rated frequency | 50Hz |
| Cooling Rated input/current | 1560W/6.9A |
| Heating Rated input/current | 1300W/5.8A |
| Cooling capacity | 4100W |
| Heating capacity | 3220W |
| Moisture removal (L/H) | 1.5 |
| Air flow | 410 m^3/h |
| Max. transmitting power | 20dBm |
| Frequency range | 2412 - 2472MHz |
ERP INFORMATION
| Value | |
| Trademark | Emerio |
| Model identification | PAC-127033.1 |
| Sound power (cooling) | 65 dB(A) |
| Sound power (heating) | 65 dB(A) |
| Name of refrigerant | R290 |
| Rated power input for cooling (kW) | 1.56 |
| Rated power input for heating (kW) | 1.30 |
| Rated energy efficiency ratio | 2.62 |
| Rated coefficient of performance | 2.48 |
| GWP (kgCO2eq) | 3 |
| Energy efficiency class | A |
| Energy consumption for double ducts appliances (kWh/h) | N.A |
| Energy consumption for single duct appliances (cooling) (kWh/h) | 1.56 |
| Energy consumption for single duct appliances (heating) (kWh/h) | 1.30 |
| Power consumption in thermostat-off mode (W) | N.A |
| Power consumption in stand-by mode (W) | 1.0 |
| Cooling capacity | 4100W |
| Heating capacity | 3220W |
| Refrigerant leakage contributes to climate change. Refrigerant with lower global warming potential (GWP) would contribute less to global warming than a refrigerant with higher GWP, if leaked to the atmosphere. This appliance contains a refrigerant fluid with a GWP equal to 3. This means that if 1 kg of this refrigerant fluid would be leaked to the atmosphere, the impact on global warming would be 3 times higher than 1 kg of CO2, over a period of 100 years. Never try to interfere with the refrigerant circuit yourself or disassemble the product yourself and always ask a professional.#Energy consumption 1.56 kWh (cooling) & 1.30 kWh (heating) for model PAC-127033.1 in 60 minutes of use under standard test conditions. The actual energy consumption depends on how the device is used and where it is located.For any additional information, please contact:Emerio Switzerland AGOberneuhofstrasse 16340 BaarSwitzerland | |
GUARANTEE AND CUSTOMER SERVICE
Before delivery our devices are subjected to rigorous quality control. If, despite all care, damage has occurred during production or transportation, please return the device to your dealer. In addition to statutory legal rights, the purchaser has an option to claim under the terms of the following guarantee:
For the purchased device we provide 2 years guarantee, commencing from the day of sale. If you have a defective product, you can directly go back to the point of purchase.
Defects which arise due to improper handling of the device and malfunctions due to interventions and repairs by third parties or the fitting of non-original parts are not covered by this guarantee. Always keep your receipt, without the receipt you can't claim any form of warranty. Damage caused by not following the instruction manual, will lead to a void of warranty, if this results in consequential damages then we will not be liable. Neither can we hold responsible for material damage or personal injury caused by improper use if the instruction manual is not properly executed. Damage to accessories does not mean free replacement of the whole appliance. In such case please contact our service department. Broken glass or breakage of plastic parts is always subject to a charge. Defects to consumables or parts subjected to wearing, as well as cleaning, maintenance, replacement of said parts or shipping and transportation costs to and from any place of repair are not covered by the warranty and are to be paid.
ENVIRONMENT FRIENDLY DISPOSAL
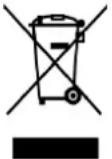
Recycling – European Directive 2012/19/EU
This marking indicates that this product should not be disposed with other household wastes. To prevent possible harm to the environment or human health from uncontrolled waste disposal, recycle it responsibly to promote the sustainable reuse of material resources. To return your used
device, please use the return and collection systems or contact the retailer where the product was purchased. They can take this product for environmental safe recycling.

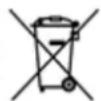
BATTERY MUST BE RECYCLED OR DISPOSED OF PROPERLY. DO NOT OPEN. DO NOT
DISPOSE OR IN FIRE OR SHORT CIRCUIT.
Emerio Switzerland AG
Oberneuhofstrasse 1
6340 Baar
Switzerland
INSTRUCTIONS FOR REPAIRING APPLIANCES CONTAINING R290
1. Servicing
1) Checks to the area
Prior to beginning work on systems containing flammable refrigerants, safety checks are necessary to ensure that the risk of ignition is minimised. For repair to the refrigerating system, the following precautions shall be complied with prior to conducting work on the system.
2) Work procedure
Work shall be undertaken under a controlled procedure so as to minimise the risk of a flammable gas or vapour being present while the work is being performed.
3) General work area
All maintenance staff and others working in the local area shall be instructed on the nature of work being carried out. Work in confined spaces shall be avoided. The area around the workspace shall be sectioned off. Ensure that the conditions within the area have been made safe by control of flammable material.
4) Checking for presence of refrigerant
The area shall be checked with an appropriate refrigerant detector prior to and during work, to ensure the technician is aware of potentially flammable atmospheres. Ensure that the leak detection equipment being used is suitable for use with flammable refrigerants, i.e. non-sparking, adequately sealed or intrinsically safe.
5) Presence of fire extinguisher
If any hot work is to be conducted on the refrigeration equipment or any associated parts, appropriate fire extinguishing equipment shall be available to hand. Have a dry powder or CO_2 fire extinguisher adjacent to the charging area.
6) No ignition sources
No person carrying out work in relation to a refrigeration system which involves exposing any pipe work that contains or has contained flammable refrigerant shall use any sources of ignition in such a manner that it may lead to the risk of fire or explosion. All possible ignition sources, including cigarette smoking, should be kept sufficiently far away from the site of installation, repairing, removing and disposal, during which flammable refrigerant can possibly be released to the surrounding space. Prior to work taking place, the area around the equipment is to be surveyed to make sure that there are no flammable hazards or ignition risks. “No Smoking” signs shall be displayed.
7) Ventilated area
Ensure that the area is in the open or that it is adequately ventilated before breaking into the system or conducting any hot work. A degree of ventilation shall continue during the period that the work is carried out. The ventilation should safely disperse any released refrigerant and preferably expel it externally into the atmosphere.
8) Checks to the refrigeration equipment
Where electrical components are being changed, they shall be fit for the purpose and to the correct specification. At all times the manufacturer's maintenance and service guidelines shall be followed. If in doubt consult the manufacturer's technical department for assistance.
The following checks shall be applied to installations using flammable refrigerants:
- The charge size is in accordance with the room size within which the refrigerant containing parts are installed;
– The ventilation machinery and outlets are operating adequately and are not obstructed;
- If an indirect refrigerating circuit is being used, the secondary circuit shall be checked for the presence of refrigerant;
- Marking to the equipment continues to be visible and legible. Markings and signs that are illegible shall be corrected;
- Refrigeration pipe or components are installed in a position where they are unlikely to be exposed to any
substance which may corrode refrigerant containing components, unless the components are constructed of materials which are inherently resistant to being corroded or are suitably protected against being so corroded.
9) Checks to electrical devices
Repair and maintenance to electrical components shall include initial safety checks and component inspection procedures. If a fault exists that could compromise safety, then no electrical supply shall be connected to the circuit until it is satisfactorily dealt with. If the fault cannot be corrected immediately but it is necessary to continue operation, an adequate temporary solution shall be used. This shall be reported to the owner of the equipment so all parties are advised. Initial safety checks shall include:
- That capacitors are discharged: this shall be done in a safe manner to avoid possibility of sparking;
- That there no live electrical components and wiring are exposed while charging, recovering or purging the system;
- That there is continuity of earth bonding.
2. Repairs to sealed components
1) During repairs to sealed components, all electrical supplies shall be disconnected from the equipment being worked upon prior to any removal of sealed covers, etc. If it is absolutely necessary to have an electrical supply to equipment during servicing, then a permanently operating form of leak detection shall be located at the most critical point to warn of a potentially hazardous situation.
2) Particular attention shall be paid to the following to ensure that by working on electrical components, the casing is not altered in such a way that the level of protection is affected. This shall include damage to cables, excessive number of connections, terminals not made to original specification, damage to seals, incorrect fitting of glands, etc.
Ensure that apparatus is mounted securely. Ensure that seals or sealing materials have not degraded such that they no longer serve the purpose of preventing the ingress of flammable atmospheres. Replacement parts shall be in accordance with the manufacturer's specifications.
NOTE: The use of silicon sealant may inhibit the effectiveness of some types of leak detection equipment. Intrinsically safe components do not have to be isolated prior to working on them.
3. Repair to intrinsically safe components
Do not apply any permanent inductive or capacitance loads to the circuit without ensuring that this will not exceed the permissible voltage and current permitted for the equipment in use. Intrinsically safe components are the only types that can be worked on while live in the presence of a flammable atmosphere. The test apparatus shall be at the correct rating. Replace components only with parts specified by the manufacturer. Other parts may result in the ignition of refrigerant in the atmosphere from a leak.
4. Cabling
Check that cabling will not be subject to wear, corrosion, excessive pressure, vibration, sharp edges or any other adverse environmental effects. The check shall also take into account the effects of aging or continual vibration from sources such as compressors or fans.
5. Detection of flammable refrigerants
Under no circumstances shall potential sources of ignition be used in the searching for or detection of refrigerant leaks. A halide torch (or any other detector using a naked flame) shall not be used.
6. Leak detection methods
The following leak detection methods are deemed acceptable for systems containing flammable refrigerants. Electronic leak detectors shall be used to detect flammable refrigerants, but the sensitivity may not be adequate, or may need re-calibration. (Detection equipment shall be calibrated in a refrigerant-free area.) Ensure that the detector is not a potential source of ignition and is suitable for the refrigerant used. Leak
detection equipment shall be set at a percentage of the LFL of the refrigerant and shall be calibrated to the refrigerant employed and the appropriate percentage of gas (25 % maximum) is confirmed. Leak detection fluids are suitable for use with most refrigerants but the use of detergents containing chlorine shall be avoided as the chlorine may react with the refrigerant and corrode the copper pipe-work. If a leak is suspected, all naked flames shall be removed/ extinguished. If a leakage of refrigerant is found which requires brazing, all of the refrigerant shall be recovered from the system, or isolated (by means of shut off valves) in a part of the system remote from the leak. Oxygen free nitrogen (OFN) shall then be purged through the system both before and during the brazing process.
7. Removal and evacuation
When breaking into the refrigerant circuit to make repairs – or for any other purpose – conventional procedures shall be used. However, it is important that best practice is followed since flammability is a consideration. The following procedure shall be adhered to:
- Remove refrigerant;
- Purge the circuit with inert gas;
- Evacuate;
- Purge again with inert gas;
- Open the circuit by cutting or brazing.
The refrigerant charge shall be recovered into the correct recovery cylinders. The system shall be “flushed” with OFN to render the unit safe. This process may need to be repeated several times. Compressed air or oxygen shall not be used for this task. Flushing shall be achieved by breaking the vacuum in the system with OFN and continuing to fill until the working pressure is achieved, then venting to atmosphere, and finally pulling down to a vacuum. This process shall be repeated until no refrigerant is within the system. When the final OFN charge is used, the system shall be vented down to atmospheric pressure to enable work to take place. This operation is absolutely vital if brazing operations on the pipe-work are to take place. Ensure that the outlet for the vacuum pump is not close to any ignition sources and there is ventilation available.
8. Charging procedures
In addition to conventional charging procedures, the following requirements shall be followed.
- Ensure that contamination of different refrigerants does not occur when using charging equipment. Hoses or lines shall be as short as possible to minimise the amount of refrigerant contained in them.
– Cylinders shall be kept upright. - Ensure that the refrigeration system is earthed prior to charging the system with refrigerant.
- Label the system when charging is complete (if not already).
– Extreme care shall be taken not to overfill the refrigeration system.
Prior to recharging the system it shall be pressure tested with OFN. The system shall be leak tested on completion of charging but prior to commissioning. A follow up leak test shall be carried out prior to leaving the site.
9. Decommissioning
Before carrying out this procedure, it is essential that the technician is completely familiar with the equipment and all its detail. It is recommended good practice that all refrigerants are recovered safely. Prior to the task being carried out, an oil and refrigerant sample shall be taken in case analysis is required prior to re-use of reclaimed refrigerant. It is essential that electrical power is available before the task is commenced.
a) Become familiar with the equipment and its operation.
b) Isolate system electrically.
c) Before attempting the procedure ensure that:
- Mechanical handling equipment is available, if required for handling refrigerant cylinders;
- All personal protective equipment is available and being used correctly;
- The recovery process is supervised at all times by a competent person;
- Recovery equipment and cylinders conform to the appropriate standards.
d) Pump down refrigerant system, if possible.
e) If a vacuum is not possible, make a manifold so that refrigerant can be removed from various parts of the system.
f) Make sure that cylinder is situated on the scales before recovery takes place.
g) Start the recovery machine and operate in accordance with manufacturer's instructions.
h) Do not overfill cylinders. (No more than 80 % volume liquid charge).
i) Do not exceed the maximum working pressure of the cylinder, even temporarily.
j) When the cylinders have been filled correctly and the process completed, make sure that the cylinders and the equipment are removed from site promptly and all isolation valves on the equipment are closed off.
k) Recovered refrigerant shall not be charged into another refrigeration system unless it has been cleaned and checked.
10. Labelling
Equipment shall be labelled stating that it has been de-commissioned and emptied of refrigerant. The label shall be dated and signed. Ensure that there are labels on the equipment stating the equipment contains flammable refrigerant.
11. Recovery
When removing refrigerant from a system, either for servicing or decommissioning, it is recommended good practice that all refrigerants are removed safely. When transferring refrigerant into cylinders, ensure that only appropriate refrigerant recovery cylinders are employed. Ensure that the correct number of cylinders for holding the total system charge is available. All cylinders to be used are designated for the recovered refrigerant and labelled for that refrigerant (i.e. special cylinders for the recovery of refrigerant). Cylinders shall be complete with pressure relief valve and associated shut-off valves in good working order. Empty recovery cylinders are evacuated and, if possible, cooled before recovery occurs. The recovery equipment shall be in good working order with a set of instructions concerning the equipment that is at hand and shall be suitable for the recovery of flammable refrigerants. In addition, a set of calibrated weighing scales shall be available and in good working order. Hoses shall be complete with leak-free disconnect couplings and in good condition. Before using the recovery machine, check that it is in satisfactory working order, has been properly maintained and that any associated electrical components are sealed to prevent ignition in the event of a refrigerant release. Consult manufacturer if in doubt. The recovered refrigerant shall be returned to the refrigerant supplier in the correct recovery cylinder, and the relevant Waste Transfer Note arranged. Do not mix refrigerants in recovery units and especially not in cylinders. If compressors or compressor oils are to be removed, ensure that they have been evacuated to an acceptable level to make certain that flammable refrigerant does not remain within the lubricant. The evacuation process shall be carried out prior to returning the compressor to the suppliers. Only electric heating to the compressor body shall be employed to accelerate this process. When oil is drained from a system, it shall be carried out safely.
Competence of service personnel
General
Special training additional to usual refrigerating equipment repair procedures is required when equipment with flammable refrigerants is affected.
In many countries, this training is carried out by national training organisations that are accredited to teach the relevant national competency standards that may be set in legislation.
The achieved competence should be documented by a certificate.
Training
The training should include the substance of the following:
Information about the explosion potential of flammable refrigerants to show that flammables may be dangerous when handled without care.
Information about potential ignition sources, especially those that are not obvious, such as lighters, light switches, vacuum cleaners, electric heaters.
Information about the different safety concepts:
Unventilated – Safety of the appliance does not depend on ventilation of the housing. Switching off the appliance or opening of the housing has no significant effect on the safety. Nevertheless, it is possible that leaking refrigerant may accumulate inside the enclosure and flammable atmosphere will be released when the enclosure is opened.
Ventilated enclosure – Safety of the appliance depends on ventilation of the housing. Switching off the appliance or opening of the enclosure has a significant effect on the safety. Care should be taken to ensure a sufficient ventilation before.
Ventilated room – Safety of the appliance depends on the ventilation of the room. Switching off the appliance or opening of the housing has no significant effect on the safety. The ventilation of the room shall not be switched off during repair procedures.
Information about the concept of sealed components and sealed enclosures according to IEC 60079-15:2010.
Information about the correct working procedures:
a) Commissioning
- Ensure that the floor area is sufficient for the refrigerant charge or that the ventilation hose is assembled in a correct manner.
- Connect the pipes and carry out a leak test before charging with refrigerant.
- Check safety equipment before putting into service.
b) Maintenance
- Portable equipment shall be repaired outside or in a workshop specially equipped for servicing units with flammable refrigerants.
- Ensure sufficient ventilation at the repair place.
- Be aware that malfunction of the equipment may be caused by refrigerant loss and a refrigerant leak is possible.
- Discharge capacitors in a way that won't cause any spark. The standard procedure to short circuit the capacitor terminals usually creates sparks.
- Reassemble sealed enclosures accurately. If seals are worn, replace them.
- Check safety equipment before putting into service.
c) Repair
- Portable equipment shall be repaired outside or in a workshop specially equipped for servicing units with flammable refrigerants.
- Ensure sufficient ventilation at the repair place.
- Be aware that malfunction of the equipment may be caused by refrigerant loss and a refrigerant leak is possible.
- Discharge capacitors in a way that won't cause any spark.
- When brazing is required, the following procedures shall be carried out in the right order:
- Remove the refrigerant. If the recovery is not required by national regulations, drain the refrigerant to the outside. Take care that the drained refrigerant will not cause any danger. In doubt, one person should guard the outlet. Take special care that drained refrigerant will not float back into the building.
- Evacuate the refrigerant circuit.
- Purge the refrigerant circuit with nitrogen for 5 min.
- Evacuate again.
- Remove parts to be replaced by cutting, not by flame.
– Purge the braze point with nitrogen during the brazing procedure.
- Carry out a leak test before charging with refrigerant.
- Reassemble sealed enclosures accurately. If seals are worn, replace them.
- Check safety equipment before putting into service.
d) Decommissioning
- If the safety is affected when the equipment is put out of service, the refrigerant charge shall be removed before decommissioning.
- Ensure sufficient ventilation at the equipment location.
- Be aware that malfunction of the equipment may be caused by refrigerant loss and a refrigerant leak is possible.
- Discharge capacitors in a way that won't cause any spark.
- Remove the refrigerant. If the recovery is not required by national regulations, drain the refrigerant to the outside. Take care that the drained refrigerant will not cause any danger. In doubt, one person should guard the outlet. Take special care that drained refrigerant will not float back into the building.
• Evacuate the refrigerant circuit. - Purge the refrigerant circuit with nitrogen for 5 min.
- Evacuate again.
- Fill with nitrogen up to atmospheric pressure.
- Put a label on the equipment that the refrigerant is removed.
e) Disposal
- Ensure sufficient ventilation at the working place.
- Remove the refrigerant. If the recovery is not required by national regulations, drain the refrigerant to the outside. Take care that the drained refrigerant will not cause any danger. In doubt, one person should guard the outlet. Take special care that drained refrigerant will not float back into the building.
• Evacuate the refrigerant circuit. - Purge the refrigerant circuit with nitrogen for 5 min.
- Evacuate again.
- Cut out the compressor and drain the oil.
Transportation, marking and storage for units that employ flammable refrigerants
Transport of equipment containing flammable refrigerants
Attention is drawn to the fact that additional transportation regulations may exist with respect to equipment containing flammable gas. The maximum number of pieces of equipment or the configuration of the equipment, permitted to be transported together will be determined by the applicable transport regulations.
Marking of equipment using signs
Signs for similar appliances used in a work area generally are addressed by local regulations and give the minimum requirements for the provision of safety and/or health signs for a work location.
All required signs are to be maintained and employers should ensure that employees receive suitable and sufficient instruction and training on the meaning of appropriate safety signs and the actions that need to be taken in connection with these signs.
The effectiveness of signs should not be diminished by too many signs being placed together.
Any pictograms used should be as simple as possible and contain only essential details.
Disposal of equipment using flammable refrigerants
See national regulations.
Storage of equipment/appliances
The storage of equipment should be in accordance with the manufacturer's instructions.
Storage of packed (unsold) equipment
Storage package protection should be constructed such that mechanical damage to the equipment inside the package will not cause a leak of the refrigerant charge.
The maximum number of pieces of equipment permitted to be stored together will be determined by local regulations.
SICHERHEITSHINWEISE
natural_image
Diagram of a cylindrical mechanical component with a curved arrow indicating rotation or force direction (no text or symbols)natural_image
Diagram of a mechanical assembly with a cylindrical component and an arrow indicating direction (no text or symbols)natural_image
Illustration of a window with a curved pipe extending into the corner, showing a light blue sky and cloud background (no text or symbols)natural_image
Line drawing of a portable air conditioner unit with ventilation grilles and control panel (no text or symbols)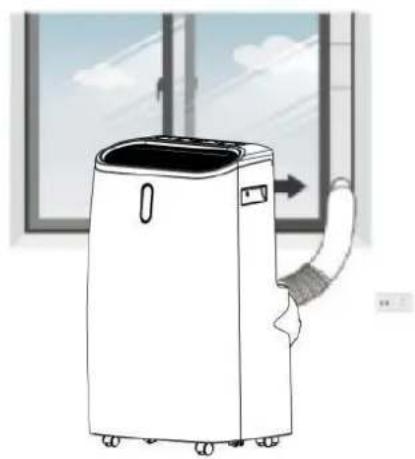
natural_image
Line drawing of a white air conditioner unit with a handle, placed near a window (no text or symbols)BETRIEB
Small Home Appliances
Air Conditioner (NB-IoT)
Portable Air Conditioner (Wi-Fi)
Air conditioner (Wi-Fi)
Reset the device first.
Press and hold the RESET button for 5 seconds until the indicator blinks (subject to the user manual).
natural_image
Close-up of a white appliance with a circular button and orange mark, placed on a wooden floor (no visible text or symbols)Perform net pairing as prompted. >
Check the status of the indicator light:
Connect your mobile phone to the device's hotspot
- Connect the phone to the hotspot shown below.
- Go back to the app and continue to add devices.
Local Network AccessDevice might not be able to be connected if the access if not enabled.

Abb. 1
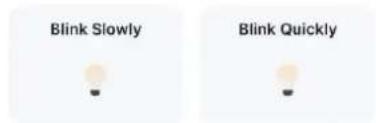
Abb. 3

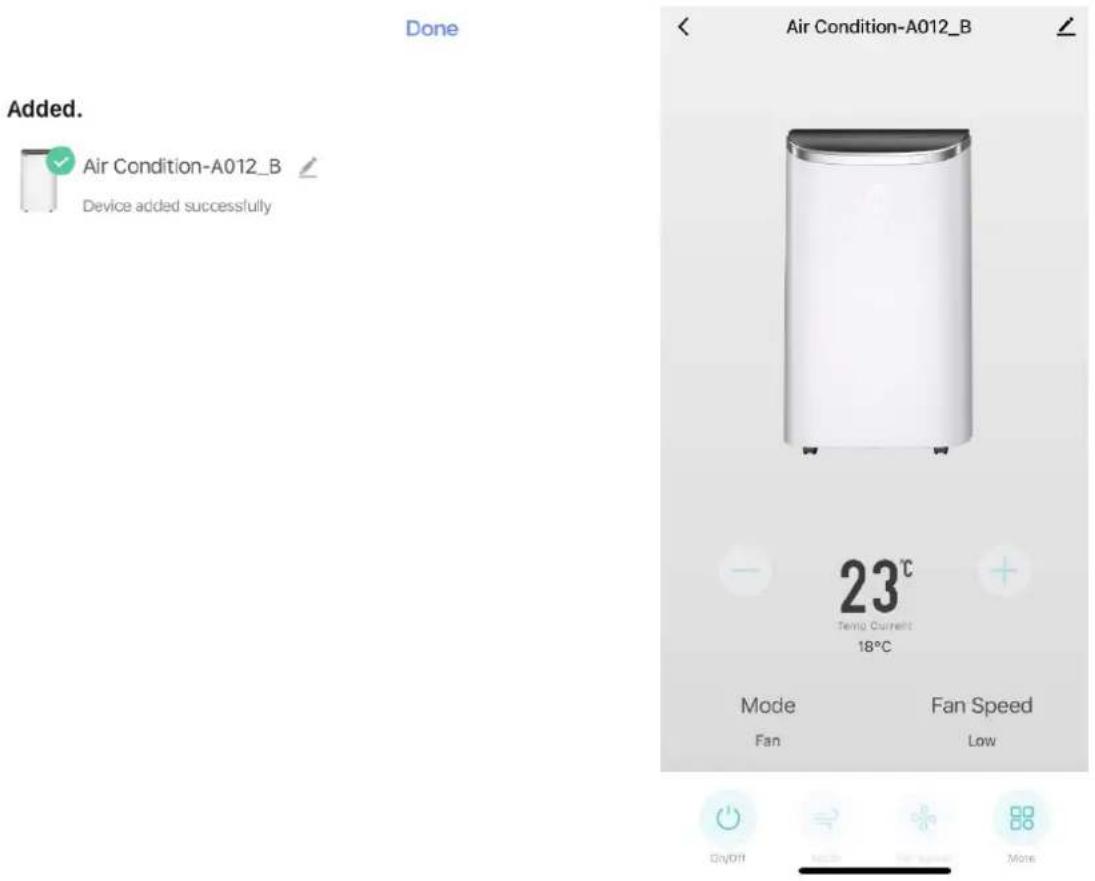
Abb. 4 Abb. 5
Mehr Funktionen:
Hinweis:
Emerio Switzerland AG
Oberneuhofstrasse 1
6340 Baar
Switzerland
natural_image
Diagram of a cylindrical mechanical component with internal mesh structure and curved arrow indicating rotation (no text or symbols)natural_image
Diagram of a mechanical assembly with a spring-loaded component and an arrow indicating direction (no text or symbols)natural_image
Illustration of a window with a scroll wheel and an arrow pointing right, no text or symbols presentnatural_image
Line drawing of a portable air conditioner unit with ventilation grilles and control panel (no text or symbols)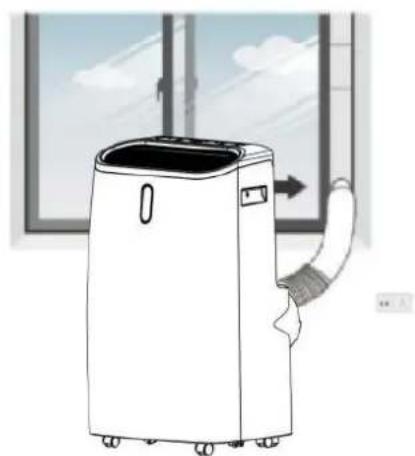
natural_image
Line drawing of a portable air conditioner unit with airflow direction indicated (no text or symbols)FONCTIONNEMENT
Small Home Appliances

Air Conditioner (NB-IoT)

Portable Air Conditioner (Wi-Fi)

Air conditioner (Wi-Fi)
Reset the device first.
Press and hold the RESET button for 5 seconds until the indicator blinks (subject to the user manual).
natural_image
Close-up of a white electronic device with a power button and base, placed on a wooden surface (no visible text or symbols)Perform net pairing as prompted.
Check the status of the indicator light:
Connect your mobile phone to the device's hotspot
- Connect the phone to the hotspot shown below.
- Go back to the app and continue to add devices.
Local Network AccessDevice might not be able to be connected if the access if not enabled.
Fig.1
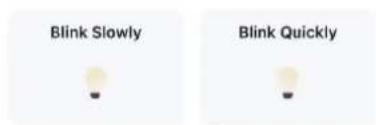
Fig.2

Fig.3
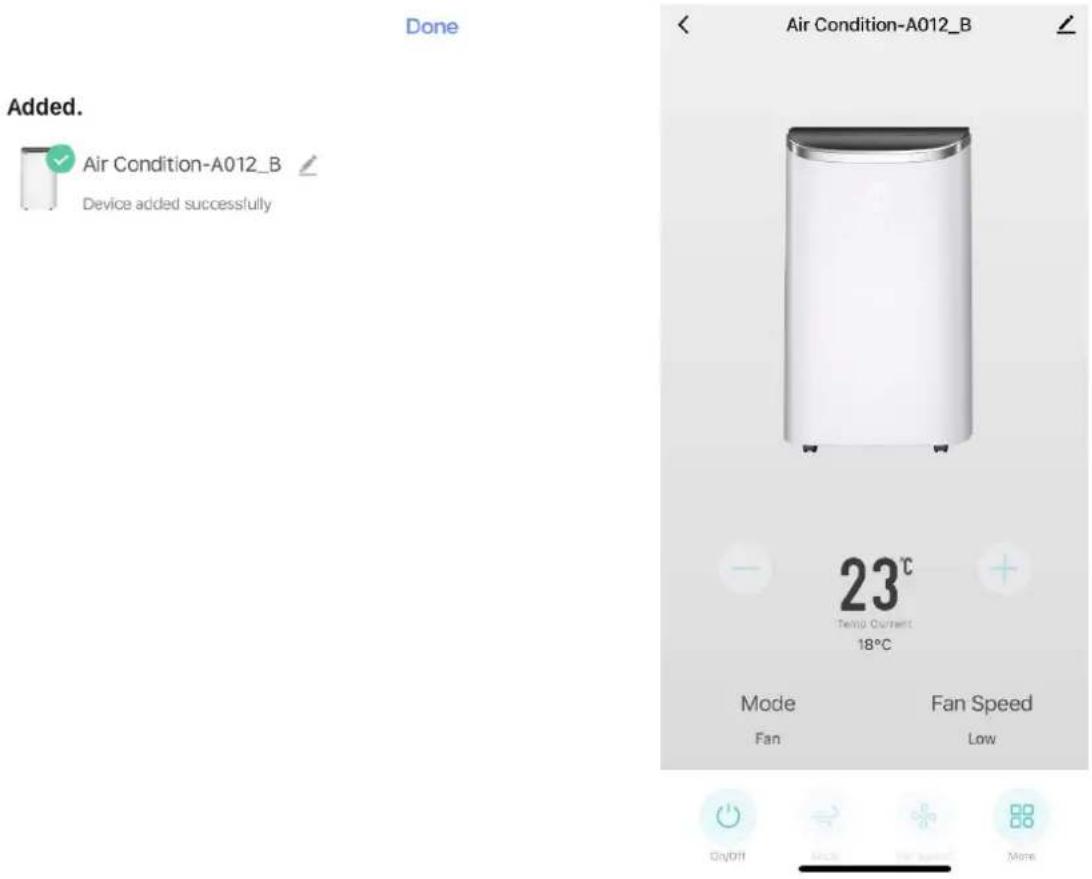
Fig.4
Fig.5
Autres fonctions :
Remarque :
Emerio Switzerland AG
Oberneuhofstrasse 1
6340 Baar
Switzerland
INSTRUCTIONS POUR LA RÉPARATION DES APPAREILS CONTENANT DU R290
1. Réparation
natural_image
Diagram of a cylindrical mechanical component with a curved arrow indicating rotation or motion (no text or symbols)natural_image
Diagram of a mechanical assembly with a cylindrical component and a vertical panel, showing motion direction (no text or symbols)natural_image
Illustration of a window with a glass door and light reflections, showing an arrow pointing right (no text or symbols)natural_image
Line drawing of a portable air conditioner unit with ventilation grilles and control panel (no text or symbols)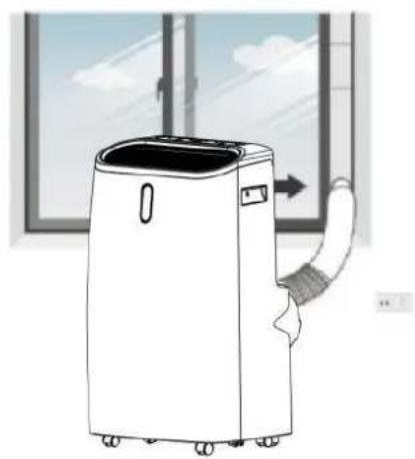
natural_image
Line drawing of a portable air conditioner unit with airflow direction indicated by an arrow (no text or symbols)UTILIZZO
Reset the device first.
Press and hold the RESET button for 5 seconds until the indicator blinks (subject to the user manual).
natural_image
Close-up of a white appliance with a circular button and orange indicator knob, placed on a wooden surface (no text or symbols visible)Perform net pairing as prompted. >
Connect your mobile phone to the device's hotspot
- Connect the phone to the hotspot shown below.
- Go back to the app and continue to add devices.
Local Network AccessDevice might not be able to be connected if the access if not enabled.
Fig.1
Check the status of the indicator light:
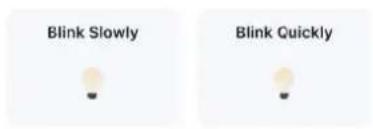
Fig.2

Fig.3
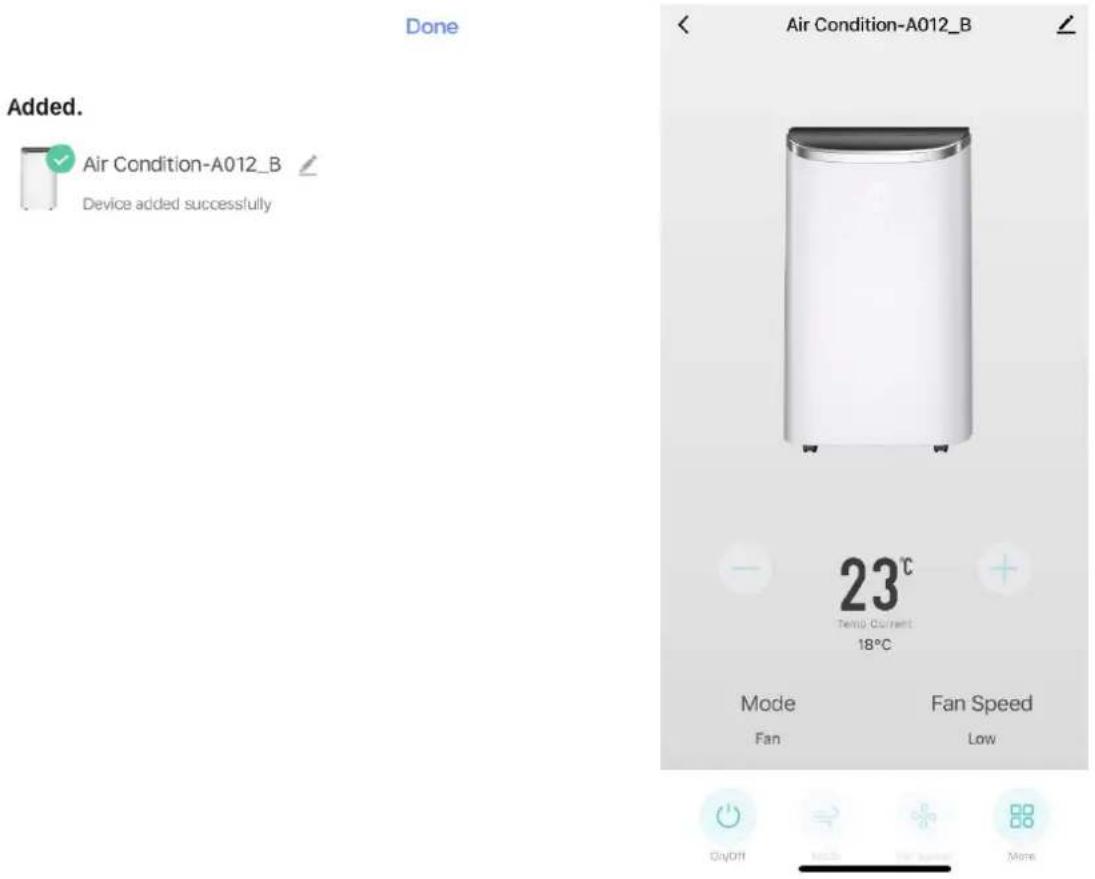
Fig.4
Fig.5
Altre funzioni
Note
Emerio Switzerland AG
Oberneuhofstrasse 1
6340 Baar
Switzerland
ISTRUZIONI PER LA RIPARAZIONE DI APPARECCHI CONTENENTI R290
- Control panel
- Remote control
- INSTALLATION
- OPERATION
- Power button
- Mode function
- 1) Cooling mode
- 2) Drying mode
- 3) Fan mode
- 4) Heating mode
- Sleep button (only active in cooling mode and heating mode)
- Temperature/timer increasing button & temperature/timer decreasing button
- Swing button
- Fan speed button
- Timer button
- Auto-ON setting
- Auto-OFF setting
- Note:
- AUTOMATIC DEFROST
- OVERLOAD PROTECTION
- DRAIN WATER
- Manual drainage:
- Continuous drainage:
- Wi-Fi CONNECTION GUIDE (The guide for the APP may not be updated regularly due to software version upgrade or other reasons. This instruction is used as a guide only. Below mobile phone interface uses English version in iOS as an example.):
- Reset the device first.
- Connect your mobile phone to the device's hotspot
- Added.
- More functions:
- CLEANING AND MAINTENANCE
- Clean the air filters (every two weeks)
- Clean the Surface
- STORAGE
- Attention:
- TECHNICAL DATA
- GUARANTEE AND CUSTOMER SERVICE
- ENVIRONMENT FRIENDLY DISPOSAL
- INSTRUCTIONS FOR REPAIRING APPLIANCES CONTAINING R290
- Servicing
- 9) Checks to electrical devices
- Repairs to sealed components
- Repair to intrinsically safe components
- Cabling
- Detection of flammable refrigerants
- Leak detection methods
- Removal and evacuation
- Charging procedures
- Decommissioning
- Labelling
- Recovery
- Competence of service personnel
- General
- Training
- d) Decommissioning
- e) Disposal
- Transportation, marking and storage for units that employ flammable refrigerants
- Transport of equipment containing flammable refrigerants
- Marking of equipment using signs
- Disposal of equipment using flammable refrigerants
- Storage of equipment/appliances
- SICHERHEITSHINWEISE
- BETRIEB
- Mehr Funktionen:
- Hinweis:
- FONCTIONNEMENT
- Autres fonctions :
- Remarque :
- INSTRUCTIONS POUR LA RÉPARATION DES APPAREILS CONTENANT DU R290
- Réparation
- UTILIZZO
- Altre funzioni
- Note
- ISTRUZIONI PER LA RIPARAZIONE DI APPARECCHI CONTENENTI R290
Brand : Emerio
Model : PAC127033.1
Category : Air Conditioning