
25086 - Food thermometer Rösle - Free user manual and instructions
Find the device manual for free 25086 Rösle in PDF.
| Product type | Digital food thermometer (probe thermometer) |
| Brand | Rösle |
| Model | 25086 |
| Power supply | 2 CR2032 button cell batteries (3V) |
| Measuring range | -20 °C to +250 °C |
| Main functions | Cooking temperature measurement, timer, alarm, meat selection (beef, veal, pork, lamb, poultry), manual adjustment |
| Use | Oven (except grill program) and barbecue/grill |
| Display | Digital screen with meat temperature, ambient temperature, target temperature, timer |
| Available languages | German, English, French |
| Probe type | Wired probe with two sensors (meat and ambient temperature) |
| Cable length | 1 meter |
| Care | Clean with a damp cloth; do not immerse or wash in dishwasher |
| Safety | Hot probe, use gloves; do not expose to >250 °C; keep out of reach of children |
| Batteries | 2x CR2032 (included) |
| Dimensions (approx.) | 70 x 50 x 20 mm |
| Weight (approx.) | 50 g |
| Material | Plastic, stainless steel (probe) |
| Color | Black/silver |
| Included accessories | Probe, batteries, folding stand, magnets on back |
| Reparability | User-replaceable batteries |
Frequently Asked Questions - 25086 Rösle
User questions about 25086 Rösle
0 question about this device. Answer the ones you know or ask your own.
Ask a new question about this device
Download the instructions for your Food thermometer in PDF format for free! Find your manual 25086 - Rösle and take your electronic device back in hand. On this page are published all the documents necessary for the use of your device. 25086 by Rösle.
USER MANUAL 25086 Rösle
natural_image
Technical line drawing of a device casing with labeled components (no text or symbols)Abbildung 1
text_image
CR-2032 CR-2032Abbildung 6
Thank you for choosing the high quality Thermometer digital from RÖSLE. It’s a wise choice and one that will prove the test of time as a durable top quality product. To make sure you get optimum results and long-lasting service from your new kitchen accessory, we’ve compiled some important information plus tips for optimal use and aftercare, as well as important safety guidelines.
Outstanding product features at a glance:
The Thermometer digital from RÖSLE is a reliable and practical aid for roasting and grilling.
→Digital Thermometer to determine the core temperature
→ Easy to operate with pre-set temperature values for beef, veal, pork, lamb and poultry
→Temperature settings can be set manually if desired
→For use at the grill and in the oven
→Measuring range -20 °C to +250 °C / -4 °F to +482 °F
→ Probe with two sensors gives reliable core and ambient temperature readings
→Display language selectable from English, French or German
→With integrated timer
→Magnets integrated into back plate
→Uses commonly available batteries (2 pieces of type CR2032, 3V)
1. Close-up on the Thermometer digital
1 Setting dial
2 Set Button
3 On / Off
4 Socket to attach Probe
5 Switch Thermometer / Timer

natural_image
Technical line drawing of a device casing with labeled components (no text or symbols)figure 1
text_image
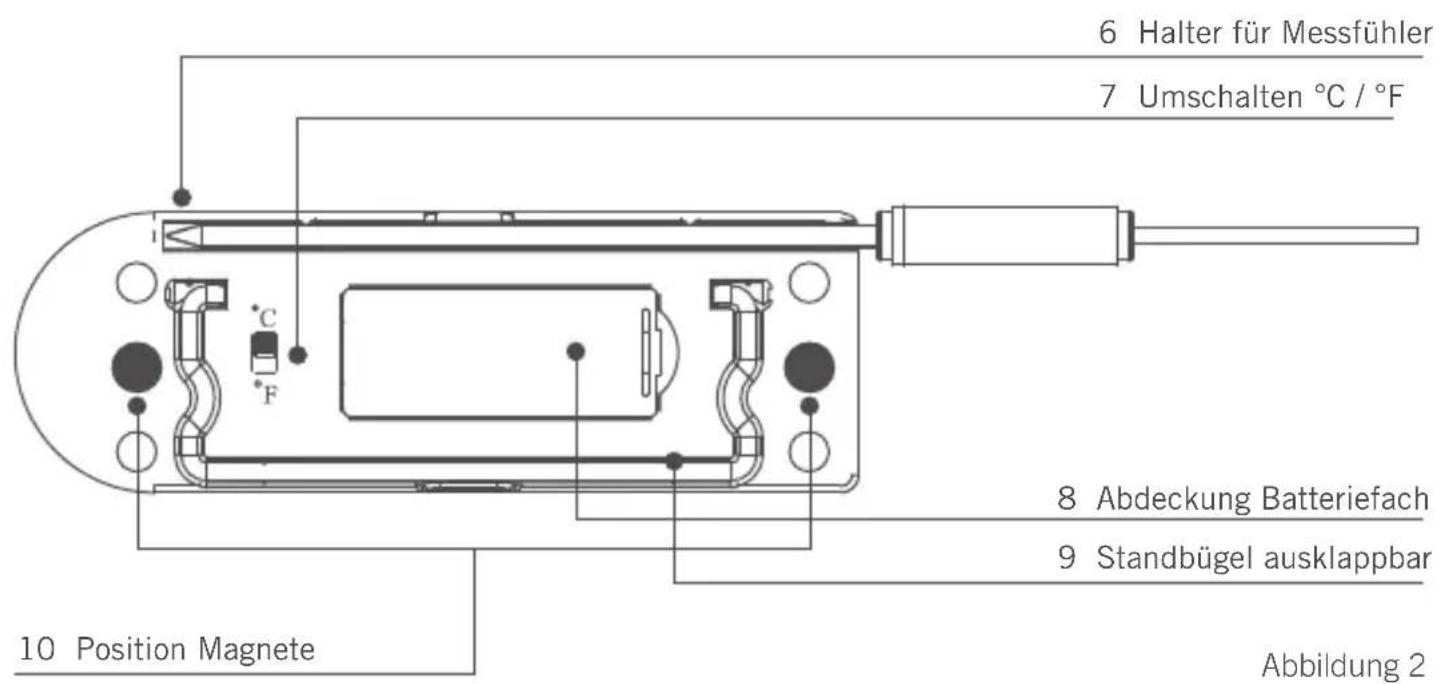
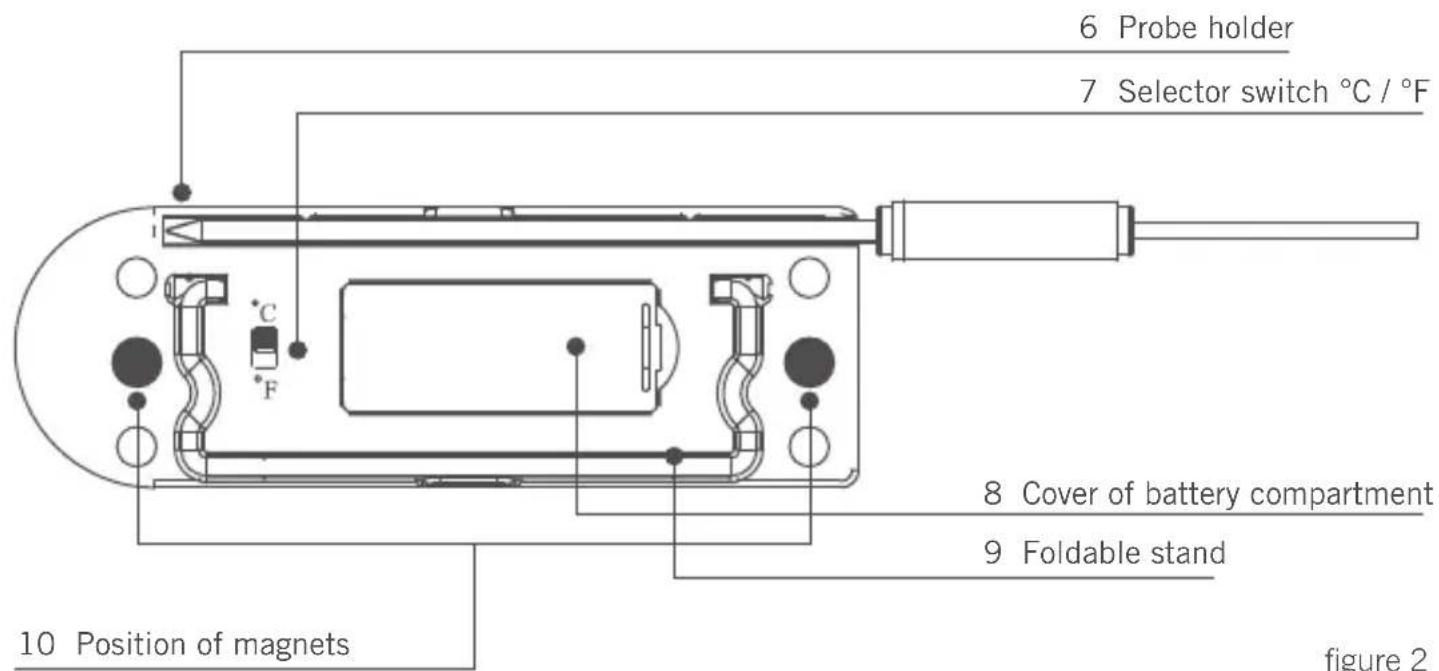
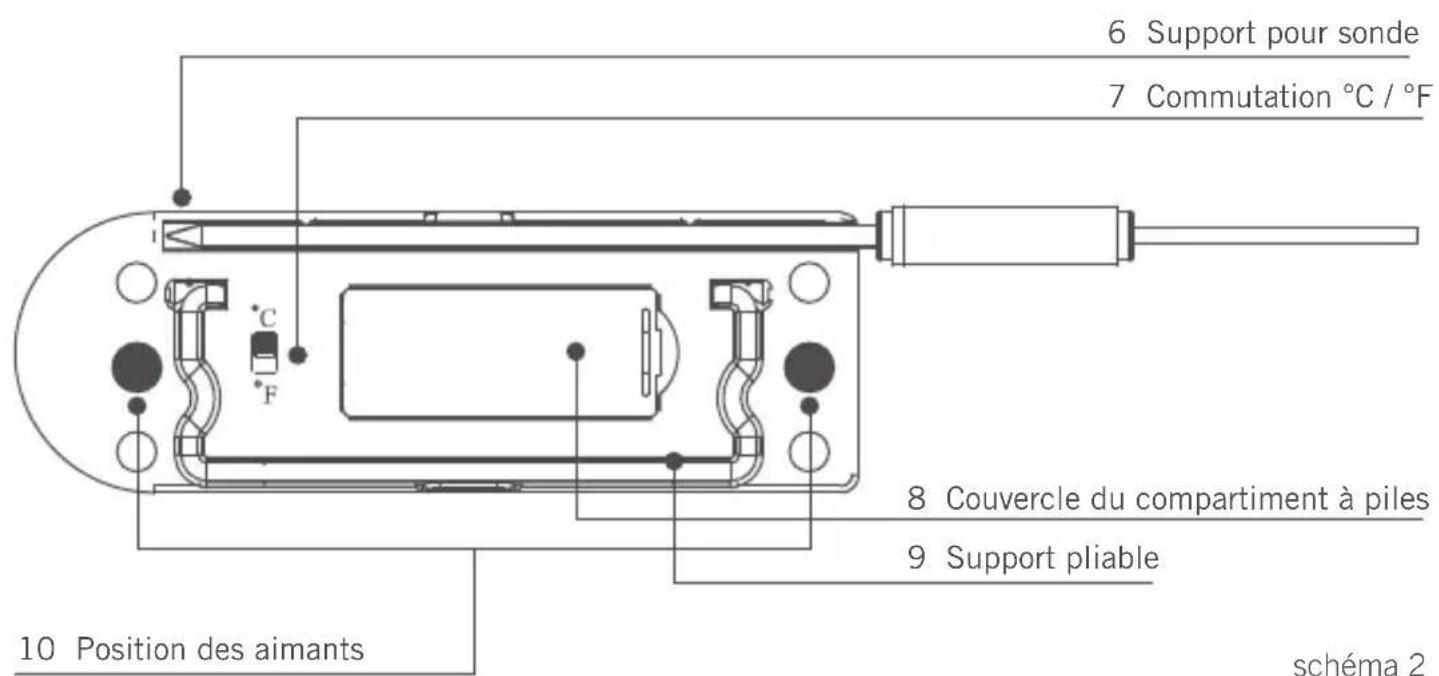
6 Probe holder 7 Selector switch °C / °F 8 Cover of battery compartment 9 Foldable stand 10 Position of magnets figure 2figure 2
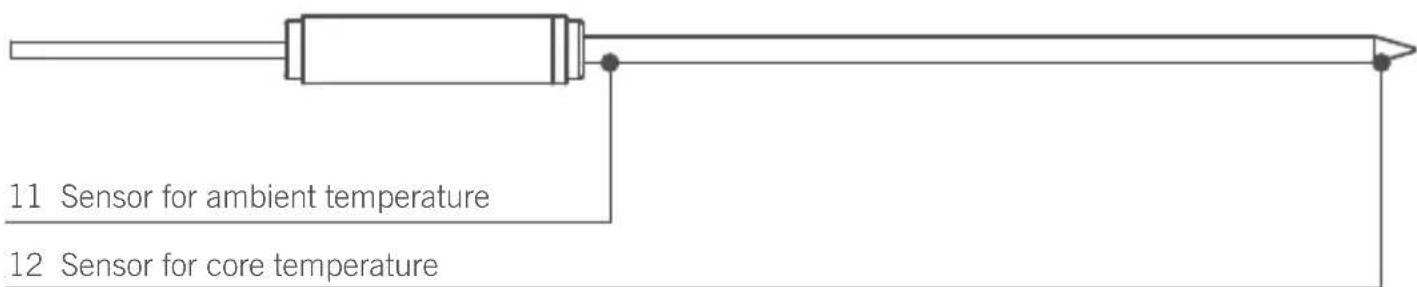
Probe
text_image
11 Sensor for ambient temperature 12 Sensor for core temperaturefigure 3
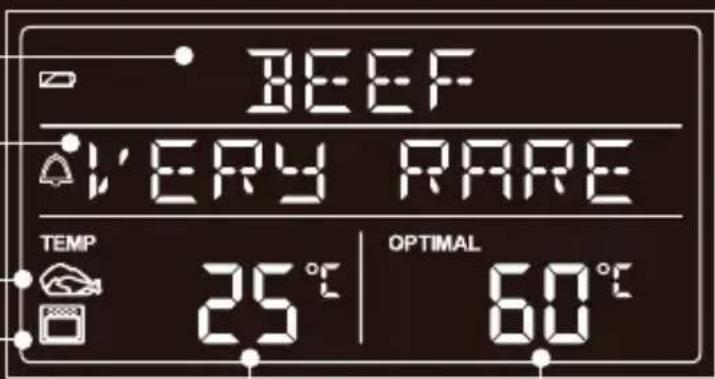
Display in Thermometer mode
13 Selected meat type / manual
14 Selected consistency
15 Core temperature symbol
16 Ambient temperature symbol (selectable)
17 Current core temperature / ambient temperature
18 Selected temperature
text_image
BEEF VERY RARE TEMP 25 °C | OPTIMAL 60 °Cfigure 4
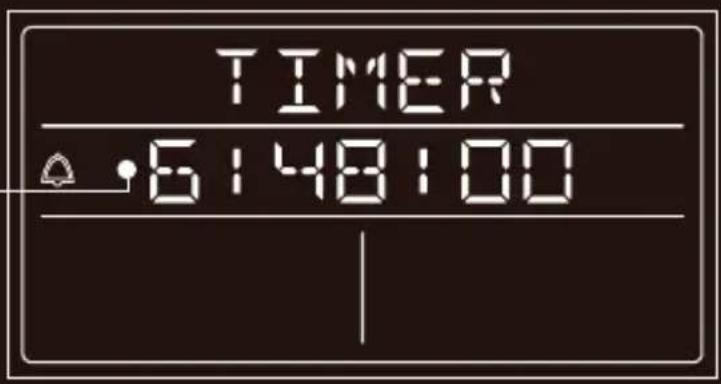
Display in Timer mode
19 Hours / minutes / seconds
text_image
TIMER 6148:00figure 5
2. First time use
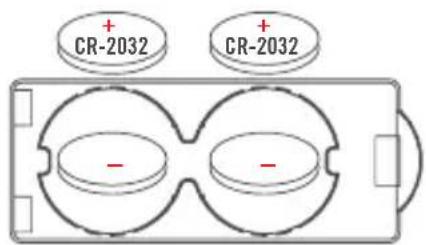
Open the battery compartment on the rear of the product and position the two provided batteries according to the illustration below.
text_image
CR-2032 CR-2032figure 6
The apparatus switches on automatically and displays the language menu. Choose one of the available languages: English, French, or German. Use the setting dial to make your choice and confirm by pressing the Set button. Insert the probe's cable into the socket (see detail 4 in illustration).
On the rear of the thermometer select measuring units in °Celsius or Fahrenheit (see detail 7 in illustration). Your Thermometer digital is now ready for use.
Note:
If the probe's cable is not inserted correctly, the display will show three strokes instead of the temperature.
Meat types at a glance with selectable consistencies and core temperatures
| Meat very rare rare medium well done | ||||
| Beef 51 °C / 124 °F 55 °C / 131 °F 60 °C / 140 °F 76 °C / 169 °F | ||||
| Pork 82 °C / 180 °F | ||||
| Poultry 82 °C / 180 °F | ||||
| Veal 57 °C / 135 °F 60 °C / 140 °F 68 °C / 154 °F 74 °C / 165 °F | ||||
| Lamb 60 °C / 140 °F 63 °C / 145 °F 71 °C / 160 °F 77 °C / 171 °F | ||||
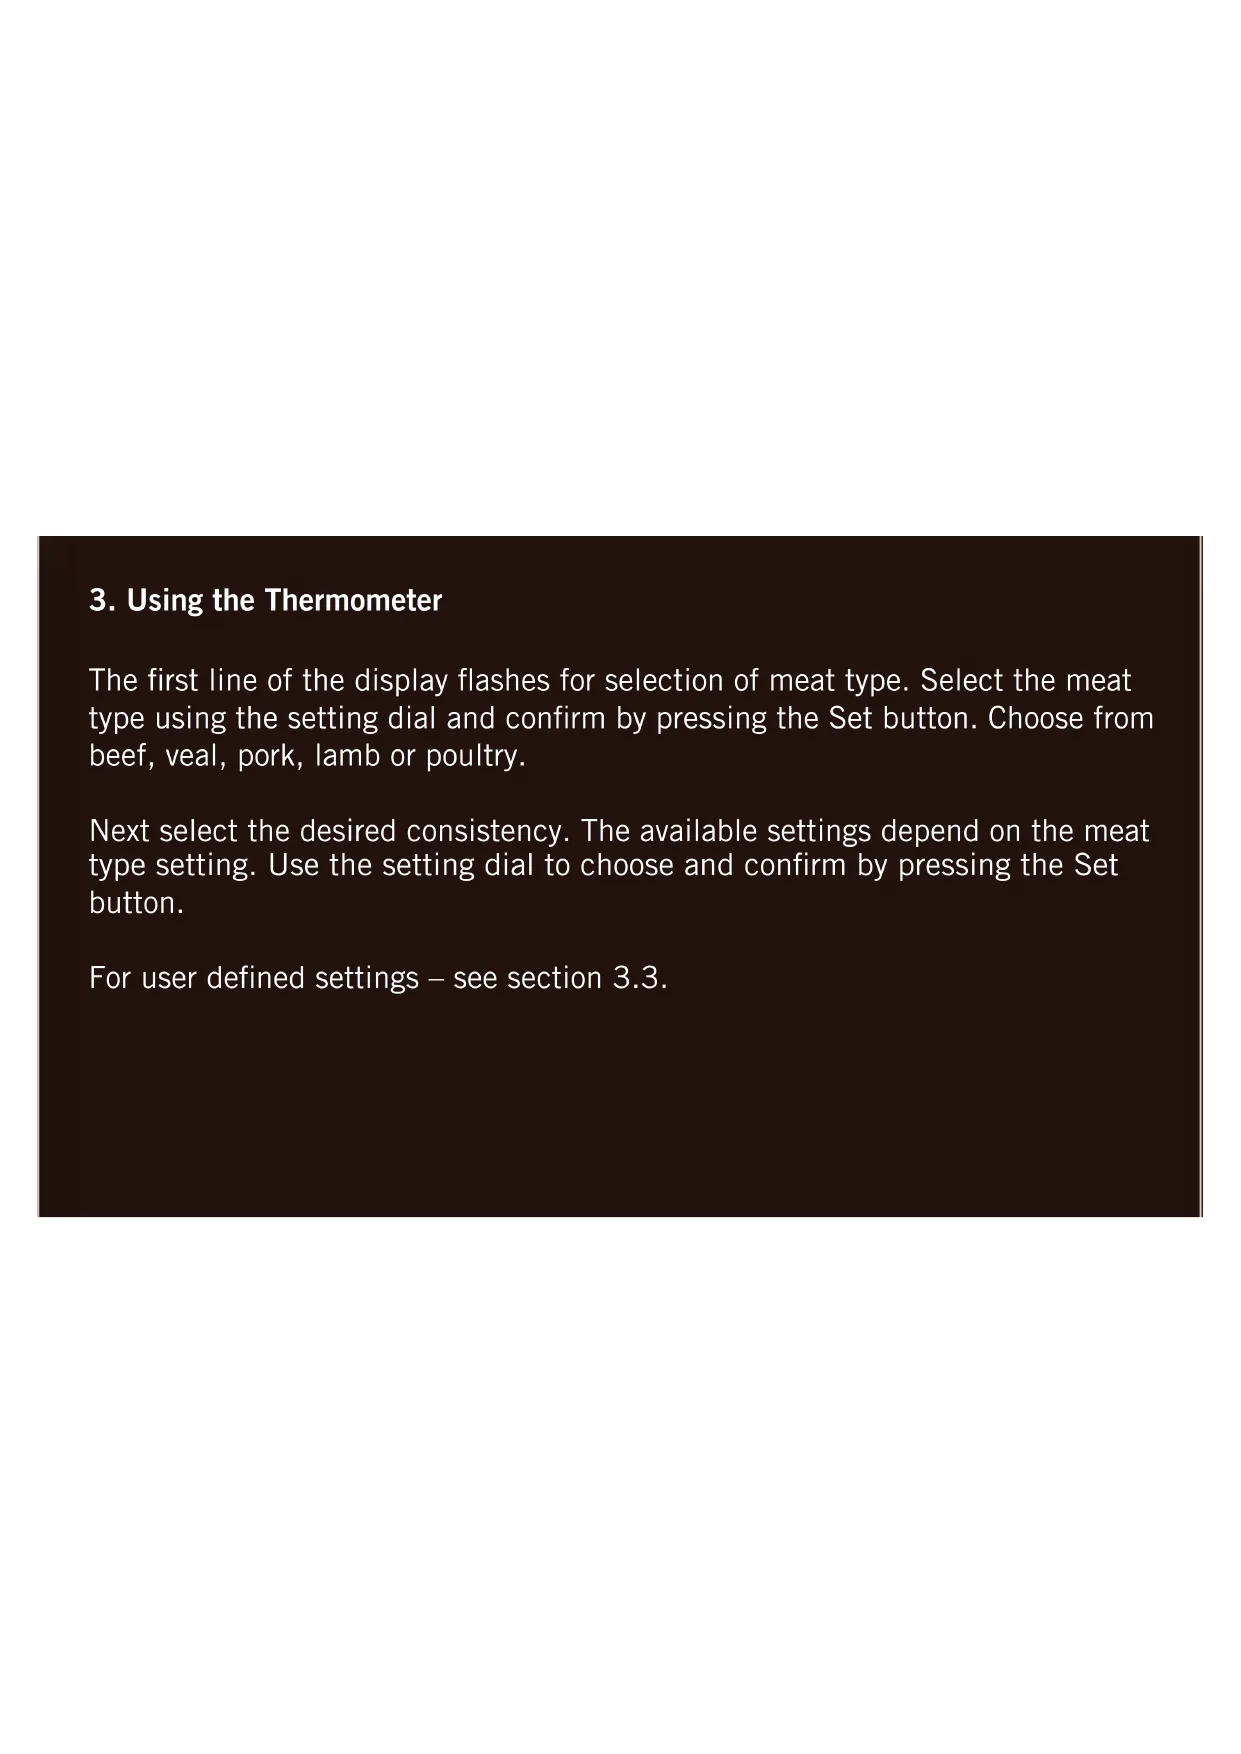
3. Using the Thermometer
The first line of the display flashes for selection of meat type. Select the meat type using the setting dial and confirm by pressing the Set button. Choose from beef, veal, pork, lamb or poultry.
Next select the desired consistency. The available settings depend on the meat type setting. Use the setting dial to choose and confirm by pressing the Set button.
For user defined settings – see section 3.3.
After selection of meat type and consistency, ‘TEMP’ will flash on the display (above the meat symbol, see detail 15 in illustration). Temperature measurement has now commenced. As long as ‘TEMP’ flashes, the probe is measuring and the current core temperature is shown on the display (see detail 17 in illustration). Using the setting dial the readout will change to the current oven, i.e. ambient temperature. After 10 seconds the display will return to normal mode.
On the right side of the display the desired target temperature will be shown depending on the selection for consistency.
3.1 Application
The probe remains in the meat throughout the cooking process. When closing the oven door check that the probe's cable is in contact with the soft seal of the door and is not jammed by the door's hinges.
Choose a convenient spot to position your Thermometer digital near the oven (cable length 1 metre / 39.4 in.). The Thermometer digital is equipped with magnets on the back plate so that it can be also positioned onto the oven door. Position only on the rim of the oven door and be careful that surface heat does not exceed 50°C / 122°F.
An acoustic signal will be activated when the preset core temperature is reached. To stop the signal press the Set button.
3.2 Changing preset values for optimum core temperature
When the preset values for core temperature for the various types of meat do not comply with your personal preference, they can be changed and stored. Select meat type (veal, lamb, beef) using the Set Button and then select the desired consistency.
Press the Set Button and hold it down for 3 seconds. The readout for the preset optimum temperature will start to light intermittently. Using the Setting dial you can now set the desired value. Press the Set Button to store the new value.
3.3 Setting temperature manually
To set the temperature manually, choose the setting ‘MANUAL’ instead of a meat type and confirm by pressing the Set button. The target temperature readout will light intermittently and the value can be changed using the setting dial.
3.4 Resetting to pre-defined factory values
If you wish to reset the appliance to the original factory values, press the Thermometer/Timer switch and the Set Button at the same time and hold pressed down for 3 seconds.
Now all user defined settings are deleted and the temperature values are reset to the pre-defined factory values.
4. Timer function
4.1 Starting Timer
To use the Timer function of the Thermometer digital press button No. 5. The timer display mode will be activated as shown in illustration 5.
Use the setting dial to choose the time setting for hours, minutes and seconds and confirm each setting by pressing the Set button. Maximum countdown: 9 hours, 59 minutes and 59 seconds.
When countdown has terminated, an acoustic signal will be activated. To stop the signal press the Set button. The timing display will continue to run for 30 minutes after completion of countdown. After interruption of the original signal no further acoustic signal will be given during this time span. After 30 minutes and stopping of the timer function, a prolonged acoustic signal will be emitted.
The timer and Thermometer digital can be operated simultaneously.
4.2 Stopping the Timer
To stop the timer while running press the Set button. Pressing the Set button again will reactivate the countdown.
4.3 Resetting Timer
To reset the timer briefly press the Set button to interrupt the countdown. Then hold the Set button pressed down for 3 seconds.
5. Storing
To avoid damage the probe's cable should be unplugged and the probe should be inserted into the holder intended for its storage.
For storage of the Thermometer digital on a RÖSLE Standard Rail, we recommend the Open Kitchen Holder (Art. No. 19223).
6. Cleaning
To clean probe and cable both should only be given a wipe with a damp cloth. Since the display unit is an electronic device it should at no time come into contact with liquid. If necessary it can be wiped clean using a dry cloth. Please note that any type of humidity may lead to malfunctioning and damage to the instrument. Cleaning in a dishwasher is not possible.
7. Safety Instructions
→The probe and cable can become hot when used at the grill or in the oven. So always use protective gloves for handling.
→The Thermometer digital and probe are for use with temperatures from -20^ / -4^ to maximum +250^ / +482^ . Temperatures beyond this range will cause damage to the instrument and will not appear on the display.
→When using the grill function of an oven, the Thermometer digital can not be used.
→The Thermometer digital must always be placed outside the oven. Excessive heat causes damage to the display unit.
→At temperatures above 250^ C / +482°F the display reads ‘TOO HOT’ and an acoustic signal is emitted. Please remove the probe from the heated area immediately using protective kitchen gloves.
8. Note on disposal of batteries
The lithium batteries provided are not rechargeable. Batteries should never be damaged, drilled through or thrown into an open fire. Never use a combination of old and new batteries.
Used batteries should never be disposed of with ordinary household waste. Used batteries may contain hazardous material which can be harmful to health and the environment. Please deliver used batteries to retailers' recycling facilities or to your local waste disposal service for battery return. Return of used batteries is a service free of charge and a legal obligation. Please use recycling containers for return of exhausted batteries. All batteries will be recycled. In this way valuable natural resources such as iron, zinc and nickel will be re-used. Recycling of batteries is an important contribution to environmental protection.
Your local waste disposal facility will provide you with further information on request.
9. Disposal
This product should not be disposed of with ordinary household waste but must be channelled to an appropriate recycling facility for electric and electronic equipment. For further information contact your local authority, communal waste disposal facilities or the shop where you purchased the item.
General Safety Guidelines
The Thermometer digital should not be used as a toy and should be handled with caution at all times. Small components could be accidentally swallowed by children or injury caused by the probe's tip – so please keep the appliance safely out of reach. Not suitable for medical application.

CE Conformity. This appliance complies with EU Directive 2014/30/EU pertaining to electro-magnetic interference.
We reserve the right to technical modification without prior notice.
We wish you pleasure and joy with your new RÖSLE Barbecue tool.
Your RÖSLE Team
Chère Cliente, cher Client RÖSLE,
natural_image
Technical line drawing of a device casing with labeled components (no text or symbols)schéma 1
text_image
CR-2032 CR-2032schéma 6