BG10716HQS - Vacuum Cleaner BISSELL - Free user manual and instructions
Find the device manual for free BG10716HQS BISSELL in PDF.
| Product Type | Commercial Upright Vacuum |
| Brand | BISSELL |
| Model | BG10716HQS |
| Power Supply | 120 V, 60 Hz, AC |
| Power Cord Length | Approximately 7.6 m (25 ft) |
| Dust Bag Type | Disposable paper bag with reusable cloth bag |
| Bag Capacity | Up to 10 L (estimated) |
| Height Adjustment | Rotating dial on the foot, multiple positions |
| Operation | Foot switch pedal |
| Suction System | With motorized rotating brush, drive belt |
| Filters | Disposable bag as primary filter |
| Routine Maintenance | Replacing disposable bag, cleaning fan compartment, replacing belt and brush |
| Safety | Grounded plug; automatic shutoff in case of unspecified issue |
| Limited Commercial Warranty | 2 years |
| Replacement Parts Available | Belt (203-7843), cloth bag assembly with plastic (203-8342), disposable bags (9469) |
| Intended Use | Indoor, dry surfaces, carpets and rugs |
| Dimensions (L x W x H) | Not specified in manual, approximately 30 x 15 x 40 cm (estimated) |
| Weight | Not specified, approximately 6 kg (estimated) |
Frequently Asked Questions - BG10716HQS BISSELL
User questions about BG10716HQS BISSELL
0 question about this device. Answer the ones you know or ask your own.
Ask a new question about this device
Download the instructions for your Vacuum Cleaner in PDF format for free! Find your manual BG10716HQS - BISSELL and take your electronic device back in hand. On this page are published all the documents necessary for the use of your device. BG10716HQS by BISSELL.
USER MANUAL BG10716HQS BISSELL
MODELS BG101H, BG102H, BG107HQS, and BG107-16HQS
2 Thank You
3 Safety Instructions
4 Product View
5 Assembly
6 Operations
7-8 Maintenance and Care
9 Troubleshooting
10 Replacement Parts
11 Warranty
12 Customer Care
text_image
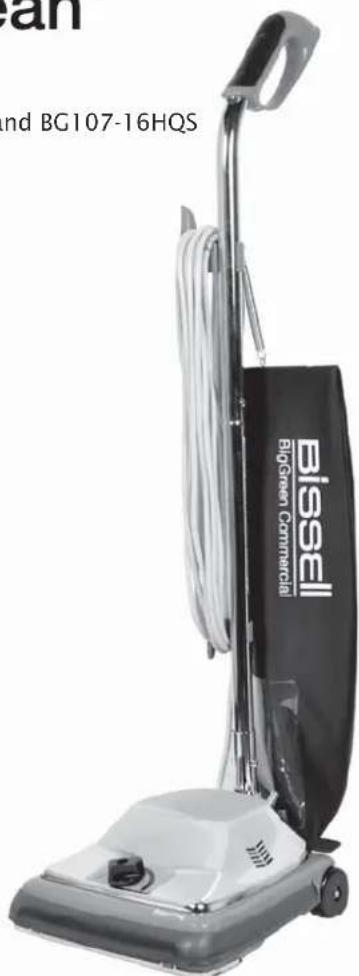
and BG107-16HQS Bissell BigGreen CommercialBISSELL® BigGreen Commercial® ProBag & DayClean Vacuums
We're glad you purchased a BISSELL® BigGreen Commercial® upright vacuum. Everything we know about floor care went into the design and construction of this complete, high-tech commercial cleaning system.
Your BISSELL® BigGreen Commercial® upright vacuum is well made, and we back it with a limited two-year commercial warranty. We also stand behind it with a knowledgeable, dedicated Customer Care department, so, should you ever have a problem, you'll receive fast, considerate assistance.
My great-grandfather invented the floor sweeper in 1876. Today, BISSELL is a global leader in the design, manufacture, and service of high quality commercial products like your BigGreen Commercial vacuum.
Thanks again, from all of us at BISSELL.
man 1.7 Simero
Mark J. Bissell Chairman & CEO
IMPORTANT SAFETY INSTRUCTIONS
When using an electrical appliance, basic precautions should be observed, including the following:
READ ALL INSTRUCTIONS BEFORE USING YOUR BISSELL BIGGREEN COMMERCIAL UPRIGHT VACUUM.
Always connect to a polarized outlet (left slot is wider than right). Unplug from outlet when not in use and before conducting maintenance.
WARNING:
To reduce the risk of fire, electric shock, or injury:
- Do not modify the polarized plug to fit a non-polarized outlet or extension cord.
■ Do not leave vacuum cleaner unattended when it is plugged in.
.gniciv
■ Do not use outdoors or on wet surfaces. - Do not allow children to operate vacuum cleaner or use as a toy.
■ Close attention is necessary when used by or near children. - Do not use for any purpose other than described in this User's Guide.
- Use only manufacturer's recommended attachments.
■ Do not use with damaged cord or plug.
If appliance is not working as it should, has been dropped, damaged, left outdoors, or dropped into water, have it repaired at an authorized service center. - Do not pull or carry by cord, use cord as a handle, close a door on cord, or pull cord around sharp edges or corners. Do not run appliance over cord. Keep cord away from heated surfaces.
- Do not unplug by pulling on cord. To unplug, grasp the plug, not the cord.
■ Do not handle vacuum cleaner or plug with wet hands.
Do not put any object into openings. Do not use with any opening blocked; keep openings free of dust, lint, hair, and anything that may reduce air flow. - Keep hair, loose clothing, fingers, and all parts of body away from openings and moving parts.
■ Turn off all controls before plugging or unplugging vacuum cleaner.
■ Use extra care when cleaning stairs. - Do not pick up flammable materials (lighter fluid, gasoline, kerosene, etc.) or use in the presence of explosive liquids or vapors.
■ Do not pick up toxic material (chlorine bleach, ammonia, drain cleaner, etc.).
Do not use vacuum cleaner in an enclosed space filled with vapors given off by oil base paint, paint thinner, some moth proofing substances, flammable dust, or other explosive or toxic vapors.
■ Do not pick up hard or sharp objects such as glass, nails, screws, coins, etc.
■ Do not pick up anything that is burning or smoking, such as cigarettes, matches, or hot ashes.
■ Do not use without filters in place.
■ efrus roodni ,yrd nylno esU
- Keep appliance on a level surface.
■ Do not carry the vacuum cleaner while it is running.
- Do not operate cleaner in bare feet or when wearing open-toe shoes or sandals.
- Do not use without dust bag or dirt cup in place. Shake bag and empty dirt cup frequently when picking up very fine materials such as powder.
SAVE THESE INSTRUCTIONS.
THIS MODEL IS FOR COMMERCIAL USE.
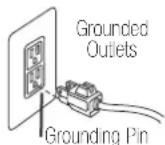
GROUNDING INSTRUCTIONS
This appliance must be connected to a grounded wiring system. If it should malfunction or break down, grounding provides a safe path of least resistance for electrical current, reducing the risk of electrical shock. The cord for this appliance has an equipment-grounding conductor and a grounding plug. It must only be plugged into an outlet that is properly installed and grounded in accordance with all local codes and ordinances.
WARNING:
Improper connection of the equipment-grounding conductor can result in a risk of electrical shock. Check with a qualified electrician or service person if you aren't sure if the outlet is properly grounded. DO NOT MODIFY THE PLUG. If it will not fit the outlet, have a proper outlet installed by a qualified electrician. This appliance is designed for use on a nominal 120-volt circuit, and has a grounding attachment plug that looks like the plug in the drawing above. Make certain that the appliance is connected to an outlet having the same configuration as the plug. No plug adapter should be used with this appliance.
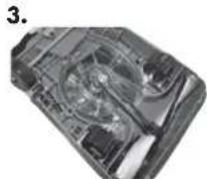
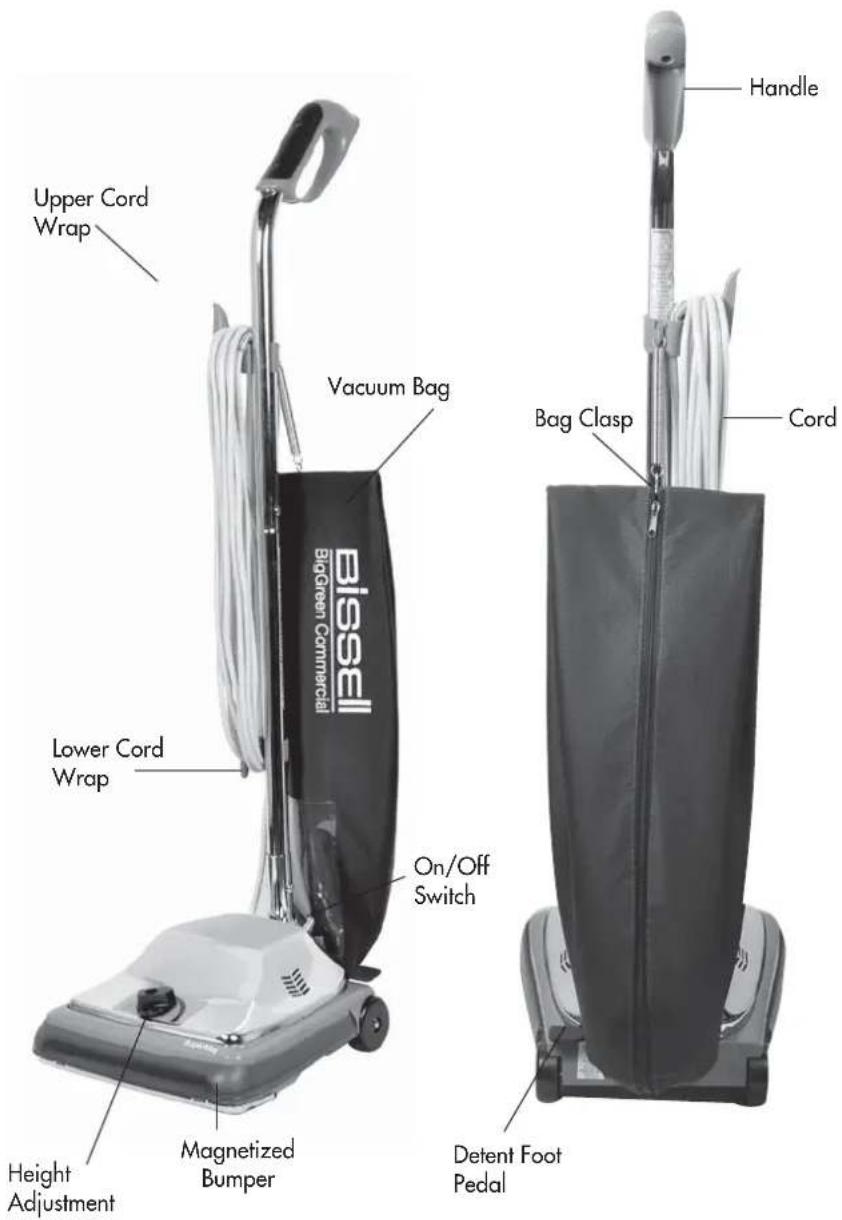
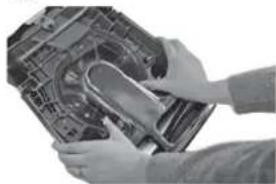
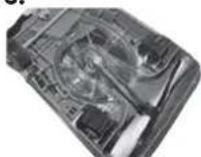
Product view
text_image
Upper Cord Wrap Vacuum Bag Lower Cord Wrap BigGreen Commercial Bissell On/Off Switch Bag Clasp Handle Cord Detent Foot Pedal Magnetized Bumper Height AdjustmentAssembly
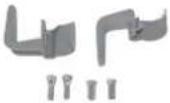
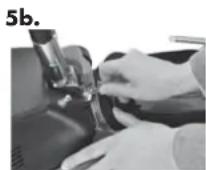
- Locate hardware pack for handle assembly. Enclosed are two nut and bolts for the handle, as well as upper (larger) and lower (smaller) plastic cord hooks. An extra drive belt is also included.
- Connect lower handle to the base of the unit. The thinner end should point upwards, toward the top of vacuum. Connect upper handle to lower handle by sliding into each other. Upper handle should curve towards the back of the unit. Insert nuts and bolts and tighten.
- Thread nut and bolt through hole in upper and lower handle. Screw together nut and bolt by hand, then tighten with screwdriver.
- Take lower cord hook with vacuum facing frontwards and snap into slot on lower handle with hook facing down.
- Take upper cord hook and place cord with spring retainer into slot and snap in.
- Wrap cord around cord clips.
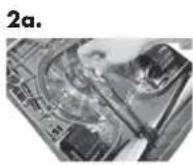
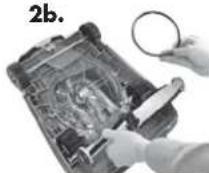
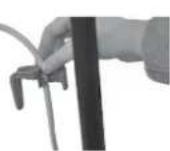
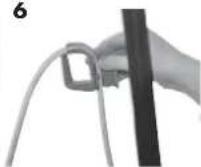
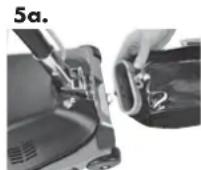
- To attach the bag to the vacuum, find hook on the bottom of the bag and hook it to the back of the vacuum base. (See image) Align latch with the back of the vacuum and bring the collar forward. Turn latch so that bag locks onto rivet.
- Attach spring from top of cloth bag to the bag clip on upper cord hook.
ATTENTION:
Some Berber carpets have a tendency to fuzz with wear. Repeated strokes in the same area with an ordinary vacuum or deep cleaner may aggravate this condition.
1.
4.
6
7a. 7b.
Operations
Operating instructions
- Check to see if the bag is securely attached to the base and upper cord wrap on the unit. The silver clasp that slides onto bag to secure it should be placed evenly on bag to avoid any air leaks.
- Plug cord into an
- Adjust the carpet height by turning round knob near the foot of the vacuum to the carpet height that best suits the carpet area you are going to clean.
- Step on the power switch located on top of the heavy-duty metal hood. Press down with foot and power will go on. Step again on the switch and power will shut off.
- To detent the handle, push on the foot pedal. Press down on it again and handle will detent all the way to the floor level.
- You can now begin to vacuum.
NOTE: Always wrap cord around cord hooks and fasten cord to prevent unwinding.
WARNING:
To avoid injury, keep loose clothing, hair, fingers, and all other parts of body away from any moving part (such as the revolving brush). Turn off the switch and unplug the cleaner before changing the cleather height setting.
Maintenance and care
Removing and Emptying Cloth Bag
- Unzip the cloth bag.
- Remove cardboard base that affixes the inner paper bag. Dispose.
- Open new disposable bag.
- Slide cardboard base over plastic extension inside bag.
- Tuck disposable bag into cloth bag, and zip cloth bag.
NOTE: Very fine powders and substances may clog the cloth bag. Please remember to empty bag often so that vacuum cleaner can efficiently operate.
WARNING:
To reduce the risk of fire, electric shock, or injury, turn power OFF and disconnect plug from electrical outlet before performing maintenance or troubleshooting.
To Adjust the Carpet Height Setting
- Turn vacuum off and unplug from the outlet.
- Turn the adjustment knob on the foot of the vacuum to the desired setting.
- Turn vacuum ON and begin to vacuum. If the vacuum is too hard to push, unplug from outlet again and adjust to the next setting until easy to use.
Maintenance and care
Clear Fan Chamber
The removable clear fan chamber enables the user of the vacuum cleaner to observe if any obstructions, dirt buildup, broken fan, broken belt, or any other maintenance issue needs to be addressed. We recommend that a qualified vacuum repair specialist at your local service center repair any maintenance issues that you may have.
Brush Roll Belt
\*Replace the belt if it is stretched, cracked or looks worn.
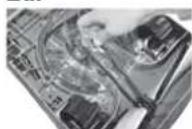
- Push the metal locks to remove the metal plate on the bottom of the vacuum.
- Remove the belt from the pulley. Remove the brush roll by lifting up, and then take off belt.
- Place the new belt on center of brush roll.
- Place the brush roll back in the vacuum and align the belt with the belt guide.
- Pull belt over the pulley and rotate the pulley to make sure belt is smoothly riding on motor pulley.
- Place the metal plate back onto the bottom of the vacuum and lock into place with both locks.
NOTE: Turn off the switch and unplug the electrical cord.

CAUTION:
Turn off switch and unplug cord before replacing belt. Belt pulleys can become hot during normal use. To prevent burns, avoid touching the belt pulley when servicing the drive belt.
natural_image
Person cleaning a car engine compartment with a tool (no visible text or symbols)2a.
2b.

Troubleshooting

WARNING:
To reduce the risk of fire, electric shock, or injury, turn power OFF and disconnect plug from electrical outlet before performing maintenance or troubleshooting.
Low Suction
Possible causes
- Disposable dust bag is full
Poor Pick Up
Possible causes
- Brush not adjusted to the proper height
- Brush is worn out
Vacuum motor is not working Possible causes
- Electrical outlet not working
- Air path obstructed
Brush Motor is not working Possible causes
- Brush motor is not working
Remedies
- Dispose current dust bag and replace with new
Remedies
- Adjust the height adjustment to confirm you're at the right carpet height
- Brush might need to be replaced
Remedies
- Check to make sure vacuum is plugged in properly
- Check electrical source
- Check to make sure the vacuum button is ON
Remedies
- Check to make sure vacuum is plugged in properly
Other maintenance or service not included in the manual should be performed by an authorized service representative.
Thank you for selecting a BISSELL® BigGreen Commercial® product.
Replacement parts
| Item | Part No. | Part Name |
| 1 | 203-7843 | Belt |
| 2 | 203-8342 | Cloth bag assy w/plastic(BG101H, BG102G, BG107HQS and BG107-16HQS) |
| 3 | 9469 | BG Disposable Bag (4-pack) |
Warranty – BISSELL® BigGreen Commercial® ProBag & DayClean Vacuums
This warranty gives you specific legal rights, and you may also have other rights which may vary from state to state. If you need additional instruction regarding this warranty or have questions regarding what it may cover, please contact BISSELL® BigGreen Commercial® Customer Care by E-mail, telephone, or regular mail as described below.
Limited Two-Year Warranty
Subject to the *EXCEPTIONS AND EXCLUSIONS identified below, upon receipt of the product BISSELL® BigGreen Commercial® will repair or replace (with new or remanufactured components or products), at BISSELL® BigGreen Commercial® option, free of charge from the date of purchase by the original purchaser, for two years any defective or malfunctioning part.
See information below on "If your BISSELL® BigGreen Commercial® product should require service".
This warranty does not apply to fans or routine maintenance components such as filters, belts, bumpers, bags, or brushes. Damage or malfunction caused by negligence, abuse, neglect, unauthorized repair, or any other use not in accordance with the user's guide is not covered.
Bissell®
BigGreen Commercial®
ProBag ^® DayClean ^®
GUIDE DE L'UTILISATEUR
MODÈLES BG101H, BG102H, BG107HQS et BG107-16HQS
natural_image
Close-up of hands installing or adjusting a mechanical component on a device (no visible text or symbols)