REF24FCIPIXR - Fridge BERTAZZONI - Free user manual and instructions
Find the device manual for free REF24FCIPIXR BERTAZZONI in PDF.
Download the instructions for your Fridge in PDF format for free! Find your manual REF24FCIPIXR - BERTAZZONI and take your electronic device back in hand. On this page are published all the documents necessary for the use of your device. REF24FCIPIXR by BERTAZZONI.
USER MANUAL REF24FCIPIXR BERTAZZONI
CARE AND CLEANING 30
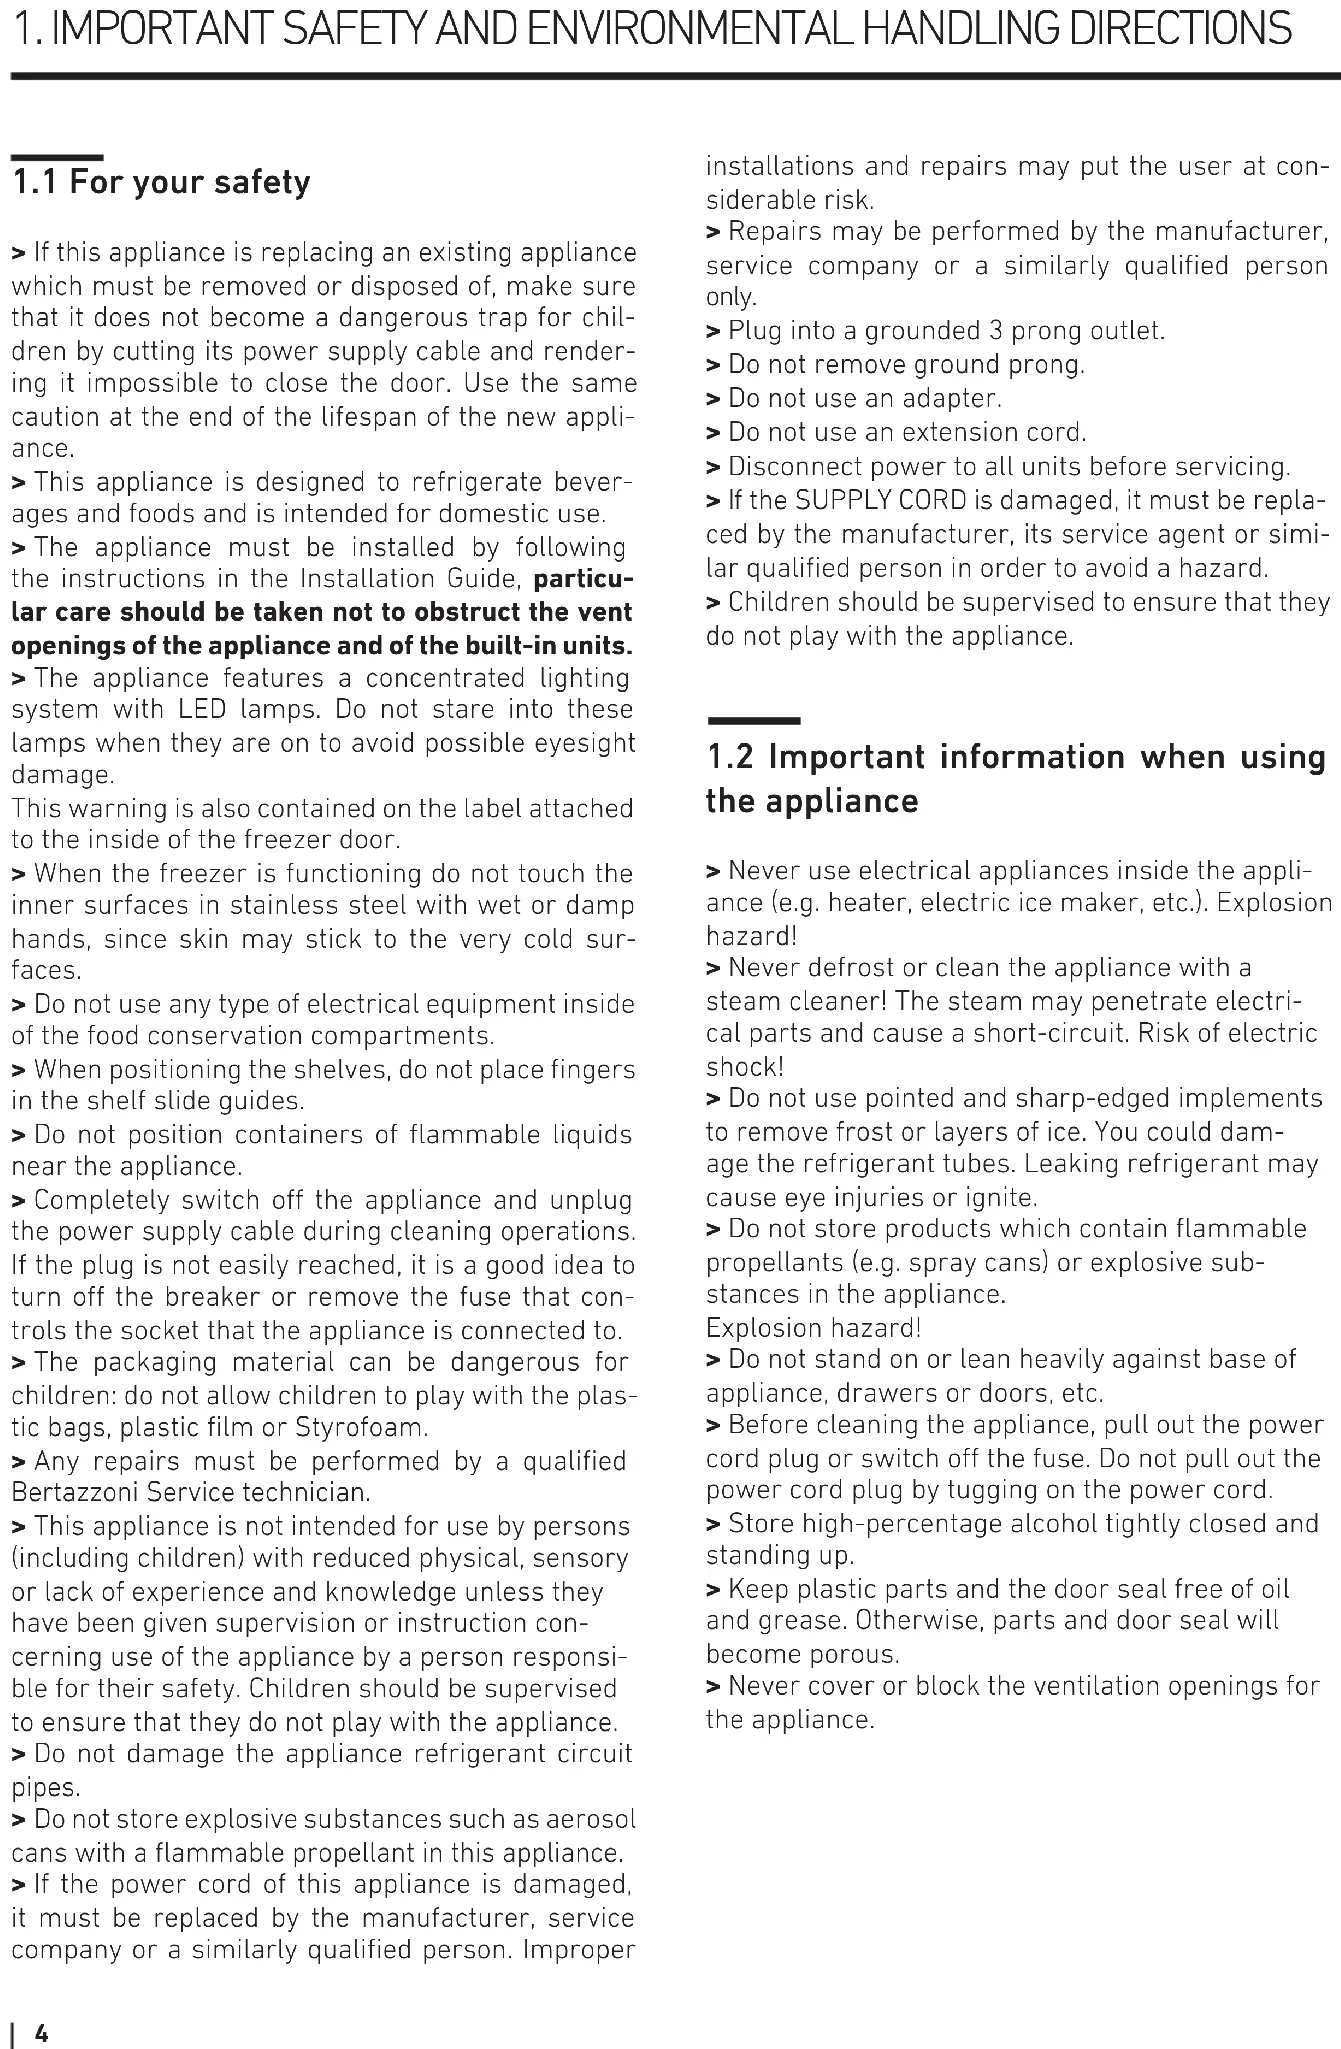
> If this appliance is replacing an existing appliance which must be removed or disposed of, make sure that it does not become a dangerous trap for chil- dren by cutting its power supply cable and render- ing it impossible to close the door. Use the same caution at the end of the lifespan of the new appli- ance. > This appliance is designed to refrigerate bever- ages and foods and is intended for domestic use. > The appliance must be installed by following the instructions in the Installation Guide, particu- lar care should be taken not to obstruct the vent openings of the appliance and of the built-in units. > The appliance features a concentrated lighting system with LED lamps. Do not stare into these lamps when they are on to avoid possible eyesight damage. This warning is also contained on the label attached to the inside of the freezer door. > When the freezer is functioning do not touch the inner surfaces in stainless steel with wet or damp hands, since skin may stick to the very cold sur- faces. > Do not use any type of electrical equipment inside of the food conservation compartments. > When positioning the shelves, do not place fingers in the shelf slide guides. > Do not position containers of flammable liquids near the appliance. > Completely switch o the appliance and unplug the power supply cable during cleaning operations. If the plug is not easily reached, it is a good idea to turn o the breaker or remove the fuse that con- trols the socket that the appliance is connected to. > The packaging material can be dangerous for children: do not allow children to play with the plas- tic bags, plastic film or Styrofoam. > Any repairs must be performed by a qualified Bertazzoni Service technician. > This appliance is not intended for use by persons (including children) with reduced physical, sensory or lack of experience and knowledge unless they have been given supervision or instruction con- cerning use of the appliance by a person responsi- ble for their safety. Children should be supervised to ensure that they do not play with the appliance. > Do not damage the appliance refrigerant circuit pipes. > Do not store explosive substances such as aerosol cans with a flammable propellant in this appliance. > If the power cord of this appliance is damaged, it must be replaced by the manufacturer, service company or a similarly qualified person. Improper installations and repairs may put the user at con- siderable risk. > Repairs may be performed by the manufacturer, service company or a similarly qualified person only. > Plug into a grounded 3 prong outlet. > Do not remove ground prong. > Do not use an adapter. > Do not use an extension cord. > Disconnect power to all units before servicing. > If the SUPPLY CORD is damaged, it must be repla- ced by the manufacturer, its service agent or simi- lar qualified person in order to avoid a hazard. > Children should be supervised to ensure that they do not play with the appliance.
1.2 Important information when using
the appliance > Never use electrical appliances inside the appli- ance (e.g. heater, electric ice maker, etc.). Explosion hazard! > Never defrost or clean the appliance with a steam cleaner! The steam may penetrate electri- cal parts and cause a short-circuit. Risk of electric shock! > Do not use pointed and sharp-edged implements to remove frost or layers of ice. You could dam- age the refrigerant tubes. Leaking refrigerant may cause eye injuries or ignite. > Do not store products which contain flammable propellants (e.g. spray cans) or explosive sub- stances in the appliance. Explosion hazard! > Do not stand on or lean heavily against base of appliance, drawers or doors, etc. > Before cleaning the appliance, pull out the power cord plug or switch o the fuse. Do not pull out the power cord plug by tugging on the power cord. > Store high-percentage alcohol tightly closed and standing up. > Keep plastic parts and the door seal free of oil and grease. Otherwise, parts and door seal will become porous. > Never cover or block the ventilation openings for the appliance.
Symbols used in the Guide: Note Recommendations for correct use of the appliance Important Directions for avoiding appliance damage Warning Indications for avoiding injury to people
1.3 Caring for the environment
> Pay special attention to correct disposal proce- dure for all the packaging materials. > The appliance must not be disposed of with urban waste. Contact local waste disposal centers for on how to dispose of recyclable waste. > Prior to disposal, cut the power supply cord and make it impossible to close the door. > During disposal, avoid damage to the refrigera- tion circuit. > The appliance does not contain hazardous sub- stances for the atmospheric ozone layer, neither in the refrigeration circuit nor in the insulation.
1.4 Cleaning, sanitization and mainte-
nance of the ice and/or water dispens- er (if present) Failure to follow the instructions regarding sanitiz- ing can compromise the hygienic safety of the wa- ter dispensed. > When using the appliance for the first time and every time the filter is changed, it is recommended to let the water flow in the circuit using the “Manual Cleaning” and discard the ice produced in the first 24 hours. > If the water dispenser has not been used for more than 4/5 days, it is advisable to clean the circuit and run o the first litre of water. > Reposition the removable water dispenser (if pre- sent), ensuring your hands are hygienically clean. > Clean the ice bucket or drawer regularly but using only drinking water. > The filter must be changed when indicated on the control panel or when the ice/water dispenser has not been used for more than 30 days. > With each filter replacement, sanitise the ice and/ or water distribution system using a food grade disinfectant (with sodium hypochlorite), which does not alter the characteristics of the materials. Rinse with at least 1/2 gallon of water before use. > Only original spare parts supplied by the manu- facturer should be used when replacing compo- nents in the ice and water dispenser. > Any work on the appliance must be carried out by a qualified technician or the After-sales Service. Warning To avoid contamination of food, please respect the following instructions: > Opening the door for long periods can cause a significant increase of the tempe- rature in the compartments of the applian- ce. > Clean regularly surfaces that can come in contact with food and accessible drainage systems. > Clean water tanks if they have not been used for 48 h; flush the water system con- nected to a water supply if water has not been drawn for 5 days. > Store raw meat and fish in suitable con- tainers in the appliance, so that it is not in contact with or drip onto other food. > If the refrigerating appliance is left empty for long periods, switch o, defrost, clean, dry, and leave the door open to prevent mould developing within the appliance.
Caution Risk of Fire or Explosion: > This product us es flammable refrigerant. > Do not use mechanical devices to defrost the refrigerator. > Do not use chemicals for cleaning. > Do not pierce the refrigerant tubing.1.5 Warning and danger This is the safety alert symbol. This symbol alerts you to potential hazards that can kill or hurt you and others. All safety messages will follow the safety alert symbol and either the word “DANGER” or “WARNING.” These words mean: You can be killed or seriously injured if you don’t follow instructions. You can be killed or seriously injured if you don't immediately follow instructions. All safety messages will tell you what the potential hazard is, tell you how to reduce the chance of injury, and tell you what can happen if the instructions are not followed. SAVE THESE INSTRUCTIONS! IMPORTANT SAFETY INSTRUCTIONS This manual contains operational instructions for the users of the appliance. Keep this manual in an easily accessible place for future reference. Improper installation, adjustment, alteration, service or maintenance can cause property damage, injury, or death. Read the installation, operating, and maintenance instructions thoroughly before installing or servicing this equipment. To reduce risk of fire, electric shock, or injury to persons when using your appliance, follow basic precautions, including the following: > Children should be supervised to ensure that they do not play with the appliance. > This appliance is not intended for use by persons (including children) with reduced physical, sensory or lack of experience and knowledge unless they have been given supervision or instruction concerning use of the appliance by a person resp onsible for their safety. > This appliance i s designed to refrigerate beverages and foods and is intended for domestic use.
> This appliance is intended to be used in household and similar applications such as: staff kitchen areas in shops, offices, and other working environments; farm houses and by clients in hotels, motels, and other residential-type environments; bed and breakfast- type environments; and catering and similar non-retail applications. > Do NOT use an ext ension cord or adapter. > Plug into a grounded 3 prong outlet. > Do not remove ground prong. > If available, ice make kit can be added to some models. See serial tag inside the food compartment of appliance for ice maker kit model information. > A qualified service technician must connect i
maker (if available) and the appliance to the water supply system ( if the appliance has water load included). > If presen t, clean the ice bucket or drawer regularly but using only drinking water. > The appliance should be supplied only with drinkable water (if is --- a water connection). In the event of a power failure, do not attempt to operate this appliance. Keep the appliance area free and clear from combustibles or flammable materials and vapors. Keep ventilation openings, in the appliance enclosure or in the built-in structure, clear of obstruction. Do not obstruct the air intake or exhaust openings of the appliance. Do not store explosive substances such as aerosol cans with a flammable propellant in this appliance. Do not use electrical appliances inside the food storage compartments of the appliance, unless they are of the type recommended by the manufacturer. WARNING' WARNING' WARNING' WARNING' WARNING' WARNING' WARNING' DANGER'
REFRIGERATOR Suffocation Hazard Remove doors or lid from your old appliance. Failure to do so can result in death or brain damage.
Risk of child entrapment. Before you throw away your old refrigerator or freezer: > Take off the doors. > Leave the shelves in place so that children may not easily climb inside. > IMPORTANT: Child entrapment and suffocation are not problems of the past. Junked or abandoned refrigerators are still dangerous, even if they will sitfor "just a few days." If you are getting rid of yourold refrigerator, please follow these instructions tohelp prevent accidents. Important information to know about disposal of refrigerants: Dispose of refrigerator in accordance with federal and local regulations. Refrigerants must be evacuated by a licensed. EPA-certified refrigerant technician in accordance with established procedures. IMPORTANT SAFETY INSTRUCTIONS FOR
MAINTENANCE AND CARE
Risk of fire or explosion due to puncture of refrigerant tubing; follow handling instructions carefully. Flammable refrigerant used. To be repaired only by trained service personnel. Use only manufacturer-authorized service parts, Do not use replacement parts that have not been recommended by the manufacturer (e.g, parts made at home using a 3D printer). If power supply cord is damaged, it must be replaced by the manufacturer, its service agent, or a similarly qualified person in order to avoid a hazard. Any repair equipment used must be designed for flammable refrigerants. Follow all manufacturer repair instructions. Use nonflammable cleaner. Do not puncture refrigerant tubing, do not damage the refrigerant circuit. Do not use mechanical devices or other means to accelerate the defrosting process, other than those recommended by the manufacturer.
Refrigerator is top heavy and tips easily when not completely installed; to avoid a hazard due to instability of the appliance, it must be fixed in accordance with the instructions (see instruction manual provided). Keep doors taped closed until refrigerator is completely installed. Use two or more people to move and install refrigerator. Failure to do can result in death or serius injury.
2.3 Connection to the electrical power
supply The appliance operates at 115 V AC, 60 Hz and is equipped with a power supply cord with a 3-prong grounded plug, which must be connected to a cor- responding 3-prong (15 Amp) grounding-type wall receptacle. Important Do not use extension cords and/or mul- tiple adapters for the power supply con- nection.
Make sure that installation is performed correctly, adhering to all directions in the specific installation manual provided with the appliance. Warning Always connect the water before the power.
2.2 Connection to the water system
The models provided with Ice Maker require a con- nection to the domestic water supply system. This can be executed through the 1/4” water line (copper or polyethylene)to the house water supply. The system pressure must be between from 8 psi to 75 psi (between 0.5 bar and 5 bar). Dierent pressures can cause malfunctions or le- aks in the water system. The appliance should be supplied only with drinka- ble water. Warning The appliance should be supplied only with drinkable water. Warning Make sure that installation is performed correctly, according to all of the direc- tions in the specific installation manual provided with the appliance. Warning Do not attempt to use a locally sourced garden hose threaded adapter or braid- ed supply line. It will strip the threads on the appliance water connection solenoid.9 MODEL REF24FCIPIXL/23 CODE KS240FZ3IU TECHNICAL CODE HKJCLECFUG.UA
Congratulations for having purchased your new appliance: from now on you can use our innovative conservation system, which will allow you to keep any kind of beverage in the best way possible. This manual will answer most of your questions about the product’s features. Should you require fur- ther information, please check our website > our website > or write us an e-mail at aftersaleservice@bertazzoni.com Important Before calling, write down the model type and serial number which are available on the warranty certificate and on the rating plate, and any messages which may have appeared on the display. Built In freezers come with 2 years parts & labor warranty, and 5 year parts & labor for sealed system only. The rating plate is located into the appliance, on side cabinet, close to the shelves. Before calling, please make sure to have the fol- lowing information ready: - Date of Purchase; - Name of dealer where product was purchased. in the US http://us.bertazzoni.com/care-service in Canada https://ca.bertazzoni.com/more/support Model . Code . Technical Code . Features . Serial Number .10 Freezer
1) Stainless steel body.
6) LED illuminations.
7) Stainless drawers.
8) Removable toe kick.
3.4 Main control panel
3.3 Eletronic Control
The innovative electronic control system designed by Bertazzoni maintains constant temperature in the entire compartment and visualizes it on the control panel display. It also allows user interaction mak- ing it possible to personalize settings of the various functions and to receive sound and/or visual mes- sages should any malfunction occur in the appliance. Home Touch the Home icon for going back to the main display screen. Alarm Touch the icon to view the alarm tone functions and to deactivate them. Back Touch the arrow icon for going back to the previous display screen. On/ Off: Touch the icon to turn the unit on or off.12 FunctionsSettings
FunctionsSettingsInitial test… Are you sure you want to power off this unit? Yes No Are you sure? Yes No
4. BASIC OPERATIONAL OF THE APPLIANCE
4.1 Turning the appliance on and o
First time starting the unit Touch the button . The display shows the following launch screens: When the appliance is first switched on it is recco- mended to wait at least 12 hours without opening the doors and before placing any food inside the unit.During such period deactivate any error mes- sage by pressing the Alarm button.
- Freezer compartment -18° (0°F) When the freezer is o there are no warning signs that prove that the freezer is plugged to a socket.
shutdown by touching the Yes icon.
3) The display shows the main screen with the
envirorment temperature measured from the fridge inside the compartments. Automatically the unit starts to cool down until reaching the set temperatures. Shutdown.
off. Switching off for longer periods During long absence periods it is recommended to switch off the freezer by pressing the Unit button for three seconds and disconnecting the electrical plug or the breaker controlling the socket. Completely empty the freezer, clean and dry it and leave the doors and drawers partially open to prevent unpleasant odors. If at the first startup the Standby message does not appear, but another message ap- pears, it means that the appliance has al- ready started the cooling process. During the first startup, it will not be possi- ble to use the Menu to modify the factory set- tings until the preset temperature has been reached. Each time the appliance is switched on it goes through a self-diagnosis procedure lasting three minutes before completely starting up.13
4.2 How to adjust the temperature for
dierent requirements. Each model has been carefully tested before leaving the factory and is adjusted in such a way to ensure high performance and low power consumption. Usually, it is not necessary to modify the settings. How it looks to the home screen: Freezer compartment Preset temperature
3) Touch the Ok icon
to confirm the desi- der temperature. Modify the temperatures compartment How to modify the freezer compartment temperature.
1) Home screen. Touch
the icon of freezer compartement.
select the desided temperature freezer from -13° C to -23° C (from 9° F to -11° F) The temperature shown can vary slightly in respect to the set temperature following frequent openings of the doors or insertion of room temperature foods or large quantities of foods. 6 to 12 hours are necessary to reach the selected temperature. Padlock icon. The padlock icon shows up when the temperatu- res are set up. The padlock open/close shows that the com- partment's temperatures can or can not be modified by the user. Usually a yellow padlock will show open, in that case you can scroll up or down with a finger on the display, select the desired temperature and press OK to confirm. Whereas a closed padlock will be seen if the user has activated a function that modifies the settings of the refrigerator and prevents the user from changing the temperature of the compartment.14 - 14 °C
If the icon function is touched and a specific function is set (for example holiday, ect...), the yellow padlock will be seen closed and it won't be possible to change the temperature of the compartments as long as the function won't be completed or if it is manually deactivated as long as the function is active.
4.3 Information signals of warning
messages on the display. An integrated control system will give infor- mation through messages you will see on the display. There is an alarm tone that occurs with some error messages which can be turned off by tou- ching the alarm button on the main control panel. You can find the list of the error messages at the end of this manual.15 Shopping Mode Freezer(up to 24 hours) On Off FunctionsSettings
It is possible to program this function 1 to 24 hours in advance.
INFORMATION FOR THE USE OF THE DISPLAY. It is possible to personalize the operation of your Bertazzoni unit in order to adapt it to the different ways you might want to use it. After touching the icon Function on the home screen , the icons for the following fun- ctions will be shown.
1) Shopping Mode Freezer.
6) Circuit cleaning.
The function works at the maximum power level, without any break, from a minimum of 1 to a maximum of 12 hours, depending on time set, permitting more rapid freezing of food that has just been placed in the freezer. Once the time set is expired, the function deactivates automatically, returning to the previously set temperature. It is possible to program a timed activation of the function. After a prolonged interruption of power supply, it is necessary to reactivate the function. Functions Settings
This function can be activated when it is necessary to cool o beverages quickly, by placing them inside the freezer compartment. It is possible to select a duration of 1 to 45 minutes. A sound signal will indicated when the optimal tem- perature has been reached. After removing the beverages, deactivate the sound signal by pressing the Alarm button
This function (recommended in case of prolonged absences since it allows considerable energy savings) brings the freezer compartment temperature to -18° C (-0.4° F) It is possible to program the duration, or it can be manually deactivated upon return after a period of absence. This function remains active even if during the period of absence there is a prolonged interruption of electrical power. It is possible to program a period from 1 to 90 days. C) Touch the button On to activate the function. B) Touch the Vaca- tion Mode icon. D) Scroll up / down to set the desired time (in days) and then press Ok. It is possible to pro- gram a period from 1 to 90 days. A) Home screen. Touch the Fun- ctions icon. C) Touch the button On to activate the function. B) Touch the Rapid Bottle Cooler icon. D) Scroll up / down to set the desired time (in minutes) and then press Ok. A) Home screen. Touch the Functions icon.
A pre-rinse of the water circuit should be performed before activating the Ice Maker for the first time. After a few minutes the Ice Maker can be activated. Important Do not activate the Ice Maker unless the appliance is connected to the water line. B) Scroll twice right and then touch the Ice Maker icon. C) Touch the button Yes to activate the ice maker. A) Home screen. Touch the Fun- ctions icon. 4a) Set Ice cube Size - SuperIce The IceMaker function permits selecting the size of the ice cubes, by choosing between Large (base setting) or Medium, and activation of the SuperIce function, which increases the quantity of produced ice. The SuperIce function deactivates automatically after 24 hours. B) Scroll twice right and then touch the icon ice maker. D) Touch the Me- dium/Large icon to choose the desired Set Cube Size. C) Touch the Set Cube Size icon. The default cube size is "medium". E) If you would like to increase the production of ice, touch the Superice icon, this will ena- ble the freezer to produce more ice, up to 1,5kg a day. A) Home screen. Touch the Fun- ctions icon. F) Confirm the function or not by touching the On or Off button.18 FunctionsSettings
Next Reminder…Left Xxx Days Off Reset Water Filter Are you sure?
The water filter is essential for the purification of the water used for making ice, for cleaning the circuit or for supplying water for the freezer com- partment. The display permits visualizing the time left before the filter needs to be replaced. The water filter Remider has to be activated by the user. B) Scroll once right and then touch the Water filter icon. A) Home screen. Touch the Functions icon. E) Indicates the remaining days before the repla- cement due date of the filter. Touch the home button . D) Confirm the fun- ction by touching the Yes button. D) Confirm the function by tou- ching the Yes button. C) Push Off to activate Water Filter Reminder. B) Scroll once right and then touch the Water filter icon. A) Home screen. Touch the Fun- ctions icon. 5a) Water Filter Deactivation To deactivate an active filter reminder follow these steps:
Ice Maker Water Filter Water System Purge Enter Start Cleaning Manual Clean Manual Clean Please wait... Cleaning running Manual Clean Ice Maker Water Dispender Water Filter Water System Flush
Push Home button to go back to the main screen or push "Yes" to deactivate filter reminder. C) Touch the Reset button. D) Touch the Yes button to proceed. E) The countdown to the next water filter cartridge replacement will be indicated. A) Home screen. Touch the Fun- ctions icon. B) Scroll once right and then touch the Water Filter icon. 5b) Reset Filter The Reset Filter function sets to zero the time left before the filter needs to be replaced. It is neces- sary to set the reminder function to zero each time the cartridge is replaced. C) Touch the Yes icon to activate the manual cleaning. B) Touch the Water System Purge icon. E) Touch the Enter icon to start the cleaning. F) Cleaning run- ning... D) Please wait...
6) Manual Clean, Water Filter
If ice production has been disabled or unused for a long period it is recommended to perform a Manual Clean function. Before proceeding it is important to turn o the ice maker. A) Home screen. Touch the Fun- ctions icon.20 SabbathReset Demo SabbathReset Demo SabbathReset Demo Maintenance ServiceInfo System Maintenance ServiceInfo System Date Time°c / °f Language Date Time°c / °f Language Date Time°c / °f Language Date Time°c / °f Language Maintenance ServiceInfo System Empty water from ice bin. Replace ice bin and press OK.
Cleaning completed Please wait... Cleaning completed
5. CUSTOMIZE FUNCTIONS AND SETTINGS
It is possible to personalize the settings of your Bertazzoni freezer for adapting it to the different ways you might want to use it.
G) At the end of the cleaning, press Ok and empty wa- ter from ice bin. H) Wait a few se- conds for the main menu screen to appear. Place a water container or vessel under the ice tray to capture any water then close the drawer. Repeat the cleaning steps until the water in the freezer tray is clean. Bypass filter The included filtration system can be bypassed when excellent water qualty is available from the home water system. You can simply remove the water filter from the adapter and the system will automatically bypass the cartridge.21 Date Time°c / °f Language
The display will show the date in the format (day:month:year). By touching the display you can modify the settings. C) Scroll up or down until the de- sired year appears and press Ok. D) Scroll up or down until the desired month appears and press Ok. B) Touch the Date icon. A) Home screen. Touch the Set- tings icon. E) Scroll up or down until the de- sires date appears and press Ok. C) Touch the desi- red method which you want the time to display: 12 hour or 24 hours. B) Touch the Time icon.
This function allows the temperature to be dis- played in Centigrade or Fahrenheit. The factory setting in Centigrade. A) Home screen. Touch the Set- tings icon. B) Touch the Lan- guage icon. C) Scroll up / down to select the desired language and press Ok.
To set the language of the freezer, simply touch the settings button on the display. A) Home screen. Touch the Set- tings icon.23 FunctionsSettings
It gives the possibility to restore the base settings that were set in the factory, cancelling all the changes that has been made from there onward.
The function makes it possible to comply to certain religious observances requiring the operation of the appliance to not be aected by the opening or closing of the doors. The thermostatic control, in- ner lighting and ice maker are deactivated. C) Touch the Yes button to confirm the selection of the resetting of factory default settings. D) Touch the Yes button. E) The reset has been performed. The freezer's fac- tory settings have been restored. A) Home screen. Touch the Settings icon. B) Scroll right twice and touch Reset icon. A) Home screen. Touch the Settings icon. B) Scroll right twice and touch the Sabbath icon. C) Touch the Yes button to activate the function. D) Touch the Yes button to activate the function. E) The fridge will work accordingly to this configuration.24 FunctionsSettings
It is possbile to simulate the functioning of the fridge, for showroom display or for trade shows.
8) Maintenance (through alarm sign).
For the entire unit to function as designed, it is important to periodically clean the access toe-kick cover and the condenser. The default setting of the unit is"Warning disa- bled". The required cleaning every 6 months is denoted by an audible and visual message on the display. For details see following pages. D) Insert the password for the activation. Default password 1-2-3-4 C) Touch Yes. E) Push Yes or No button B) Scroll to the right three times and touch the Maintenance icon. A) Home screen. Touch the Settings icon. A) Home screen. Touch the Settings icon. B) Scroll right twice and touch Demo icon.25 FunctionsSettings
The service function is reserved for the authorized Bertazzoni after sales service technician. If you want to disable the reminder, at step C touch Off, then touch Yes as below Maintenance Service Info System26
6.1 Internal Layout (positioning, adjust-
ment, removal). Ice Tray Located in the upper drawer of the freezer com- partment. > after removal, make sure to reposition it cor- rectly. Warning Do not place hands or fingers near the Ice- maker when in function. Shelves The shelves are sliding and can be easily re-posi- tioned by the user as follows: > release the locking knob by turning it anti-clock- wise. > lift or lower the shelf to the desired position. > re-tighten the locking knob. To remove a shelf it is necessary to slide it upwards.
Door bins The door bins can be easily removed for cleaning > Hold the door bin at the sides and push it upwards to detach from the side rails, then pull it outwards. > Reverse the procedure to reinstall.27 Ice Maker Water FilterWater System Purge Ice Maker On/Off Set Cube SizeSuperice Ice Maker On/Off Set Cube SizeSuperice Ice Maker Water Filter Water System Purge Rapid Bottle Cooler Vacation Mode Shopping Mode Freezer Ice Maker Water Filter Water System Purge Ice Maker Water Filter Water System PurgeIce Maker Water FilterWater System Purge
Do the ice cubes have an unusual odour? Ice is a porous material which can absorb odours from the environment. Ice cubes which have been in the ice cube container for a long time may absorb odours, stick together and slowly become smaller. We recommend that old ice cubes not be used. Other means of preventing odors: > The ice cube container should be cleaned occa- sionally with warm water. Make sure that you switch o the ice maker before clearing the container. Rinse out and wipe dry. > Check the contents of the freezer for spoiled or out- of-date food. All odorous foods should be wrapped thoroughly or stored in airtight containers to prevent the build-up of odors. > The water filter may have to be replaced in some models. > In some cases the quality of the water connection in the house should be checked. Operating noises Quite normal noises > Grumbling: refrigerating unit is running. Fan in the recirculating air system is running. > Bubbling, humming or gurgling noises: refrigerant is flowing through the tubes. > Clicking: motor is switching on or o. Solenoid valve on the water connection is opening/closing. > Rumbling: ice cubes are falling into the ice cube container. Warning Do not place any bottles or food for rapid cooling in the ice cube container. The ice maker may become blocked and be dam- aged.
7.2 Water filter for freezer column
Ice Maker Freezer columns equipped with automatic ice-mak- ers include an externally mounted water filter kit. The water filter manifold and waterline connections must be installed in conjunction with the freezer as the waterline connecting the back of the appliance to the filter kit must be in place before installing the unit.
7.1 Activation and use of the Ice Maker
Note > If the ice is not used frequently is advisable to empty the ice bin once every 8-10 days. It is normal that some ice cubes stick to one another. If the ice is not frequently used, the older cubes can become opaque, and will have a strange flavour and become smaller. > The Icemaker automatically deactivates if the Vacation function is activated. When the Icemaker is started for the first time, it is recommended to dispose of the first full bin of ice. > If the equipment has been switched o for a month or more, it is recommended to per- form a water and filter cleaning cycle. Warning The ice maker will continue to operate even when the ice bin is not in position To activate the Ice Maker after installation of the ap- pliance touch the function icon and then and then the ice maker icon from the functions . Please note that 12 to 24 hours are necessary be- fore ice production may begin. The production is of 10 cubes per cycle in approx- imately 10 cycles in 24 hours. The yield depends on the temperature set in the freezer, the room temperature and the frequency of door opening. If the appliance is operating without being connected to the water system, make sure that the Icemaker is deactivated by toch the icon . The Ice Maker produces ice until the ice tray is full and will automatically stop once the maximum level is reached. With the SuperIce function, it is possible to in- crease the quantity of ice produced within 24 hours, while the Set Cube Size function permits selection of the size of the produced ice cubes.28 Ice Maker Water Filter Water System Purge The filter kit should be installed in an accessible location (such as an adjacent cabinet) to allow for the water filter cartridge to be changed annually. If you choose not to use the water filter (such as connecting the appliance to an already filtered water source) then it is suggested to also set the function Water Filter throught the icon ,touch the icon reset and disable the warning to avoid receiving reminders to change the filter (that you are not using).
AP2 FILTER CARTRIDGE REPLACEMENT
! WARNING ! To reduce the risk associated with choking: > Do not allow children under 3 years of age to have access to small parts during the installation of this product. To reduce the risk associated with the ingestion of contaminants: > Do not use with water that is microbiologically unsafe or of unknown quality without adequate disinfection before or after the system. Systems certified for cyst reduction maybe used on disinfected water that may contain filter able cysts. EPA Establishment #070595-Mex-001 CAUTION: To reduce the risk associated with property damage due to water leakage: > Read and follow replacement instructions before replacement of the filter cartridge. > Protect from freezing, remove filter cartridge when temperatures are expected to drop below 33° F (1° C). HOW TO REPLACE THE FILTER CARTRIDGE (Fig.1 ) IMPORTANT: The disposable filter cartridge MUST be replaced every 6 months, at the rated capacity or sooner if a noticeable reduction in flow rate occurs. Note: The system is equipped with an internal by- pass valve. A. Turn cartridge slowly to the left, about 1 /4 turn, until it stops. At this position both inlet and outlet ports are closed and water pressure has been relieved. B. Pull used cartridge straight down and discard. Note: There maybe a small amount of residual water drainage after pressure is relieved and during cartridge removal. C. Make sure the o- rings are positioned correctly in grooves. Moisten the o-rings with water. Push new cartridge into filter head. Turn cartridge 1/4 turn to the right until it stops. Top surface of cartridge will become flush with bottom of the head when fully engaged. D. Open faucet or down stream valve (if installed) and flush new filter cartridge for two minutes, expelling any trapped air and carbon fines. Water may run cloudy with air but will quickly clear.29 Freezerfrom -13° C to -23° C(from 9° F to -11° F)
To provide optimum interior lighting, LED strips illu- minate the freezer compartment from the side and sets of LED lights directly illuminate dierent areas of the compartment. In case of malfunction and/or wearing out of the lighting system, the repair should be carried out by a qualified Bertazzoni Service technician.
9.1 General directions
Your appliance is designed to ensure precise, con- stant temperatures and appropriate humidity levels in all compartments. Nevertheless, to properly preserve all of your foods, it is not enough to have an excellent appliance. It is also necessary to know the rules for correct food preservation. Do bear in mind that all foods will inevitably change their characteristics over the passage of time. This change begins long before the food is consumed, since foods contain micro organisms which multi- ply and can cause deterioration. This process occurs more rapidly due to improper handling, preservation temperatures and humidity levels. It is therefore recommended to follow the directions presented below which will permit using your freez- er in the most eective and safe manner to keep your foods in the best way for as long as possible. Periodically check that all foods are in a perfect state of preservation. If you believe that a food item was kept for an excessive period of time and may be de- teriorated, do not consume this item or even taste it, even if it seems to still be healthy, since the bacteria that cause deterioration of food can also cause poi- soning and illness. When in doubt, throw the food away.30
10. CARE AND CLEANING
9.2 How to best preserve food quality
When buying groceries Always take the following precautions: > Place any packages of raw meat, fish or poultry in plastic bags so that they do not drip on other foods. > Purchase meat, poultry and fish last. Do not leave your groceries in a warm car after shopping. Keep a freezer bag in your car and use it in case of very high temperatures or long trips. > Check the production dates and “best before” times on foods to be sure that they are fresh. > Be very careful when buying fresh foods, and only buy a quantity that can be consumed during your planned preservation period. When placing foods in > To keep food in the freezer is a good idea to use freezer containers. > Label and date the packages. > Be careful to correctly position the food items on the shelves in a way that does not obstruct the air circulation vents inside the compartment. Warning After a prolonged interruption of electri- cal power, once the electrical power is re- activated, an audible signal will indicate if the temperature has raised above normal levels. In addition to this the display will show for one minute the highest temper- ature detected inside the compartments, to allow the user to decide how to better use the food items. After one minute the display will resume normal operation, while the Alarm button will continue to blink. Press the Alarm button to display the highest recorded temperatures.
10.1 Care and Cleaning
To clean the parts made of steel use a microfiber cloth and the sponge provided in the kit with the appliance. Always use the cloth and sponge in the direction of the steel’s satin finish. Every now and then, to polish the steel, wipe with a slightly damp microfiber cloth. Do not use the sponge on aluminium parts, such as the handles and the profiles of the glass shelves. You should use special care to keep the ventila- tion openings in the appliance or in the cabinet that houses it free of obstructions. Carefully follow the detailed directions that can be found in the provided kit and never use abrasive or metallic products which could scratch and damage the satin finishing on the appliance permanently. Before performing any sort of cleaning, disconnect the appliance from the electrical power supply. Make sure you do not damage the refrigerant circuit in any way. Warning Do not use chlorine-based detergents or cleaning agents.
10.2 Internal cleaning
Clean the internal and removable parts by washing them with a solution of lukewarm water, a small amount of dishwashing detergent. Rinse and dry right away. Do not use mechanical devices or other methods to speed up defrosting. Warning Do not use water on the electrical parts, lights and control panel. Warning The use of chlorine-based detergents or similar that contains it should be avoided (bleach, hypochlorite, etc). Do not bring cold glass parts into contact with boiling water. Do not wash any parts of the appliance in a dishwashing machine since this could dam- age or irreparably deform the parts.
10.3 Cleaning of the toe kick cover, filter
and condenser. It is recommended to perform the following cle- aning steps very 6 months. An audio and visual message on the display will serve as a reminder. It is possible to disable the warning signal and see the time left before the next cleaning has to be done. Behind the frontal toe kick cover there is the con- denser. To clean it use a vacuum cleaner with a soft brush attachment at maximum power, sweeping it along the vent slits. In case of a significant dust build up, the toe kick cover can be removed to allow a more accurate cleaning of the filter. On the mantenience settings, after the installation of the unit and after it has been turned on, you can set the condenser cleaning warning. In the case the warning sign is enabled, there will be an audible signal every 6 months, alerting that it is time to clean the condenser. After cleaning it, touch the reset icon in order to reactivate the warning signal in 6 months. If you do not want the cleaning signal alert for the condenser, touch the O icon.32
10. CARE AND CLEANING 11. TROUBLESHOOTING GUIDE
Lower condenser. For cleaning the condenser follow the instruc- tions: > Switch o the appliance by pressing the Unit button on the main control panel for approx 3 seconds. > Wait approx 30 minutes, until the finned condens- er cools down to room temperature. > Remove the removable grille under the door. > Clean it thoroughly from any dust build up as shown in the picture, taking care not to damage it. > Restart the unit again, pressing on the unit button for three second. Warning The edges of the condenser are sharp, therefore use adequate protection for hands and arms when cleaning the condenser.
11.1 Troubleshooting Guide
If you notice malfunctions in your appliance, use this guide before calling for service: this guide can help you personally resolve the problem or could provide important information to be conveyed to the service technician to ensure rapid and eective repair. Display message and audible alarms. A malfunction is usually indicated by the display. Problems that cannot be solved by the user are reported through a fault code. Keep in mind, however, that in messages or alarms they may appear for particular conditions of use or during start-up. In these cases, deactivate the audible alarm by pressing the Alarm button and leave the appliance running and limit the opening of the doors to the maximum for about 10-12 hours. The freezer does not work. Is the appliance connected to the electrical power supply? Is electrical power available at the electricity socket? Is the Unit button activated? Is the unit in ‘Demo’ Mode? The freezer is warmer than usual. Does the display show a malfunction code? Is the temperature adjusted correctly? Were the doors or drawers open for a long period of time? Were large quantities of food recently inserted? Is the unit in ‘Demo’ Mode? The appliance remains in function for a long time period. Bear in mind that during very hot weather and with very high temperatures in the room it is normal that the compressor remains on for prolonged periods of time. Were the doors or drawers open for a long period of time? Were large quantities of food recently inserted? Check that the doors are closed and that the food or containers do not obstruct the perfect closure of the door. Is one or more compartments in Shopping Mode? If you hear unusual noises. It is normal to hear noises from the ventilators or compressors during operation or during the defrost phase. Noise could be more noticed depending on the position of the appliance and the surrounding environment.33 Ice Maker Water Filter Water System Purge
Condensation inside and outside of the freezer. If the climate is very humid, the formation of condensation is normal.Opening the door or draw- ers for prolonged periods of time can contribute to the formation of condensation. In any case, make sure that the doors are always completely closed. Ice or frost build up inside the freezer. Did you leave the doors open for a long period of time? Do the doors close completely? If the doors do not close completely, contact your installer. The doors are dicult to open. The appliance is designed to ensure a fully hermetic closure. When the door is closed, a vacuum condition can occur: in this case it is necessary to wait a few seconds until the pressure balances before opening the door. Appliance is cooling but lights and display are not working. Check to see if the appliance was accidently placed into Sabbath Mode The Ice Maker does not work. Make sure that the Ice Maker is on (icon ). To switch on the Ice Maker press the button. Make sure that the appliance is connected to the water supply. The Ice Maker does not produce sucient amounts of ice. On average, the Ice Maker produces approximately 10 cubes of ice every two and half hours. The ice cubes freeze into one block. If the ice is not used frequently, it is possible that blocks of ice may form. It is recommended to remove the block of ice cubes and then let the Ice Maker fill the ice tray again. The ice has an unusual flavour or colour. When the Ice Maker is started for the first time, it is recommended to empty the first full tray of ice cubes. If the freezer was switched o for more than one month or if the cartridge was not changed for more than six months, it could be necessary to replace the filter cartridge. Contact a plumber or a water treatment expert to make sure that the problem is not due to the water supply. If the unit you purchased was used as a showroom model it may be in a special en- ergy-saving mode called Demo Mode where the appliance appears to be operating (lights work and false temperatures are displayed) but no cooling actually takes place. If you sus- pect your appliance is in Demo Mode please contact your point of purchase for assistance with disabling this feature.34
11. TROUBLESHOOTING GUIDE
> In case of errors, touch the button Alarm and the display will show the error message with its error number code. > The message will be shown for 3 seconds, then it will go back to the home screen. > For blocking the message on the screen, press on the display, the button info ( ). The message will be on the screen for 30 seconds, then it will go back to the home screen. > In the case there is more than one error message, the dispay will show in time sequence the dierent error messages.
11.2 Error messages appearing on the display
Display message Malfunction description Power Failure!! Prolonged interruption of electrical power the appliance resumes work automatically, the display shows the warmest temperatures achieved Door Unit OPEN Unit door open the message appears after few minutes from the door opening Replace filter Replace filter cartridge message appears when only 30% of filter capacity is left Error Code... Functional problems call Customer Care who may help you to solve the problem or put you in contact with the nearest Service Agent may help you solve the problem Check condenser Check Condenser Every 6 months the display shows the message “Check Cond”, clean the condenser and follow the instructions above about how to clean the condenser. Vuoi attivarela modalità COOLER BOTTIGLIE? Sì NoEN Limited two-year warranty The Warranty coverage provided by Bertazzoni SpA (“Bertazzoni”) in this statement applies exclusively to the original Bertazzoni appliance (“Product”) sold to the consumer (“Purchaser”) by an authorized Bertazzoni dealer/distributor/retailer, purchased and installed in the United States, District of Columbia, or Canada which has always remained within the country of original purchase (United States, District of Columbia, or Canada). Warranty coverage is activated on the date of original retail purchase of the Product and has a duration of two(2) years. Limited five year parts and labor warranty on sealed system After year two(2) through year five(5) from original purchase date, Bertazzoni warranty covers all parts and labor to repair or replace any components that prove to be defective in materials or workmanship in the sealed system. The “Sealed System” means only the compressor, condenser, evaporator, drier and all connecting tubing. Warranty coverage is non-transferrable. In the event of parts replacement or entire product replacement, the replacement Product (or parts) shall assume the remaining original Warranty activated with original retail purchase document. This Warranty shall not be extended with respect to such replacement. Bertazzoni SpA will repair or replace any compo- nent/part which fails or proves defective due to materials and/or workmanship within 2 years from the date of original retail purchase and under conditions of normal residential, non-commercial use. Repair or replacement will be free of charge, including labor at standard rates and shipping expenses. Purchaser is responsible for making the Product reasonably accessible for service. Repair service must be performed by a Bertazzoni Authorized Service company during normal working hours. Labor performed at overtime or premium rates shall not be covered by Warranty. IMPORTANT: retain proof of original purchase to establish warranty period. Bertazzoni’s liability on any claim of any kind, with respect to the goods and/or services provided, shall in no event exceed the value of the goods or service or part thereof which gives origin to the claim. 30 Day Cosmetic warranty Inspection of the product must be made by Purchaser at time of delivery. Bertazzoni warrants that the Product is free from manufacturing defects in materials and workmanship for a period of thirty (30) days from date of original retail purchase of the Product. This coverage includes: > Paint blemishes > Chips > Macroscopic finish defects Cosmetic warranty does NOT cover: > issues resulting from incorrect transport, handling and/or installation (i.e: dents, broken, bowed or deformed structures or components, shattered glass components) > slight color variations in painted/enameled components > dierences caused by natural or artificial lighting, location or other analogous factors. > Stains/corrosion/discoloration caused by external substances and/or environmental factors > labor costs, display, floor, B-stock, out- of-box, “as is” appliances and demo units. How to obtain service To receive warranty service, the Purchaser must contact Bertazzoni Service for problem determination and correct service procedures. Model number, serial number and date of original retail purchase will be requested. IMPORTANT: retain proof of original purchase to establish warranty period. If located in the USA
https://us.bertazzoni.com/more/support If located in CANADA
https://ca.bertazzoni.com/more/support
PRODUCT SOLD BY BERTAZZONI NOT CAUSED
OF THIS PRODUCT, IS NON-TRANSFERABLE AND
STATES YOUR EXCLUSIVE REMEDY. Bertazzoni does not assume any responsibility for incidental or consequential damages. Some states do not allow the exclusion or limi tation of incidental or consequential damages, so the above limitation or exclusion may not apply to you. This warranty gives you specific legal rights and you may also have other rights which may vary from state to state or province to province. Any questions about this Limited Warranty may be directed to Bertazzoni Customer Care If located in the USA:
https://us.bertazzoni.com/more/support If located in CANADA:
https://ca.bertazzoni.com/more/support
GARANTIE EXPRESSE OU GARANTIE DONNÉE
https://ca.bertazzoni.com/more/support1 ÍNDICE
https://ca.bertazzoni.com/more/support