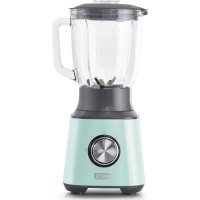
Chef Series Hand DHB100GBMN06 - Blender Dash - Free user manual and instructions
Find the device manual for free Chef Series Hand DHB100GBMN06 Dash in PDF.
| Product Type | Immersion blender |
| Brand | Dash |
| Model | Chef Series Hand DHB100GBMN06 |
| Category | Blender |
| Color | Not specified (estimated: black/white) |
| Material | Plastic and metal (stainless steel blades) |
| Dimensions (approx.) | 25 x 6 x 6 cm (estimated) |
| Weight (approx.) | 0.6 kg (estimated) |
| Power supply | Polarized electrical plug 120 V~60 Hz (estimated) |
| Power | Not specified (estimated 200-300 W) |
| Cord length | Approximately 1 m (estimated) |
| Included accessories | Blending arm, whisk, motor unit |
| Main functions | Blend, whisk, emulsify, chop |
| Speeds | 2 speeds (estimated) |
| Max continuous use | 30 seconds, then 1 minute rest |
| Care and cleaning | Clean accessories with warm soapy water; wipe motor unit with a damp cloth |
| Safety | Polarized plug, do not immerse, sharp blades, do not use by children |
| Warranty | Not specified (estimated 1 year) |
| Spare parts and repairability | Contact StoreBound at 1-800-898-6970 or support@bydash.com |
| Usage | Household use only |
Frequently Asked Questions - Chef Series Hand DHB100GBMN06 Dash
User questions about Chef Series Hand DHB100GBMN06 Dash
0 question about this device. Answer the ones you know or ask your own.
Ask a new question about this device
Download the instructions for your Blender in PDF format for free! Find your manual Chef Series Hand DHB100GBMN06 - Dash and take your electronic device back in hand. On this page are published all the documents necessary for the use of your device. Chef Series Hand DHB100GBMN06 by Dash.
USER MANUAL Chef Series Hand DHB100GBMN06 Dash
Instruction Manual | Recipe Guide


CHEF SERIES HAND BLENDER
Important Safeguards. 4-7
Parts & Features 8
Using Your Hand Blender 9-11
Using Your Whisk Attachment 12-13
Cleaning & Maintenance 14
Troubleshooting 15
Recipes 16-27
Notes 28-29
Customer Support 30
Warranty. 31
IMPORTANT SAFEGUARDS
IMPORTANT SAFEGUARDS: PLEASE READ AND SAVE THIS INSTRUCTION AND CARE MANUAL.
When using electrical appliances, basic safety precautions should be followed, including:
- Read all instructions.
- Remove all bags and packaging from appliance before use.
- Confirm that the main voltage in your home conforms to the rated voltage shown on the label at the bottom of product.
- Use the attachments only as recommended to avoid injury or damage to the appliance.
Always unplug the appliance from the outlet prior to assembly, disassembly, cleaning and storage. - Never leave appliance unattended when in use.
- Before using for the first time, clean all accessories with warm, soapy water. Rinse and dry thoroughly.
- Do not use appliance for other than intended use. For household use only. Do not use outdoors.
- To prevent the risk of fire, electric shock, or personal injury, do not put cord, plug, or appliance in or near water or other liquids.
- Never use abrasive cleaning agents to clean your appliance as this may damage the Hand Blender.
- Do not operate this appliance with a damaged cord, damaged plug, after the appliance malfunctions, is dropped, or damaged in any manner. Return appliance to the nearest authorized service facility for examination, repair or adjustment.
- Before connecting the appliance to an electrical wall outlet, check that the local electrical supply corresponds to that specified on the
appliance plate.
- Disconnect the power cable from the power system as soon as you stop using and before any cleaning operation, maintenance and assembly of accessories.
- Handle the Blades with care as they are extremely sharp and can cause injury.
- Switch off the unit and disconnect it from the power supply before changing the accessories or approaching parts that are mobile during operation.
Details on cleaning surfaces that come into contact with food can be found in the section "CLEANING AND MAINTENANCE". - CAUTION: Improper use may result in personal injury or property damage.
- For maintenance other than cleaning, please contact StoreBound directly at 1-800-898-6970 from 7AM-7PM PST Monday-Friday or by email at support@bydash.com.
- This appliance is not intended for use by persons (including children) with reduced physical, sensory, or mental capabilities, or lack of experience and knowledge unless they are provided with supervision and instruction concerning use of the appliance by a person responsible for their safety.
- Do not place appliance on or near a hot gas burner, hot electric burner, or in a heated oven.
- Refrain from using attachments that are not
IMPORTANT SAFEGUARDS
recommended by the appliance manufacturer, as this may result in fire, electric shock, or personal injury.
- This appliance must not be used by children. Hold the device and its cable out of reach from children.
- Do not let the cord touch hot surfaces or hang over the edge of tables or counters.
Always be sure to unplug the appliance from outlet prior to moving, cleaning, storage, and when not in use. - StoreBound shall not accept liability for damages caused by improper use of the appliance.
-
Never use the appliance continuously for more than 30 seconds, and allow one minute to elapse between each use.
-
Close supervision is necessary when any appliance is used by or near children.
- Avoid contact with moving parts.
- Do not use outdoors. Keep hands and utensils away from the blade while chopping food to reduce the risk of severe injury!
- This appliance has a polarized plug (one blade is wider than the other). To reduce the risk of electric shock, this plug will fit in a polarized outlet only one way. If the plug does not fit fully in the outlet, reverse the plug. If it still does not fit contact a qualified electrician. Do not modify the plug in any way.
Household use only.
IMPORTANT SAFEGUARDS: PLEASE READ AND SAVE THIS INSTRUCTION AND CARE MANUAL.
VEUILLEZ LIRE ET CONSERVER CE MANUEL D'UTILISATION
1 Speed Adjustment Dial
2 Power Button
3 Turbo Mode Button
4 Attachment Buttons
8 Whisk Attachment
USING YOUR HAND BLENDER
The Hand Blender is intended for blending liquids (saues, dairy, fruit juice, soups, mixed drinks, shakes) mixing soft ingredients like pancake batter or mayonnaise, and puréeing cooked ingredients.

Put the ingredients in a bowl. Attach the Blender Wand to the Motor Unit by pressing in the Attachment Buttons on the sides of the Motor Unit (photo A).

Immerse the Blender Wand completely in the ingredients (photo B).
Plug in the Motor Unit.
USING YOUR HAND BLENDER

Select your speed, then press the Power Button. The higher the speed, the shorter processing time is required (photo C). Press the Turbo Mode Button to blend at max speed.

Blend until desired consistency is reached by continuing to hold down the power button and stirring ingredients in a circular motion (photo D).
WARNING:
The mixing blades are extremely sharp. Be careful when operating. Do not process any completely dry foods using the Blender Wand attachment.
The Hand Blender should not be used continuously for over 30 seconds. Do not put the appliance on one side during operation to avoid splashing.
Unplug the Hand Blender before removing the Blender Wand for cleaning.
Do not immerse the Motor Unit in water.

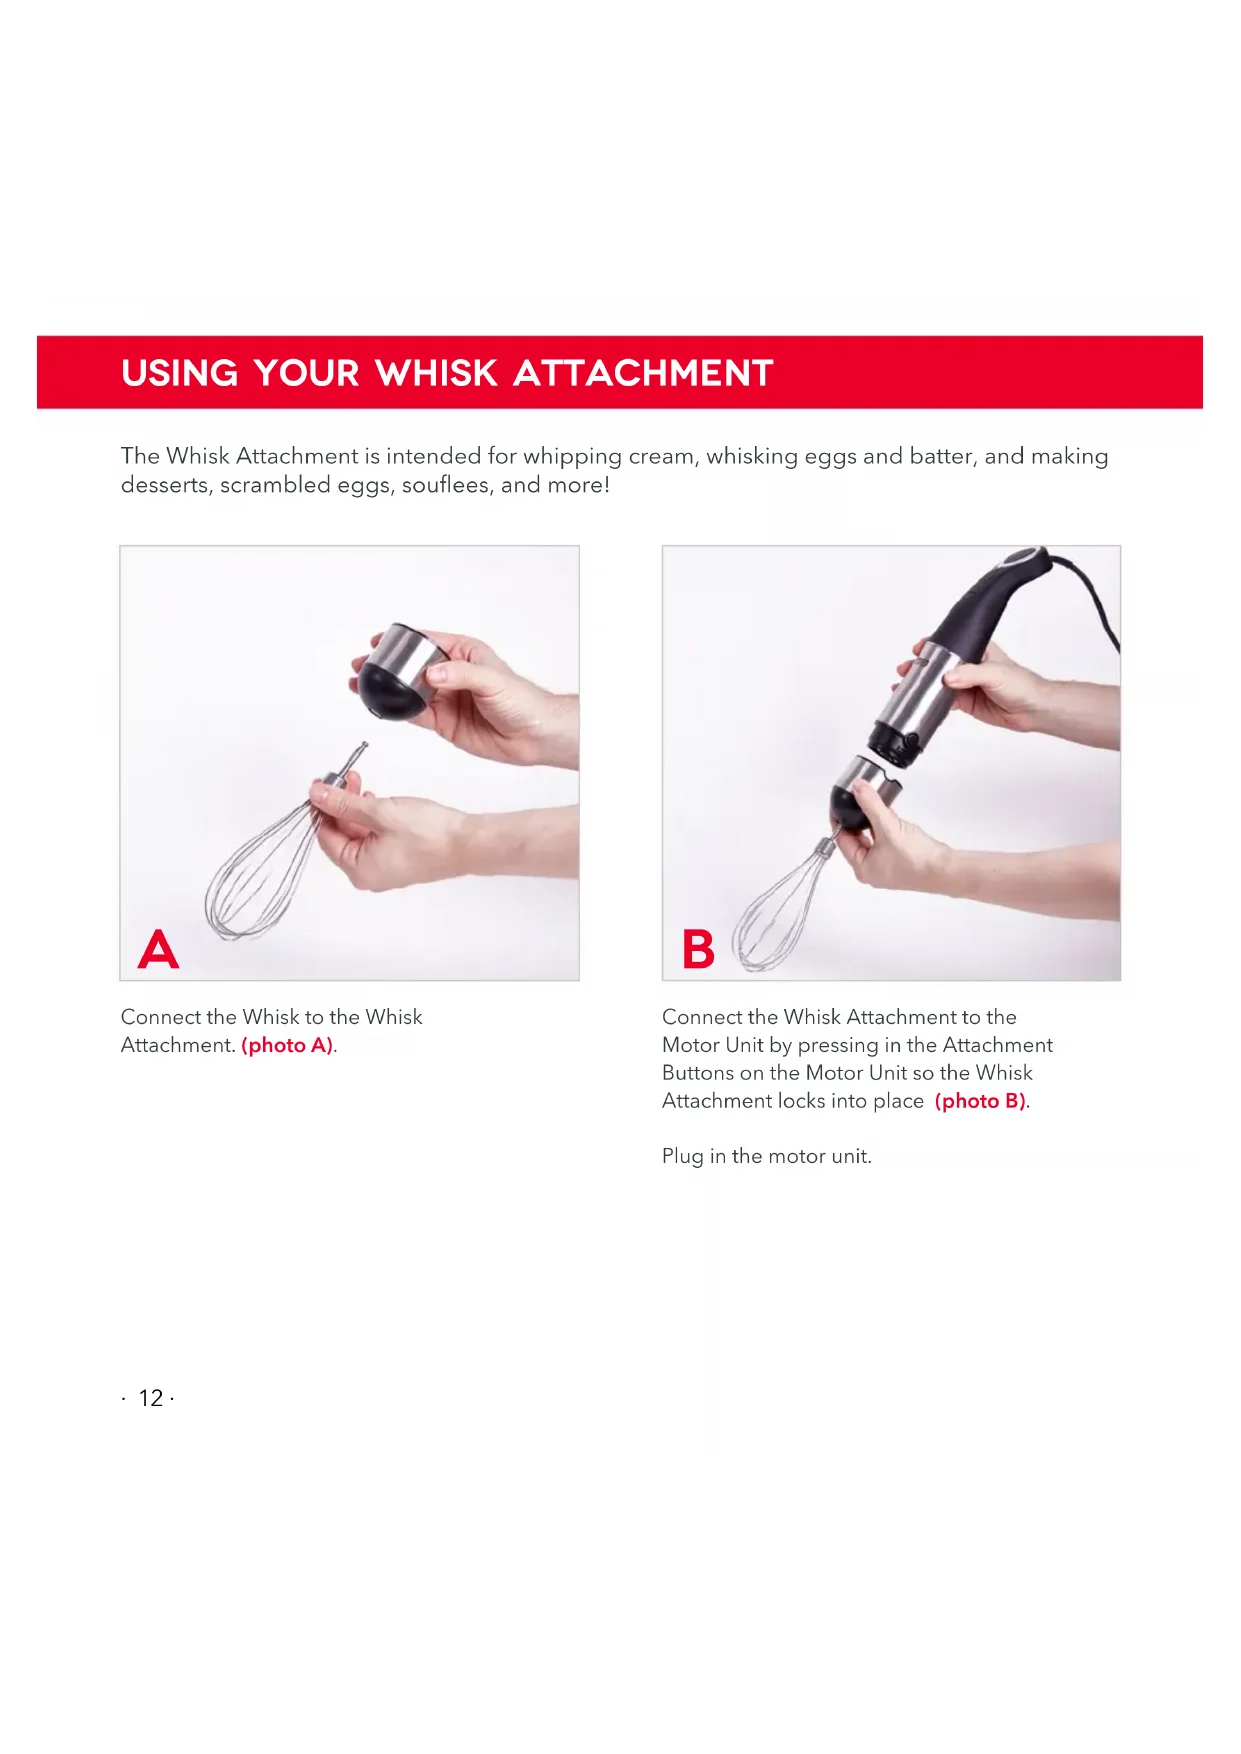
USING YOUR WHISK ATTACHMENT
The Whisk Attachment is intended for whipping cream, whisking eggs and batter, and making desserts, scrambled eggs, souflees, and more!

Connect the Whisk to the Whisk Attachment. (photo A).

Connect the Whisk Attachment to the Motor Unit by pressing in the Attachment Buttons on the Motor Unit so the Whisk Attachment locks into place (photo B).
Plug in the motor unit.
USING YOUR WHISK ATTACHMENT

After connecting the Whisk Attachment, select the speed and then hold down the Power Button (photo C).
Start using the Whisk Attachment on a lower speed to prevent splatters!
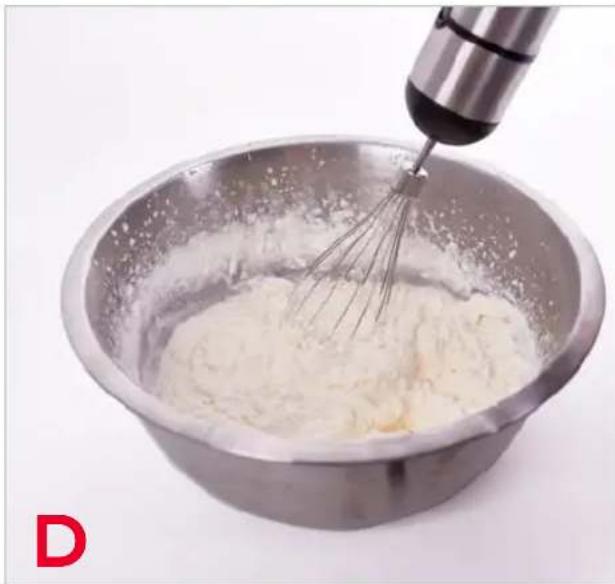
Whisk until ingredients reach desired consistency (photo D).
Unplug the Hand Blender and remove the Whisk Attachment from the Motor Unit for cleaning by pressing the Attachment Buttons.
Always unplug the Hand Blender before disassembly and cleaning!
CLEANING & MAINTENANCE
ALWAYS Unplug the Hand Blender before cleaning or disassembling.
Wipe down the Motor Unit with a warm, damp cloth to clean.
Attachments can be washed with warm, soapy water and wiped dry after each use.
WARNING: Sharp blades pose risk of injury. ALWAYS remove attachments from the Motor Unit before attempting to clean either the Motor Unit or the attachments.
DO NOT submerge the Motor Unit of the Hand Blender in water or other liquids.
The Hand Blender and attachments are NOT Dishwasher safe.
TROUBLESHOOTING
PROBLEM
SOLUTION
The product won't start working.
Please check if the power cord is plugged into the electrical outlet and the attachments you wish to use are properly secured.
The electrical motor gives off an odor or smokes.
This is normal when first using your appliance. Note: If the appliance has been in continuous use for over the recommended period of time, this may happen. In such a case, the appliance must be stopped and allowed to cool for 1 hour.
The appliance stops working while blending.
The motor is equipped with a temperature protection device. The motor will power off automatically once the temperature rises to a dangerous level. Unplug the power cord from the electrical outlet and allow the appliance to cool down (about 1 hour).
The motor is stopping and starting.
Because the shaft of the Hand Blender operates in a limited space, there are time limits for its operation. For some soft foods such as bananas, it takes a break after operating for one minute, and stops for half an hour after five cycles. For hard foods including meat or hard cheeses, the appliance will stop after 15 seconds and stop for a half an hour after three cycles.

CHEF SERIES
HAND BLENDER
RECİPE
GUIDE

Follow us @unprocessyourfood
for recipes, videos, & daily inspiration
HABANERO HOT SAUCE
Ingredients:
1 tbsp neutral oil
2 cups cherry tomatoes
1 / 2 tsp kosher salt
1 tbsp neutral oil
2 red bell peppers, cored, chopped
1 / 2 tsp kosher salt
2 tbsp neutral oil
1 / 2 medium yellow onion, peeled, sliced
1 small fennel bulb, cored, sliced
6 cloves garlic
1-2 habanero peppers, seeded, stemmed, chopped
3 sprigs oregano, leaves only
2 fresh bay leaves
1 tsp whole allspice berries
1 tsp kosher salt
1 tsp fish sauce (optional)
14 tsp ground white pepper
12 cup cherry tomatoes
2 cloves garlic
12 lemon,juiced
12 lime,juiced
Kosher salt, to taste
White sugar, to taste
Ground white pepper, to taste
Directions:
Preheat oven to 375^
Toss cherry tomatoes with oil and salt. Place on parchment-lined sheet tray and roast 25-30 minutes, or until lightly caramelized and skin is wrinkly. Reserve.
Toss bell peppers with oil and salt. Place in parchment-lines sheet tray and roast 15-20 minutes or until lightly caramelized at edges. Reserve.
Heat oil in medium stock pot over medium heat until slick and shiny. Add onion, fennel, garlic, habanero, oregano, bay leaves, allspice, salt, pepper, fish sauce.
Sauté 5-8 minutes, or until very fragrant and onions are beginning to caramelize lightly.
Remove from heat and add roasted tomatoes, roasted bell pepper, fresh tomatoes, fresh garlic, lemon juice, lime juice.
Use Hand Blender and puree to desired consistency.
Season with salt, sugar, pepper to taste.

CAULIFLOWERSOUP
Ingredients:
2 tbsp neutral oil
1 medium onion, sliced (approx. 2 cups)
4 cloves garlic, sliced
2 medium parsnips, peeled, chopped (approx. 2 cups)
2 tsp whole coriander seed
1/4 tsp ground ginger
14 cup dry white wine
1 14 tsp white sugar
16 oz cauliflower florets (aprox. 4 cups)
1 quart unsalted chicken or vegetable stock
Kosher salt, to taste
Ground white peper, to taste
White sugar, to taste
Dill, chopped, as garnish
Directions:
Heat oil in suitably sized pot over medium heat until slick and shiny.
Add onion, garlic, coriander seed, parsnip, ginger, salt, pepper, Saute 5-8 minutes or until onion and parsnip are lightly caramelized at edges.
Deglaze with white wine, and let reduce 2-3 minutes.
Add cauliflower florets, sugar, and stock.
Bring mixture to a boil, then reduce heat to medium-low and let cook approximately 30 minutes or until parsnips and cauliflower are completely soft.
Use Hand Blender to blend soup to desired consistency.
Season soup with additional salt, sugar, pepper to taste.
Garnish with dill if desired.
PRO TIP: If you want to add in some extra flavor, try the vegetarian seasoning Yondu that's often used in Japanese cooking.
BUTTERNUT SQUASH
SOUP
Ingredients:
1 small butternut squash
2 tbsp neutral oil
1 small onion, peeled, sliced (approx. 2 cups)
6 cloves garlic, sliced
3 sprigs sage, leaves only, sliced
12 tsp whole cumin seed
Roasted squash, from above
1 tsp shrimp paste (optional)
2 tsp kosher salt
1 14 tsp white sugar
14 ground white pepper
2 quart unsalted chicken or vegetable stock
Kosher salt, to taste
White sugar, to taste
Ground white pepper, to taste
Lemon juice, to taste
Cilantro, chopped, as garnish
Directions:
Preheat oven to 375^
Prick butternut squash all over with fork. Place on parchment lined sheet tray and roast until soft and easily pierced by fork, approximately 45 minutes.
Remove and let cool
Peel away skin and scoop out seeds. Reserve.
Heat oil in suitably sized pot over medium heat until slick and shiny.
Add onion, garlic, sage, cumin seed with a dash of salt and sauté 3-5 minutes or until fragrant.
Add the roasted squash, shrimp paste, salt, sugar, pepper and stock.
Bring mixture to a boil, then reduce heat to medium-low and let cook approximately 15 minutes or until flavors are well combined.
Use Hand Blender to blend soup to desired consistency.
Season soup with additional salt, sugar, pepper, lemon juice to taste.
Garnish with cilantro if desired.
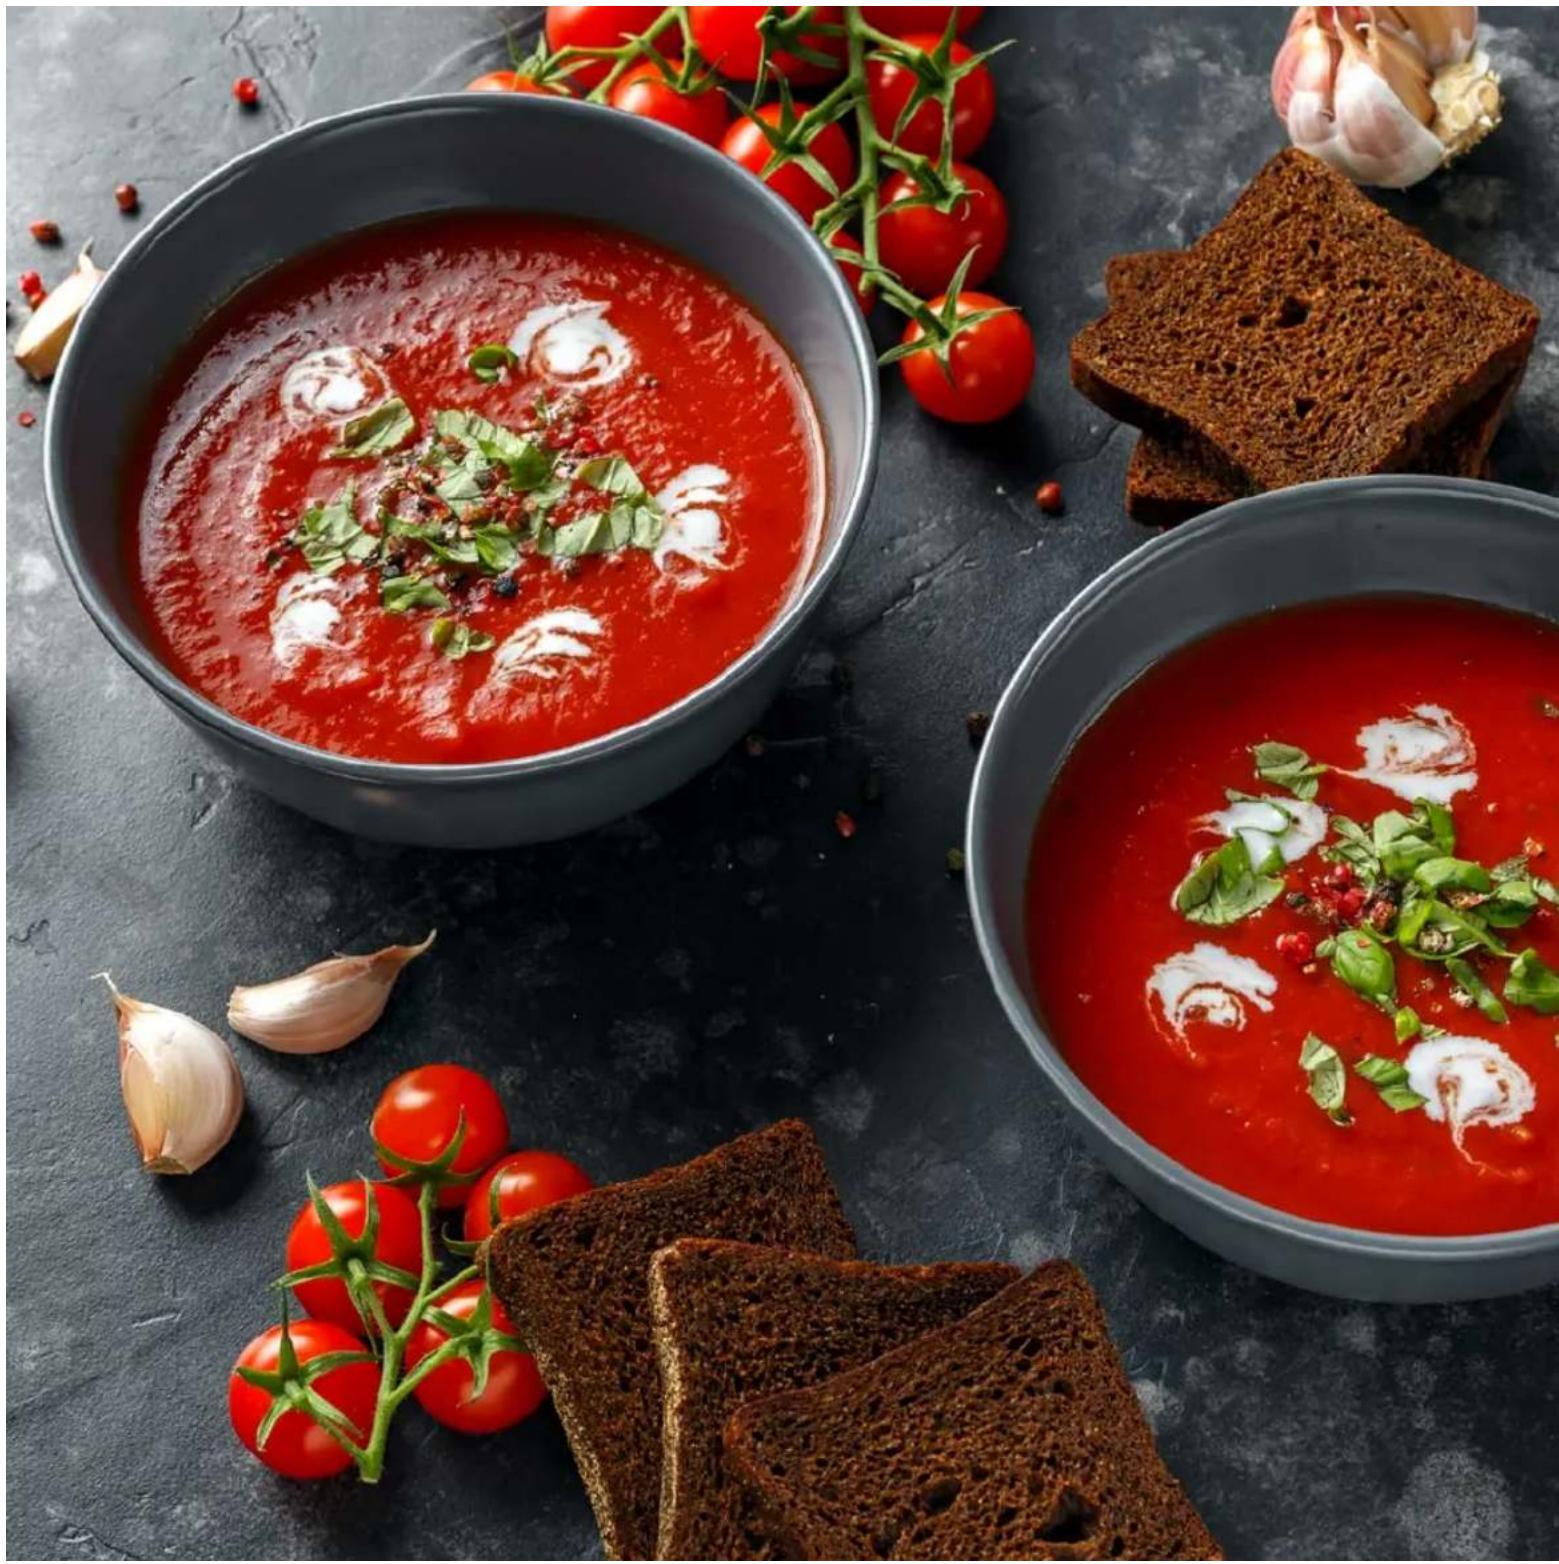
TOMATO SOUP
Ingredients:
2 tbsp neutral oil
2 leeks, white parts only, halved, sliced (approx. 2 cups)
6 cloves garlic, sliced
3 sprigs oregano, leaves only, chopped
3 sprigs rosemary, leaves only, chopped
2 sprigs marjoram, leaves only, chopped
3 cups sliced white
mushrooms
2 tsp kosher salt
2 tsp fish sauce
1/4 cup dry white wine
6 beefsteak tomatoes, chopped
2 small Yukon gold potatoes, peeled, chopped
2 tsp kosher salt
2 tsp fish sauce
1 / 2 tsp white sugar
112 tsp ground black pepper
1 tbsp sweet white miso (optional)
1 quart unslated chicken or vegetable stock
Kosher salt, to taste
White sugar, to taste
Ground black pepper, to taste
Parsley, leaves only, chopped, as garnish
Directions:
Heat oil in suitably sized pot over medium heat until slick and shiny.
Add leeks, garlic, oregano, rosemary, majoram with a dash of salt. Sauté 3-5 minutes or until fragrant.
Add mushrooms, salt, fish sauce and cook another 5 minutes or until mushrooms have reduced in size by approximately 12 .
Deglaze with white wine, and let reduce 2-3 minutes.
Add tomatoes and let cook another 3-5 minutes.
Add potatoes, salt, fish sauce, sugar, black pepper, miso and stock.
Bring mixture to a boil, then reduce heat to medium-low and let cook approximately 30 minutes or until potatoes are completely soft.
Use the Hand Blender to blend soup to desired consistency.
Season soup with additional salt, sugar, pepper to taste.
Garnish with parsley if desired.
BASIC MAYONNAISE
Ingredients:
1 large egg yolk
1 / 2 tsp kosher salt
14 tsp finely ground black pepper
1 cup neutral oil
2 tsp lemon juice.
Directions:
Using the Whisk Attachment, whisk together egg yolk with salt and pepper on lowest setting (1).
Increase speed to 3, and begin to add oil in a thin but steady stream.
Continue adding in oil until mixture thickens and lightens up considerably, approx. 2-3 minutes.
Once all oil hs been incorporated, add in lemon juice.
Pause and season again with salt, pepper and more lemon if desired.
Store in refrigerator for up to 1 week.
LEMON CURD “BARS”
Ingredients:
13 cup lemon or citrus juice
12 cup white sugar
1/2 tsp kosher salt
7 egg yolks
4-6 lemons or citrus, zested
1 full egg
1 6" pie crust of choice, par-baked
Directions:
Combine citrus juice with sugar and salt over small pot on low heat.
Whisk together egg yolks, zest, and egg using the Whisk Attachment on lowest speed (1).
Once juice is at a simmer, carefully whisk by hand hot juice into egg yolks in a thin, steady stream.
Transfer the juice-yolk emulsion back to stovetop in the small pot over the lowest flame possible. Whisk by hand 30 seconds to 1 minute until mixture thickens and cooks, taking care not to curdle or "scramble" the eggs.
Transfer mixture into pie crust, smoothing the top.
Let cool in refrigerator 4 hours or until completely set.
Cut pie into "bar" shapes and serve!
COCONUT MACAROONS
Ingredients:
2 large egg whites
1/3 cup sugar
1/2 tsp kosher salt
1 tbsp all purpose flour
2 cups unsweetened desiccated coconut
1 tsp vanilla or almond extract
Melted chocolate, as needed (optional)
Directions:
Preheat oven to 350^
Combine egg whites with sugar and salt. Whisk at lowest speed (1) until frothy and just lightly glossy, approx. 2-3 minutes. The Hand Blender is best used in 30-second intervals with rests for cooling in between.
Add in flour, coconut and extract. Whisk to combine.
Using round tablespoon mesure or similarly sized scoop, portion out macaroons on parchment lined sheet tray.
Bake on middle rack until lightly golden brown on top, approx. 10 minutes.
Let fully cool before removing.

NOTES
NOTES
CUSTOMER SUPPORT

Dash values quality and workmanship and stands behind this product with our Feel Good Guarantee™. To learn more about our commitment to quality, visit bydash.com/feelgood.
Our US-based customer support team is at your service Monday - Friday during the times below.
Reach us at 1 (800) 898-6970 or support@bydash.com

Hey Hawaii! You can reach our customer service team from 5AM to 5PM. And also, Alaska, feel free to reach out from 6AM - 6PM.
STOREBOUND, LLC - 1 YEAR LIMITED WARRANTY
Your StoreBound product is warranted to be free from defects in material and workmanship for a period of one (1) year from the date of the original purchase when utilized for normal and intended household use. Should any defect covered by the terms of the limited warranty be discovered within one (1) year, StoreBound, LLC will repair or replace the defective part. To process a warranty claim, contact Customer Support at 1-800-898-6970 for further assistance and instruction. A Customer Support agent will assist you by troubleshooting minor problems. If troubleshooting fails to fix the problem, a return authorization will be issued. Proof of purchase indicating the date and place of purchase is required and should accompany the return. You must also include your full name, shipping address, and telephone number. We are unable to ship returns to a PO box. StoreBound will not be responsible for delays or unprocessed claims resulting from a purchaser's failure to provide any or all of the necessary information. Freight costs must be prepaid by the purchaser.
Send all inquiries to support@storebound.com.
There are no express warranties except as listed above.
REPAIR OR REPLACEMENT AS PROVIDED UNDER THIS WARRANTY IS THE EXCLUSIVE REMEDY OF THE CUSTOMER. STOREBOUND SHALL NOT BE LIABLE FOR ANY INCIDENTAL OR CONSEQUENTIAL DAMAGES OR FOR BREACH OF ANY EXPRESS OR IMPLIED WARRANTY ON THIS PRODUCT EXCEPT TO THE EXTENT REQUIRED BY APPLICABLE LAW. ANY IMPLIED WARRANTY OF MERCHANTABILITY OR FITNESS FOR A PARTICULAR PURPOSE ON THIS PRODUCT IS LIMITED IN DURATION TO THE DURATION OF THIS WARRANTY.
Some states do not allow the exclusion or limitation of incidental or consequential damages, or limitations on how long an implied warranty lasts. Therefore, the above exclusions or limitations may not apply to you. This warranty gives you specific legal rights and you may also have other rights, which vary from state to state.
REPAIRS
DANGER! Risk of electric shock! The Dash Chef Series Hand Blender is an electrical appliance.
Do not attempt to repair the appliance yourself under any circumstances.
Contact Customer Support regarding repairs to the appliance.
TECHNICAL SPECIFICATIONS
Voltage 120V 60Hz
Power Rating 330W (Max.)
This product has passed
food safety testing in
accordance
with FDA guidelines.