USER MANUAL Cotton Candy Maker BELLA
www.bellahousewares.com
BELL
THANK YOU
For your purchase

Register & sign up for special
announcements and trendy recipes!

Tell us what you think!
Rate, review or ask us a question.

bellahousewares.com
get inspired


BellaLifestyle
BellaLife
Table of Contents
Important Safeguards 2
Additional Important Safeguards 3
Notes On The Cord 3
Notes On The Plug. 3
Plasticizer Warning 3
Electric Power. 3
Getting To Know Your Cotton Candy Maker. 4
Before Using For The First Time 4
Operating Instructions 4-5
Hints For Best Results 5
Preferred Sugar And Sugar-Free Candy List 5
Sugar And Sugar-Free Candy Not Recommended 5
Flavor Combinations 6
User Maintenance Instructions.. 6
Care & Cleaning Instructions 6
Storing Instructions 6
Warranty 7
Table des matieres
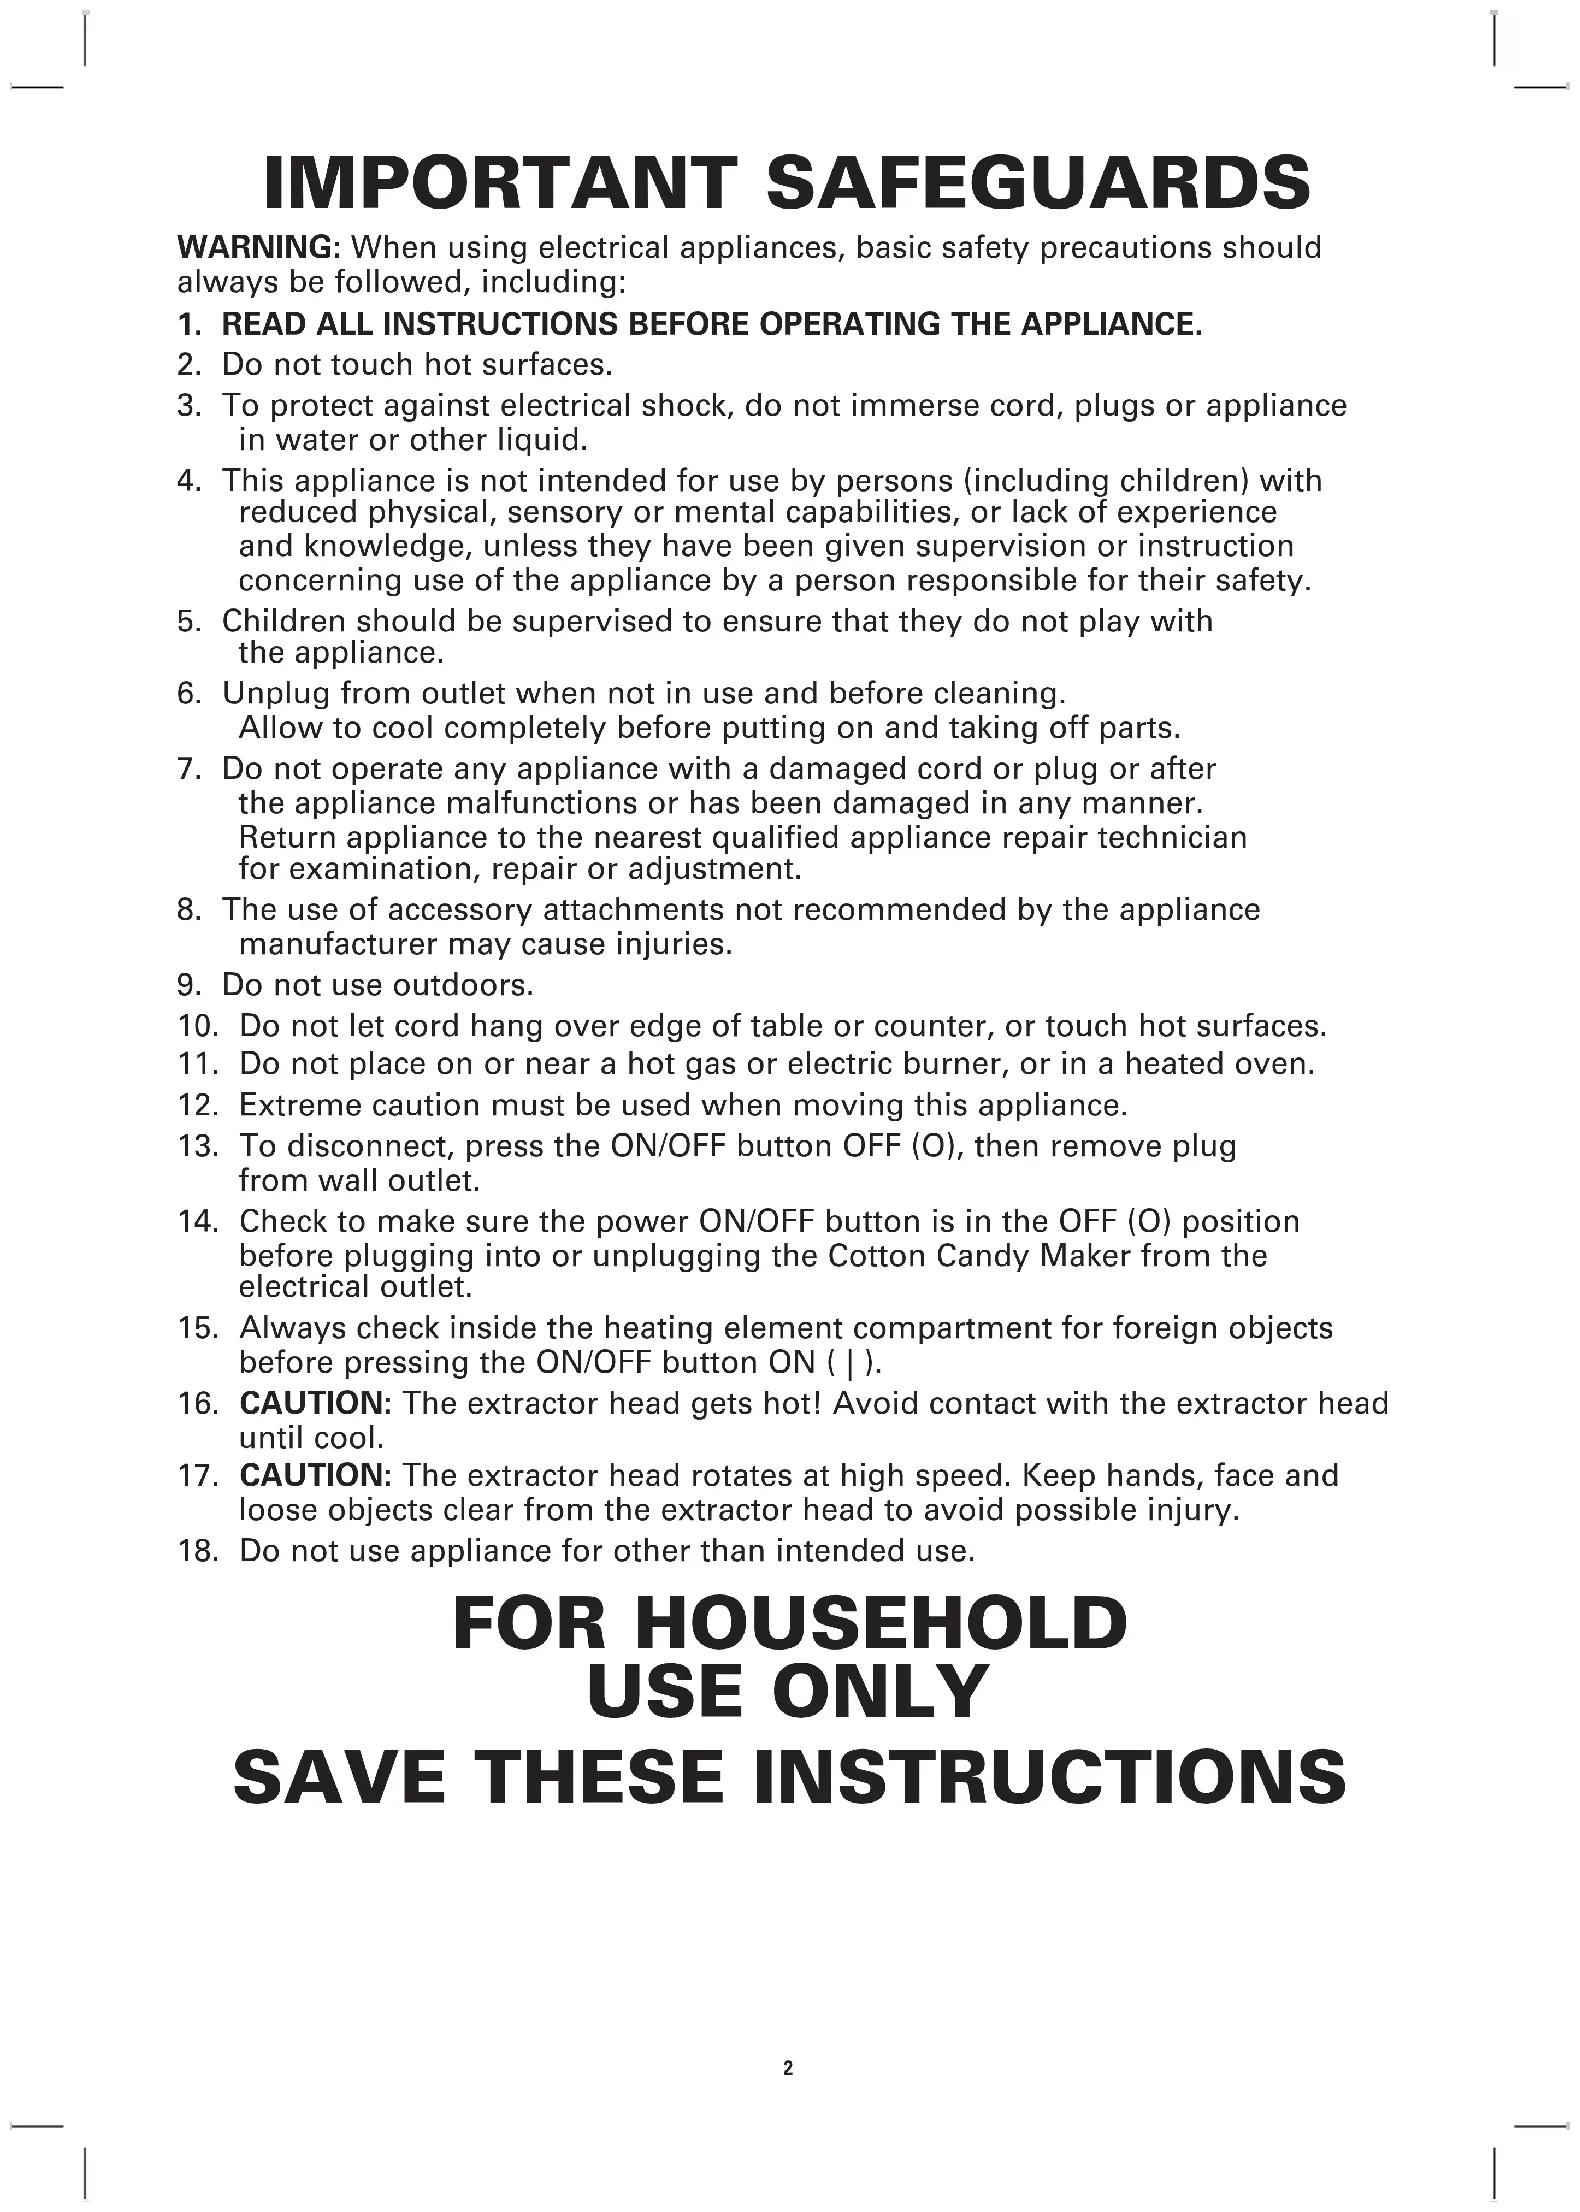
WARNING: When using electrical appliances, basic safety precautions should always be followed, including:
- READ ALL INSTRUCTIONS BEFORE OPERATING THE APPLIANCE.
- Do not touch hot surfaces.
- To protect against electrical shock, do not immerse cord, plugs or appliance in water or other liquid.
- This appliance is not intended for use by persons (including children) with reduced physical, sensory or mental capabilities, or lack of experience and knowledge, unless they have been given supervision or instruction concerning use of the appliance by a person responsible for their safety.
- Children should be supervised to ensure that they do not play with the appliance.
- Unplug from outlet when not in use and before cleaning. Allow to cool completely before putting on and taking off parts.
- Do not operate any appliance with a damaged cord or plug or after the appliance malfunctions or has been damaged in any manner. Return appliance to the nearest qualified appliance repair technician for examination, repair or adjustment.
- The use of accessory attachments not recommended by the appliance manufacturer may cause injuries.
- Do not use outdoors.
- Do not let cord hang over edge of table or counter, or touch hot surfaces.
- Do not place on or near a hot gas or electric burner, or in a heated oven.
- Extreme caution must be used when moving this appliance.
- To disconnect, press the ON/OFF button OFF (O), then remove plug from wall outlet.
- Check to make sure the power ON/OFF button is in the OFF (O) position before plugging into or unplugging the Cotton Candy Maker from the electrical outlet.
- Always check inside the heating element compartment for foreign objects before pressing the ON/OFF button ON ( | ).
- CAUTION: The extractor head gets hot! Avoid contact with the extractor head until cool.
- CAUTION: The extractor head rotates at high speed. Keep hands, face and loose objects clear from the extractor head to avoid possible injury.
- Do not use appliance for other than intended use.
SAVE THESE INSTRUCTIONS
ADDITIONAL IMPORTANT SAFEGUARDS
CAUTION, HOT SURFACES: This appliance generates heat and escaping steam during use. Proper precautions must be taken to prevent the risk of burns, fires or other injury to persons or damage to property.
- A person who has not read and understood all operating and safety instructions is not qualified to operate this appliance. All users of this appliance must read and understand this Instruction Manual before operating or cleaning this appliance.
- If this appliance falls or accidentally becomes immersed in water, unplug it from the wall outlet immediately. Do not reach into the water!
- When using this appliance, provide adequate air space above and on all sides for air circulation. Do not operate this appliance while it is touching or near curtains, wall coverings, clothing, dish towels or other flammable materials.
- Do not leave this appliance unattended when the plugged into an electrical outlet and ON/OFF button is ON ( | ).
- If this appliance begins to malfunction during use, immediately unplug the cord. Do not use or attempt to repair a malfunctioning appliance!
- The cord to this appliance should be plugged into a 120V AC electrical wall outlet.
- Do not use this appliance in an unstable position. This unit should be used on a flat, level surface.
Notes on the Plug
This appliance has a polarized plug (one blade is wider than the other). To reduce the risk of electric shock, this plug will fit in a polarized outlet only one way. If the plug does not fit fully into the outlet, reverse the plug. If it still does not fit, contact a qualified electrician. Do not modify the plug in any way.
Notes on the Cord
The provided short power-supply cord should be used to reduce the risk resulting from becoming entangled in or tripping over a longer cord. Do not use an extension cord with this product. Always plug directly into a wall outlet/receptacle.
Plasticizer Warning
CAUTION: To prevent Plasticizers from migrating to the finish of the counter top or table top or other furniture, place NON-PLASTIC coasters or place mats between the appliance and the finish of the counter top or table top. Failure to do so may cause the finish to darken; permanent blemishes may occur or stains can appear.
Electric Power
If the electrical circuit is overloaded with other appliances, your appliance may not perate properly. It should be operated on a separate electrical circuit from other appliances.
Cotton Candy Party at Home!
Children young and old, love eating cotton candy. For carnival fun from home, your Cotton Candy Maker transforms both granulated sugar and hard candies into your favorite flavored cotton candy in minutes! Use sugar-free candies to create a low calorie treat. Simple to operate and easy to clean, your Cotton Candy Maker will be the hit of any party or family celebration.
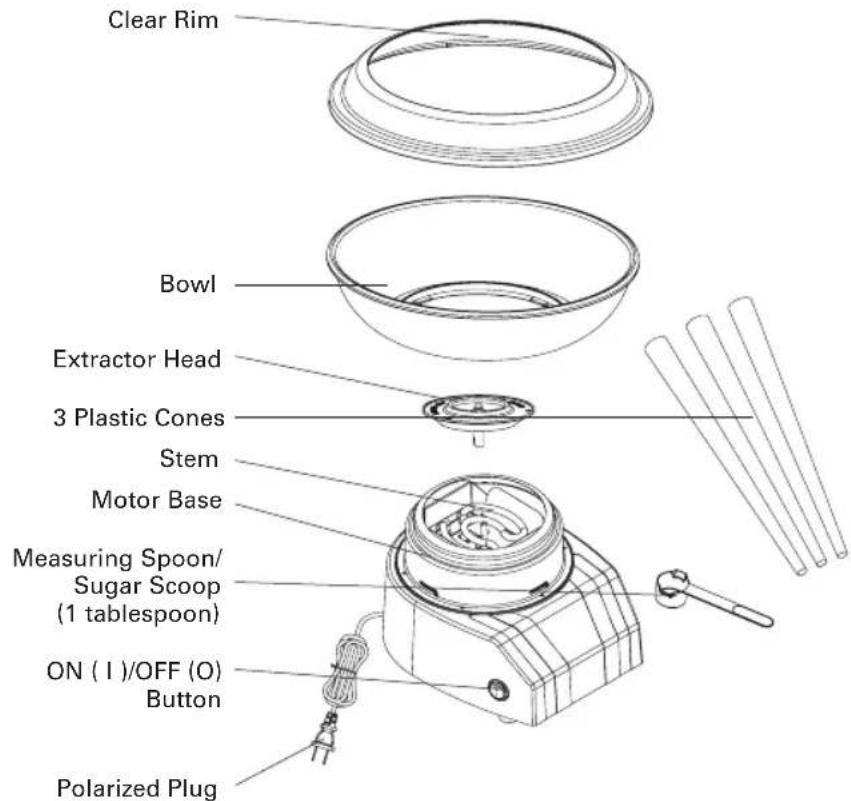
Figure 1
Getting to Know Your Cotton Candy Maker
Product may vary slightly from illustration
Before Using for the First Time
- Carefully unpack the Cotton Candy Maker and remove all packaging materials.
- Before using your Cotton Candy Maker for the first time, wipe down the unit with a non-abrasive cloth or sponge to clean any dust or loose materials.
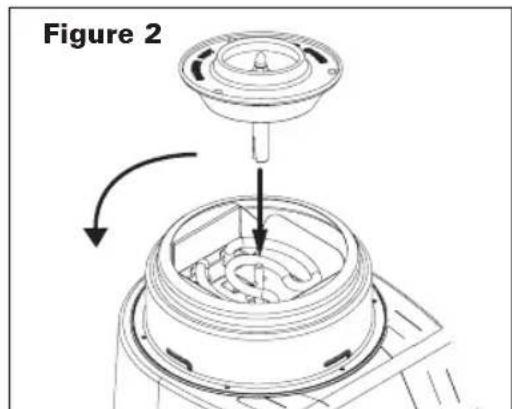
- To attach the extractor head, align the grooves to fit over the pegs on the stem and gently push down. (Figure 2)
- To attach the bowl, carefully push the bowl down and turn it counter clockwise to lock it into place.
- Attach the clear rim by snapping it in place. Your Cotton Candy Maker is now ready to use.
OperatingInstructions
- Place the Cotton Candy Maker on a dry, clean, and level surface.
- Check to make sure the power ON/OFF button is in the (O) OFF position. Plug the fully assembled Cotton Candy Maker into a 120V AC electrical outlet.
- Press the power ON/OFF button to ON ( | ) position. The extractor head will begin to spin and the element will begin to heat.
-
When using hard candies, run the Cotton Candy Maker for 5 minutes to allow the extractor head to preheat. When using granulated or superfine sugar, allow the Cotton Candy Maker to run for 10 minutes to allow the extractor head to preheat.
-
After preheating, press the power ON/OFF button to (O) OFF.
CAUTION: After preheating, extractor head is hot! Avoid contact. Make sure the extractor comes to a complete stop before adding candy or sugar to the extractor head.
- Place no more than 2 pieces of hard candy (Figure 3) or 1 scoop of granulated or superfine sugar (1 tablespoon) into the extractor head (Figure 4). Make sure the hard candies are evenly spaced. For a list of preferred candies or suggested flavor combinations, see the "Hints For Best Results" section of this Instruction Manual.
WARNING: To ensure the Cotton Candy Maker functions optimally, do not use more than 2 pieces of hard candy or 1 scoop of granulated or superfine sugar at one time. Overfilling the extractor head will clog the unit.
- Press the power ON/OFF button to ON ( | ) position. The extractor head will spin and the element will begin to heat.
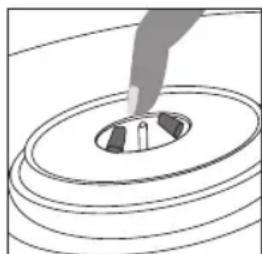
Figure 3 Figure 4
Preheat 5 minutes before adding hard candies
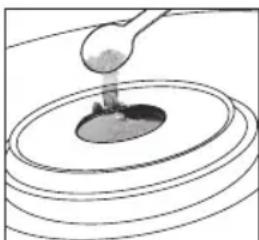
Preheat 10 minutes before adding sugar
- When the web of spun sugar fibers begin to collect around the bowl, slowly spin the cone in your fingers while circling the bowl.
- Once the cotton candy begins to collect on the cone, hold it horizontally over the extractor head and continue to spin the cone, moving from side to side, collecting all of the candy from inside the bowl. WARNING: Do not leave the Cotton Candy Maker unattended when ON/OFF button is ON ( | ).
- When no more cotton candy fibers are emitted from the extractor head, press the power ON/OFF button to the (O) OFF position. Additional servings can be prepared by repeating the instructions previously described. Allow the extractor head to come to a complete stop before adding more candy or sugar.
- Press the power ON/OFF button to ON ( | ) position and resume spinning. CAUTION: When the Cotton Candy Maker has been powered ON (I), the extractor head gets hot! To avoid burns or personal injury, avoid contact with the extractor head. NOTE: As the extractor head heats making cotton candy, spun fibers will flow more quickly.
- When you are finished making cotton candy, press the power ON/OFF button to the (O) OFF position and unplug the Cotton Candy Maker from the electrical outlet.
Hints for Best Results
To avoid brittle texture or if the unit is not producing cotton candy, follow these helpful hints.
- Always use the Cotton Candy Maker on a stable and level surface.
- Make sure the extractor head is clean and free of candy residue before use.
- Do not add more than 2 pieces of hard candy or more than 1 sugar scoop (1 tablespoon) of granulated or superfine sugar to the extractor head at one time.
- To avoid clumps of sugar, it may be necessary to break the candies into smaller pieces and distribute evenly around the extractor head.
- Create your own favorite cotton candy flavors by combining several hard candies.
- Stand your finished cotton candy cones in a drinking glass until you are ready to serve.
Preferred Sugar and Sugar-Free Candy List
- Fruit flavors such as cherry, strawberry, mixed fruits, grape, lime, orange.
Cinnamon
Root Beer
Peppermint
Coffee
Sugar and Sugar-Free Candy Not Recommended
Candy shaped in balls
- Cream flavors or cream-based hard candies
Gummy or chewy candies
- Sugar-pressed candies
- Hard-shelled candies
- Sugar and sugar-free drink mix packets
Flavor Combinations: The possibilities are endless!
- Fruit Punch = Any fruit flavors or combination
Candy Apple = GreenApple ^+ Cinnamon
Red Berry = Cherry + Strawberry
Red Melon = Cherry ^+ Watermelon
Hot Toddy = Butterscotch + Cinnamon
- Blue Raspberry = Blueberry or Wildberry + Raspberry
- Monkey Business = Banana + Chocolate
- Afternoon Refresher = Orange or Lemon + Mint
- Mocha Sensation = Chocolate + Coffee
User Maintenance Instructions
This appliance requires little maintenance. It contains no user serviceable parts. Do not try to repair it yourself. Any servicing requiring disassembly other than cleaning, must be performed by a qualified appliance repair technician.
Care & Cleaning Instructions
CAUTION: NEVER IMMERSE BASE UNIT OR CORD IN WATER OR OTHER LIQUID.
- The Cotton Candy Maker comes apart for easy cleaning.
- Always unplug and allow to cool completely before cleaning.
- When fully cooled, unlock and remove the bowl by turning counter-clockwise.
- Remove the extractor head by gripping both sides firmly and pulling straight up.
- The clear lid, bowl and extractor head are top rack dishwasher-safe. To clean by hand, wash the clear lid, bowl and extractor head in warm, soapy water. Never use abrasive cleansers or scouring pads, as they may damage the surfaces. Rinse and dry thoroughly.
- If sugar sticks to the extractor head, allow it to soak it in warm soapy water for a couple of hours to overnight before cleaning with a non-abrasive cloth or sponge. Rinse and dry thoroughly.
- Wipe the exterior of the motor base with a soft, slightly damp cloth or sponge. Never use abrasive cleansers or scouring pads to clean the motor base, as they may damage the surfaces.
Storing Instructions
- Never store Cotton Candy Maker while it is hot or wet.
- Be sure Cotton Candy Maker is clean and dry and fully assembled before storing.
- Store appliance in its box or in a clean, dry place.
- Never wrap cord tightly around the appliance; keep it loosely coiled.
Limited TWO-YEAR Warranty
SENSIO Inc. hereby warrants that for a period of TWO YEARS from the date of purchase, this product will be free from mechanical defects in material and workmanship, and for 90 days in respect to non-mechanical parts. At its sole discretion, SENSIO Inc. will either repair or replace the product found to be defective, or issue a refund on the product during the warranty period.
The warranty is only valid for the original retail purchaser from the date of initial retail purchase and is not transferable. Keep the original sales receipt, as proof of purchase is required to obtain warranty validation. Retail stores selling this product do not have the right to alter, modify, or in any way revise the terms and conditions of the warranty.
EXCLUSIONS:
The warranty does not cover normal wear of parts or damage resulting from any of the following: negligent use of the product, use of improper voltage or current, improper routine maintenance, use contrary to the operating instructions, disassembly, repair, or alteration by anyone other than qualified SENSIO Inc. personnel. Also, the warranty does not cover Acts of God such as fire, floods, hurricanes, or tornadoes.
SENSIO Inc. shall not be liable for any incidental or consequential damages caused by the breach of any express or implied warranty. Apart from the extent prohibited by applicable law, any implied warranty of merchantability or fitness for a particular purpose is limited in time to the duration of the warranty. Some states, provinces or jurisdictions do not allow the exclusion or limitation of incidental or consequential damages, or limitations on how long an implied warranty lasts, and therefore, the above exclusions or limitations may not apply to you. The warranty covers specific legal rights which may vary by state, province and/or jurisdiction.
HOW TO OBTAIN WARRANTY SERVICE:
You must contact Customer Service at our toll-free number: 1-866-832-4843. A Customer Service Representative will attempt to resolve warranty issues over the phone. If the Customer Service Representative is unable to resolve the problem, you will be provided with a case number and asked to return the product to SENSIO Inc. Attach a tag to the product that includes: your name, address, daytime contact telephone number, case number, and description of the problem. Also, include a copy of the original sales receipt. Carefully package the tagged product with the sales receipt, and send it (with shipping and insurance prepaid) to SENSIO Inc.'s address. SENSIO Inc. shall bear no responsibility or liability for the returned product while in transit to SENSIO Inc.'s Customer Service Center.
CONSIGNES DE SECURITE IMPORTANTES
For customer service questions or comments
BELLA is a registered trademark of Sensio Inc., Montréal, Canada H3B 3X9. All rights reserved.