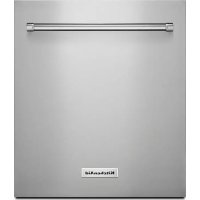
KDAS104HSS - Dishwasher KITCHENAID - Free user manual and instructions
Find the device manual for free KDAS104HSS KITCHENAID in PDF.



| Product Type | Built-in Dishwasher |
| Brand | KitchenAid |
| Model | KDAS104HSS |
| Width | 60.9 cm (24 in) |
| Height (min - max) | 86.4 - 91.4 cm (34 - 36 in) |
| Depth (door closed) | 60.9 cm (24 in) |
| Net Weight | Approximately 45 kg |
| Power Supply | 120 V, 60 Hz, 15 A |
| Capacity (place settings) | 14 place settings |
| Wash Programs | Normal, Intensive, Light, Rinse, ProWash™ |
| Additional Functions | Delayed Start, ProDry™ Drying, Soil Sensor |
| Drying Type | Heat Assisted Drying |
| Energy Class | Not specified (estimated A+ per standard) |
| Water Consumption per Cycle | Approximately 11 L |
| Noise Level (dBA) | Approximately 44 dBA |
| Tub Material | Stainless Steel |
| Custom Panel Compatibility | Yes (kit included) |
| Custom Panel Thickness | 1.5 cm (0.59 in) min. |
| Tools Required for Installation | Drill, Phillips screwdriver, pliers |
| Included Parts | Template, brackets, dowels, screws (ST4X14, ST3.5X45, etc.) |
| Recommended Maintenance | Clean filters regularly, use rinse aid |
| Manual Access | Manual available in PDF format at notice-facile.com |
Frequently Asked Questions - KDAS104HSS KITCHENAID
User questions about KDAS104HSS KITCHENAID
0 question about this device. Answer the ones you know or ask your own.
Ask a new question about this device
Download the instructions for your Dishwasher in PDF format for free! Find your manual KDAS104HSS - KITCHENAID and take your electronic device back in hand. On this page are published all the documents necessary for the use of your device. KDAS104HSS by KITCHENAID.
USER MANUAL KDAS104HSS KITCHENAID
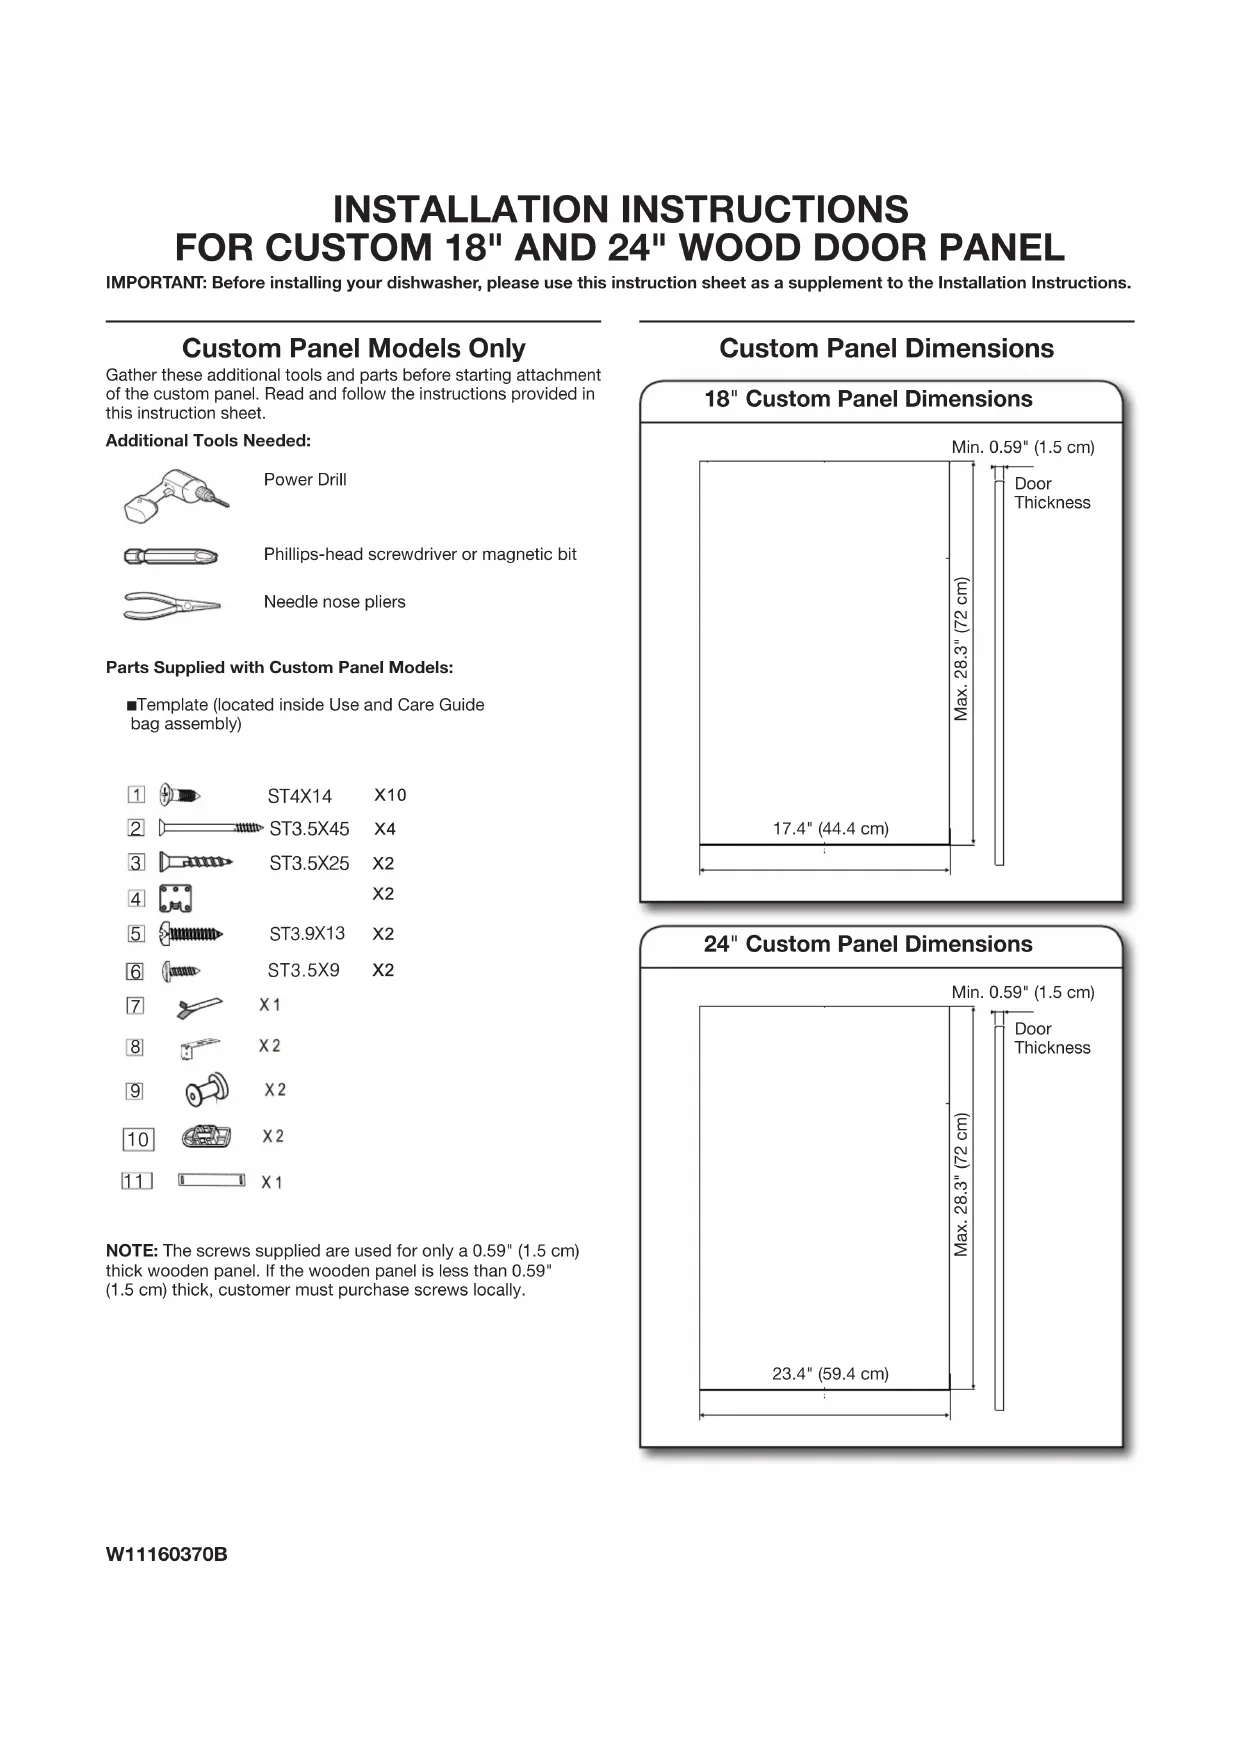
INSTALLATION INSTRUCTIONS
FOR CUSTOM 18" AND 24" WOOD DOOR PANEL
IMPORTANT: Before installing your dishwasher, please use this instruction sheet as a supplement to the Installation Instructions.
Custom Panel Models Only
Gather these additional tools and parts before starting attachment of the custom panel. Read and follow the instructions provided in this instruction sheet.
Additional Tools Needed:
Power Drill
Phillips-head screwdriver or magnetic bit
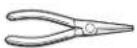
Needle nose pliers
■Template (located inside Use and Care Guide bag assembly)
Parts Supplied with Custom Panel Models:








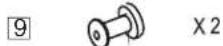


NOTE: The screws supplied are used for only a 0.59" (1.5 cm) thick wooden panel. If the wooden panel is less than 0.59" (1.5 cm) thick, customer must purchase screws locally.
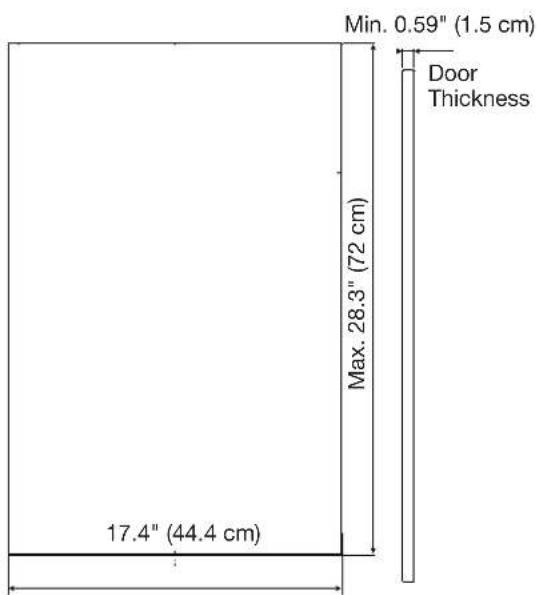
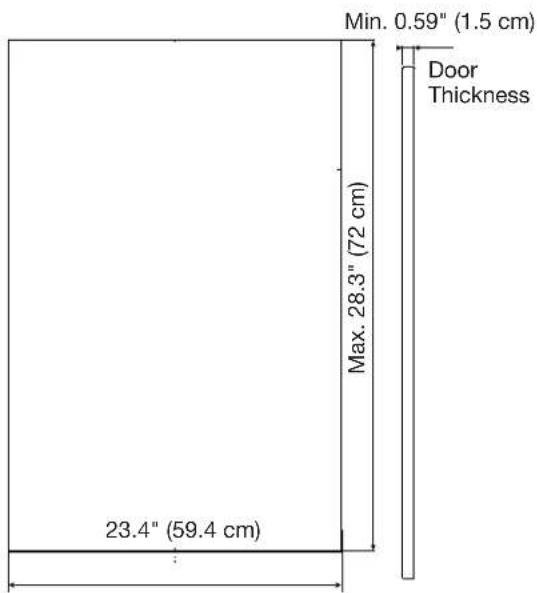
Custom Panel Dimensions
18" Custom Panel Dimensions
24" Custom Panel Dimensions
NOTES:
■The handle for the custom panel is not included.
All mounting hardware supplied is for a 0.59" (1.5 cm) thick wood panel. If a thinner wood panel or materials other than wood are used, it is the customer's responsibility to obtain the proper length screws and adjust the pilot holes accordingly.
IMPORTANT: Use a moisture-resistant sealer on both sides and all edges of the panel to avoid damage from moisture.
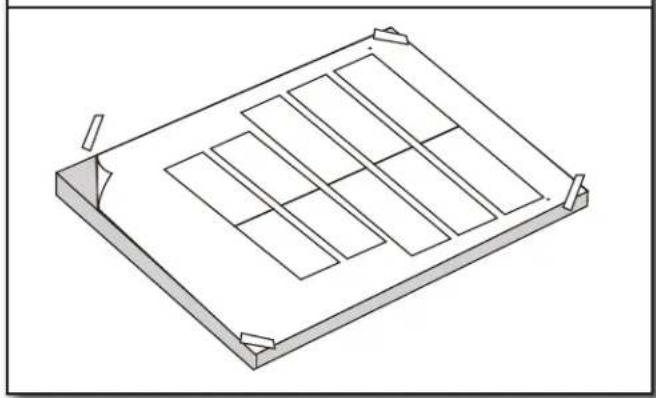
- Attach template to wood panel
natural_image
Isometric line drawing of a rectangular frame with internal compartments and corner supports (no text or symbols)Attach the provided template to the back side of the custom panel with tape. Make sure that the center of the template is aligned with the center of the wooden panel and top of the template is aligned to the top face of the wooden panel.
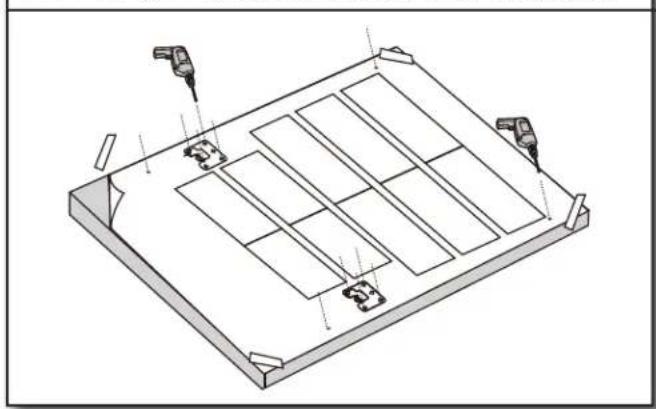
- Pre-drill holes for studs and brackets
natural_image
Isometric technical drawing of a rectangular panel with internal compartments and mounting fixtures (no text or symbols)- Install brackets and studs
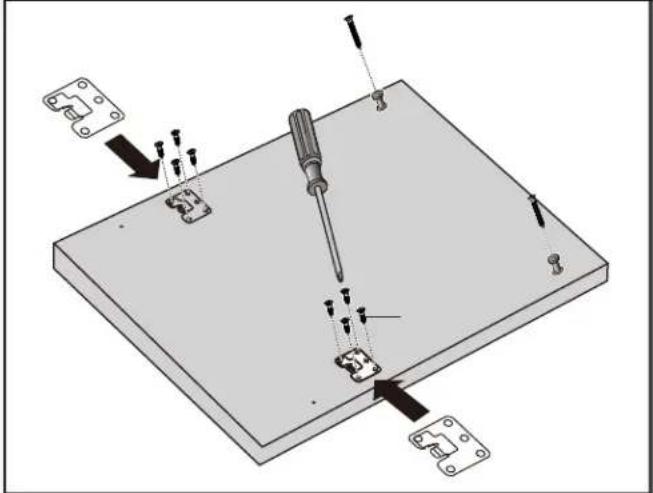
Remove the template. Install brackets and studs using the screws provided.
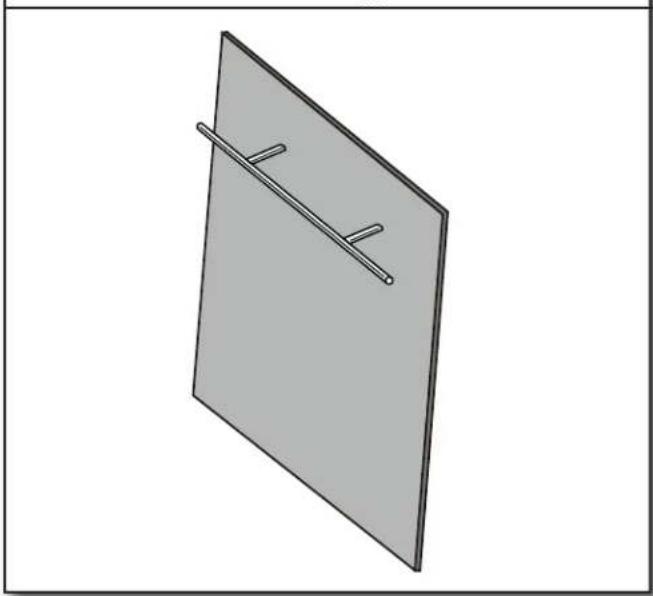
- Install customer-supplied handle
natural_image
Simple 3D diagram of a rectangular plate with a diagonal line and two small protrusions on top (no text or symbols)IMPORTANT: Make sure to countersink screw heads on back side of panel so that the screw heads are flush with the panel.
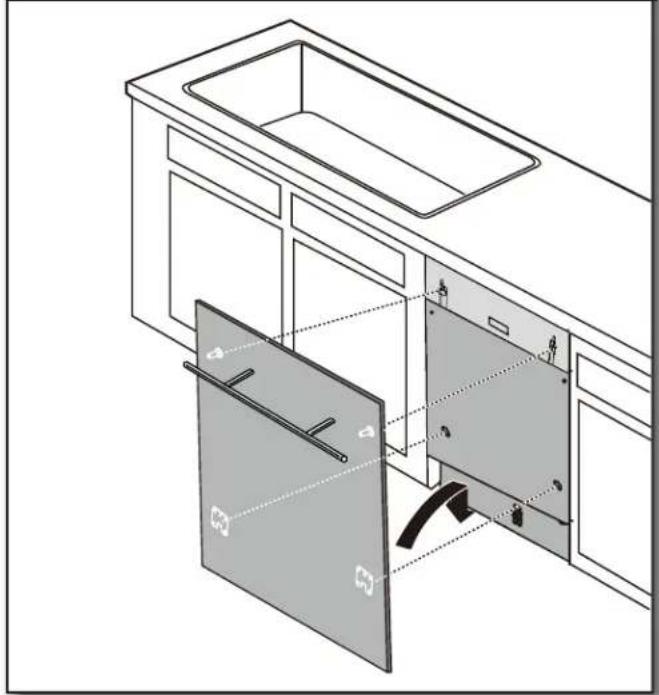
- Slide panel onto door
natural_image
Technical line drawing of a kitchen appliance showing internal compartments and doorways (no text or symbols)Align the studs on the custom panel to the keyhole slots on the door assembly. Ensure that the studs and brackets are engaged in the keyhole slots. Slide panel down until the top surface of the panel is flush with the top of the door.
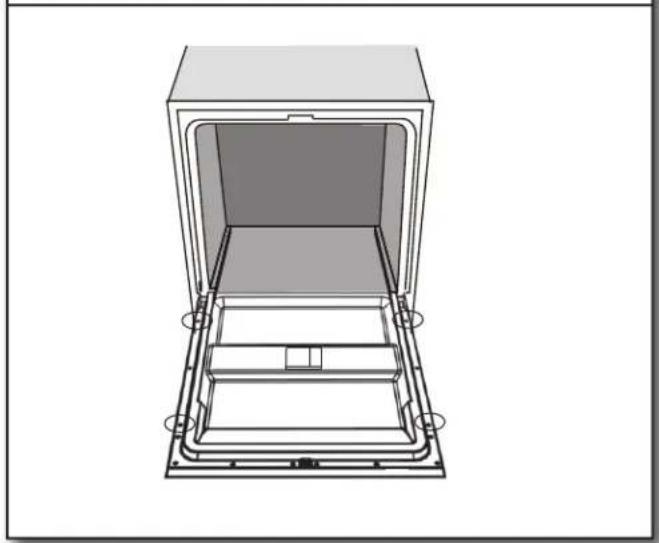
- Secure the door panel
natural_image
Technical line drawing of a rectangular oven or storage unit with internal compartments and mounting base (no text or symbols)Secure the door panel by inserting the four anchor screws provided into the inner door frame holes. See screw hole locations in the above illustration.
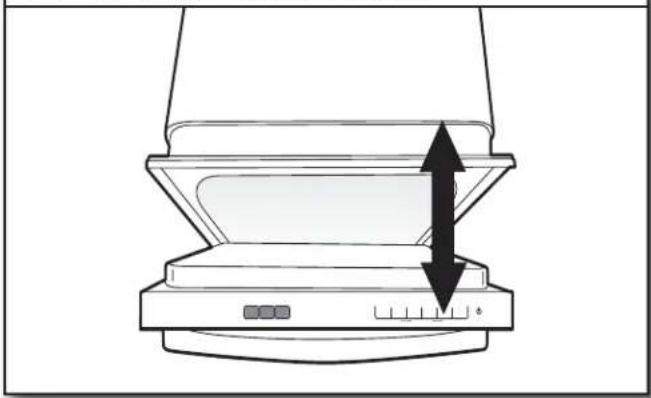
- Check the spring tension
natural_image
Diagram of a computer monitor with an open lid and two arrows indicating directional movement (no text or symbols)Open and close the door to check the spring tension of the door.
- Adjust spring tension (if needed)
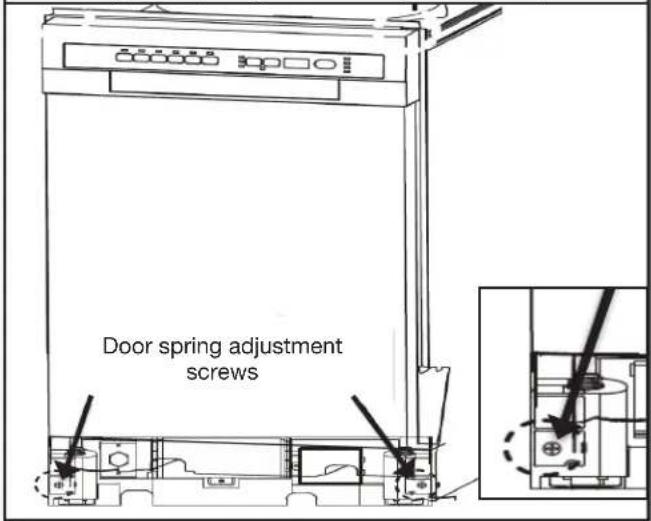
If needed, adjust the spring tension by using a Phillips-head screwdriver. Turn screws clockwise to increase tension or counterclockwise to decrease door tension.
natural_image
Isometric line drawing of a rectangular frame with internal compartments and corner arrows (no text or symbols)natural_image
Isometric technical drawing of a rectangular frame with internal compartments and mounting points (no text or symbols)natural_image
Simple 3D diagram of a rectangular plate with two metal rods inserted, no text or symbols present.natural_image
Line drawing of a kitchen appliance interior showing exterior and internal compartments with no text or symbolsnatural_image
Technical line drawing of a door frame with internal compartments and mounting base (no text or symbols)natural_image
Diagram of a computer monitor with an upward arrow indicating compression or shift (no text or symbols present)natural_image
Isometric line drawing of a rectangular frame with internal compartments and corner arrows (no text or symbols)natural_image
Isometric technical drawing of a rectangular panel with internal compartments and mounting features (no text or symbols)natural_image
3D diagram of a rectangular plate with a diagonal line and two small protrusions on top (no text or symbols)natural_image
Technical line drawing of a kitchen appliance showing internal compartments and doorways (no text or symbols)natural_image
Technical line drawing of a mechanical or architectural component with no visible text or symbolsnatural_image
Diagram of a computer monitor with an upward arrow indicating speed or direction (no text or symbols present)
Brand : KITCHENAID
Model : KDAS104HSS
Category : Dishwasher