44045N - Kitchen scales Kern - Free user manual and instructions
Find the device manual for free 44045N Kern in PDF.
User questions about 44045N Kern
0 question about this device. Answer the ones you know or ask your own.
Ask a new question about this device
Download the instructions for your Kitchen scales in PDF format for free! Find your manual 44045N - Kern and take your electronic device back in hand. On this page are published all the documents necessary for the use of your device. 44045N by Kern.
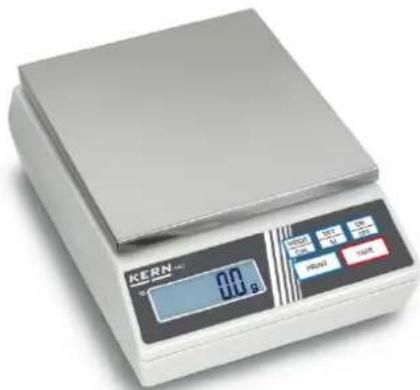
USER MANUAL 44045N Kern
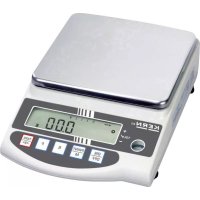
natural_image
Digital laboratory balance scale with a rotary knob and digital display (no visible text or symbols)
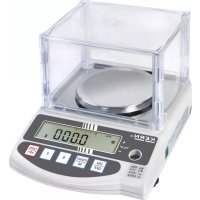
natural_image
Digital laboratory balance scale with digital display and control buttons (no visible text or symbols on the device itself)
Further language versions you will find online under www.kern-sohn.com/manuals

natural_image
Simple grayscale illustration of a table with a hanging weight and a suspended load (no text or symbols)Ausschalten

→ Speichern
→ Verwerfen


Entweder
Pin 5: Signal ground
LF = Zeilenvorschub-Zeichen (Line Feed)
2 Declaration of conformity 7
3 Basic Information (General) 8
3.1 Proper use....8
3.2 Improper Use 8
3.3 Warranty 8
3.4 Monitoring of Test Resources....8
4 Basic Safety Precautions....9
4.1 Pay attention to the instructions in the Operation Manual 9
4.2 Personnel training....9
5 Transportation & Storage....9
5.1 Testing upon acceptance 9
5.2 Packaging....9
6 Unpacking, Setup and Commissioning 9
6.1 Installation Site, Location of Use 9
6.2 Unpacking / setup.... 10
6.3 Mains connection....10
6.4 Operation using a (rechargeable) battery (optional) 11
6.5 Connection of peripheral devices.... 11
6.6 Initial Commissioning 12
6.7 Adjustment.... 12
6.8 Underfloor weighing....13
7 Operation elements 14
7.1 Keyboard overview.... 14
8 Basic Operation 15
Start-up 15
Switching Off 15
Weighing....15
Taring....15
PRE-TARE-Function 16
Plus/minus weighings.... 17
Parts counting 17
Net-total weighings 18
Percent determination.... 19
9 Menu 20
9.1 Navigation in the menu 20
9.2 Menu overview....23
9.3 Description of individual menu items 25
Weighing Units 25
Dosing and Zero-tracking 26
Selection adjustment weight....27
Filter 28
Display background illumination.... 28
Animal weighing function....29
Reset to factory setting.... 29
9.4 Interface parameters 30
Data transfer mode.... 30
printout 31
Baud rate 31
10 Data output RS 232 C 32
10.1 Technical Data 32
10.2 Pin allocation of balance output bushing: 32
10.3 Explanation of the data transfer 32
10.3.1 Pr PC.... 32
10.3.2 AU Pr 33
10.3.3 AU PC 33
10.3.4 rE Cr....34
10.4 Output on bar code printer 35
11 Service, maintenance, disposal.... 35
11.1 CLEANING 35
11.2 Service, maintenance.... 35
11.3 Disposal.... 35
12 Instant help.... 36
1 Technical Data
| KERN | 440-21N | 440-21A | 440-33N |
| Readability (d) | 0.001 g | 0.001 g | 0.01 g |
| Weighing range (max) | 40 g | 60 g | 200 g |
| Taring range (subtractive) | 40 g | 60 g | 200 g |
| Reproducibility | 0.001 g | 0.001 g | 0.01 g |
| Linearity | ± 0.003 g | ± 0.003 g | ± 0.02 g |
| Minimum unit weight at piece counting | 0.002 g | 0.002 g | 0.02 g |
| Warm-up time | 2 hours | 2 hours | 30 minutes |
| Reference quantities at piece counting | 5, 10, 25, 50 | ||
| Weighing Units | Details „Weighing units“ chapter 9.3 | ||
| Recommended adjustment weight, not added (class) | 40g (F1) | 50g (F2) | 200g (M1) |
| Stabilization time (typical) | 3 sec. | ||
| Operating temperature | + 5°C .... + 35°C | ||
| Humidity of air | max. 80 % (not condensing) | ||
| Housing (B x D x H) mm | 165 x 230 x 80 | ||
| Weighing plate mm | ∅ 81 | ∅ 81 | ∅ 105 |
| Weight kg (net) | 1.0 | 1.0 | 1.0 |
| Underfloor weighing | - | - | Standard |
| Flush-mounted hook | - | - | Option |
| KERN | 440-35N | 440-35A | 440-43N | 440-45N | |
| Readability (d) | 0.01 g | 0.01 g | 0.1 g | 0.1 g | |
| Weighing range (max) | 400 g | 600 g | 400 g | 1000 g | |
| Taring range (subtractive) | 400 g | 600 g | 400 g | 1000 g | |
| Reproducibility | 0.01 g | 0.01 g | 0.1 g | 0.1 g | |
| Linearity | ± 0.03 g | ± 0.03 g | ± 0.2 g | ± 0.2 g | |
| Minimum unit weight at piece counting | 0.02 g | 0.02 g | 0.2 g | 0.2 g | |
| Warm-up time | 2 hours | 2 hours | 10 minutes | 30 minutes | |
| Reference quantities at piece counting | 5, 10, 25, 50 | ||||
| Weighing Units | Details „Weighing units“ chapter 9.3 | ||||
| Recommended adjustment weight, not added (class) | 400g (F2) | 500g (F2) | 400 g (M2) | 1000 g (M1) | |
| Stabilization time (typical) | 3 sec. | ||||
| Operating temperature | + 5°C .... + 35°C | ||||
| Humidity of air | max. 80 % (not condensing) | ||||
| Housing (B x D x H) mm | 165 x 230 x 80 | ||||
| Weighing plate mm | ∅ 105 | ∅ 105 | 130 x 130 | 130 x 130 | |
| Weight kg (net) | 1.0 | 1.0 | 1.0 | 1.0 | |
| Underfloor weighing | Standard | ||||
| Flush-mounted hook | Option | ||||
| KERN | 440-47N | 440-49N | 440-49A |
| Readability (d) | 0.1 g | 0.1 g | 0.1 g |
| Weighing range (max) | 2000 g | 4000 g | 6000 g |
| Taring range (subtractive) | 2000 g | 4000 g | 6000 g |
| Reproducibility | 0.1 g | 0.1 g | 0.1 g |
| Linearity | ± 0.2 g | ± 0.3 g | ± 0.3 g |
| Minimum unit weight at piece count | 0.2 g | 0.2 g | 0.2 g |
| Warm-up time | 30 minutes | 2 hours | 2 hours |
| Reference unit weights at piece count | 5, 10, 25, 50 | ||
| Weighing Units | Details „Weighing units“ chapter 9.3 | ||
| Recommended adjustment weight, not added (class) | 2000 g (M1) | 4000 g (F2) | 5000 g (F2) |
| Stabilization time (typical) | 3 sec. | ||
| Operating temperature | + 5°C .... + 35°C | ||
| Humidity of air | max. 80 % (not condensing) | ||
| Housing (B x D x H) mm | 165 x 230 x 80 | ||
| Weighing plate mm | 130 x 130 | 150 x 170 | 150 x 170 |
| Weight kg (net) | 1.0 | 1.0 | 1.0 |
| Underfloor weighing | Standard | ||
| Flush-mounted hook | Option | ||
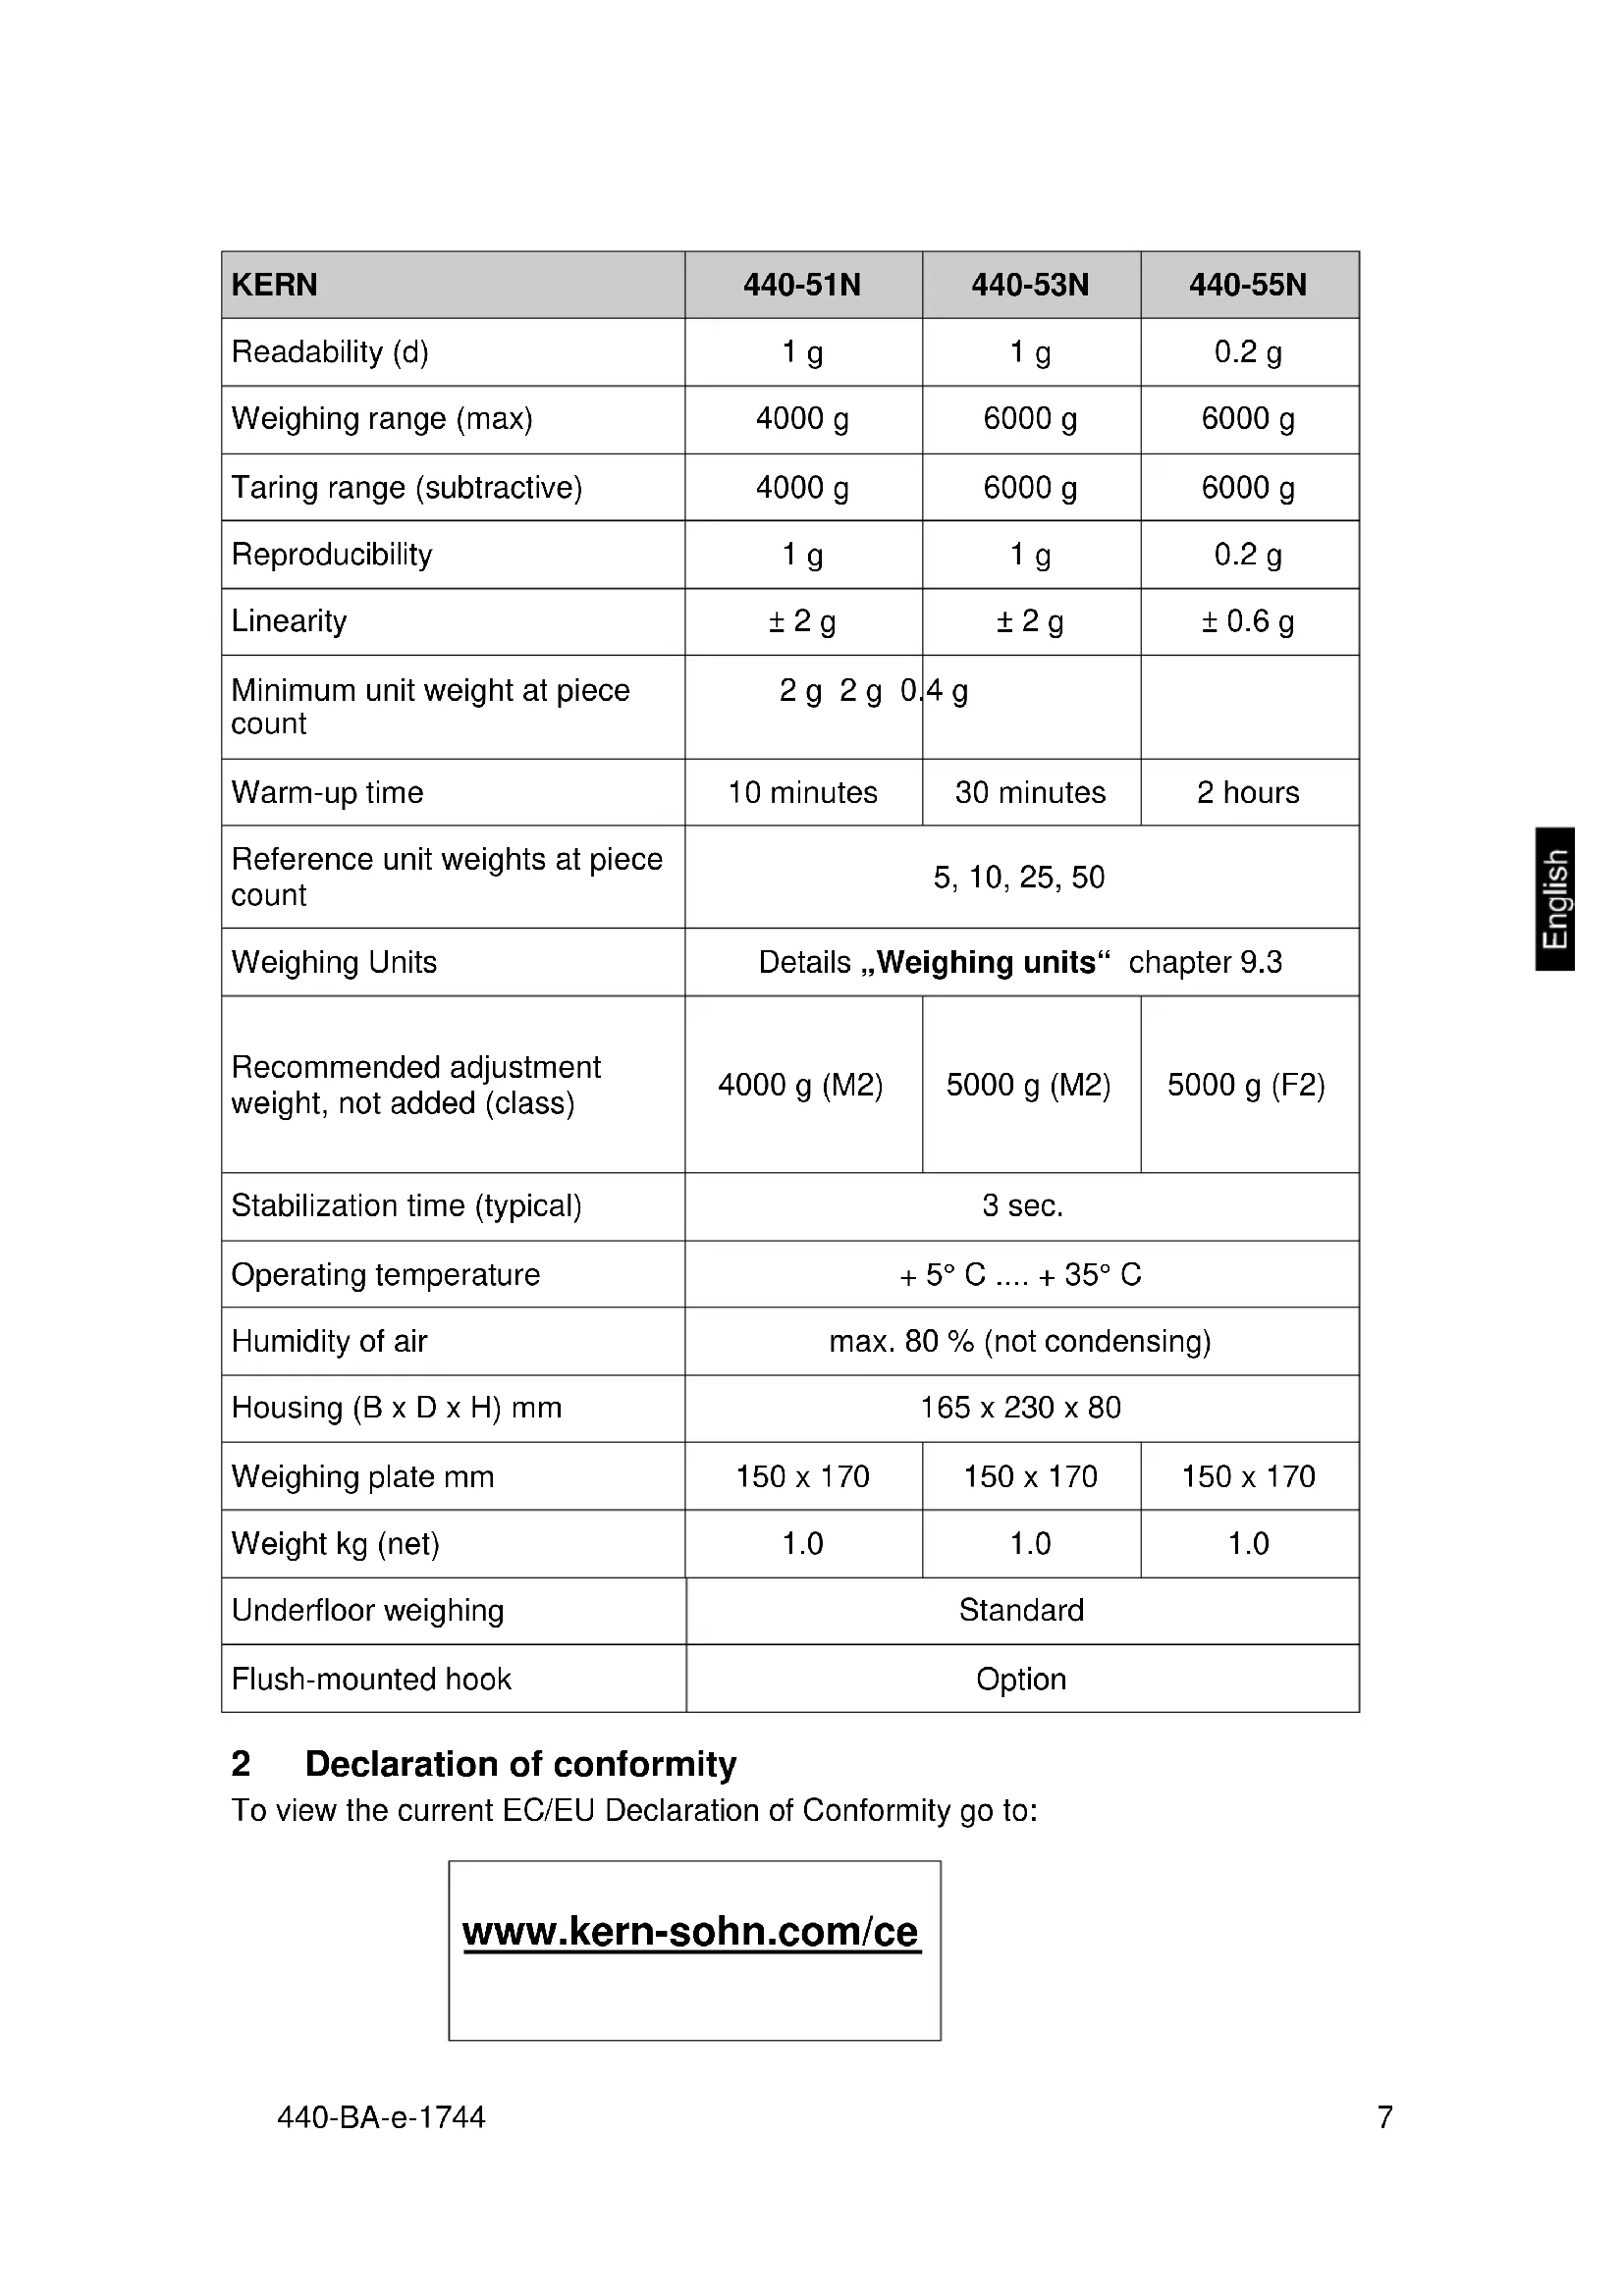
| KERN | 440-51N | 440-53N | 440-55N |
| Readability (d) | 1 g | 1 g | 0.2 g |
| Weighing range (max) | 4000 g | 6000 g | 6000 g |
| Taring range (subtractive) | 4000 g | 6000 g | 6000 g |
| Reproducibility | 1 g | 1 g | 0.2 g |
| Linearity | ± 2 g | ± 2 g | ± 0.6 g |
| Minimum unit weight at piece count | 2 g 2 g 0.4 g | ||
| Warm-up time | 10 minutes | 30 minutes | 2 hours |
| Reference unit weights at piece count | 5, 10, 25, 50 | ||
| Weighing Units | Details „Weighing units“ chapter 9.3 | ||
| Recommended adjustment weight, not added (class) | 4000 g (M2) | 5000 g (M2) | 5000 g (F2) |
| Stabilization time (typical) | 3 sec. | ||
| Operating temperature | + 5°C .... + 35°C | ||
| Humidity of air | max. 80 % (not condensing) | ||
| Housing (B x D x H) mm | 165 x 230 x 80 | ||
| Weighing plate mm | 150 x 170 | 150 x 170 | 150 x 170 |
| Weight kg (net) | 1.0 | 1.0 | 1.0 |
| Underfloor weighing | Standard | ||
| Flush-mounted hook | Option | ||
2 Declaration of conformity
To view the current EC/EU Declaration of Conformity go to:
www.kern-sohn.com/ce
3 Basic Information (General)
3.1 Proper use
The balance you purchased is intended to determine the weighing value of material to be weighed. It is intended to be used as a “non-automatic” balance, i.e. the material to be weighed is manually and carefully placed in the centre of the weighing plate. As soon as a stable weighing value is reached the weighing value can be read.
3.2 Improper Use
Do not use balance for dynamic weighing. In the event that small quantities are removed or added to the material to be weighed, incorrect weighing results can be displayed due to the “stability compensation” in the balance. (Example: Slowly draining fluids from a container on the balance). Do not leave permanent load on the weighing plate. This may damage the measuring system. Impacts and overloading exceeding the stated maximum load (max) of the balance, minus a possibly existing tare load, must be strictly avoided. Balance may be damage by this.
Never operate balance in explosive environment. The serial version is not explosion protected.
The structure of the balance may not be modified. This may lead to incorrect weighing results, safety-related faults and destruction of the balance.
The balance may only be used according to the described conditions. Other areas of use must be released by KERN in writing.
3.3 Warranty
Warranty claims shall be voided in case
• Our conditions in the operation manual are ignored
- The appliance is used outside the described uses
• The appliance is modified or opened
• Mechanical damage and damage caused by media, liquids
• Natural wear and tear
- The appliance is improperly set up or incorrectly electrically connected
• The measuring system is overloaded
3.4 Monitoring of Test Resources
In the framework of quality assurance the measuring-related properties of the balance and, if applicable, the testing weight, must be checked regularly. The responsible user must define a suitable interval as well as type and scope of this test. Information is available on KERN's home page (www.kern-sohn.com) with regard to the monitoring of balance test substances and the test weights required for this. In KERN's accredited DKD calibration laboratory test weights and balances may be calibrated (return to the national standard) fast and at moderate cost.
4 Basic Safety Precautions
4.1 Pay attention to the instructions in the Operation Manual

Carefully read this operation manual before setup and commissioning, even if you are already familiar with KERN balances.
Versions in other languages are non-binding translations. The only binding version is the original document in German.
4.2 Personnel training
The appliance may only be operated and maintained by trained personnel.
5 Transportation & Storage
5.1 Testing upon acceptance
When receiving the appliance, please check packaging immediately, and the appliance itself when unpacking for possible visible damage.
5.2 Packaging
Keep all parts of the original packaging in case you need to return the appliance. Only use original packaging for returning.
Before sending, disconnect all connected cables and loose/movable parts.
Attach possibly existing transport safeguards. Secure all parts, e.g. weighing plate, mains adapter etc., to prevent slipping and damage.
6 Unpacking, Setup and Commissioning
6.1 Installation Site, Location of Use
The balances are designed in a way that reliable weighing results are achieved in common conditions of use.
You will work accurately and fast, if you select the right location for your balance. Therefore, observe the following for the installation site:
- Place the balance on a firm, level surface;
- Avoid extreme heat as well as temperature fluctuation caused by installing next to a radiator or in the direct sunlight;
- Protect the balance against direct draughts due to open windows and doors;
- Avoid jarring during weighing;
- Protect the balance against high humidity, vapors and dust;
- Do not expose the device to extreme dampness for longer periods of time. Non-permitted condensation (condensation of air humidity on the appliance) may occur if a cold appliance is taken to a considerably warmer environment. In this case, acclimatize the disconnected appliance for ca. 2 hours at room temperature.
- Avoid static charge of goods to be weighed and weighing container.
Major display deviations (incorrect weighing results) may be experienced should electromagnetic fields (e.g. due to mobile phones or radio equipment), static electricity accumulations or instable power supply occur. Change location or remove source of interference.
6.2 Unpacking / setup
Carefully remove the balance from the packaging, remove plastic cover and setup balance at the intended workstation.
The balance must be installed in a way that the weighing plate is exactly in horizontal position.
At the models 440-21N and 440-21A the transport securing must be removed before the weighing plate is mounted.
Scope of delivery / serial accessories
• Balance (incl. protective cover)
- Weighing plate
- Mains power supply
- Operating Manual
• Windshield (440-21N, 440-21A)
6.3 Mains connection
Power is supplied via the external mains adapter. The stated voltage value must be the same as the local voltage.
Only use original KERN mains adapters. Using other makes requires consent by KERN.
6.4 Operation using a (rechargeable) battery (optional)
Lift-off the battery cover on the lower side of the balance. Connect 9 V compound battery.
Replace the battery compartment cover.
For battery operation the balance has an automatic switch-off function which can be activated or deactivated in the menu (chapter 9).
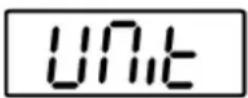
In weighing mode keep the PRINT-key pressed until [Unit] appears.
⇒ Press MODE key repeatedly until „AF“ appears.
→ Use the SET key, to confirm.
→ Use the MODE key to choose between the two following settings:
„AF on“: In order to save the battery, the balance switches automatically off after 3 minutes without weighing.
„AF off“: Switch-off function deactivated.
→ Use the SET key to confirm. The balance returns to weighing mode.
If the batteries are run down, "LO" appears in the display. Press ON/OFF-key and replace the batteries immediately.
If the balance is not used for a longer time, take out the batteries and store them separately. Leaking battery liquid could damage the balance.
If there exists an optional rechargeable battery, it has to be connected in the battery compartment via a separate plug-in socket. Now the mains adapter delivered with the rechargeable battery must be applied.
6.5 Connection of peripheral devices
Before connecting or disconnecting of additional devices (printer, PC) to the data interface, always disconnect the balance from the power supply.
With your balance, only use accessories and peripheral devices by KERN, as they are ideally tuned to your balance.
6.6 Initial Commissioning
In order to obtain exact results with the electronic balances, your balance must have reached the operating temperature (see warming up time chap. 1). During this warming up time the balance must be connected to the power supply (mains, accumulator or battery).
The accuracy of the balance depends on the local acceleration of gravity.
Strictly observe hints in chapter Adjustment.
6.7 Adjustment
As the acceleration value due to gravity is not the same at every location on earth, each balance must be coordinated - in compliance with the underlying physical weighing principle - to the existing acceleration due to gravity at its place of location (only if the balance has not already been adjusted to the location in the factory). This adjustment process must be carried out for the first commissioning, after each change of location as well as in case of fluctuating environment temperature. To receive accurate measuring values it is also recommended to adjust the balance periodically in weighing operation.
The adjustment should be made with the recommended adjustment weight (see chap. 1 "Technical data"). Adjustment is also possible with the weights of other nominal values (see table 1), but not the optimum for measuring technique.
Procedure when adjusting:
Observe stable environmental conditions. A warming up time (see chapter 1) is required for stabilization.
→ Turn on balance by pressing the ON/OFF key.
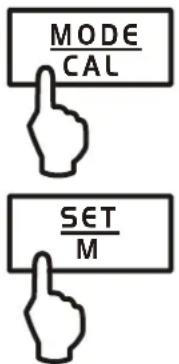
→ Press the MODE key and keep it pressed, after the acoustic signal there appears in the display for short time „CAL“. After that the exact size appears flashing in the display (see chapter.9.3) of the adjustment weight.
Now set the adjusting weight in the centre of the weighing plate.
⇒ Press the SET key. Short time later there appears „CAL F“, then the automatic return to the weighing mode. In the display there appears the value of the adjustment weight.
An error during adjustment or the use of an incorrect adjusting weight will result in an error message „CAL E“. Repeat adjustment.
Keep the adjustment close to the balance. Daily control of the weighing exactness is recommended for quality-relevant applications.
6.8 Underfloor weighing
Objects unsuitable for placing on the weighing scale due to size or shape may be weighed with the help of the flush-mounted platform.
Proceed as follows:
- Switch off the balance
- Open closing cover at the balance bottom.
- Suspend hook for underfloor weighing carefully and completely.
- Place weighing balance over an opening.
- Attach load to hook and carry out weighing procedure.
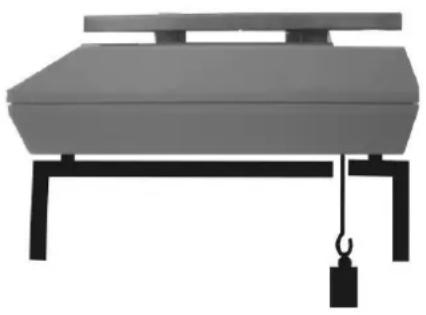
natural_image
Simple illustration of a table with a hanging weight and a top platform (no text or symbols)Fig. 1: Setup of balance for underfloor weighing

- Always ensure that all suspended objects are stable enough to hold the desired goods to be weighed safely (danger of breaking).
- Never suspend loads that exceed the stated maximum load (max) (danger of breaking)
- Always ensure that there are no persons, animals or objects that might be damaged underneath the load.

After completing the underfloor weighing the opening on the bottom of the balance must always be closed (dust protection).
7 Operation elements
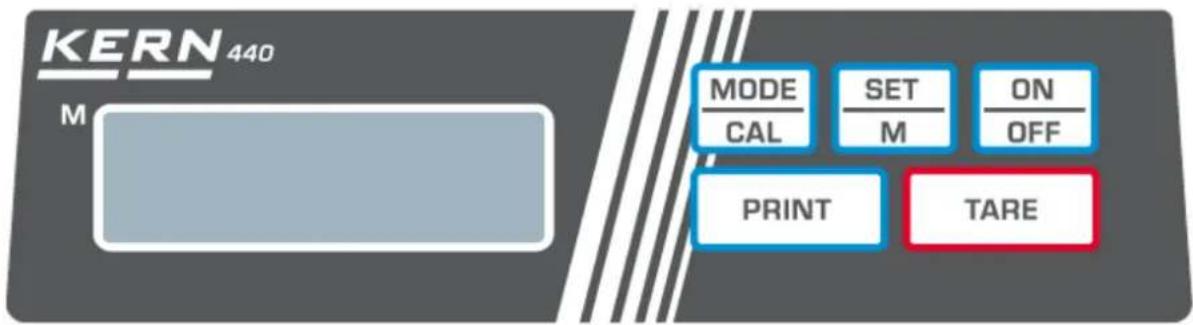
7.1 Keyboard overview
| Key Designation Function | ||
| PRINT PRINT | -key | Calculate weighing data via interfaceCall up menu (keep key pressed until UNIT appears) |
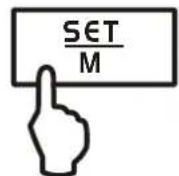
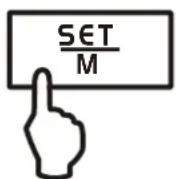
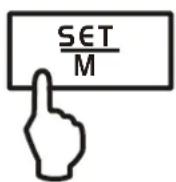
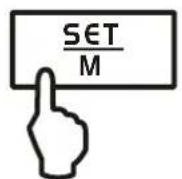
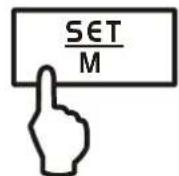
| SET/M SET | key | Confirm settings in the menuSave and exit menu |
| MODE/CAL | MODE key | How to select menu itemsChange settings in the menuAdjustment |
| TARE TARE | key | Taring |
| ON/OFF ON/OFF switch | Turn on/off | |
8 Basic Operation
Start-up

→ Press ON button.
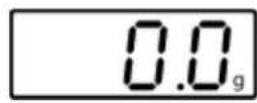
The balance will carry out a self-test The balance is ready for weighing when the weight display appears.

Switching Off

⇒ Press OFF button, the display disappears

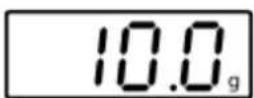
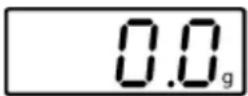
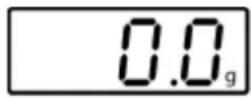
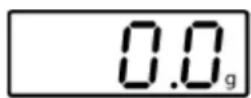
Weighing
→ Place goods to be weighed on balance
→ Wait for standstill control, after the standstill control, the weighing unit appears right hand in the display (e.g. g or kg)
→ Read weighing result.
If the goods are heavier than the weighing range, the display will show "Error" (=Overload), and a whistle is sounded.
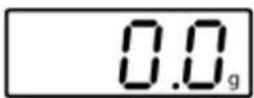
Taring
⇒ Place an empty weighing container, the weight of the weighing container will be displayed.

⇒ Press the TARE button, the zero display disappears. The tare weight is saved until it is deleted.
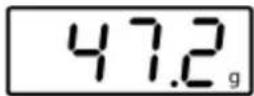
→ Weigh the material, the net weight will be indicated.
The taring process can be repeated any number of times, e.g. when adding several components for a mixture (adding). The limit is reached when the whole weighing range is exhausted.
The weight of the weighing container will be displayed as a minus number after removing the weighing container.
The tare weight is saved until it is deleted.
Delete tare

→ Unload the balance and press the TARE button, the zero display appears.

PRE-TARE-Function

Using this function the weight of a tare vessel is stored. Even after turning off/on the weighing balance will continue working with the saved tare value.
→ In weighing mode put tare vessel on the weighing plate
⇒ Press repeatedly the MODE key until „PtArE“ flashing appears.
⇒ Use SET key to store the current weight on the weighing plate as a PRE-TARE value.
→ Remove all loads from the balance and press repeatedly the MODE key until „PtArE“ flashing appears.
Use the SET key to confirm. The PRE-TARE value is deleted, the zero display appears.
Delete PRE-TARE value

Plus/minus weighings

For example unit weight control, fabrication control etc.
⇒ Put the nominal weight on the weighing plate and tare using the TARE button.
→ Remove the nominal weight
⇒ Put the test objects subsequently on the weighing plate, the respective deviation from the nominal weight is displayed with the respective sign to „+“ and „-“.
According to the same procedure also packages with the same weight can be produced, referring to a nominal weight.
→ Back to weighing mode by pressing the TARE button.
Parts counting
During piece counting parts can either be counted into a container or out of a container. To count a greater number of parts the average weight per part has to be determined with a small quantity (reference quantity).
The larger the reference quantity, the higher the counting exactness. High reference must be selected for small parts or parts with considerably different sizes.
The larger the reference quantity, the more accurate the parts counting.
The process has four steps:
Tare the weighing container
Determine the reference unit
Original weighing of reference weight
Count the items
⇒ In weighing mode press MODE key shortly. Reference piece number „5 ^PCS “ appears flashing.
⇒ By pressing the MODE button several times other reference quantities 5, 10, 20, 25 and 50 can be called up. Place as many pieces to count on the weighing plate as the set reference quantity requires.
⇒ Use the SET key to confirm. The balance is now in parts counting mode counting all units on the weighing plate.
i
- Back to weighing mode by pressing the MODE button.
- Error message „Er 1“ Piece below minimum weight of piece (See chpt. 1 "Technical specifications"): Press MODE key and restart reference determination.
- Taring The tare vessels can also be used for piece counting. Before starting piece counting use the TARE button to tare out the container.
Net-total weighings
It is useful if a mixture of several components is weighed into a tare vessel and finally the sum weight of all weighed components is necessary for control purposes (nettotal, i.e. the weight of the tare vessel).
Example:
- Place tare container on the weighing plate. Press the TARE button, the zero display disappears.
- Weigh-in component ①. Press the SET button, the zero display disappears. [▲] is displayed on the right border of the display.
- Weigh-in component ② and press SET key. Net-total (sum weight of the components ① and ②) is displayed.
- Press the SET button, the zero display disappears.
- Weigh-in component ③ and press SET key. Net-total (sum weight of the components ① and ② and ③.) is displayed.
If necessary, also fill the formula up to the desired final value. For every component more repeat the steps 4-5.
→ Back to weighing mode by pressing the TARE button.
Percent determination

Percentage calculation facilitates weight display in percent related to a reference weight equivalent to 100 %.
In weighing mode press MODE key repeatedly, until [100 %] is displayed.
⇒ Put a reference weight which corresponds to 100 %.
→ Store by pressing the SET key. Remove reference weight.
→ Place goods to be weighed on balance.
The weight of the sample is displayed in percentage in terms of the reference weight.
Back to weighing mode by pressing the MODE button.
9 Menu
9.1 Navigation in the menu
Access to menu 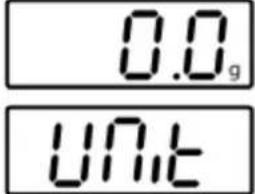 | In weighing mode keep the PRINT keypressed until [Unit] appears. | |
How to select menu items 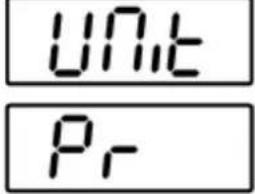 | Using the MODE key the individual menuitems can be selected one after theother. | |
How to change settings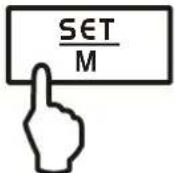  | Acknowledge selected menu item usingSETkey, the current setting is displayed. | |
  | Change the settings using the MODEkey. At any pressing of the MODE key,the next setting is displayed, see chapter9.2 „Menu Overview“. | |
1. Save change of a menu item andexit the menu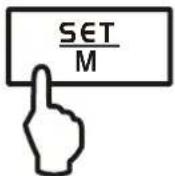  | ⇒ Press the SET key; balance willreturn to weighing mode. | |
2. Change settings of several menu items


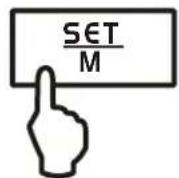
Acknowledge selected menu item using SET key, the current setting is displayed.
Use the MODE key to change settings.
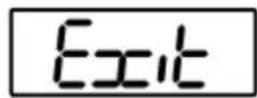
Press the TARE key, „Exit“ is displayed.
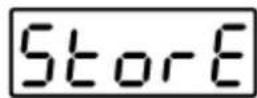
Either
Acknowledge with SET key (yes), "StorE" is displayed. Save (SET key) or reject (PRINT key) and exit the menu,
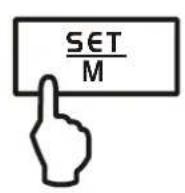
or
Press PRINT key (no) and make the changes on the other menu items as described above
Save/reject and exit the menu
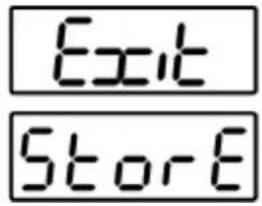
→ Save

→ Reject


Either
Any changes carried out are stored by pressing the SET key (yes). The balance returns automatically into weighing mode.
or
To cancel changes, press the PRINT key (no). The balance returns automatically into weighing mode.
9.2 Menu overview
| Description of function | Function | Parameter | Description of options |
| Weighing units switching over (see chapter 9.3). | UNIT | g* | Gram |
| kg | Kilogram (dependent on model) | ||
| oz | Pound | ||
| ozt | Ounce | ||
| lb | Troy ounce | ||
| tlh | Tael Hongkong | ||
| ltt | Tael Taiwan | ||
| gn | Grain (dependent on model) | ||
| dwt | Pennyweight (dependent on model) | ||
| mo | Momme | ||
| Tol | Tola | ||
| ct | Carat (dependent on model) | ||
| FFA | Freely selectable factor | ||
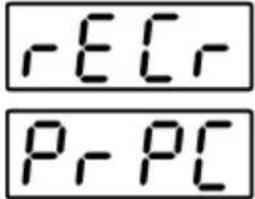
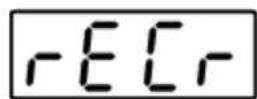
| Data transfer mode (see chapter 9.4) | Pr | rE CR* | Data output via remote control commands (see chapter 10.3) |
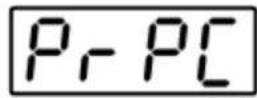
| Pr PC | Data output by pressing the PRINT key (see chapter 10.3) | ||
| AU PC | Continuous data output (see chapter 10.3) | ||
| bA Pr | Printout on barcode printer (see chapter 10.4) | ||
| AU Pr | Autom. Data output of stable weighing values (see chapter 10.3) | ||
| Selection printer output (see chapter 9.4) | LAPr | Hdr* | Edition of the headlines |
| GrS | Edition of the total weight | ||
| Net | Edition of the net weight | ||
| tAr | Edition of the tare weight | ||
| N7E | Edition of the stored weight | ||
| PCS | Edition of quantity | ||
| AUJ | Edition of the unit weight | ||
| Rqt | Edition of the reference quantity | ||
| FFd | Edition of a page feeding at start printer output | ||
| FFE | Edition of a page feeding at end printer output | ||
| Baud rate(see chapter 9.4). | bAUd | 19200 | |
| 9600* | |||
| 4800 | |||
| 2400 | |||
| 1200 | |||
| Auto off(battery operation), see chap. 6.4 | AF | on* | Automatic switch-off function after 3 min without changing load ON |
| off | Automatic switch-off function after 3 min without changing load OFF | ||
| Auto Zero(see chapter 9.3) | tr | on* | On |
| off | Off | ||
| Selection adjustment weight (see chapter 9.3) | CAL | 100 | *dependent on model |
| 200 | |||
| 300 | |||
| Filter function(see chapter 9.3), only models 440-21A, 440-35A, 440-49A | StAbiL | 1 | Fast display |
| 2 | Normal display | ||
| 3 | Slow display | ||
| Background illumination of the display,(see chap. 9.3) | bL | on* | Background illumination on |
| off | Background illumination off | ||
| CH | The background illumination will be switched off automatically 10 sec after having reached a stable weighing value. | ||
| Animal weighing function(see chapter 9.3) | ANL | off* | Off |
| 3 Period 3 seconds | |||
| 5 Period 5 seconds | |||
| 10 Period 10 seconds | |||
| 15 Period 15 seconds | |||
| Reset to factory setting(see chap. 9.3) | rSt | no* | no |
| yes yes | |||
* = default setting
9.3 Description of individual menu items
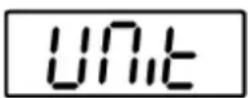
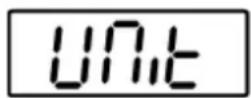
Weighing Units
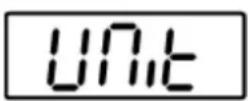
In weighing mode keep the PRINT key pressed until [Unit] appears.

⇒ Press SET key, the selected unit is displayed.
Use the MODE key to select between the different units (see following table).
→ Use the SET key to confirm the selected unit
| Display | Conversion factor 1 g = | |
| Gram | g | 1. |
| Ounce | oz | 0.035273962 |
| Troy ounce | ozt | 0.032150747 |
| Pound | lb | 0.0022046226 |
| Tael Hongkong | tlh | 0.02671725 |
| Tael Taiwan | ltt | 0.0266666 |
| Grain (dependent on model) | gn | 15.43235835 |
| Pennyweight (dependent on model) | dwt | 0.643014931 |
| Momme | (mom) | 0.2667 |
| Tola | tol | 0.0857333381 |
| Carat (dependent on model) | ct | 5 |
| Freely selectable factor *) | FFA | xx.xx |
\*) Input conversion factor
⇒ As specified above, press repeatedly the MODE key until „FFA“ appears.
To enter the factor, press the SET key; the enabled digit starts flashing.
Using the MODE button, the displayed value is increased by 1, with the PRINT button it is reduced by 1.
With the TARE key selection of the number to the left.
→ Confirm input by pressing the SET key.
⇒ Press repeatedly the SET key to take over the „Freely selectable factor“ as current weighing unit.
The different weighing models have integrated different foreign weighing units.
Details can be seen in this table:
| Units\Model | 440-21N | 440-21A | 440-33N | 440-35N | 440-35A | 440-43N | 440-45N | 440-47N | 440-49N | 440-49A | 440-51N | 440-53N | 440-55N |
| Gram | X | X | X | X | X | X | X | X | X | X | X | X | X |
| Pound | X | X | X | X | X | X | X | X | X | X | X | ||
| Ounce | X | X | X | X | X | X | X | X | X | X | X | X | X |
| Troy ounce | X | X | X | X | X | X | X | X | X | X | X | X | X |
| Tael Hongkong | X | X | X | X | X | X | X | X | X | X | X | X | X |
| Tael Taiwan | X | X | X | X | X | X | X | X | X | X | X | X | X |
| Grain | X | X | X | X | X | X | |||||||
| Pennyweight | X | X | X | X | X | X | X | X | X | X | X | X | X |
| Momme | X | X | X | X | X | X | X | X | X | X | X | X | X |
| Tola | X | X | X | X | X | X | X | X | X | X | X | X | X |
| Carat | X | X | X | X | X | ||||||||
| Freely selectable factor | X | X | X | X | X | X | X | X | X | X | X | X | X |
Dosing and Zero-tracking
The Auto-Zero function is used to tare small variations in weight automatically.
In the event that small quantities are removed or added to the material to be weighed, incorrect weighing results can be displayed due to the “stability compensation” in the balance.
(Example: Slowly draining fluids from a container on the balance). When apportioning involves small variations of weight, it is advisable to switch off this function.
If Zero-Tracking however is switched off, the weighing display becomes more busy.
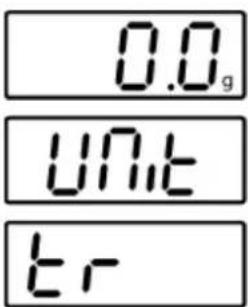
⇒ In weighing mode keep the PRINT key pressed until [Unit] appears.
⇒ Press the MODE button several times until „tr“ is displayed.
⇒ Acknowledge using SET key, the current setting is displayed.
→ Select the desired settings by pressing the MODE key.
| tr | on | Function activated |
| tr | off | Function deactivated |
→ Use the SET key to confirm selection.
Selection adjustment weight
In the model series KERN FKB_A, the adjustment weight can be selected from three pre-set nominal values (approx.1/3; 2/3; max) (refer also to following table, factory setting with grey background). In order to achieve high-quality weighing results in the sense of the measuring technology, it is recommended to select the nominal value as high as possible. The non delivered adjustment weights can be purchased from KERN as option.
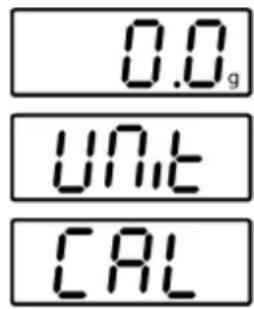
In weighing mode keep the PRINT key pressed until [Unit] appears.
⇒ Press the MODE key several times until „CAL“ is displayed.
Acknowledge using SET key, the current setting is displayed.
→ Select the desired settings by pressing the MODE key.
⇒ Use the SET key to confirm selection.
| 440-21N | 440-21A | 440-33N | 440-35N | 440-35A | 440-43N | 440-45N |
| 10g | 10g | 50g | 100g | 100g | 100g | 200g |
| 20g | 20g | 100g | 200g | 200g | 200g | 500g |
| 30g | 40g | 150g | 300g | 400g | 300g | 700g |
| 40g | 50g | 200g | 400g | 500g | 400g | 1000g |
| 60g | 600g |
(exemple)
This menu item allows the balance to be set according to specific ambient conditions and measuring purposes.
In weighing mode keep the PRINT key pressed until [Unit] appears.
⇒ Press the MODE button several times until „StAbiL“ is displayed.
Acknowledge using SET button, the current setting is displayed.
⇒ Select the desired settings by pressing the MODE button.
| 1 | Filter 1:The balance reacts quickly and in a sensitive manner, quiet set-up location. |
| 2 | Filter 2:The scale reacts normally, normal installation site |
| 3 | Filter 3:The balance reacts slowly and in a robust manner, busy set-up location |
→ Use the SET key to confirm selection.
Display background illumination
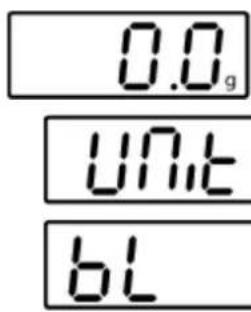
⇒ In weighing mode keep the PRINT key pressed until [Unit] appears.
⇒ Press the MODE button several times until „bl“ is displayed.
⇒ Acknowledge using SET key, the current setting is displayed.
→ Select the desired settings by pressing the MODE key.
| bl | on | Background illumination switched on | Contrastful display which can also be red in the darkness. |
| bl | off | Background illumination switched off | Battery saving |
| bl | Ch | The background illumination will be switched off automatically 10 sec after having reached a stable weighing value. | Battery saving |
→ Use the SET key to confirm selection.
Animal weighing function
The animal weighing function can be applied for busy weighing. During a defined period the average value of the weighing results is formed.
The more unquiet the weighed item, the longer the period should be selected.
⇒ In weighing mode keep the PRINT key pressed until [Unit] appears.
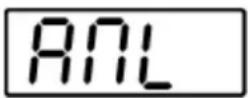
⇒ Press the MODE button several times until „ANL“ is displayed.
Acknowledge using SET key, the current setting is displayed.
⇒ Select the desired settings by pressing the MODE key
| ANL | 3 | Period 3 seconds |
| ANL | 5 | Period 5 seconds |
| ANL | 10 | Period 10 seconds |
| ANL | 15 | Period 15 seconds |
| ANL | off | Animal weighing not active |
⇒ Use the SET key to confirm selection.
⇒ Put the weighing good (animal) on the weighing plate and press the SET button. In the display runs a „Countdown“.
The average value of the weighing results is displayed and remains displayed on the screen.
⇒ Use the SET key to change between animal weighing and normal weighing.
⇒ Press the SET key to restart the weighing cycle for animal weighing.
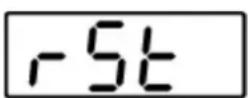
Reset to factory setting
This function resets all balance settings to factory setting.
⇒ In weighing mode keep the PRINT key pressed until [Unit] appears.
⇒ Press the MODE button several times until „rSt“ is displayed.
Acknowledge using SET key, the current setting is displayed.
⇒ Select the desired settings by pressing the MODE key
| rSt | yes | Balance will be reset to factory setting. |
| rSt | no | The balance keeps its individual setting |
⇒ Use the SET key to confirm selection. The balance returns to weighing mode.
9.4 Interface parameters
Data output is carried out via interface RS 232 C.
General
The previous condition for the data transfer between balance and a peripheral device (e.g. printer, PC ...) is that the appliances are set to the same interface parameters (e.g. baud rate, transfer mode ...).
Data transfer mode

⇒ In weighing mode keep the PRINT key pressed until [Unit] appears.
⇒ Press the MODE button several times until „Pr“ is displayed.
⇒ Acknowledge using SET key, the current setting is displayed.
→ Select the desired settings by pressing the MODE key
| rE CR | Data output via remote control commands |
| Pr PC | Data output using the PRINT key |
| AU PC | Continuous data output |
| bA Pr | Output on bar code printer |
| AU Pr | Autom. data output of stable weighing values |
⇒ Use the SET key to confirm selection. The balance returns to weighing mode.
printout
Using this function data are selected which are to be sent via the RS232C (not valid for data transfer mode BAPr).

⇒ In weighing mode keep the PRINT key pressed until [Unit] appears.
⇒ Press the MODE key several times until „LAPr“ is displayed.
Acknowledge using SET key, the current setting is displayed.
→ Select the desired output parameter by pressing the MODE key
| Hdr | Edition of the headlines |
| GrS | Edition of the total weight |
| Net | Edition of the net weight |
| tAr | Edition of the tare weight |
| N7E | Edition of the stored weight |
| PCS | Edition of quantity |
| AUJ | Edition of the unit weight |
| Rqt | Edition of the reference quantity |
| FFd | Edition of a page feeding at start printer output |
| FFE | Edition of a page feeding at end printer output |
⇒ After actuating the SET button, the current state is displayed (on / off).
⇒ Use MODE and PRINT key to change the status „on ⇔ off“.
Use the SET key to confirm selection. The balance returns to weighing mode.
i Baud rate
By that way the user can configure his own data block, which then is sent to a printer or to a PC.
The baud rate defines the transfer speed via the interface, 1 Baud = 1 Bit/second.

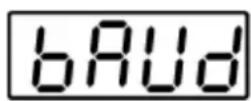
In weighing mode keep the PRINT key pressed until [Unit] appears.
⇒ Press the MODE key several times until „bAUd“ is displayed.
Acknowledge using SET key, the current setting is displayed.
→ Use MODE key select the desired settings
Use the SET key to confirm selection. The balance returns to weighing mode.
$$ 9 6 0 0 \Rightarrow 4 8 0 0 \Rightarrow 2 4 0 0 \Rightarrow 1 2 0 0 \Rightarrow 1 9 2 0 0 $$
10 Data output RS 232 C
10.1 Technical Data
- 8-bit ASCII Code
• 1 start bit, 8 data bits, 1 stop bit, no parity bit - Baud rate selectable at 1200, 2400, 4800, 9600 and 19200 baud
- Miniature plug-in necessary (9 pole D-Sub)
- For operation with interface faultless operation is only ensured with the correct KERN – interface cable (max. 2m)
10.2 Pin allocation of balance output bushing:
Front view:
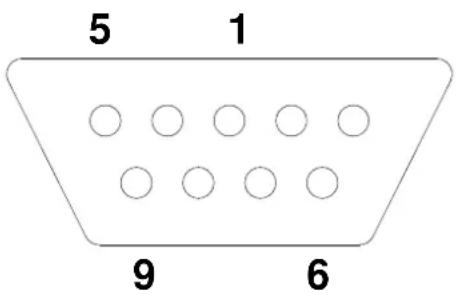
Pin 2: Transmit data
Pin 3: Receive data
Pin 5: Signal ground
10.3 Explanation of the data transfer
10.3.1 Pr PC
Press the PRINT key, at stable value the format is transferred from LAPR.
a. Format for stable values for weight/quantity/percentage
b. Format in case of fault
As soon as the weighing value is stable, the format is automatically transferred from LAPR.
c. Format for stable values for weight/quantity/percentage
d. Format in case of fault
The weighing values are sent automatically and continuously, no matter if the value is stable or unstable.
e. Format for stable values for weight/quantity/percentage
f. Format in case of fault
The remote control commands s/w/t are sent from the remote control unit to the balance as ASCII code. After the balance having received the s/w/t commands, it will send the following data.
Take into account that the following remote control commands must be sent without a subsequent CR LF.
s Function: Stable weighing value for the weight is sent via the RS232 interface
w Function: Weighing value for the weight (stable or unstable) is sent via the RS232 interface
t Function: No data are sent, the balance carries out the tare function.
h. Format for stable values for weight/quantity/percentage
i. Format in case of fault
CR = carriage return symbol
LF = line feed symbol
10.4 Output on bar code printer
The data transfer mode has to be set on „BA Pr“ (chapter 9.4).
As bar code printer the Zebra printer model LP2824 is provided.
Take into account that the output format of the balance is fixedly defined and cannot be changed.
The printer format is stored in the printer, i.e. in case of a failure the printer cannot be changed with a new one from factory, previously it is necessary that KERN installs the respective software.
The Zebra printer and the balance must be connected to the delivered interface cable when they are switched off.
After switching-on both appliances, and after reaching the status ready-for-operation, a label will be printed out when pressing the PRINT button.
11 Service, maintenance, disposal
11.1 CLEANING
Before cleaning, disconnect the appliance from the operating voltage.
Please do not use aggressive cleaning agents (solvents or similar agents), but a cloth dampened with mild soap suds. Take care that the device is not penetrated by fluids and polish it with a dry soft cloth.
Loose residue sample/powder can be removed carefully with a brush or manual vacuum cleaner.
Spilled weighing goods must be removed immediately.
11.2 Service, maintenance
The appliance may only be opened by trained service technicians who are authorized by KERN.
Before opening, disconnect from power supply.
11.3 Disposal
Disposal of packaging and appliance must be carried out by operator according to valid national or regional law of the location where the appliance is used.
12 Instant help
In case of an error in the program process, briefly turn off the balance and disconnect from power supply. The weighing process must then be restarted from the beginning.
Help:
Fault Possible cause
The displayed weight does not glow.
- The balance is not switched on.
- The mains supply connection has been interrupted (mains cable not plugged in/faulty).
• Power supply interrupted.
• Batteries are inserted incorrectly or empty - No batteries inserted.
The displayed weight is permanently changing
- Draught/air movement
- Table/floor vibrations
- The weighing plate is in contact with foreign matter.
- Electromagnetic fields / static charging (choose different location/switch off interfering device if possible)
The weighing value is obviously wrong
• The display of the balance is not at zero
- Adjustment is no longer correct.
• Great fluctuations in temperature.
- Electromagnetic fields / static charging (choose different location/switch off interfering device if possible)
Should other error messages occur, switch balance off and then on again. If the error message remains inform manufacturer.

KERN 440
Version 4.4 2017-10
Mode d'emploi
natural_image
Simple illustration of a table with a hanging weight and a top platform (no text or symbols)Arrêt

Enregistrer

→ Rejet


Soit :
| Unités\Modèle | 440-21N | 440-21A | 440-33N | 440-35N | 440-35A | 440-43N | 440-45N | 440-47N | 440-49N | 440-49A | 440-51N | 440-53N | 440-55N |
| Gramme | X | X | X | X | X | X | X | X | X | X | X | X | X |
| Pound | X | X | X | X | X | X | X | X | X | X | X | ||
| Once | X | X | X | X | X | X | X | X | X | X | X | X | X |
| Troy once | X | X | X | X | X | X | X | X | X | X | X | X | X |
| Tael Hongkong | X | X | X | X | X | X | X | X | X | X | X | X | X |
| Tael Taiwan | X | X | X | X | X | X | X | X | X | X | X | X | X |
| Grain | X | X | X | X | X | X | |||||||
| Pennyweight | X | X | X | X | X | X | X | X | X | X | X | X | X |
| Momme | X | X | X | X | X | X | X | X | X | X | X | X | X |
| Tola | X | X | X | X | X | X | X | X | X | X | X | X | X |
| Carat | X | X | X | X | X | ||||||||
| Facteur pouvant être librement sélectionné | X | X | X | X | X | X | X | X | X | X | X | X | X |
Pin 5: Signal ground