
DWMSCL4570VW - Wall mount for video screen Tripp Lite - Free user manual and instructions
Find the device manual for free DWMSCL4570VW Tripp Lite in PDF.

| Product Type | Wall Mount for Video Screen |
| Brand | Tripp Lite |
| Model | DWMSCL4570VW |
| VESA Compatibility | 200x200, 300x300, 400x200, 400x400, 600x400 |
| Orientation | Landscape |
| Security | Built-in lock to prevent unauthorized removal of the screen |
| Installation | Professional recommended, on brick or concrete |
| Main Features | Wall mounting, level adjustment, tilt for cable management |
| Adjustments | Vertical and horizontal leveling, tilt |
| Maintenance | Check security every three months minimum |
| Warranty | Limited 5 years |
| Usage | Indoor only |
| Included Components | Adapter brackets (x2), lock, anti-slip blocks (x2), plastic locking pieces (x2), hex key, screws, washers, spacers |
| Material | Steel (estimated) |
| Weight | Not specified in the manual |
| Dimensions | Not specified in the manual |
Frequently Asked Questions - DWMSCL4570VW Tripp Lite
User questions about DWMSCL4570VW Tripp Lite
0 question about this device. Answer the ones you know or ask your own.
Ask a new question about this device
Download the instructions for your Wall mount for video screen in PDF format for free! Find your manual DWMSCL4570VW - Tripp Lite and take your electronic device back in hand. On this page are published all the documents necessary for the use of your device. DWMSCL4570VW by Tripp Lite.
USER MANUAL DWMSCL4570VW Tripp Lite
Landscape Video Wall with Security
Model: DWMSCL4570VW
Espanol 15 • Français 29 • Pycckn 43 • Deutsch 57

CAUTION: DO NOT EXCEED MAXIMUM LISTED WEIGHT CAPACITY. SERIOUS INJURY OR PROPERTY DAMAGE MAY OCCUR!

200x200/300x300
400x200/400x400
600x400


154 lb.
(70 kg)
RATED
WARRANTY REGISTRATION
Register your product today and be automatically entered to win an ISOBAR® surge protector in our monthly drawing!

triplite.com/warranty


Manufacturing
Excellence.
1111 W. 35th Street, Chicago, IL 60609 USA · triplite.com/support
Copyright © 2021 Tripp Lite. All rights reserved.
Important Safety Instructions

CAUTION
- Read the entire instruction manual before you start assembly and installation. Do not begin installation until you have read and understood all the instructions and warnings contained in this installation sheet. If you have questions about any of the instructions or warnings, contact Tripp Lite Support.
- Use with products heavier than the rated weights indicated may result in instability, causing possible injury.
- Mounts must be attached as specified in these instructions. Improper installation may result in damage or serious personal injury.
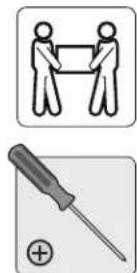
- Safety gear and proper tools must be used. This product should only be installed by professionals.
- Ensure the supporting surface will safely support the combined weight of the equipment and all attached hardware and components.
- Use the mounting screws provided, tighten them firmly, but DO NOT OVERTIGHTEN the mounting screws. Overtightening can cause damage to the items. This greatly reduced their holding power.
- This product contains small items that could be a choking hazard if swallowed. Keep these items away from children.
This product is intended for indoor use only. Using this product outdoors could lead to product failure and personal injury. - Check that the bracket is secure and safe to use at regular intervals (at least every three months).
Warranty and Product Registration
5-Year Limited Warranty
Seller warrants this product, if used in accordance with all applicable instructions, to be free from original defects in material and workmanship for a period of 5 years from the date of initial purchase. If the product should prove defective in material or workmanship within that period, Seller will repair or replace the product, at its sole discretion.
THIS WARRANTY DOES NOT APPLY TO NORMAL WEAR OR TO DAMAGE RESULTING FROM ACCIDENT, MISUSE, ABUSE OR NEGLECT. SELLER MAKES NO EXPRESS WARRANTIES OTHER THAN THE WARRANTY EXPRESSLY SET FORTH HEREIN. EXCEPT TO THE EXTENT PROHIBITED BY APPLICABLE LAW, ALL IMPLIED WARRANTYES, INCLUDING ALL WARRANTYES OF MERCHANTABILITY OR FITNESS, ARE LIMITED IN DURATION TO THE WARRANTY PERIOD SET FORTH ABOVE; AND THIS WARRANTY EXPRESSLY EXCULES ALL INCIDENTAL AND CONSEQUENTIAL DAMAGES. (Some states do not allow limitations on how long an implied warranty lasts, and some states do not allow the exclusion or limitation of incidental or consequential damages, so the above limitations or exclusions may not apply to you. This warranty gives you specific legal rights, and you may have other rights which vary from jurisdiction to jurisdiction.)
WARNING: The individual user should take care to determine prior to use whether this device is suitable, adequate or safe for the use intended. Since individual applications are subject to great variation, the manufacturer makes no representation or warranty as to the suitability or fitness of these devices for any specific application.
PRODUCT REGISTRATION
Visit triplite.com/warranty today to register your new Tripp Lite product. You'll be automatically entered into a drawing for a chance to win a FREE Tripp Lite product!*
- No purchase necessary. Void where prohibited. Some restrictions apply. See website for details.
Tripp Lite has a policy of continuous improvement. Specifications are subject to change without notice. Images may differ slightly from actual products.
Component Checklist
IMPORTANT: Ensure you have received all parts according to the component checklist prior to installing. If any parts are missing or faulty, visit tripplite.com/support for service.

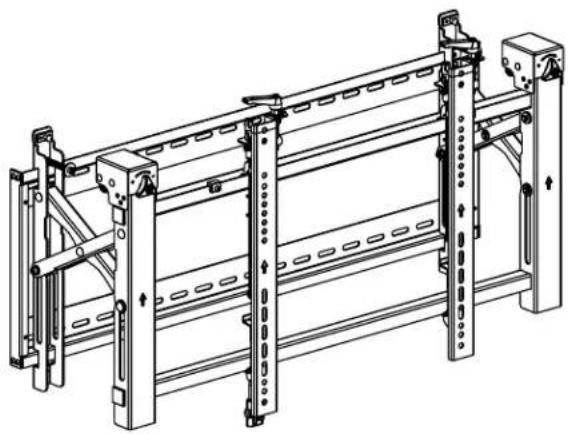
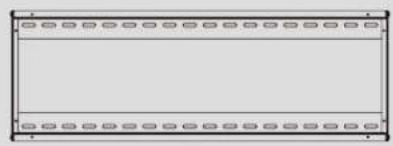
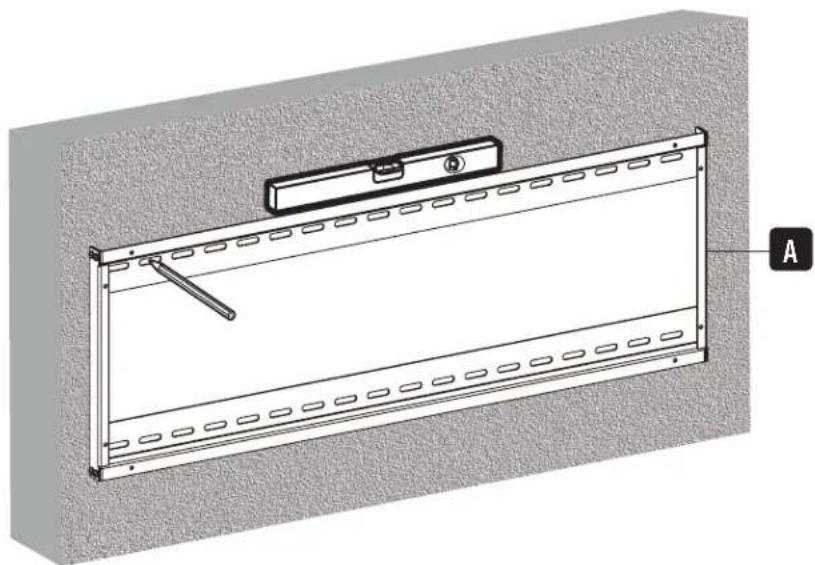
A
Wall Plate (x1)
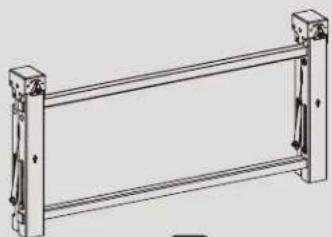
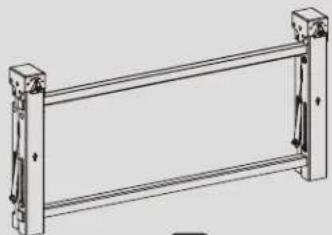
B
Pop-Out Module(x1)

c
Adapter Bracket (x2)

G
Lock (x1)
Package P

D
Anti-Skid Block (x2)

E
Plastic Locking Piece (x2)

F
Hex Key (x1)
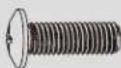
Package M

M-A
M5x14 (x4)

M-B
M6x14 (x4)

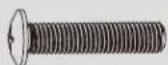
M-C
M8x20 (x4)

M-D
M6x30 (x4)
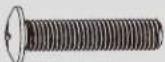
M-E
M8x30 (x4)

M-F
Washer (x4)

M-G
Small Spacer (x8)

M-H
Large Spacer (x4)
Package W
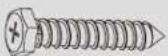
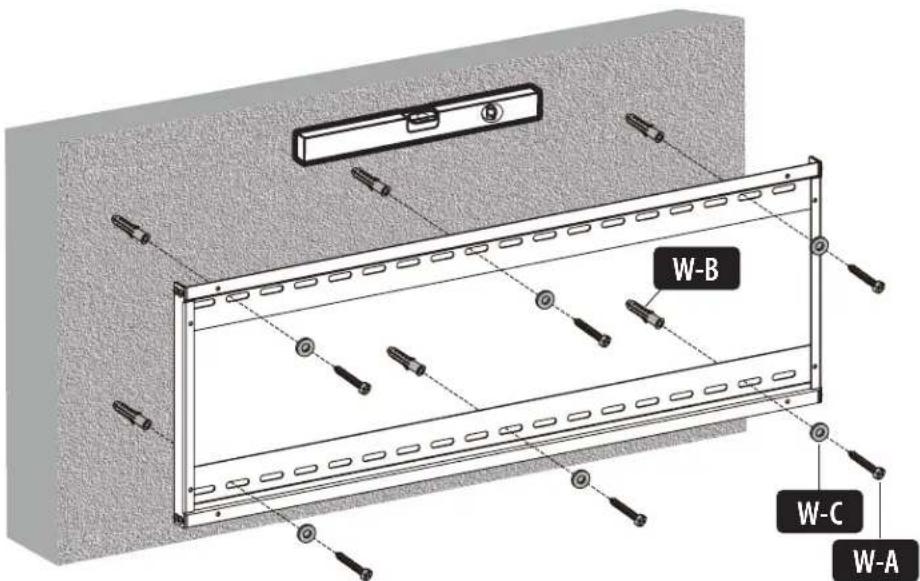
W-A
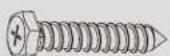
ST6.3x55 (x6)
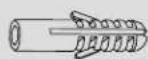
W-B
Concrete Anchor (x6)

W-C
D6 Washer (x6)
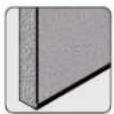
1. Solid Brick and Concrete Wall Mounting

WARNING
Installers must verify that the supporting surface will safely support the combined weight of the equipment and all attached hardware and components.


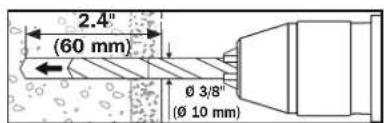
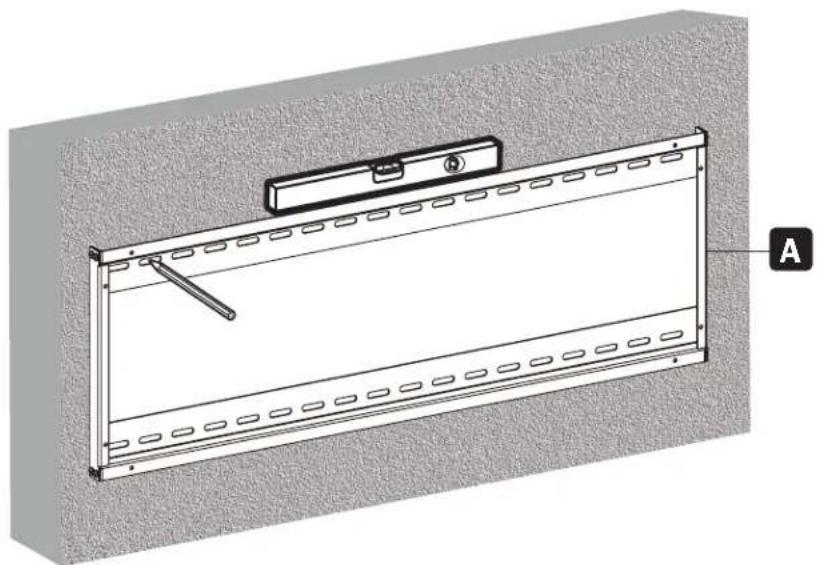
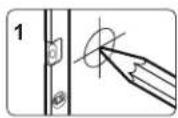
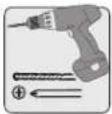
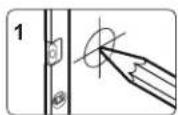
Mark the exact location of the mounting holes.
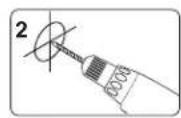
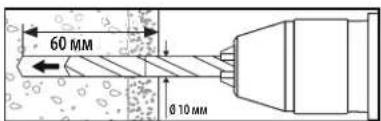
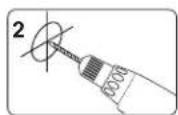
Drill pilot holes
Screw the wall mount onto the wall.

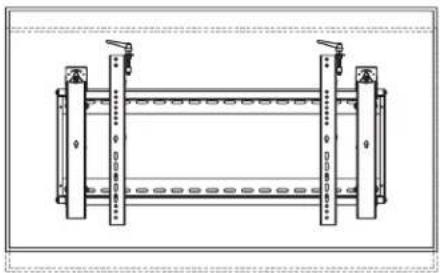
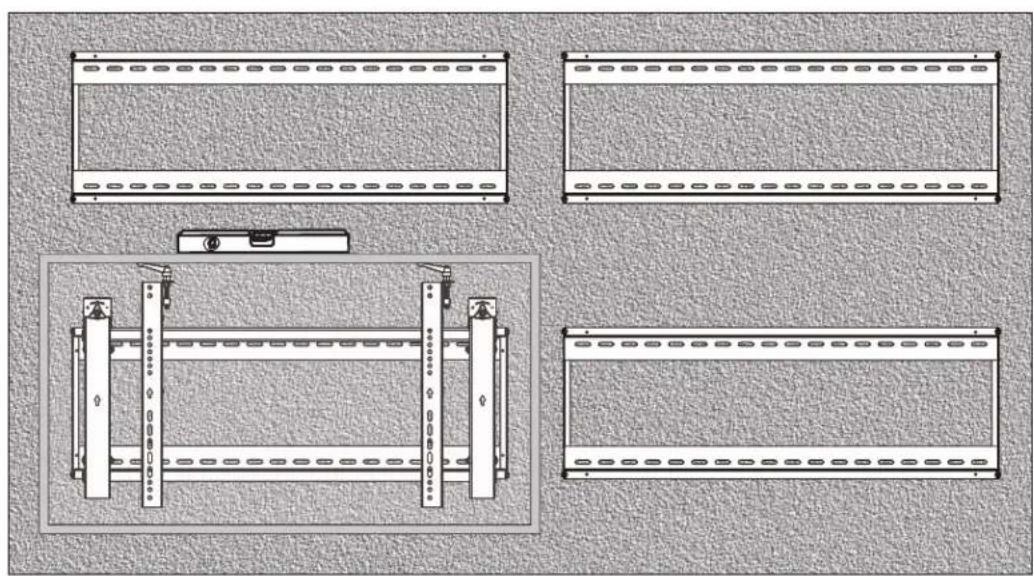
2. Video Wall Installation (mounting space as shown below)
X=Length of display Y=height of display

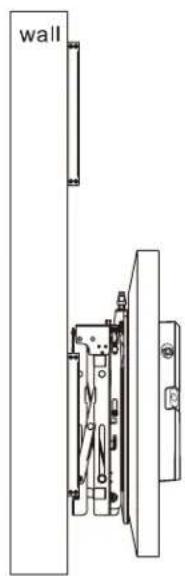
3. Installing the Pop-Out Module
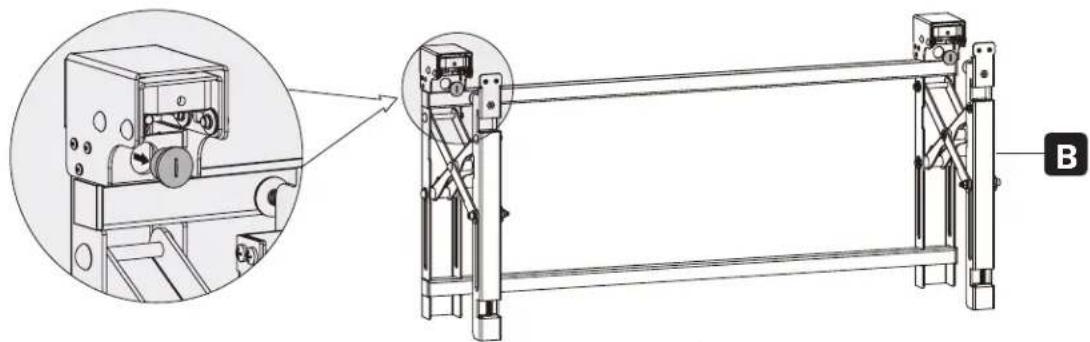
Remove caps before installing the pop-out module.

Hang the pop-up module onto the wall plate. Secure it by tightening both screws.
4. Installing the Adapter Brackets
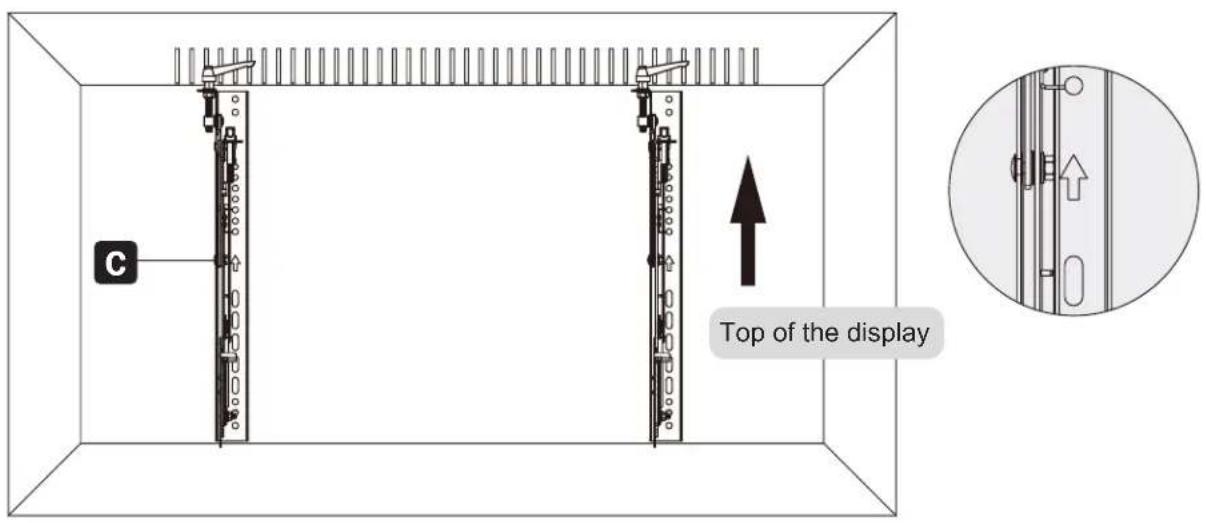
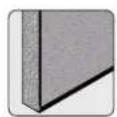
4.1 For Flat-Back Screens
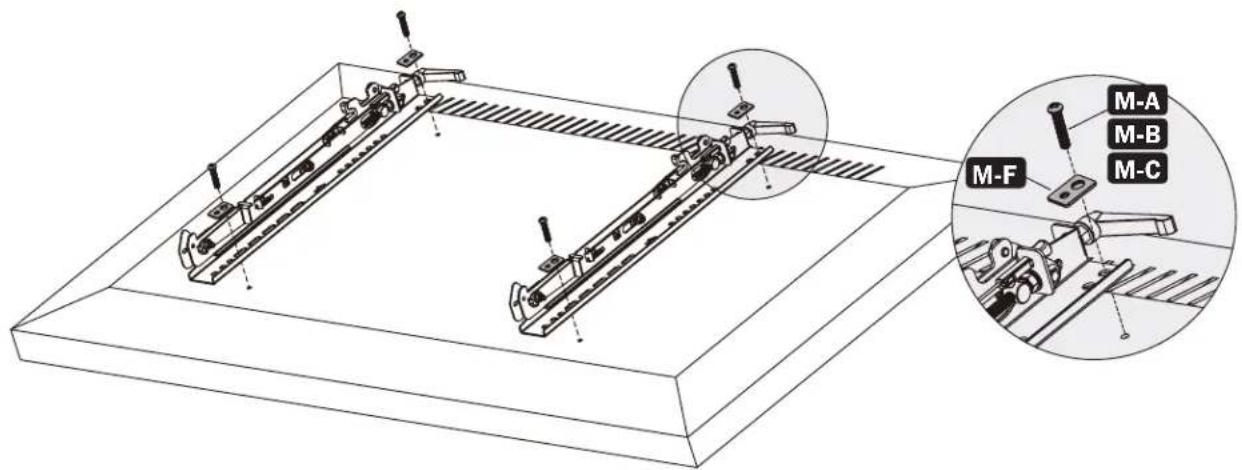
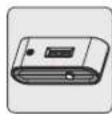
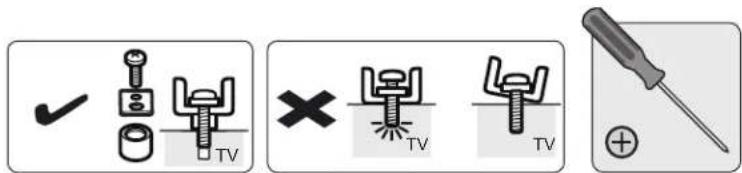
4.2 For Bump-Out or Recessed-Back Screens
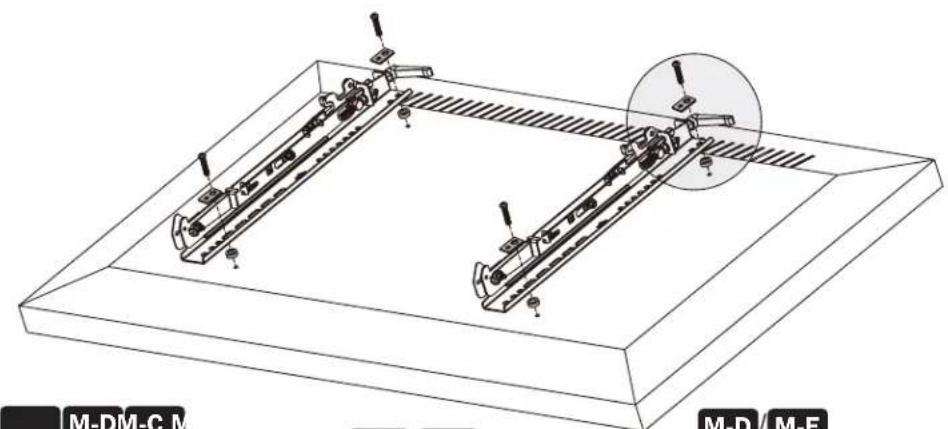
Notes:
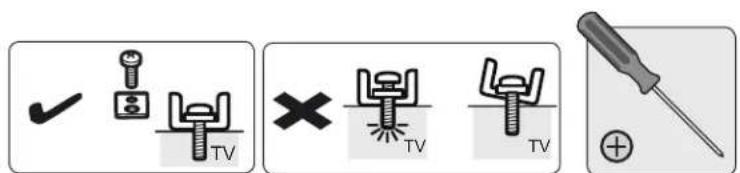
- Choose the appropriate screws, washers and spacers (if necessary) according to the type of screen.
- Position the adapter brackets as close as possible to the center of the display.
- Screw the adapter brackets onto the display.

Tighten all screws but do not overtighten.
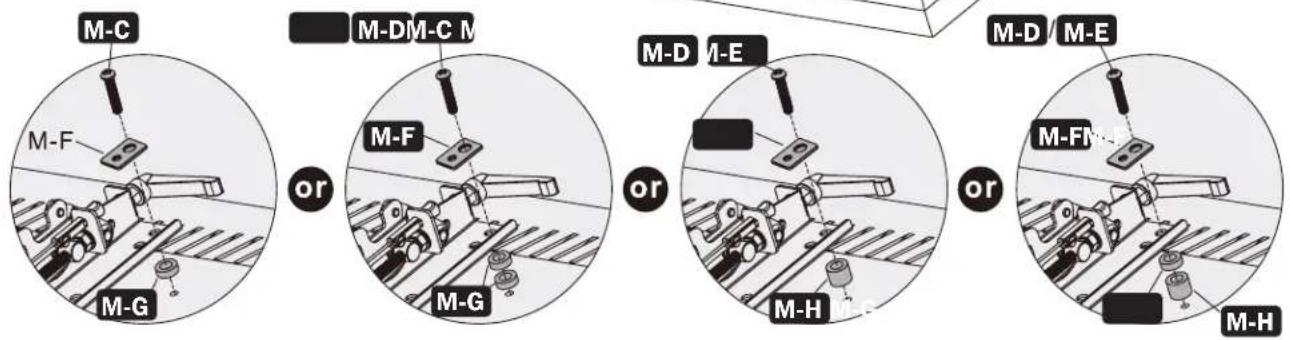
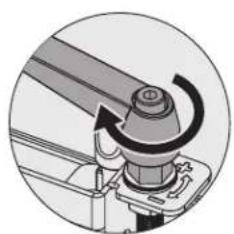
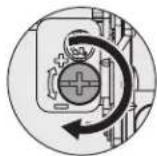
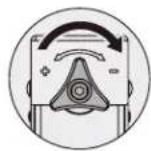
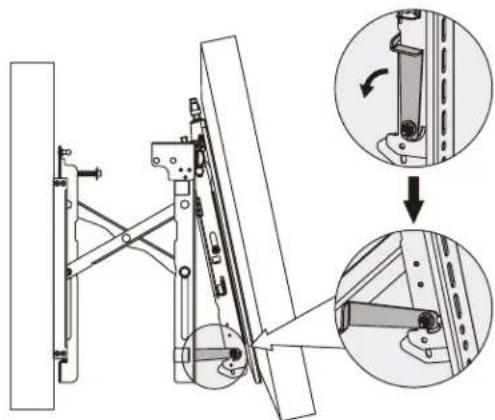
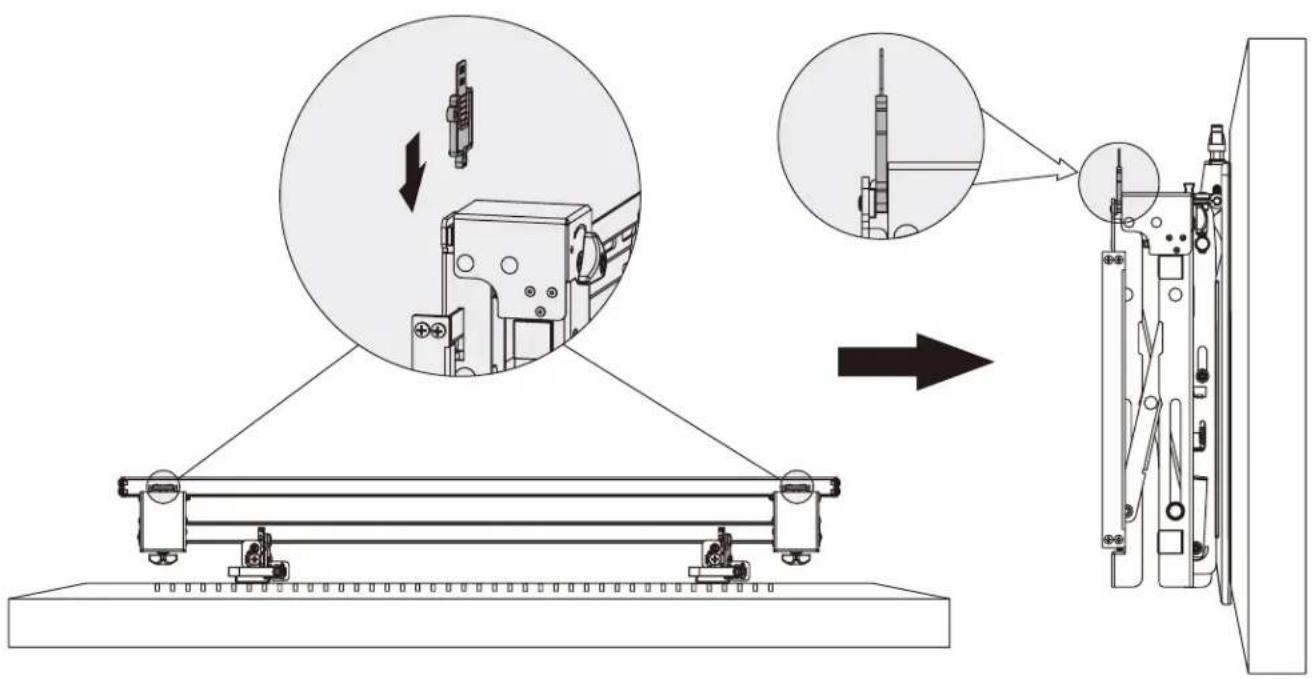
5. Hooking the Display onto the Pop-Out Module
Notes:
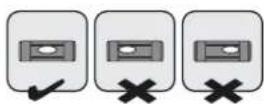
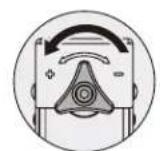
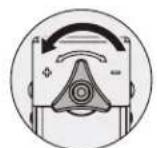
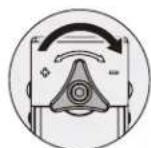
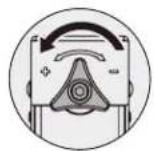
- Before hooking the display, ensure the knobs are rotated to the unlock position.
- Lift the display carefully and hook it onto the pop-out module. Rotate the knobs to the lock position to secure the display.
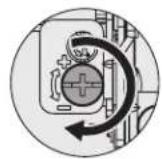
- Use the lock to prevent the display from being removed from the mount.
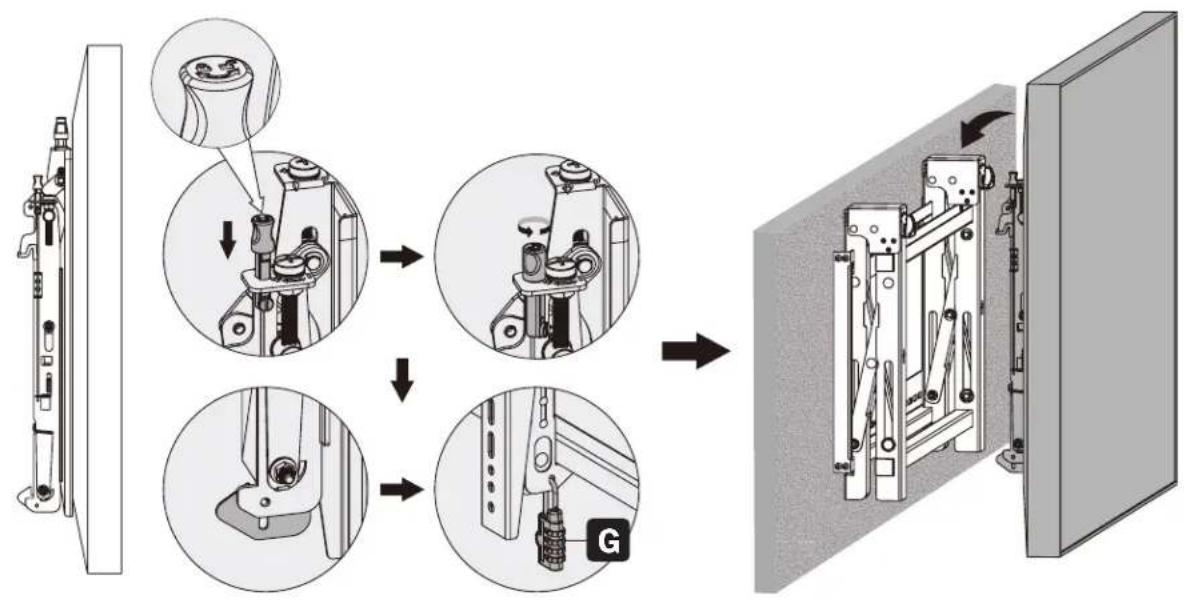
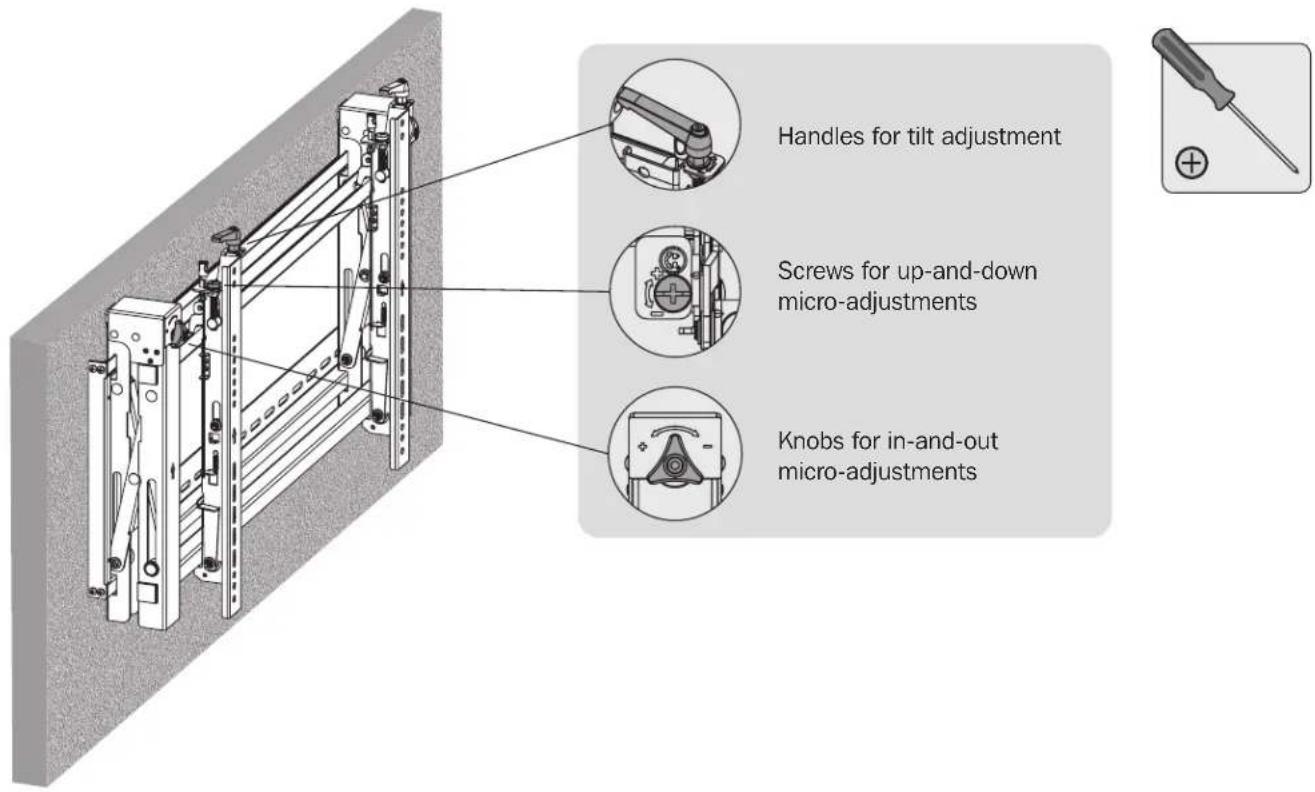
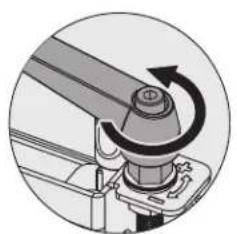
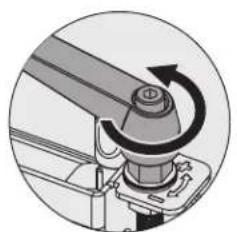
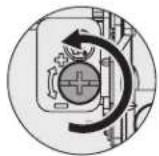
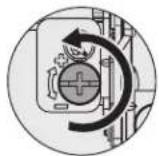
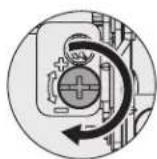
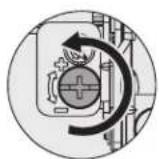
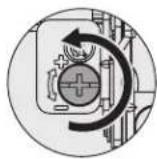
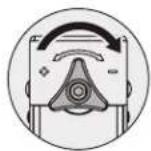
6. Adjustment
6. Adjustment
Left Left
Right Right

6. Adjustment

Left

Left

Right
Right
Left

Left
Right

Right
6. Adjustment
Left
Right
Left
Right
Left Left
Right Right
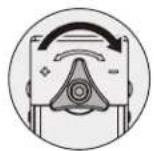
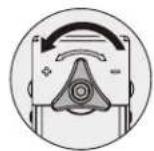


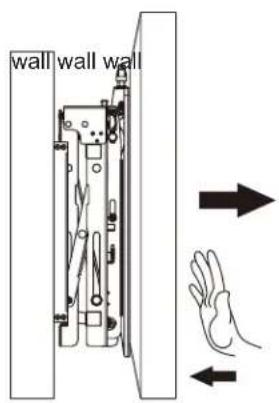
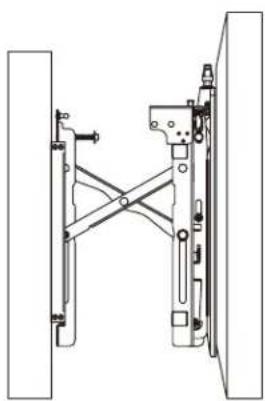

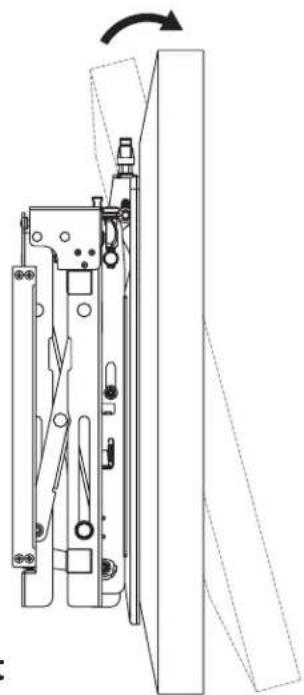
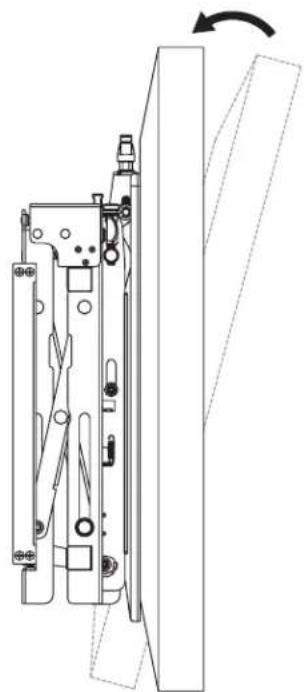
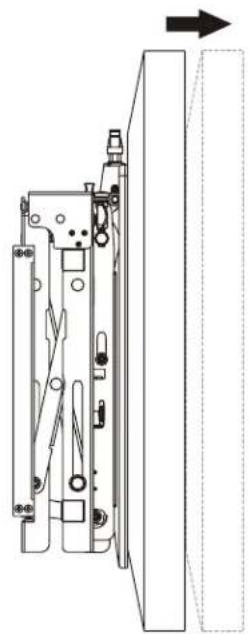
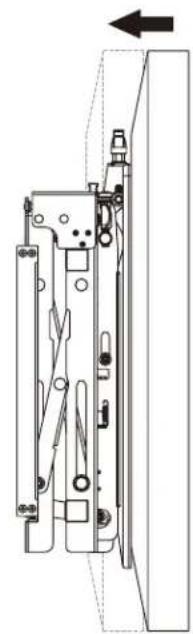
To pop out the display, push it inward and then release it.
Kickstands provide tilt access for easy cable management and maintenance.
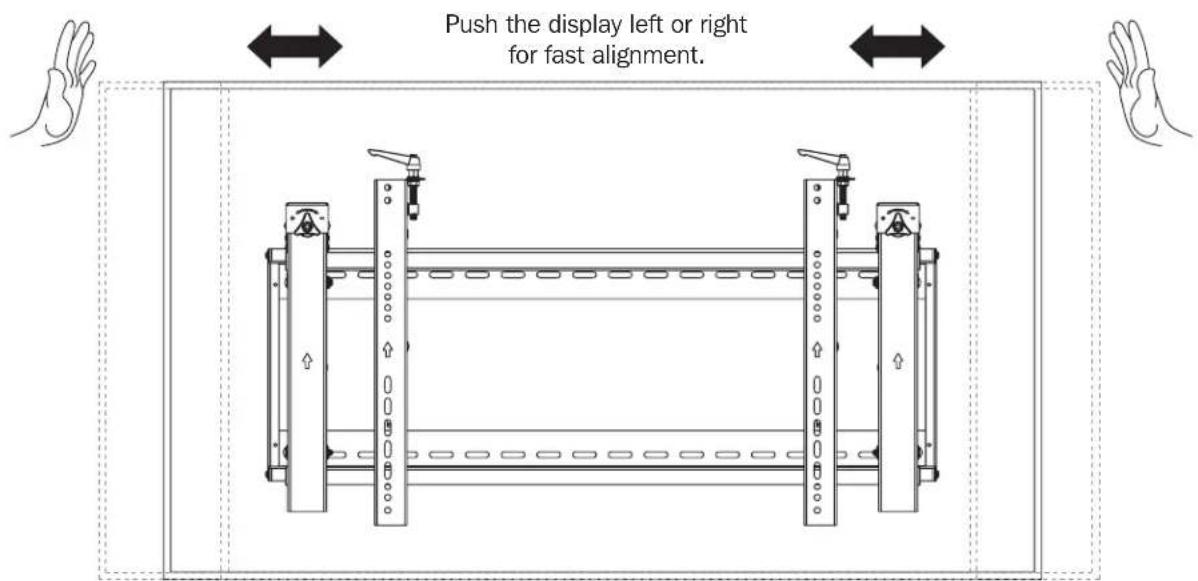
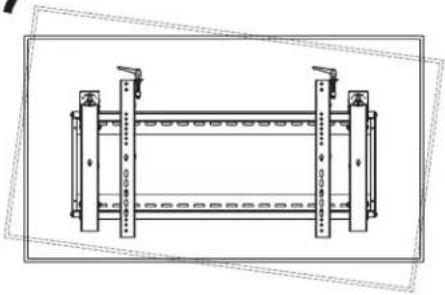
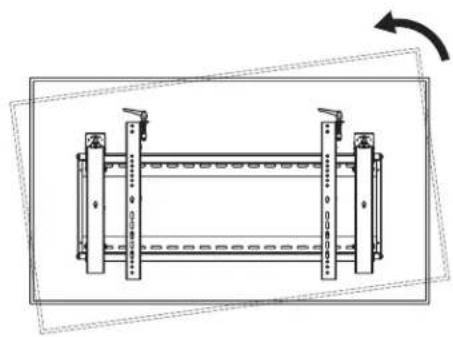
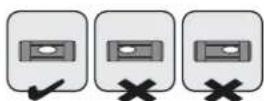
7. Level the Displays
Adjust the display to keep it level in vertical and horizontal directions.

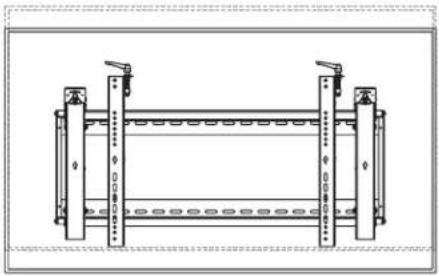
8. Fixing the Bracket Positions with the Anti-Skid Blocks
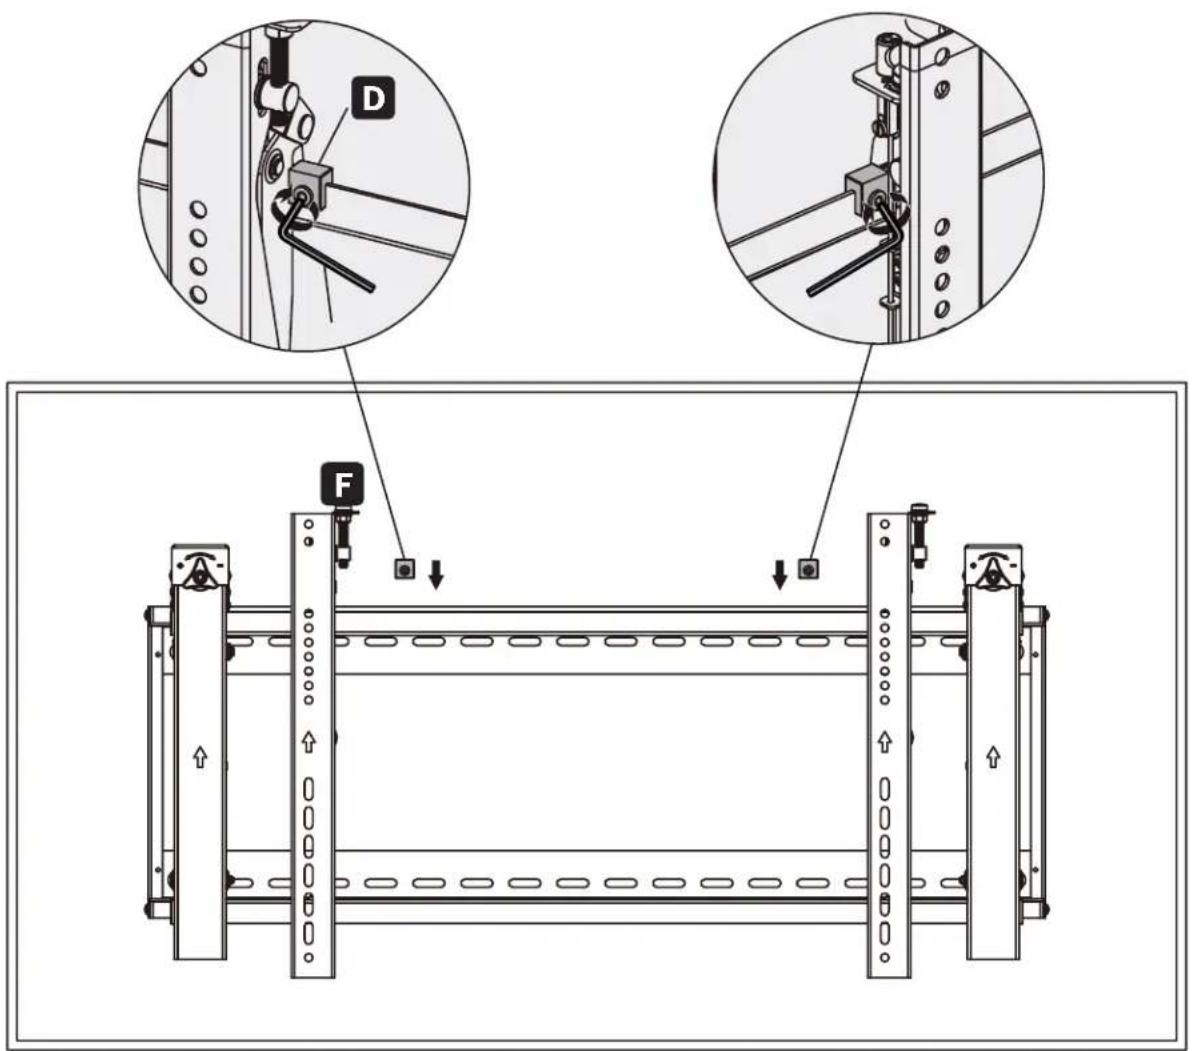
Install both of the anti-skid blocks as close to the adapter brackets as possible.
Tighten screws on the anti-skid blocks using an hex key to prevent the display from moving.
9. Lock the Pop-Out Module with the Plastic Locking Pieces
Maintenance
- Check that the bracket is secure and safe to use at regular intervals (at least every three months).
- Please contact Tripp Lite if you have any questions.


Manufacturing Excellence.
1111 W. 35th Street, Chicago, IL 60609 USA · triplite.com/support
Llave Hexagonal (x1)
Paquete M

M-A
M5x14 (x4)

M-B
M6x14 (x4)

M-C
M8x20 (x4)
M-D
M6x30 (x4)

M-E
M8x30 (x4)
M-F
Arandela (x4)

M-G
A
Plaque murale (x1)
B
Module retractable (x1)
BbDnKHO Moynb (1wT.)

C
PepexoHbI KpoHHTeH (2 wT.)

G
3amok (1wT.)
YnakoBOUHbI KOMPJIeKTP

D
POTMBOCKOJIb3aIeI 6IOK (2Wt.)

E
Pnactmaccobbmykcatop (2wT.)

F
WcTnprHnnbKIOU(1wT.)
YnakoOboHybIKOMnIeKTM

M-A
M5x14 (4 ut.)

M-B
M6x14 (4 ut.)
M-C
M8x20(4 unit.)

M-D
M6x30(4um.)
M-E
M8x30 (4 unit.)

M-F
山a6a(4u.)

M-G
YnakoBOUHbI KOMnNEkT W
W-A
ST6.3x55(6wT.)

W-B
AnkepДЯбетонa(6шт.)

W-C
山a6aD6(6u.)
1. KpenneHnE K cTeHe n3 cnlooHoro Knpnua nn6eToHa

BHUMAHNE!
YCTAHOBUHK 063aH y6eHtCB R TOM, YTO ONOPHAR NOBEPXHOCTb C3aIaCOM BbIepKHT cyMMapHyIO HArpy3Ky, CO3daBaEMyIO 6OpdyoBaHM E M BCEMM BXOJUIMM B KOMIINEKT DEtaJIaM N OCHACTKN I DpyTMM KOMIOHEHTAMN.


Pa3MeTbTe ToHoe
MeCToNoToXeHHe
MOHTaXHHbIX OTBepCTM.
BbCbePnnte
HappaBraioo
OTBepCTH
PnBHTte y3e1
JaHAcTeHHoro
Kpennnna K cTeHe.
2.YCTaHOBKa BnDeoCTeHbI (cuyETOM MOHTaxxHoro npoctpaHCTBa, KaK nOKa3aHo HmXe)
Texhueeckoe oebcnykuaueaue
- Pezynphno (he pexke, yem pa3 8 mpu meca) npoepeaime hadeekhocmb kpenneuhr kpoohmeuHa u 6e3onacchocmb e2o unnonb0anua.
Ipu 0o3nukhoBenu nio6bx oonpocob obauaumecb 6 kOmnaHIO Tripp Lite.


印图康普BHBZ00KNECTBA
1111 W. 35th Street, Chicago, IL 60609 USA · tripplite.com/support
Bedienungsanleitung

F
Inbusschlüssel (1 x)
Paket M

M-A
M5x14 (x4)

M-B
M6x14 (x4)
M-C
M8x20 (x4)
M-D
M6x30 (x4)
M-E
M8x30 (x4)
M-F
Beilagscheibe (x4)

M-G
Manufacturing Excellence.
1111 W. 35th Street, Chicago, IL 60609 USA · triplite.com/support