JBC7624BS - Coffee machine JENN-AIR - Free user manual and instructions
Find the device manual for free JBC7624BS JENN-AIR in PDF.
Document temporarily unavailable
The manual is currently being transferred to our new server. It will be accessible again in a few hours. Thank you for your patience.
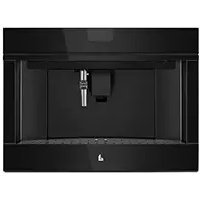
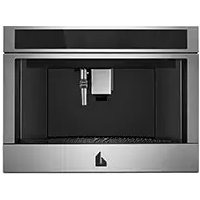
| Product type | Automatic espresso machine with integrated bean grinder |
| Brand | JENN-AIR |
| Model | JBC7624BS |
| Power supply | 120 V, 60 Hz (domestic use) |
| Coffee types prepared | Espresso, regular coffee, cappuccino, long coffee, ground coffee |
| Water tank capacity | Approx. 1.5 L (fill up to MAX line) |
| Bean container capacity | Approx. 250 g (fill without packing down) |
| Grounds container | Capacity for about 14 cups before emptying |
| Drip tray | With level indicator (red float) |
| Milk container | Integrated, with frothing nozzle and intake tube, dishwasher safe |
| Programs and settings | Intensity (extra mild to extra strong), size (espresso to mug), temperature (low, medium, high), auto shut-off, delayed start, clock, water hardness, descaling |
| Grinder | Stainless steel, adjustable (7 settings) |
| Adjustable coffee spout height | Yes (up to approx. 15 cm) |
| Hot water dispensing | Yes, via a dedicated spout (approx. 250 mL per cycle) |
| Display and controls | LCD screen, navigation keys, 1 coffee/2 coffee buttons, cappuccino, hot water, menu |
| Automatic rinsing function | Yes, on startup and standby |
| Descaling | Automatic program with recommended descaling agent |
| Cleaning | Removable brew unit washable with water, tray and grounds container cleanable manually, milk container dishwasher safe |
| Safety | Automatic shut-off, overheating protection, important safety instructions |
| Spare parts and repairability | Original parts available through Jenn-Air after-sales service (1-800-JENNAIR) |
Frequently Asked Questions - JBC7624BS JENN-AIR
User questions about JBC7624BS JENN-AIR
0 question about this device. Answer the ones you know or ask your own.
Ask a new question about this device
Download the instructions for your Coffee machine in PDF format for free! Find your manual JBC7624BS - JENN-AIR and take your electronic device back in hand. On this page are published all the documents necessary for the use of your device. JBC7624BS by JENN-AIR.