JJB6424HM - Coffee machine JENN-AIR - Free user manual and instructions
Find the device manual for free JJB6424HM JENN-AIR in PDF.
Document temporarily unavailable
The manual is currently being transferred to our new server. It will be accessible again in a few hours. Thank you for your patience.
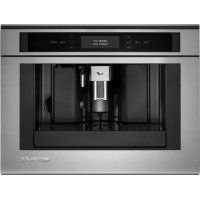
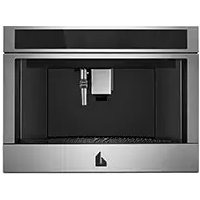
| Product Type | Espresso coffee machine with built-in grinder |
| Brand | JENN-AIR |
| Model | JJB6424HM |
| Beverage Types | Espresso, Doppio+, Coffee, Long, X2 Espresso, Americano, Cappuccino, Latte Macchiato, Caffè Latte, Hot Milk, Espresso Macchiato, Flat White, Cappuccino Mix, Hot Water, Steam |
| Number of Customizable Profiles | 6 |
| Grind Adjustment | Yes, wheel with 9 positions |
| Intensity Adjustment | 5 levels (very mild to very strong) + custom |
| Size Adjustment | 4 levels (small to extra large) + custom |
| Water Hardness Adjustment | Yes, levels 1 to 4 with test included |
| Coffee Temperature Adjustment | Low, medium, high, max |
| Milk System | Milk container with adjustable frother (no foam, little, lots) |
| Special Functions | Rinse, descaling, automatic shut-off, automatic start, energy saving, cup warmer, cup lighting, demo mode, statistics |
| Use of Ground Coffee | Yes, with dedicated funnel (1 scoop max) |
| Included Accessories | Hardness test strip, ground coffee scoop, cleaning brush, hot water/steam spout, milk container with frother |
| Maintenance | Regular cleaning of brew unit, bean container, drip tray, water tank, spouts, milk container, periodic descaling |
| Safety | Automatic shut-off, automatic start, safety instructions, unplug before cleaning |
| Customer Service | 1-800-JENNAIR (U.S. and Canada), online support |
| Warranty | 2 years parts and labor, 3-5 years selected components |
| Usage | Domestic only |
| Installation Type | Countertop (not built-in) |
Frequently Asked Questions - JJB6424HM JENN-AIR
User questions about JJB6424HM JENN-AIR
0 question about this device. Answer the ones you know or ask your own.
Ask a new question about this device
Download the instructions for your Coffee machine in PDF format for free! Find your manual JJB6424HM - JENN-AIR and take your electronic device back in hand. On this page are published all the documents necessary for the use of your device. JJB6424HM by JENN-AIR.