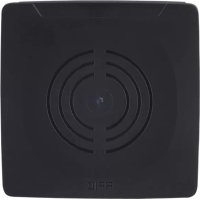
DTE902 - RFID system IFM - Free user manual and instructions
Find the device manual for free DTE902 IFM in PDF.


User questions about DTE902 IFM
0 question about this device. Answer the ones you know or ask your own.
Ask a new question about this device
Download the instructions for your RFID system in PDF format for free! Find your manual DTE902 - IFM and take your electronic device back in hand. On this page are published all the documents necessary for the use of your device. DTE902 by IFM.
USER MANUAL DTE902 IFM
Operating instructions
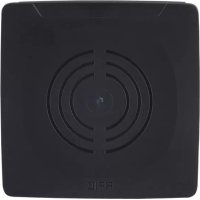
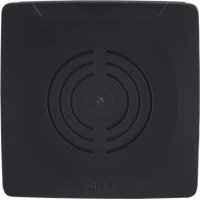
RFID compact unit
DTE801
DTE802
DTE804
DTE805
DTE901
DTE902
DTE904
DTE905
DTE911
DTE912
DTE914
DTE915
DTE921
DTE922
DTE924
DTE925
DTE931
DTE932
DTE934
DTE961
DTE962
DTE964
DTE965
Contents
1 Preliminary note 3
1.1 Symbols used 3
1.2 Warnings.... 3
1.3 Legal and copyright information 3
1.4 Open source information.... 4
2 Safety instructions.... 5
2.1 Cybersecurity 5
3 Intended use 7
3.1 Application areas 7
4 Items supplied.... 8
5 Function 9
5.1 Device overview 9
6 Installation.... 15
6.1 Installation instructions for devices 15
6.2 Installation instructions for ID tags.... 15
6.3 Avoiding interference 15
6.4 Mechanical design 16
6.5 Mounting options.... 16
6.5.1 Installation with angle bracket E80432 17
6.5.2 Installation with mounting device E80431 17
6.5.3 Installation with fixing bars E80337 18
6.5.4 Installation with cooling element E80430.... 18
6.6 Mounting distances.... 19
6.7 Positioning of the ID tags 19
7 Electrical connection.... 20
7.1 Wiring 20
7.2 Connecting the functional earth.... 21
8 Operating and display elements 22
8.1 Display elements DTE8x1 / DTE9x1 23
8.2 Display elements DTE8x2 / DTE9x2 24
8.3 Display elements ▷ DTE8x4/DTE8x5/DTE9x4/DTE9x5 25
9 Maintenance, repair and disposal 26
10 Approvals / standards 27
1 Preliminary note
You will find instructions, technical data, approvals and further information using the QR code on the unit / packaging or at documentation.ifm.com.
1.1 Symbols used
√ Requirement
Instructions
Reaction, result
[...] Designation of keys, buttons or indications
→ Cross-reference

Important note
Non-compliance may result in malfunction or interference.

Information
Supplementary note
1.2 Warnings
Warnings indicate the possibility of personal injury and damage to property. This enables safe product handling. Warnings are graded as follows:

WARNING
Warning of serious personal injury
▷ If the warning is not observed, fatal and serious injuries are possible.

CAUTION
Warning of minor to moderate personal injury
▷ If the warning is not observed, minor to moderate injuries are possible.
ATTENTION
Warning of damage to property
▷ If the warning is not observed, damage to property is possible.
1.3 Legal and copyright information
© All rights reserved by ifm electronic gmbh. No part of these instructions may be reproduced and used without the consent of ifm electronic gmbh.
All product names, product pictures, companies or other brands used on our pages are the property of the respective rights owners:
• AS-i is the property of AS-International Association
• CAN is the property of Robert Bosch GmbH, Germany
• CANopen is the property of CiA (CAN in Automation e. V.), Germany
- CODESYS™ is the property of CODESYS GmbH, Germany (→ www.codesys.com)
- Device
Net™ is the property of ODVA™ (Open Device
Net Vendor Association), USA
- Ether
Net/IP is the property of ODVA TM - EtherCAT® is a registered trademark and patented technology, licensed by Beckhoff Automation GmbH, Germany
- IO-Link® is the property of → PROFIBUS Nutzerorganisation e. V., Deutschland
• ISOBUS is the property of AEF - Agricultural Industry Electronics Foundation e. V., Germany - Windows® is the property of Microsoft Corporation, USA
- Modbus® is the property of Schneider Electric SE, France
• PROFINET® is the property of PROFIBUS Nutzerorganisation e. V., Deutschland
• PROFINET® is the property of PROFIBUS Nutzerorganisation e. V., Deutschland - Windows® is the property of Microsoft Corporation, USA
1.4 Open source information

For more open source information see: documentation.ifm.com.
2 Safety instructions
General
- The unit described is a subcomponent for integration into a system.
- The system architect is responsible for the safety of the system.
- The system architect undertakes to perform a risk assessment and to create documentation in accordance with legal and normative requirements to be provided to the operator and user of the system. This documentation must contain all necessary information and safety instructions for the operator, the user and, if applicable, for any service personnel authorised by the architect of the system.
- Read this document before setting up the product and keep it during the entire service life.
- The product must be suitable for the corresponding applications and environmental conditions without any restrictions.
- Only use the product for its intended purpose (→ Intended use).
- If the operating instructions or the technical data are not adhered to, personal injury and/or damage to property may occur.
- The manufacturer assumes no liability or warranty for any consequences caused by tampering with the product or incorrect use by the operator.
- Installation, electrical connection, set-up, operation and maintenance of the product must be carried out by qualified personnel authorised by the machine operator.
- Protect units and cables against damage.
Radio equipment
In general, radio equipment must not be used in the vicinity of petrol stations, fuel depots, chemical plants or blasting operations.
▶ Do not transport and store any flammable gases, liquids or explosive substances near the unit.
Interference of electronic and medical devices
Operation can affect the function of electronic devices that are not correctly shielded.
▶ Disconnect the device in the vicinity of medical equipment.
▶ Contact the manufacturer of the corresponding device in case of any interference.
2.1 Cybersecurity
Installation
The device is suitable for operation in a secure environment according to IEC 62443-1-1.
▶ Carry out a risk assessment of the system according to IEC 62443-1-1.
▶ Take measures to ensure physical security.
▶ Ensure that only authorised persons have access to the device, its interfaces and the RFID tags.
Operation
▶ Observe the security functions described in the product documentation and the recommendations for their use.
Maintenance
▶ Regularly check whether software updates are available for the device.
- ▶ Back up system configuration and system data in accordance with your company’s change management processes.
Decommissioning
▶ Ensure that no sensitive information can fall into unauthorised hands.
▶ Always reset the system settings to the factory settings before decommissioning the device.
Ethernet interface
The device has no built-in protection against unauthorised access.
▶ Only operate the device in trustworthy networks.
Examples of trustworthy networks (according to IEC 62443-3-1, part 5):
• Internal company networks (Local Area Networks - LANs)
– Networks managed and secured by the IT department
• Industrial control systems (Industrial Control Systems - ICS)
– Networks for the control and monitoring of industrial processes
– ICS are isolated from other networks
- Point-to-point connection between the device and its direct communication partner
▶ Set the system password during initial set-up.
RFID
ID tags are portable and can be duplicated.
▶ Ensure that ID tags are operated within a secure environment.
▶ Do not store any sensitive data on unencrypted ID tags, e.g. personal data or financial data.
Software update
Ensure the integrity and authenticity of the software update by taking the following organisational measures:
▶ Download the new firmware file to a secure laptop/PC.
▶ Calculate the SHA-256 hash value for the downloaded firmware file, www.ifm.com/cnt/product-security.
▶ Check whether the calculated hash value matches the SHA-256 hash value provided on the ifm website.
▶ Install the firmware file on the device via a secure connection, e.g. a point-to-point connection.
3 Intended use
The device is composed of an evaluation unit and an integrated RFID read/write head and provides the following functions
• non-contact reading and writing of ID tags that conform to the system,
- configuration via a web server,
- DTE8x1/DTE9x1 only: communication with the control level via PROFINET IO,
- DTE8x2/DTE9x2 only: communication with the control level via Ether
Net/IP,
- DTE8x4/DTE9x4 only: communication with the control level via Ether
Net TCP/IP,
- DTE8x5/DTE9x5 only: communication with the control level via Ether
Net IoT protocols.
3.1 Application areas
The device safety is rated for use under the following operating conditions:
- Protection class 3 (SELV/PELV) and supply of the device to limited energy according to IEC 61010-1, chapter 9.4. Isolate the external circuits as required by figure 102 in IEC 61010-2-201.
- For indoor use.
• Altitudes up to 2000 m. - Relative air humidity up to max. 80 %, non condensing.
• Pollution degree 2.
Possible applications
• Material flow control in production lines,
- Warehouse management by the automatic detection of stored products,
- Tank management, order picking or product tracking.

The device may only be used under the operating conditions specified in the data sheet.
4 Items supplied
- RFID compact unit
• Package insert 'general information'
• Package insert 'radio approval'

The device is supplied without installation and connection accessories.
Available accessories: www.ifm.com.
The optimum function is not ensured when using components from other manufacturers.
5 Function
The ID tags are operated passively without battery. The energy required for operation is provided by the compact RFID device.
The energy is transferred via an electromagnetic wave. The receiving antenna takes up the wave and transforms it into voltage which supplies the data carrier with energy.
The radiated power is specified in ERP (Effective Radiated Power) and in EIRP (Effective Isotropic Radiated Power) for the devices. The respective value can be converted using the following formula:
P [dBm EIRP] = P [dBm ERP] + 2.15 [dB]
5.1 Device overview
DTE801
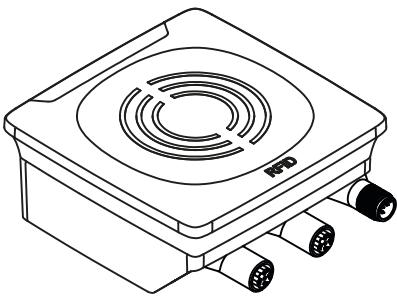 | Article number: | DTE801 |
| Function: | RFID compact device | |
| Type designation: | DTRUHFE HLRWPNUS04 | |
| Type: | rectangular |
DTE802
 | Article number: | DTE802 |
| Function: | RFID compact device | |
| Type designation: | DTRUHFE HLRWEIUS04 | |
| Type: | rectangular |
DTE804
 | Article number: | DTE804 |
| Function: | RFID compact device | |
| Type designation: | DTRUHFE HLRWENUS04 | |
| Type: | rectangular |
DTE805
 | Article number: | DTE805 |
| Function: | RFID compact device | |
| Type designation: | DTRUHFE HLRWITUS04 | |
| Type: | rectangular |
DTE901
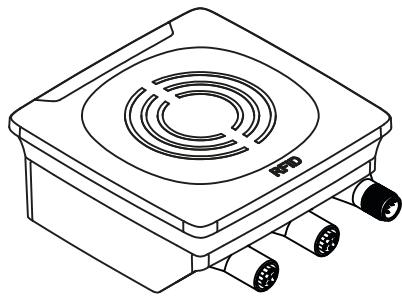 | Article number: | DTE901 |
| Function: | RFID compact device | |
| Type designation: | DTRUHFA HLRWPNUS04 | |
| Type: | rectangular |
DTE902
 | Article number: | DTE902 |
| Function: | RFID compact device | |
| Type designation: | DTRUHFA HLRWEIUS04 | |
| Type: | rectangular |
DTE904
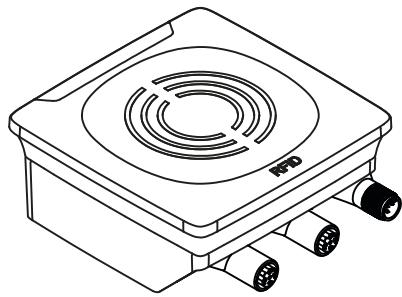 | Article number: | DTE904 |
| Function: | RFID compact device | |
| Type designation: | DTRUHFA HLRWENUS04 | |
| Type: | rectangular |
DTE905
 | Article number: | DTE905 |
| Function: | RFID compact device | |
| Type designation: | DTRUHFA HLRWITUS04 | |
| Type: | rectangular |
DTE911
 | Article number: | DTE911 |
| Function: | RFID compact device | |
| Type designation: | DTRUHFA HLRWPNUS04 | |
| Type: | rectangular |
DTE912
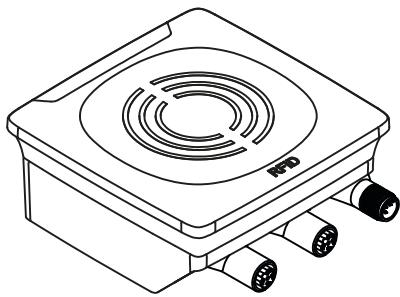 | Article number: | DTE912 |
| Function: | RFID compact device | |
| Type designation: | DTRUHFA HLRWEIUS04 | |
| Type: | rectangular |
DTE914
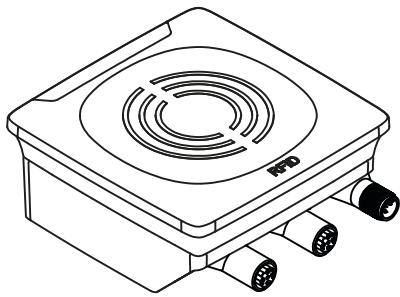 | Article number: | DTE914 |
| Function: | RFID compact device | |
| Type designation: | DTRUHFA HLRWETUS04 | |
| Type: | rectangular |
DTE915
| Article number: | DTE915 |
| Function: | RFID compact device | |
| Type designation: | DTRUHFA HLRWITUS04 | |
| Type: | rectangular |
DTE921
| Article number: | DTE921 |
| Function: | RFID compact device | |
| Type designation: | DTRUHFA HLRWPNUS04 | |
| Type: | rectangular |
DTE922
| Article number: | DTE922 |
| Function: | RFID compact device | |
| Type designation: | DTRUHFA HLRWEIUS04 | |
| Type: | rectangular |
DTE924
| Article number: | DTE924 |
| Function: | RFID compact device | |
| Type designation: | DTRUHFA HLRWETUS04 | |
| Type: | rectangular |
DTE925
| Article number: | DTE925 |
| Function: | RFID compact device | |
| Type designation: | DTRUHFA HLRWITUS04 | |
| Type: | rectangular |
DTE931
| Article number: | DTE931 |
| Function: | RFID compact device | |
| Type designation: | DTRUHFA HLRWPNUS04 | |
| Type: | rectangular |
DTE932
| Article number: | DTE932 |
| Function: | RFID compact device | |
| Type designation: | DTRUHFA HLRWEIUS04 | |
| Type: | rectangular |
DTE934
| Article number: | DTE934 |
| Function: | RFID compact device | |
| Type designation: | DTRUHFA HLRWETUS04 | |
| Type: | rectangular |
DTE961
| Article number: | DTE961 |
| Function: | RFID compact device | |
| Type designation: | DTRUHFA HLRWPNUS04 | |
| Type: | rectangular |
DTE962
| Article number: | DTE962 |
| Function: | RFID compact device | |
| Type designation: | DTRUHFA HLRWEIUS04 | |
| Type: | rectangular |
DTE964
| Article number: | DTE964 |
| Function: | RFID compact device | |
| Type designation: | DTRUHFA HLRWETUS04 | |
| Type: | rectangular |
DTE965
| Article number: | DTE965 |
| Function: | RFID compact device | |
| Type designation: | DTRUHFA HLRWITUS04 | |
| Type: | rectangular |
6 Installation
ATTENTION
Radiated electromagnetic field strengths
▷ The device sends ultrahigh frequency electromagnetic waves. It complies with the country-specific limit values for the public and workers.
▶ Disconnect the device in the vicinity of medical equipment.
6.1 Installation instructions for devices
Devices installed next to each other interfere if they are not configured correspondingly.
When mounting several RFID units adhere to the minimum distances between the systems.
Installing a unit in or on metal reduces the read and write distance.
Device performance can be affected if positioned in the immediate vicinity of powerful HF emission sources such as welding transformers or converters.
6.2 Installation instructions for ID tags
For installation in and on metal use the ID tags provided for this purpose.
Position the ID tag in the area of the sensing face. When doing so, the angle of aperture and the operating distance must be adhered to (→ Data sheet of the device).
Align the axes of the RFID device and the ID-TAG in the same way.
6.3 Avoiding interference
The device generates a modulated electromagnetic field in the following frequency ranges:
DTE80x: 865-868 MHz
DTE90x: 902-928 MHz
DTE91x: 920–925 MHz
DTE92x: 915–928 MHz
DTE93x: 918.4–923 MHz
DTE96x: 916.8–920.4 MHz
Interference in data communication is avoided if there are no other RFID UHF devices in the vicinity. If there are other RFID UHF devices in the vicinity:
▶ The mounting distances between the devices should be as large as possible.
▶ Use the RSSI filter.
▶ Use the devices in alternating operation.
▶ Switch the HF field of the device on/off.
The UHF field is attenuated if there are people or objects (cables, metal profiles, etc.) between the device and ID tag.
▶ Keep the area between the device and ID tag clear during reading or writing.
6.4 Mechanical design
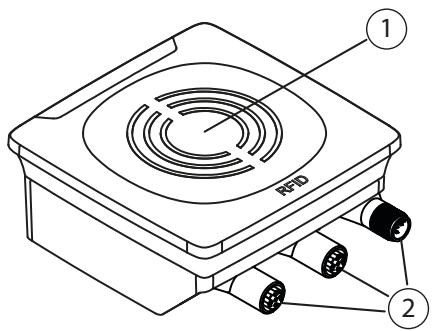
1 Sensing face
2 Connections (can be rotated by 270° )
6.5 Mounting options
The device can be mounted without the accessories.
▶ For installation, please use the threaded sleeves on the back of the device.
▷ The required screws are not supplied with the device.
No liquid should be allowed to accumulate on the connected sockets and plugs.
▶ Mount the device preferably vertically, with the connections facing downwards.
▶ Route the connection cables vertically or horizontally downwards away from the device.

Fig. 1: Vertically mounted device with the connections facing downwards
6.5.1 Installation with angle bracket E80432
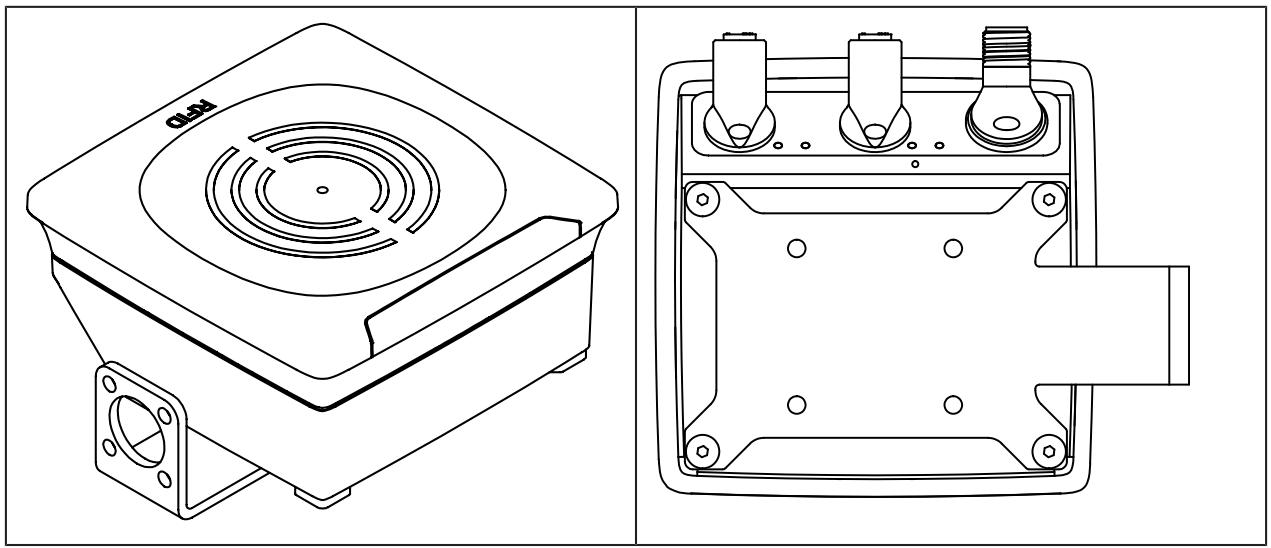
6.5.2 Installation with mounting device E80431
The mounting device is used to mount the unit on a clamp. Compatible clamps:
• E21110 with a rod diameter of 12 mm
• E20795 with a rod diameter of 14 mm
• E21109 with a rod diameter of 14 mm

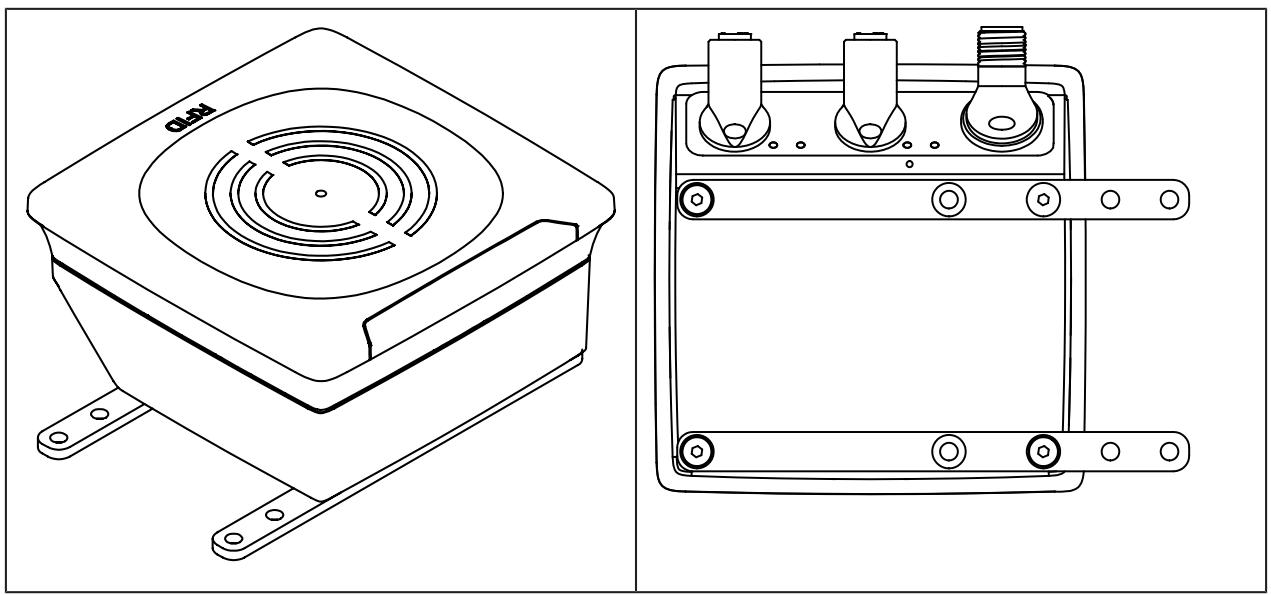
6.5.3 Installation with fixing bars E80337
6.5.4 Installation with cooling element E80430
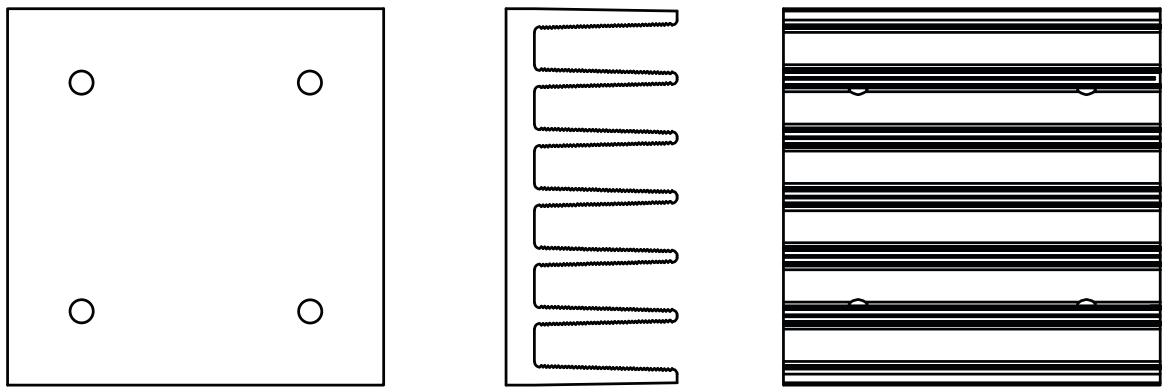
Fig. 2: Cooling element E80430
The cooling element E80430 can improve the heat dissipation of the device when
• the device is used in environments with high temperatures,
- the device is loaded by computationally intensive tasks.
Mounting the cooling element:
▶ Mount the cooling element E80430 on the mounting device E80431 or the angle bracket E80432.
▶ Mount the mounting device or the angle bracket on the device.
In addition, the mounting device E80336 and the angle bracket E80335 are available. Both articles are missing the drill holes for the cooling element E80430.
▶ For mounting the cooling element E80430, only use the mounting device E80431 or the angle bracket E80432.
6.6 Mounting distances
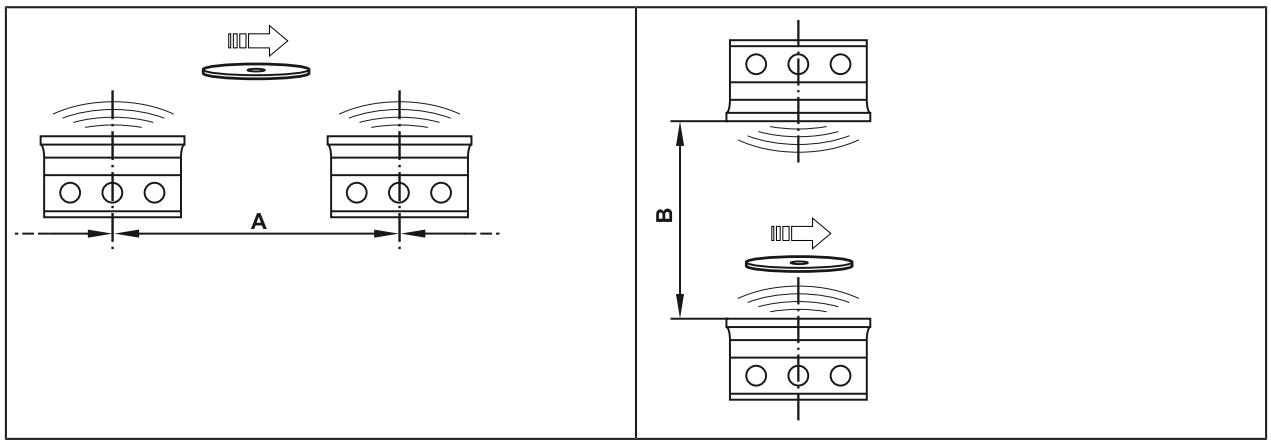
| Operating mode | Distance side (A) | Distance front (B) |
| Reading and writing at 100% transmitting power (simultaneous operation) | >0.6 m | >0.6 m |
| Reading and writing at 100% transmitting power (alternating operation) | >0.3 m | >0.3 m |
Interference in data communication is avoided if there are no other RFID UHF devices in the vicinity. If there are other RFID UHF devices in the vicinity:
▶ The mounting distances between the devices should be as large as possible.
▶ Use the RSSI filter.
▶ Use the devices in alternating operation.
▶ Switch the HF field of the device on/off.
6.7 Positioning of the ID tags
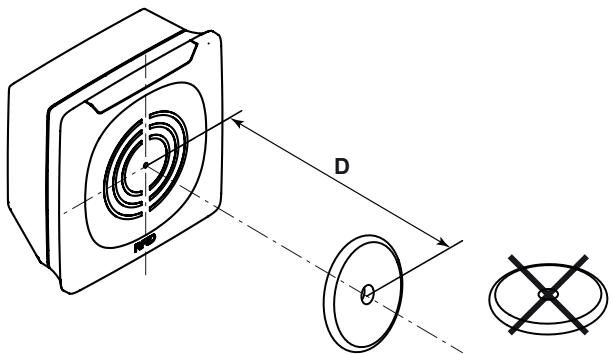
Fig. 3: Position the ID tag
▶ Align the ID tag on the antenna central axis.
The distance "D" is indicated in the data sheet.
ID tags are also detected on the back of the device. To avoid this:
▶ Use the RSSI filter.
7 Electrical connection

The device must be connected by a qualified electrician.
Device of protection class III (PC III).
The electrical supply must only be made via PELV/SELV circuits.
▶ Disconnect power before connecting the device.
ATTENTION
The IP rating indicated in the data sheet is only guaranteed if the M12 connectors are firmly screwed. The device can be damaged by insufficiently tightened M12 connectors.
▶ Screw the M12 connector to the device applying 1 to 1.5 Nm.

Use strain reliefs for cables connected to the device.
7.1 Wiring
+PWR voltage supply
▶ Connect the device to a voltage supply using an M12 connection cable.
| Pin assignment | Wiring | |
 | 1 | 24 V DC |
| 2 | Digital input / output 2 | |
| 3 | 0 V | |
| 4 | Digital input / output 1 | |
| 5 | not connected |
Ethernet
▶ Connect the device to a PC using an M12 Ethernet connection cable.
| Pin assignment | Wiring | |
 | 1 | TD+ |
| 2 | RD+ | |
| 3 | TD- | |
| 4 | RD- |

For trouble-free operation:
▶ use a shielded M12 Ethernet connection cable.
The following parameters are preset at the factory:
| Parameter | Preset |
| IP address | 192.168.0.79 |
| Gateway address | 192.168.0.100 |
| Subnet mask | 255.255.255.0 |
| Auto-negotiation | On |
| DHCP | Off |
The settings can be changed via the device's web server or via a connected PC.
Resetting the Ethernet parameters
Reset the Ethernet parameters to factory setting:
▶ Remove all cable connections from the device.
▶ Insert an electrically conductive bridge between pin 2 and pin 4 on the connection “PWR voltage supply”.
▶ Connect the device to the voltage supply.
▷ The LEDs of the signal bar (yellow) are on one after the other. Then LED 4 of the signal bar (yellow) flashes at 8 Hz.
▶ As soon as the LEDs of the signal bar (yellow) flash at 8 Hz, remove the electrically conductive bridge between pin 2 and pin 4.
▶ Disconnect the device from the voltage supply and connect it again after 1 s.
▷ The Ethernet parameters have been reset.
7.2 Connecting the functional earth

For trouble-free operation:
▶ Connect the device to an earth potential free from external voltage.
▶ Connect the mounting plate to functional earth.
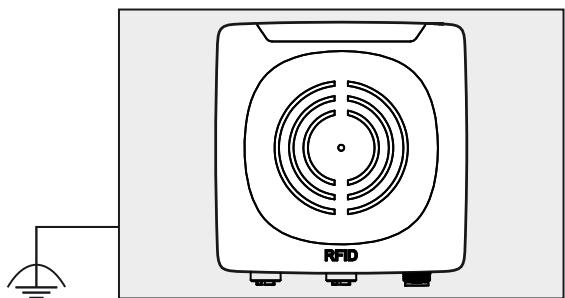
Fig. 4: Mounting plate with mounted device
When the device is mounted on a mounting plate:
▶ Connect one of the 4 mounting bolts on the back of the device to the mounting plate.
▶ Connect the mounting plate to an earth potential free from external voltage.
8 Operating and display elements
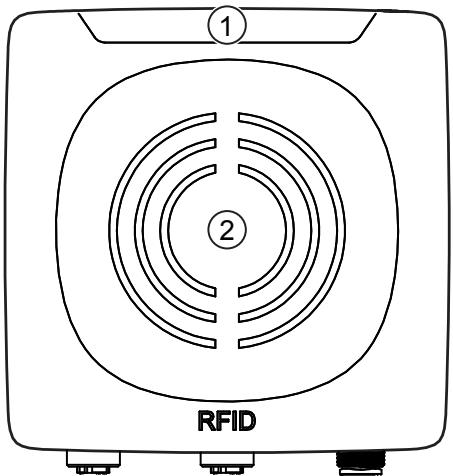
Fig. 5: LED signal bar and sensing face
1 1x LED Power (green)
4x LED signal bar (yellow)
2x LEDs SF/BF or LEDs Mod/Net (green/red)
2 Sensing face

Depending on the device, the LEDs SF/BF or the LEDs Mod/Net are used:
▷ DTE8x1/DTE9x1: LEDs SF/BF (→ Display elements DTE8x1 / DTE9x1 ☐ 23)
▷ DTE8x2/DTE9x2: LEDs Mod/Net (→ Display elements DTE8x2 / DTE9x2 ☐ 24)
▷ DTE8x4/DTE8x5/DTE9x4/DTE9x5: LEDs SF/BF (→ Display elements DTE8x4/DTE8x5/DTE9x4/DTE9x5 ☐ 25)
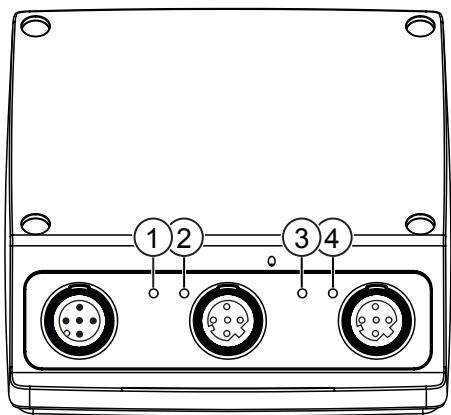
Fig. 6: Connections with LEDs
1 ETH2 ACT
3 ETH1 ACT
2 ETH2 LINK
4 ETH1 LINK
The following table applies to all devices.
| State | Power LED (green) | LED signal bar (yellow) |
| Voltage supply OK (18 V ≤ UPWR ≤ 36 V) | on | off |
| Antenna (HF field) is deactivated | flashes at 2 Hz | off |
| ID tag read / written successfully | on | flashes twice |
| ID tag read / written incorrectly | on | flashing quickly |

The maximum receive signal strength depends on the type of the ID tag.

If the ID tag has a high receive signal strength, all LEDs of the signal bar are on.
▷ The response of the LEDs of the signal bar is adjustable.
LED LINK/ACT ETH1 / ETH2
| LED green | LED yellow | State | Note |
| off | off | No connection to an Ethernet counterpart. | Link status: “No Link” |
| on | off | Connection to Ethernet counterpart exists, no data exchange. | Link status: “Link”, “No traffic” |
| on | flashes sporadically | Connection to Ethernet counterpart exists, data exchange running. | Link status: “Link”, “Traffic” |
Special device LED indicators
| LED | State | Note |
| Power LED (green) on LEDs of signal bar (yellow) flashing at 8 Hz. | Device is in the service mode “emergency system started”. | A firmware update is necessary and can be executed via the web server. |
| Power LED (green) on LEDs of signal bar (yellow) flashing at 8 Hz. | Major error, device has to be returned. | Hardware fault or permanent data in the device are corrupt. |
| Power LED (green) on The LEDs of the signal bar (yellow) are on one after the other. Then LED 4 of the signal bar (yellow) flashes at 8 Hz. | Reset to factory settings. | - |
8.1 Display elements DTE8x1 / DTE9x1
The following tables only apply to the DTE8x1 / DTE9x1 devices.
LED SF
| LED red | LED green | State | Note |
| off | off | no voltage supply | Check the voltage supply |
| off | flashes | “Node flash test”, initiated by the PROFINET IO controller | - |
| off | on | Normal operation | - |
| flashes | off | Error at channel level | Overload TemperatureInternal error |
| on | off | Error at device level | Undervoltage Temperature |
| flashes | flashes | Self-test | Starting phase of the device |
LED BF
| LED red | LED green | State | Note |
| off | off | no voltage supply | Check the voltage supply |
| off | flashes | PROFINET IO controller is in STOP mode | - |
| off | on | PROFINET IO controller is in RUN mode | - |
| flashes | off | Connection to the PROFINET IO controller is established, no valid configuration | Check configuration |
| on | off | No connection to the PROFINET IO controller | Check connection |
| flashes | flashes | Self-test | Starting phase of the device |
8.2 Display elements DTE8x2 / DTE9x2
The following tables only apply to the DTE8x2 / DTE9x2 devices.
LED Mod (module status)
| LED red | LED green | State | Note |
| off | off | no voltage supply | ▶ Verify voltage supply. |
| off | flashes | Ready for operation | The device is not configured. There is no exchange of data:▶ Check the connection of the Ethernet/IP scanner. ▶ Check the parameter setting of the configuration assembly. |
| off | on | Normal operation | Connection to the Ether Net/IP scanner is established. The device is configured. The data transfer is running. |
| flashes | off | Minor error | A connection to the Ether Net/IP scanner was not established:▶ Verify voltage supply. ▶ Check the configuration of the unit. |
| on | off | Major error | Software / hardware error of the device:▶ Reboot the device. ▷ If the error remains, send the device for service. |
| flashes | flashes | Self-test | Starting phase of the device. |
LED Net (network status)
| LED red | LED green | State | Note |
| off | off | No IP address or no voltage supply | ▸ Verify voltage supply.▸ ▶ If DHCP is activated, check the accessibility of the DHCP server. |
| off | flashes | No connection | The device has received an IP address. An Ether Net/IP connection was not established.▸ ▶ Check the configuration of the device via Ether Net/IP scanner. |
| off | on | Connection exists | At least one Ether Net/IP connection to the device was established. |
| flashes | off | Timeout of the connection | A timeout was found with one of the existing Ether Net/IP connections.▸ ▶ Check the status of the connection in the Ether Net/IP scanner. |
| on | off | The IP address already exists | The same IP address as that of the device was detected in the Ether Net/IP network.▸ ▶ Activate DHCP. |
| flashes | flashes | Self-test | Starting phase of the device. |
8.3 Display elements DTE8x4/DTE8x5/DTE9x4/DTE9x5
The following tables only apply to the DTE8x4/DTE8x5/DTE9x4/DTE9x5 devices.
LED SF
| LED red | LED green | State | Note |
| off | off | No voltage supply | Verify voltage supply. |
| off | on | Normal operation | - |
| flashes | off | Error at channel level | Overload TemperatureInternal error |
| on | off | Error at device level | Undervoltage Temperature |
| flashes | flashes | Self-test | Starting phase of the device. |
LED BF
| LED red | LED green | State | Note |
| off | off | No voltage supply | Check the voltage supply |
| off | flashes | Connection to the host controller is established, there is no data exchange | - |
| off | on | Connection to the host controller is established, data exchange takes place | - |
| flashes | off | Connection to the host controller is established, no valid configuration | Check configuration |
| on | off | No connection to the host controller | Check connection |
| flashes | flashes | Self-test | Starting phase of the device |
9 Maintenance, repair and disposal
The unit is maintenance-free.
▶ Contact ifm in case of malfunction.
▶ Do not open the housing as the unit does not contain any components which can be maintained by the user. The unit must only be repaired by the manufacturer.
▶ Clean the device using a dry cloth.
▶ Dispose of the unit in accordance with the national environmental regulations.
10 Approvals / standards
The EU Declaration of Conformity, approvals and country-specific certificates are available at: → www.ifm.com
Notes relevant for approval: → Package insert
- 1 PRELIMINARY NOTE
- 1.1 SYMBOLS USED
- 1.2 WARNINGS
- 1.3 LEGAL AND COPYRIGHT INFORMATION
- 1.4 OPEN SOURCE INFORMATION
- 2 SAFETY INSTRUCTIONS
- 2.1 CYBERSECURITY
- 3 INTENDED USE
- 3.1 APPLICATION AREAS
- 4 ITEMS SUPPLIED
- 5 FUNCTION
- 5.1 DEVICE OVERVIEW
- 6 INSTALLATION
- 6.1 INSTALLATION INSTRUCTIONS FOR DEVICES
- 6.2 INSTALLATION INSTRUCTIONS FOR ID TAGS
- 6.3 AVOIDING INTERFERENCE
- 6.4 MECHANICAL DESIGN
- 6.5 MOUNTING OPTIONS
- 6.5.1 INSTALLATION WITH ANGLE BRACKET E80432
- 6.5.2 INSTALLATION WITH MOUNTING DEVICE E80431
- 6.5.3 INSTALLATION WITH FIXING BARS E80337
- 6.5.4 INSTALLATION WITH COOLING ELEMENT E80430
- 6.6 MOUNTING DISTANCES
- 6.7 POSITIONING OF THE ID TAGS
- 7 ELECTRICAL CONNECTION
- 7.1 WIRING
- 7.2 CONNECTING THE FUNCTIONAL EARTH
- 8 OPERATING AND DISPLAY ELEMENTS
- 8.1 DISPLAY ELEMENTS DTE8X1 / DTE9X1
- 8.2 DISPLAY ELEMENTS DTE8X2 / DTE9X2
- 8.3 DISPLAY ELEMENTS DTE8X4/DTE8X5/DTE9X4/DTE9X5
- 9 MAINTENANCE, REPAIR AND DISPOSAL
- 10 APPROVALS / STANDARDS
Brand : IFM
Model : DTE902
Category : RFID system