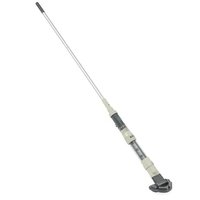
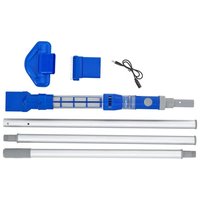
H2OGO! 53350 - Electric inflatable equipment BESTWAY - Free user manual and instructions
Find the device manual for free H2OGO! 53350 BESTWAY in PDF.
User questions about H2OGO! 53350 BESTWAY
0 question about this device. Answer the ones you know or ask your own.
Ask a new question about this device
Download the instructions for your Electric inflatable equipment in PDF format for free! Find your manual H2OGO! 53350 - BESTWAY and take your electronic device back in hand. On this page are published all the documents necessary for the use of your device. H2OGO! 53350 by BESTWAY.
USER MANUAL H2OGO! 53350 BESTWAY
text_image
Visit www.bestwaycorp.com/support for help WE SUGGEST NOT TO RETURN THE PRODUCT TO THE STORE QUESTIONS? PROBLEMS? MISSING PARTS? For FAQ, Manuals, Videos Or Spare Parts, Please Visit bestwaycorp.com/supportOWNER'S MANUAL
bestwaycorp.com/support
Visit Bestway YouTube channel YouTube
WARNING
IMPORTANT SAFETY INSTRUCTIONS
READ ALL INSTRUCTIONS BEFORE ASSEMBLING THIS INFLATABLE DEVICE AND
KEEP INSTRUCTIONS FOR FUTURE USE.
FAILURE TO FOLLOW THESE INSTRUCTIONS COULD RESULT IN SERIOUS INJURY
OR DEATH.
WARNING
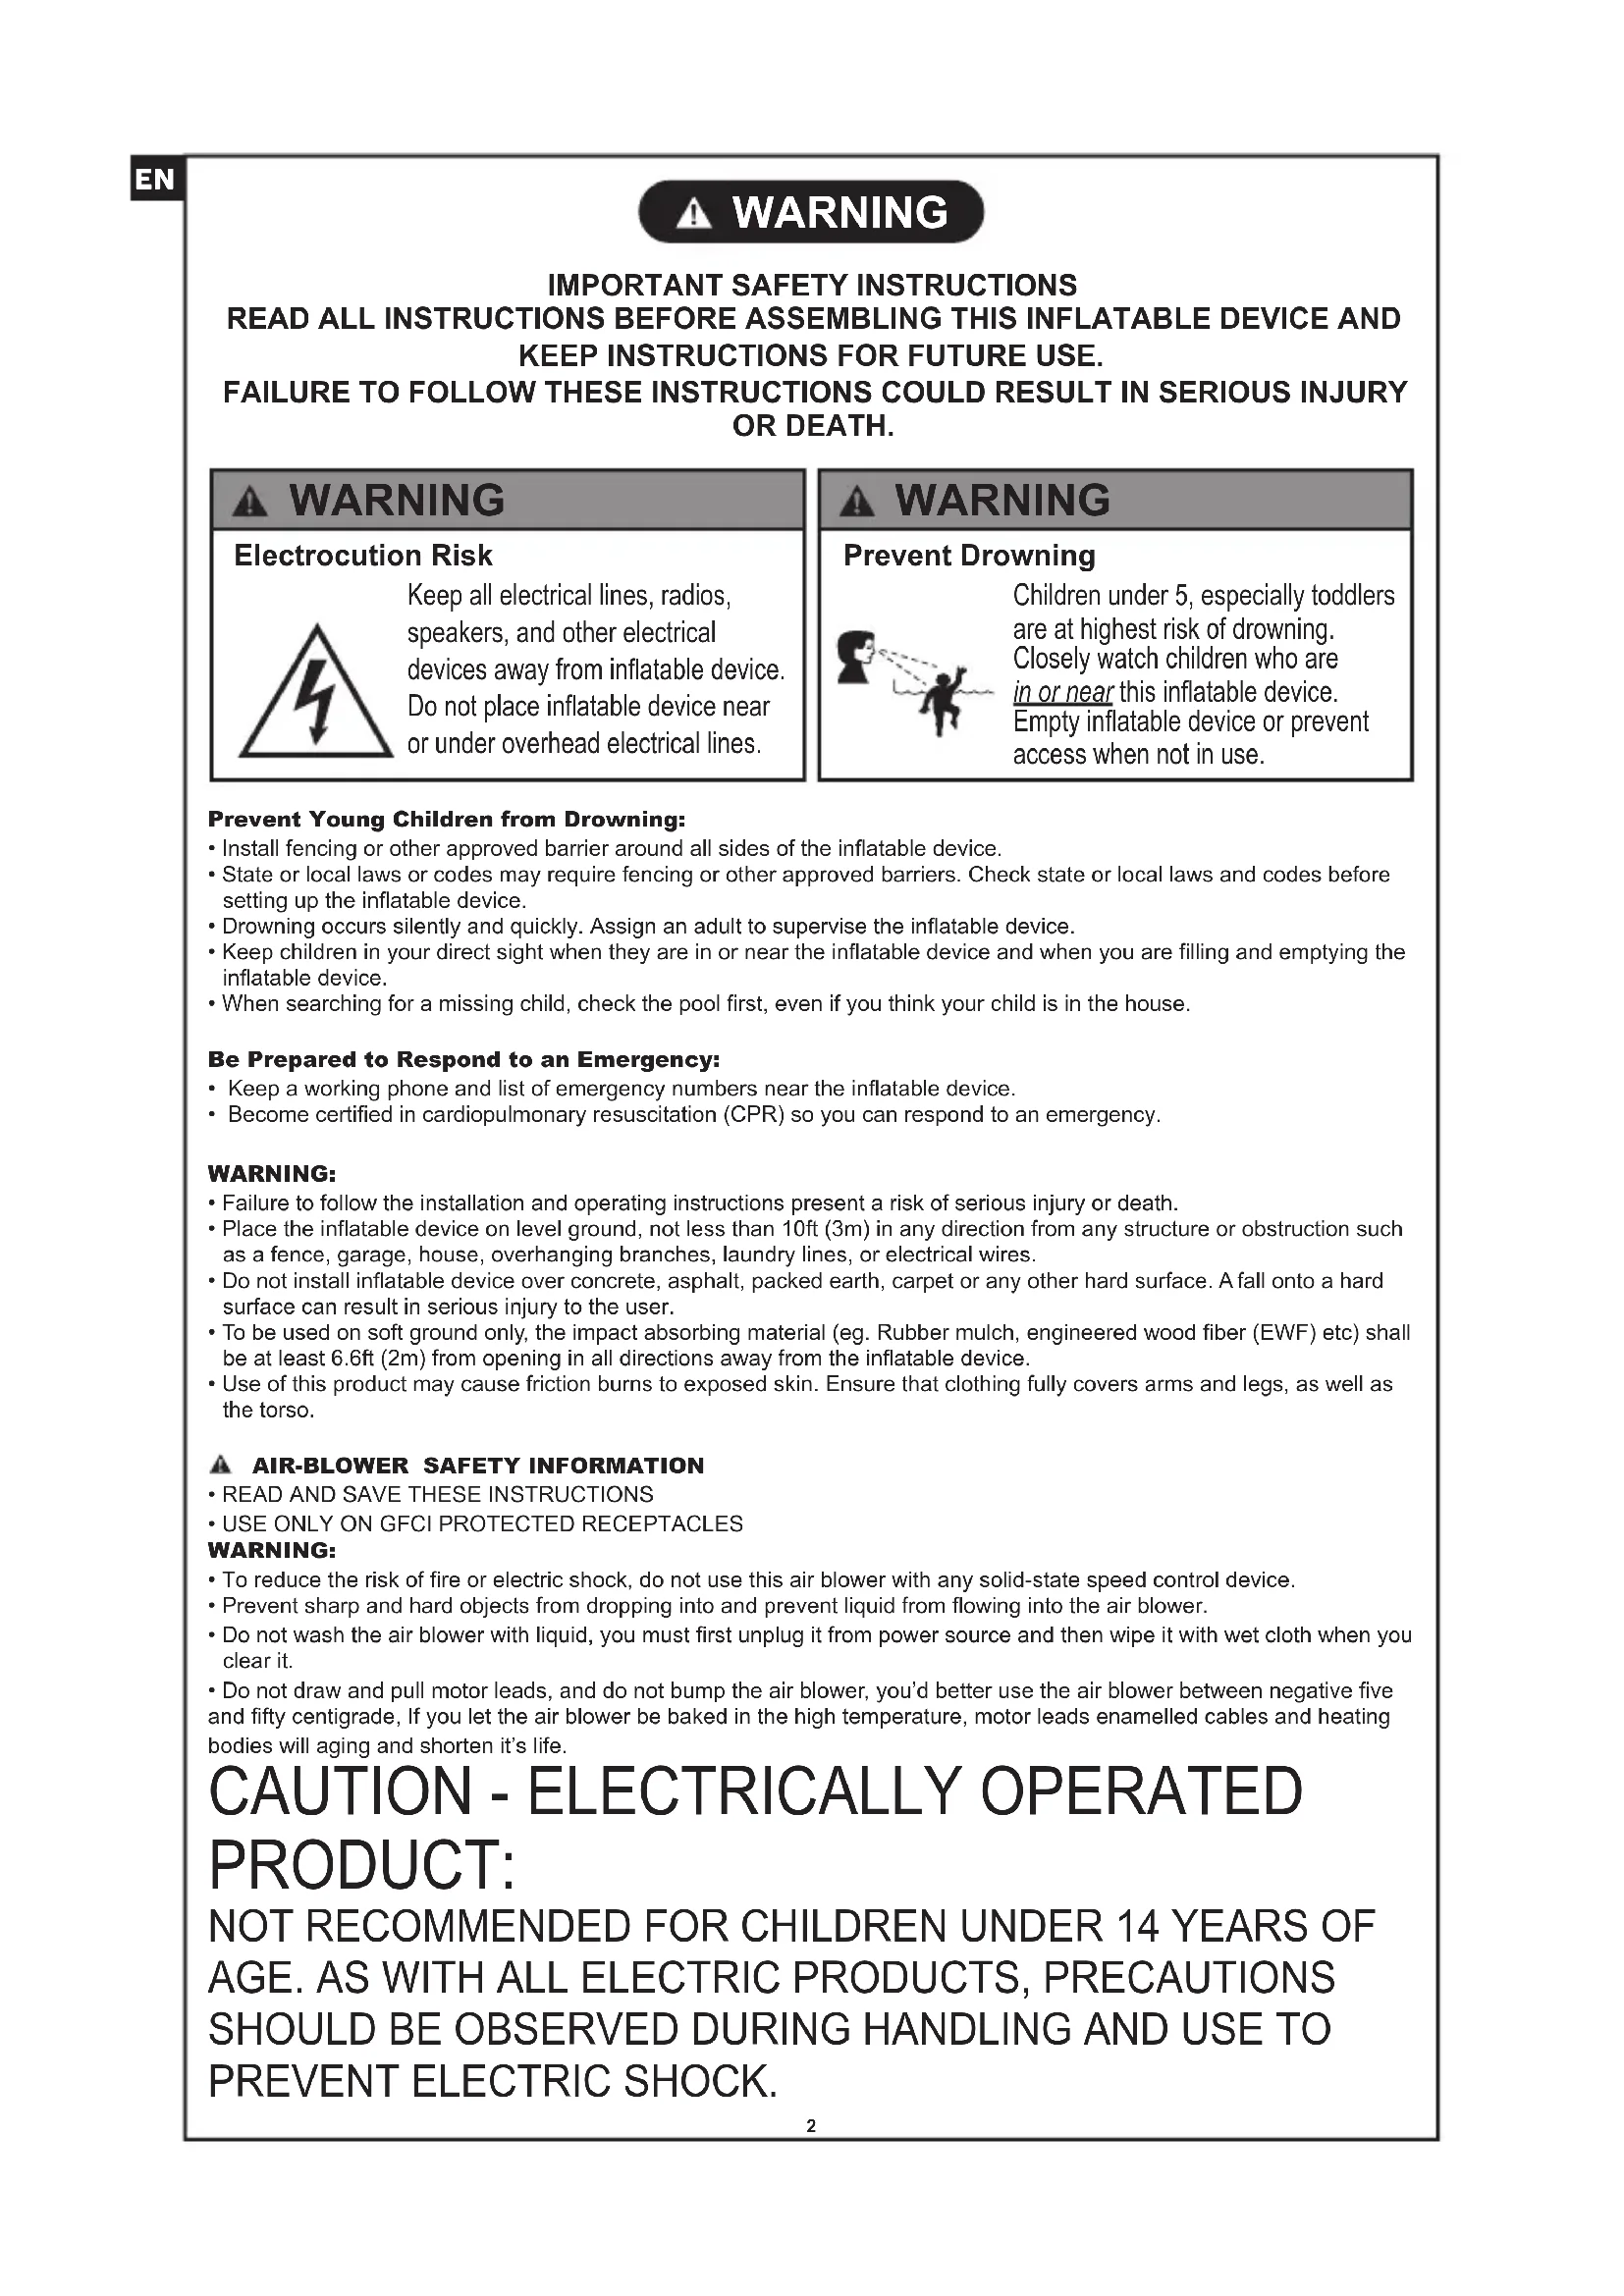
Electrocution Risk
Keep all electrical lines, radios, speakers, and other electrical devices away from inflatable device. Do not place inflatable device near or under overhead electrical lines.
WARNING
Prevent Drowning
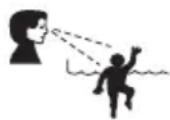
Children under 5, especially toddlers are at highest risk of drowning.
Closely watch children who are in or near this inflatable device.
Empty inflatable device or prevent access when not in use.
Prevent Young Children from Drowning:
- Install fencing or other approved barrier around all sides of the inflatable device.
- State or local laws or codes may require fencing or other approved barriers. Check state or local laws and codes before setting up the inflatable device.
- Drowning occurs silently and quickly. Assign an adult to supervise the inflatable device.
- Keep children in your direct sight when they are in or near the inflatable device and when you are filling and emptying the inflatable device.
- When searching for a missing child, check the pool first, even if you think your child is in the house.
Be Prepared to Respond to an Emergency:
- Keep a working phone and list of emergency numbers near the inflatable device.
- Become certified in cardiopulmonary resuscitation (CPR) so you can respond to an emergency.
WARNING:
- Failure to follow the installation and operating instructions present a risk of serious injury or death.
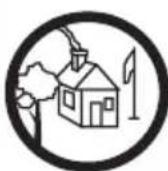
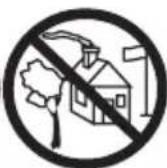
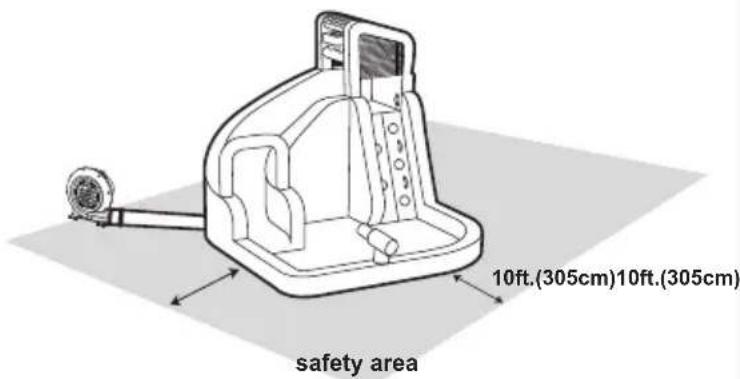
- Place the inflatable device on level ground, not less than 10ft (3m) in any direction from any structure or obstruction such as a fence, garage, house, overhanging branches, laundry lines, or electrical wires.
- Do not install inflatable device over concrete, asphalt, packed earth, carpet or any other hard surface. A fall onto a hard surface can result in serious injury to the user.
- To be used on soft ground only, the impact absorbing material (eg. Rubber mulch, engineered wood fiber (EWF) etc) shall be at least 6.6ft (2m) from opening in all directions away from the inflatable device.
- Use of this product may cause friction burns to exposed skin. Ensure that clothing fully covers arms and legs, as well as the torso.
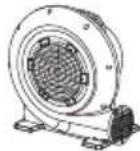
AIR-BLOWER SAFETY INFORMATION
- READ AND SAVE THESE INSTRUCTIONS
• USE ONLY ON GFCI PROTECTED RECEPTACLES
WARNING:
- To reduce the risk of fire or electric shock, do not use this air blower with any solid-state speed control device.
- Prevent sharp and hard objects from dropping into and prevent liquid from flowing into the air blower.
- Do not wash the air blower with liquid, you must first unplug it from power source and then wipe it with wet cloth when you clear it.
- Do not draw and pull motor leads, and do not bump the air blower, you'd better use the air blower between negative five and fifty centigrade. If you let the air blower be baked in the high temperature, motor leads enamelled cables and heating bodies will aging and shorten it's life.
CAUTION - ELECTRICALLY OPERATED
PRODUCT:
NOT RECOMMENDED FOR CHILDREN UNDER 14 YEARS OF AGE. AS WITH ALL ELECTRIC PRODUCTS, PRECAUTIONS SHOULD BE OBSERVED DURING HANDLING AND USE TO PREVENT ELECTRIC SHOCK.
KEEP CHILDREN AWAY: Do not allow children to play with or around the unit, in any way, which could result in injury.
PROTECT POWER CORD FROM DAMAGE: Never operate a unit with a damaged power cord, as this may lead to electrical or fire hazards. If the power supply cord is damaged, it must be replaced by a cord of the same type and amperage rating.
This device complies with part 15 of the FCC Rules. Operation is subject to the following two conditions:
(1) This device may not cause harmful interference, and (2) this device must accept any interference received, including interference that may cause undesired operation.
- Warning: Any changes or modifications to this unit not expressly approved by the party responsible for compliance could void the user's authority to operate the equipment.
- NOTE: This equipment has been tested and found to comply with the limits for a Class B digital device, pursuant to part 15 of the FCC Rules. These limits are designed to provide reasonable protection against harmful interference in a residential installation. This equipment generates, uses and can radiate radio frequency energy and, if not installed and used in accordance with the instructions, may cause harmful interference to radio communications. However, there is no guarantee that interference will not occur in a particular installation. If this equipment does cause harmful interference to radio or television reception, which can be determined by turning the equipment off and on, the user is encouraged to try to correct the interference by one or more of the following measures:
—Reorient or relocate the receiving antenna.
—Increase the separation between the equipment and receiver.
—Connect the equipment into an outlet on a circuit different from that to which the receiver is connected.
—Consult the dealer or an experienced radio/ TV technician for help.
OPERATION
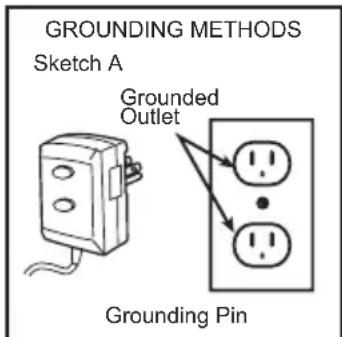
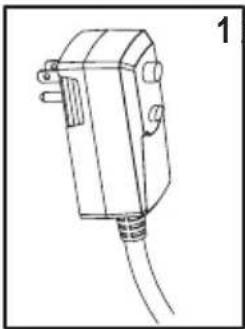
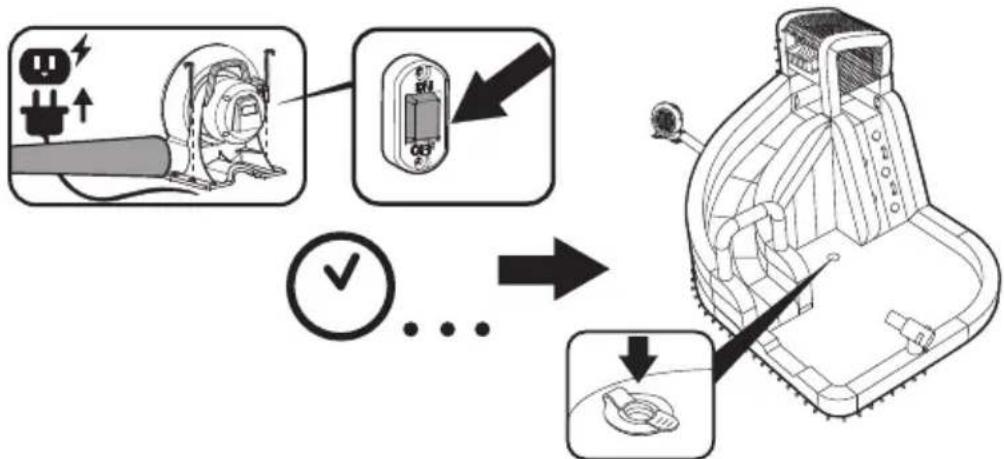
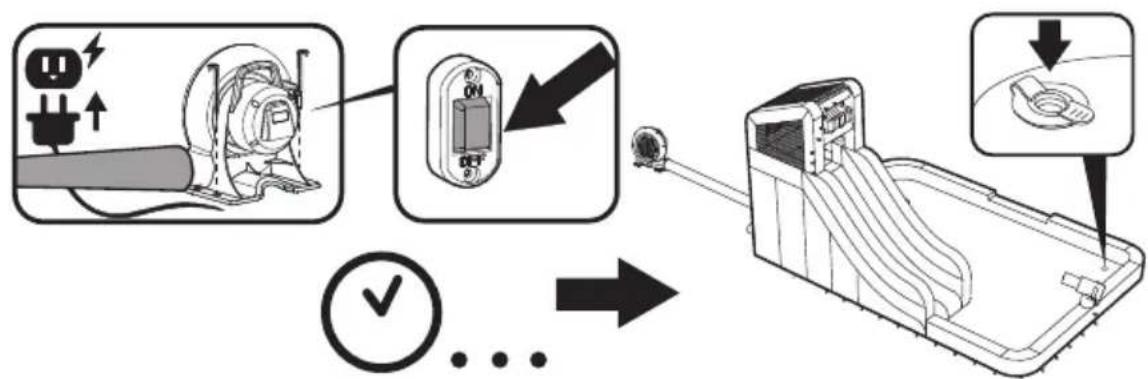
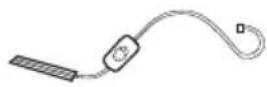
Place the air blower on a steady net surface where children can be kept away. This air blower is for use on a nominal 120-volt circuit and has a grounding plug similar to the plug illustrated in sketch (A). Only connect the product to an outlet having the same configuration as the plug. Do not use an adapter with this product.
KEEP UNIT GROUNDED: Air blower should be grounded. In the event of an electrical short circuit, grounding reduces the risk of electric shock by providing an escape wire for the electric current. This product is equipped with a cord having a grounding wire with an appropriate grounding plug. The plug must be plugged into an outlet that is properly installed and grounded in accordance with all local codes and ordinances.
WARNING: Improper installation of the grounding plug is able to result in a risk of electric shock. When repair or replacement of the cord or plug is required, do not connect the grounding wire to either flat blade terminal.
The wire with insulation having an outer surface that is green with or without yellow stripes is the grounding wire.
CAUTION: Check with a qualified electrician or serviceman when the grounding instructions are not completely understood, or when in doubt as to whether the air blower is properly grounded. Do not modify the plug provided. If it will not fit the outlet, have the proper outlet installed by a qualified electrician. The appliance must be positioned so that the plug is accessible. If the supply cord is damaged, it must be replaced by the manufacture or its service agent or a similarly qualified person in order to avoid a hazard.
text_image
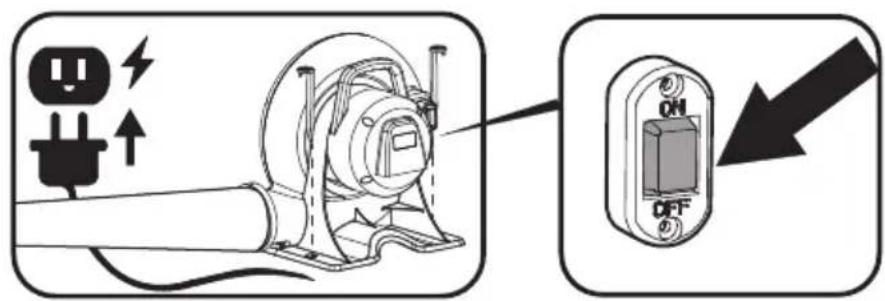
GROUNDING METHODS Sketch A Grounded Outlet Grounding PinON/OFF SWITCH
OFF — O
ON-1
PRODUCT DESCRIPTION
| Item Age | Maximum number of users | Maximum user weight capacity | Individual weight capacity | Combined user weight capacity (Platform) | Maximum fall height | Critical fall height | Water capacity | |
| 53302 | 5-10 | 5 | 270 kg (600 lbs) | 54 kg (120 lbs) | 54 kg (120 lbs) | 1.42 m (56") | 1.92 m (6'3.5") | 0.97 cbm (256 gal.) |
| 53346 | 5+ | 5 | 270 kg (600 lbs) | 54 kg (120 lbs) | 54 kg (120 lbs) | 1.43 m (56") | 1.73 m (68") | 1.089 cbm (288 gal.) |
| 53350 | 5+ | 5 | 270 kg (600 lbs) | 54 kg (120 lbs) | 54 kg (120 lbs) | 1.43 m (56") | 1.73 m (68") | 1.462 cbm (386 gal.) |
| 53382 | 3-8 | 5 | 227 kg (500 lbs) | 45 kg (100 lbs) | 135 kg (300 lbs) | 35 cm (14") | 1.43 m (56") | 1.13 cbm (298 gal.) |
| 53388 | 5+ | 10 | 544 kg (1200 lbs) | 54 kg (120 lbs) | 108 kg (238 lbs) | 1.45 m (57") | 1.72 m (68") | 2.39 cbm (631 gal.) |
Blower Rating: AC110-120V, 60Hz, 3.5A (53302;53382)
AC110-120V, 60Hz, 4.1A (53346;53350)
AC110-120V, 60Hz, 5.7A (53388)
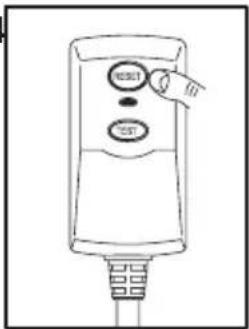
GFCI TEST
natural_image
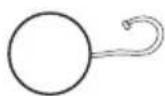
Line drawing of a mechanical component with a coiled cable (no text or symbols)1234

text_image
RESULT TEST
text_image
RESET TEST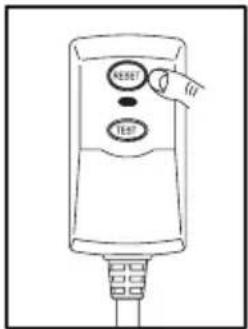
text_image
RESET TESTWARNING: Risk of electric shock. The GFCI must be tested before each use.
WARNING: Do not use the blower if the above test fails.
SETUP INSTRUCTIONS

WARNING
Follow Anchoring Instructions
User must read and follow anchoring instructions to ensure the proper: number of anchors used, soil conditions, and stake installation.
Yes
No Yes No

Wind Speed Judgement Stake Angle
PLACEMENT:
Use on a flat, grassy area only. Do not use on pavement or hard surfaces. Usage area should be free of rocks, bumps, holes, sticks, etc. The water park setup location should have a minimum distance of 10ft (305cm) from any free-standing structures or obstructions. this include: houses, garages, fences, trees, playground equipment, large rocks, etc.
text_image
10ft.(305cm)10ft.(305cm) safety areaASSEMBLY
Place on level ground and firm grass or soil to allow proper use of stakes.
Do not set up the inflatable device on a slope or incline.
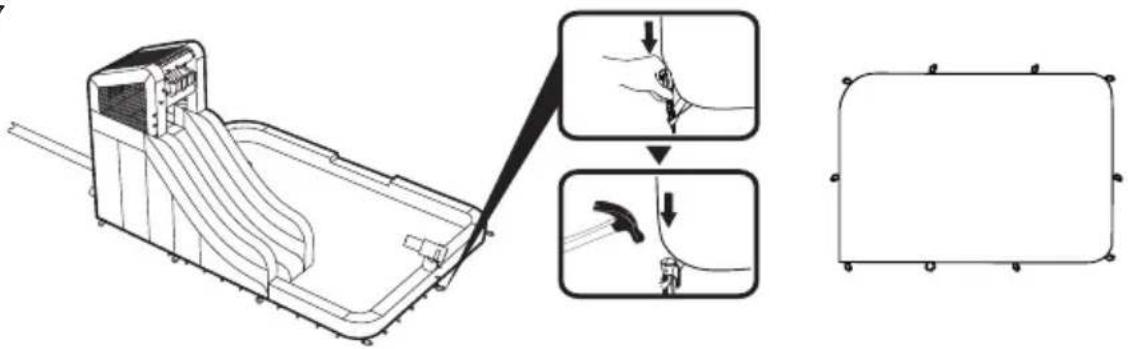
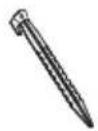
Stakes should be placed at an angle for better anchorage, should be driven under the ground to prevent tripping.
Stakes are to be driven straight down until the top of the stake is below ground level. Do not drive stakes at an angle.
For best holding strength, drive stakes into hard, dry soil. In loose or wet soil, or both, stake holding strength will be reduced.
Do not use the product if wind speed exceeds 20 mph.
Do not set up in windy or rainy conditions: sudden gust of wind may lift the product off the ground.
Only the blower provided or other manufacturer specified replacement blower should be used for inflation.
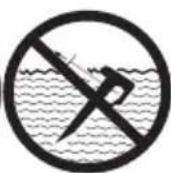
Use only with Ground Fault Circuit Interrupter(GFCI) receptacle.
Do not use extension cords with this product and keep the blower and power cord away from water.
Product shall be fully inflated and anchored before use.
ATTENTION: Each anchor bag should be filled to 40lbs.(18kg) of water. Each anchor bag must be attached while using the park (If your product is equipped with anchor bag).
After inflation, the blower should run continuously while children are playing.
DRAINING & DEFLATION
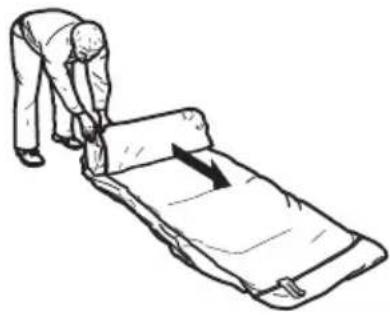
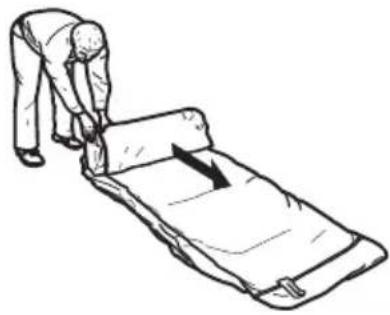
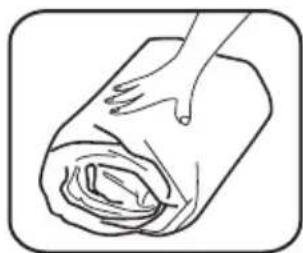
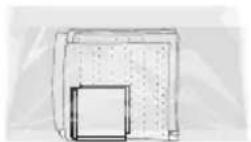
IMPORTANT: Drain the water park of all water to prevent mold and mildew. Product should be completely dry before storage. Do not fold and store water park if any moisture remains.
IMPORTANT: All children must exit the water park before deflation or draining.
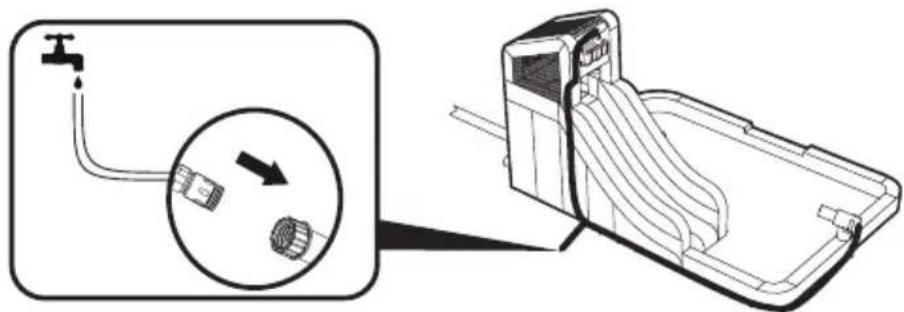
- Turn off the garden hose and disconnect it from the tube.
- Turn off the blower motor and unplug it from the outlet. Move the blower to dry ground if it appears that it will get wet from draining water.
- Open the water valve and drain the water.
- Remove stakes and drag water park away from the drained water to a dry area.
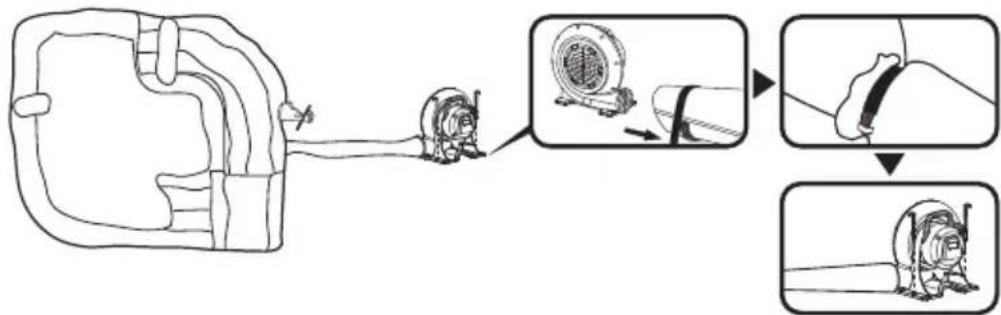
- Re-stake the water park and blower, tie the inflation tube to the blower, then reconnect and power up the blower.
- Leave the water park inflated until all remaining water has evaporated and the water park is dry.
- Once water park is completely dry, turn off the blower and unpulg it from the outlet.
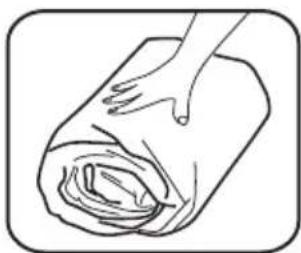
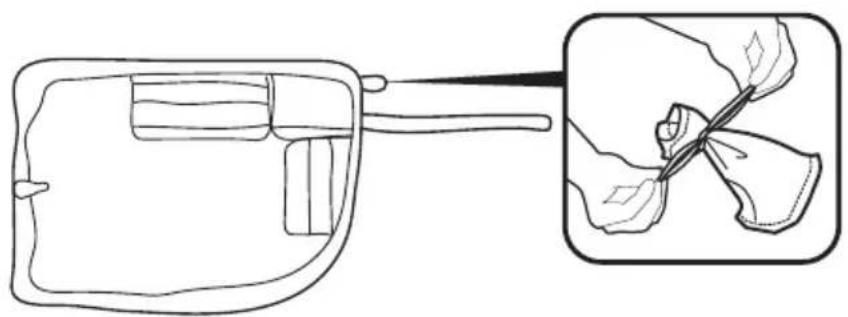
- Remove and drain the hose assembly from the Water park. Untie the drawstring from the short outlet tube and allow the water park to fully deflate. Remove the hose assembly and wrap it up with no kinks.
WARNING
- Constant, competent adult supervision of children and other young users is required at all times in front of the device where all parts of play areas can be seen.
- Keep the area around the product clean, and clear of objects, to prevent slips and falls.
• Always check all anchors before and during use.
• To prevent electric shock, do not clean the blower with water. - Children should not wear loose or baggy clothing, scarves, hoods or clothing with drawstrings or long cords while playing in this product.
- Children must remove helmets, loose clothing, scarves, headgear, shoes and glasses, as well as any sharp or hard objects from their pockets, as they may puncture the bounding surface.
- Separation of larger children from smaller children. Do not allow children to play together who are unevenly matched in weight and height.
- Do not allow users to climb or hang on containment walls.
- Do not allow users to do somersaults or rough play.
- Do not allow food, drink or gum inside unit.
- Children must not slide down head first on their stomach.
- Keep pets away from product.
- Do not attach items to the inflatable device that are not specifically designed for use with the inflatable device, such as, but not limited to, jump ropes, clothesline, pet leashes, cables and chain as they have the potential to cause a strangulation hazard.
MAINTENANCE OF WATER PARK
- To keep the product clean: wipe the inflatable device using a dry cloth or a cloth dampened with a neutral, non-flammable, non-toxic cleaning and sanitizing solution or pure water.
- If applicable, remove water and debris from pocket steps after each play cycle.
- As an outdoor product, the inflatable device is subject to wear and deterioration. Inspect for signs of fabric failure; weak or torn surface must be repaired promptly.
MAINTENANCE OF AIR BLOWER
The source of electrical supply must be disconnected prior to any servicing or cleaning.
- Use a dry cloth to gently clean all surfaces.
- Store in a cool, dry place and out of children's reach.
STROAGE
IMPORTANT:
- Never store the water park when wet. Allow to dry before folding for storage. Follow all previous instructions each use.
- Store park in a secure place away from children to prevent suffocation hazards. Never leave either the park or the blower outside when not in use.
- Please place it the dry and ventilated position where is not sour, not alkali and not corrosive gases. After having used it in outdoors, you should place it in a dry and ventilated room in time. Do not let water into the air-blower.
1
natural_image
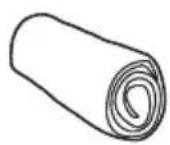
Simple line drawing of a mechanical component or tool (no text or symbols)2

natural_image
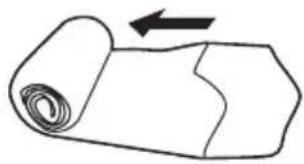
Line drawing of a person pushing a large bed with a directional arrow (no text or symbols)3

natural_image
Illustration of a hand pressing down on a rolled-up fabric (no text or symbols)
natural_image
Line drawing of a person adjusting a rolled-up blanket (no text or symbols)TROUBLESHOOTING
| PROBLEM CAUSE | |
| Motor won't run | 1. Switch not turned on.2. The circuit is opened or it is poor contact.3. Electric capacity is damaged.4. Choked up by hard objects. |
| Motor runs but wheel makes a scraping noise | 1. Screws on the vaned wheel are loose.2. Foreign objects in air-blower. |
| Motor is unable to run normally | 1. The voltage is unstable.2. Motor is affected with damp.3. Electric capacity is failure.4. The impeller is loose. |
NOTICE D'UTILISATION
natural_image
Line drawing of a mechanical component with a coiled cable (no text or symbols)1234

text_image
RESET TEST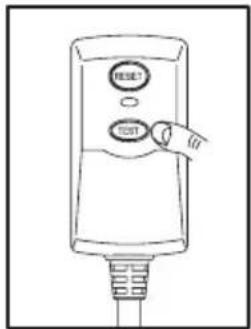
text_image
RESET TEST
text_image
RESET TESTnatural_image
Technical line drawing of a mechanical device with no visible text or symbolsnatural_image
Simple line drawing of a mechanical component or tool (no text or symbols)2
natural_image
Line drawing of a person pushing a large bed with a directional arrow (no text or symbols)3

natural_image
Illustration of a hand pressing down on a rolled-up fabric (no text or symbols)
natural_image
Line drawing of a person adjusting a rolled-up blanket (no text or symbols)DÉPANNAGE
natural_image
Line drawing of a mechanical component with a coiled cable (no text or symbols)1234

text_image
RESET TEST
text_image
RESET TEST
text_image
NEE7 TESTnatural_image
Technical line drawing of a mechanical device with no visible text or symbols10pies. (305cm)10pies.
(305cm)
zona de seguridad
MONTAJE
natural_image
Illustration of a mechanical component with curved and straight sections (no text or symbols)2
natural_image
Line drawing of a person pushing a large bed with a directional arrow (no text or symbols)3
natural_image
Line drawing of a hand pressing down on a rolled-up sheet of paper (no text or symbols)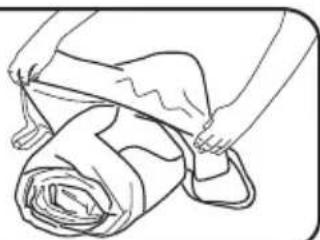
natural_image
Line drawing of a person adjusting a rolled-up blanket (no text or symbols)natural_image
Line drawing of a mechanical component with a coiled cable (no text or symbols)1234
text_image
RESET TEST
text_image
RESET TEST
text_image
NEEST TESTnatural_image
Illustration of a mechanical component with curved and straight sections (no text or symbols)2

natural_image
Line drawing of a person adjusting a blanket with a directional arrow (no text or symbols)3
natural_image
Illustration of a hand pressing down on a rolled-up sheet of paper (no text or symbols)
natural_image
Line drawing of a person adjusting a rolled-up blanket (no text or symbols)natural_image
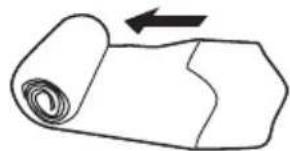
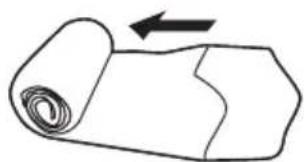
Simple line drawing of a rolled-up document with an arrow indicating direction (no text or symbols)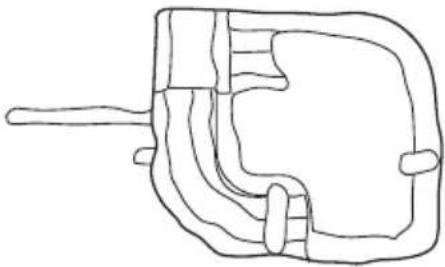
natural_image
Line drawing of a mechanical component with a handle and internal channels (no text or symbols)4

natural_image
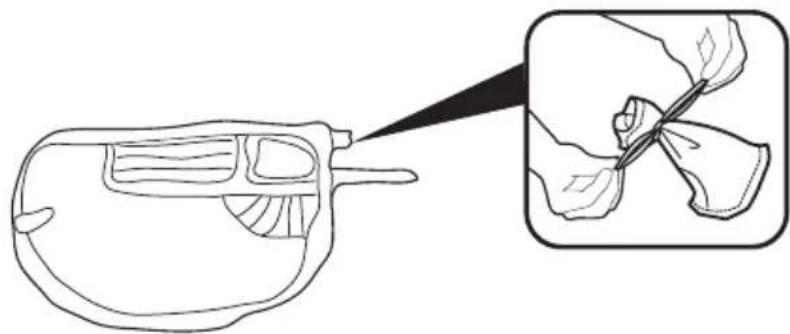
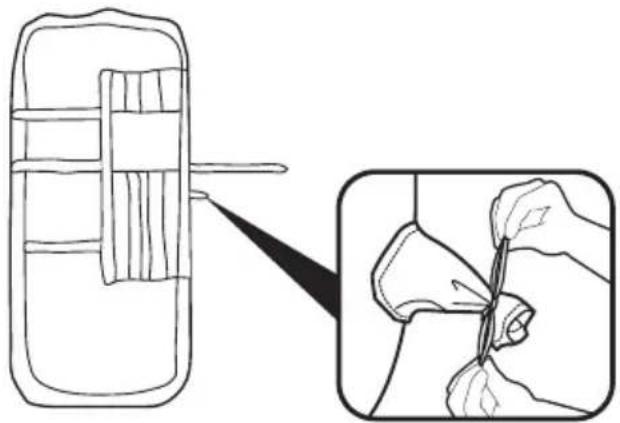
Diagram showing a mechanical component being cut with a magnified inset illustrating the process (no text or symbols present)5
text_image
Diagram illustrating a mechanical device with three sequential steps showing tool positioning and assembly.6
flowchart
graph TD
    A["Power Input"] --> B["Charging Device"]
    B --> C["Control Panel"]
    C --> D["Motor"]
    D --> E["Output"]
7
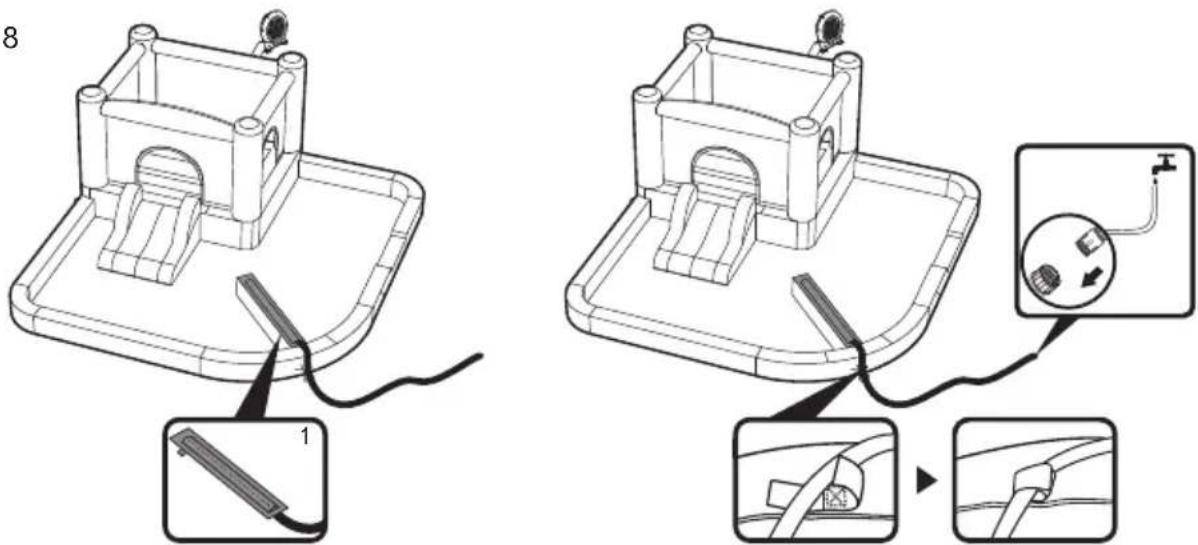
text_image
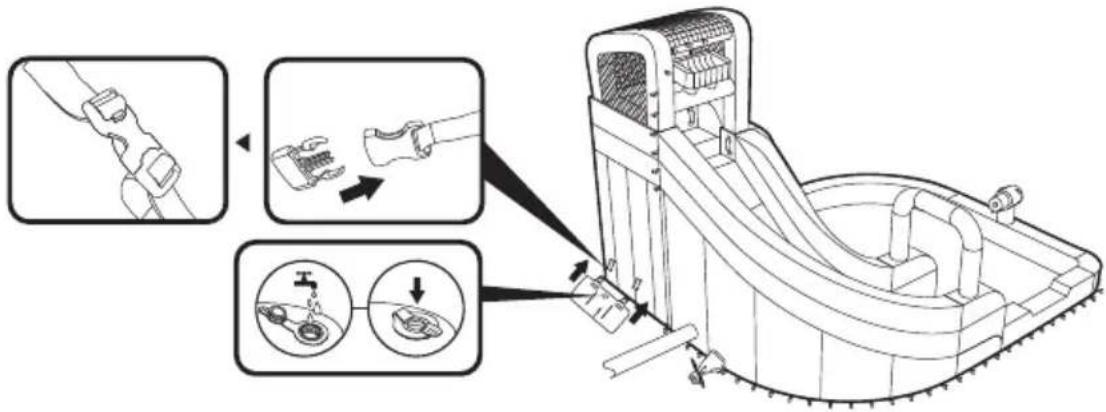
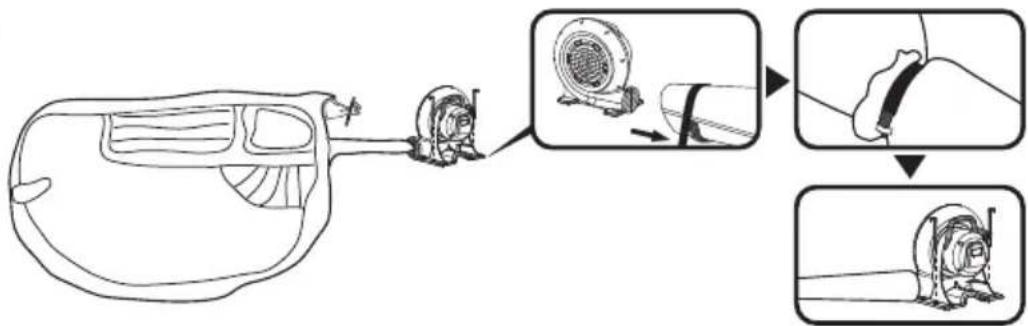
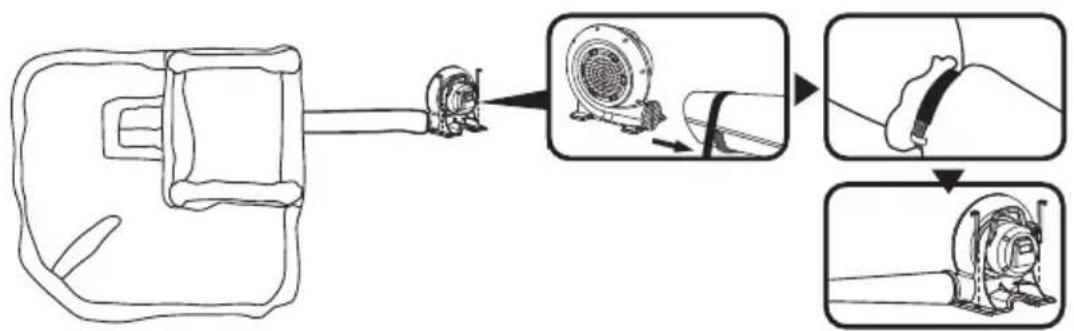
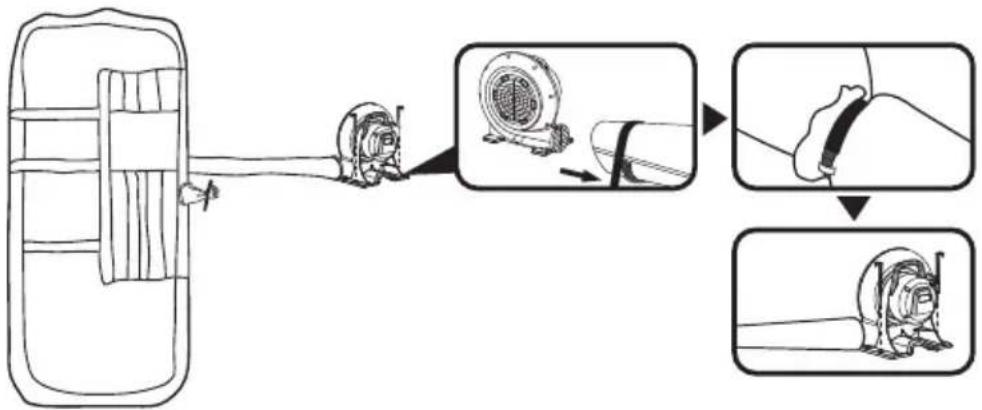
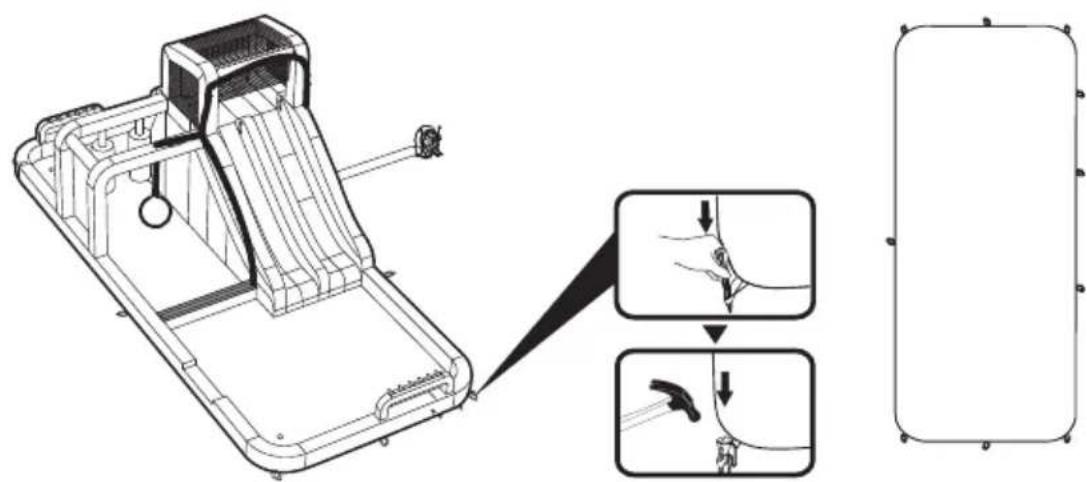
Technical diagram illustrating the step-by-step installation of a mechanical device, showing cable fastening and valve assembly.8
text_image
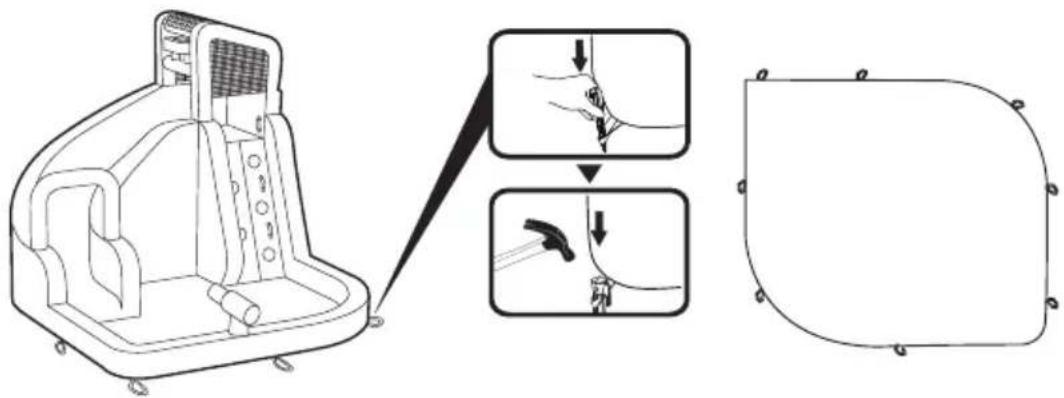
Technical diagram showing a 3D model of a car interior with two zoomed-in views of the seat, one demonstrating hand manipulation and the other using a tool.9
text_image
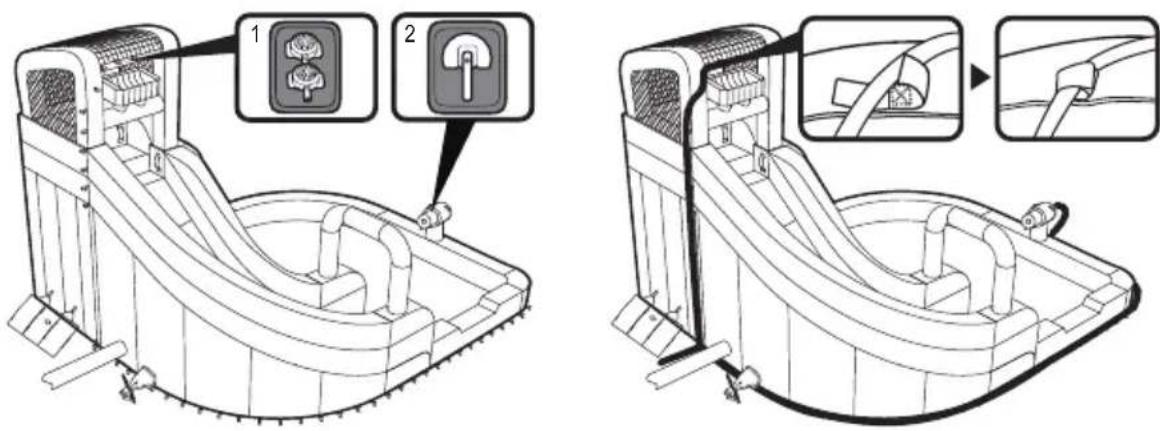
Technical diagram showing two stages of a mechanical device with labeled parts and directional arrows indicating assembly or installation.10
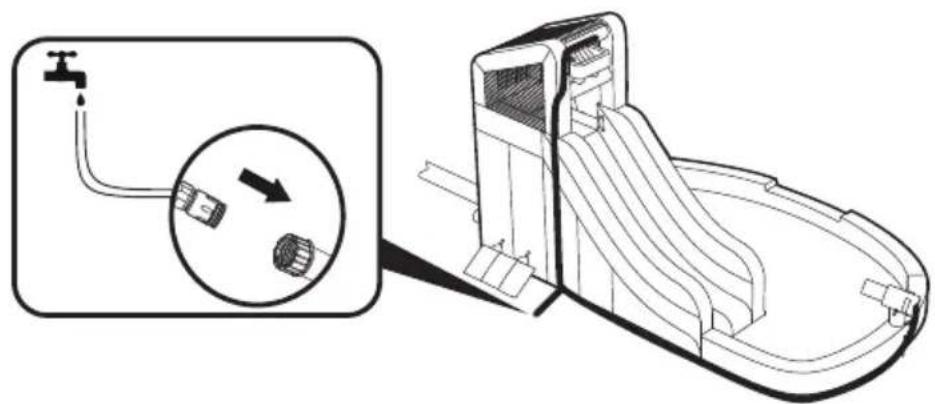
text_image
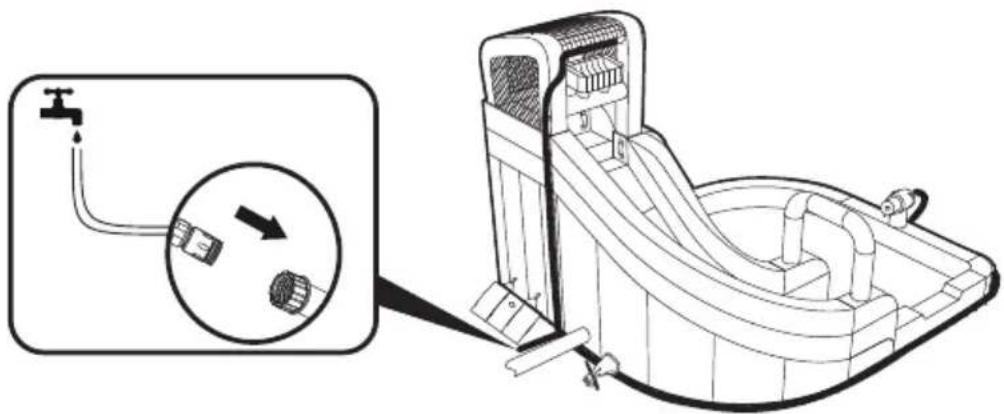
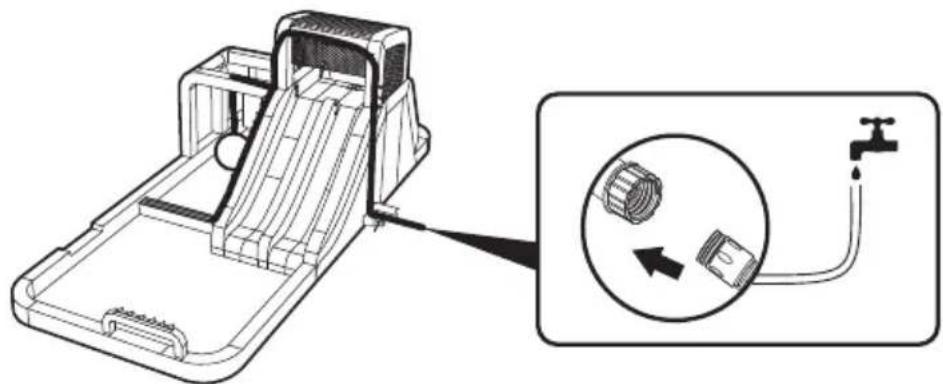
Technical diagram showing a pipe connection and a mechanical device with labeled parts, including a magnified inset of the pipe connection.53346
1 2 3

natural_image
Simple line drawing of a rolled-up document with an arrow indicating direction (no text or symbols)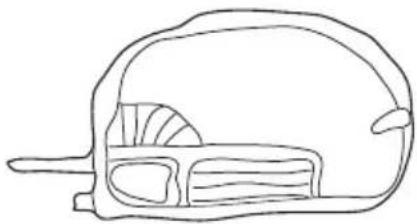
natural_image
Simple line drawing of a stylized object resembling a helmet or device, with no text or symbols present.4
natural_image
Line drawing of a mechanical component with an inset showing a close-up of a hand holding a piece of leaf (no text or symbols)5
text_image
Diagram illustrating a mechanical assembly process with three steps: wire insertion, rolling, and cutting.6
flowchart
graph TD
    A["Electrical plug"] --> B["Switch"]
    B --> C["Device with warning icon"]
    C --> D["Timing indicator: ✓ ..."]
    D --> E["Device with switch"]
    E --> F["End"]
7
text_image
Technical diagram showing steps to install a mechanical component with labeled parts and directional arrows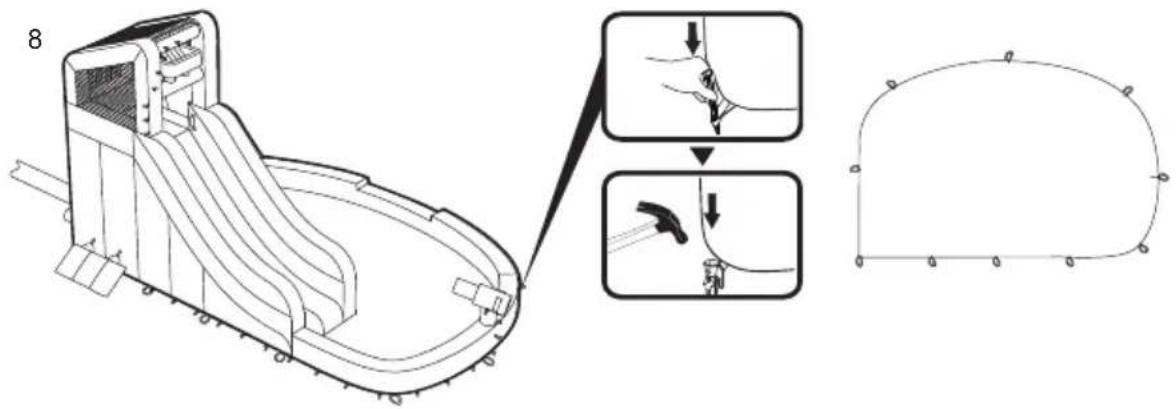
text_image
8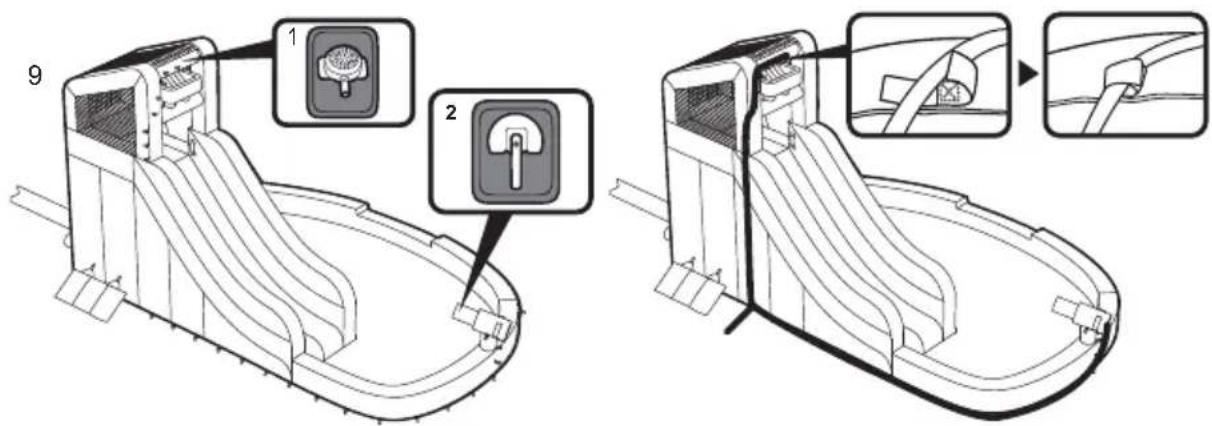
text_image
Technical diagram showing two views of a car seatbelt device with labeled parts and steps10
text_image
Technical diagram showing a water pump connected to a water tower with a magnified inset illustrating the process.53350
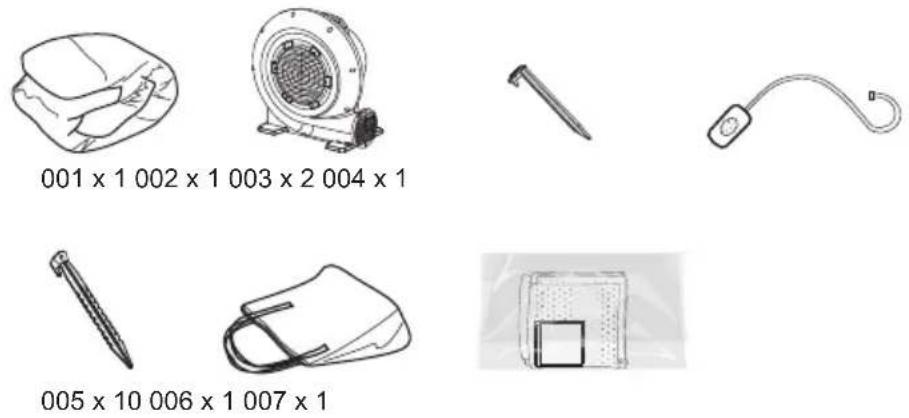
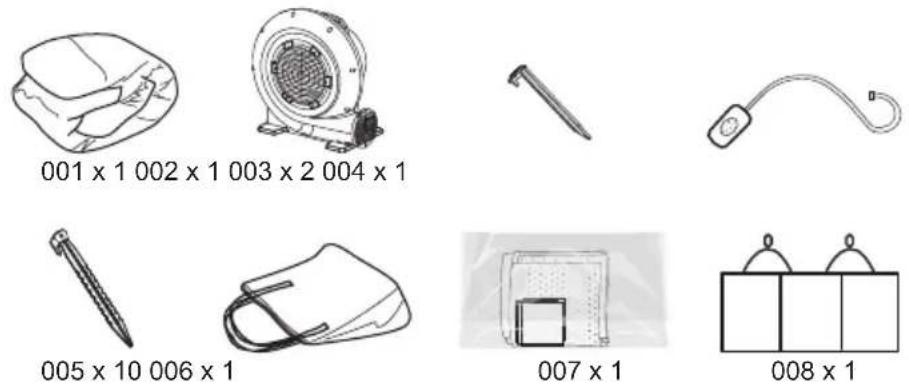
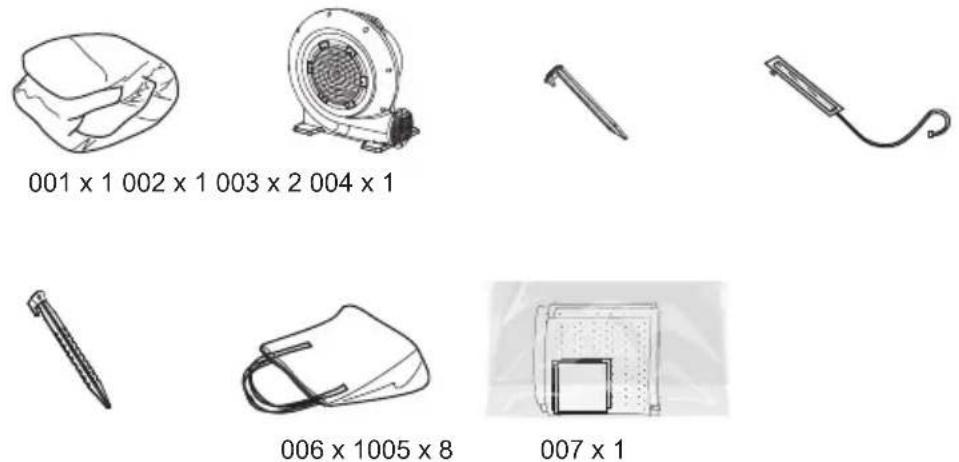
text_image
001 x 1 002 x 1 003 x 2 004 x 1 005 x 10 006 x 1 007 x 1123
natural_image
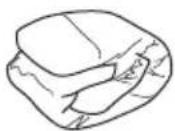
Line drawing showing a rolled-up document, a folded paper sheet, and a closed door mechanism (no text or symbols)4
natural_image
Diagram showing a device with a cable inserted into a housing and then being cut off into a leafy tissue (no text or symbols present)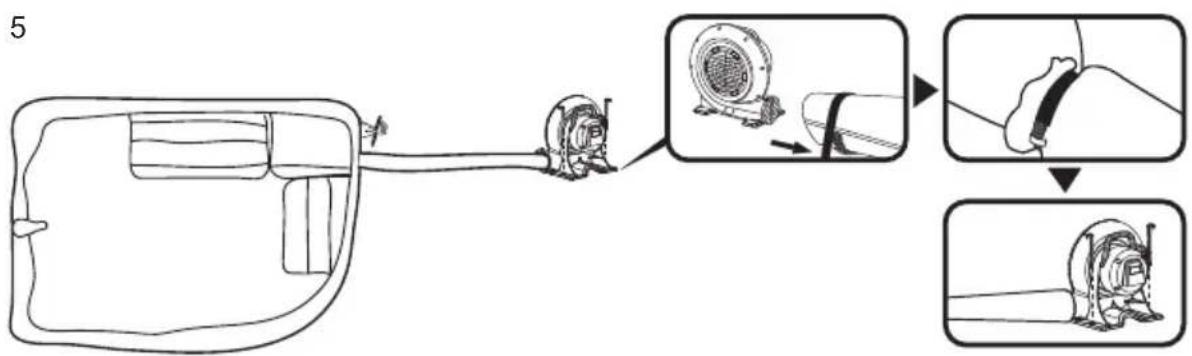
text_image
56
flowchart
graph TD
    A["Electrical plug"] --> B["Switch"]
    B --> C["Battery"]
    C --> D["Device with switch"]
    D --> E["Device with cable"]
    style A fill:#f9f,stroke:#333
    style B fill:#ccf,stroke:#333
    style C fill:#cfc,stroke:#333
    style D fill:#fcc,stroke:#333
    style E fill:#ffc,stroke:#333
7
text_image
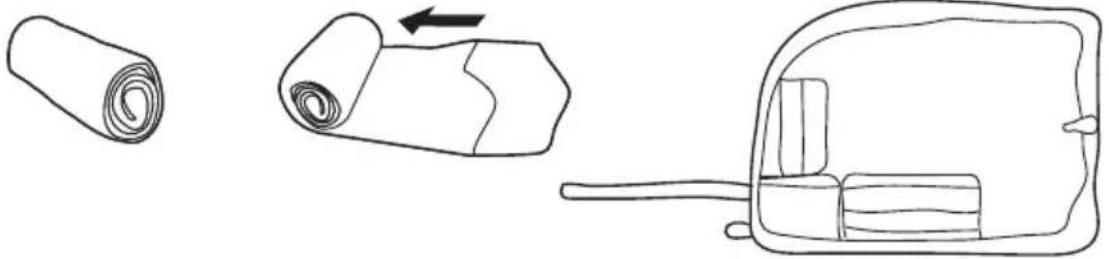
Technical diagram showing a vehicle chassis with two steps: adding force to a handle and removing the cable, before and after assembly.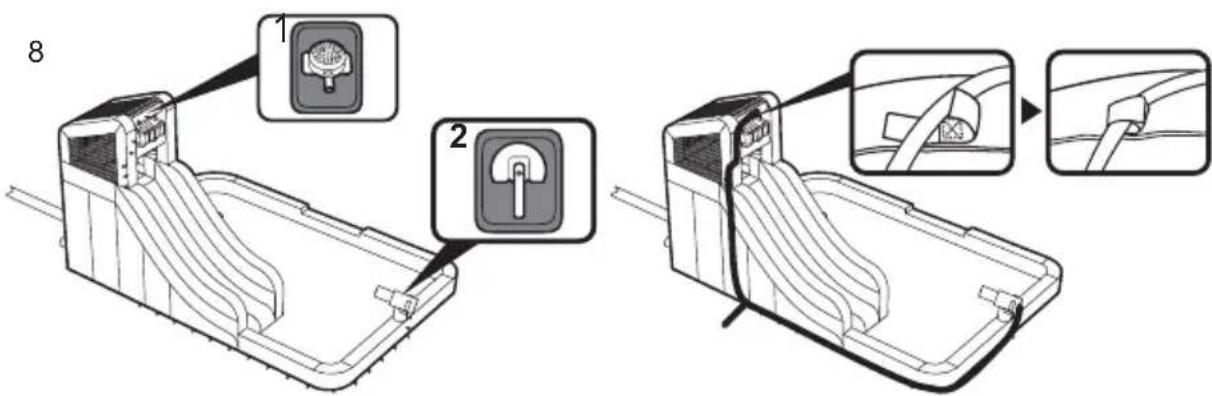
text_image
Technical diagram showing two steps of a device lock or cable installation, with labeled components and directional arrows.9
text_image
Diagram showing a water tap connected to a device with a magnified inset illustrating the connection between components.53382
001 × 1 002 × 1 003 × 2 004 × 1
006 × 1005 × 8
007 × 1
12
natural_image
Simple line drawing of a rolled-up document with an arrow indicating direction (no text or symbols)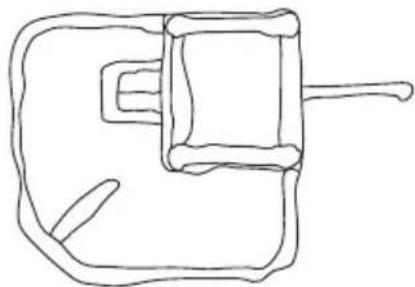
natural_image
Simple line drawing of a mechanical component or device with no visible text, numbers, or symbols.4
flowchart
graph LR
    A["Engine"] --> B["Valve"]
    B --> C["Valve with valve mechanism"]
    C --> D["Valve with valve mechanism"]
    D --> E["Valve with valve mechanism"]
5
text_image
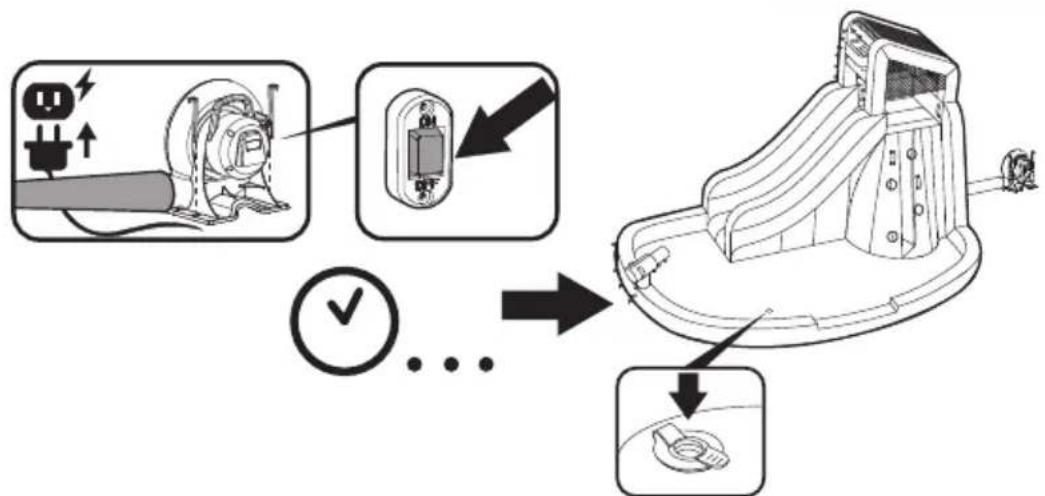
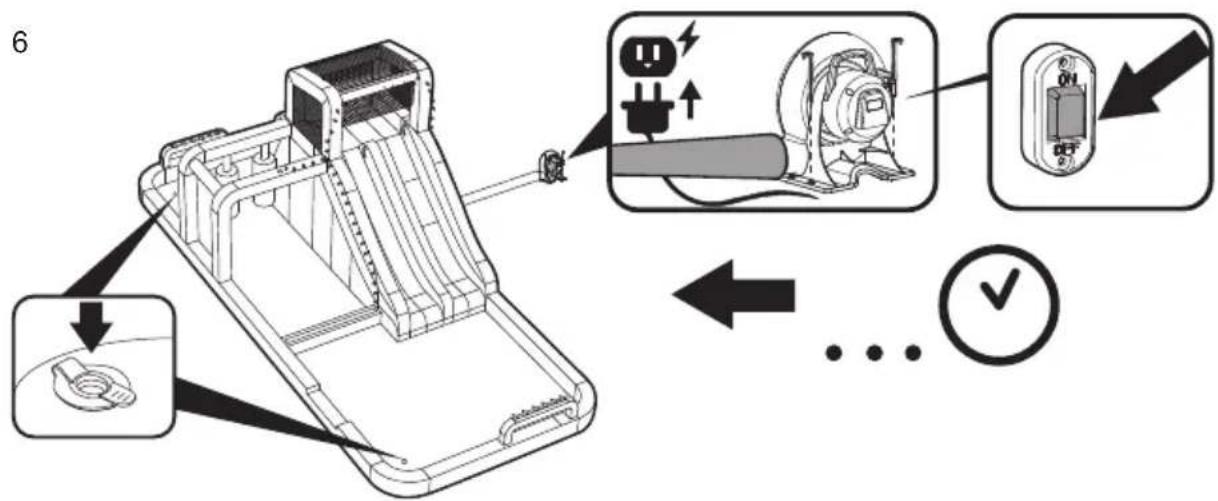
Diagram showing electrical switch installation with power plug, motor, and ON/OFF buttons, plus a lightning bolt symbol indicating charging direction.6
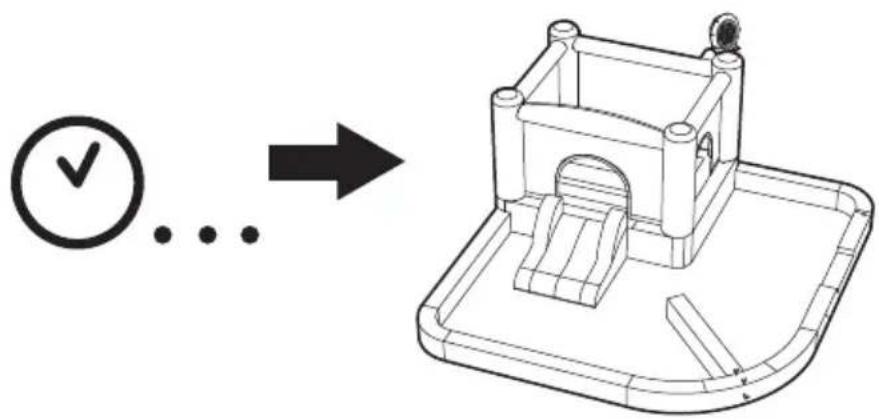
text_image
Diagram showing a clock icon pointing to a 3D mechanical part with an arrow indicating direction.7
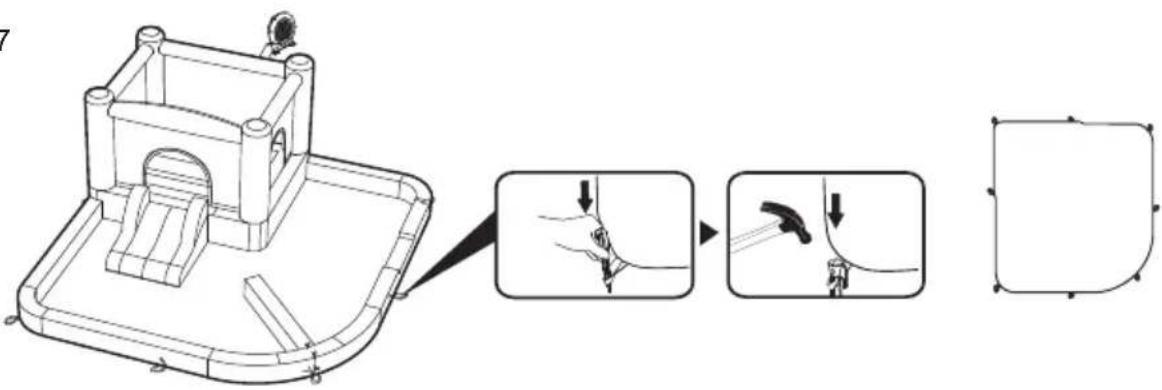
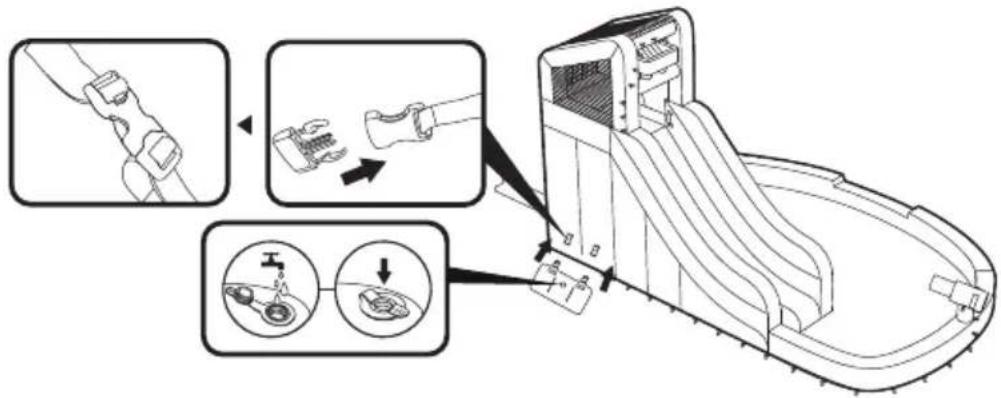
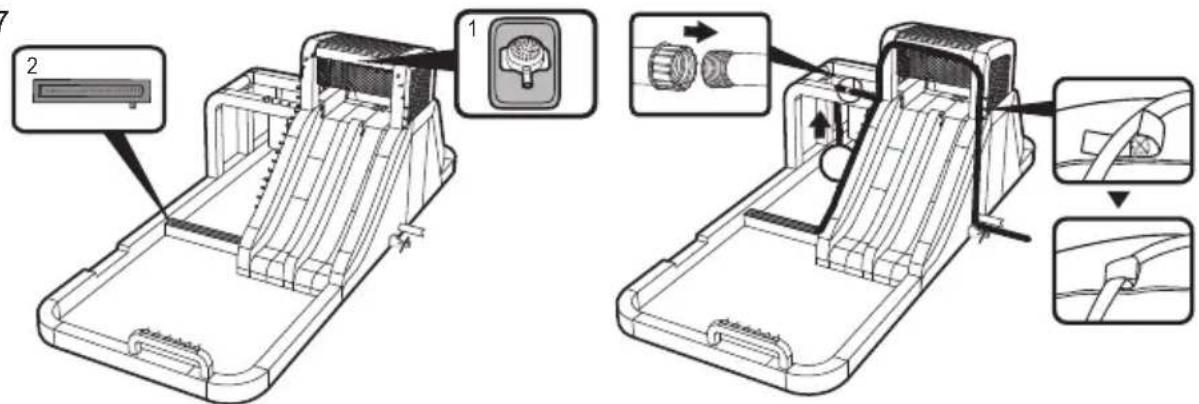
text_image
Technical diagram showing a 3D mechanical assembly with a close-up of the component being processed, including a hand tool and a cable being inserted.8
text_image
8 153388
001 x 1
002 × 1

003 × 2
004 x 1
005 × 10

006 × 1
007 × 1
008 × 1
123
natural_image
Simple line drawing of a rolled-up document with an arrow indicating rotation (no text or symbols)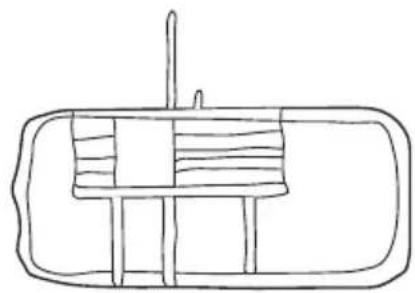
natural_image
Simple line drawing of a rectangular container with internal compartments and a vertical rod (no text or symbols)4
natural_image
Diagram showing a hand holding a tool with a pointed tip, alongside a magnified view of the tip being cut (no text or symbols present)5
flowchart
graph TD
    A["Patient with laparoscopic implant"] --> B["Initial laparoscopic implant"]
    B --> C["Initial surgical placement"]
    C --> D["Final surgical placement"]
    D --> E["Final surgical placement"]
text_image
6 ← ... √7
text_image
Technical diagram showing component assembly steps with labeled parts and directional arrows8
text_image
Technical diagram showing a 3D mechanical assembly with labeled parts and two zoomed-in views of the component.9
natural_image
Technical line drawing of a mechanical device with an inset showing internal components connected to a water tap (no text or symbols present)

text_image
1
text_image
2 ×


flowchart
graph LR
    A["Start"] --> B["Hand撕开纸,无纺布"]
    B --> C["Close down, no text or symbols"]
    C --> D["Close down, no text or symbols"]
    D --> E["Close down, no text or symbols"]
    E --> F["Close down, no text or symbols"]
    F --> G["Close down, no text or symbols"]
    G --> H["Close down, no text or symbols"]
    H --> I["Close down, no text or symbols"]
    I --> J["Close down, no text or symbols"]
    J --> K["Close down, no text or symbols"]
    K --> L["Close down, no text or symbols"]
    L --> M["Close down, no text or symbols"]
    M --> N["Close down, no text or symbols"]
    N --> O["Close down, no text or symbols"]
    O --> P["Close down, no text or symbols"]
    P --> Q["Close down, no text or symbols"]
    Q --> R["Close down, no text or symbols"]
    R --> S["Close down, no text or symbols"]
    S --> T["Close down, no text or symbols"]
    T --> U["Close down, no text or symbols"]
    U --> V["Close down, no text or symbols"]
    V --> W["Close down, no text or symbols"]
    W --> X["Close down, no text or symbols"]
    X --> Y["Close down, no text or symbols"]
    Y --> Z["Close down, no text or symbols"]


text_image
Diagram illustrating a procedure with hand-drawn cleaning, cutting, and lighting steps, including time and voltage measurement indicators.For support please visit us at:
bestwaycorp.com/support
©2022 Bestway Inflatables & Material Corp.
All rights reserved/Tous droits réservés/Todos los derechos reservados/Alle Rechte vorbehalten/Tutti i diritti riservati
Trademarks used in some countries under license from/
Manufactured, distributed and represented in the European Union by/
Distributed in Australia & New Zealand by Bestway Australia Pty Ltd, Unit 2/98-104 Carnarvon St Silverwater, NSW 2128, Australia
Tel: Australia: (+61) 2 9037 1388; New Zealand: 0800 142 101
Distributed in United Kingdom by Bestway Corp UK Ltd. 8 Wentworth Road, Heathfield Industrial Estate, Newton Abbot, Devon, TQ12 6TL
Exported by/Exporté par/Exportado por/Exportiert von/Esportato da
Bestway (Hong Kong) International Ltd./Bestway Enterprise Company Limited
Suite 713, 7/Floor, East Wing, Tsim Sha Tsui Centre, 66 Mody Road, Kowloon, Hong Kong
www.bestwaycorp.com
Bestway.