AR4P16 - Heating ARDES - Free user manual and instructions
Find the device manual for free AR4P16 ARDES in PDF.

User questions about AR4P16 ARDES
0 question about this device. Answer the ones you know or ask your own.
Ask a new question about this device
Download the instructions for your Heating in PDF format for free! Find your manual AR4P16 - ARDES and take your electronic device back in hand. On this page are published all the documents necessary for the use of your device. AR4P16 by ARDES.
USER MANUAL AR4P16 ARDES
natural_image
Technical line drawing of a vertical electronic device with grid pattern and labeled component (no text or symbols beyond label)text_image
Prohibition sign with crossed-out document and folder icon, indicating no file or document restrictionsNON COPRIRE
natural_image
Three schematic diagrams of mechanical bearing assembly showing cross-sections and centerlines (no text or labels)text_image
Diagram showing three steps of a device with labeled arrows indicating sequence from component 1 to final connector.ATTENTION : read this booklet carefully it contains important instructions for a safe installation, use and maintenance. Important instructions to be kept for future reference.
- This appliance can be used by children aged from 8 years and above and persons with reduced physical, sensory or mental capabilities or lack of experience and knowledge if they have been given supervision or instruction concerning use of the appliance in a safe way and understand the hazards involved.
- Children shall not play with the appliance.
- Cleaning and user maintenance shall not be made by children without supervision.
• Children of less than 3 years should be kept away unless continuously supervised.
- Children aged from 3 years and less than 8 years shall only switch on/off the appliance provided that it has been placed or installed in its intended normal operating position and they have been given supervision or instruction concerning use of the appliance in a safe way and understand the hazards involved.
• Children aged from 3 years and less than 8 years shall not plug in, regulate and clean the
appliance or perform user maintenance.
- CAUTION — Some parts of this product can become very hot and cause burns. Particular attention has to be given where children and vulnerable people are present.
- If the power cable gets damaged, it has to be replaced only at a service centre approved by the manufacturer in order to prevent any risks.
text_image
Prohibition sign with crossed-out document and shield icon, indicating no liability or exclusionDO NOT COVER
- WARNING: In order to avoid overheating, do not cover the heater.
- Do not place the appliance immediately below a socketoutlet.
- Do not use this heater in the immediate surroundings of a bath, a shower or a swimming pool.
- Do not use this heater if it has been dropped.
- Do not use if there are visible signs of damage to the heater.
- Use this heater on a horizontal and stable surface.
- WARNING: Do not use this heater in small
rooms when they are occupied by persons not capable of leaving the room on their own, unless constant supervision is provided.
- WARNING: To reduce the risk of fire, keep textiles, curtains, or any other flammable material a minimum distance of 1 m from the air outlet.
- Don’t connect the appliance to the power supply and don’t use it unless it is completely assembled (see mounting instructions).
Keep handy the guarantee, receipt of payment and these instructions for future use and reference.
After removing the packaging, check the appliance for any signs of damage.
In case of visible damage, do not use it and contact a qualified technician.
Do not leave parts of the packaging with in the reach of children.
This appliance is not a children's toy: it is an electrical device and must be treated with the necessary caution.
Before connecting the appliance, make sure that the power supply voltage matches the indication on the data plate.
If the plug and socket are not compatible, the socket has to be replaced with a suitable type by skilled persons.
Do not use adapters or extension cables which do not meet current safety standards or that exceed the current carrying capacity limits.
When you don't use the appliance disconnect it from the power supply and assure that the interruptor is off.
Do not tug on the power cable or on the appliance itself to remove the plug from the socket.
The use of any electrical appliance requires that a number of basic rules are observed, namely:
- Never touch the appliance with wet or humid hands.
- Do not leave the appliance exposed to weathering (rain, sunlight).
- Do not subject it to rough handling.
In case of a breakdown or malfunctioning of the appliance, disconnect it at once.
Do not attempt to repair it, but take it to a service centre approved by the manufacturer.
If you decide you do not want to use this appliance any longer, disable it by cutting the power cable - of course, after disconnecting it from the socket.
The power cable should be extended to its full lenght to avoid over heating.
For safety reasons, the appliance should never be opened.
The appliance has been designed and manufactured to operate in the home.
Any other use is considered inappropriate and dangerous.
Do not insert objects through the safety grill or the air inlets.
During use, rest the appliance on a flat surface.
Do not use this heating appliance with programmers, timers, separate remote control systems (different to the ones provided with the appliance) or any other device that automatically turns on the appliance, as there is a risk of fire in the event the appliance is covered or positioned incorrectly.
Do not use the heater in presence of flammable substances (petrol, paints, etc.).
Do not place the cord near sources of heat.
WARNING: DO NOT COVER THIS PRODUCT NEAR CURTAINS OR OTHER COMBUSTIBLE MATERIAL.
WARNING: DO NOT COVER THE APPLIANCE OR OBSTRUCT THE AIR INLETS TO AVOID OVERHEATING.
WARNINGS ABOUT BATTERIES:
- KEEP BATTERIES OUT OF THE REACH OF CHILDREN. Swallowing can lead to chemical burns, perforation of soft tissue, and death. Severe burns can occur within 2 hours of ingestion. Seek medical attention immediately.
- Do not allow children to replace batteries.
- Always insert batteries correctly with regard to polarity (+ and -) marked on the battery and the equipment.
- Do not short-circuit batteries.
- Do not charge batteries.
- Do not force discharge batteries.
- Do not mix new and used batteries or batteries of different types or brands.
- Exhausted batteries should be immediately removed from equipment and properly disposed of.
- Do not heat batteries
- Do not weld or solder directly to batteries.
- Do not dismantle batteries.
-
Do not deform batteries.
-
Do not dispose of batteries in fire.
- A lithium battery with a damaged container should not be exposed to water.
- Do not encapsulate and/or modify batteries.
- Store unused batteries in their original packaging away from metal objects. If already unpacked, do not mix or jumble batteries.
- Remove batteries from equipment if it is not to be used for an extended period of time unless it is for emergency purposes.
- Clean the battery contacts and also those of the equipment prior to battery installation.
- In case of leak from batteries, avoid any contact with it; in case of contact, wash the affected part with water and seek medical attention.
GBTe
(pag.2)
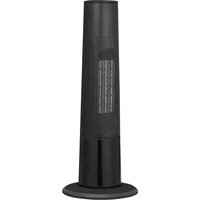
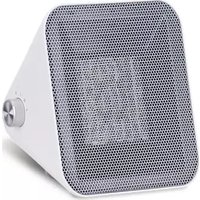
| 1 – Air outlet grid2 - Display3 - Base4 - Air inlet grid5 - Button / Indicator light: “TEMPERATURE” | 6 - Button / Indicator light: “TIMER”7 - Button / Indicator light: “SWING”8 - Button / Indicator light: ON/OFF |
Technical data indicated on the appliance.
Instructions for use
GB
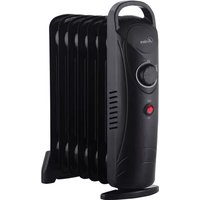
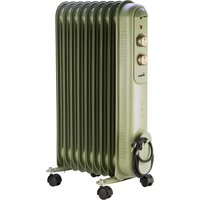
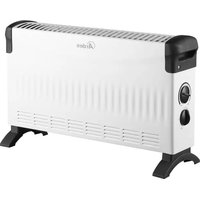
Assembly.
Caution! The heater should always be switched off and does not connected to the mains supply, if you mounting the heater.
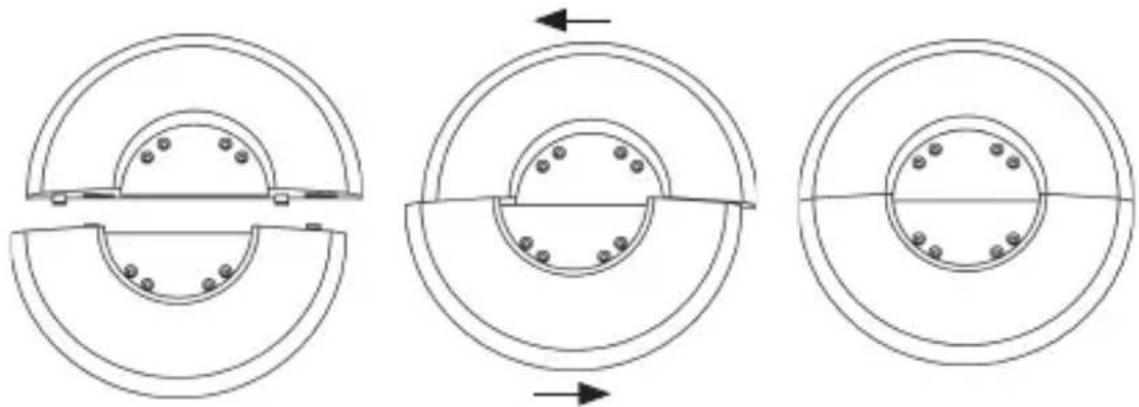
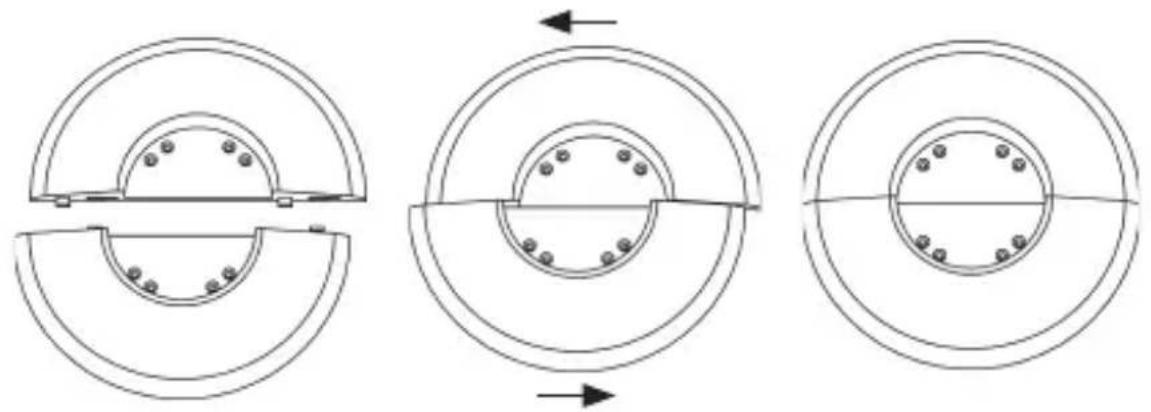
- Assemble the two halves of the base together by aligning the pins with the holes (pic. 1) and sliding them one over the other (pic. 2). The base is assembled (pic. 3).
- To fix the base of the heater, turn the main body upside down laying it on a soft surface in order to avoid any damages on the upper part.
- Place the base on the unit e fix it by using the screws provided.
Pic. 1 Pic. 2 Pic. 3
natural_image
Three schematic diagrams of mechanical bearing assemblies showing cross-sectional views and alignment (no text or labels)Pay attention that all the parts are correct and firmly connected with each other.
Caution! Connect to the mains supply only after the heater has been fully assembled.
- The device must not be used without a fixed base
- The device may be operated only in straight and upright position
- This device may not be used in a horizontal position
Batteries
Remote control is supplied without batteries; before use remote control open the batteries holder placed on the back of remote control (refer to the diagram shown on the back of the remote control) and insert 1 battery CR2025 3V respecting the indicated polarity.
To remove the battery, refer to the diagram shown on the back of the remote control.

text_image
Diagram showing three steps of a device with labeled arrows indicating sequence from component 1 to final connector.Description of controls:
To turn the appliance on, insert the plug in the power outlet.
For your convenience the unit can be operated by using control panel in the main body or using remote control included.
"On/Off" button (control panel)
- When the device is switched off, press this button to turn it on. The device switches on in minimum heating mode.
The indicator light (8) will switch on in blue colour and the display (2) shows the room temperature.
- When the device is switched on, press this button to change the operating mode:
- minimum heating; indicator (8) will be blue;
- maximum heating; indicator (8) will be red;
- off; indicator (8) will be switched off. Wait 15 seconds until the fan will stop.
"SWING" button (control panel and remote control)
Press this button to activate or deactivate the automatic swing function of the device. When the swing function is active, the corresponding indicator (7) lights up.
"TIMER" button (control panel and remote control)
Press the TIMER button when the device is working to program automatic switch-off at an interval of between 1 to 24 hours from when it is programmed. Every time the button is pressed, the interval increases by one hour.
A few seconds after selecting the timer, the display (2) will show the room temperature again.
When the timer function is activated, the indicator (6) lights up on the control panel. To disable the timer function, press the timer button repeatedly until the display shows "0 0".
"Temp" button (control panel and remote control)
Press one of these buttons to set the desired room temperature (automatic function); the set temperature will flash on the display (2).
The set temperature will change from a minimum of 15^ C to a maximum of 40^ C.
Once the desired temperature has been selected, the display (2) will show the room temperature after a few seconds.
In automatic mode, the device will automatically regulate the heating power based on the difference between the room temperature and the set temperature. In this operating mode, the device will also switch between the various power levels (ventilation, low power, high power) repeatedly.
The selected power level is always shown on indicator (8):
- minimum heating (blue);
- maximum heating (red);
- ventilation (switched off).
Once the set temperature has been reached, ventilation will still remain active in order to monitor the room temperature more effectively.
To disable this function, press the “ON/OFF” or “HEAT” button and manually select the desired function (low power or high power).
button (remote control)
- When the device is switched off, press this button to turn it on. The device switches on in minimum heating mode.
The indicator light (8) will switch on in blue colour and the display (2) shows the room temperature.
- When the device is switched on, press this button to turn it off.
Wait 15 seconds until the fan will stop.
"HEAT" button (remote control)
- When the device is switched on, press this button to change the operating mode:
- minimum heating; indicator (8) will be blue;
- maximum heating; indicator (8) will be red;
"LOCK" button (remote control)
Press this button to lock all other buttons.
To unlock, press this button or keep pressed for few seconds both (5) and (6) buttons on the control panel.
Note:
- to switch off the display and the indicator lights, keep pressed the "Swing" button on the control panel for few seconds; press any other button to switch on again the display and the indicator lights.
- The appliance will switch off automatically when the ambient temperature exceeds 50^ C.
Maintenance
GB
Disconnect the plug from the socket and let the appliance cool down well before cleaning it.
In order to clean the appliance, use a soft or slight damp cloth.
Never use abrasives or chemical solvents.
Do not use very wet substances, liquids or cloths to prevent water from entering into the appliance and irreparably damaging it.
NEVER IMMERSE THE APPLIANCE INTO THE WATER.
Dust inside the appliance
Use a vacuum cleaner on the back grid.
PACKAGING
In order to respect the environment, packaging material must be disposed of properly in accordance with separate collection.
Check local regulations.
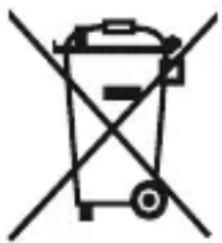 | BATTERIES - Remove the batteries from the appliance before its disposal. Do not dispose the batteries with domestic waste. The batteries must be disposed of in the appropriate containers or in the specific collecting centre. Suitable segregated collection helps prevent damage to the environment and to human health. To remove batteries, refer to Instructions for use. |
natural_image
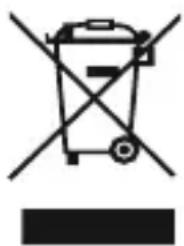
Symbol of a trash bin crossed with no text or numbers, representing waste sorting or disposal (no text present)USER INFORMATION
“Implementation of Directive 2012/19/EU on Waste Electrical and Electronic Equipment (WEEE)”, pertaining to reduced use of hazardous substances in electrical and electronic equipment, as well as to waste disposal”.
The symbol of the crossed-out wheelie bin on the equipment or on its packaging indicates that the product must be disposed of separately from other waste at the end of its service life.
The user must therefore take the dismissed equipment to suitable separate collection centres for electrical and electronic waste.
For more details, please contact the appropriate local authority.
Suitable segregated collection of the equipment for subsequent recycling, treatment or environmentally-friendly disposal helps prevent damage to the environment and to human health, and encourages the re-use and/or recycling of the materials that make up the equipment.
Abusive disposal of the product by the user shall result in the application of administrative fines in accordance with the laws in force.
Terms and Conditions
The guarantee is valid for 24 months.
This guarantee applies only if it has been duly filled in and is submitted with the receipt showing the date of purchase.
The guarantee covers the replacement or repair of parts making up the appliance which were faulty at source due to manufacturing faults.
After the guarantee has expired, the appliance will be repaired against payment.
The manufacturer declines any responsibility for damage to persons, animals or property due to misuse of the appliance and failure to observe the directions contained in the instructions.
Limits
All rights under this guarantee and any responsibility on our part will be voided if the appliance has been:
- mishandled by unauthorized persons
- improperly used, stored or transported.
The guarantee does not cover damage to the outward appearance or any other that does not prevent regular operation.
If any faults should be found despite the care taken in selecting the materials and in creating the product, or if any information or advice are required, please contact your local dealer.
Information requirements for electric local space heaters
| Model identifier(s): AR4P16 | ||||||
| Item | Symbol | Value Unit | Item Unit | |||
| Heat output | Type of heat input, for electric storage local space heaters only (select one) | |||||
| Nominal heat output | P_nom | 2,0 kW | Manual heat charge control, with integrated thermostat | N.A. | ||
| Minimum heat output (indicative) | P_min | 1,2 kW | Manual heat charge control with room and/or outdoor temperature feedback | N.A. | ||
| Maximum continuous heat output | P_max,c | 2,0 kW | Electronic heat charge control with room and/or outdoor temperature feedback | N.A. | ||
| Auxiliary electricity consumption | Fan assisted heat output N.A. | |||||
| At nominal heat output | eI_max | N.A. kW | Type of heat output/room temperature control (select one) | |||
| At minimum heat output | eI_min | N.A. kW | Single stage heat output and no room temperature control | No | ||
| In standby mode | eI_SB | 0,0004 kW | Two or more manual stages, no room temperature control | No | ||
| With mechanic thermostat room temperature control | No | |||||
| With electronic room temperature control | Yes | |||||
| Electronic room temperature control plus day timer | No | |||||
| Electronic room temperature control plus week timer | No | |||||
| Other control options (multiple selections possible) | ||||||
| Room temperature control, with presence detection | No | |||||
| Room temperature control, with open window detection | No | |||||
| With distance control option No | ||||||
| With adaptive start control No | ||||||
| With working time limitation Yes | ||||||
| With black bulb sensor No | ||||||
| Contact details POLY POOL S.p.A. - via Sottocorna 21/B, 24020 Parre (BG) - Italy | ||||||
text_image
Prohibition sign with crossed-out document and shield icon, indicating no liability or exclusionNE PAS COUVRIR
Image 1 Image 2 Image 3
natural_image
Three schematic diagrams of mechanical bearing assembly showing cross-sections and centerlines (no text or labels)text_image
Diagram showing three steps of a device with labeled arrows indicating sequence from component 1 to final connector.text_image
Prohibition sign with crossed-out document and heart symbol, indicating no liability or exclusionNICHT ABDECKEN
natural_image
Three circular mechanical components with bolt holes, shown from different angles (no text or symbols)text_image
Diagram showing three steps of a device with labeled arrows indicating sequence from component 1 to final connector.natural_image
Symbol of a trash bin crossed with no text or numbers, representing waste sorting or disposal (no text present)INFORMATION FÜR DEN BENUTZER
text_image
Prohibition sign with crossed-out document and folder icon, indicating no file or document restrictionsNO CUBRIR
natural_image
Three schematic diagrams of mechanical bearing assembly showing cross-sections and centerlines (no text or labels)text_image
Diagram showing three steps of a device with labeled arrows indicating sequence from component 1 to final connector.natural_image
Symbol of a trash bin crossed with diagonal lines, no text or numbers presenttext_image
Prohibition sign with crossed-out document icon and diagonal line, indicating no text or symbols beyond the prohibition symbol.NEZAKRÝVEJTE
natural_image
Three schematic diagrams of mechanical bearing assembly showing cross-sections and centerlines (no text or labels)text_image
Diagram showing three steps of a device with labeled arrows indicating sequence from component 1 to final connector.ARDES, Guzzanti, Scarlett, Luxell, Graef
ČERTES spol. s r.o.
Donínská 83
463 34 Hrádek nad Nisou
text_image
Prohibition sign with crossed-out document icon and diagonal line, indicating no text or symbols beyond the prohibition symbol.NEZAKRÝVAJTE
- UPOZORNENIE: nezakrývajte spotrebič ani neblokujte vetracie otvory, aby ste zabránili prehriatiu.
- Nepokladajte spotrebič priamo pod
elektrickú zásuvku.