KDS611 - Vacuum Cleaner Leifheit - Free user manual and instructions
Find the device manual for free KDS611 Leifheit in PDF.
| Product type | Window cleaner (smooth surface vacuum) |
| Tank capacity | 100 ml |
| Battery type | Built-in rechargeable lithium-ion |
| Charger voltage | 5 V |
| Battery life | About 35 minutes |
| Charging time | About 180 minutes |
| Weight (without accessories) | 0.7 kg |
| Rubber lip width | 28 cm |
| Recommended use | Wet and smooth surfaces: windows, mirrors, tiles. Do not use on rough surfaces or to vacuum dust. |
| Included accessories | Base unit with battery, tank, suction nozzle, charging cable, instruction manual |
| Safety instructions | Do not immerse in water, do not open the device, use only the provided charger, unplug before cleaning. |
| Maintenance and cleaning | Clean the tank and nozzle with clean water, dry completely before storage. Do not clean the base unit under running water. |
| Repairability | Repairs only by authorized technicians. Do not disassemble the device yourself. |
| Optional accessories | Suction nozzle 17 cm, Leifheit telescopic arms (65-110 cm, 110-190 cm, 145-400 cm) |
| Warranty | Household use only. Manufacturer warranty according to conditions. |
Frequently Asked Questions - KDS611 Leifheit
User questions about KDS611 Leifheit
0 question about this device. Answer the ones you know or ask your own.
Ask a new question about this device
Download the instructions for your Vacuum Cleaner in PDF format for free! Find your manual KDS611 - Leifheit and take your electronic device back in hand. On this page are published all the documents necessary for the use of your device. KDS611 by Leifheit.
USER MANUAL KDS611 Leifheit
When using an electrical device, basic safety measures should always be observed:
- Only use the window cleaner as described in these instructions.
- Do not store or charge the window vacuum in the open but always at room temperature and in a dry place.
- Do not operate the charger with moist or wet hands.
- Do not insert any objects into the ventilation slots.
- This appliance can be used by children aged from 8 years and above and persons with reduced physical, sensory or mental capabilities or lack of experience and knowledge if they have been given supervision or instruction concerning use of the appliance in a safe way and understand the hazards involved. Children shall not play with the appliance. Cleaning and user maintenance shall not be made by children without supervision.
- The window cleaner may only be operated with the supplied charger.
- Fully charge the window cleaner prior to the first use (see start-up / charging the battery).
- Always remove the charger from the socket and window cleaner after charging.
- Repairs may only be performed by authorised customer service technicians. Never open the basic device by yourself. The individual components of the basic device may not be disassembled, repaired or modified.
- Unplug the device before cleaning or maintenance. When cleaning, ensure that no liquids make their way into the switches and buttons.
VHODNÉ IBA NA POUŽITIE V DOMÁCNOSTI!

GÜVENLİK UYARILARI
text_image
Exploded view diagram of a handbag device with labeled parts including power plug, switch, and paper layout
natural_image
Close-up of hands holding a small electronic device with a black tray (no visible text or symbols)natural_image
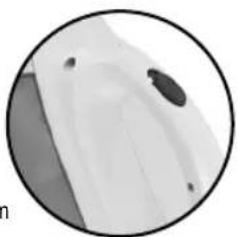
Close-up of a white object with black circular marks, possibly part of a device or tool (no visible text or symbols)natural_image
Two hands holding a device with checkmark and cross symbols (no text or labels)text_image
Exploded view diagram of a handbag device with labeled parts including power plug, switch, and paper layout
20
3. GEBRUIK VOLGENS DE BEPALINGEN
natural_image
Close-up of hands holding a black object with a small circular mark (no visible text or symbols)natural_image
Close-up of a white garment with black circular indentations, no visible text or symbols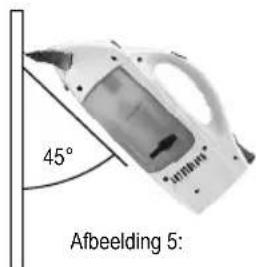
natural_image
Two hands holding a device with checkmark and cross symbols (no text or labels)Afbeelding 7
natural_image
Close-up of hands operating a handheld device with a white body, labeled 'Afbeelding 8' (no other text or symbols visible)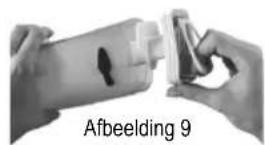

text_image
Exploded view diagram of a handbag device with labeled parts including power plug, switch, and paper feed coverF 24
3. UTILISATION SPECIFIQUE
natural_image
Close-up of hands holding a small electronic device with a screen (no visible text or symbols)natural_image
Close-up of a white garment with a black circular mark on the side (no visible text or symbols)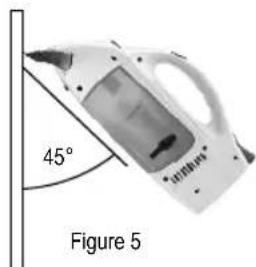
text_image
45° Figure 5natural_image
Two hands holding a device with checkmark and cross symbols (no text or labels)Figure 6
natural_image
Close-up of hands operating a handheld device with a black handle, labeled 'Figure 8' (no other text or symbols visible)
text_image
Exploded view diagram of a handwashing device with labeled parts including power plug, switch, and paper feed cover
3. POUŽITÍ K URČENÉMU ÚČELU
natural_image
Close-up of hands holding a black object with a small circular mark (no visible text or symbols)natural_image
Close-up of a white mechanical component with a black circular mark, no visible text or symbols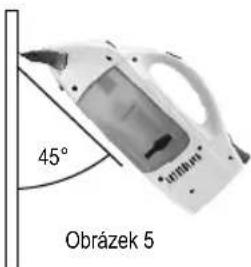
natural_image
Close-up of hands operating a handheld device with a black handle, labeled 'Obrázek 8' (no other text or symbols visible)

natural_image
Two hands holding a cylindrical object with checkmark and cross symbols, no readable text or symbols presenttext_image
Exploded view diagram of a handheld air cleaner with labeled parts including power plug, switch, and paper feed cover① 32
3. IMPIEGO CONFORME ALLE NORME
natural_image
Two hand gestures with checkmarks and X marks, no text or symbols presentFigura 6
natural_image
Two industrial devices: a circular device labeled 'MAX' and a handheld device with a hand, both without visible text or symbols.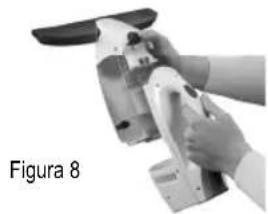
natural_image
Close-up of hands operating a handheld device with a curved handle (no visible text or symbols)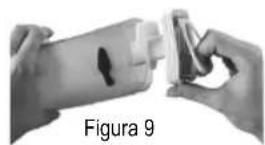
text_image
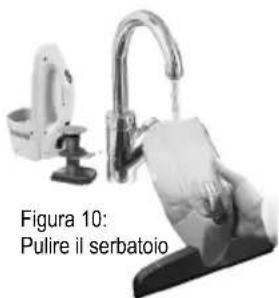
Figura 10: Pulire il serbatoio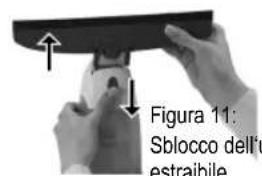
text_image
Exploded view diagram of a handwashing device with numbered parts and a printed page showing internal components.
- Aspirar superfi cies
natural_image
Close-up of hands operating a handheld device with a black handle, labeled 'Imagen 8' (no other text or symbols visible)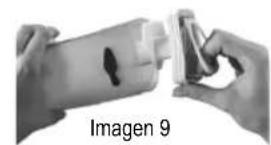
natural_image
Close-up of hands holding a small object with a dark hole, labeled 'Imagen 9' at the bottom (no other text or symbols visible)
natural_image
Two hands holding a cylindrical object with checkmark and cross symbols, no readable text or symbols present
text_image
Imager montaj depeADVERTENCIA:
text_image
Exploded view diagram of a handwashing device with numbered parts and a printed sheet of contents
natural_image
Close-up of hands holding a small object, possibly a tool or device, with no visible text or symbols.natural_image
Close-up of a white mechanical component with a black circular feature, no visible text or symbols5. USO
1. Aspirar
natural_image
White electric iron shaver with 45° angle annotation (no other text or symbols)Figura 5
natural_image
Close-up of hands operating a handheld device with a black handle, labeled 'Figura 8' (no other text or symbols visible)
natural_image
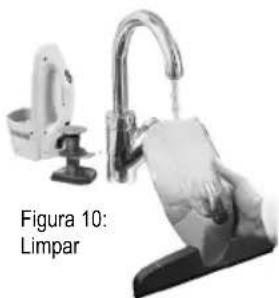
Product photo showing a hand washing a cup on a sink, with a small inset image of a washing machine and a caption 'Figure 10: Limpar' (no other text or symbols)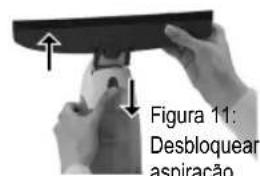
natural_image
Two hand gestures with checkmarks and X marks, no text or symbols present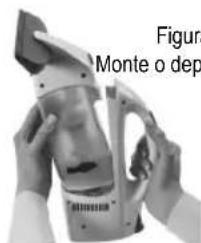
text_image
Figura Monte o depCUIDADO:
NUNCA UTILIZE A UNIDADE QUANDO ESTÁ NÃO TOTALMENTE CONSTRUÍDO!
6. ACESSÓRIOS
You can also find the operating instructions on the Leifheit homepage at www.leifheit.de
Contents:
- TECHNICAL DATA
- DELIVERY SCOPE
- PROPER USE
- START-UP / CHARGING THE BATTERIES
- USE
- SPECIAL ACCESSORIES
- DISPOSAL / BATTERY REMOVAL
- COMPLIANCE / DECLARATION OF CONFORMITY
- TROUBLESHOOTING
Dear customer,
Congratulations on your purchase of the Leifheit window cleaner.
Please read the operating instructions for the window vacuum before use and store these for later use or subsequent owners. These will assist you in operating the device sensibly and correctly from the start and to avoid mistakes in operation. Pay particular attention to the safety instructions provided in these operating instructions.
We hope that you are satisfied with the window cleaner.
If you would like to contact us in writing, our contact form is available to you on the LEIFHEIT home page www.Leifheit.de or you can choose to use the postal service.
Regards
your Leifheit team
1. TECHNICAL DATA
Type of device: Window vacuum cleaner
Tank volume: 100 ml
Battery type: Lithium ion battery
Wide rubber lip: 28 cm
Charger voltage: 5 V
Operating time: approx. approx. 35 min.
Charging time: approx. 180 min.
Weight (without accessories): 0.7 kg
All values are approximate values!

Use only original window vacuum rechargeable batteries by Leifheit!
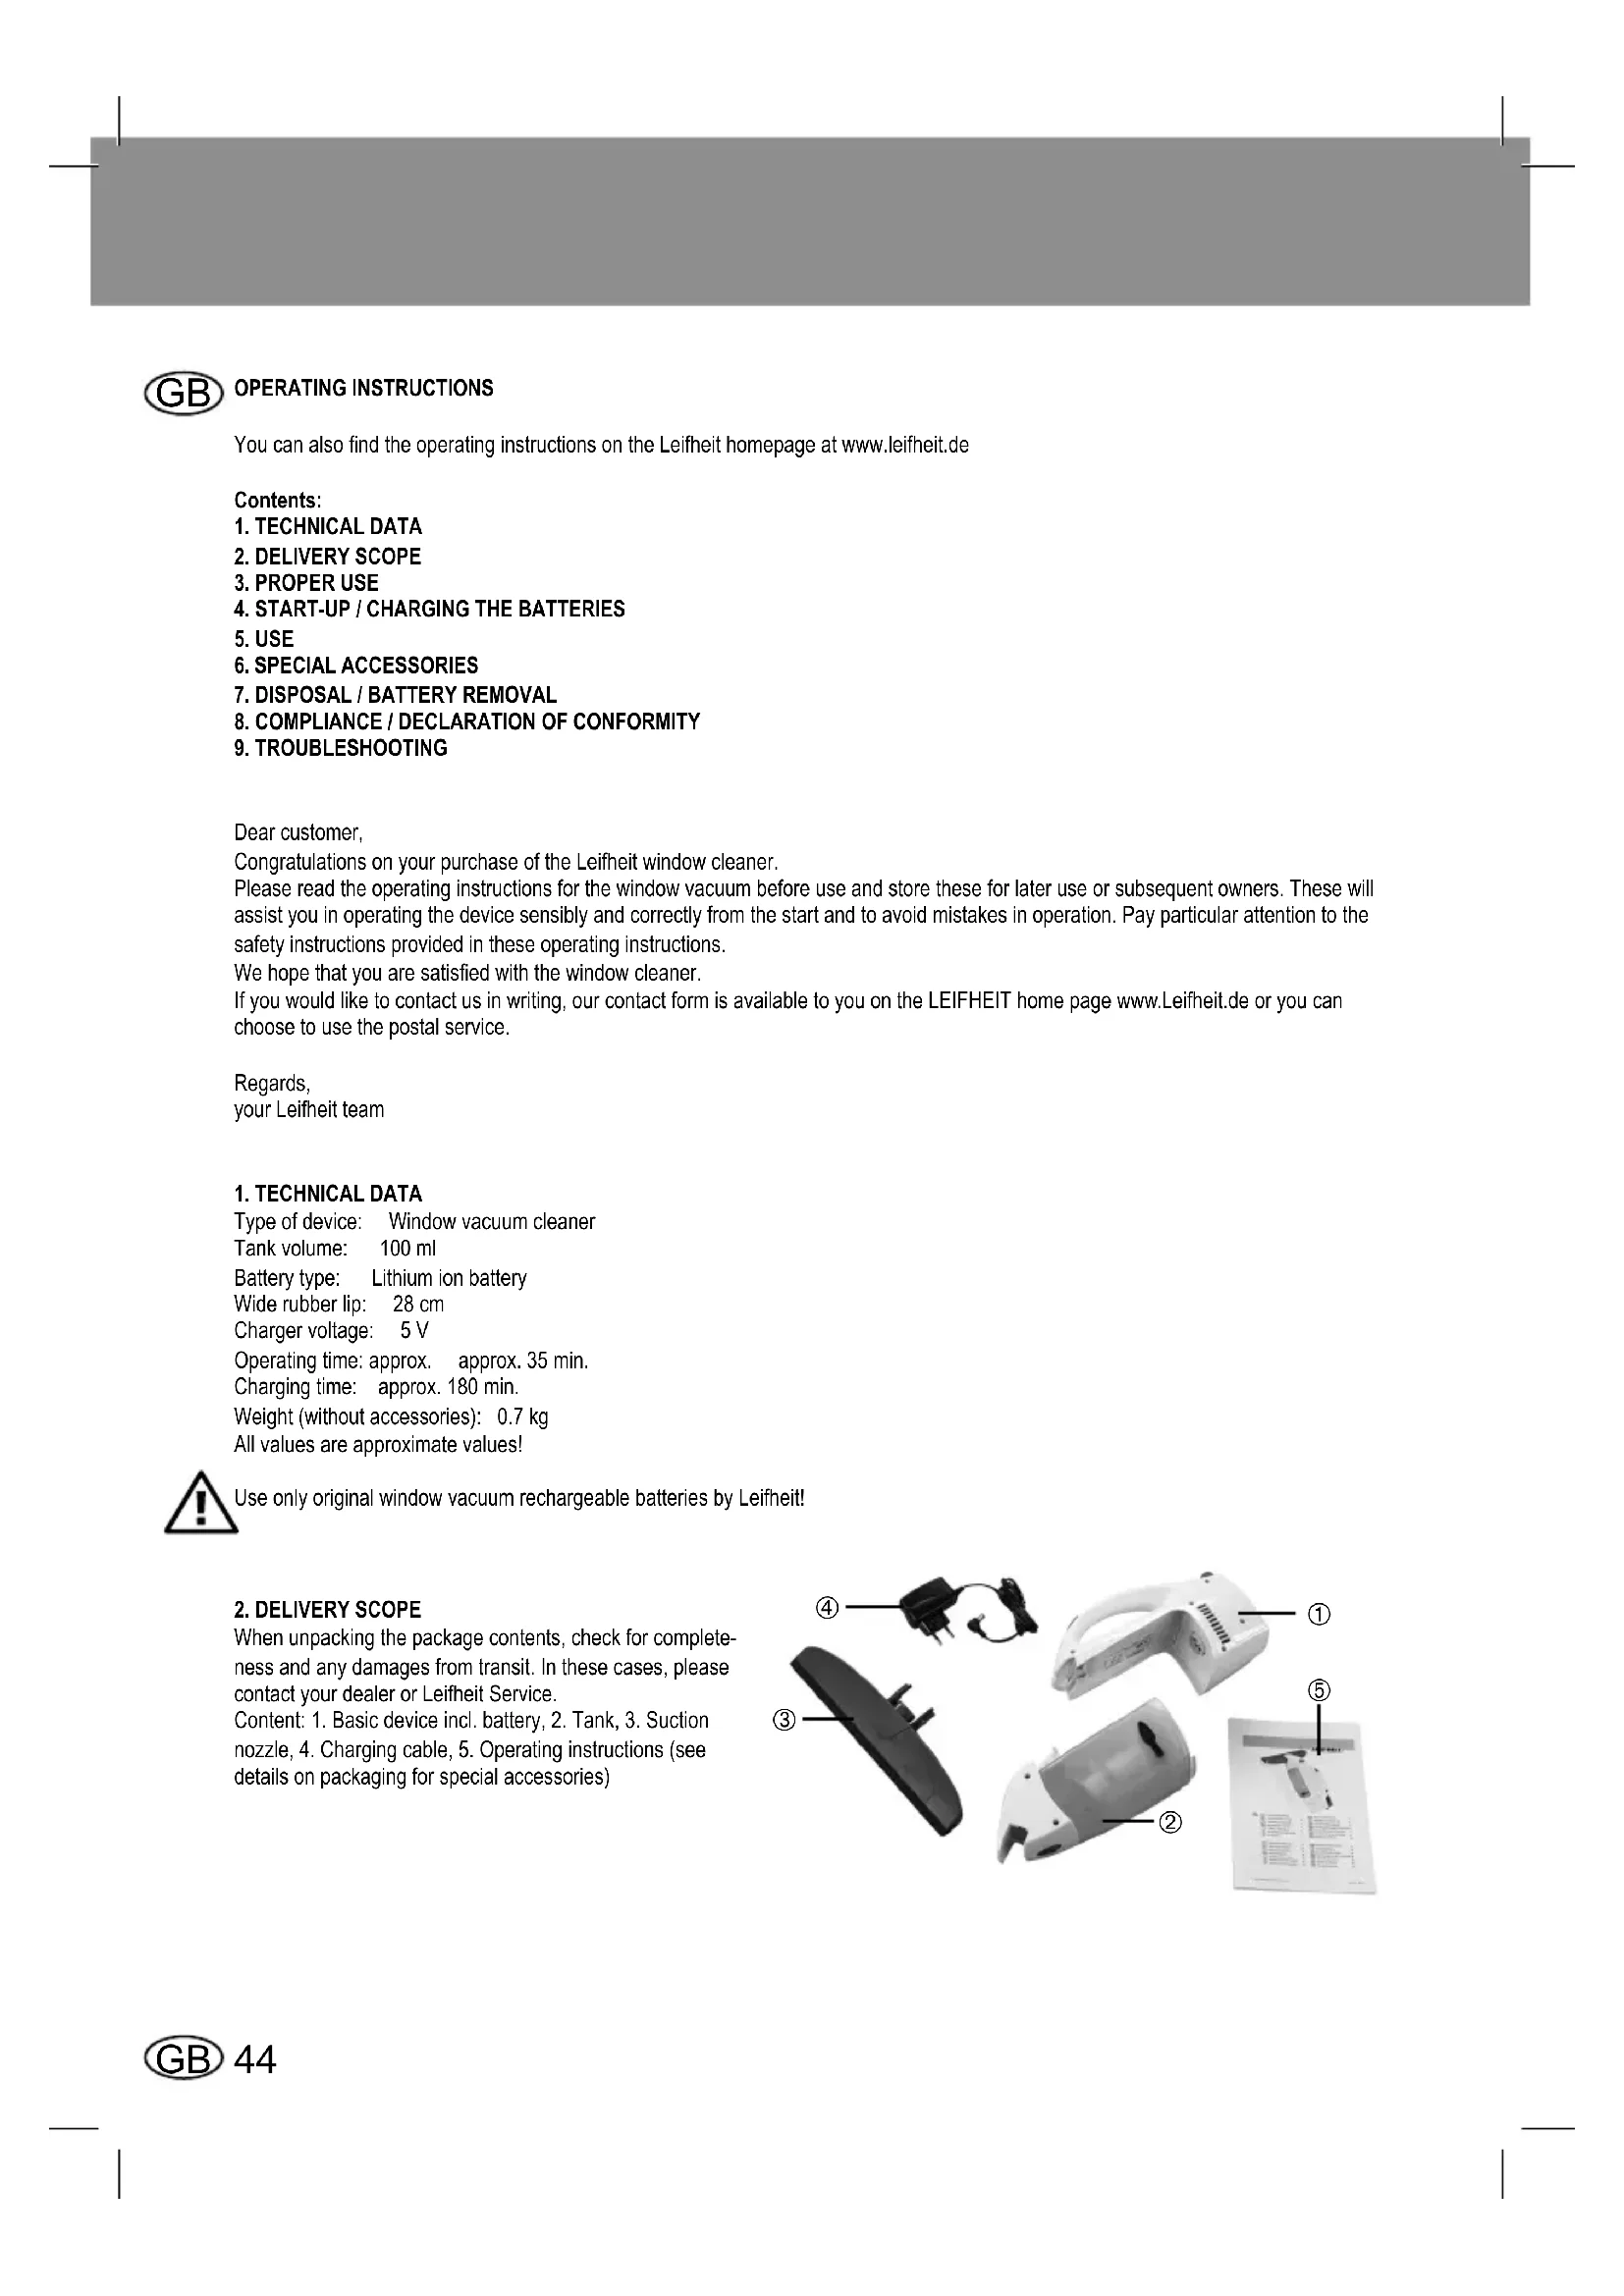
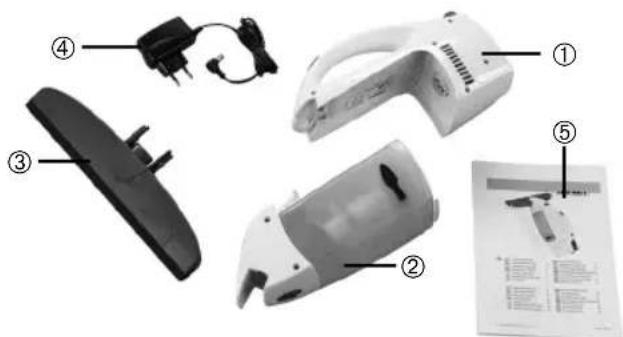
2. DELIVERY SCOPE
When unpacking the package contents, check for completeness and any damages from transit. In these cases, please contact your dealer or Leifheit Service.
Content: 1. Basic device incl. battery, 2. Tank, 3. Suction nozzle, 4. Charging cable, 5. Operating instructions (see details on packaging for special accessories)
text_image
Exploded view diagram of a handbag device with labeled parts including power plug, switch, and paper feed cover
3. PROPER USE
- Please note that this product is only intended for household use. Leifheit does not provide a manufacturer's warranty for commercial use.
- Only use this device for cleaning wet, smooth surfaces, such as windows, mirrors and tiles.
• No dust may be sucked in. - Do not use the window cleaner on rough surfaces so as to avoid damage to the rubber lip.
• The device is not suitable for suction of large quantities of fluids above 100 ml, fl ammable or sticky fluids. - Only use this device in connection with conventional window cleaning agents (no spirits, no foam cleaner). We recommend: Leifheit Glass Cleaning Liquid or Window Spray.
- Only use this device with the accessories and spare parts approved by Leifheit.
Any other use is considered to be improper. The manufacturer is not liable for damages resulting from improper use. The user alone shall bear the risk for this.
Figure 2: Window cleaner operating controls
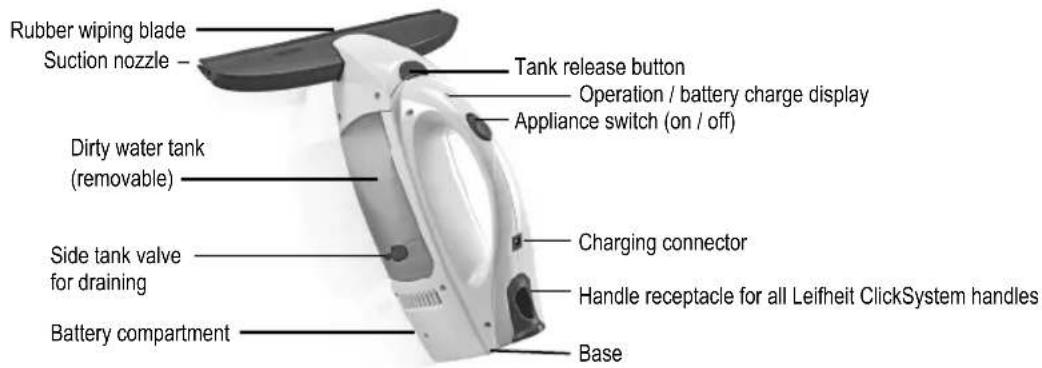
text_image
Rubber wiping blade Suction nozzle Tank release button Operation / battery charge display Appliance switch (on / off) Dirty water tank (removable) Side tank valve for draining Battery compartment Charging connector Handle receptacle for all Leifheit ClickSystem handles Base4. START-UP / CHARGING THE BATTERIES
- The window cleaner is not delivered with a fully charged battery. Therefore, please fully charge the battery prior to the first use.
- The battery reaches full capacity after some full charges and use cycles.
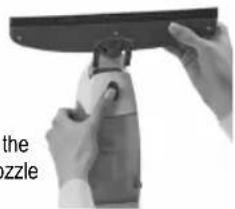
- Attach the suction nozzle to the tank. Push the two accompanying locking tabs into the tank's upper surface until you hear the connection make an audible click. The visible screws should be facing down in this position (see figure 3).
• Before you charge the device, please ensure that the device is switched off (see figure 4). - Connect the charger to the charging connector. Plug the charger into the socket. The LED display will flash green while the charging.
The LED will be solid green once the battery is fully charged.
• The battery may only be charged by using the supplied charger.
- The charger is only to be used in connection with the Leifheit window cleaner.
• Always charge the rechargeable battery after work and always store the device fully charged.
5. USE
-
Suction clean the surface
-
Clean the window as usual with water and a cleaning agent. Switch the window vacuum on by pushing the main power switch; the indicator light will be a steady green. Place the rubber lip of the device on the surface to be vacuumed and use light pressure to pull it from top to bottom across the surface. To achieve the best results, hold the appliance at a 45° angle to the pane (see figure 5).
- Hard-to-reach surfaces can be suctioned either from top to bottom, sideways or upside down. If a windowsill or very wide window frames prevent or hinder a vacuuming to the bottom edge of the window pane, vacuum across the pane once at the end of the vacuuming process.
Figure 3: Attaching the suction nozzle
natural_image
Close-up of hands holding a small object, possibly a device or tool, with no visible text or symbols.Figure 4: Appliance switch in the off position
natural_image
Close-up of a white garment with a black circular mark on the side (no visible text or symbols)
natural_image
White electric shaver with 45° angle标注 (no text or symbols on device)Figure 5
NOTE: The powered-on device operates quietly in stand-by mode. The window cleaner generates its full power once the rubber lip of the window cleaner is placed on the glass pane or is lightly pressed. The battery charge lasts longer due to this automatic power control.
• After suction cleaning the window, power off the device by pressing the appliance switch.
- Interrupting work
- Place the device on its base (see figure 2) and power it off while it is not in use. NOTE: If the window vacuum is not used for 2 minutes while it is switched on (no contact between rubber lip and a hard surface), the device will switch into sleep mode; the LED will flash in green. The vacuum function will be activated automatically once the rubber lip comes into contact with a window pane. To interrupt or stop work for a long period of time, always use the main power switch to shut the device off.
-
Emptying the container during work
-
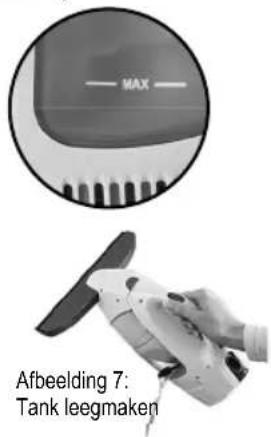
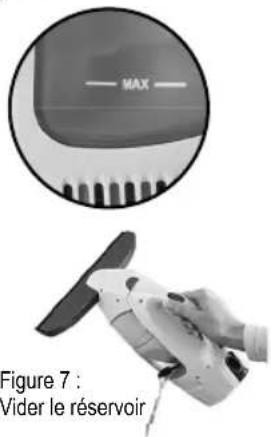
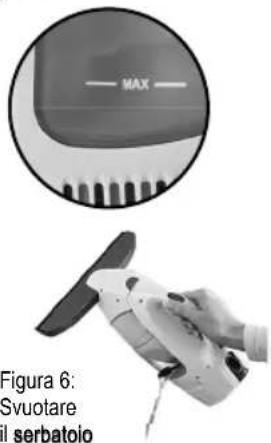
If the maximum fi ll level (marked „MAX“ see fi gure 6) of the dirty water tank has been reached, the tank must be emptied. NOTE: If the maximum fill level is exceeded, small amounts of water may leak out of the ventilation slots if the device is tilted too far. In order to avoid this, empty the tank before the maximum fi ll level is exceeded.
-
To do this, power off the device, open the side closure on the dirty water tank and pour the water into a container or drain (see figure 7) Then close the tank again.
-
Ending work / cleaning the device
• Power off the device. Unlock the tank via the release button and remove it (see figure 8) NOTE: The device cannot be powered on when the tank is unlocked.
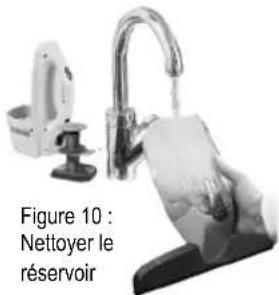
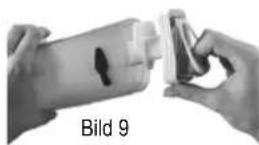
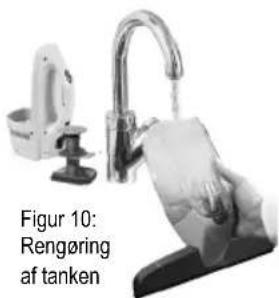
- Remove the bottom cap from the tank and empty it through the opening in the base (see fi gure 9). Rinse the tank out with clean water (see fi gure 10).
- Do not put any hard objects, such as a washing-up brush, into the tank as this may cause damage.
- Release the suction nozzle (see figure 11) and clean both nozzle and rubber lip under flowing water.
- Leave the device to dry fully while in the open position. Charge the battery after the work is complete.
- Lock the tank before the next use by pushing the tank cover until it connects with the tank. Be careful to ensure that the tank cover is pushed into the correct position (see figure 12).
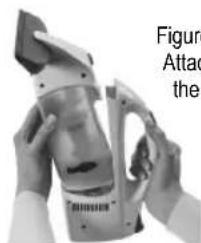
- Push the tank onto the basic device from above until you hear the connection make an audible click. Insert the tank into the housing at a slight angle. (see figure 13).
CAUTION: The basic unit contains electrical components.
Therefore, do not clean the basic unit under running water!
NOTES
- Do not use the window cleaner on rough surfaces.
- Clean the device with a damp cloth.
- Never submerge the device in water.
- If your product does not work properly under normal conditions, please contact your dealer with your proof of purchase.
Figure 6

text_image
MAX Figure 7: Emptying the tank Figure 8

text_image
Figure 10: Cleaning the tank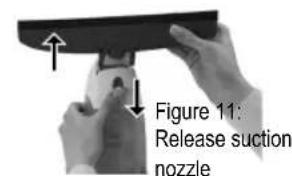
text_image
Figure 11: Release suction nozzleFigure 12: Lock the tank cover

natural_image
Two hands holding a device with checkmark and cross symbols (no text or labels)Figure 13: Attaching the tank
text_image
Figure Attacked theWARNING:
NEVER OPERATE THE DEVICE IN A PARTIALLY ASSEMBLED CONDITION!
6. SPECIAL ACCESSORIES
A small 17 cm suction nozzle is separately available for narrow windows and windows with glazing bars.
The window cleaner can be attached to all Leifheit telescope handles thanks to the Click System function. This allows you to also reach hard-to-reach / high surfaces: Steel telescope handle (65 - 110 cm), Steel telescope handle with an articulated joint (65 - 190 cm), Aluminium telescope handle (145 - 400 cm)
7. DISPOSAL / BATTERY REMOVAL
The battery must be removed before disposing of the device. To do so, unplug the device and open the battery compartment by removing the screw. Disconnect the cable connection and dispose of the battery properly.
The symbol on the product or its packaging indicates that this product is not to be treated as normal household waste, but rather must be taken to a collection point for recycling electrical and electronic equipment. The battery is to be removed
before disposing of the device and taken separately to corresponding collection points. You can obtain additional information from your local authorities, the municipal waste disposal service or the shop where you purchased the product.
Attention: always observe the following information when handling lithium-ion rechargeable batteries:
- Do not damage the rechargeable battery or open it as this can cause a short circuit. Risk of fire! Risk of hazardous or poisonous substances.
- Do not place the rechargeable batteries in open flames; do not subject them to direct sunlight or heat.
8. COMPLIANCE / DECLARATION OF CONFORMITY
Leifheit herewith declares that this device is in compliance with the basic requirements and the other pertinent regulations of the Directive 2004/108/EC, 2006/95/EC, 2011/65/EU (RoHS) and Directive 1907/2006/EU (REACH).
You can view the EU declaration of conformity at www.Leifheit.de


- TROUBLESHOOTING
| Error Note | |
| LED flashes red | 1. The rechargeable battery is empty. Recharge the device.2. If the device is partially or fully charged► Use the main power switch to shut the device off and immediately on again - up to three times - to exclude a short-term error.If the flashing continues► Let the device stand at room temperature for a few minutes while it is switched off. Low temperatures of the device can cause short-term errors.If the flashing continues► Contact your seller where you purchased the device. |
| Streaks on window 1. | Check the rubber lip for damage - this can be changed if required.2. The rubber lip can be purchased separately in stores. For simple use just gently wet the rubber lip before you push it sideways into the suction nozzle. |
| Water exits from the ventilation opening | 1. The tank has reached the maximum limit of 100 ml and must be emptied.2. Fitful movements while using the device overhead can cause water to leak through the fan. Empty the tank regularly and avoid very fitful movements of the device. |

BRUKSANVISNING
text_image
Exploded view diagram of a handbag with labeled parts including power plug, switch, and paper feed cover
3. ÄNDAMÄLSENLIG ANVÄNDNING
natural_image
Close-up of hands holding a mechanical component, no visible text or symbolsBild 4:
Strömbrytaren
i av-läge

natural_image
Close-up of a white mechanical component with a black circular feature and two small holes, enclosed in a circular frame (no text or symbols visible)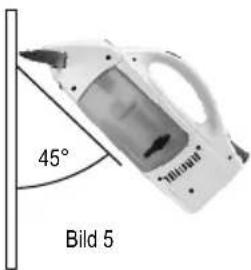
natural_image
Close-up of a mechanical component with no visible text or symbols
natural_image
Hand holding a small propeller device with a black handle, labeled '7: Emma tanken' (no other text or symbols visible)natural_image
Close-up of hands operating a handheld device (no visible text or symbols)Bild 8

natural_image
Product photo showing a hand cleaning a wall sink with a rack-mounted clamp (no text or symbols visible)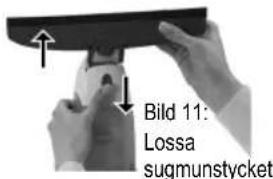
text_image
Bild 11: Lossa sugmunstycketnatural_image
Two hands holding a device with checkmark and cross symbols (no text or labels)
text_image
Exploded view diagram of a handbag with labeled parts including front, side, and top views
3. TILSIGTET BRUG
natural_image
Close-up of hands holding a small electronic device with a screen (no visible text or symbols)Fig. 4: Kontakt i off-position
natural_image
Close-up of a white garment with a black circular mark on the side (no text or symbols visible)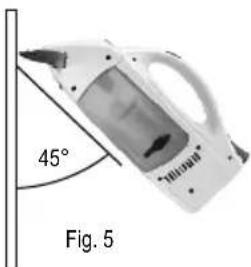
text_image
45° Fig. 5natural_image
Person holding a handheld device with a white body, labeled 'Figur 8' (no other text or symbols visible)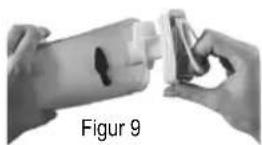
natural_image
Product photo showing a hand washing a sink with a water dispenser, no visible text or symbols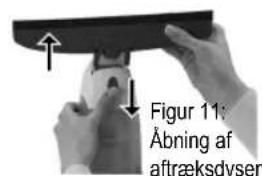
natural_image
Two hands holding a device with checkmark and cross symbols (no text or labels)
text_image
Figure Monterin beholdtext_image
Exploded view diagram of a handbag with labeled parts including power plug, switch, and paper feed cover
natural_image
Close-up of hands holding a small object, possibly a device or tool, with no visible text or symbols.natural_image
Close-up of a white mechanical component with black circular features (no visible text or symbols)natural_image
Two hands holding a cylindrical object with checkmark and cross symbols, no readable text or symbols presentРисунок 6

text_image
Exploded view diagram of a handbag device with labeled parts including power plug, switch, and paper feed cover
natural_image
Close-up of hands holding a small mechanical component, possibly a tool or device (no visible text or symbols)natural_image
Close-up of a white object with black circular markings, possibly part of a device or component (no visible text or symbols)5. ZASTOSOWANIE
natural_image
Close-up of hands operating a handheld electronic device labeled 'Rysunek 8' (no other text or symbols visible)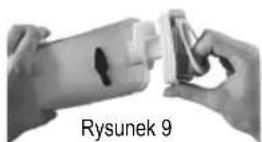

natural_image
Two hands holding a device with checkmark and cross symbols (no text or labels)
text_image
Exploded view diagram of a handbag device with labeled parts including power plug, switch, and paper feed cover
3. POUŽITIE NA STANOVENÝ ÚČEL
natural_image
Close-up of hands holding a small mechanical component, possibly a tool or device (no visible text or symbols)natural_image
Close-up of a white mechanical component with a black circular feature, no visible text or symbolsnatural_image
Close-up of hands operating a handheld device with a black handle, labeled 'Obrázok 8' (no other text or symbols visible)

natural_image
Two hands holding a device with checkmark and cross symbols (no text or labels)
text_image
Exploded view diagram of a handwashing device with labeled parts including power plug, switch, and paper feed coverTR
3. TALİMATLARA UYGUN KULLANIM
natural_image
Close-up of a white garment with a black circular mark, no visible text or symbols5. KULLANIM
natural_image
Two hands holding a cylindrical object with checkmark and cross symbols, no readable text or symbols present