
TX65HX700 - Television PANASONIC - Free user manual and instructions
Find the device manual for free TX65HX700 PANASONIC in PDF.
| Product type | 4K Ultra HD LED TV |
| Brand | Panasonic |
| Model | TX65HX700 |
| Screen size | 65 inches (165 cm) |
| Resolution | 3840 x 2160 pixels (4K) |
| Display technology | LED |
| HDR | HDR10, HLG, Dolby Vision |
| Operating system | My Home Screen (Smart TV) |
| TV tuner | DVB-S/S2, DVB-T/T2, DVB-C |
| Connectivity | Wi-Fi, Bluetooth, Ethernet, 3x HDMI, 2x USB |
| Sound | 2 x 10 W, Dolby Atmos |
| Dimensions (without stand) | 1450 x 838 x 49 mm |
| Dimensions (with stand) | 1450 x 898 x 300 mm |
| Weight (without stand) | 25.5 kg |
| Weight (with stand) | 26.5 kg |
| Power supply | 220-240 V, 50/60 Hz |
| Power consumption (standby) | 0.5 W |
| Maintenance | Clean with a soft, dry cloth. Do not use abrasive products. |
| Safety | Do not expose to rain or humidity. Keep away from heat sources. |
| Included accessories | Remote control, batteries (AAA), power cord, stand, screws |
| Repairability | Repairability index: 8.0/10 (estimate) |
| Manual available | French, English and 20 other languages on notice-facile.com |
Frequently Asked Questions - TX65HX700 PANASONIC
User questions about TX65HX700 PANASONIC
0 question about this device. Answer the ones you know or ask your own.
Ask a new question about this device
Download the instructions for your Television in PDF format for free! Find your manual TX65HX700 - PANASONIC and take your electronic device back in hand. On this page are published all the documents necessary for the use of your device. TX65HX700 by PANASONIC.
USER MANUAL TX65HX700 PANASONIC
Initial Setup / Satellite Installation
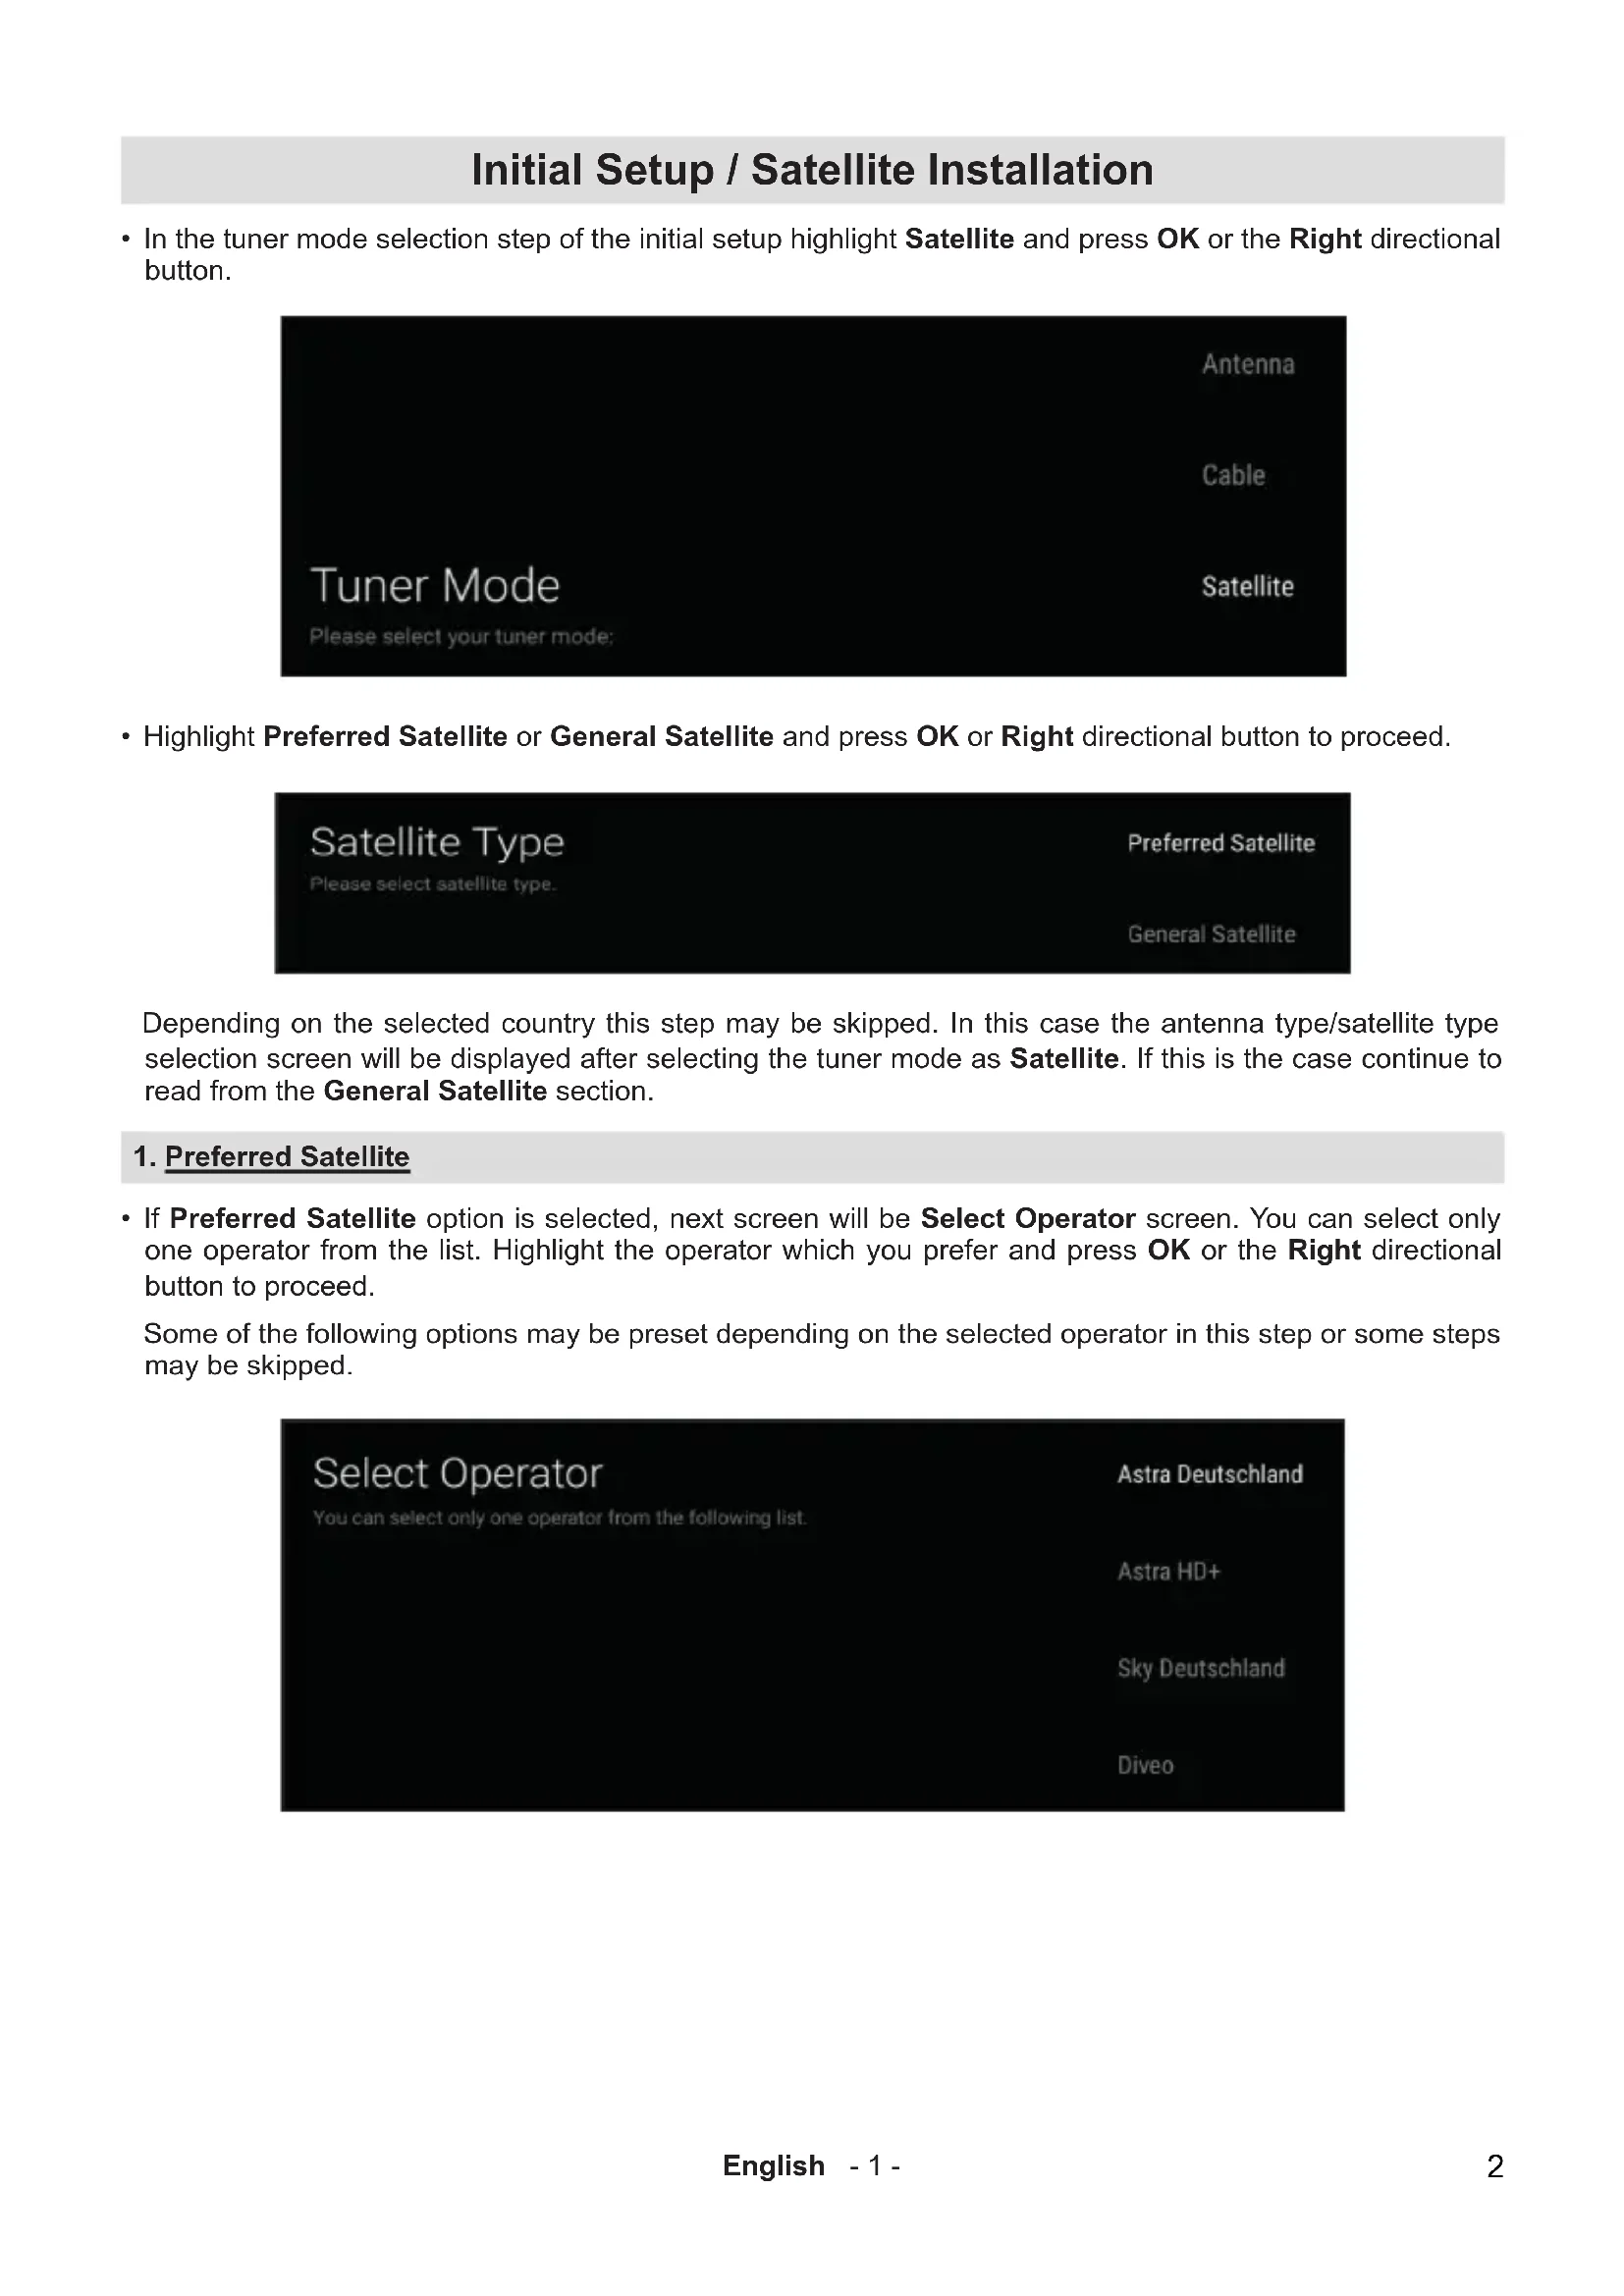
- In the tuner mode selection step of the initial setup highlight Satellite and press OK or the Right directional button.
- Highlight Preferred Satellite or General Satellite and press OK or Right directional button to proceed.

Depending on the selected country this step may be skipped. In this case the antenna type/satellite type selection screen will be displayed after selecting the tuner mode as Satellite. If this is the case continue to read from the General Satellite section.
1. Preferred Satellite
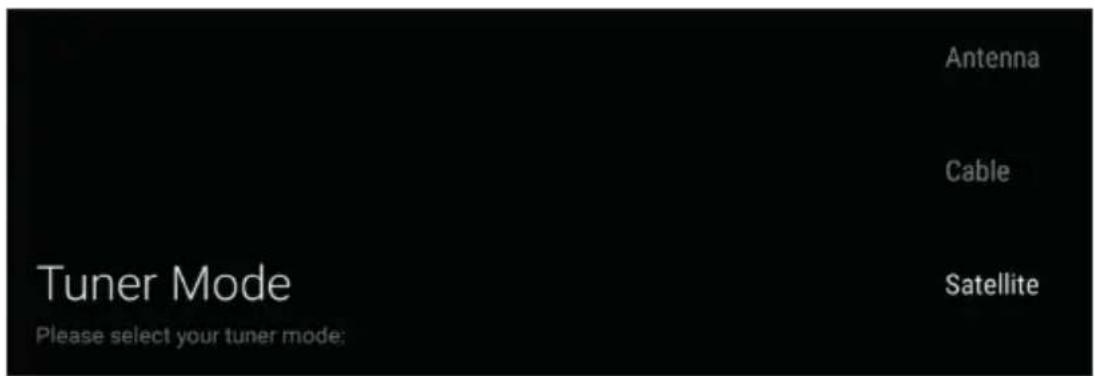
- If Preferred Satellite option is selected, next screen will be Select Operator screen. You can select only one operator from the list. Highlight the operator which you prefer and press OK or the Right directional button to proceed.
Some of the following options may be preset depending on the selected operator in this step or some steps may be skipped.
1.1. Antenna Type - Direct
- Set the antenna type/satellite type to Universal for Direct satellite system. Press OK, highlight Universal and press OK again.
Press the Right directional button to proceed.

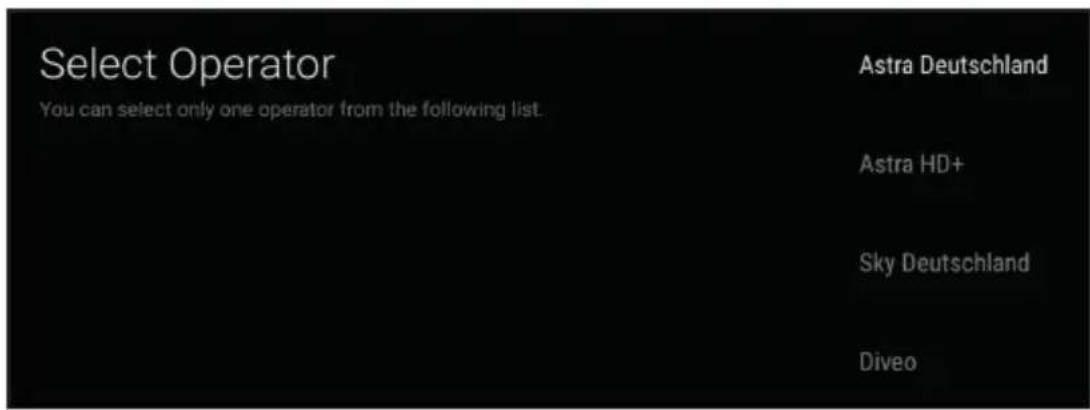
- The first satellite option will be preset in accordance with the selected operator. Press the Right directional button to proceed.
- Highlight Scan and press OK or Right directional button to proceed.
| Channel scan | Scan |
| First, please connect satellite. | |
| Start channel scan now? | |
| If you skip this step, the channel scan could be performed in menu. | Skip scan |
- The Scan Mode option will be preset to Network and cannot be changed. Highlight Channel and press OK. Highlight the option which you prefer for channel search and press OK. Press Right directional button to start the channel search.

1.2. Antenna Type - DiSEqC
- Set the antenna type/satellite type to Universal for DiSEqC satellite system. Press OK, highlight Universal and press OK again.
Press the Right directional button to proceed.

- The first satellite option will be preset in accordance with the selected operator. Highlight that satellite option and press OK. Highlight DiSEqC Set and press OK. DiSEqC 1.0 Port and DiSEqC 1.1 Port options will be available. Highlight the option that corresponds to your system and press OK. DiSEqC port options will be displayed. Highlight the port option to which the satellite of the selected operator is allocated and press OK. (A=1, B=2, C=3, D=4)
Press the Right directional button to proceed.
- Highlight Scan and press OK or Right directional button to proceed.
| Channel scan | Scan |
| First, please connect satellite. Start channel scan now? If you skip this step, the channel scan could be performed in menu. | Skip scan |
- The Scan Mode option will be preset to Network and cannot be changed. Highlight Channel and press OK. Highlight the option which you prefer and press OK.
Press Right directional button to start the channel search.

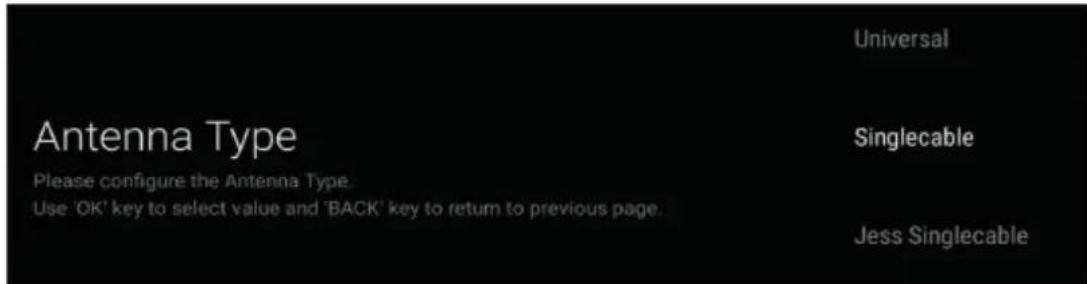
1.3. Antenna Type - Unicable
- Set the antenna type/satellite type to Singlecable or Jess Singlecable for Unicable satellite system.
Press OK, Singlecable and Jess Singlecable options will be available. Highlight the option that corresponds to your system and press OK. (Singlecable = Unicable 1, Jess Singlecable = Unicable 2)
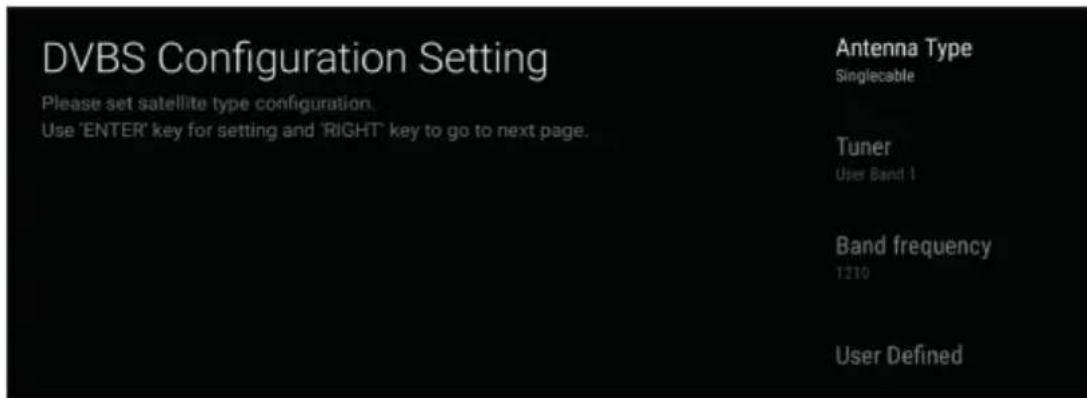
Highlight Tuner and press OK. Highlight the number of the user band which is allocated to your TV and press OK.
The Band frequency option will change in accordance with the Tuner(User Band) selection. If you need to change the frequency highlight Band frequency and press OK. Highlight the frequency of the user band which is allocated to your TV and press OK. If you need to define a different frequency highlight User defined option and press OK.
User defined option can be used if you set the Band frequency option accordingly. Highlight User defined and press OK. Enter the frequency using numeric buttons on the remote or use the virtual keyboard, then highlight the tick mark on the keyboard and press OK.
Press the Right directional button to proceed.
- The first satellite option will be preset in accordance with the selected operator.
Press the Right directional button to proceed.
- Highlight Scan and press OK or Right directional button to proceed.

- The Scan Mode option will be preset to Network and cannot be changed. Highlight Channel and press OK. Highlight the option which you prefer and press OK.
Press Right directional button to start the channel search.

2. General Satellite
2.1. Antenna Type - Direct
- Set the antenna type/satellite type to Universal for Direct satellite system. Press OK, highlight Universal and press OK again.

Press the Right directional button to proceed.
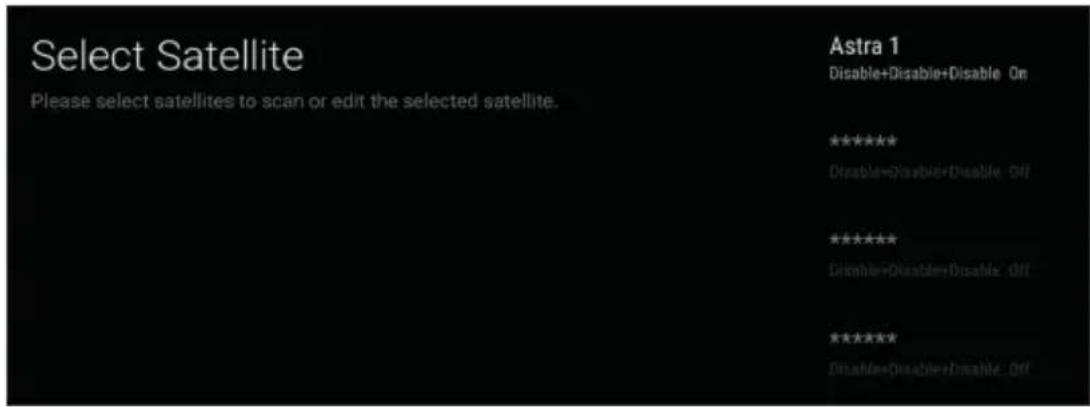
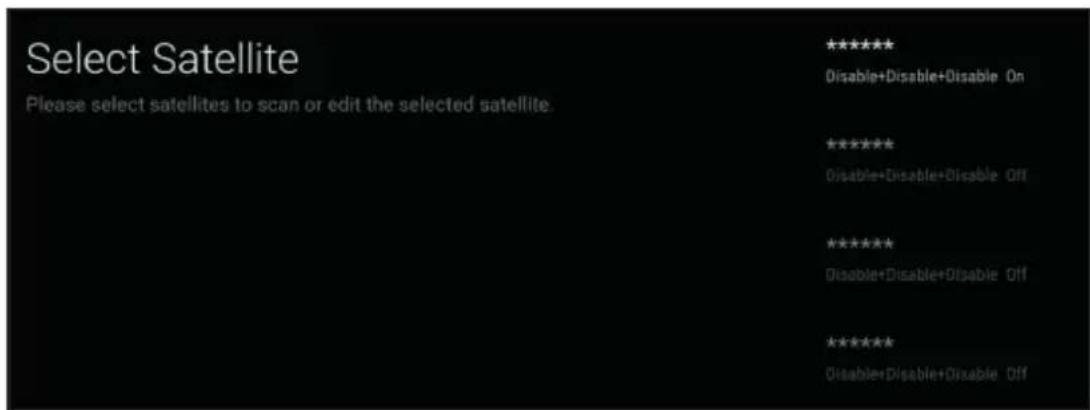
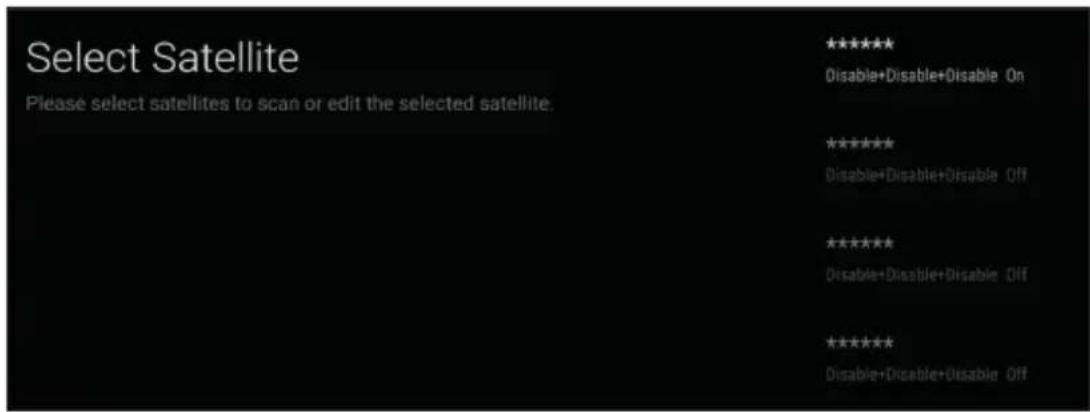
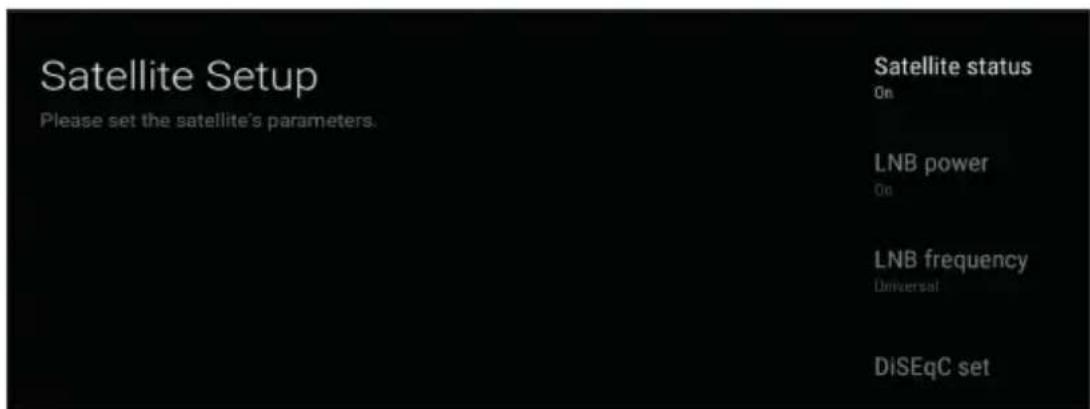
- The status of the first satellite option will appear as On.
If you are going to perform a network scan (Scan Mode=Network) make sure that you set the transponder parameters of the network in this step.
Highlight the satellite, the status of which appears as On, and press OK.
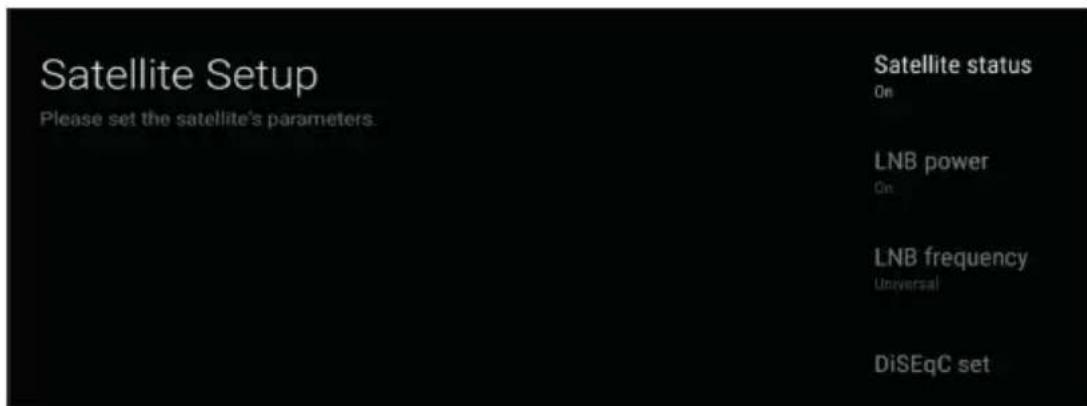
Highlight Transponder and press OK.
Set to Frequency, Symbol rate and Polarisation parameters according to the network. If you are going to perform a full scan (Scan Mode=Full) no actions are required here.
Press the Right directional button to proceed.
- Highlight Scan and press OK or Right directional button to proceed.

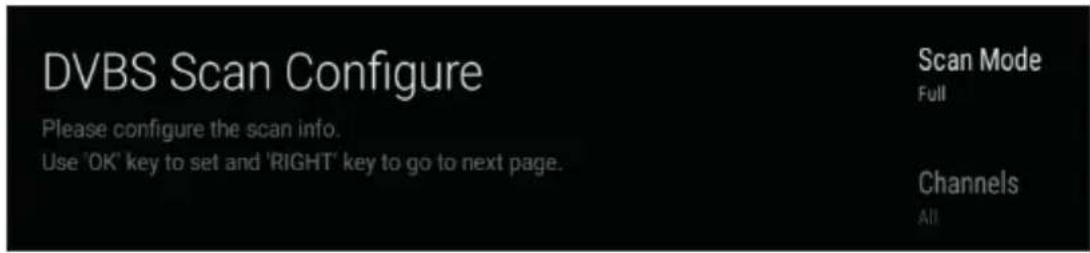
• Highlight Scan Mode and press OK.
Network and Full options will be available. Highlight the option which you prefer and press OK.
Then Highlight Channel and press OK.
All, Only encrypted channels and Free options will be available. Highlight the option which you prefer for channel search and press OK.
Press Right directional button to start the channel search.
While the search continues you can press the Back/Return button, highlight Skip Scan and press OK or Right directional button to stop the search. The channels that have already been found will be stored in the channel list.
2.2. Antenna Type - DiSEqC
- Set the antenna type/satellite type to Universal for DiSEqC satellite system. Press OK, highlight Universal and press OK again.

Press the Right directional button to proceed.
- The status of the first satellite option will appear as On.
Highlight that satellite option and press OK.
Highlight DiSEqC Set and press OK.
DiSEqC 1.0 Port and DiSEqC 1.1 Port options will be available. Highlight the option that corresponds to your system and press OK. DiSEqC port options will be displayed. Highlight the port option to which the satellite of the selected operator is allocated and press OK (A=1, B=2, C=3, D=4).
Press the Back/Return button to continue satellite setup.
If you are going to perform a network scan (Scan Mode=Network) make sure that you also set the transponder parameters of the network in this step.
Highlight Transponder and press OK.
Set to Frequency, Symbol rate and Polarisation parameters according to the network. If you are going to perform a full scan (Scan Mode=Full) you won't need to set the transponder parameters.
Press the Back/Return button twice to setup multiple satellites.
If you have multiple satellites connected to your system, set an option for each satellite in your system. You will need to set the Satellite Status option to On first. Then you will be able to set other parameters of your satellite. Set as mentioned above.
Press the Right directional button to proceed.
- Highlight Scan and press OK or Right directional button to proceed.
| Channel scan | Scan |
| First, please connect satellite. Start channel scan now? If you skip this step, the channel scan could be performed in menu. | Skip scan |
• Highlight Scan Mode and press OK.
Network and Full options will be available. Highlight the option which you prefer and press OK.
Then Highlight Channel and press OK.
All, Only encrypted channels and Free options will be available. Highlight the option which you prefer for channel search and press OK.

Press Right directional button to start the channel search.
While the search continues you can press the Back/Return button, highlight Skip Scan and press OK or Right directional button to stop the search. The channels that have already been found will be stored in the channel list.
2.3. Antenna Type - Unicable
- Set the antenna type/satellite type to Singlecable or Jess Singlecable for Unicable satellite system.
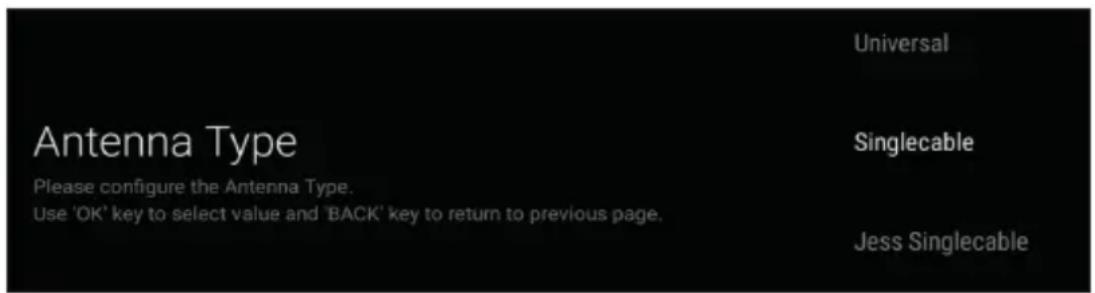
Press OK, Singlecable and Jess Singlecable options will be available. Highlight the option that corresponds to your system and press OK. (Singlecable = Unicable 1, Jess Singlecable = Unicable 2)

Highlight Tuner and press OK. Highlight the number of the user band which is allocated to your TV and press OK.
The Band frequency option will change in accordance with the Tuner(User Band) selection. If you need to change the frequency highlight Band frequency and press OK. Highlight the frequency of the user band which is allocated to your TV and press OK. If you need to define a different frequency highlight User defined option and press OK.
User defined option can be used if you set the Band frequency option accordingly. Highlight User defined and press OK. Enter the frequency using numeric buttons on the remote or use the virtual keyboard, then highlight the tick mark on the keyboard and press OK.
Press the Right directional button to proceed.
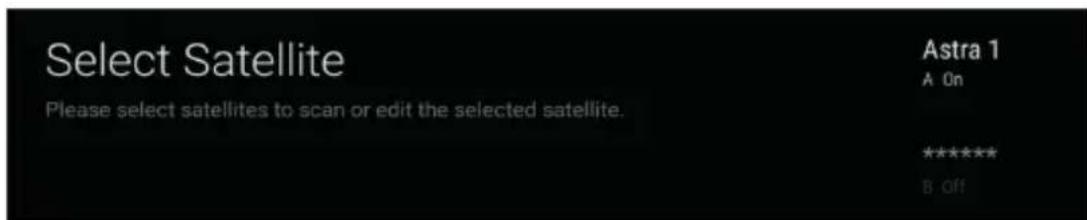
- The position of the first satellite option will appear as A and the status of it as On. If you need to change the position, highlight that satellite option and press OK. Highlight Position and press OK. Position options will be displayed. Highlight the option to which your satellite is allocated and press OK. (A=1, B=2, ...)
If you are going to perform a network scan (Scan Mode=Network) make sure that you also set the transponder parameters of the network in this step. Highlight Transponder and press OK. Set to Frequency, Symbol rate and Polarisation parameters according to the network. If you are going to perform a full scan (Scan Mode=Full) you won't need to set the transponder parameters.
If you have multiple satellites connected to your system, set an option for each satellite in your system. You will need to set the Satellite Status option to On first. Then you will be able to set other parameters of the satellite. Set as mentioned above.

Press the Right directional button to proceed.
- Highlight Scan and press OK or Right directional button to proceed.

- Highlight Scan Mode and press OK. Network and Full options will be available. Highlight the option which you prefer and press OK. Then Highlight Channel and press OK. All, Only encrypted channels and Free options will be available. Highlight the option which you prefer for channel search and press OK.

Press Right directional button to start the channel search.
While the search continues you can press the Back/Return button, highlight Skip Scan and press OK or Right directional button to stop the search. The channels that have already been found will be stored in the channel list.
| Csatornakeresés | Keresés |
| First, please connect múhold. | |
| Start channel scan now? | |
| If you skip this step, the channel scan could be performed in Menu. | Keresés kihagyása |
| Csatornakeresés | Keresés |
| First, please connect műhold. Start channel scan now? If you skip this step, the channel scan could be performed in Menu. | Keresés kihagyása |
| Kanavahaku | Hae |
| First, please connect satelliitti. Start channel scan now? If you skip this step, the channel scan could be performed in Menu. | Ohita haku |
| Kanavahaku | Hae |
| First, please connect satelliitti. Start channel scan now? If you skip this step, the channel scan could be performed in Menu. | Ohita haku |
| Scanning af kanaler | Scan |
| First, please connect satellit. Start channel scan now? If you skip this step, the channel scan could be performed in Menu | Spring scanning over |
| Scanning af kanaler | Scan |
| First, please connect satellit. Start channel scan now? If you skip this step, the channel scan could be performed in Menu. | Spring scanning over |
| Scanarea canalelor | Scanati |
| First, please connect satelit. Start channel scan now? If you skip this step, the channel scan could be performed in Menu. | Omiteti scanarea |
| Scanarea canalelor | Scanati |
| First, please connect satelit. Start channel scan now? If you skip this step, the channel scan could be performed in Menu. | Omiteti scanarea |
| Scanarea canalelor | Scanați |
| First, please connect satelit. Start channel scan now? If you skip this step, the channel scan could be performed in Menu. | Omiteți scanarea |
Brand : PANASONIC
Model : TX65HX700
Category : Television