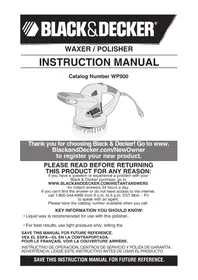
WP900 - Grinder BLACK & DECKER - Free user manual and instructions
Find the device manual for free WP900 BLACK & DECKER in PDF.

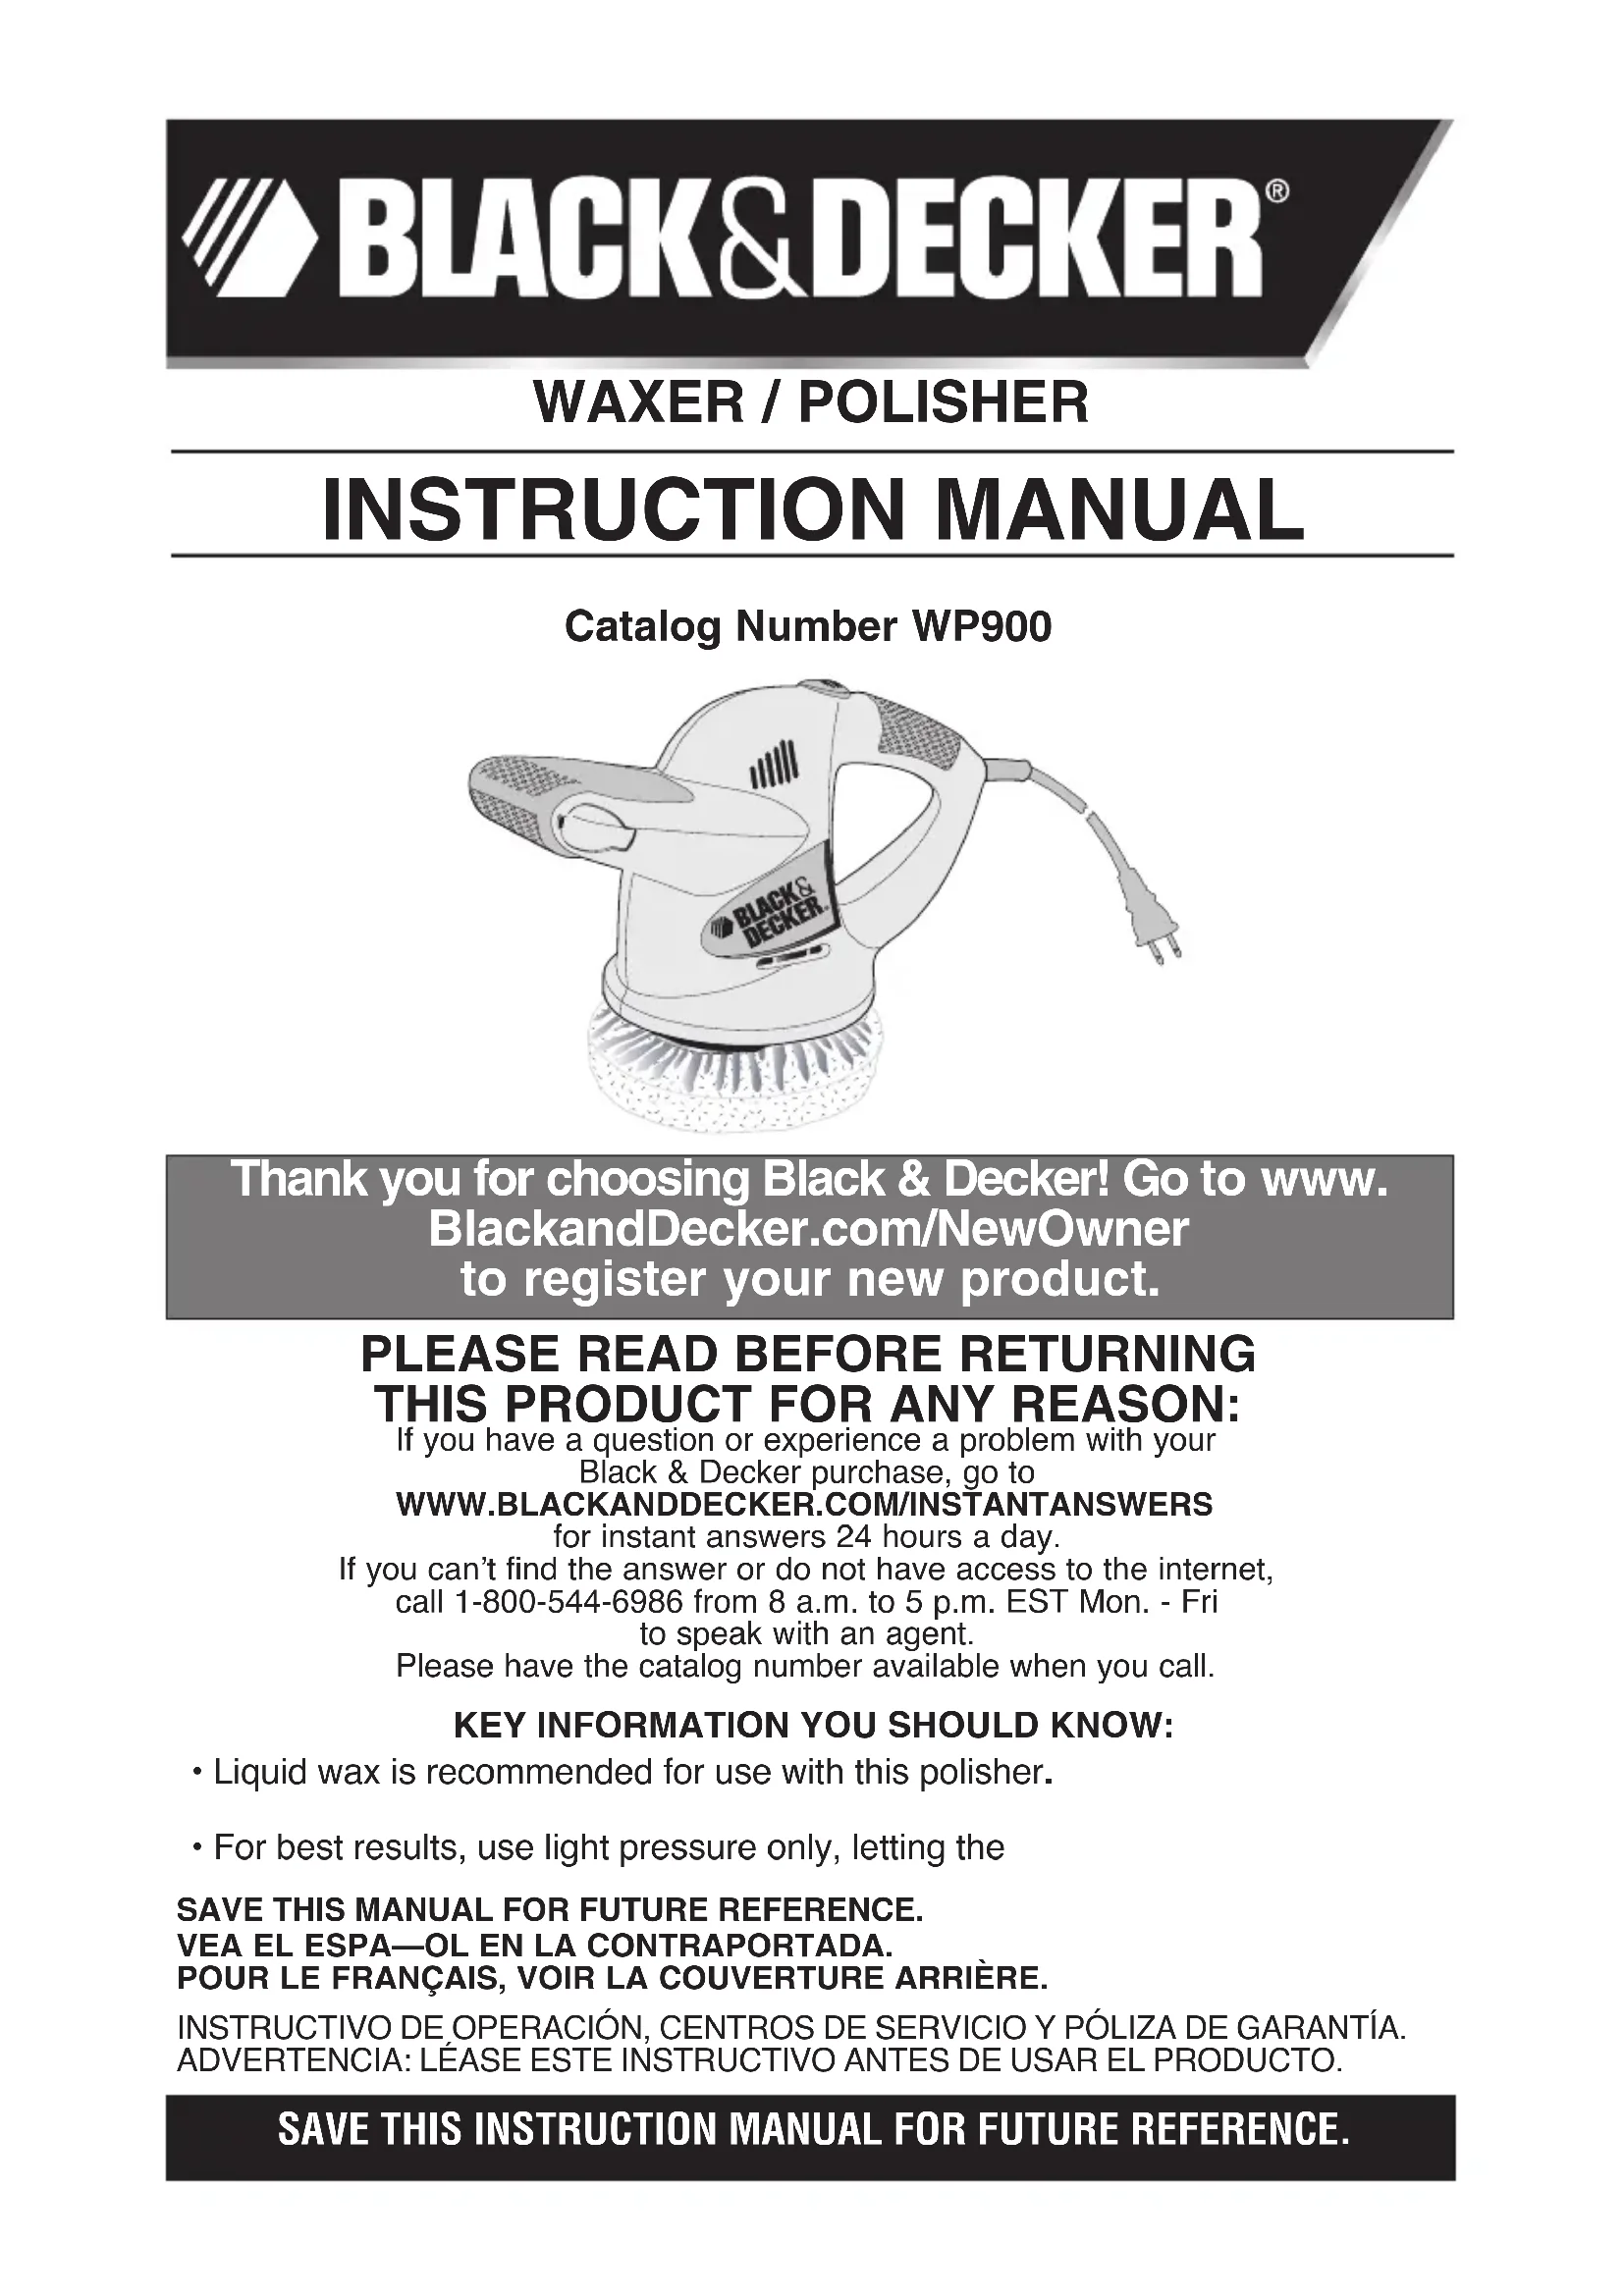


| Brand | Black & Decker |
| Model | WP900 |
| Product Type | Orbital Polisher |
| Power Supply | 120 V, 60 Hz, AC |
| Rated Current | 6 A |
| Motor | AC Electric Motor |
| Included Accessories | Pad, foam applicator (single-use), wool polishing bonnet |
| Recommended Use | Polishing flat surfaces: car bodies, wood floors, furniture, boats |
| Recommended Wax Type | Liquid wax |
| Safety | On/off switch, insulated gripping surfaces, eye and hearing protection recommended |
| Maintenance | Clean with mild soap and damp cloth; do not immerse |
| Warranty | 2 years for domestic use |
| Approximate Weight | 2.5 kg |
| Approximate Dimensions | 30 x 20 x 15 cm |
| Noise Level | Hearing protection required |
| Repairability | Black & Decker authorized repair center |
Frequently Asked Questions - WP900 BLACK & DECKER
User questions about WP900 BLACK & DECKER
0 question about this device. Answer the ones you know or ask your own.
Ask a new question about this device
Download the instructions for your Grinder in PDF format for free! Find your manual WP900 - BLACK & DECKER and take your electronic device back in hand. On this page are published all the documents necessary for the use of your device. WP900 by BLACK & DECKER.
USER MANUAL WP900 BLACK & DECKER
Thank you for choosing Black & Decker! Go to www.BlackandDecker.com/NewOwner to register your new product.
PLEASE READ BEFORE RETURNING THIS PRODUCT FOR ANY REASON:
If you have a question or experience a problem with your Black & Decker purchase, go to
WWW.BLACKANDDECKER.COM/INSTANTANSWERS
for instant answers 24 hours a day. If you can't find the answer or do not have access to the internet, call 1-800-544-6986 from 8 a.m. to 5 p.m. EST Mon. - Fri to speak with an agent.
Please have the catalog number available when you call.
KEY INFORMATION YOU SHOULD KNOW:
- Liquid wax is recommended for use with this polisher.
- For best results, use light pressure only, letting the
SAVE THIS MANUAL FOR FUTURE REFERENCE.
VEA EL ESPA—OL EN LA CONTRAPORTADA.
POUR LE FRANÇAIS, VOIR LA COUVERTURE ARRIÈRE.
INSTRUCTIVO DE OPERACION, CENTROS DE SERVICIO Y POLIZA DE GARANTIA. ADVERTENCIA: LÉASE ESTE INSTRUCTIVO ANTES DE USAR EL PRODUCTO.
SAVE THIS INSTRUCTION MANUAL FOR FUTURE REFERENCE.
SAFETY GUIDELINES - DEFINITIONS
It is important for you to read and understand this manual. The information it contains relates to protecting YOUR SAFETY and PREVENTING PROBLEMS. The symbols below are used to help you recognize this information.
DANGER: Indicates an imminently hazardous situation which, if not avoided, will result in death or serious injury.
WARNING: Indicates a potentially hazardous situation which, if not avoided, could result in death or serious injury.
CAUTION: Indicates a potentially hazardous situation which, if not avoided, may result in minor or mod er ate injury.
NOTICE: Used without the safety alert symbol indicates potentially hazardous situation which, if not avoided, may result in property damage.
General Power Tool SafetyWarnings
WARNING: Read all safety warnings and all instructions.
Failure to follow the warnings and instructions may result in electric shock, fire and/or serious injury.
SAVE ALL WARNINGS AND INSTRUCTIONS FOR FUTURE REFERENCE
The term "power tool" in the warnings refers to your mains-operated (corded) power tool or battery-operated (cordless) power tool.
1) WORK AREA SAFETY
a) Keep work area clean and well lit. Cluttered or dark areas invite accidents.
b) Do not operate power tools in explosive atmospheres, such as in the presence of flammable liquids, gases or dust. Power tools create sparks which may ignite the dust or fumes.
c) Keep children and bystanders away while operating a power tool. Distractions can cause you to lose control.
2) ELECTRICAL SAFETY
a) Power tool plugs must match the outlet. Never modify the plug in any way. Do not use any adapter plugs with earthed (grounded) power tools. Unmodified plugs and matching outlets will reduce risk of electric shock.
b) Avoid body contact with earthed or grounded surfaces such as pipes, radiators, ranges and refrigerators. There is an increased risk of electric shock if your body is earthed or grounded.
c) Do not expose power tools to rain or wet conditions. Water entering a power tool will increase the risk of electric shock.
d) Do not abuse the cord. Never use the cord for carrying, pulling or unplugging the power tool. Keep cord away from heat, oil, sharp edges or moving parts. Damaged or entangled cords increase the risk of electric shock.
e) When operating a power tool outdoors, use an extension cord suitable for outdoor use. Use of a cord suitable for outdoor use reduces the risk of electric shock.
f) If operating a power tool in a damp location is unavoidable, use a ground fault circuit interrupter (GFCI) protected supply. Use of a GFCI reduces the risk of electric shock.
3) PERSONAL SAFETY
a) Stay alert, watch what you are doing and use common sense when operating a power tool. Do not use a power tool while you are tired or under the influence of drugs, alcohol or medication. A moment of inattention while operating power tools may result in serious personal injury.
b) Use personal protective equipment. Always wear eye protection. Protective equipment such as dust mask, nonskid safety shoes, hard hat, or hearing protection used for appropriate conditions will reduce personal injuries.
c) Prevent unintentional starting. Ensure the switch is in the off position before connecting to power source and/ or battery pack, picking up or carrying the tool. Carrying power tools with your finger on the switch or energizing power tools that have the switch on invites accidents.
d) Remove any adjusting key or wrench before turning the power tool on. A wrench or a key left attached to a rotating part of the power tool may result in personal injury.
e) Do not overreach. Keep proper footing and balance at all times. This enables better control of the power tool in unexpected situations.
f) Dress properly. Do not wear loose clothing or jewelry. Keep your hair, clothing and gloves away from moving parts. Loose clothes, jewelry or long hair can be caught in moving parts.
g) If devices are provided for the connection of dust extraction and collection facilities, ensure these are connected and properly used. Use of dust collection can reduce dust-related hazards.
4) POWER TOOL USE AND CARE
a) Do not force the power tool. Use the correct power tool for your application. The correct power tool will do the job better and safer at the rate for which it was designed.
b) Do not use the power tool if the switch does not turn it on and off. Any power tool that cannot be controlled with the switch is dangerous and must be repaired.
c) Disconnect the plug from the power source and/or the battery pack from the power tool before making any adjustments, changing accessories, or storing power tools. Such preventive safety measures reduce the risk of starting the power tool accidentally.
d) Store idle power tools out of the reach of children and do not allow persons unfamiliar with the power tool or these instructions to operate the power tool. Power tools are dangerous in the hands of untrained users.
e) Maintain power tools. Check for misalignment or binding of moving parts, breakage of parts and any other condition that may affect the power tool's operation. If damaged, have the power tool repaired before use. Many accidents are caused by poorly maintained power tools.
f) Keep cutting tools sharp and clean. Properly maintained cutting tools with sharp cutting edges are less likely to bind and are easier to control.
g) Use the power tool, accessories and tool bits, etc. in accordance with these instructions, taking into account the working conditions and the work to be performed. Use of the power tool for operations different from those intended could result in a hazardous situation.
5) SERVICE
a) Have your power tool serviced by a qualified repair person using only identical replacement parts. This will ensure that the safety of the power tool is maintained.
Specific Safety Rules
- Hold tool by insulated gripping surfaces when performing an operation where the cutting tool may contact hidden wiring or its own cord. Contact with a "live" wire will make exposed metal parts of the tool "live" and shock the operator.
- Accessories must be rated for at least the speed recommended on the tool warning label. Wheels and other accessories running over rated speed can fly apart and cause injury.
WARNING: Some dust created by power sanding, sawing, grinding, drilling, and other construction activities contains chemicals known to the State of California to cause cancer, birth defects or other reproductive harm. Some examples of these chemicals are:
- lead from lead-based paints,
crystalline silica from bricks and cement and other masonry products, and - arsenic and chromium from chemically-treated lumber.
Your risk from these exposures varies, depending on how often you do this type of work. To reduce your exposure to these chemicals: work in a well ventilated area, and work with approved safety equipment, such as those dust masks that are specially designed to filter out microscopic particles.
- Avoid prolonged contact with dust from power sanding, sawing, grinding, drilling, and other construction activities. Wear protective clothing and wash exposed areas with soap and water. Allowing dust to get into your mouth, eyes, or lay on the skin may promote absorption of harmful chemicals.
WARNING: Use of this tool can generate and/or disperse dust, which may cause serious and permanent respiratory or other injury. Always use NIOSH/OSHA approved respiratory protection appropriate for the dust exposure. Direct particles away from face and body.
Always wear eye protection.
- Be sure bonnet is snugly installed on pad.
- Keep hands and fingers away from rotating bonnet.
Before turning the switch to the ON position, be sure the pad is free to revolve harmlessly.
Inspect the bonnet frequently for wear, dirt or imbedded debris.
CAUTION: Do not allow the power cord to contact the rotating bonnet as it may become quickly tangled around it. If this occurs, turn tool OFF and unplug the power cord before attempting to untangle the cord. If the cord is damaged, have it repaired or replaced at your local tool repair station.
- Never use a damaged or torn bonnet.
Wear proper clothing, short sleeves, nothing loose or bulky, such as shop coat, etc. - Do not turn tool on unless the polishing bonnet is against surface being polished.
- Be extremely careful when polishing around sharp or protruding objects on the car body.
This product is designed as a polisher only. Do not use as a sander.
CAUTION: Do not use abrasive or rubbing compounds. The abrasive nature of these products can damage painted surfaces.
CAUTION: Wear appropriate hearing protection during use. Under some conditions and duration of use, noise from this product may contribute to hearing loss.
SYMBOLS
The label on your tool may include the following symbols.
V. volts
Hz.....hertz
min............minutes
--- direct current
Class II Construction
.. safety alert symbol
A. amperes
W... .watts
...alternating current
no no load speed
earthing terminal
.../min . . . . . . . . . . . . . . . . . . . . . . . . . . . . . . . . . . . . . . . . . . revolutions or reciprocations per minute
SAVE THESE INSTRUCTIONS

Descriptions Figure 1
A. Pad
B. Front handle
C. On/Off switch
D. End handle
E. Foam applicator bonnet
F. Polishing Bonnet




USE OF EXTENSION CORDS
Make sure the extension cord is in good condition before using. Always use the proper size extension cords with the tool - that is, proper wire size for various lengths of cord and heavy enough to carry the current the tool will draw. Use of an undersized cord will cause a drop in line voltage resulting in loss of power and overheating. For proper size cords see
chart below.
| Minimum Gauge for Cord Sets Volts Total Length of Cord in Feet | |||||
| 120V | 0-25 | 26-50 | 51-100 | 101-150 | |
| (0-7,6m) | (7,6-15,2m) | (15,2-30,4m) | (30,4-45,7m) | ||
| 240V | 0-50 | 51-100 | 101-200 | 201-300 | |
| (0-15,2m) | (15,2-30,4m) | (30,4-60,9m) | (60,9-91,4m) | ||
| Ampere Rating | |||||
| More | Not more | American Wire Gauge | |||
| Than | Than | ||||
| 0 | 6 | 18 | 16 | 16 | 14 |
| 6 | 10 | 18 | 16 | 14 | 12 |
| 10 | 12 | 16 | 16 | 14 | 12 |
| 12 | 16 | 14 | 12 | Not Recommended | |
MOTOR
Be sure your power supply agrees with nameplate marking. 120 Volts AC only means your tool will operate on standard 60Hz household power. Do not operate AC tools on DC.
A rating of 120 volts AC/DC means that you tool will operate on standard 60Hz AC or DC power. This information is printed on the nameplate. Lower voltage will cause loss of power and can result in over-heating. All Black & Decker tools are factory-tested; if this tool does not operate, check the power supply.
Assembly and Adjustment
CAUTION: Turn off and unplug from power supply.
FITTING THE FOAM APPLICATOR OR POLISHING BONNET (FIG. 2)
Place the foam applicator bonnet (E) or polishing bonnet (F) on pad (A) as shown. Make sure the elastic is tucked down securely and evenly around the underside of the pad.
Before Operation
NOTE: Although this discussion deals with polishing a car, your polisher is capable of polishing a wide array of flat surfaces such as hardwood floors, furniture, boats and other surfaces that could use an occasional shine.
Before you begin, make sure the car is clean and dry. The work area should be dry also. If necessary, remove road tar with a general cleaner before polishing. Also remove excess grease spots, bug stains, etc.
Using Liquid Wax and Paste Wax
Black and Decker recommends the use of liquid wax with this polisher.
Using Liquid Wax (FIG. 3)
Apply three swirls of liquid wax on the foam applicator bonnet (E).
DO NOT APPLY WAX DIRECTLY TO CAR. This first application should do about 1/4 of the car. For the second and third applications of wax, use half the quantity stated above.
The bonnet will not absorb as much when reloading.
Using Paste Wax (FIG. 4)
Spread about a heaping teaspoonful of wax evenly over the entire surface of the foam applicator bonnet (E). Use a putty knife or any flat object.
DO NOT APPLY WAX DIRECTLY TO CAR.
Operation (Figs. 5, 6, 7, 8)
- Fit the foam applicator bonnet (E) on pad (A).
- MAKE SURE THE POLISHER IS IN THE OFF ("0") POSITION BEFORE PLUGGING THE POLISHER INTO AN APPROPRIATE POWER OUTLET.
- Apply wax on the foam applicator bonnet (E) as described on "Using Liquid Wax and Paste Wax" section above.
- To switch your polisher on, press the on/off switch (C) on the side marked "l". To switch it off press the on/off switch on the side marked "0".
- ALWAYS START AND STOP THE POLISHER ON OR AGAINST THE SURFACE.
Place the cord over your shoulder and do flat surfaces first - hood, trunk and roof. Cover areas quickly with broad, sweeping strokes in a criss-cross pattern (Fig. 5).
-
DO NOT press down on the polishers. The machine's action, not pressure, does the best job.
-
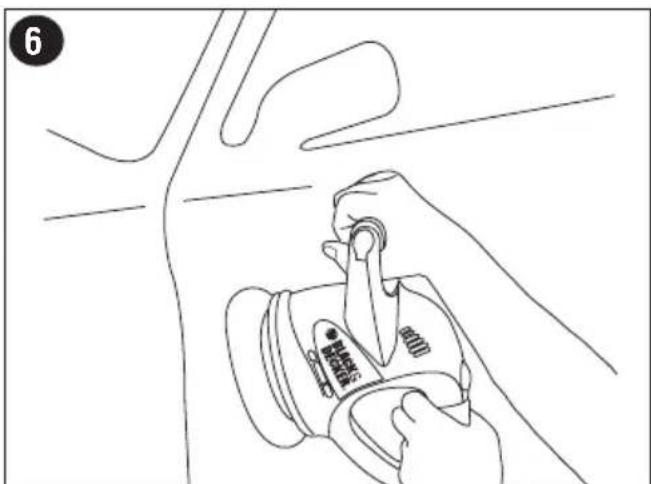
After flat surfaces are covered with wax, do sides of the car. Hold the polisher as in Figure 6. Let the cord hang free. It is not necessary to use a criss-cross motion on doors and fenders.
- Remove the foam applicator bonnet (E) and use it to hand polish all hard to reach surfaces, under the bumpers, around the door handles, etc. as shown in Figure 7.
- Throw away the foam applicator bonnet (E) and put a clean polishing bonnet (F) on the polisher as described in the section "Fitting the Foam Applicator or Polishing Bonnet (Fig. 2) above.
Polish the wax in the same order it was applied. Use long, sweeping strokes in a crisscross pattern. Do not press hard. Let the polisher do the work(Fig. 8).
Handy Hints
This waxer/polisher is a random orbit polisher. it is designed to wobble. The wobbling motion produces the fine, swirl free finish.
- For best results, use light pressure only, letting the polisher do the work.
Exercise caution around edges, corners or small surface areas. Prolonged polishing on edges and corners can damage these areas.
Polishing bonnet (F) can be hand washed in warm water and mild detergent. It can be machine dried at the lowest setting however air drying is recommended.
Foam applicator bonnets (E) are to be used only once, then thrown away.
DO NOT USE ABRASIVE COMPOUNDS. Liquid wax is recommended to use with this polisher.
The most common error is applying too much wax. If pad becomes saturated, it will not last as long and polishing will be more difficult and take longer.
Too much wax may have been applied if:
- foam applicator bonnet continually comes off pad;
- buffing seems difficult.
The polishing bonnet is only to be used for the final buff. Do not use it to apply wax.
MAINTENANCE
Use only mild soap and damp cloth to clean the tool. Never let any liquid get inside the tool; never immerse any part of the tool into a liquid.
To prolong pad life and shape, always store polisher with pad face up.
Remove bonnet from pad when polisher is not in use so that pad can dry out and retain its original shape.
IMPORTANT: To assure product SAFETY and RELIABILITY, repairs, maintenance and adjustment (other than those listed in this manual) should be performed by authorized service centers or other qualified service organizations, always using identical replacement parts.
TROUBLESHOOTING
| Problem | Possible Cause | Possible Solution | ||
| · Unit will not start. · Cord not plugged in. · Circuit fuse is blown. · Replace circuit fuse. (If the product repeatedly causes the circuit fuse to blow, and have it serviced at a Black & Decker servicer.) · Circuit breaker is · Reset circuit breaker. tripped. (If the product repeatedly causes the circuit breaker to tripped. | · Cord not plugged in. · Plug tool into a working outlet. · Replace circuit fuse. (If the product repeatedly causes the circuit fuse to blow, and have it serviced at a Black & Decker servicer.) · Reset circuit breaker. (If the product repeatedly causes the circuit breaker to tripped. | · Cord not plugged in. · Plug tool into a working outlet. · Replace circuit fuse. (If the product repeatedly causes the circuit fuse to blow, and have it serviced at a Black & Decker servicer.) · Reset circuit breaker. (If the product repeatedly causes the circuit breaker to tripped. | · Cord not plugged in. · Plug tool into a working outlet. · Replace circuit fuse. (If this product repeatedly causes the circuit fuse to blow, and have it serviced at a Black & Decker servicer.) · Reset circuit breaker. (If this product repeatedly causes the circuit breaker to tripped. | · Cord not plugged in. · Plug tool into a working outlet. · Replace circuit fuse. (If this product repeatedly causes the circuit fuse to blow, and have it serviced at a Black & Decker servicer.) · Reset circuit breaker. (If this product repeatedly causes the circuit breaker to tripped. |
For assistance with your product, visit our website www.blackanddecker.com for the location of the service center nearest you or call the BLACK & DECKER help line at 1-800-544-6986.
ACCESSIONS
Recommended accessories for use with your tool are available from your authorized service center. If you need assistance regarding accessories, please call: 1-800-544-6986 WARNING: The use of any accessory not recommended for use with this tool could be hazardous. Do not use bonnets that tie with a string. The WP900 polisher is designed for use with bonnets that use an elastic band to hold them on the platen.
SERVICE INFORMATION
All Black & Decker Service Centers are staffed with trained personnel to provide customers with efficient and reliable power tool service. Whether you need technical advice, repair, or genuine factory replacement parts, contact the Black & Decker location nearest you. To find your local service location, refer to the yellow page directory under "Tools-Electric" or call: 1-800-544-6986 or visit www.blackanddecker.com
FULL TWO-YEAR HOME USE WARRANTY
Black & Decker (U.S.) Inc. warrants this product for two years against any defects in material or workmanship. The defective product will be replaced or repaired at no charge in either of two ways.
The first, which will result in exchanges only, is to return the product to the retailer from whom it was purchased (provided that the store is a participating retailer). Returns should be made within the time period of the retailer's policy for exchanges (usually 30 to 90 days after the sale). Proof of purchase may be required. Please check with the retailer for their specific return policy regarding returns that are beyond the time set for exchanges.
The second option is to take or send the product (prepaid) to a Black & Decker owned or authorized Service Center for repair or replacement at our option. Proof of purchase may be required. Black & Decker owned and authorized Service Centers are listed under "Tools-Electric" in the yellow pages of the phone directory and on our website www.blackanddecker.com.
This warranty does not apply to accessories. This warranty gives you specific legal rights and you may have other rights which vary from state to state. Should you have any questions, contact the manager of your nearest Black & Decker Service Center. This product is not intended for commercial use.
LATIN AMERICA: This warranty does not apply to products sold in Latin America. For products sold in Latin America, check country specific warranty information contained in the packaging, call the local company or see the website for warranty information.
FREE WARNING LABEL REPLACEMENT: If your warning labels become illegible or are missing, call 1-800-544-6986 for a free replacement.
Black & Decker (U.S.) Inc., 701 E. Joppa Rd. Towson, MD 21286 U.S.A.

BlackandDecker.com 1-800-544-6986
See 'Tools-Electric'
- Yellow Pages - for Service & Sales

CIREUSE/POLISSEUSE MODE D'EMPLOI
Col. Americana, S. Juarez
Guadalajara, Jalisco
Tel. 01 33 38 25 69 78
Col. Fracc. Universidad
Chihuahua, Chihuahua
Tel. 01 614 413 64 04
Fernando González Armenta
Bolivia No. 605
Col. Felipe Carrillo Puerto
Cd. Madero, Tampico
Tel. 01 833 221 34 50



- PLEASE READ BEFORE RETURNING THIS PRODUCT FOR ANY REASON:
- KEY INFORMATION YOU SHOULD KNOW:
- SAFETY GUIDELINES - DEFINITIONS
- General Power Tool SafetyWarnings
- 4) POWER TOOL USE AND CARE
- 5) SERVICE
- Specific Safety Rules
- SYMBOLS
- SAVE THESE INSTRUCTIONS
- Descriptions Figure 1
- USE OF EXTENSION CORDS
- MOTOR
- Assembly and Adjustment
- FITTING THE FOAM APPLICATOR OR POLISHING BONNET (FIG. 2)
- Before Operation
- Using Liquid Wax and Paste Wax
- Using Liquid Wax (FIG. 3)
- Using Paste Wax (FIG. 4)
- Operation (Figs. 5, 6, 7, 8)
- Handy Hints
- MAINTENANCE
- TROUBLESHOOTING
- ACCESSIONS
- SERVICE INFORMATION
- FULL TWO-YEAR HOME USE WARRANTY
- CIREUSE/POLISSEUSE MODE D'EMPLOI
Brand : BLACK & DECKER
Model : WP900
Category : Grinder