
Starfish S11286 - Recessed LED lighting Satco - Free user manual and instructions
Find the device manual for free Starfish S11286 Satco in PDF.

User questions about Starfish S11286 Satco
0 question about this device. Answer the ones you know or ask your own.
Ask a new question about this device
Download the instructions for your Recessed LED lighting in PDF format for free! Find your manual Starfish S11286 - Satco and take your electronic device back in hand. On this page are published all the documents necessary for the use of your device. Starfish S11286 by Satco.
USER MANUAL Starfish S11286 Satco
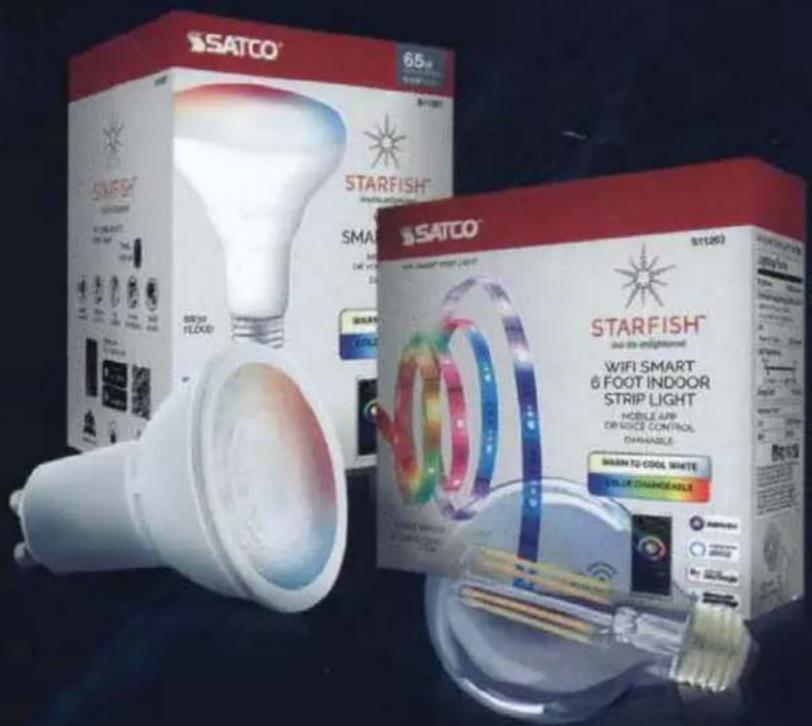
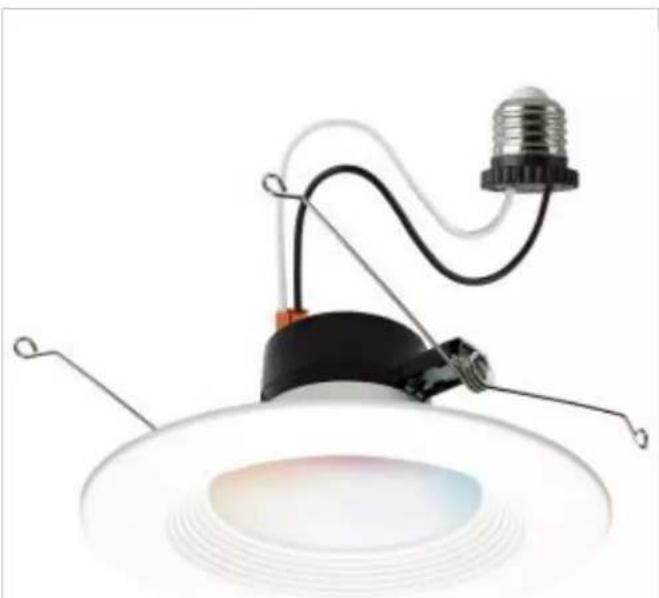
STARFISH™ SMART WIFI LED RETROFIT DOWNLIGHTS
Model: S11568, S11569, S11570, S11571
INSTALLATION AND SAFETY INSTRUCTIONS
IMPORTANT: Read before installing fixture. Retain for future reference.
STARFISH
live life enlightened
WARNING: Risk of Fire or Electric Shock
- LED Retrofit Kit installation requires knowledge of luminaries electrical systems. If not qualified, do not attempt installation. Contact a qualified electrician.
To reduce risk of fire and over-heating, secure all connections. - TURNOFF the electrical power before proceeding.
- Install this kit only in luminaires that have the construction features and dimensions shown in the photographs and/or drawings and where the input rating of the retrofit kit does not exceed the input rating of the luminaire.
The electrical rating of this product is 120V / 60Hz - To prevent wiring damage or abrasion, do not expose wiring to edges of sheet metal or other sharp objects.
- Do not make or alter any open holes in an enclosure of wiring or electrical components during kit installation.
- This retrofit kit is accepted as a component of a luminaire where the suitability of the combination shall be determined by authorities having jurisdiction.
This device is not intended for use with emergency exits. - Suitable for wet locations, covered ceiling-mounted luminaire.
S11568:4" (101mm)
S11570: 5^ / 6^ (152mm)
S11569:4" (101mm)
S11571: 5^ / 6^ (152mm)
INSTALLATION
STEP 1: Turn OFF power prior to installation.
STEP 2: Remove existing trim installed in recessed housing (if necessary).
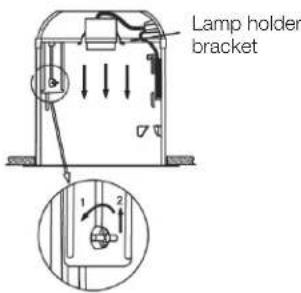
STEP 3: If applicable, slide lamp holder bracket to its upward maximum position. If the lamp holder bracket is less than 41/2'' from the bottom edge of the fixture enclosure, the lamp holder bracket must be removed.
STEP 4: If necessary, remove the lamp holder mounting bracket and the lamp holder from the bracket, then attach the provided label to the existing luminaire. See Figure A.
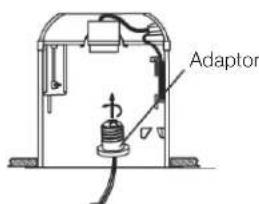
STEP 5: Install adapter into socket. See Figure B.
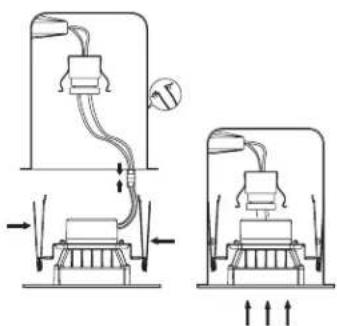
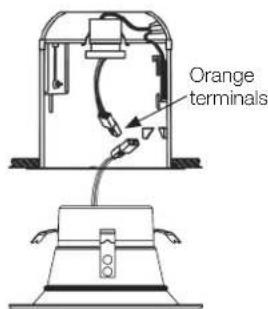
STEP 6: Connect the orange terminals together. See Figure C.
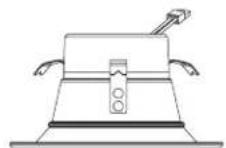
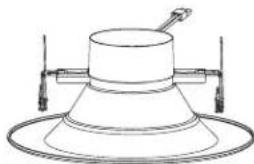
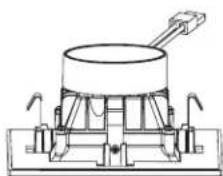
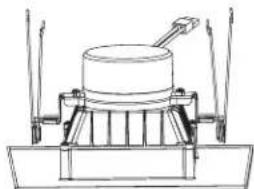
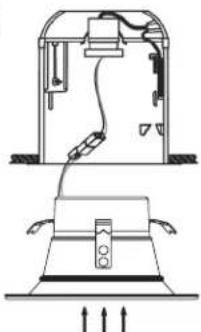
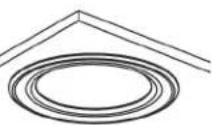
STEP 7: To install the 4^ downlight, slide the downlight up into the recessed housing. Push the trim until the outer edge is flush with the ceiling surface. See Figures D & F.
STEP 8: To install the 5''/6'' downlight, insert torsion springs into luminaire housing brackets. Gently push up trim and slide the LED downlight up into the recessed housing until the trim is flush with the ceiling. See Figures E & F.
STEP 9: Installation is complete. Turn power ON.
STEP 10: App Connection: To connect your device, download the free "Starfish Smart Lighting" App from the app store. Please refer to our Starfish User Guide for detailed instructions on how to pair your device.
For Installation into existing recessed LED luminaire with compatible connectors:
- Follow STEPS 1 and 2 above.
STEP 3: Discard medium base adapter. - Skip STEPS 4 and 5 above. Continue with STEPS 6 - 9 above.

Download the STARFISH App
A
D
B
E
C
F
ESPANOL:
STARFISH WIFINTELIGENTE
RETROADAPTACION LED DESCENDIENTE
Modelo: S11568, S11569, S11570, S11571
- Minimum iOS 9.3 or Wi-Fi 4.4
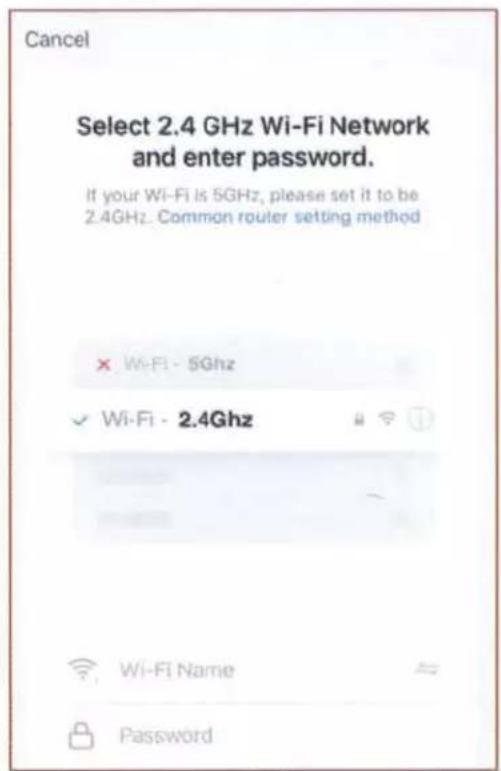
Dedicated 2.4GHz Wi-Fi Network
TECHINCAL SUPPORT
support@satcostarfish.com
1 DOWNLOAD THE STARFISH APP

GET IT ON
Google Play

Download on the
App Store
(App design is subject to change without notice.)
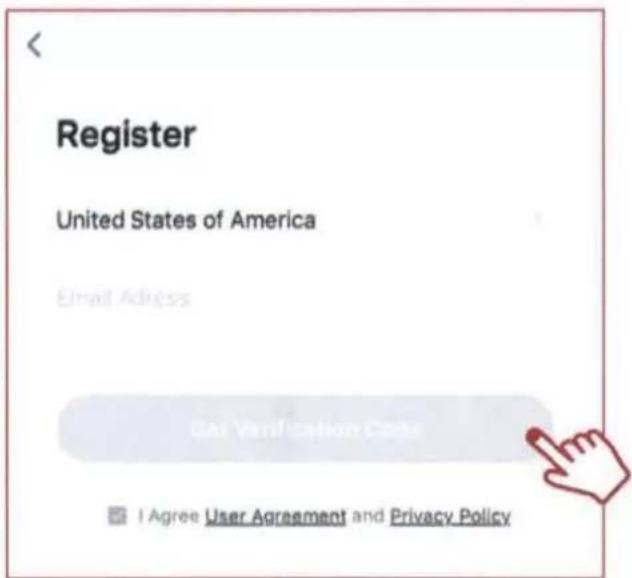
REGISTER YOUR ACCOUNT
Verify you're connected to a 2.4GHz Wi-Fi Network.
2
Launch the STARFISH app and tap "Sign-up" to create a new account or "Login" to your existing account.
3
Enter email address, then select "Get verification code".
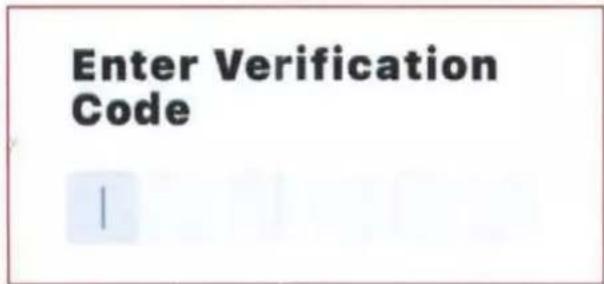
4
Enter verification code that was sent to your email.
CREATE A HOME
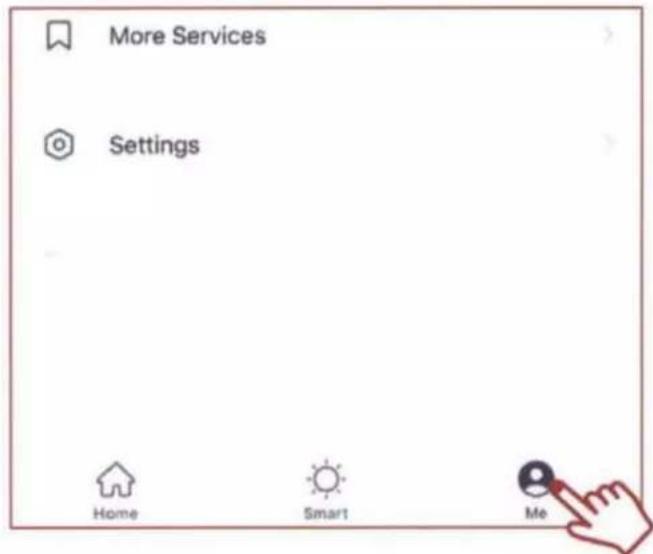
5
Tap the "Me" button at the bottom of the screen, and then "Home Management".
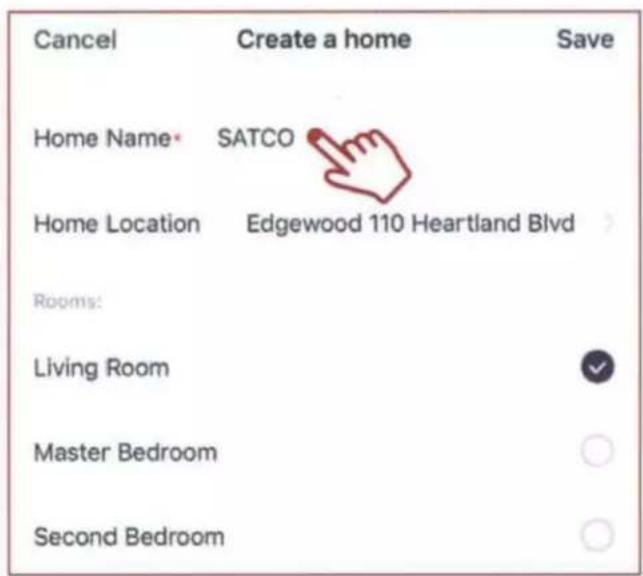
Select the "Create a home" button to set up your home.
ADD A DEVICE
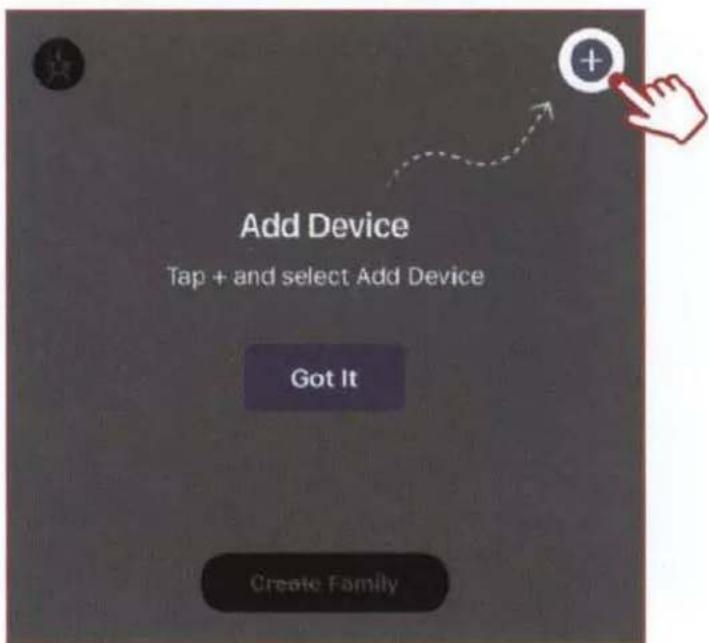
6
Tap the (+) button on the top right corner to access the action menu, then select "Add Device".
7
Select device type from the listed categories.
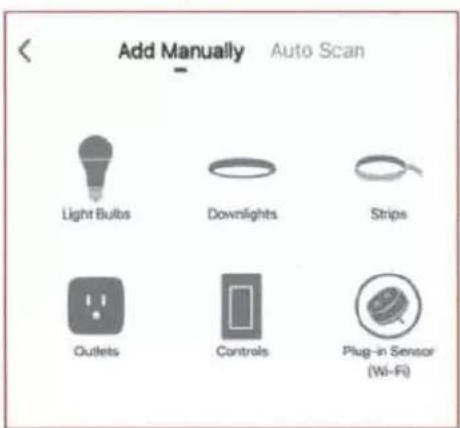
It is recommended to pair 8 or fewer devices at 1 time. If you are pairing multiple devices at one time, and some of the devices do not pair the 1st time; repeat the pairing process.
PAIR A DEVICE WITH WI-FI
8A
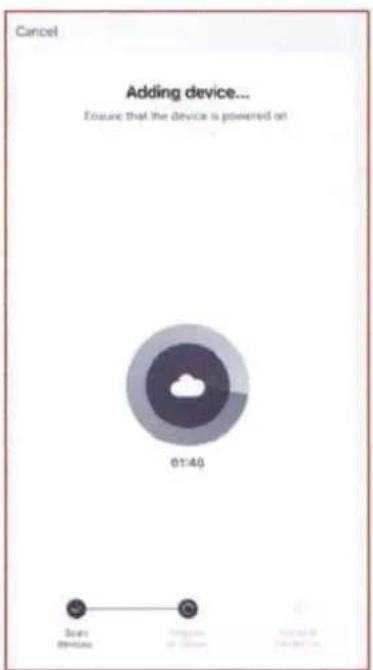
Turn your device on. The device should automatically enter pairing mode. If it does not start blinking rapidly after 7-10 seconds then turn your device off/on 5 times to enter pairing mode. Confirm that the device is blinking quickly and click "next".
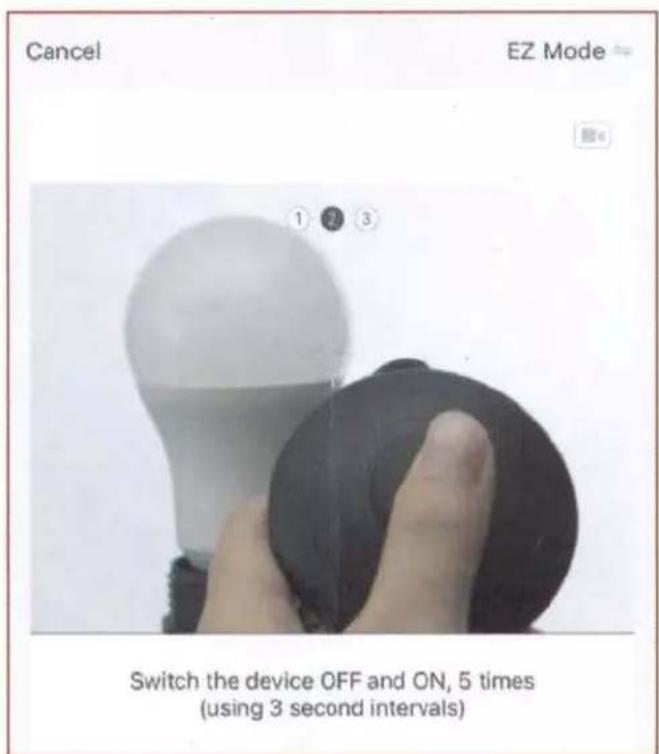
This device has advanced pairing retention technology. The device(s) that already paired will remain paired to the network, the device(s) that did not pair will return to pairing mode. To reset to factory settings, turn the switch off/on 8x.

Select your 2.4GHz Wi-Fi Network name and enter password then click "Next."
The pairing status screen will appear.
PAIR A DEVICE WITH
WI-FI/BLUETOOTH
Note: Verify your mobile device is connected to a 2.4GHz Wi-Fi Network and that you have Bluetooth turned ON for connection.
8B
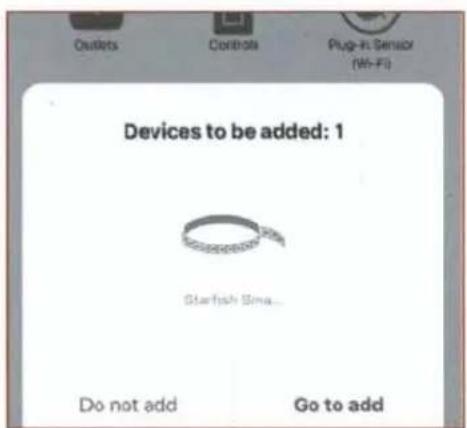
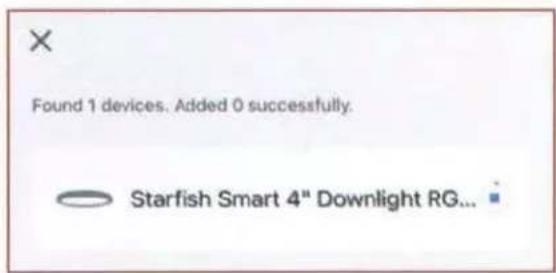
For Wi-Fi/Bluetooth enabled devices, you will see a pop-up indicating that there are unpaired devices in the area.
The device does not need to be in pairing mode.
Tap "Add" and select the devices you would like to connect.
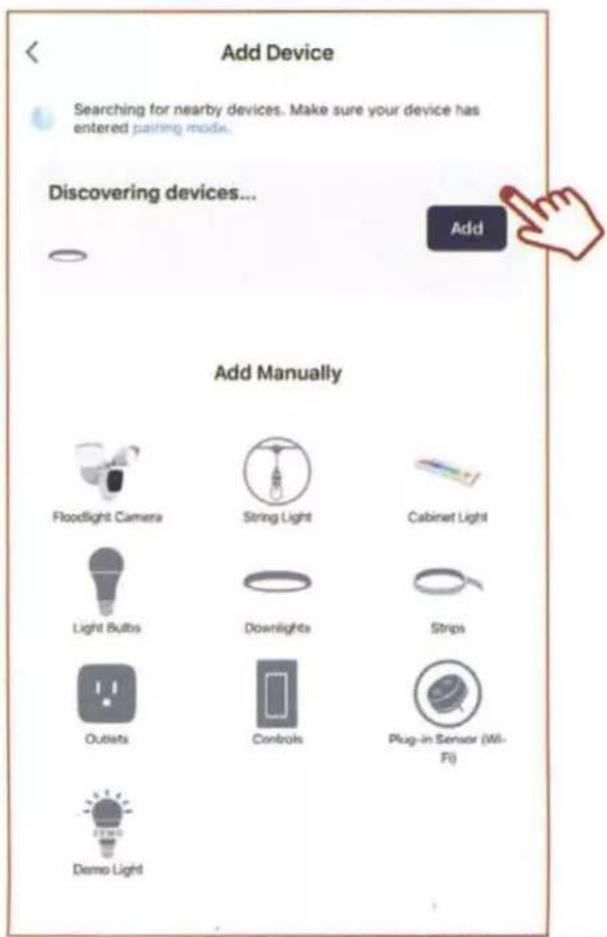
Once all the devices have connected, tap "Next".
Found 1 devices. Added 1 successfully.

Starfish Smart 4" Downlight RG...
Next
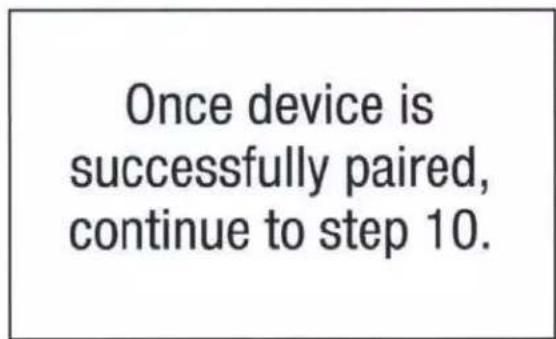
Once device is successfully paired, continue to step 10.
10
When successfully connected, you may rename the device. Tap the "Pen" icon, enter the new name and select "Done". The device is now ready to be controlled with the STARFISH app.
Added.
Starfish Smart 4" Downlight TW 8.7W
Device added successfully
Living Room
Master Bedroom
Second Bedroom
Dining Room
Kitchen
Study Room
Note: If pairing is unsuccessful, please refer to the FAQs on Satco.com/Starfish
Bluetooth is strictly used to pair and connect the device. A 2.4GHz Wi-Fi Network is required to operate all STARFISH products.
Done
SHARE A HOME
11
From the Home Management screen, select the Home that you would like to share.
Tap "Add Member" and select the way that you would like to send the invitation

Home Management
Home
SATCO

Home Member
johnsmith
johnsmith@gmail.com
Add Member

Home Owner >
12
Enter the user information and select if the new member will be an "Administrator" or a "Common Member" in the Home.
Tap "Save" to send the invitation.
Cancel
Add Member
Save
Name
Please enter a home member name.

Region
United States of America
Account
Please enter your account
Only after accepting the invitation will the account owner become a family member and be able to use relevant functions.
Family Role
Common Member 2
To view the entire STARFISH product line visit Satco.com/STARFISH

Scan QR Code to learn more
Lighting Facts Per Bulb
Brightness 850 lumens
Estimated Yearly Energy Cost $1.57
Based on 3 hrs/day, 11 /kWh
Cost depends on rates and use
Life
Based on 3 hrs/day

ENERGY STAR
45.7 years
Light Appearance

2000K / 5000K
Energy Used
13 watts
SATCO NUVO
Project Name
Location Prepared By
SATCO S11570
13WLED/RDL/5-6/RGBTW/RND/WH
Notes
General
Status Active
Finish White
Wattage 13W
Style Utility
CCT (Kelvin) 2000K-5000K
Color Temperature
Width (in.) 7.32
Height (in.) 3.03
Indoor or Outdoor Fixture Indoor
Warm to Cool White\Color Changeable
Smart Product Info
IOT Enabled Yes
Voice Assistants Supported
Home:Alexa:Siri:SmartThings
Specifications
Technology LED
CRI 90
Lumen Output 850L
Rated Hours
Voltage
Dimmable
Dimming Note
Beam Angle
Operating Temperature
IC Rated
Weight (lb.)
Fixture Shape
Fixture Material
Fixture Type
50000
120V
Yes-Dimmable
Only with Starfish App
110
20C(-4F)to +40C (+104F)
Yes
0.57
Round
Aluminum
Downlight Retrofit
Compliance
Safety Listing
Location Rating
Energy Star
ES Unique ID
Air Tight Rated
CA T20 / T24 Rationale
California Status
Title 20/24 Status
California Prop 65
RoHS Compliant
FCC Compliant
SDS Sheet
cETLus
Net
Yes
ESID-2495004
Yes
California T24 2016 - 2022 JA8
Listed
-awful for sale in California
California T24 Listed
Lead
Yes
Yes
LED Fixtures
Additional Information
Includes
Warranty
E26 Adapter included (S9001)
5 Year Limited - Fixtures