
24VWSBCT - Vacuum Cleaner Sun Joe - Free user manual and instructions
Find the device manual for free 24VWSBCT Sun Joe in PDF.
User questions about 24VWSBCT Sun Joe
0 question about this device. Answer the ones you know or ask your own.
Ask a new question about this device
Download the instructions for your Vacuum Cleaner in PDF format for free! Find your manual 24VWSBCT - Sun Joe and take your electronic device back in hand. On this page are published all the documents necessary for the use of your device. 24VWSBCT by Sun Joe.
USER MANUAL 24VWSBCT Sun Joe
IMPORTANT! Safety Instructions
All Operators Must Read These Instructions Before Use
Read all the instructions contained in this manual. Keep this manual in a safe place, so that the information is available at all times. If you give the equipment to another person, make sure to provide these operating instructions. Basic safety precautions should always be followed to reduce the risk of fire, electric shock, and personal injury.
⚠️DANGER! This indicates a hazardous situation, which, if not followed, will result in serious injury or death.
⚠ WARNING! This indicates a hazardous situation, which, if not followed, could result in serious injury or death.
⚠️CAUTION! This indicates a hazardous situation, which, if not followed, could result in minor or moderate injury.
Improper use of the machine will invalidate the warranty, relieve the manufacturer from all liabilities. The user will consequently be liable for all and any damage or injury to himself/herself or others.
General Safety
⚠️CAUTION! Wear appropriate hearing protection during use. After long periods of extended use, the noise generated from this appliance may cause hearing loss if your ears are not properly protected.
⚠ WARNING! When using the power tool, basic safety precautions should always be followed to reduce the risk of fire, electric shock, and personal injury. These include:
- Keep work area clean and well-lit – Cluttered, dark areas invite accidents.
- Replacement parts – When servicing this unit, use only identical replacement parts.
-
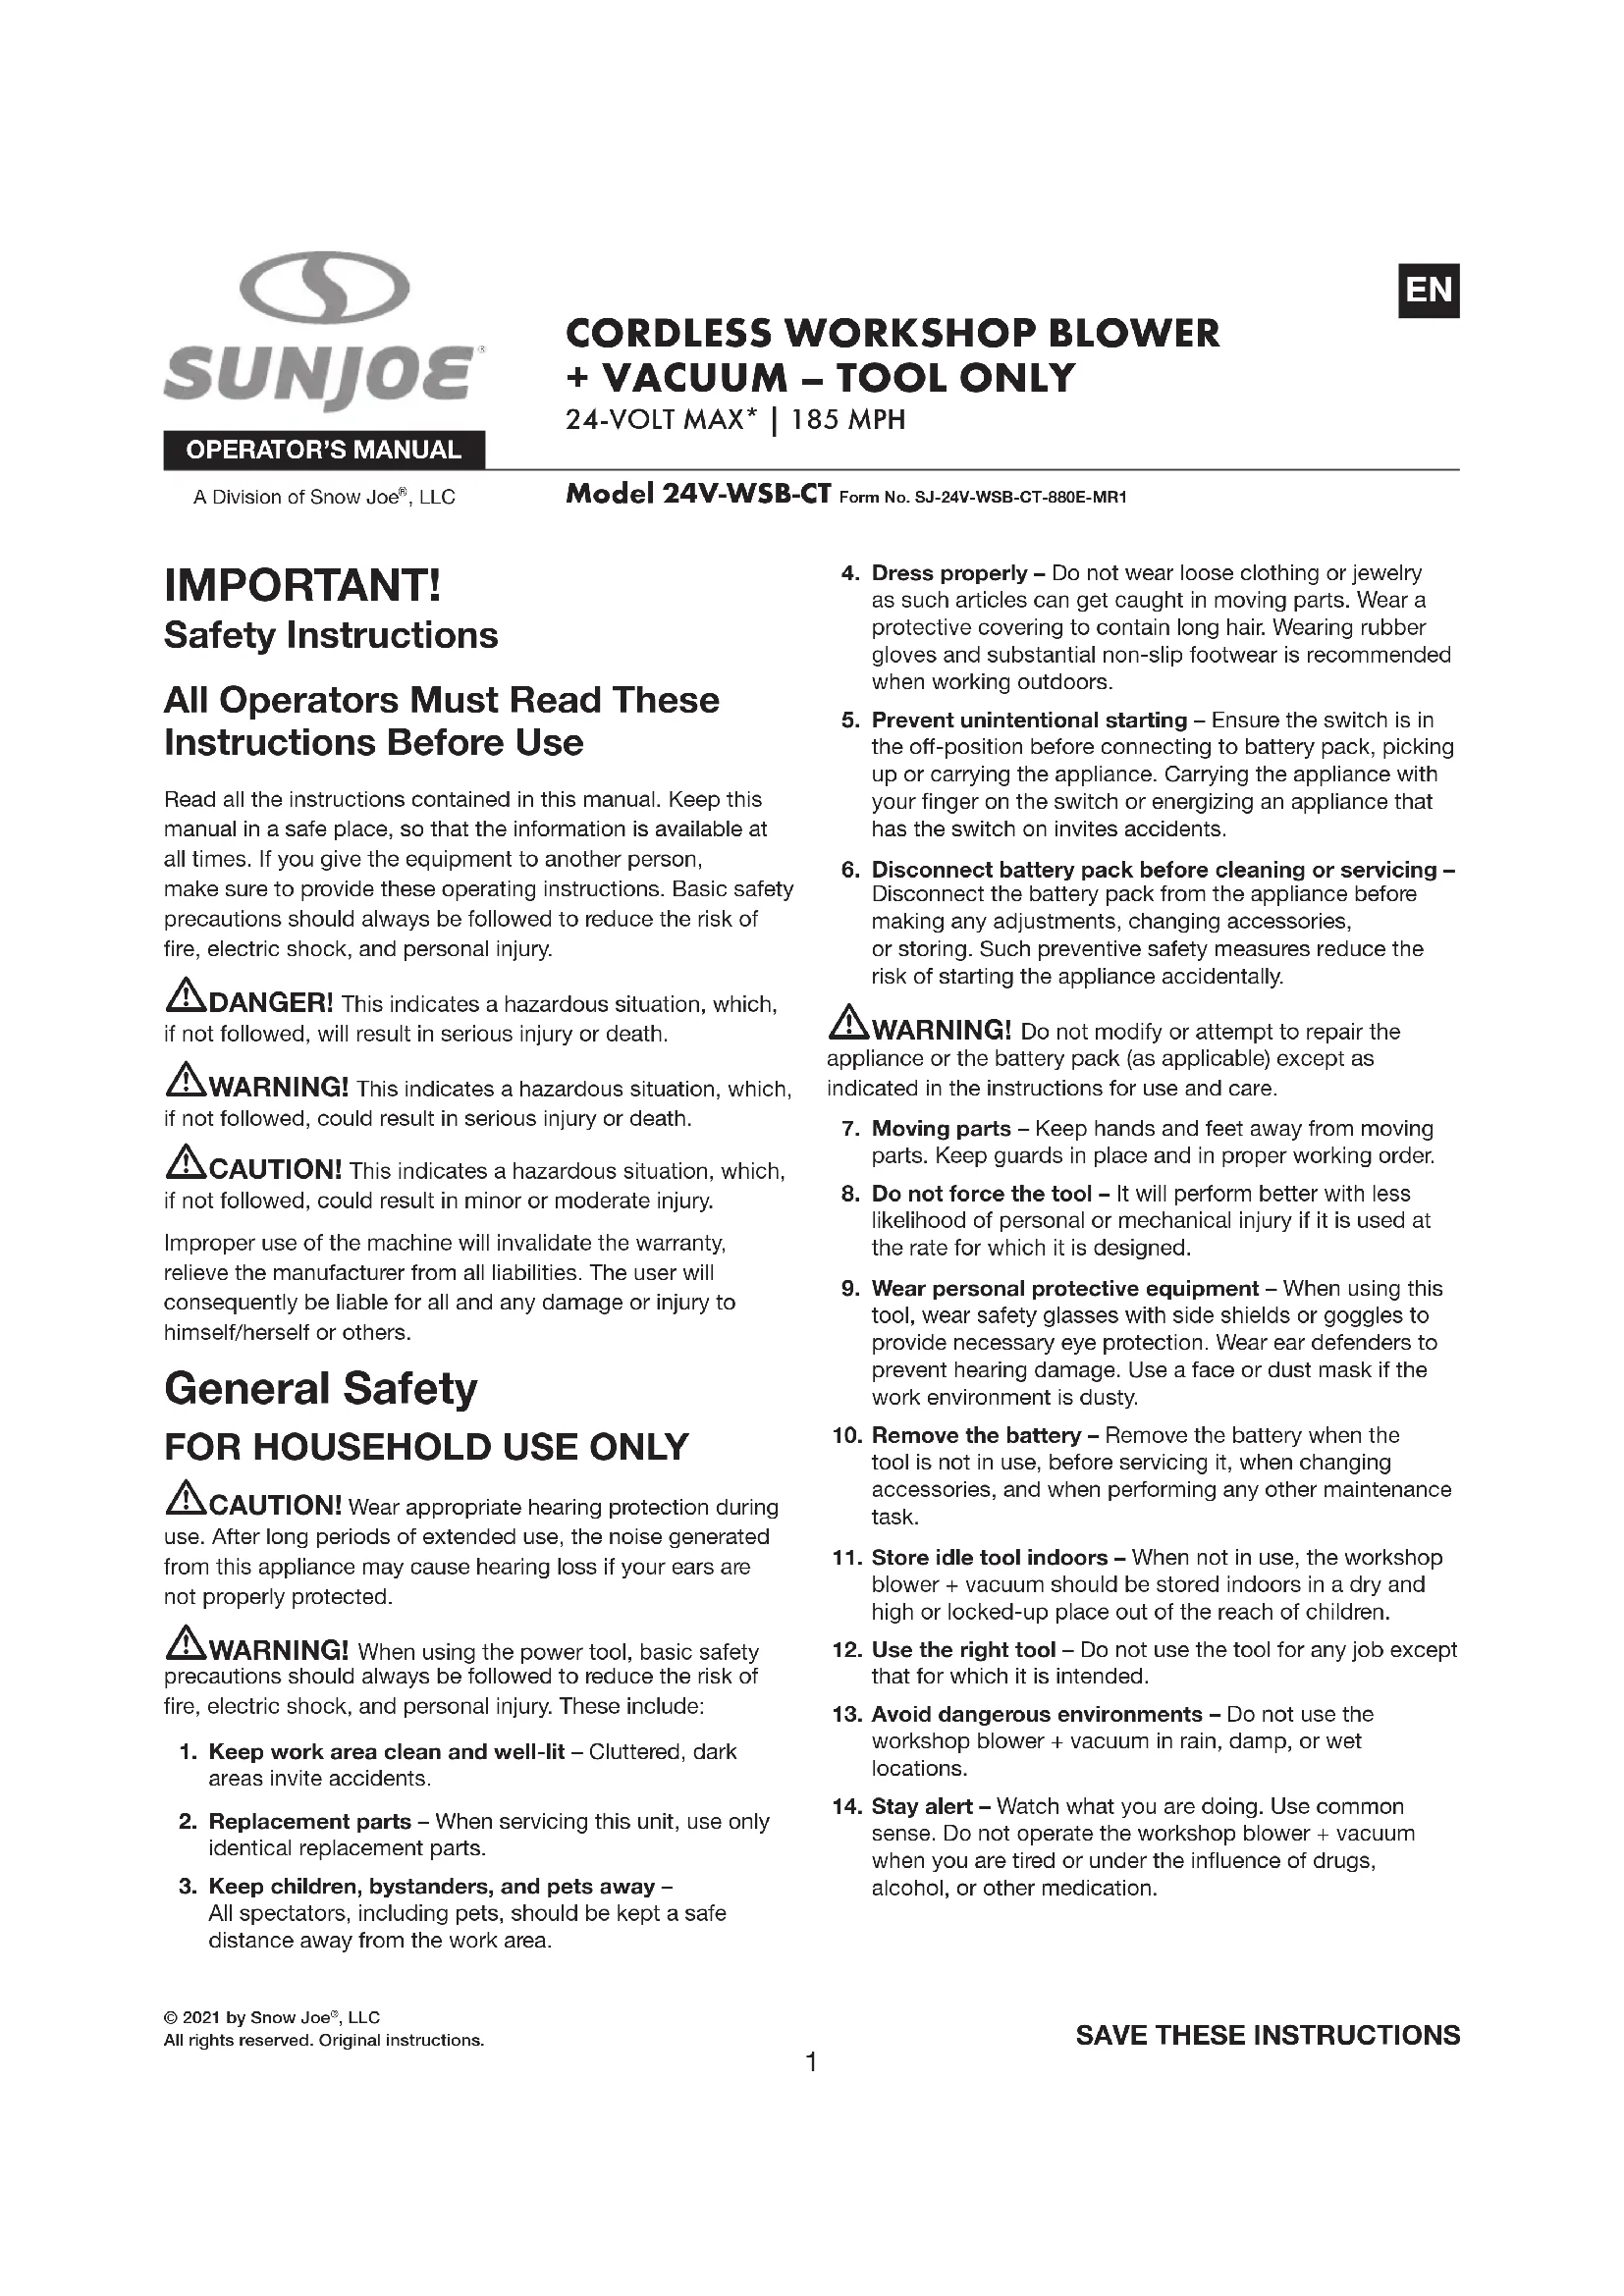
Keep children, bystanders, and pets away – All spectators, including pets, should be kept a safe distance away from the work area.
-
Dress properly – Do not wear loose clothing or jewelry as such articles can get caught in moving parts. Wear a protective covering to contain long hair. Wearing rubber gloves and substantial non-slip footwear is recommended when working outdoors.
- Prevent unintentional starting – Ensure the switch is in the off-position before connecting to battery pack, picking up or carrying the appliance. Carrying the appliance with your finger on the switch or energizing an appliance that has the switch on invites accidents.
- Disconnect battery pack before cleaning or servicing – Disconnect the battery pack from the appliance before making any adjustments, changing accessories, or storing. Such preventive safety measures reduce the risk of starting the appliance accidentally.
⚠ WARNING! Do not modify or attempt to repair the appliance or the battery pack (as applicable) except as indicated in the instructions for use and care.
- Moving parts – Keep hands and feet away from moving parts. Keep guards in place and in proper working order.
- Do not force the tool – It will perform better with less likelihood of personal or mechanical injury if it is used at the rate for which it is designed.
- Wear personal protective equipment – When using this tool, wear safety glasses with side shields or goggles to provide necessary eye protection. Wear ear defenders to prevent hearing damage. Use a face or dust mask if the work environment is dusty.
- Remove the battery – Remove the battery when the tool is not in use, before servicing it, when changing accessories, and when performing any other maintenance task.
- Store idle tool indoors – When not in use, the workshop blower + vacuum should be stored indoors in a dry and high or locked-up place out of the reach of children.
- Use the right tool – Do not use the tool for any job except that for which it is intended.
- Avoid dangerous environments – Do not use the workshop blower + vacuum in rain, damp, or wet locations.
- Stay alert – Watch what you are doing. Use common sense. Do not operate the workshop blower + vacuum when you are tired or under the influence of drugs, alcohol, or other medication.
Additional Safety Instructions
- Do not use the workshop blower + vacuum in the rain or in a damp area.
- Use extra care when cleaning on stairs or steps.
- Keep firm footing and maintain good balance at all times. Do not overreach. Overreaching can result in loss of balance.
- Turn off all controls before unplugging the tool.
- Do not use the tool if the power switch does not turn it ON or OFF. Any tool that cannot be controlled with the switch is dangerous and must be repaired.
- Carefully inspect your appliance prior to use and follow all label and marking instructions.
- Keep all parts of your body away from any moving parts and all hot surfaces of the unit.
- Do not put any object into the tool's openings. Do not use the tool with any opening blocked; keep openings free of dust, lint, hair, or any other object that may reduce air flow.
- Check the work area before each use. Remove all objects such as rocks, broken glass, nails, wire, or string, which can be thrown or become entangled in the machine.
- Service on the product must be performed by qualified repair personnel only. Service or maintenance performed by unqualified personnel could result in injury to the user or damage to the product.
- This workshop blower + vacuum is intended for residential use only. Commercial use of this product is prohibited and will void the manufacturer's warranty.
- Never run the unit without the proper equipment attached. Always ensure the workshop blower + vacuum tube is properly installed.
- Always grasp the handle when operating the unit, only operate the machine in its intended orientation.
- Do not use to pick up flammable or combustible liquids, such as gasoline, or use in areas where they may be present.
- Do not pick up anything that is burning or smoking, such as cigarettes, matches, or hot ashes.
- Do not use without dust bag in place.
Specific Safety Rules For Workshop Blower + Vacuum
- The workshop blower + vacuum has been designed to clear light debris and leaves from hard surfaces – not for clearing grassed areas.
- When operating the unit, never point the workshop Blower + vacuum tube in the direction of people or pets or in the direction of windows. Use extra caution when blowing debris near solid objects, such as trees, automobiles, and walls.
- Be sure to secure the unit when transporting it.
- Never douse or squirt the unit with water or any other liquid. Clean the unit after each use as described in the cleaning and storage section.
Battery & Charger Safety Instructions
NOTE: This unit is the tool only. The battery and the charger are not included. They must be purchased separately.
Model 24V-WSB-CT is compatible with the iON+ 24V System batteries and chargers. See page 13 for more information.
We pay a great deal of attention to the design of every battery pack to ensure that we supply you with batteries that are safe, durable and have a high energy density. The battery cells have a wide range of safety devices. Each individual cell is initially formatted and its electrical characteristic curves are recorded. This data is then used exclusively to be able to assemble the best possible battery packs.
Despite all the safety precautions, caution must always be exercised when handling batteries. The following points must be obeyed at all times to ensure safe use. Safe use can only be guaranteed if undamaged cells are used. Incorrect handling of the battery pack can cause cell damage.
IMPORTANT! Analyses confirm that incorrect use and poor care of high-performance batteries are the main factors responsible for personal and/or product damage.
⚠ WARNING! Use only approved replacement batteries; other batteries may damage the workshop blower + vacuum and cause it to malfunction.
⚠️CAUTION! To reduce the risk of injury, charge the iON+ 24V lithium-ion battery pack only in its designated iON+ 24V lithium-ion charger. Other types of chargers present risk of fire, personal injury and damage. Do not wire a battery pack to a power supply plug or car cigarette lighter. Such misuse will permanently disable or damage the battery pack.
- Avoid dangerous environments – Do not charge the battery pack in rain, snow or in damp or wet locations. Do not use the battery pack or charger in the presence of explosive atmospheres (gaseous fumes, dust or flammable materials) because sparks may be generated when inserting or removing the battery pack, which could lead to a fire.
- Charge in a well-ventilated area – Do not block the charger vents. Keep them clear to allow for proper ventilation. Do not allow smoking or open flames near a charging battery pack. Vented gases may explode.
NOTE: The safe temperature range for the battery is 41^ F – 105^ F ( 5^ C – 40.5^ C). Do not charge the battery outside in freezing weather; charge it at room temperature.
- Maintain charger cord – When unplugging the charger, pull the plug, not the cord, from the receptacle to reduce the risk of damage to the electrical plug and cord. Never carry the charger by its cord or yank it by the cord to disconnect it from the receptacle. Keep the cord away from heat, oil and sharp edges. Make sure the cord will not be stepped on, tripped over or subjected to damage or stress when the charger is in use. Do not use the charger with a damaged cord or plug. Replace a damaged charger immediately.
- Do not use an extension cord unless it is absolutely necessary – Using the wrong, damaged or improperly wired extension cord poses a risk of fire and electric shock. If an extension cord must be used, plug the charger into a properly wired 16 gauge or larger extension cord with the female plug matching the male plug on the charger. Make sure that the extension cord is in good electrical condition.
- Check the rated input for the charger before using – The charger must be plugged into an appropriate receptacle.
- Use only recommended attachments – Use of an attachment not recommended or sold by the battery charger or battery pack manufacturer may result in risk of fire, electric shock or personal injury.
- Unplug charger when not in use – Make sure to remove battery packs from unplugged chargers.
⚠ WARNING! To reduce the risk of electric shock, always unplug the charger before performing any cleaning or maintenance. Do not allow water to flow into the charger. Use a Ground Fault Circuit Interrupter (GFCI) to reduce shock hazards.
- Do not burn or incinerate battery packs – Battery packs may explode, causing personal injury or damage. Toxic fumes and materials are created when battery packs are burned.
- Do not crush, drop or damage battery packs – Do not use the battery pack or charger if they have sustained a sharp blow, been dropped, run over or have been damaged in any way (i.e. pierced with a nail, hit with a hammer, stepped on, etc.).
- Do not disassemble – Incorrect reassembly may pose a serious risk of electric shock, fire or exposure to toxic battery chemicals. If the battery or charger are damaged, please contact an authorized Snow Joe® + Sun Joe® dealer or call the Snow Joe® + Sun Joe® customer service center at 1-866-SNOWJOE (1-866-766-9563).
- Battery chemicals cause serious burns – Never let a damaged battery pack contact the skin, eyes or mouth. If a damaged battery pack leaks battery chemicals, use rubber or neoprene gloves to safely dispose of it. If skin is exposed to battery fluids, wash the affected area with soap and water and rinse with vinegar. If eyes are exposed to battery chemicals, immediately flush with water for 20 minutes and seek medical attention. Remove and dispose of contaminated clothing.
- Store your battery pack and charger in a cool, dry place – Do not store the battery pack or charger where temperatures may exceed 105°F (40.5°C), such as in direct sunlight or inside a vehicle or metal building during the summer.
⚠ WARNING! Read all safety warnings and instructions Failure to follow the warnings and instructions may
result in electric shock, fire and/or serious injury
Information about the battery
- The battery pack supplied with your cordless workshop blower + vacuum is only partially charged. The battery
pack has to be charged completely before you use the tool for the first time.
- For optimum battery performance, avoid low discharge cycles by charging the battery pack frequently.
- Store the battery pack in a cool place, ideally at 77°F (25°C) and charged to at least 40%.
- Lithium-ion batteries are subject to a natural aging process. The battery pack must be replaced at the latest when its capacity falls to just 80% of its capacity when new. Weakened cells in an aged battery pack are no longer capable of meeting the high power requirements needed for the proper operation of your workshop blower + vacuum, and therefore pose a safety risk.
- Do not throw battery packs into an open fire as this poses a risk of explosion.
- Do not ignite the battery pack or expose it to fire.
- Do not exhaustively discharge batteries. Exhaustive discharge will damage the battery cells. The most common cause of exhaustive discharge is lengthy storage or non-use of partially discharged batteries. Stop working as soon as the performance of the battery falls noticeably or the electronic protection system triggers. Place the battery pack in storage only after it has been fully charged.
- Protect batteries and the tool from overloads. Overloads will quickly result in overheating and cell damage inside the battery housing even if this overheating is not apparent externally.
- Avoid damage and shocks. Immediately replace batteries that have been dropped from a height of more than one meter or those that have been exposed to violent shocks, even if the housing of the battery pack appears to be undamaged. The battery cells inside the battery may have suffered serious damage. In such instances, please read the waste disposal information for proper battery disposal.
- If the battery pack suffers overloading and overheating, the integrated protective cutoff will switch off the equipment for safety reasons.
IMPORTANT! Do not press the ON/OFF switch any more if the protective cut-off has been activated. This may damage the battery pack.
- Recharge only with the charger specified by the manufacturer. A charger that is suitable for one type of battery pack may create a risk of fire when used with another battery pack.
- Use appliances only with specifically designated battery packs. Use of any other battery packs may create a risk of injury and fire.
- Under abusive conditions, liquid may be ejected from the battery; avoid contact. If contact accidentally occurs, flush with water. If liquid contacts eyes, additionally seek medical help. Liquid ejected from the battery may cause irritation or burns.
-
Do not use a battery pack or appliance that is damaged or modified. Damaged or modified batteries may exhibit unpredictable behavior resulting in fire, explosion or risk of injury.
-
Do not expose a battery pack or appliance to fire or excessive temperature. Exposure to fire or temperature above 266°F (130°C) may cause explosion.
- Follow all charging instructions and do not charge the battery pack or appliance outside of the temperature range specified in the instructions. Charging improperly or at temperatures outside of the specified range may damage the battery and increase the risk of fire.
- Prevent unintentional starting – Ensure the switch is in the off-position before connecting to battery pack, picking up or carrying the appliance. Carrying the appliance with your finger on the switch or energizing an appliance that has the switch on invites accidents.
- Disconnect battery pack before cleaning or servicing – Disconnect the battery pack from the appliance before making any adjustments, changing accessories, or storing. Such preventive safety measures reduce the risk of starting the appliance accidentally.
- Do not short circuit – When battery pack is not in use, keep it away from other metal objects, like paper clips, coins, keys, nails, screws or other small metal objects, that can make a connection from one terminal to another. Shorting the battery terminals together may cause burns or a fire.
- Replacement parts – When servicing this unit, use only identical replacement parts.
- Do not modify or attempt to repair the appliance or the battery pack (as applicable) except as indicated in the instructions for use and care.
- Have servicing performed by a qualified repair person using only identical replacement parts. This will ensure that the safety of the product is maintained.
Information about the charger and the charging process
- Please check the data marked on the rating plate of the battery charger. Be sure to connect the battery charger to a power supply with the voltage marked on the rating plate. Never connect it to a different mains voltage.
- Protect the battery charger and its cord from damage. Keep the charger and its cord away from heat, oil and sharp edges. Have damaged cords repaired without delay by a qualified technician at an authorized Snow Joe ^® + Sun Joe ^® dealer or call the Snow Joe ^® + Sun Joe ^® customer service center at 1-866-SNOWJOE (1-866-766-9563).
- Electrical plugs must match the outlet. Never modify the plug in any way. Do not use any adapter plugs with grounded appliances. Unmodified plugs and matching outlets will reduce the risk of electric shock.
- Keep the battery charger, battery pack(s) and the cordless tool out of the reach of children.
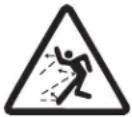
- Do not use the supplied battery charger to charge other cordless tools.
-
During periods of heavy use, the battery pack will become warm. Allow the battery pack to cool to room temperature before inserting it into the charger to recharge.
-
Do not overcharge batteries. Do not exceed the maximum charging times. These charging times only apply to discharged batteries. Frequent insertion of a charged or partially charged battery pack will result in overcharging and cell damage. Do not leave batteries in the charger for days on end.
- Never use or charge batteries if you suspect that it has been more than 12 months since the last time they were charged. There is a high probability that the battery pack has already suffered dangerous damage (exhaustive discharge).
- Charging batteries at a temperature below 41^ F ( 5^ C) will cause chemical damage to the cells and may cause a fire.
- Do not use batteries that have been exposed to heat during the charging process, as the battery cells may have suffered dangerous damage.
- Do not use batteries that have suffered curvature or deformation during the charging process or those that exhibit other atypical symptoms (gassing, hissing, cracking, etc.)
- Never fully discharge the battery pack (maximum recommended depth of discharge is 80%). A complete discharge of the battery pack will lead to premature aging of the battery cells.
Protection from environmental influences
- Wear suitable work clothes. Wear safety goggles.
- Protect your cordless tool and the battery charger from moisture and rain. Moisture and rain can cause dangerous cell damage.
- Do not use the cordless tool or the battery charger near vapors and flammable liquids.
- Use the battery charger and cordless tools only in dry conditions and at an ambient temperature of 41^ F – 105^ F ( 5^ C – 40.5^ C).
- Do not keep the battery charger in places where the temperature is liable to reach over 105^ F ( 40.5^ C). In particular, do not leave the battery charger in a car that is parked in the sunshine.
- Protect batteries from overheating. Overloads, overcharging and exposure to direct sunlight will result in overheating and cell damage. Never charge or work with batteries that have been overheated – replace them immediately, if possible.
- Store the charger and your cordless tool only in dry locations with an ambient temperature of 41^ F – 105^ F ( 5^ C – 40.5^ C). Store your lithium-ion battery pack in a cool, dry place at a temperature of 77^ F ( 25^ C). Protect the battery pack, charger and cordless tool from humidity and direct sunlight. Only place fully charged batteries in storage (charged to at least 40%).
- Prevent the lithium-ion battery pack from freezing. Battery packs that were stored below 32^ F ( 0^ C) for more than 60 minutes must be discarded.
- When handling batteries, be wary of electrostatic charge. Electrostatic discharges can damage the electronic protection system and the battery cells. Avoid electrostatic charging and never touch the battery poles.
Safety Symbols
The following table depicts and describes safety symbols that may appear on this product. Read, understand and follow all instructions on the machine before attempting to assemble and operate.
| Symbols Symbols | Descriptions | Descriptions | |
 | READ THE OPERATOR'S MANUAL(S) – Read, understand and follow all instructions in the user manual(s) before attempting to assemble and operate. | 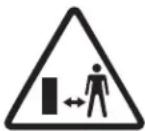 | Keep bystanders and children a safe distance away. |
 | SAFETY ALERT – Indicates a precaution, a warning or a danger. |  | WARNING! Do not expose the unit to rain or wet conditions. |
 | Beware of flying objects and debris. |  | Wear hearing protection.Wear eye protection.Wear breathing protection. |
 | DANGER! Rotating blades pose a serious risk of injury.Keep hands and feet away from openings while the machine is running. |  | The rotating part will continuously run for several seconds after you turn off the machine. |
 | |||
 | Indoor use only. Only use battery charger indoors. |  | WARNING! Turn the machine OFF and disconnect it from the power supply before inspecting, cleaning, changing accessories or conducting any other maintenance task. |
Know Your Cordless Workshop Blower + Vacuum
Read the owner's manual and safety instructions carefully before operating the cordless workshop blower + vacuum. Compare the illustration below to the cordless workshop blower + vacuum in order to familiarize yourself with the location of the various controls and adjustments. Save this manual for future reference.
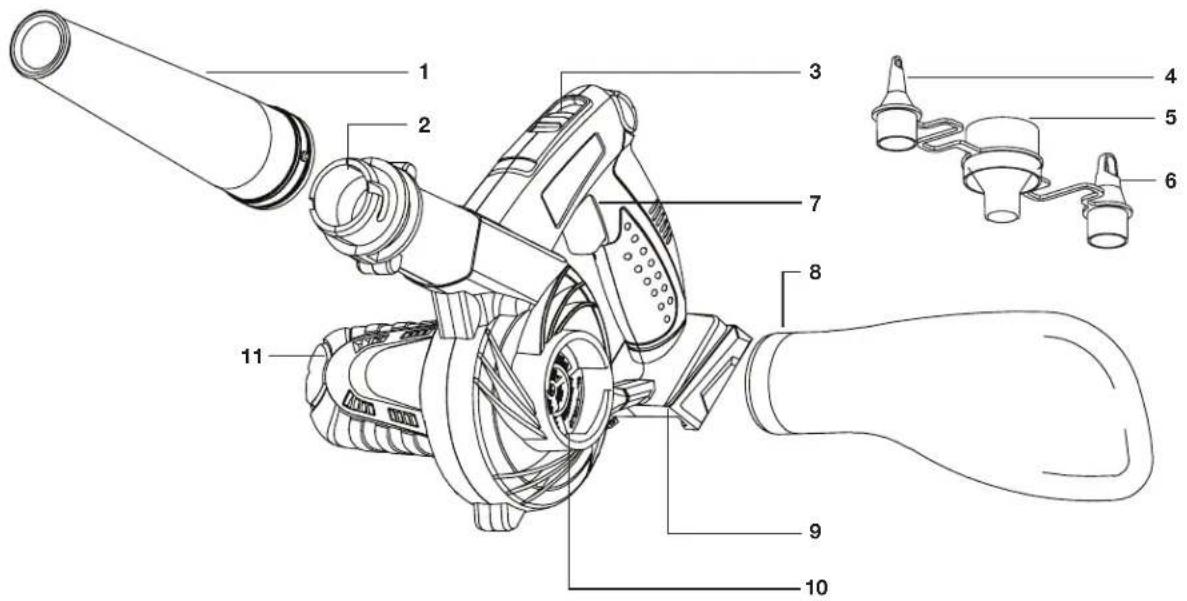
text_image
Technical diagram of a mechanical device with numbered parts, including a cylindrical component and a multi-pin connector.- Blower + vacuum tube
- Air outlet
- Speed selector
-
Small nozzle
-
Large nozzle
- Medium nozzle
- ON/OFF trigger
-
Collection bag (x2)
-
Battery compartment
- Air inlet
- Motor housing
text_image
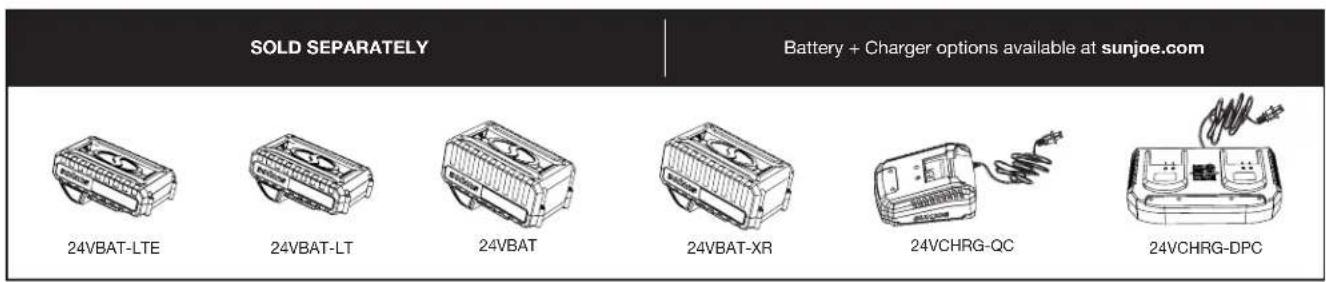
SOLD SEPARATELY Battery + Charger options available at sunjoe.com 24VBAT-LTE 24VBAT-LT 24VBAT 24VBAT-XR 24VCHRG-QC 24VCHRG-DPCTechnical Data
Motor 400 W
Battery Voltage Max ^* 24 V D.C.
Speed Settings 2
Air Speed Max....185 mph
Air Flow Max 105 cfm
Small Nozzle Diameter 0.2 in (5.3 mm)
Medium Nozzle Diameter 0.5 in (13.2 mm)
Large Nozzle Diameter 0.9 in (22.2 mm)
Net Weight 2.3 lbs (1.05 kg)
* Initial no-load voltage, when fully charged, peaks at 24 volts; nominal voltage under typical load is 21.6 volts.
Unpacking
Carton Contents
- Small, medium, and large nozzles (attached)
- Cordless workshop blower + vacuum body
- Blower + vacuum tube
- Collection bag (2)
- Manual with registration card
NOTE: In order to operate this cordless workshop blower + vacuum you will need iON+ 24V System batteries and chargers. See page 13 for battery options and specifications, or visit sunjoe.com.
- Carefully remove the cordless workshop blower + vacuum and check to see that all of the above items are supplied.
- Inspect the product carefully to make sure no breakage or damage occurred during shipping. If you find damaged or missing parts, DO NOT return the unit to the store. Please call the Snow Joe ^® + Sun Joe ^® customer service center at 1-866-SNOWJOE (1-866-766-9563).
NOTE: Do not discard the shipping carton and packaging material until you are ready to use the cordless workshop blower + vacuum. The packaging is made of recyclable materials. Properly dispose of these materials in accordance with local regulations.
IMPORTANT! The equipment and packaging material are not toys. Do not let children play with plastic bags, foils or small parts. These items can be swallowed and pose a suffocation risk!
Battery Pack Operation
The equipment is powered by a lithium-ion battery. The battery pack is completely sealed and maintenance free.
TOOL ONLY
BATTERY + CHARGER SOLD SEPARATELY
In order to operate this cordless workshop blower + vacuum you will need an iON+ 24V System battery and charger. See page 13 for battery and charger options and specifications, or for more information visit sunjoe.com.
Battery Charge Level Indicator
The battery pack is equipped with a push button for checking the charge level. Simply press the push button to read off the battery charge level from the LEDs of the battery indicator:
- All 3 level monitoring LEDs are lit: Battery charge level is high.
- 2 level monitoring LEDs are lit: Battery charge level is decreasing. Stop work as soon as possible.
- 1 level monitoring LED is lit: Battery is flat. Stop work IMMEDIATELY and charge the battery. Otherwise the battery's service life will be greatly shortened.


| Light IndicatorsLights | |
| Charge level button | |
| The battery is at 30% capacity and requires charging | |
| The battery is at 60% capacity and requires charging soon | |
| The battery is at full capacity |
NOTE: If the charge level button does not appear to be working, place the battery pack on the charger and charge as needed.
Immediately after using the battery pack, the charge level button may display a lower charge than it will if checked a few minutes later. The battery cells “recover” some of their charge after resting.
Charger Operation
WARNING! Charge only iON+ 24V lithium-ion battery packs with its compatible iON+ 24V lithium-ion quick charger. Other types of batteries may cause personal injury and damage. To reduce the risk of electric shock, do not allow water to flow into the charger's AC/DC plug.
TOOL ONLY
BATTERY + CHARGER SOLD SEPARATELY
In order to operate this cordless workshop blower + vacuum you will need an iON+ 24V System battery and charger. See page 13 for battery and charger options and specifications, or for more information visit sunjoe.com.
When to Charge the iON+ 24V Lithium-iON Battery
NOTE: The iON+ 24V lithium-ion battery packs do not develop a "memory" when charged after only a partial discharge. Therefore, it is not necessary to run down the battery pack before inserting the charger plug.
- Use the battery charge indicator lights to determine when to charge your iON+ 24V lithium-ion battery pack.
- You can "top-off" your battery pack's charge before starting a big job or after a long day of use.
Charging the Battery
- Push the push lock button on the battery to pull it out of the equipment (Fig. 1).
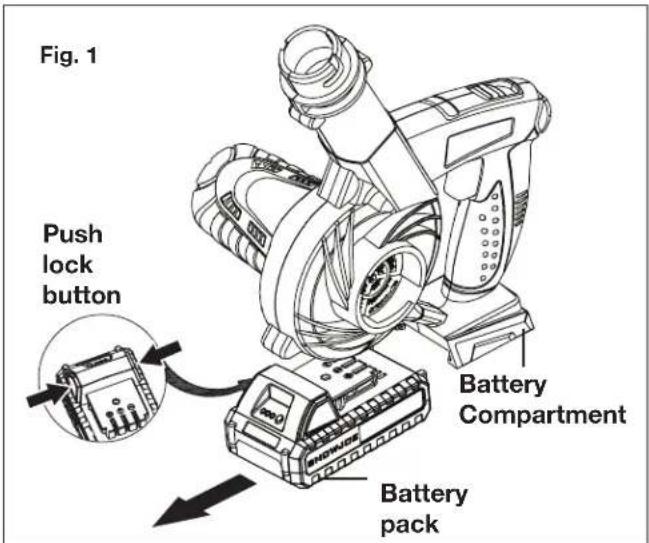
text_image
Fig. 1 Push lock button Battery Compartment Battery pack- Depending on your Snow Joe ^® + Sun Joe ^® charger model, how to recharge your lithium-ion battery will vary. You may either insert your 24-volt battery into the 24VCHRG-QC Quick Charger (sold separately) or the 24VCHRG-DPC Dual Port Charger (sold separately) (Figs. 2 – 3).

text_image
Fig. 2 Battery pack Charging red 24VCHRG-QC quick charger (Sold separately) Fully Charged green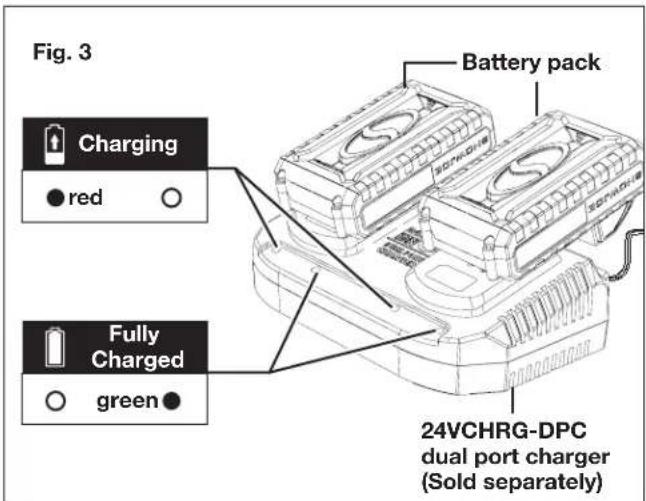
text_image
Fig. 3 Battery pack Charging red Fully Charged green 24VCHRG-DPC dual port charger (Sold separately)- The battery indicator LEDs will illuminate one by one during the charging process. Unplug the charger immediately when the 3 LEDs are all illuminated.
- The 24VCHRG-QC Quick Charger (sold separately) and the 24VCHRG-DPC Dual Port Charger (sold separately) are also equipped with additional charging indicating lights which will indicate the charging status (Figs. 2–3).
CAUTION! FIRE HAZARD. When disconnecting the charger from the battery, be sure to unplug the charger from the outlet first, then disconnect the charger from the battery.
WARNING! This charger does not automatically turn off when the battery is fully charged. Please take care not to leave the battery plugged into the charger. Switch off or unplug the charger at the mains when charging is complete.
- Timely recharging of the battery will help prolong the battery's life. You must recharge the battery pack when you notice a drop in the equipment's power.
IMPORTANT! Never allow the battery pack to become fully discharged as this will cause irreversible damage to the battery.
- When charging is complete, remove the battery from the charger by pulling the push lock button and sliding the battery backward to unlock it from the charger.
Assembly
WARNING! To avoid serious personal injury, read and understand all safety instructions provided.
WARNING! Do not insert battery until assembly is complete. Failure to comply could result in accidental starting and possible serious personal injury.
WARNING! Before performing any maintenance, make sure battery is removed. Failure to heed this warning could result in serious personal injury.
⚠ WARNING! To prevent serious personal injury, make sure the switch is in the OFF (0) position, the battery is removed and the impeller has come to a complete stop before attaching or detaching the tubes.
Assembling for Blower Mode
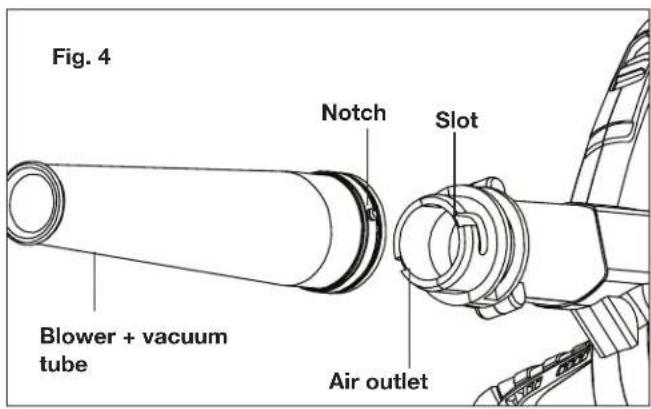
- Align the notches on the blower + vacuum tube with the slots on the air outlet and slide together. Rotate to lock into place (Fig. 4).
text_image
Fig. 4 Blower + vacuum tube Notch Slot Air outletAssembling for Vacuum Mode
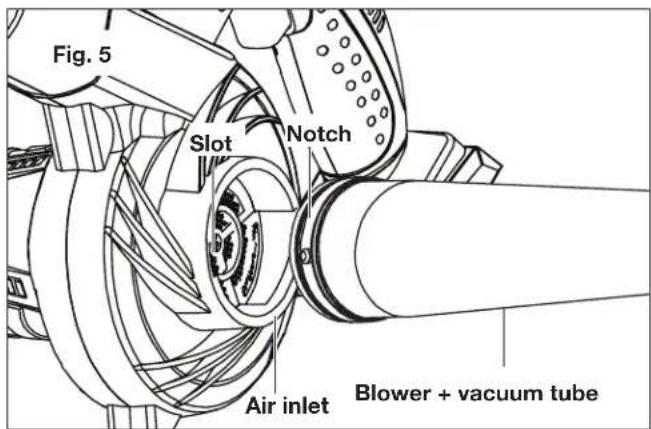
Make sure both the blower + vacuum tube and collection bag are assembled for Vacuum mode.
⚠️CAUTION! Only use vacuum mode in workshops and garages to clean up sawdust, dirt, and dust.
- Align the notches on the blower + vacuum tube with the slots on the air inlet and slide together. Rotate to lock into place (Fig. 5).
text_image
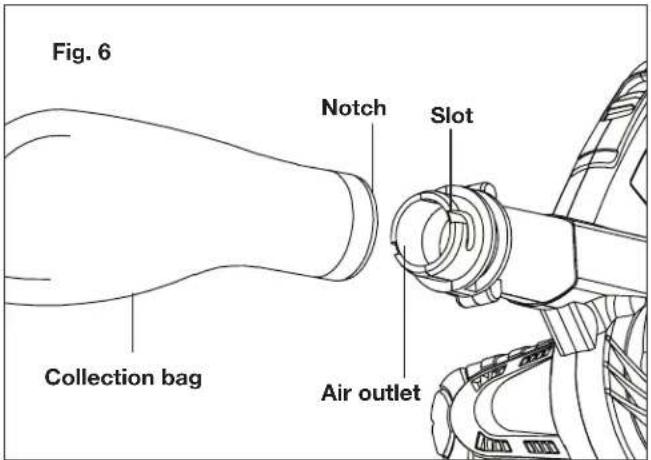
Fig. 5 Slot Notch Air inlet Blower + vacuum tube- Align the notches on the collection bag with the slots on the air outlet and slide together. Rotate counter clockwise to lock into place (Fig. 6).
text_image
Fig. 6 Notch Slot Collection bag Air outletAssembling the Nozzles
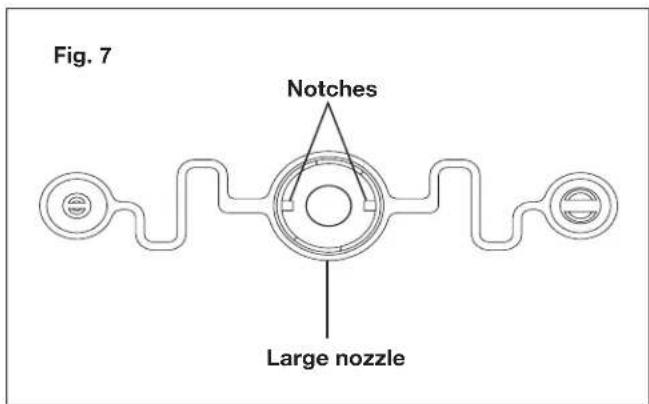
Attach either of the three nozzles to the air outlet only to blow fine debris from hard-to-reach nooks and crannies.
- Align the notches on the inside of the large nozzle with the slots on the air outlet and slide together. Rotate to lock into place (Fig. 7).
text_image
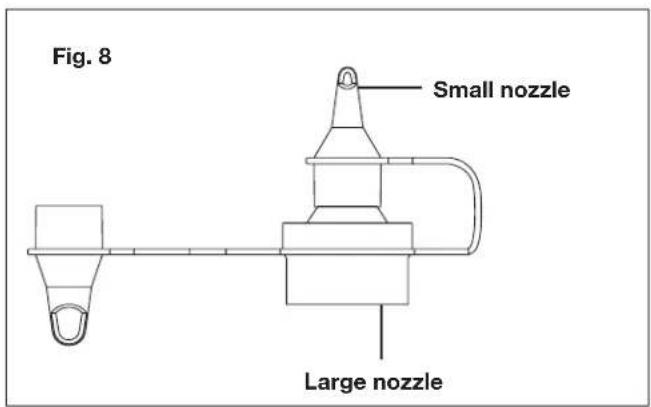
Fig. 7 Notches Large nozzle- To use either the small or medium nozzle, simply place either on top of the large nozzle and press on until secure (Fig. 8).
text_image
Fig. 8 Small nozzle Large nozzleOperation
TOOL ONLY BATTERY + CHARGER SOLD SEPARATELY
In order to operate this cordless workshop blower + vacuum you will need an iON+ 24V System battery and charger. See page 13 for battery and charger options and specifications, or for more information visit sunjoe.com.
Starting + Stopping
CAUTION! Starting, stopping, and restarting a DC motor repeatedly within a few seconds can generate a great deal of heat and damage the motor. To protect the life of your cordless workshop blower + vacuum, always wait at least five seconds after stopping before restarting the workshop blower + vacuum.
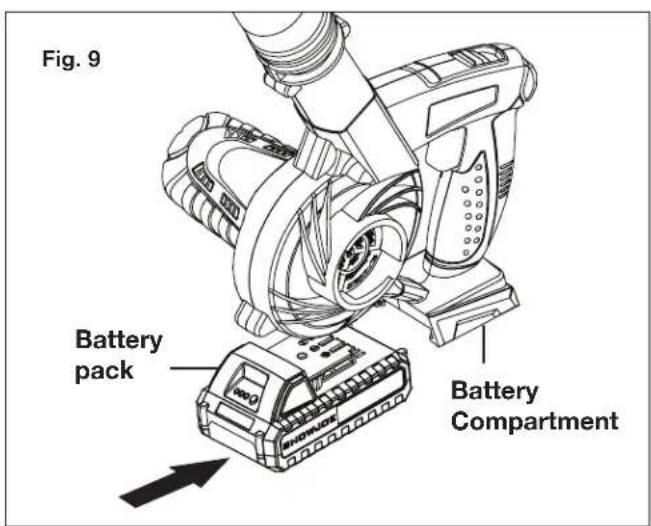
- Insert the battery into the battery compartment until it clicks to lock it into position (Fig. 9).
text_image
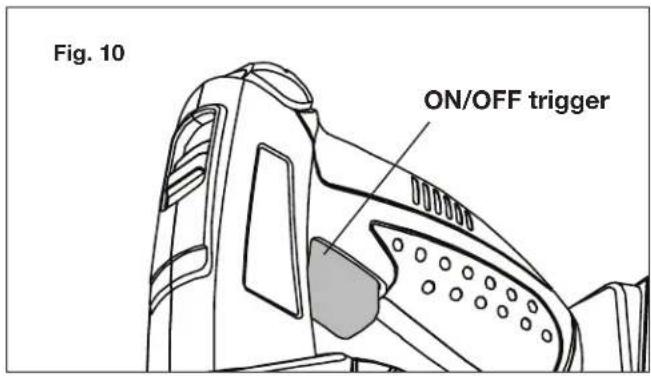
Fig. 9 Battery pack Battery Compartment- To start the cordless workshop blower + vacuum, press the ON/OFF trigger once (Fig. 10).
text_image
Fig. 10 ON/OFF trigger- To turn the tool off, press the ON/OFF trigger once more (Fig. 10).
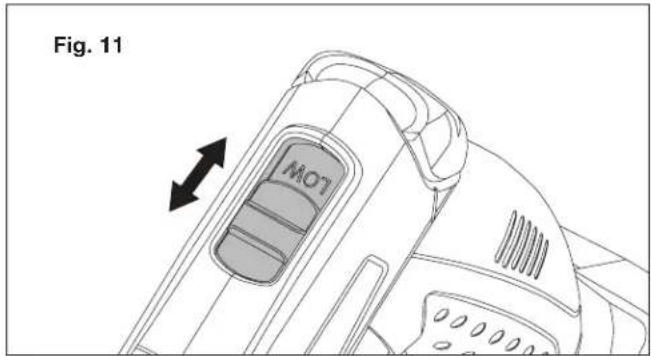
- To control the speed, use the speed selector and slide to choose HIGH or LOW (Fig. 11).
text_image
Fig. 11 MOTOperating Tips
⚠ WARNING! Use the cordless workshop blower + vacuum only in daylight or good artificial light.
- When using the cordless workshop blower + vacuum, plant your feet firmly on the ground and place your dominant hand on the unit handle to control the unit. Use your other hand to steady the unit as needed.
- Wear personal protective equipment during your work session. This includes boots, safety glasses/goggles, ear defenders, long pants and a long-sleeve shirt.
- Make sure the Blower + vacuum tube is not directed at anybody or any loose debris before starting the unit.
- Verify that the unit is in good working condition. Make sure the tubes are in place and secure.
- Keep a firm grip on the unit handle while in use.
• To reduce the risk of hearing loss associated with increased sound levels, hearing protection is required. -
Operate power equipment only at reasonable hours—not early in the morning or late at night when people might be disturbed. Comply with times listed in local ordinances. Usual recommendations are 9:00 am to 5:00 pm, Monday through Saturday.
-
To reduce noise levels, limit the number of pieces of power equipment used at any one time and operate power workshop blower + vacuums at the lowest possible speed setting necessary to do the job.
- Use rakes and brooms to loosen debris before blowing.
- In dusty conditions, slightly dampen surfaces.
- Blow debris into a safe, open area away from children, pets, open windows or freshly washed cars.
- Clean up after using the workshop blower + vacuum and other lawn equipment. Dispose of debris appropriately.
WARNING! To avoid serious personal injury, wear ear defenders, goggles or safety glasses at all times when operating this unit. Wear a face mask or dust mask in dusty locations.
⚠ WARNING! To prevent serious personal injury or damage to the unit, make sure the Blower + vacuum tube is in place before operating the unit.
Air Vents
Never cover air vents. Keep them free from obstructions and debris. They must always remain clear for proper motor cooling.
⚠ WARNING! To avoid serious personal injury, do not wear loose fitting clothing or articles such as scarves, strings, chains, ties, etc., that could get drawn into the air vents. To make sure long hair does not get drawn into the air vents, tie back long hair.
Blower Mode
- Hold the workshop blower + vacuum firmly with your dominant hand on the unit handle. Sweep from side to side with the lower tube several inches above the ground or floor (Fig. 12).
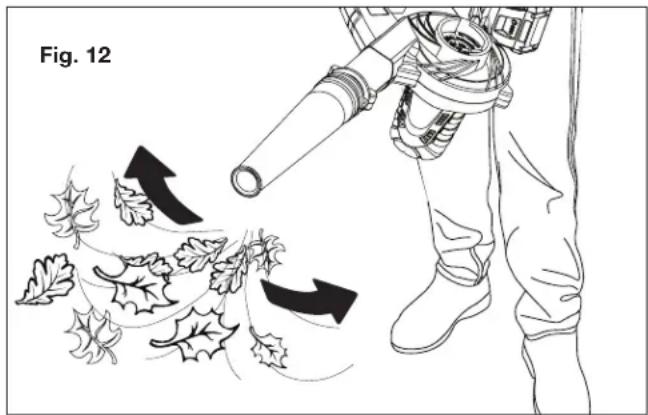
natural_image
Illustration of a person using a handheld device to lift leafy materials, with arrows indicating motion (no text or symbols)- Slowly advance the unit, keeping the accumulated pile of debris in front of you. Most dry blowing operations are better suited to low speeds rather than high speeds. High speed blowing is best for moving heavier items like large debris or gravel.
Vacuum Mode
- Once you have blown the debris/dust into a pile, you can convert to vacuum mode to collect the debris.
- Ensure collection bag is attached securely.
- With a firm hold on the unit, tilt the Blower + vacuum tube 2 in. - 4 in. (5 cm - 10 cm) from the ground and use a sweeping action to collect light debris. The debris will flow into the bag. For longer bag life and optimal performance, empty the bag frequently.
- As the bag fills, suction power will decrease. When this happens, use the ON/OFF trigger to turn the unit OFF remove the battery. Remove the bag and empty the debris.
Maintenance
⚠ WARNING! Always wear protective gloves during maintenance operations. Do not carry out maintenance when the engine is running or hot.
WARNING! Use only original manufacturer's replacement parts, accessories and attachments. Failure to do so can cause possible injury and poor performance.
To order genuine replacement parts or accessories for the Sun Joe ^® iON+ 24V-WSB-CT cordless workshop blower + vacuum, please visit sunjoe.com or contact the Snow Joe ^® + Sun Joe ^® customer service center at 1-866-SNOWJOE (1-866-766-9563).
⚠ WARNING! Remove the battery before performing any maintenance task. If the battery is connected with the unit, someone could accidentally turn on the unit while you are inspecting it, which could result in serious personal injury.
- Store the tool, instruction manual and accessories in a secure, dry place. In this way, you will always have the information ready at hand.
- Keep the tool's air vents unclogged and clean at all times.
- Remove dust and dirt regularly. Cleaning is best done with a rag or brush.
- Never use caustic agents to clean plastic parts.
⚠ WARNING! Do not use cleaning agents to clean the plastic parts of the tool. A mild detergent on a damp cloth is recommended. Water must never come into contact with the tool.
Storage
-
Examine the cordless workshop blower + vacuum thoroughly for worn, loose, or damaged parts. Should you need to repair or replace a part, contact an authorized Snow Joe® + Sun Joe® dealer or call the Snow Joe® + Sun Joe® customer service center at 1-866-SNOWJOE (1-866-766-9563) for assistance.
-
Remove the battery from the cordless workshop blower + vacuum before storing.
- Store the workshop blower + vacuum in a dry, well-ventilated place that is inaccessible to children. Keep away from corrosive agents.
Battery Caution + Disposal
Always dispose of your battery pack according to federal, state, and local regulations. Contact a recycling agency in your area for recycling locations.
⚠️CAUTION! Even discharged battery packs contain some energy. Before disposing, use electrical tape to cover the terminals to prevent the battery pack from shorting, which could cause a fire or explosion.
⚠ WARNING! To reduce the risk of injury or explosion, never burn or incinerate a battery pack even if it is damaged, dead, or completely discharged. When burned, toxic fumes and materials are emitted into the surrounding atmosphere.
- Batteries vary according to device. Consult your manual for specific information.
- Install only new batteries of the same type in your product (where applicable).
- Failure to insert batteries in the correct polarity, as indicated in the battery compartment or manual, may shorten the life of the batteries or cause batteries to leak.
- Do not mix old and new batteries.
- Do not mix Alkaline, Standard (Carbon-Zinc), or Rechargeable (Nickel Cadmium, Nickel Metal Hydride, or Lithium-Ion) batteries.
- Do not dispose of batteries in fire.
- Batteries should be recycled or disposed of as per state and local guidelines.
Service and Support
If your Sun Joe ^® iON+ 24V-WSB-CT cordless workshop blower + vacuum requires service or maintenance, please call 1-866-SNOWJOE (1-866-766-9563) for assistance.
Model and Serial Numbers
When contacting the company, reordering parts, or arranging service from an authorized dealer, you will need to provide the model and serial numbers, which can be found on the decal located on the housing of the unit. Copy these numbers into the space provided below.
Record the following numbers from the housing or handle of your new product:

text_image
Model # 2 | 4 | V | - | W | S | B | - | C | T | Serial #:Optional Accessories
⚠ WARNING! ALWAYS use only authorized Snow Joe ^® + Sun Joe ^® replacement parts and accessories. NEVER use replacement parts or accessories that are not intended for use with this cordless blower + vacuum. Contact Snow Joe ^® + Sun Joe ^® if you are unsure whether it is safe to use a particular replacement part or accessory with your cordless blower + vacuum. The use of any other attachment or accessory can be dangerous and could cause injury or mechanical damage.
| ModelAcc | |||
| 1 |  | iON+ 24V 2.0 Ah Lithium-Ion Battery | 24VBAT-LTE |
| 2 |  | iON+ 24V 2.5 Ah Lithium-Ion Battery | 24VBAT-LT |
| 3 | 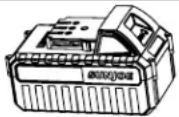 | iON+ 24V 4.0 Ah Lithium-Ion Battery | 24VBAT |
| 4 | 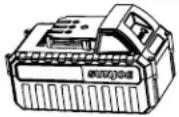 | iON+ 24V 5.0 Ah Lithium-Ion Battery | 24VBAT-XR |
| 5 | 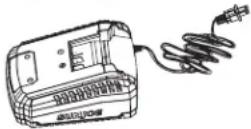 | iON+ 24V Lithium-Ion Battery Quick Charger | 24VCHRG-QC |
| 6 | 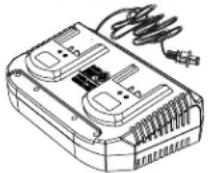 | iON+ 24V Lithium-Ion Battery Charger | 24VCHRG-DPC |
NOTE: Accessories are subject to change without any obligation on the part of Snow Joe ^® + Sun Joe ^® to provide notice of such changes. Accessories can be ordered online at sunjoe.com or via phone by contacting the Snow Joe ^® + Sun Joe ^® customer service center at 1-866-SNOWJOE (1-866-766-9563).
SNOW JOE® + SUN JOE® CUSTOMER PROMISE
ABOVE ALL ELSE, Snow Joe, LLC (“Snow Joe”) is dedicated to you, our customer. We strive to make your experience as pleasant as possible. Unfortunately, there are times when a Snow Joe ^® , Sun Joe ^® , or Aqua Joe ^® product (“Product”) does not work or breaks under normal operating conditions. We think it’s important that you know what you can expect from us. That’s why we have a Limited Warranty (“Warranty”) for our Products.
OUR WARRANTY:
Snow Joe warrants new, genuine, powered and non-powered Products to be free from defects in material or workmanship when used for ordinary household use for a period of two years from the date of purchase by the original, end-user purchaser when purchased from Snow Joe or from one of Snow Joe's authorized sellers with proof of purchase. Because Snow Joe is unable to control the quality of its Products sold by unauthorized sellers, unless otherwise prohibited by law, this Warranty does not cover Products purchased from unauthorized sellers. If your Product does not work or there's an issue with a specific part that is covered by the terms of this Warranty, Snow Joe will elect to either (1) send you a free replacement part, (2) replace the Product with a new or comparable product at no charge, or (3) repair the Product. How cool is that!
This Warranty gives you specific legal rights, and you may also have other rights which vary from State to State.
PRODUCT REGISTRATION:
Snow Joe strongly encourages you to register your Product. You can register online at snowjoe.com/register, or by printing and mailing in a registration card available online from our website, or calling our Customer Service Department at 1-866-SNOWJOE (1-866-766-9563), or by e-mailing us at help@snowjoe.com. Failure to register your Product will not diminish your warranty rights. However, registering your Product will allow Snow Joe to better serve you with any of your customer service needs.
WHO CAN SEEK LIMITED WARRANTY COVERAGE:
This Warranty is extended by Snow Joe to the original purchaser and original owner of the Product.
WHAT IS NOT COVERED?
This Warranty does not apply if the Product has been used commercially or for non-household or rental applications. This Warranty also does not apply if the Product was purchased from an unauthorized seller. This Warranty also does not cover cosmetic changes that do not affect performance. Wearing parts like belts, augers, chains and tines are not covered under this Warranty, and can be purchased at snowjoe.com or by calling 1-866-SNOWJOE (1-866-766-9563).

Una división de Snow Joe ^® , LLC Modelo 24V-WSB-CT Forma N° SJ-24V-WSB-CT-880S-MR1