
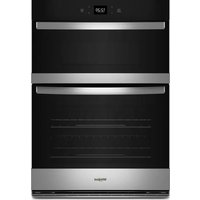
W7 OM75 - Electric oven WHIRLPOOL - Free user manual and instructions
Find the device manual for free W7 OM75 WHIRLPOOL in PDF.
| Product type | Electric oven |
| Brand | Whirlpool |
| Model | W7 OM75 |
| Power supply | 220-240 V ~ 50/60 Hz |
| Power (estimated) | 2500 W |
| Capacity (estimated) | 70 L |
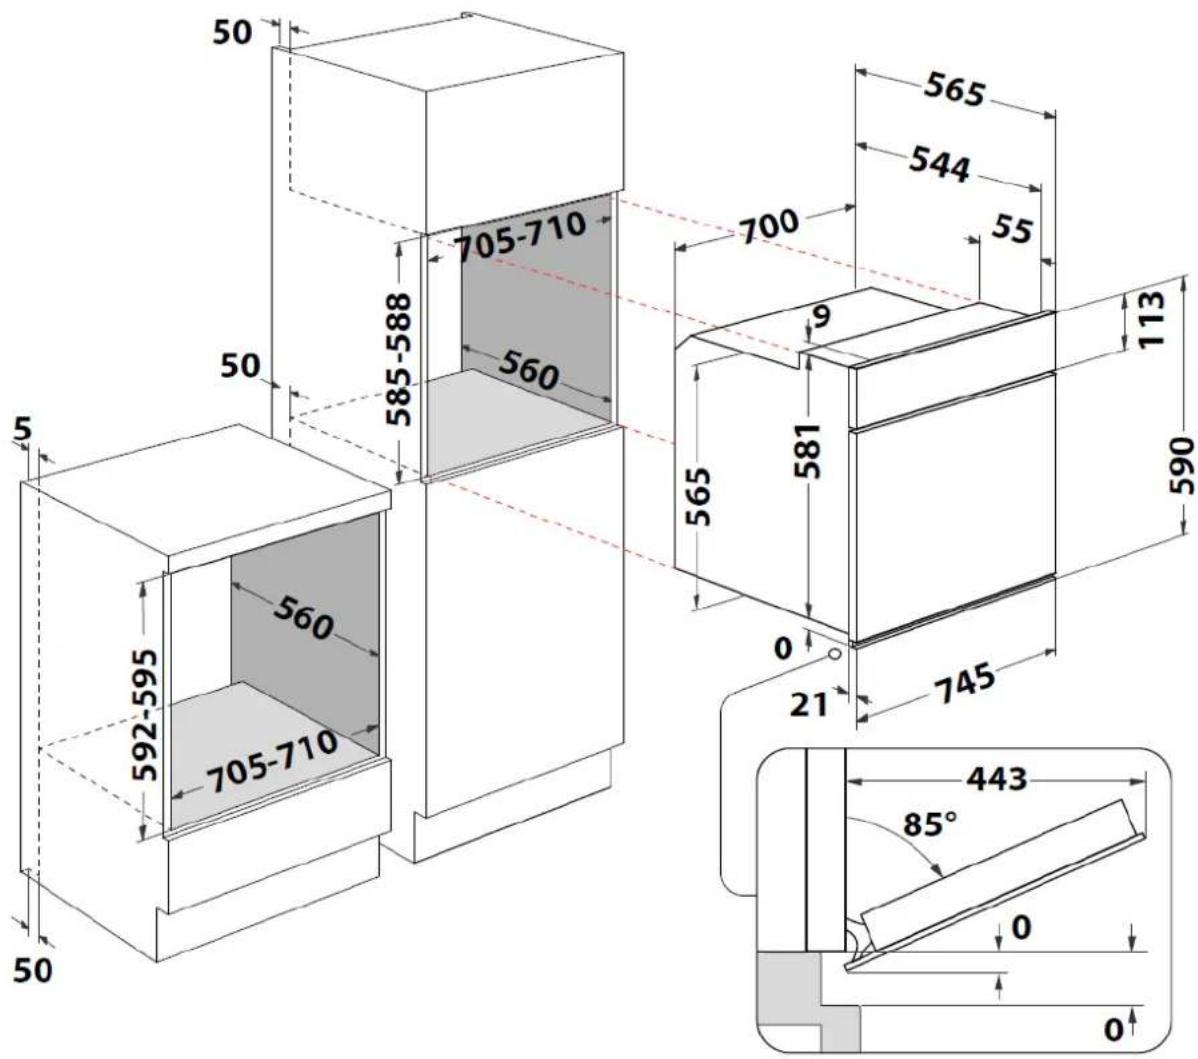
| Dimensions (W x H x D) (estimated) | 595 x 595 x 560 mm |
| Weight (estimated) | 30 kg |
| Number of cooking functions | 7 |
| Cooking functions | Natural convection, Forced hot air, Bottom + fan, Grill, Turbo grill, Fan, Eco mode |
| Electronic timer | Yes |
| Interior lighting | Halogen bulb 25 W (type G9) |
| Removable door | Yes |
| Cleaning | Manual (non-pyrolytic) |
| Automatic key lock | Yes (after 30 seconds) |
| Supplied accessories | Metal grid, drip tray |
| Cooling system | Intermittent operation fan |
| Warranty | See provided booklet |
| After-sales service | Whirlpool authorized service center |
Frequently Asked Questions - W7 OM75 WHIRLPOOL
User questions about W7 OM75 WHIRLPOOL
0 question about this device. Answer the ones you know or ask your own.
Ask a new question about this device
Download the instructions for your Electric oven in PDF format for free! Find your manual W7 OM75 - WHIRLPOOL and take your electronic device back in hand. On this page are published all the documents necessary for the use of your device. W7 OM75 by WHIRLPOOL.
USER MANUAL W7 OM75 WHIRLPOOL
natural_image
Simple line drawing of a computer monitor icon (no text or symbols)natural_image
3D rendering of a rectangular tray with side flanges (no text or symbols)natural_image
Diagram of a ladder inside a storage unit with an arrow indicating direction (no text or symbols)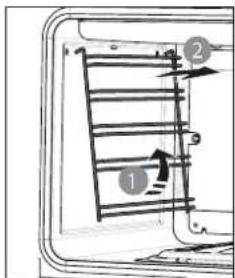

LUCE
natural_image
Three-step illustration showing hands holding a buckle, with a key inserted into a seat (no text or symbols)Nota: Usare solo lampade alogene 25W tipo G9
natural_image
Technical line drawing of a mechanical bracket assembly (no text or symbols)natural_image
Pure technical line drawing of a mechanical assembly without any text, numbers, or symbolsnatural_image
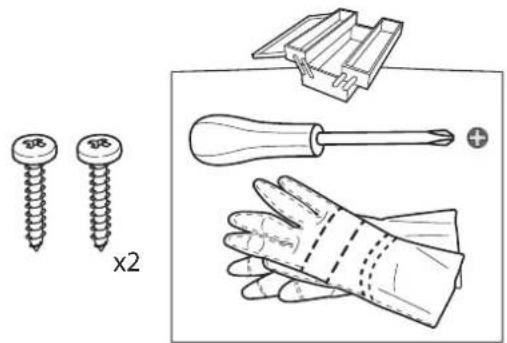
Illustration of screw and tool components including a pushpin, screwdriver, and gloves (no text or symbols)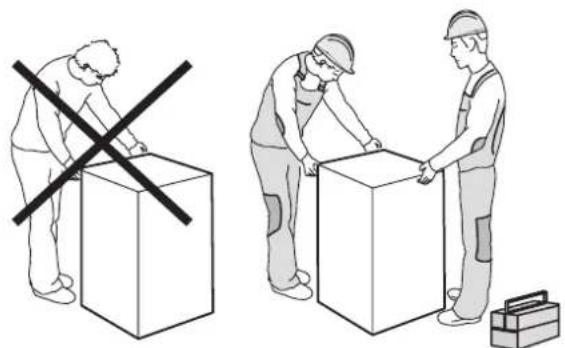
natural_image
Illustration showing two workers handling boxes with a crossed-out box and a toolbox nearby (no text or symbols)

natural_image
Two technical illustrations of a kitchen appliance with a diagonal black X mark, no text or symbols present.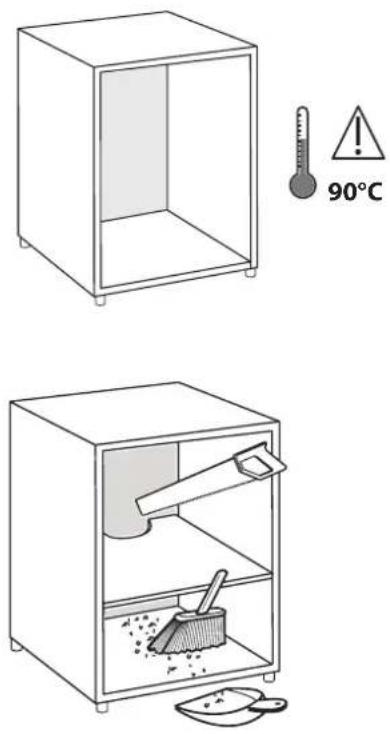
natural_image
Technical line drawing of a cabinet or enclosure with horizontal lines and a labeled dimension '5' (no text or symbols beyond the label)

natural_image
Technical line drawing of an oven with internal compartments and a side view showing internal structure (no text or symbols)


natural_image
Simple line drawing of a computer monitor icon (no text or symbols)DÉCLARATIONS DE CONFORMITÉ
natural_image
3D rendering of a rectangular plastic tray with side flanges (no text or symbols)natural_image
Diagram of a ladder inside a container with an arrow pointing to the ladder (no text or symbols present)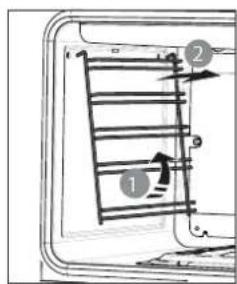

ÉCLAIRAGE
natural_image
Illustration showing three steps of a car seatbelt buckle being adjusted, with no text or symbols present.natural_image
Technical line drawing of a mechanical bracket assembly (no text or symbols)natural_image
Pure mechanical assembly diagram showing a bracket and mounting bracket without any text or symbolsnatural_image
Illustration of various screw and tool components including a screw, plunger, and gloves (no text or symbols)
natural_image
Illustration showing two workers handling boxes with a cross symbol, one holding a tool and the other handling a box (no text or symbols present)


natural_image
Two technical illustrations of a device with a cross symbol, one showing a broken-out section and the other showing a mounted device (no text or symbols present)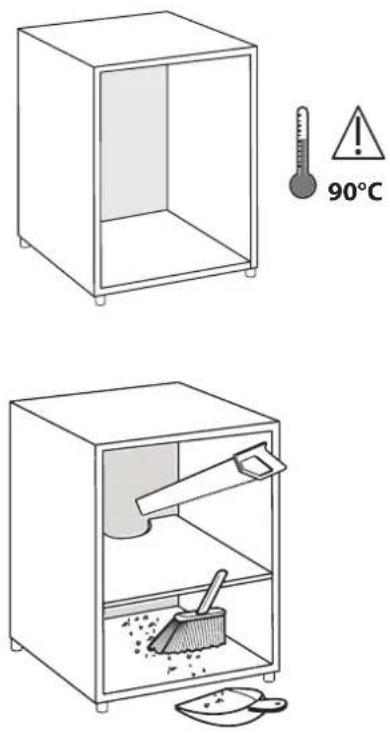
natural_image
Technical line drawing of a cabinet or enclosure with a sloped roof and a wall-mounted panel, no text or symbols present.

natural_image
Technical line drawing of an oven with internal compartments and a side view showing internal structure (no text or symbols)
natural_image
Illustration of a person in protective gear conducting electrical installation with a battery and switch (no text or symbols)


natural_image
Simple line drawing of a computer monitor icon (no text or symbols)Safety instructions Use and Care guide Installation guide
SAFETY INSTRUCTIONS
Before using the appliance, read these safety instructions. Keep them nearby for future reference.
These instructions and the appliance itself provide important safety warnings that must be read and heeded at all times. The manufacturer does not accept any liability for failure to observe these safety instructions, for inappropriate use of the appliance or for incorrect setting of the controls.
⚠️ Keep the appliance out of the reach of children under the age of 3. Children under the age of 8 should be kept away from the appliance unless they are continuously supervised. Children over 8 years old and persons who have reduced physical, sensory or mental capabilities, or persons who lack experience with or knowledge of this appliance, should only use it if they are supervised or have been given instructions on how to use it safely and are aware of the hazards involved. Children must not play with the appliance. Cleaning and user maintenance must not be carried out by children without supervision.
WARNING: The appliance and its accessible parts may get very hot during use. Be careful not to touch the heating elements. Children less than 8 years of age must be kept away unless continuously supervised.
⚠️ Never leave the appliance unattended when dehydrating food. If the appliance is designed for use with a heat probe, use only the types of probe recommended for this oven to avoid the risk of fire. ⚠️ Keep clothes or other flammable materials away from the appliance until all the components have cooled down completely to avoid the risk of fire. Always be vigilant when cooking foods rich in fat, oil or when adding alcoholic beverages, as they present a fire risk. Use oven gloves to remove pans and accessories.
At the end of cooking, open the door with caution, allowing hot air or steam to escape gradually before taking the dish out, to avoid the risk of burns. Do not obstruct the hot air vents on the front of the oven as this will create a fire risk.
Exercise caution when the oven door is in the open or down position, to avoid hitting the door.
IMPORTANT: READ AND FOLLOW THESE INSTRUCTIONS
PERMITTED USE
⚠️ CAUTION: the appliance is not intended to be operated by means of an external switching device such as a timer, or using a separate remote control system.
The appliance is designed for domestic use and similar applications, such as: staff kitchen areas in shops, offices and other working environments; farm houses; by clients in hotels, motels, bed & breakfast and other residential environments.
⚠️ No other use is permitted (e.g. heating rooms).
This appliance is not for professional use. Do not use the appliance outdoors.
⚠️ Do not store explosive or flammable substances (e.g. gasoline canisters or aerosol cans) inside or near the appliance to avoid the risk of fire.
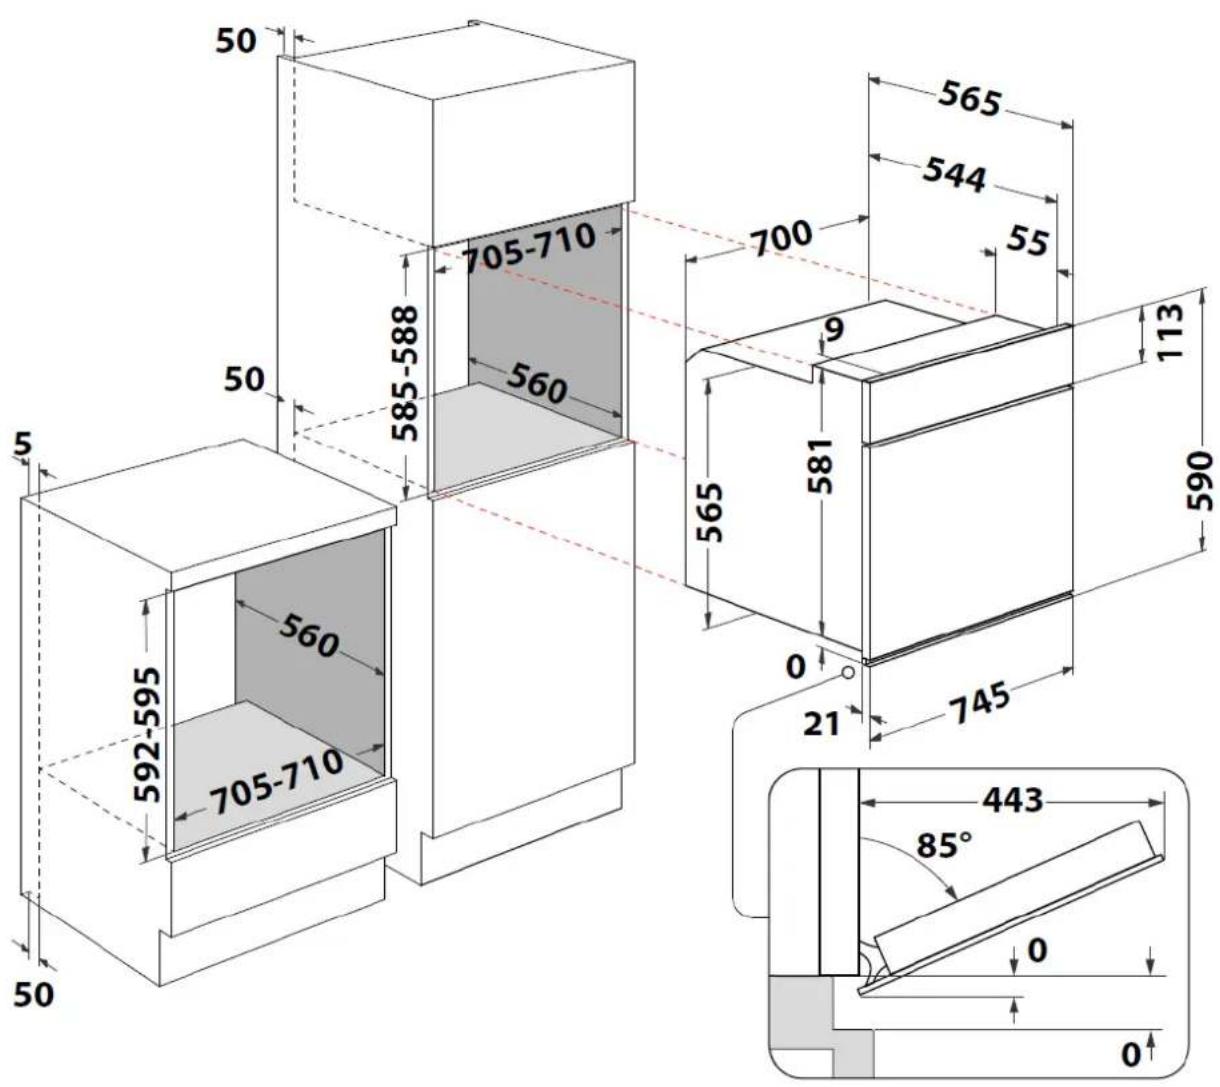
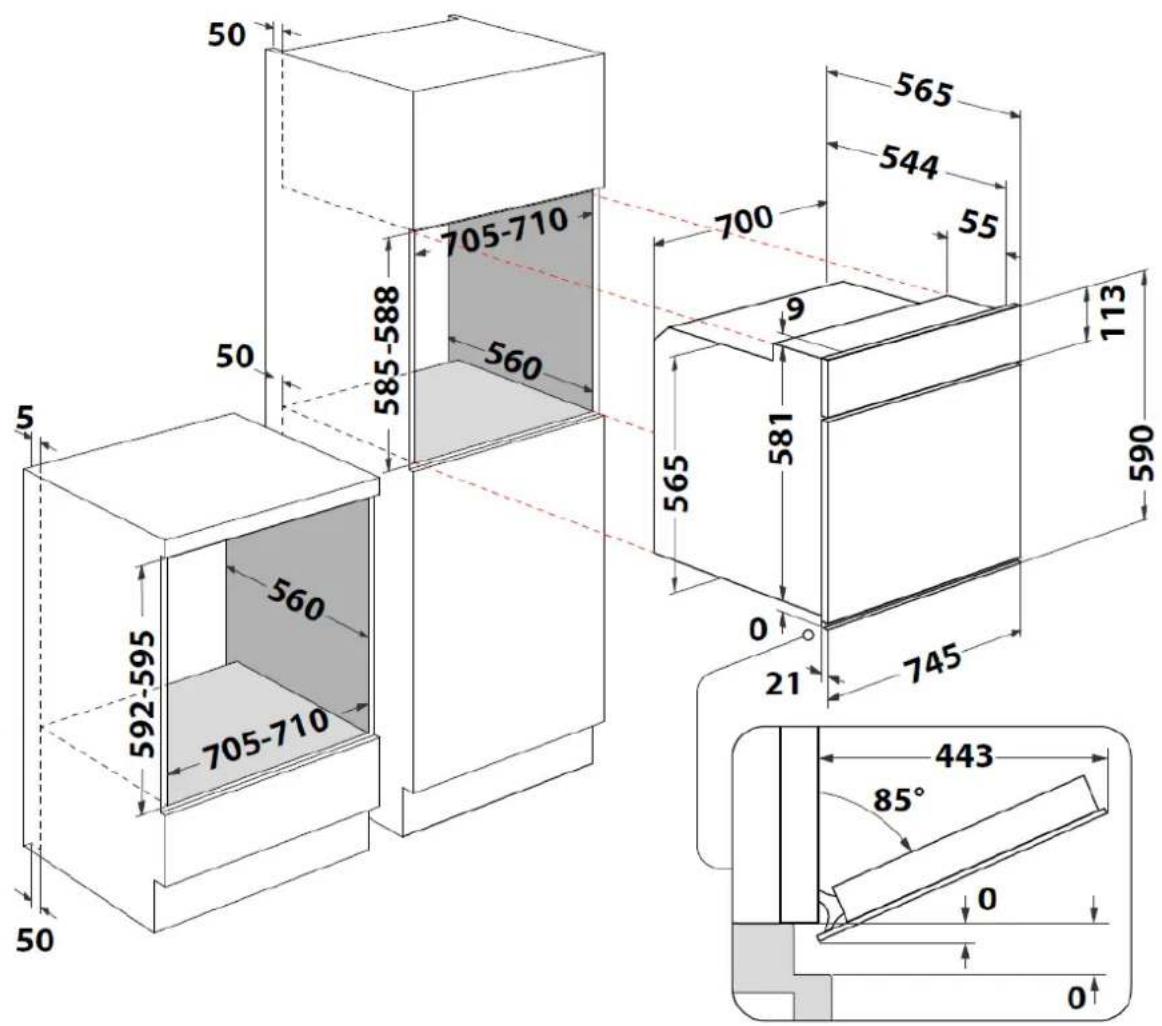
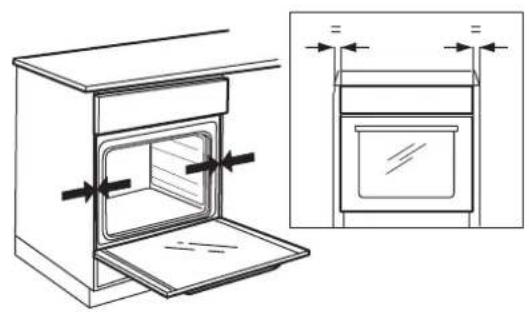
INSTALLATION
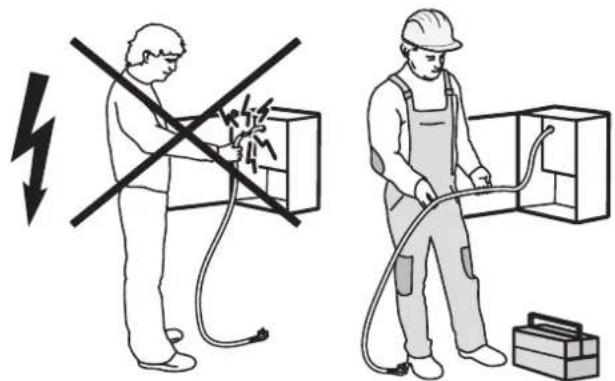
⚠️ The appliance must be handled and installed by at least two people to avoid any risk of injury. Use protective gloves to unpack and install - risk of cuts.
⚠️ Installation, including water supply (if any), electrical connections and repairs must be carried out by a qualified technician.
Do not repair or replace any part of the appliance unless specifically indicated in the user manual.
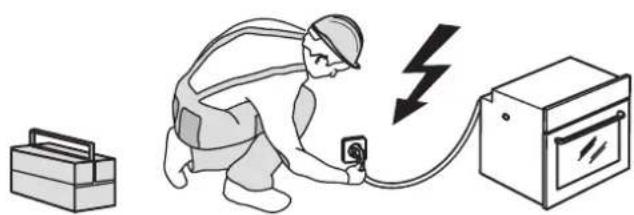
Keep children away from the installation site. After unpacking the appliance, make sure it has not been damaged during transportation. In the event of problems, contact the dealer or your nearest Aftersales Service. Once installed, packaging waste (plastic, polystyrene parts etc.) must be stored out of reach of children - risk of suffocation. To avoid any risk of electric shock, disconnect the appliance from the power supply before installing it.
During installation, make sure the appliance cannot damage the power cable and create a risk of electric shock. Do not switch on the appliance until installation is complete.
⚠️ Carry out all cabinet cutting works before fitting the appliance in the furniture and remove all wood chips and sawdust.
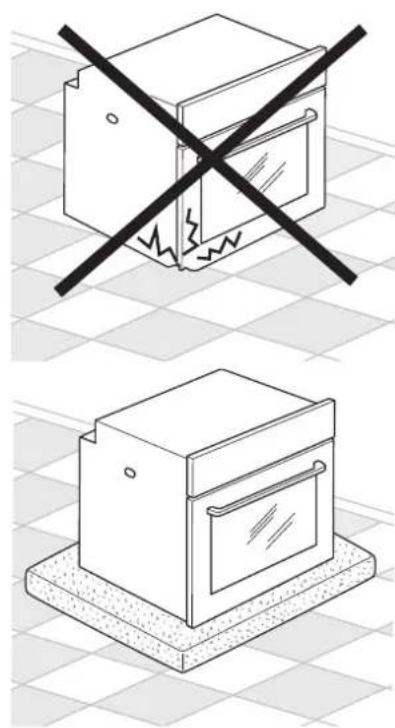
Do not remove the appliance from its polystyrene base until the time of installation.
⚠️ After installation, the bottom of the appliance must no longer be accessible - risk of burns.
⚠️ Do not install the appliance behind a decorative door - possible fire risk.
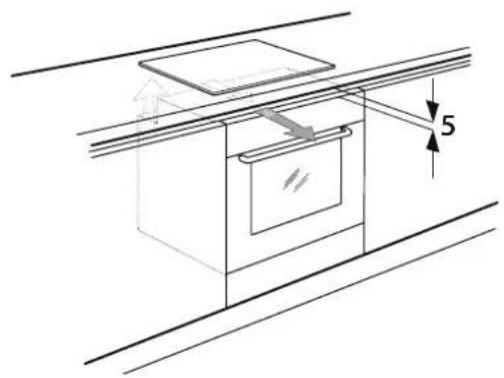
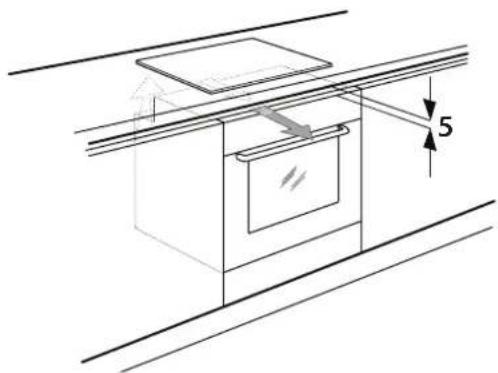
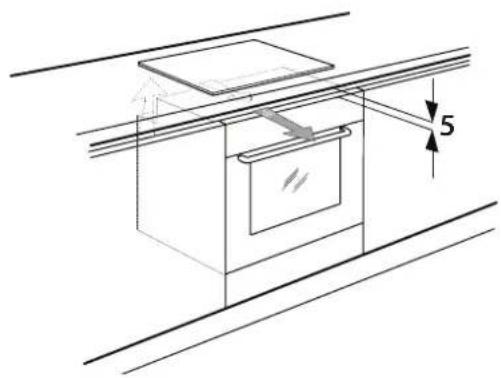
⚠️ If the appliance is installed under the worktop, do not obstruct the minimum gap between the worktop and the upper edge of the oven as this may create a fire risk.
ELECTRICAL WARNINGS
⚠️ The rating plate is on the front edge of the oven (visible when the door is open).
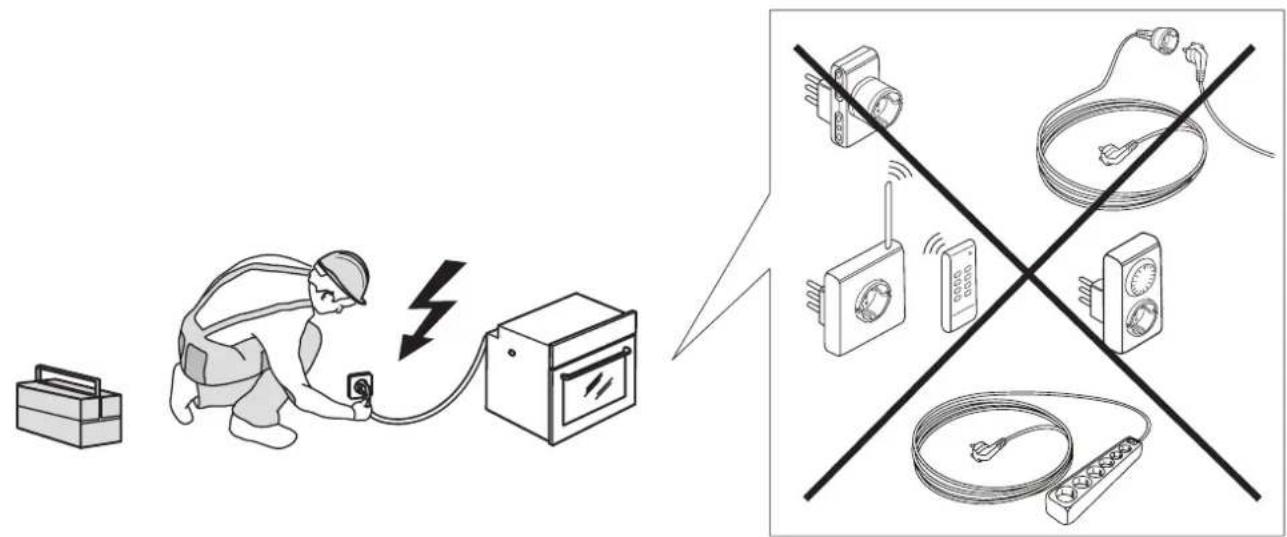
⚠ It must be possible to disconnect the appliance from the mains supply by unplugging it (if the plug is accessible), or via a multi-pole switch installed upstream of the socket in accordance with the wiring rules. The appliance must be earthed in conformity with national electrical safety standards.
⚠️ Do not use extension leads, multiple sockets or adapters. After installation, the electrical components must no longer be accessible. Do not use the appliance when you are wet or barefoot. Do not switch the appliance on if the power cable or plug is damaged, if it is not working properly, or if it has been damaged or dropped. ⚠️If the supply cord is damaged, it must be replaced with an identical one by the manufacturer, its service agent or similarly qualified persons in order to avoid a hazard - risk of electric shock.
⚠️ If the power cable needs to be replaced, contact an authorised service centre.
CLEANING AND MAINTENANCE
⚠ WARNING: To avoid any risk of electric shock, make sure the appliance is switched off and disconnected from the mains supply before carrying out any maintenance work. To avoid risk of personal injury use protective gloves (risk of laceration) and safety shoes (risk of contusion); be sure to handle by two persons (reduce load); never use steam cleaning equipment (risk of electric shock).
Non-professional repairs not authorised by the manufacturer could result in a risk to health and safety, for which the manufacturer cannot be held liable. Defects or damage resulting from non-professional repairs or maintenance are not be covered by the guarantee, the terms of which are outlined in the document delivered along with the unit.
⚠ Do not use harsh abrasive cleaners or metal scrapers to clean the door glass since they can scratch the surface, which may result in shattering of the glass.
⚠️ Make sure the appliance has cooled down before cleaning or performing maintenance. - risk of burns.
⚠ WARNING: switch the appliance off before replacing the lamp - risk of electric shock.
DISPOSAL OF PACKAGING MATERIALS
The packaging material is 100% recyclable and is marked with the recycle symbol. The various parts of the packaging must therefore be disposed of responsibly and in full compliance with local authority regulations.
DISPOSAL OF HOUSEHOLD APPLIANCES
This appliance is manufactured with recyclable or reusable materials. Dispose of it in accordance with local waste disposal regulations. For further information on the treatment, recovery and recycling of household electrical appliances, contact your local authority, the household waste collection service, or the shop where you purchased the appliance. This appliance is marked in accordance with European Directive 2012/19/EU, Waste Electrical and Electronic Equipment (WEEE) and with the Waste Electrical and Electronic Equipment regulations 2013 (and subsequent modifications). By ensuring this product is disposed of correctly, you will help prevent negative consequences for the environment and health.
The symbol 🖱️ on the product or on the accompanying documentation indicates that it should not be treated as domestic waste but must be taken to an appropriate collection centre for the recycling of electrical and electronic equipment.
ENERGY-SAVING TIPS
Only preheat the oven if specified in the cooking table or your recipe. Use dark lacquered or enamelled baking trays as they absorb heat better.
Food requiring prolonged cooking will continue to cook even once the oven is switched off.
DECLARATIONS OF CONFORMITY
This appliance meets: Ecodesign requirements of European Regulation 66/2014; Energy Labelling Regulation 65/2014; Ecodesign for Energy-Related Products and Energy Information (Amendment) (EU Exit) Regulations 2019, in compliance with the European standard EN 60350-1.
This product contains a light source of energy efficiency class G.
PRODUCT DESCRIPTION
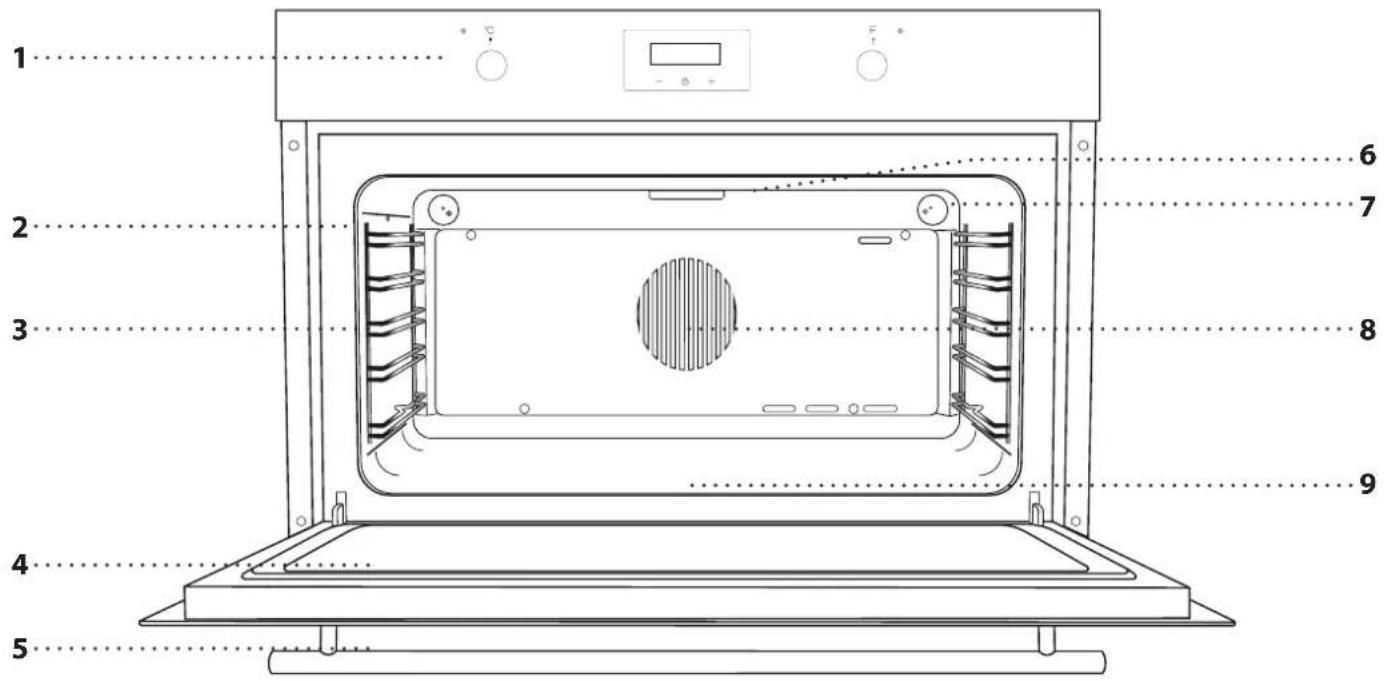
- control panel
- Shelf guides
(the level is indicated on the front of the oven)
- Turnspit insert point
- Oven door (Soft Closing)
-
Handle
-
Upper heating element/grill
- Light
- Fan and circular heating element
- Bottom heating element (non-visible)
CONTROL PANEL DESCRIPTION

1. THERMOSTAT KNOB
Turn to select the desired temperature.
2. TEMPERATURE LED
Lights up during the warm-up phase; switches off once the required temperature has been reached.
3. + / - BUTTONS
To decrease or increase the value shown on the display.
4. TIME BUTTON
for selecting the various settings: duration, cooking end time, timer.
5. DISPLAY
6. SELECTION KNOB
For switching the oven on by selecting a function. Turn to the 0 position to switch the oven off.
7. "OVEN ON" LED
Indicates that the oven is ON; in the 0 position, the oven is OFF.
Please note: All knobs are push activated knobs.
Push down on the centre of the knob to release it from its seating.
WIRE RACK
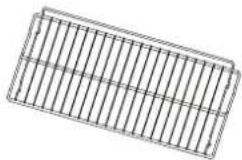
To be used when cooking food, or as a support for pans, cake tins and other oven-proof cookware.
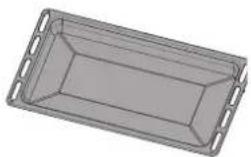
DRIP TRAY
natural_image
3D rendering of a rectangular tray with side flanges (no text or symbols)Use as an oven tray for cooking meat, fish, vegetables, cacciatore, etc. or position underneath the wire shelf to collect cooking juices.
The number and the type of accessories may vary depending on which model is purchased.
Other accessories can be purchased separately from the After-sales Service.
INSERTING THE WIRE SHELF AND OTHER ACCESSORIES
Insert the wire shelf horizontally by sliding it across the shelf guides, making sure that the side with the raised edge is facing upwards. Other accessories, such as the drip tray and the baking tray, are inserted horizontally in the same way as the wire shelf.
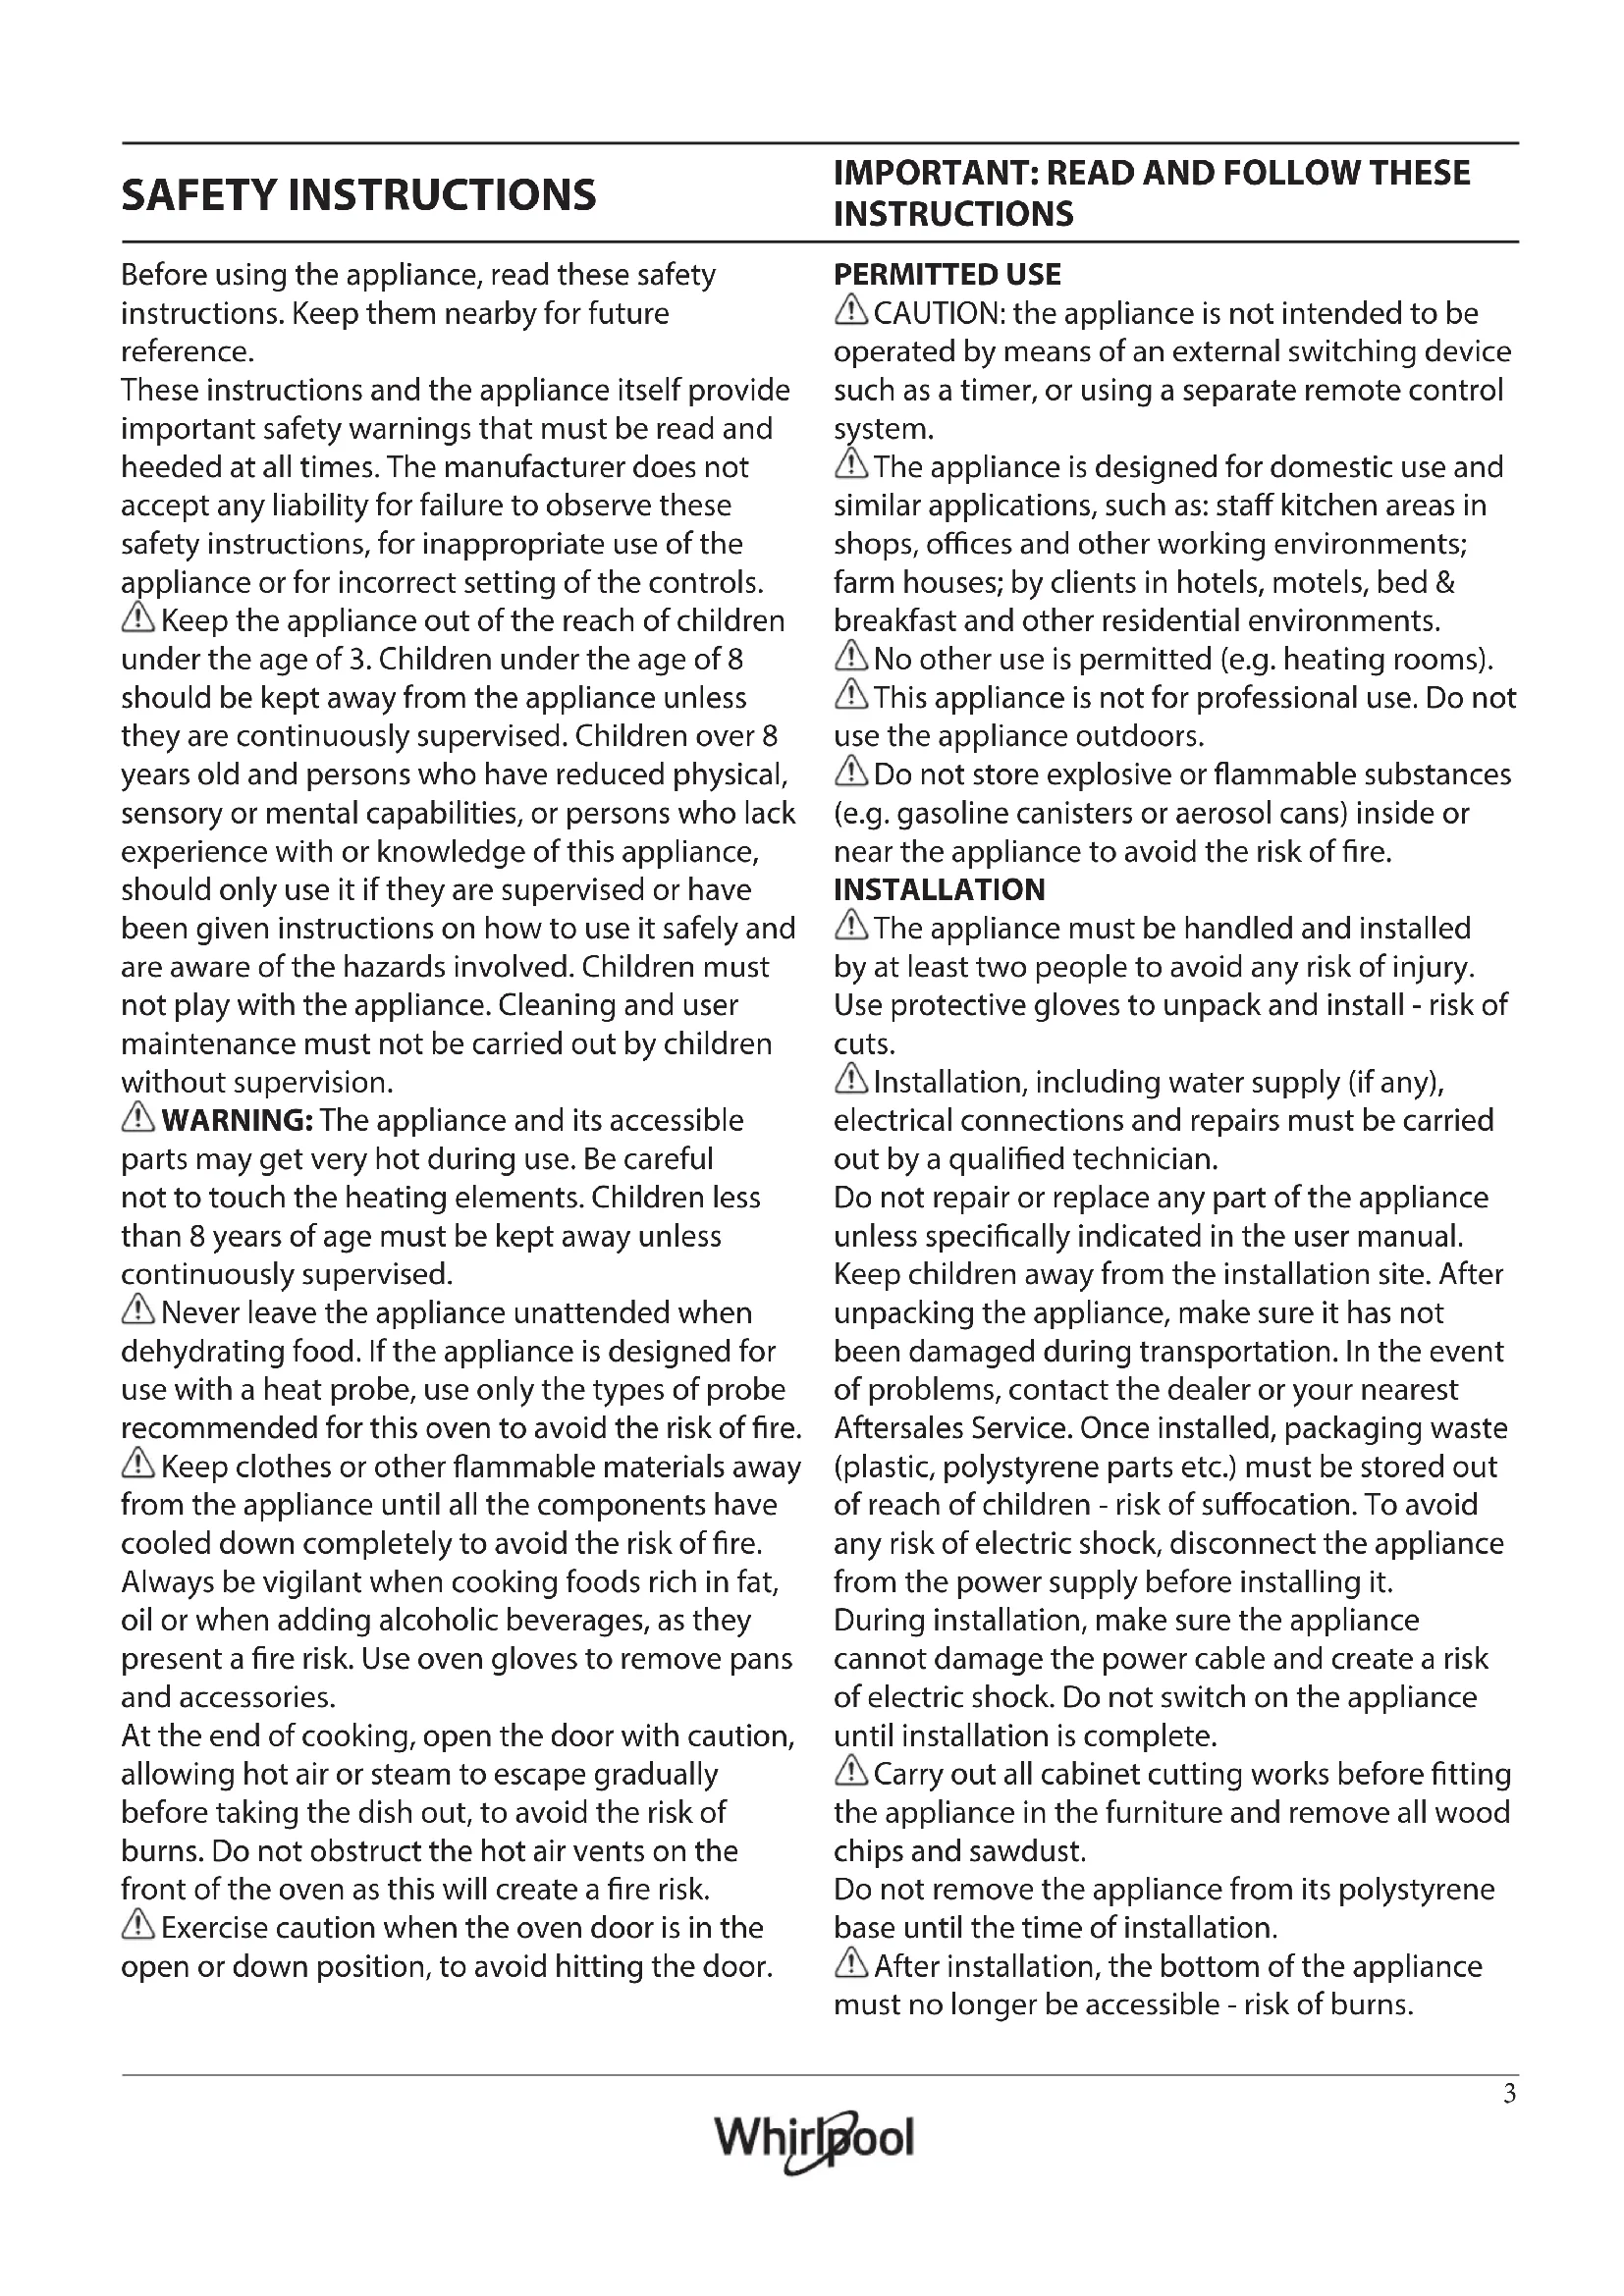
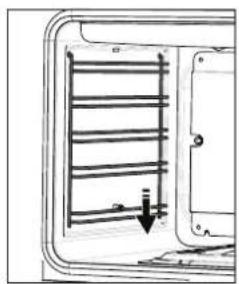
REMOVING AND REFITTING THE SHELF GUIDES
• To remove the side guides, take hold of them and lower them to detach the bottom part. Then gently pull the upper part out of their seating.
• To refit the side guides, insert them in the upper seat then lower them and push the bottom part into its seat.
natural_image
Diagram of a ladder inside a container with an arrow pointing to the ladder (no text or symbols present)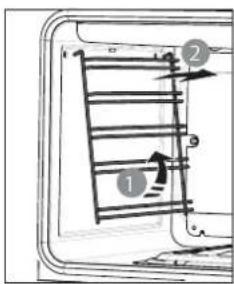
FUNCTIONS

LAMP
To switch the oven light on.

CONVENTIONAL
For cooking any kind of dish on one shelf.

FORCED AIR
For cooking meat, filled pies (cheesecake, strudel, fruit pies) and stuffed vegetables on one level only. This function can also be used for cooking on two shelves. Switch the position of the dishes to cook food more evenly.

BOTTOM + FAN
To finish cooking food with a very liquid consistency and to obtain crisp, golden bases. Also useful for thickening sauces.

GRILL
For grilling steaks, kebabs and sausages, cooking vegetables au gratin or toasting bread. When grilling meat, we recommend using a drip tray to collect the cooking juices: position the tray on any of the levels below the wire shelf and add 500 ml of drinking water.

TURBO GRILL
For roasting large joints of meat (legs, roast beef, chicken). We recommend using a drip tray to collect the cooking juices: Position the pan on any of the levels below the wire shelf and add 500 ml of drinking water.

FAN
For cooking any kind of dish on one shelf.

FORCED AIR
With this type of cooking, a fan evenly distributes the hot air flow inside the oven. The cooking time is therefore reduced compared with conventional cooking. Ideal for multi-level cooking because several dishes (all requiring the same temperature) can be cooked at the same time on up to 3 shelves. If there are dishes that need less cooking time, remove them from the oven first, leaving the others to cook for longer.

ECO-MODE
This mode is intended to save energy. Ideal for frozen or precooked food, and small portions meals. The preheating time is very short, and the cooking process tends to be slower. it is not recommended for large portions or big meal preparations.
USING THE APPLIANCE FOR THE FIRST TIME
1. SETTING THE TIME AND THE TONE
You will need to set the time when you switch on the appliance for the first time: "AUTO" and "0.00" will flash on the display.
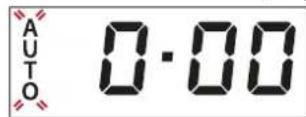
To set the clock, press the central button for about 3 seconds. When the ⏻ symbol appears, use the + and - buttons to set the time.
Wait until a buzz confirms that the clock has been set.
Please note: to change the time afterwards, for example following a lengthy power cut, proceed as described above.
2. REHEAT THE OVEN
A new oven may release odours that have been left behind during manufacturing: this is completely normal. Before starting to cook food, we therefore recommend heating the oven with it empty in order to remove any possible odours.
Remove any protective cardboard or transparent film from the oven and remove any accessories from inside it. Heat the oven at the maximum temperature for about 1 hour. The oven must be empty during this time. Follow the instructions for setting the function correctly.
Please note: It is advisable to air the room after using the appliance for the first time.
1. SELECT A FUNCTION
To select a function, turn the selection knob to the symbol for the function you require.
2. ACTIVATE A FUNCTION
To start the function you have selected, turn the thermostat knob to set the temperature you require. To interrupt the function at any time, switch off the oven, turn the selection knob and the thermostat knob to 0 and 0.
3. USING THE ELECTRONIC PROGRAMMER
By pressing the time button it is possible to select various mode to keep or program the cooking time.
SETTING THE MINUTE MINDER
This option does not interrupt or activate cooking but allows you to use the display as a timer, both while a function is active and when the oven is off. To activate the timer, long press the central button: the 🔔 symbol will flash on the display. (1).
Set the duration using the + and - buttons: the countdown begins after a few seconds.
At the end, press any button to deactivate the alarm.
1
0.00
SETTING THE DURATION
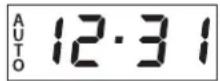
After selecting and activating the function, in order to stop it automatically, you can set a cooking time. Long press the central button. DUR and AUTO will appear on the display.
Set the duration using the + and - buttons.
2
13.20
After a few seconds, AUTO remains lit, confirming the setting (2).
When the set cooking time is over, an alarm will sound and the cooking will be stopped.
Press the time button to deactivate the alarm. Return the selection knob and thermostat knob to 0 and ● to switch off the oven.
FULLY AUTOMATIC PROGRAM / DELAYED START
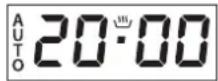
You can delay the start of the function by programming its end time.
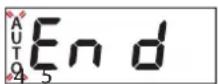
After setting the duration, press the central button until the display shows END (3). Press the + and - buttons to select the cooking end time. After a few seconds the display shows the symbol 🎨 and AUTO,
confirming the setting (4).
If you set both the duration and the end time, the function will remain paused until the symbol lights up: at that point the oven proceeds automatically with the selected cooking mode (5).
3
At the end, long press any button to deactivate the alarm. Return the selection knob and thermostat knob to 0 and ● to switch off the oven.
Please note: By only selecting the end time (with no duration setting), the function will immediately start. The cooking will continue up to the required end time.
OPTIONS
ALARM TONE
To set the alarm tone, press and hold buttons + and - simultaneously.
To select the required tone, press the + or - button, and then the central button to confirm.
KEY LOCK
The key lock is activated 30 seconds after the last pressing of a button. The 🔒 icon is shown on display. To deactivate it, long press the time button.
4. PREHEATING
Once the function has been activated, the LED thermostat will switch on signalling that the preheating process has begun.
At the end of this process, the LED thermostat switches off indicating that the oven has reached the set temperature: at this point, place the food inside and proceed with cooking.
Please note: Placing the food in the oven before preheating has finished may have an adverse effect on the final cooking result.
COOLING SYSTEM
The cooling fan may switch itself on every so often during cooking in order to reduce energy consumption.
Once cooking is complete and the oven has been switched off, the cooling fan may continue to run for a certain period of time.
Make sure that the oven has cooled down before carrying out any maintenance or cleaning.
Do not use steam appliances.
Do not use wire wool, abrasive scourers or abrasive/corrosive cleaning agents, as these could damage the surfaces of the appliance.
Wear protective gloves.
The oven must be disconnected from the mains before carrying out any kind of maintenance work.
EXTERIOR SURFACES
- Clean the surfaces with a damp Microfibre cloth. If they are very dirty, add a few drops of pH -neutral detergent. Dry with a dry cloth.
- Do not use corrosive or abrasive detergents. If any of these products inadvertently comes into contact with the surfaces of the appliance, clean immediately with a damp microfibre cloth.
INTERIOR SURFACES
- After every use, leave the oven to cool and then clean it - preferably while it's still warm - to remove any deposits or stains caused by food residue. To dry any condensation that has formed as a result of cooking foods with a high water content, leave the oven to cool completely and then wipe it with a cloth or sponge.
- Clean the glass in the door with a specific liquid detergent.
- The oven door can be removed to facilitate cleaning.
ACCESSORIES
Soak the accessories in a washing-up liquid solution after use, handling them with oven gloves if they are still hot. Food residues can be removed using a washing-up brush or a sponge.
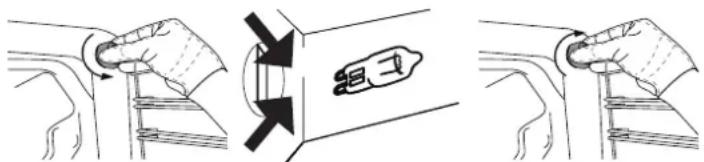
REPLACING THE LAMP
- Disconnect the oven from the mains supply.
- Unscrew the lamp cover, replace the lamp, then screw the lamp cover back on.
- Reconnect the oven to the mains supply.
natural_image
Illustration showing three steps of a hand fastening a seatbelt, with no text or symbols present.Please note: use only 25W type G9 220W -240V T300°C halogen lamps. The lamp used in the device is specifically designed for domestic appliances and is not suitable for general room lighting in the home (EC Regulation 244/2009).
Light bulbs are available from our After-sales Service. When using bulbs, do not handle them with your bare hands as your fingerprints could cause damage. Do not use the oven until the lamp cover has been repositioned.
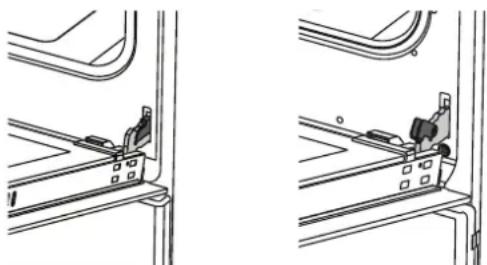
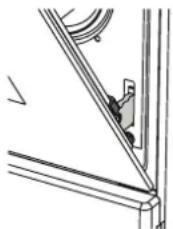
REMOVING AND REFITTING THE DOOR
To remove the door, open it fully and lower the catches until they are in the unlock position. Set the hinge lock to the widest angle. Adjust both hinges connecting oven door to the oven to the same position.
natural_image
Technical line drawing of a mechanical bracket assembly (no text or symbols)Partially close the oven door so it's in contact with the hinge lock.
natural_image
Pure mechanical assembly diagram showing a bracket and mounting bracket without any text or symbolsFake a firm hold of the door with both hands – do not hold it by the handle. Remove it by continuing to close it while pulling it upwards and outwards at the same time until it's released from its seat.
Put the door to one side, resting it on a soft surface. To reinstall the door, repeat the above steps but in reverse order.
Please note: the door hinges use Soft Closing technology, a special system that allows the door to close gradually, avoiding any noise (even when it's accidentally closed).
COOKING TABLE
| RECIPE FUNCTION TEMPERATURE (°C) DURATION (MIN) LEVEL | ||||
| Cake |  | 160-200 30 - 50 | 2 / 3 | |
| Small Cake |  | 160-180 20-40 | 2 | |
| Desserts |  | 140 - 160 20-40 | 2 | |
| Cookies |  | 140 - 160 10 - 40 | 2 | |
| Pizza |  | 200 10 - 20 | 1 - 3 | |
| Lasagne |  | 180-200 50 - 60 | 2 | |
| Grilled Chicken* |  | 220 50 - 60 | 2 / 3 | |
| Grilled Fish* |  | 190 60 - 70 | 2 / 3 | |
 | 160-180 45 - 60 | 2 / 3 | ||
| Calf Steak* |  | Max. 30 | 4 | |
| Sausages / meatballs* |  | Max. 18 | 4 | |
| Vegetables 170 - 190 | 40 | 3 | ||
* Turn the food halfway through cooking


| Problem Possible cause Solution | ||
| The oven does not switch on Power cut. | Disconnection from the mains. | Check the mains supply is OK, and that the oven is connected to it.Wait at least one minute, then try to switch the oven on again and see if the problem persists. |
| Switch-on procedure carried out incorrectly. | Wait at least one minute and then repeat the steps described in the “How to operate the oven” section. | |
| In the event of problems, turn the adjustment knob to the ● position and open the oven door. | ||
AFTER-SALES SERVICE
Before calling the After-Sales Service:
See if you can solve the problem yourself with the help of the suggestions given in the "Troubleshooting".
If after the above checks the fault still occurs, get in touch with the nearest After-sales Service.
Be prepared to provide:
• a brief description of the fault;
• the type and exact model of the oven;
- the service code (the number after the word
"Service" on the serial number plate).
The plate is located on the inner right edge of the oven, and can be seen when the oven door is open. The service number is also indicated on the guarantee booklet;
- your full address;
- your telephone number.
If any repairs are required, please contact an authorised After-sales Service (to guarantee that original spare parts will be used and repairs carried out correctly).
natural_image
Illustration of various screw and tool components including a screw, plunger, and gloves (no text or symbols)
natural_image
Illustration showing two workers handling boxes with a cross symbol, one holding a tool and the other handling a box (no text or symbols present)
natural_image
Two technical illustrations of a device with a cross symbol, one showing a broken-out section and the other showing a mounted device (no text or symbols present)
natural_image
Technical line drawing of a mechanical assembly with dimension label '5' (no text or symbols present)
natural_image
Technical line drawing of an oven with internal compartments and a side view showing internal structure (no text or symbols)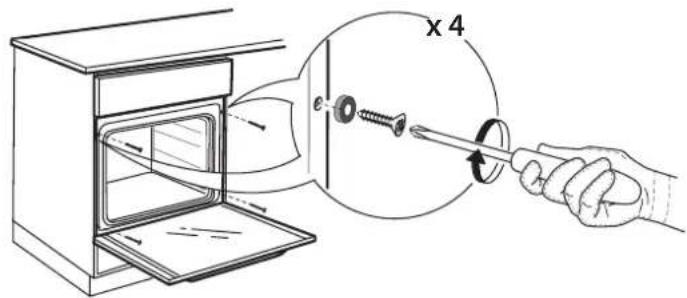

natural_image
Illustration of a person in protective gear conducting electrical installation with a battery and switch (no text or symbols)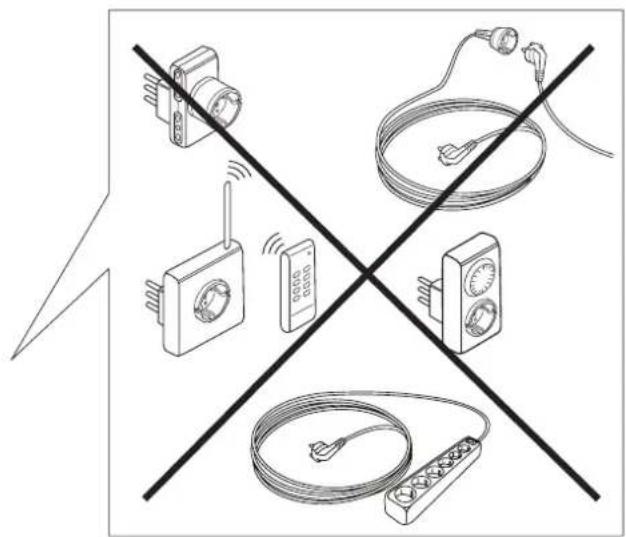

- LUCE
- DÉCLARATIONS DE CONFORMITÉ
- ÉCLAIRAGE
- SAFETY INSTRUCTIONS
- IMPORTANT: READ AND FOLLOW THESE INSTRUCTIONS
- PERMITTED USE
- INSTALLATION
- ELECTRICAL WARNINGS
- CLEANING AND MAINTENANCE
- DISPOSAL OF PACKAGING MATERIALS
- DISPOSAL OF HOUSEHOLD APPLIANCES
- ENERGY-SAVING TIPS
- DECLARATIONS OF CONFORMITY
- PRODUCT DESCRIPTION
- CONTROL PANEL DESCRIPTION
- THERMOSTAT KNOB
- TEMPERATURE LED
- + / - BUTTONS
- TIME BUTTON
- DISPLAY
- SELECTION KNOB
- "OVEN ON" LED
- WIRE RACK
- DRIP TRAY
- INSERTING THE WIRE SHELF AND OTHER ACCESSORIES
- REMOVING AND REFITTING THE SHELF GUIDES
- FUNCTIONS
- LAMP
- CONVENTIONAL
- FORCED AIR
- BOTTOM + FAN
- GRILL
- TURBO GRILL
- FAN
- ECO-MODE
- USING THE APPLIANCE FOR THE FIRST TIME
- SETTING THE TIME AND THE TONE
- REHEAT THE OVEN
- SELECT A FUNCTION
- ACTIVATE A FUNCTION
- USING THE ELECTRONIC PROGRAMMER
- SETTING THE MINUTE MINDER
- SETTING THE DURATION
- FULLY AUTOMATIC PROGRAM / DELAYED START
- OPTIONS
- ALARM TONE
- KEY LOCK
- PREHEATING
- COOLING SYSTEM
- EXTERIOR SURFACES
- INTERIOR SURFACES
- ACCESSORIES
- REPLACING THE LAMP
- REMOVING AND REFITTING THE DOOR
- AFTER-SALES SERVICE
Brand : WHIRLPOOL
Model : W7 OM75
Category : Electric oven