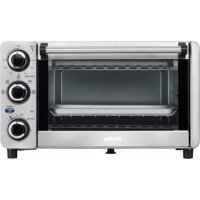
DBTO0961ABSS - Toaster DANBY - Free user manual and instructions
Find the device manual for free DBTO0961ABSS DANBY in PDF.

| Brand | Danby |
| Model | DBTO0961ABSS |
| Product Type | Multifunction Toaster Oven |
| Oven Capacity | 25 liters |
| Rated Power | Not specified in manual (estimated 1500 W) |
| Power Supply | 120 V ~ 60 Hz |
| Dimensions (approx.) | Not specified (estimated 45 x 35 x 30 cm) |
| Weight (approx.) | Not specified (estimated 6 kg) |
| Main Functions | Air fry, toast, bake, cookies, broil, dehydrate, keep warm, pizza |
| Browning Settings | 7 levels for toast |
| Temperature Range | Not specified (estimated 80-230 °C) |
| Timer | Yes, up to 60 minutes |
| Included Accessories | Wire rack, baking pan, crumb tray, handle, air fry basket |
| Material | Stainless steel, tempered glass door |
| Care and Cleaning | Clean with a damp cloth and mild soap. Do not immerse. Allow to cool before cleaning. |
| Safety | Auto shut-off, hot surfaces, grounding required, do not leave unattended |
| Spare Parts and Repairability | No user-serviceable parts. Contact an authorized service center. |
| Warranty | 2 years (functional parts) with possible 2-month extension upon registration |
| Usage | Household use only |
Frequently Asked Questions - DBTO0961ABSS DANBY
User questions about DBTO0961ABSS DANBY
0 question about this device. Answer the ones you know or ask your own.
Ask a new question about this device
Download the instructions for your Toaster in PDF format for free! Find your manual DBTO0961ABSS - DANBY and take your electronic device back in hand. On this page are published all the documents necessary for the use of your device. DBTO0961ABSS by DANBY.
USER MANUAL DBTO0961ABSS DANBY
Do the right thing.*
OWNER'S MANUAL MANUEL DU PROPRIÉTAIRE MANUAL DEL PROPIETARIO
TOASTER OVEN
Owner's Manual....1 - 10
FOUR GRILLE-PAIN
Welcome to the Danby family.
We are proud of our quality products and we believe in dependable service. We suggest that you read this owner's manual before plugging in your new appliance as it contains important operation information, safety information, troubleshooting, and maintenance tips to ensure the reliability and longevity of your appliance.
You are entitled to the warranty coverage as described in the owner's manual provided with your new appliance.
- Please write down your appliance information below. You must keep the original proof of purchase receipt to validate and receive warranty services.
- Register your product online and receive a FREE 2 MONTH WARRANTY EXTENSION after fi lling out a product survey, at www.danby.com/support/product-registration/
Model Number:
Serial Number:
Date of Purchase:
Need Help?
- Read your Owner's Manual for installation help, troubleshooting, and maintenance assistance.
- Visit www.Danby.com to access self-service tools, FAQs and much more by searching your model number in the search bar.
- For the Quickest Customer Service, please fill out the web form at www.danby.com/support. Your submission will go directly to an expert on your particular appliance. Our average response times are between 20 minutes and 2 hours, during EST business hours.
- Call 1-800-263-2629 - please note that during peak hours, hold times can exceed one hour.
SAFETY REQUIREMENTS
- Read all instructions.
- Do not touch hot surfaces. Use handles or knobs.
- To protect against electrical shock do not immerse cord, plugs or any other part of the appliance in water or any other liquid.
- Close supervision is necessary when any appliance is use by or near children.
- Unplug from the wall outlet when not in use and before cleaning. Allow to cool before putting on or taking off parts.
- Do not operate any appliance with a damaged cord or plug or after the appliance malfunctions or has been damaged in any manner. Return the appliance to the nearest authorized service facility for examination, repair or adjustment.
- The use of accessory attachments not recommended by the appliance manufacturer may cause injuries.
- Do not use outdoors.
- Do not let the cord hang over the edge of the table or counter or touch hot surfaces.
- Do not place on or near a hot gas or electric burner or in a heated oven.
- Extreme caution must be used when moving an appliance containing hot oil or other hot liquids.
- Always attach the plug to the appliance first and then plug the cord into the wall outlet. To disconnect, turn any control to "off" and then remove the plug from the wall outlet.
- Do not use the appliance for other than its intended use.
- When operating the oven keep at least 4 inches of space on all sides of the oven to allow for adequate air circulation.
- Do not rest cooking utensils or baking dishes on the glass door.
- The maximum weight of food allowed on the food tray/wire rack can not be more than 3.0 kg. Do not concentrate the food on one side of the food tray/wire rack, place food evenly.
- The rear surface of the appliance should be placed against a wall.
SAFETY REQUIREMENTS
- Oversize foods, metal foil packages or utensils must not be inserted in a toaster as they may involve a risk of fi re or electric shock.
- A fi re may occur if toasters are covered or touching fl ammable material including curtains, draperies, walls and the like when in operation.
- Do not attempt to dislodge food when the toaster is plugged in.
- Do not operate unattended.
- When heater toaster pastries, always use the lightest toaster colour setting.
- Do not clean with metal scouring pads. Pieces can break off the pad and touch electrical parts involving risk of electric shock.
- Extreme caution should be exercised when using containers constructed of anything other than metal or glass.
- Do not store any materials other than the manufacturers recommended accessories inside this oven when not in use.
- Do not place fl ammable materials such as paper, cardboard, plastic, etc, in the oven.
- Do not cover the crumb tray or any part of the oven with metal foil. This will cause overheating of the oven.
- This appliance has a tempered safety glass door. The glass is stronger than ordinary glass and more resistant to breakage. Tempered glass can break but the edges will not be sharp. Avoid scratching the door surface or nicking the edges. If the door glass has a scratch or nick, contact consumer service before using the oven.
- The temperature of the door or the outer surface may be higher when the appliance is working.
- Temperature of accessible surfaces may be high when the appliance is operating.
- This appliance is intended to be used in household and similar applications such as: farm houses; staff kitchen areas in shops, offices and other working environments; by clients in hotels, motels and other residential type environments; bed and breakfast type environments.
SAVE THESE INSTRUCTIONS!
SAFETY REQUIREMENTS
- Protect against hurt by sharp edge when action.
- Children should be supervised to ensure that they do not play with the appliance.
- Do not place on or near a hot gas or electric burner or inside a heated oven.
- Turn the timer knob to "LOW" to the turn the appliance off.
- Appliances are not intended to be operated by means of an external timer or separate remote control system.
- This appliance can be used by children aged 8 years and above if they have been given supervision or instruction concerning use of the appliance in a safe way and understand the hazards involved.
- Cleaning and user maintenance shall not be made by children without supervision.
WARNING - This appliance includes a heating function. Surfaces, other than the functional surfaces may develop high temperatures. Since temperatures are perceived differently by different people, this device should be used with CAUTION. Hold the appliance exclusively to grip surfaces intended to hold and use such heat protection measures as heat protection Gloves or pot holders. Areas which are not intended to grips must be given sufficient time to cool.
CAUTION: APPLIANCE SURFACES ARE HOT AFTER USE. ALWAYS wear protective, insulated oven gloves when touching hot oven or hot dishes and food, or when inserting or removing rack, pans or baking dishes.
GROUNDING INSTRUCTIONS
This appliance must be grounded. Grounding reduces the risk of electrical shock by providing an escape wire for the electrical current.
This appliance has a cord that has a grounding wire with a 3-prong plug. The power cord must be plugged into an outlet that is properly grounded. If the outlet is a 2-prong wall outlet, it must be replaced with a properly grounded 3-prong wall outlet. The serial rating plate indicates the voltage and frequency the appliance is designed for.
WARNING - Improper use of the grounding plug can result in a risk of electric shock. Consult a qualified electrician or service agent if the grounding instructions are not completely understood, or if doubt exists as to whether the appliance is properly grounded.
Do not connect your appliance to extension cords or together with another appliance in the same wall outlet. Do not splice the power cord. Do not under any circumstances cut or remove the third ground prong from the power cord. Do not use extension cords or ungrounded (two prongs) adapters.
If the power supply cord is damaged, it must be replaced by the manufacturer, its service agent or similar qualified person in order to avoid hazard.
Have a qualified electrician install a grounded outlet near the appliance if the power cord is too short. A short power supply cord is provided to reduce the risks resulting from becoming entangled in or tripping over a longer cord.
OPERATING INSTRUCTIONS
BEFORE FIRST USE
- Unpack the appliance.
- Remove all racks and pans. Wash the racks and pans in hot sudsy water or in dishwasher and rinse with cold water.
- Thoroughly dry all accessories and re-assemble in the oven. Plug the oven into the outlet and it is ready to use.
- It is recommended to run the oven at MAX temperature for 15 minutes before using for the first time to eliminate and packing oil that may remain after shipping.
Note: The oven may produce smoke during this process. This is normal for a new oven and will not last more than 10 - 15 minutes.
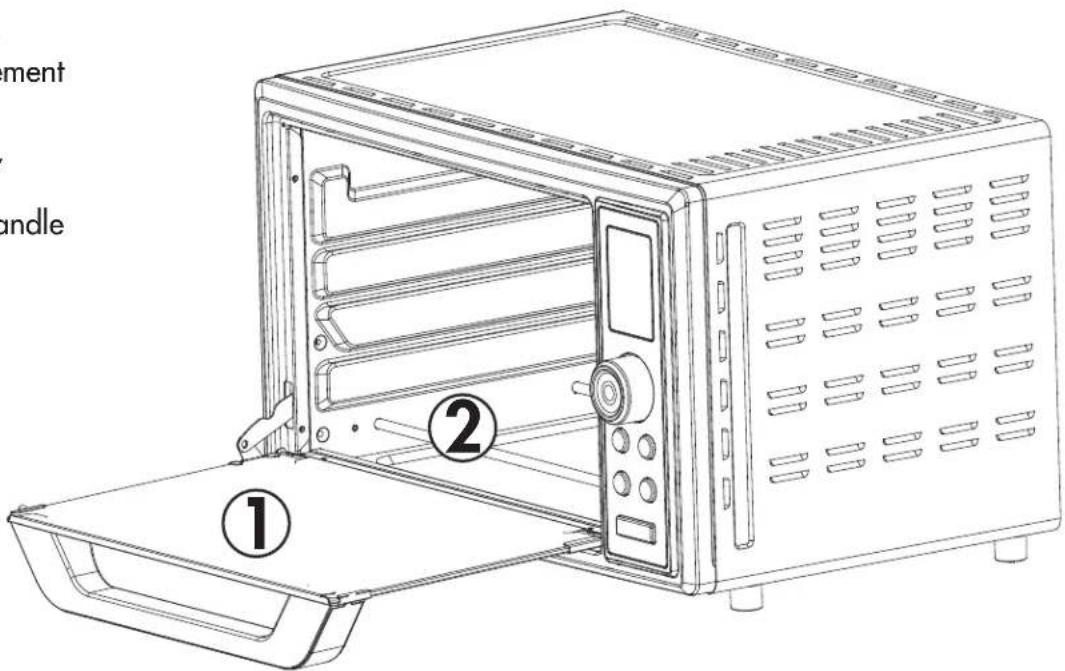
FEATURES
- Glass door
- Heating element
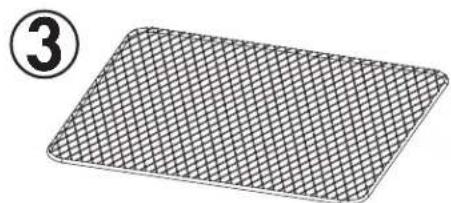
- Air fry rack
- Wire rack
- Crumb tray
- Food tray.
- Food tray handle
natural_image
3D grid-patterned rectangular object with a circled number 3 nearby (no text or symbols on the object itself)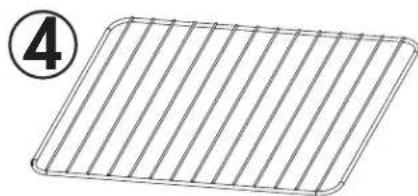
natural_image
Simple 3D wire mesh diagram with a circled number 4, no text or symbols present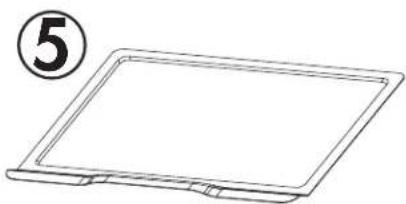
natural_image
Simple line drawing of a rectangular tray or holder with a circled number 5 on the top (no text or symbols on the tray itself)
natural_image
Line drawing of a rectangular tray with vertical slats, no text or symbols present
OPERATING INSTRUCTIONS
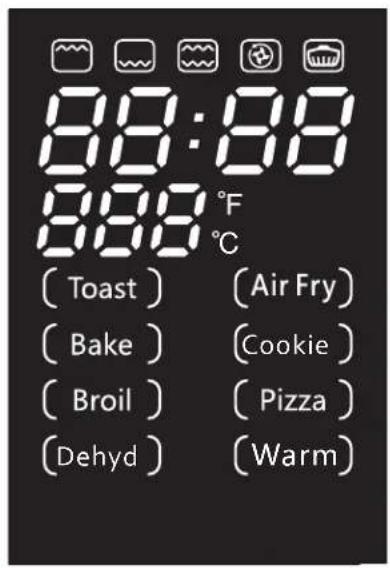
CONTROL PANEL
- Air fry button
- Function button: turn the knob to select the desired function. The selected function will show on the display.
-
Time/darkness button:
-
Press the time/darkness button, turn the knob to select the desired cooking time.
- For toast function, the time/darkness button is to adjust the shade level. The shade level shows on the display.
-
The time shown on the display with an "h" indicates hours. The time shown on the display with no "h" indicates minutes.
-
Temp/darkness button:
-
Press the temp/darkness button, turn the knob to select the desired cooking temperature.
- For toast function, the time/darkness button is to adjust the shade level. The shade level shows on the display.
- In setting or cooking mode, press and hold the temp/darkness button for 3 seconds to switch the temperature between C and F.
-
In standby mode, press and hold the temp/darkness button for 3 seconds to show the temperature units: "dd-C" or "dd-F".
-
Start/cancel button:
-
Once this function is selected it can be activated by pressing the start/cancel button.
- During operating press this button to cancel the work and return to standby.
- When setting the cooking data, press and hold this button for 3 seconds to cancel all the settings and return to standby mode.
Note: In standby mode, only the function button and the air fry button can be pressed. Press the function button or the air fry button to wake the appliance from standby mode.
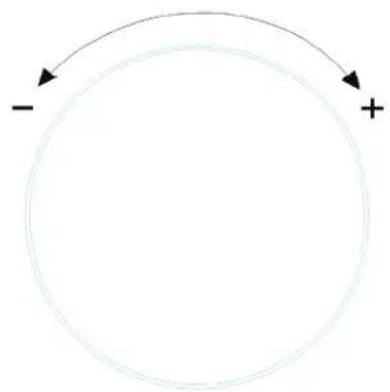
flowchart
graph TD
    A["Start"] --> B{Decision}
    B -->|Yes| C["+"]
    B -->|No| D["-"]

natural_image
Two empty white circles on a white background (no text or symbols)AIR FRY TIME Darkness

natural_image
Two empty white circles on a white background (no text or symbols)FUNCTION TEMP Darkness

START/CANCEL
OPERATING INSTRUCTIONS
GENERAL INSTRUCTIONS
CAUTION: APPLIANCE SURFACES ARE HOT AFTER USE. ALWAYS wear protective, insulated oven gloves when touching hot oven or hot dishes and food, or when inserting or removing rack, pans or baking dishes.
- Baking level, time or temperature is not adjustable while the oven is working.
- To cancel operation, press the start/cancel button. Operation cannot be paused.
- To check or remove food use the handle to help slide the food in and out.
- Cooked food, the metal tray/rack and the door can be very hot, handle with care. Do not leave the oven unattended.
- When the cycle is complete the oven will stop and beep. "00:00" will show on the display until the start/cancel button is pressed. Remove the food immediately with the handle.
AIR FRY
The air fry function is good for cooking a variety of French fries or chicken wings with intense heat and maximized air flow to cook foods crispy and brown.
- Press the air fry button or press the function button and turn the knob to select the air fry function.
- Press the time/darkness button, turn the knob to select the desired cooking time.
- Press the temp/darkness button, turn the knob to select the desired cooking temperature.
- Press the start/cancel button to start the preheating. "PRE" will show on the display. When preheating is complete, the oven will beep.
- Open the door, place the food on the food tray/air fry rack, insert the tray/rack into the middle rack position and close the door.
- Press the start/cancel button to start the operation. The remaining time will count down.
- When the cycle is complete the oven will stop and beep.
Note: The convection fan runs at high speed during preheating and operating.
AIR FRY COOKING CHART
| Food Amount | (lbs) | Temp (F) | Time (min) |
| Frozen fries 1 400 20 | |||
| Hand cut fries 1 400 25 | |||
| Frozen chicken nuggets 1 | 400 18 | ||
| Vegetables 1 400 12 | |||
| Chicken wings 1.2 400 2 | 4 |
Note: Air frying does not require oil but a light coating can enhance browning and crispness. Use an oil sprayer or non-stick olive oil cooking spray, a pastry brush to evenly coat or pour a little oil into a bowl, add food and toss.
OPERATING INSTRUCTIONS
TOAST
Note that different types of bread require different settings. Lighter breads and waffl es require lighter settings. Darker breads, muffi ns and English muffi ns require a darker setting.
- Open the door and place the bread on the wire rack. Insert the rack into the middle rack position and close the door.
- Press the function button, turn the knob to select the toast function.
- Press the time/darkness/temp/darkness button to select the shade colour.
- Press the start/cancel button to start the operation. The remaining time will count down.
- When the cycle is complete the oven will stop and beep. Remove the food immediately or the remaining heat in the oven will continue to toast the bread.
BAKE
The bake function cooks food evenly throughout. This function is ideal for baking cakes, muffins, brownies and pastries.
- Open the door and place the food on the tray/ wire rack. Insert the rack into the middle rack position and close the door.
- Press the function button, turn the knob to select the bake function.
- Press the time/darkness button to select the desired cook time.
- Press the temp/darkness button to select the desired cook temperature.
- Press the start/cancel button to start the operation. The remaining time will count down.
- When the cycle is complete the oven will stop and beep.
COOKIE
The cookie function is ideal for baking homemade or commercially prepared cookies and other baked treats. Ready-to-bake crescent rolls, cinnamon scrolls, biscuits and strudels are ideally baked using this function. It can also be used for reheating leftovers without browning or drying them out.
- Open the door and place the food on the tray/ wire rack. Insert the rack into the middle rack position and close the door.
- Press the function button, turn the knob to select the bake function.
- Press the time/darkness button to select the desired cook time.
- Press the temp/darkness button to select the desired cook temperature.
- Press the start/cancel button to start the operation. The remaining time will count down.
- When the cycle is complete the oven will stop and beep.
BROIL
The broil function is good for cooking open faced sandwiches, thin cuts of meat like bacon, poultry and fish, sausages and vegetables. Broiling can also be used to brown the tops of casseroles, gratins and desserts.
- Open the door and place the food on the tray/ wire rack. Insert the rack into the middle rack position and close the door.
- Press the function button, turn the knob to select the broil function.
- Press the time/darkness button to select the desired cook time. Cooking temperature is automatically set and cannot be adjusted.
- Press the start/cancel button to start the operation. The remaining time will count down.
- When the cycle is complete the oven will stop and beep.
OPERATING INSTRUCTIONS
DEHYDRATE
The dehydrate function combines low and stable heat with air flow to evenly dry out foods without cooking. This function is good for drying out fruit or vegetable crisps.
- Open the door and place the food on the tray/ wire rack. Insert the rack into the middle rack position and close the door.
- Press the function button, turn the knob to select the dehydrate function.
- Press the time/darkness button to select the desired cook time. Cooking temperature is automatically set and cannot be adjusted.
- Press the start/cancel button to start the operation. The remaining time will count down.
- When the cycle is complete the oven will stop and beep.
WARM
The warm function will maintain cooked foods at the recommended temperature to prevent bacterial growth.
- Open the door and place the food on the tray/ wire rack. Insert the rack into the middle rack position and close the door.
- Press the function button, turn the knob to select the warm function.
- Press the time/darkness button to select the desired cook time.
- Press the temp/darkness button to select the desired cook temperature.
- Press the start/cancel button to start the operation. The remaining time will count down.
- When the cycle is complete the oven will stop and beep.
PIZZA
The pizza function melts and browns cheese and toppings while crisping the pizza crust.
- Open the door and place the food on the pizza pan, then put the pan on the wire rack. Insert the rack into the middle rack position and close the door.
- Press the function button, turn the knob to select the pizza function.
- Press the time/darkness button to select the desired cook time.
- Press the temp/darkness button to select the desired cook temperature.
- Press the start/cancel button to start the operation. The remaining time will count down.
- When the cycle is complete the oven will stop and beep.
CARE & MAINTENANCE
MAINTENANCE
This appliance requires very little maintenance. It contains no user serviceable parts. Do not try to repair it yourself. Contact a qualified appliance repair technician if the product requires servicing.
CLEANING
CAUTION - To protect against electrical shock DO NOT IMMERSE THE OVEN IN WATER OR ANY OTHER LIQUIDS.
The oven should be cleaned regularly for best performance and long life. Regular cleaning will also reduce the risk of fire hazard.
- Remove the plug from the electrical outlet. Allow the oven to cool completely before completely any cleaning.
- Remove the crumb tray, food tray and wire rack from the oven. Clean them with a damp, soapy cloth. Make sure to only use mild soap.
- To clean the inside of the oven, wipe the oven walls, bottom and glass door with a damp, soapy cloth. Repeat with a dry, clean cloth.
- Wipe the outside of the oven with a damp cloth.
LONG-TERM STORAGE
Allow the appliance to completely cool and dry before placing into storage.
If storing the oven for long periods of time make certain that the oven is clean and free of food particles.
Store the oven in a dry location such as on a table or counter top or cupboard shelf.
Other than recommended cleaning, no further user maintenance should be necessary. Any other servicing should be performed by an authorized service representative.
SPECIFICATIONS
Model: DBTO0961ABSS
Rated voltage: 120V
Rated frequency: 60Hz
Rated power: 1800W
Oven capacity: 25 litres
Household use only. Do not immerse in water.
LIMITED "CARRY IN" WARRANTY
This quality product is warranted to be free from manufacturer's defects in material and workmanship, provided that the unit is used under the normal operating conditions intended by the manufacturer.
This warranty is available only to the person to whom the unit was originally sold by Danby Products Limited (Canada) or Danby Products Inc. (U.S.A.) (hereafter "Danby") or by an authorized distributor of Danby, and is non-transferable.
TERMS OF WARRANTY
Plastic parts are warranted for thirty (30) days from the date of purchase, with no extensions provided.
First 24 months
During the first twenty four (24) months, any functional parts of this product found to be defective, will be repaired or replaced, at warrantor's option, at no charge to the original purchaser.
To obtain service
Contact the dealer where the unit was purchased, or contact the nearest authorized Danby service depot, where service must be performed by a qualified service technician. If service is performed on the unit by anyone other than an authorized service depot, all obligations of Danby under this warranty shall be void.
It is the responsibility of the purchaser to transport the appliance to the nearest authorized service depot.
Transportation charges to and from the service location are not protected by this warranty and are the responsibility of the purchaser.
Nothing within this warranty shall imply that Danby will be responsible or liable for any spoilage or damage to food or other contents of this appliance, whether due to any defect of the appliance, or its use, whether proper or improper.
EXCLUSIONS
Save as herein provided, by Danby, there are no other warranties, conditions, representations or guarantees, express or implied, made or intended by Danby or its authorized distributors and all other warranties, conditions, representations or guarantees, including any warranties, conditions, representations or guarantees under any Sale of Goods Act or like legislation or statute is hereby expressly excluded. Save as herein provided, Danby shall not be responsible for any damages to persons or property, including the unit itself, howsoever caused or any consequential damages arising from the malfunction of the unit and by the purchase of the unit, the purchaser does hereby agree to indemnify and hold harmless Danby from any claim for damages to persons or property caused by the unit.
GENERAL PROVISIONS
No warranty or insurance herein contained or set out shall apply when damage or repair is caused by any of the following:
1) Power failure.
2) Damage in transit or when moving the appliance.
3) Improper power supply such as low voltage, defective house wiring or inadequate fuses.
4) Accident, alteration, abuse or misuse of the appliance such as inadequate air circulation in the room or abnormal operating conditions (i.e. extremely high or low room temperature).
5) Use for commercial or industrial purposes (i.e. If the appliance is not installed in a domestic residence).
6) Fire, water damage, theft, war, riot, hostility, acts of God such as hurricanes, floods etc.
7) Service calls resulting in customer education.
8) Improper Installation (i.e. Building-in of a free standing appliance or using an appliance outdoors that is not approved for outdoor application, including but not limited to: garages, patios, porches or anywhere that is not properly insulated or climate controlled).
Proof of purchase date will be required for warranty claims; retain bills of sale. In the event that warranty service is required, present the proof of purchase to our authorized service depot.
Warranty Service
Carry In
Danby Products Limited
PO Box 1778, Guelph, Ontario, Canada N1H 6Z9
Telephone: |519| 837-0920 FAX: |519| 837-0449
1-800-263-2629
04/17
Danby Products Inc
PO Box 669, Findlay, Ohio, U.S.A. 45840
Telephone: (419) 425-8627 FAX: (419) 425-8629
natural_image
Rectangular grid-patterned object with a circled number 3 in the top-left corner (no text or symbols on the object itself)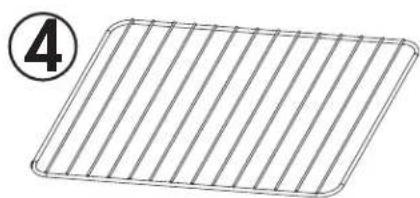
natural_image
Simple line drawing of a rectangular grid with vertical lines, no text or symbols present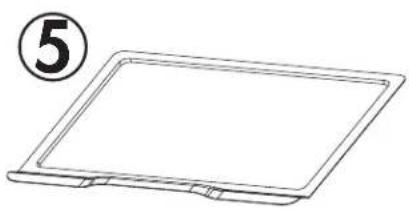
natural_image
Simple line drawing of a rectangular plate with a circled number 5 in the top-left corner (no text or symbols on the plate itself)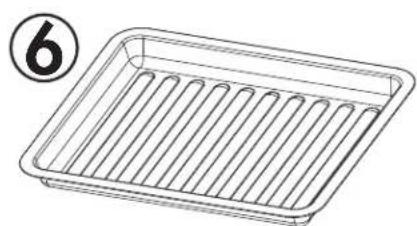
natural_image
Line drawing of a rectangular tray with vertical slats and a circled number 6 (no text or symbols on the tray itself)
INSTRUCTIONS D'UTILISATION

flowchart
graph TD
    A["Start"] --> B{Decision}
    B -->|Yes| C["+"]
    B -->|No| D["-"]

natural_image
Two empty white circles on a white background (no text or symbols)AIR FRY
TIME
Darkness

natural_image
Two empty white circles on a white background (no text or symbols)FUNCTION
TEMP
Darkness

START/CANCEL
INSTRUCTIONS D'UTILISATION
INSTRUCTIONS GÉNÉRALES
Danby Products Limited
PO Box 1778, Guelph, Ontario, Canada N1H 6Z9
natural_image
3D grid-patterned rectangular object with a circled number 3 in the top-left corner (no text or symbols on the object itself)
natural_image
Simple line drawing of a rectangular grid with vertical lines, no text or symbols present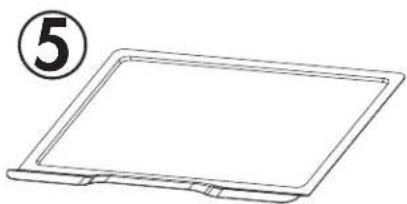
natural_image
Line drawing of a rectangular electronic device with a circular label containing the number 5 (no text or symbols on the device itself)
natural_image
Line drawing of a rectangular tray with vertical slots, no text or symbols present

flowchart
graph TD
    A["Start"] --> B{Decision}
    B -->|Yes| C["+"]
    B -->|No| D["-"]

natural_image
Two empty white circles on a white background (no text or symbols)AIR FRY
TIME
Darkness

natural_image
Two empty white circles on a white background (no text or symbols)FUNCTION
TEMP
Darkness

START/CANCEL
Danby Products Limited
PO Box 1778, Guelph, Ontario, Canada N1H 6Z9
Telephone: [519] 837-0920 FAX: [519] 837-0449
1-800-263-2629
04/17
Danby Products Inc.
PO Box 669, Findlay, Ohio, U.S.A. 45840
Telephone: (419) 425-8627 FAX: (419) 425-8629
Danby Products Limited, Guelph, ON, Canada N1H 6Z9 Danby Products Inc., Findlay, Ohio, USA 45840
*Trademarks of Danby Products Limited and/or its subsidiaries
* Marques de commerce de Danby Products Limited et / ou de ses filiales
* Marcas comerciales de Danby Products Limited y / o sus subsidiarias